6 Common Houseplant Mistakes and How to Fix Them
Houseplant mistakes can look alike. Check soil, light, roots, and recent changes first, then choose a fix that matches what your plant is actually showing.
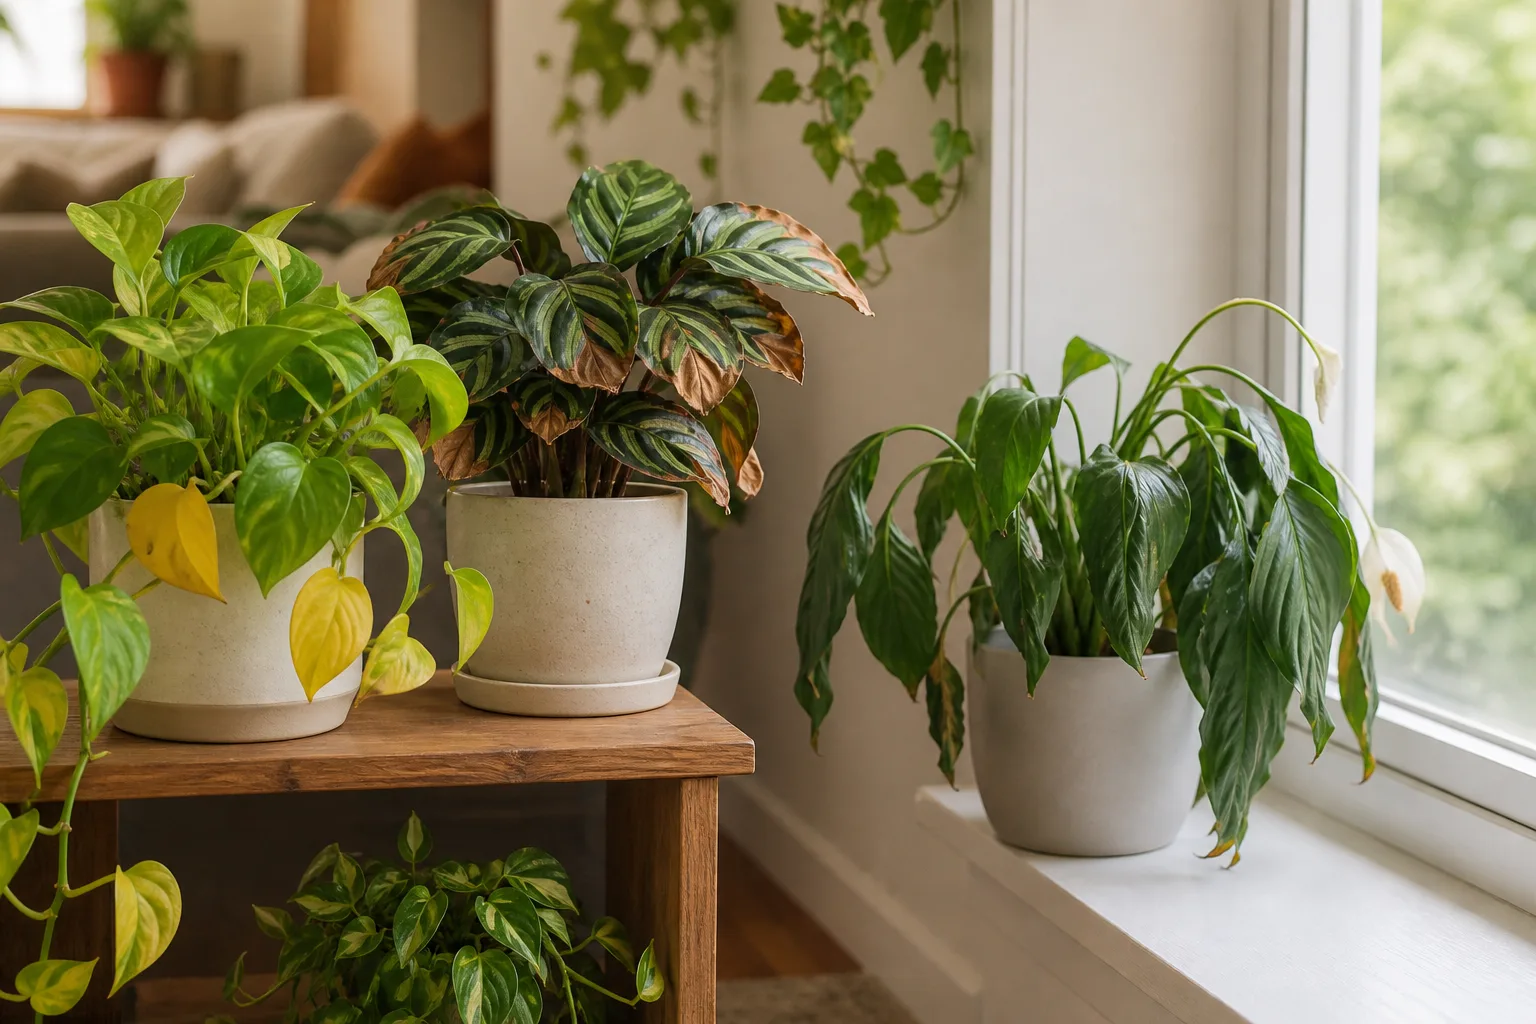
A drooping plant can be thirsty, waterlogged, chilled, or struggling in dim light. Yellow leaves can follow poor drainage, overfertilizing, a recent move, pests, or the normal loss of an older leaf. Treating the first symptom you notice as a diagnosis often leads to a second problem: watering a plant whose roots are already wet, fertilizing one that cannot use the nutrients, or moving a sun-sensitive plant into even harsher light.
Start by looking at the plant and its growing conditions together. Check the potting mix, feel how heavy the pot is, recall when it was last watered or moved, and look for a pattern across several leaves. This takes less time than trying three fixes at once, and it gives you a way to tell whether your change helped.
Diagnose the Pattern Before Changing Care
UC Statewide Integrated Pest Management notes that houseplant symptoms often have several possible causes. Yellowing or leaf drop can follow low light, cold temperatures, overwatering, poor drainage, or pests; wilting may point to underwatering, excess light, or damaged roots. Brown tips are just as ambiguous: fertilizer salts, dry or wet soil, low humidity, heat, and drafts can all contribute. A leaf is evidence, but it is not a diagnosis by itself.
Use a quick sequence before you act:
- Check the root zone. Touch the mix below the surface or use a clean wooden skewer. Lift the pot if you know what it feels like after a thorough watering and after it dries.
- Check the container. Confirm that water can escape through an open drainage hole and that the plant is not sitting in a full saucer or cachepot.
- Look for a pattern. Note whether damage is on the sun-facing side, limited to older leaves, concentrated on new growth, or spread across the whole plant.
- Review recent changes. A move, repot, feed, cold night, open window, heat vent, or sudden increase in sun can explain why the problem started when it did.
Make one correction, then watch the next leaves and the plant’s overall posture. Existing brown or scorched tissue will not turn green again, so judge progress by whether damage stops spreading and new growth looks healthier. If several plants in the same spot develop the same symptom, investigate a shared condition such as light, temperature, or water quality before changing each plant’s routine separately.
Check soil, recent care, and where new damage appears
A single older leaf turning yellow can be normal as the plant replaces it, especially when the rest of the plant is growing well. Several leaves yellowing at once, new leaves emerging pale or distorted, or a plant losing firmness deserves a closer look. Note the sequence: did the soil stay wet for days, did the plant move into a bright window, or did symptoms begin after you fed it?
Do not use leaf color alone to decide whether a plant needs more water or fertilizer. A plant with damaged roots may show a nutrient-like yellowing even though nutrients are present in the pot; roots that cannot function cannot deliver water and minerals normally. If the soil is wet and the plant continues to decline, correct the conditions around the roots before adding anything.
Mistake 1: Watering by the Calendar Instead of the Root Ball
A weekly watering day is useful as a reminder to check plants, but it is a poor rule for deciding which ones actually need water. A small terracotta pot beside a bright window can dry quickly; a large plastic pot in a cool room may stay damp much longer. Species, pot size, pot material, mix, light, temperature, humidity, season, and growth rate all affect how quickly the root ball dries. Gardens Illustrated’s houseplant watering guide makes the same practical point: there is no dependable single interval for every indoor plant.
Check regularly, then water when the plant’s own mix has reached the right level of dryness. Iowa State University Extension and Outreach suggests feeling the mix about an inch below the surface as a starting check for many houseplants. That depth is not a universal trigger: a cactus or succulent usually needs the mix to dry more deeply than a moisture-loving plant, while an orchid in bark needs its own cues. If the top looks dry but the pot is still heavy and the mix below is damp, wait and check again.
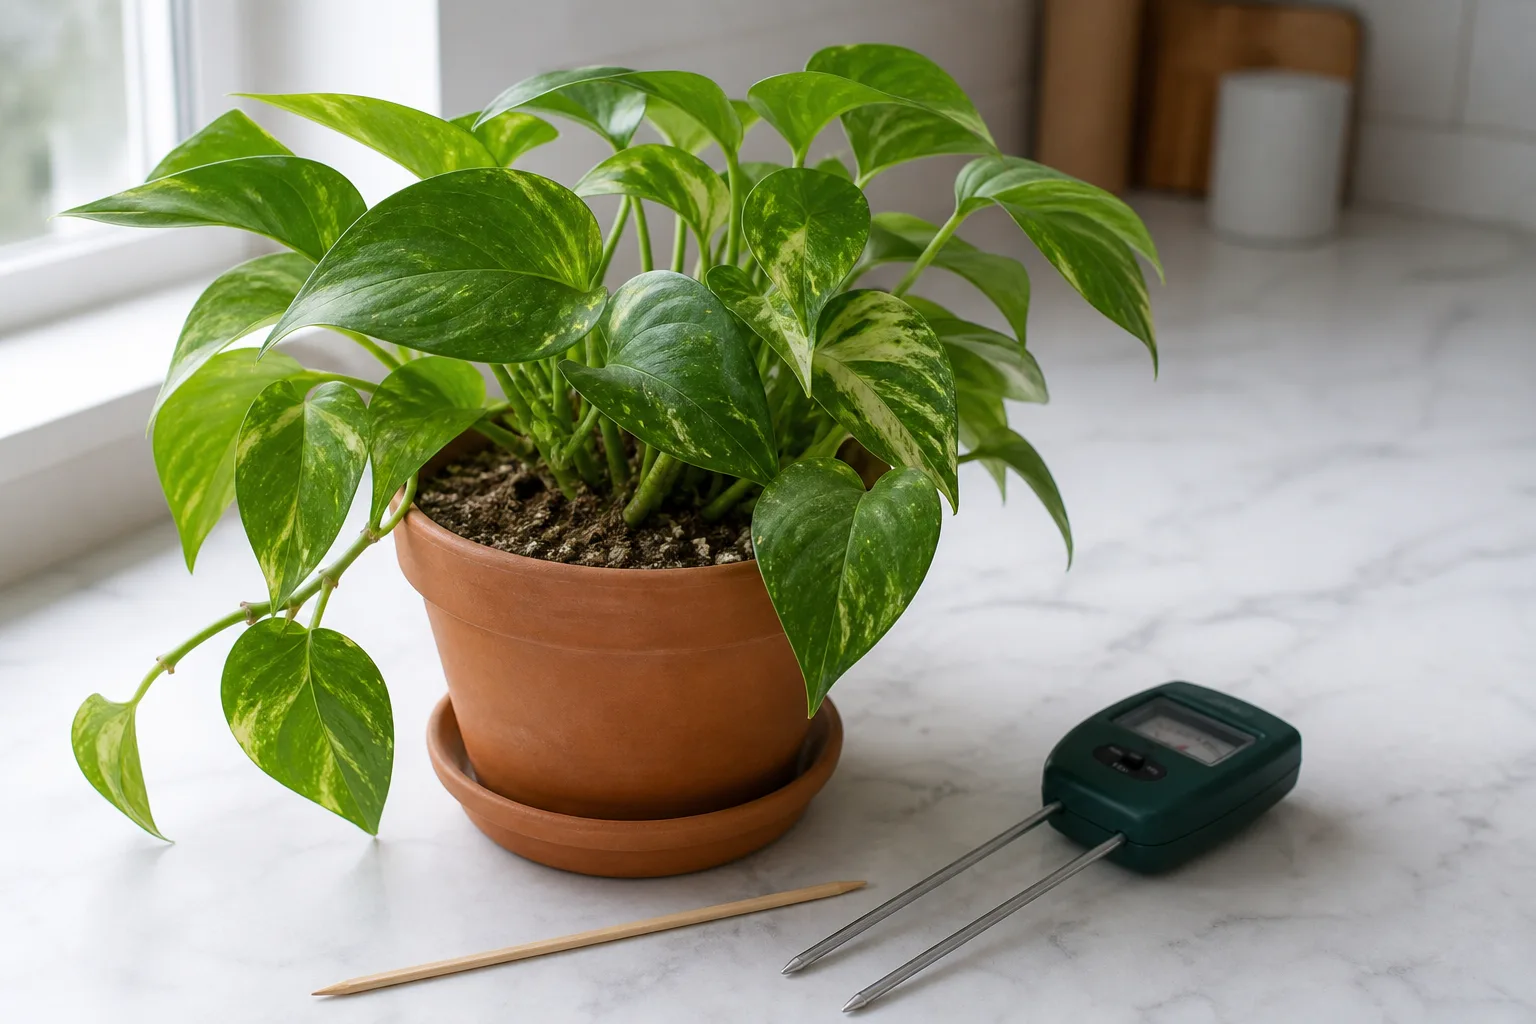
Check moisture below the surface
Use a finger, wooden skewer, or the pot-weight check. A skewer that comes out cool or with damp mix clinging to it shows that moisture remains deeper than the surface. A light pot with dry mix through much of the root zone is a stronger signal to water than a dry crust on top of still-wet soil. After a few checks, you will learn the difference between a recently watered pot and one that is ready.
When the plant is ready, water the mix evenly until water runs freely from the drainage hole. This thorough soak reaches the whole root ball; it does not mean the plant has been overwatered. The problem is repeatedly adding water before the mix has dried enough for that species, or leaving the pot in the runoff. Let it drain, then empty the saucer or decorative outer pot. If water runs straight through a shrunken, bone-dry mix, apply it in two or three slower passes; very dry mix can repel water instead of absorbing it.
This is also why keeping a plant on a schedule can fail in winter. Shorter days and cooler rooms often slow growth and drying, so a plant that needed water every week in summer may need a longer interval. A heated, sunny room can still dry a pot quickly, though, so use the soil and pot rather than the month as your signal. For species that need a different rhythm—such as many cacti, succulents, and orchids—follow species-specific care rather than general houseplant rules.
When leaves droop but the soil is wet
Do not answer every wilt with water. A thirsty plant often has dry mix and a light pot; a plant with waterlogged or damaged roots may droop while the mix is wet because compromised roots cannot absorb water effectively. Gardens Illustrated and Gardeningetc both call out this overlap: wilting alone cannot distinguish thirst from root trouble.
If the mix is wet, pause watering and check that the drainage hole is open and the saucer is empty. If the pot stays wet for an unusually long time, smells sour, or the plant worsens despite drying, slide the root ball out gently and inspect it. Healthy roots are generally firm; brown or black mushy roots that slough apart are a reason to remove the damaged portion and repot into fresh, suitable mix in a draining container. Avoid tearing apart roots that still look sound, and do not add fertilizer to a plant whose roots are struggling.
Mistake 2: Confusing “Bright Room” With the Right Light
A room can feel bright to you and still provide too little light for a plant several feet from the window. The reverse is also possible: direct sun concentrated through glass can scorch foliage that would be comfortable in a more sheltered position. “Low light” means less light than a plant prefers, not no light at all. A plant can survive for a while in a dim corner while producing smaller leaves, stretched stems, sparse growth, or a lean toward the nearest window.
Start with the plant’s needs and the light reaching its leaves, not the room’s overall impression. The Royal Horticultural Society’s houseplant guide advises checking a plant’s light requirements and notes that strong summer sun can scorch susceptible plants through glass; bright shade can be suitable for many foliage plants. Window direction, glazing, blinds, nearby buildings, trees, and the season all change the result, so a fixed “two feet from the window” rule cannot fit every home.
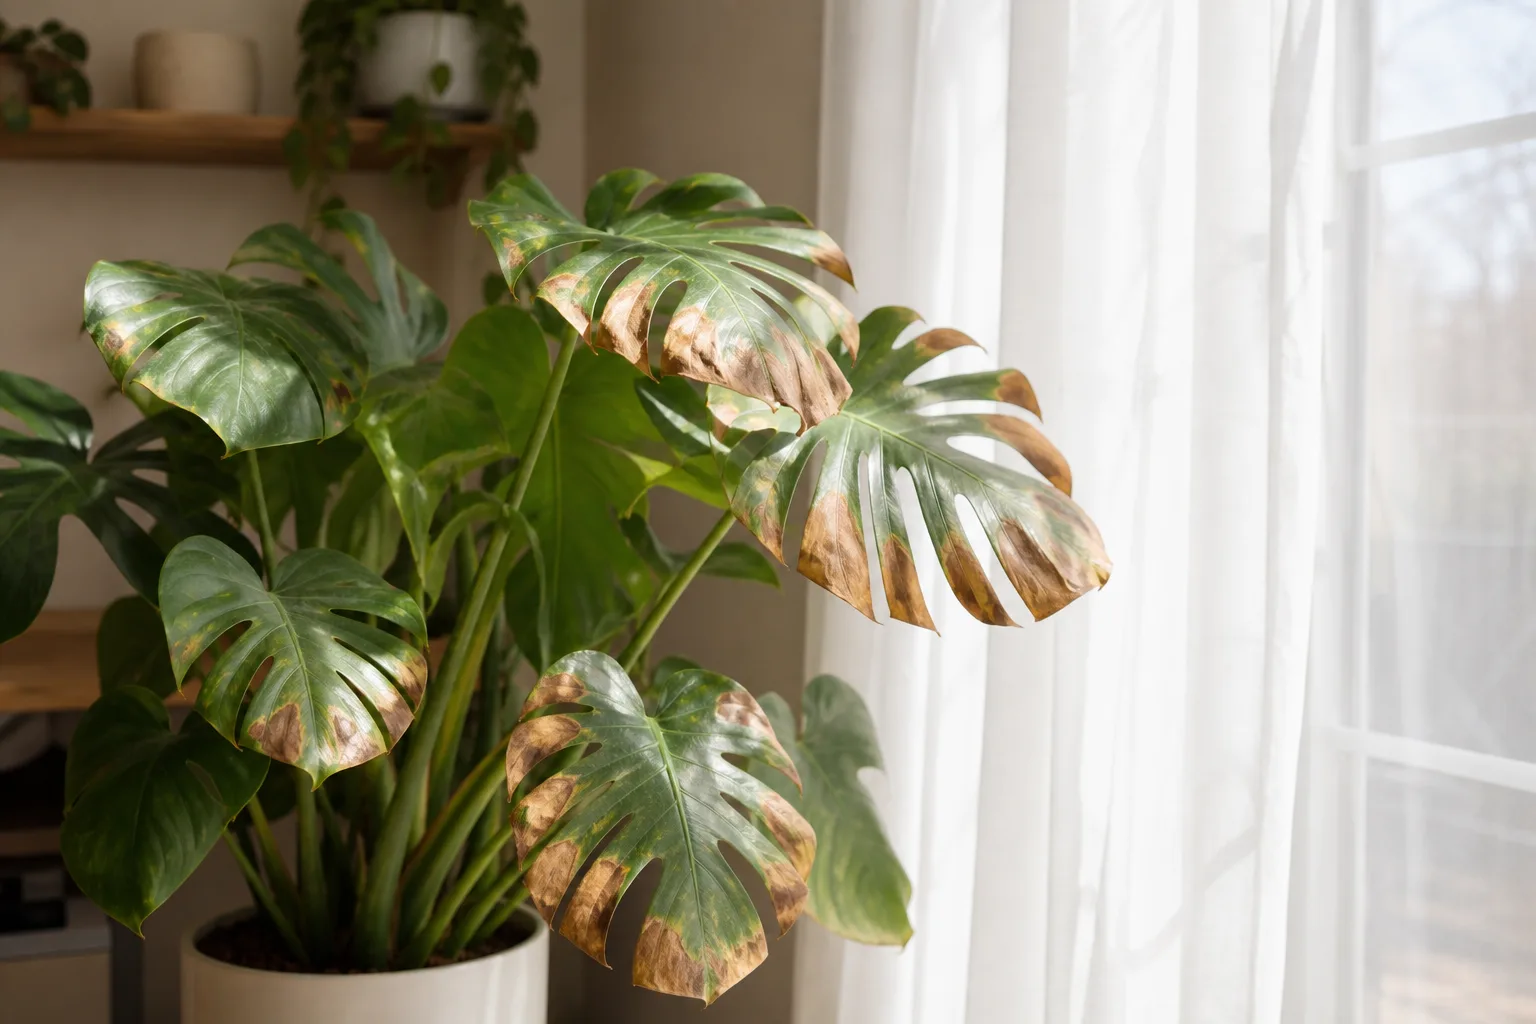
Read light at the leaves, not across the room
Look at the plant at the time of day when the window gets its strongest sun. A crisp, sharply defined shadow on the leaves suggests direct light; softer shadows point to filtered or indirect light. This is a quick comparison, not a substitute for the plant’s care requirements. A sun-loving succulent may welcome a bright, sunny sill that would mark a shade-adapted fern or calathea.
Match placement to the plant instead of trying to force every plant into the same bright spot. A pothos or many foliage plants may grow well in bright, indirect light, while a cactus or flowering plant often needs stronger light. A dark hallway or windowless room is not a long-term growing location for a plant that depends on photosynthesis; a suitable grow light can help when natural light is insufficient.
Move plants gradually after a light change
Moving a plant from a dim shelf directly into strong sun can damage leaves even if the brighter spot is ultimately better. Shift it closer in stages, or soften direct afternoon sun with a sheer curtain, and watch new growth for a few weeks. If pale, bleached, dry patches appear mainly on the exposed side after a move, reduce the intensity and let the plant acclimate before trying again.
If growth is stretched or consistently leaning, increase usable light gradually rather than compensating with extra water or fertilizer. Rotate the pot occasionally if you want more even growth, but do not spin it constantly; a stable position makes it easier to see whether the plant is responding. Seasonal changes matter too: a winter window may be gentler and dimmer than the same window in summer, while a cold pane or draft can introduce a separate stress.
Mistake 3: Trapping Roots in a Pot That Cannot Drain
A decorative planter without a hole can look tidy, but it gives excess water nowhere to go. When water occupies the spaces that should contain air, roots have less oxygen and stay vulnerable to decay. Adding gravel or broken pottery under the soil does not turn a sealed container into a draining one; it leaves water trapped above the layer and does not remove excess moisture from the root zone. Iowa State Extension’s container guidance specifically advises against using a gravel layer as a substitute for a drainage hole.
Potting mix matters alongside the container. Garden soil is usually too dense for most indoor pots and may stay wet or compact around the roots. Use a potting medium formulated for containers, then choose a mix that fits the plant: a standard houseplant mix works for many foliage plants, while succulents and cacti need a faster-drying blend. “Well-draining” does not mean that water should race through without wetting the root ball; the mix must hold enough moisture for the plant while releasing excess and maintaining air pockets.
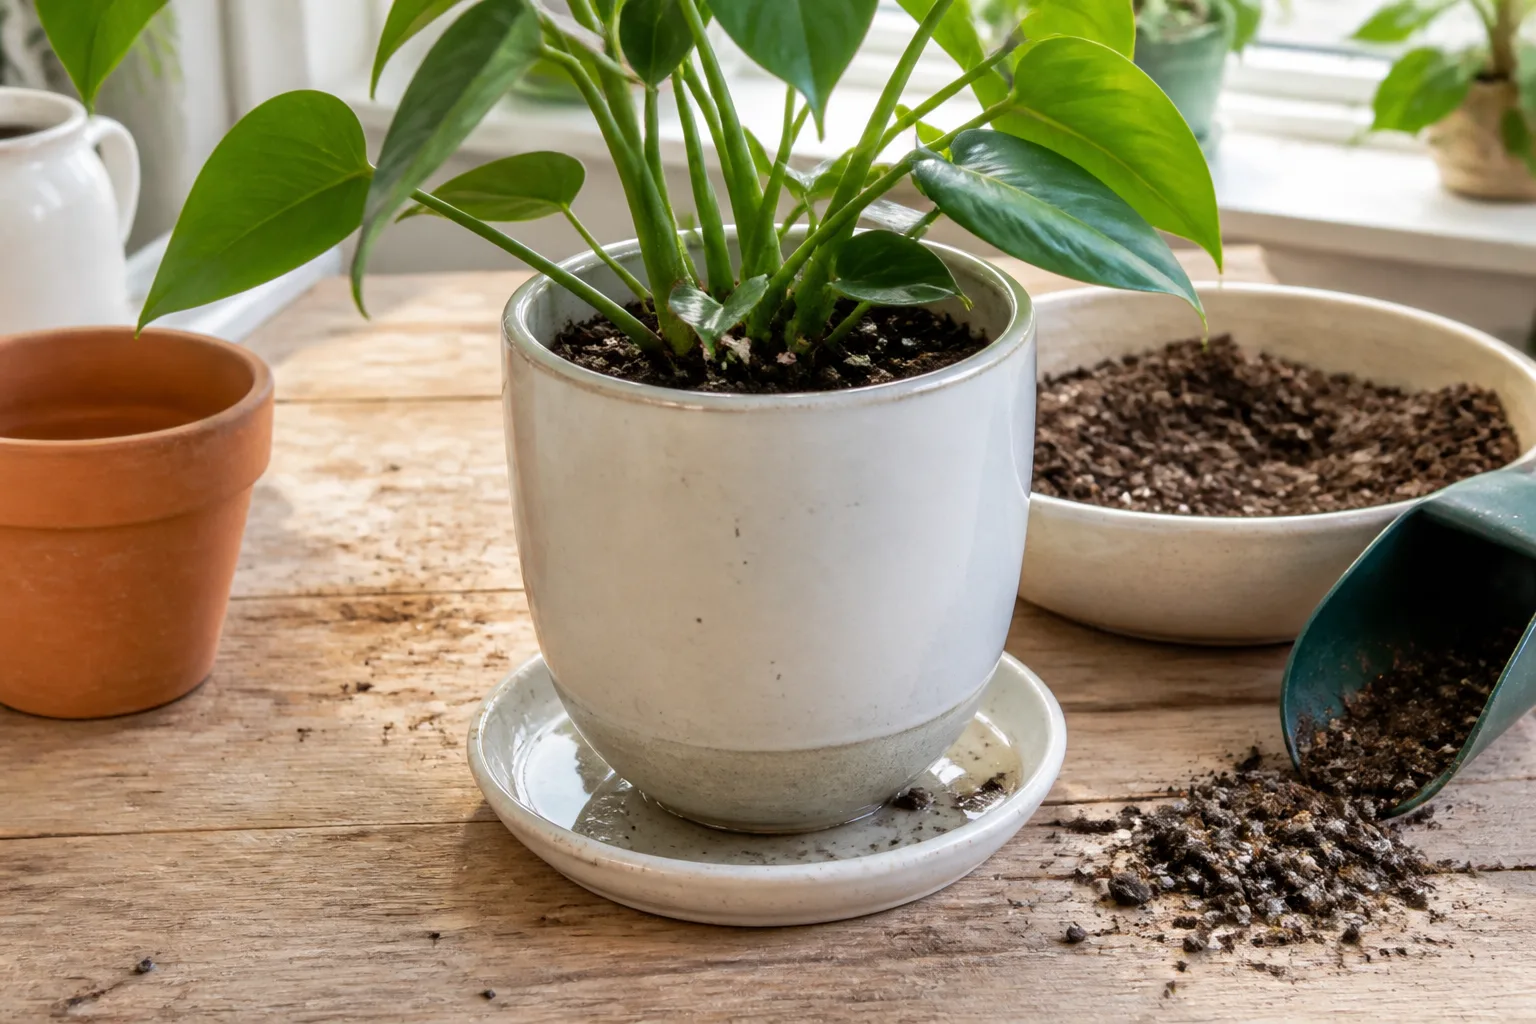
Use a nursery pot inside a decorative cachepot
The easiest way to keep the look of a favorite pot is to leave the plant in a plastic or terracotta grow pot with drainage holes and set that pot inside the decorative cachepot. Lift the inner pot out to water, let it finish draining, and pour away any water collected in the outer pot before returning it. Check that drainage holes are not blocked by a flat surface, roots, or compacted debris.
If you already planted directly into a pot without drainage, the safest long-term fix is to move the plant into a draining inner pot. Until then, water cautiously and check below the surface, but recognize that this setup leaves less margin for error. Never let the base of the root ball sit in standing water. A wet saucer after watering is normal for a short time; a pot left in that water is a different condition.
Mistake 4: Choosing a Pot Too Large—or Repotting on Autopilot
A much larger pot is not automatically a better home. A small root system cannot draw water evenly from a large volume of mix, so unused soil may remain wet and oxygen-poor for longer. A pot that is too small can also create problems: a densely packed root ball may dry rapidly, push the plant off balance, or leave little fresh mix. The answer is not “as big as possible” or “always one inch up”; it is a container proportionate to the roots and the plant’s drying conditions.
Many houseplants tolerate snug roots and do not need annual repotting. Iowa State University Extension lists top-heavy growth, slowing growth, potting mix that dries unusually fast, and old compacted mix as clues to consider repotting. Roots emerging from a drainage hole can be one clue, but a few visible roots do not prove that a plant is suffering. Check whether several signs line up and whether light, watering, or seasonal slowdown offers a more likely explanation.

Let roots and potting mix decide when to repot
When repotting is warranted, move up only enough to fit the root ball comfortably with fresh mix around it. For many average houseplants, that means moving up one pot size rather than jumping to a container several sizes wider; the RHS gives a broader 2–4 inch increase as a general guide, but plant and pot proportions still matter. A small seedling and a large tree-form plant do not need the same step up. Keep the crown at the same depth unless the species has different planting needs, and do not pack mix so tightly that water and air cannot move through it.
Repotting can refresh a mix that has collapsed or become difficult to wet, but it also disturbs roots. Avoid doing it just because a calendar says the plant is “due,” especially when it is already stressed by cold, drought, pests, or a recent move. When you do repot, use a clean container with a drainage hole and fresh potting mix, water it in, let it drain, and give it time to settle before restarting fertilizer. The photo of healthy and rotted roots in this section is a useful reminder that root condition—not the pot’s appearance—is what matters.
Mistake 5: Feeding by Month or Using Fertilizer as Medicine
Fertilizer supplies nutrients; it does not compensate for inadequate light, damaged roots, poor drainage, or a plant that is simply slowing down. Indoor plants often grow less during short, dim days, so feeding them at the same rate year-round can add salts when growth and water use are low. A plant that has yellow leaves is not automatically hungry, and adding fertilizer before checking the roots can worsen an already stressed plant.
Feed according to the plant’s growth and the fertilizer label. Iowa State University Extension’s houseplant guidance recommends fertilizing during active growth, reducing feeding during a rest period, and accounting for the fertilizer already present in many potting mixes after repotting. If you use an all-purpose formula intended for outdoor plants, its guidance is to dilute to roughly one-quarter or one-half strength because houseplants usually grow more slowly; a product made specifically for indoor plants should be used as labeled. Do not combine products or increase the concentration to force faster growth.
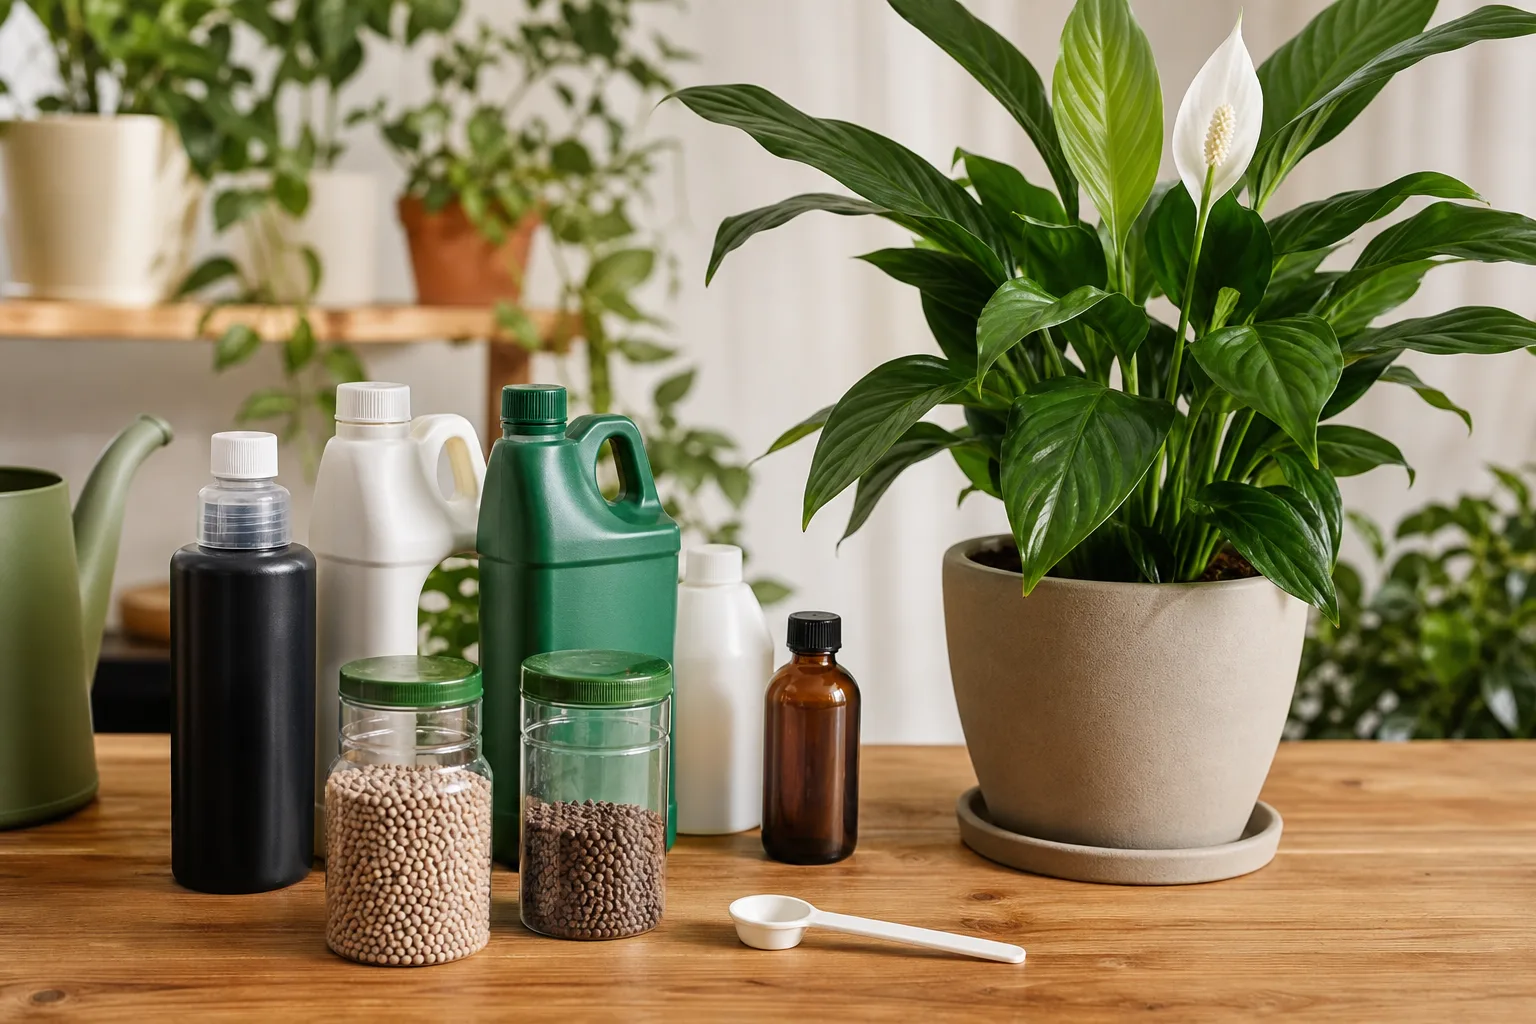
Match feeding to active growth
Look for new leaves, stems, or roots to determine whether the plant is actively growing. Some tropical plants continue growing indoors through winter under adequate warmth and light; others barely grow until brighter days return. Follow the plant’s pattern rather than stopping or starting food on a universal date. Newly purchased or recently repotted plants may already have enough nutrients in the potting mix, so check the mix or product instructions before feeding.
If brown tips or a white crust appear after repeated feeding, consider fertilizer salts among several possible causes. UC IPM’s diagnostic guide notes that brown margins can also result from dry or wet soil, low humidity, sun, or heat, so do not diagnose from the leaf edge alone. Stop unnecessary feeding, check drainage, and review the product dose. If the plant is in a draining pot and the mix can be flushed safely, water thoroughly and let all runoff escape; do not flush a sealed pot or one already waterlogged. Resume only when the plant is growing and the underlying conditions are stable.
Mistake 6: Chasing Humidity Without Measuring It
Some tropical plants are sensitive to dry indoor air, but not every houseplant needs rainforest conditions. A desert-adapted succulent in a humid display case can be just as mismatched as a humidity-loving fern beside a radiator. The RHS explains that relative humidity affects transpiration and that plant species differ in the humidity they need. Before buying a humidifier or misting every leaf, confirm that the plant is one that benefits from higher humidity and check the air where it sits.
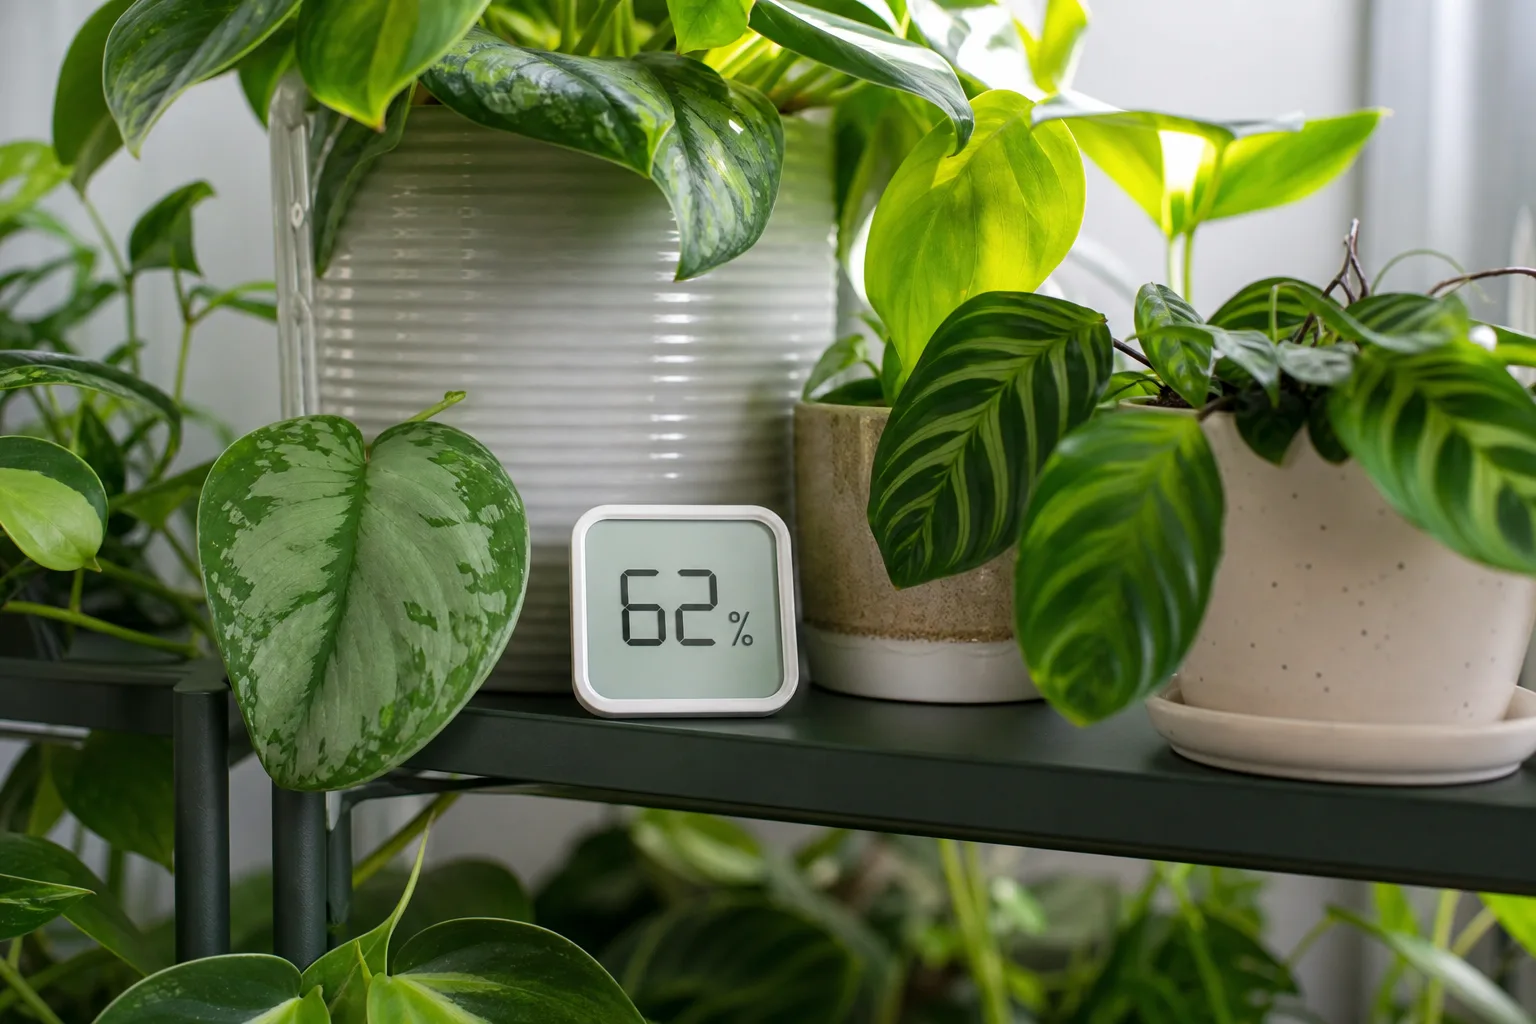
Raise humidity only when the plant and room call for it
A small hygrometer placed near the foliage can show whether the air is persistently dry; readings in another room or across the house may not reflect the plant’s location. Dry air can contribute to crispy edges on sensitive plants, but those edges can also follow inconsistent moisture, soluble salts, direct sun, or hot air. Check those other conditions before concluding that humidity is the cause.
If a humidity-sensitive plant repeatedly develops dry margins while its root-zone moisture, light, and water quality are otherwise appropriate, try grouping compatible plants or using a room humidifier. Keep some air movement around foliage and avoid placing leaves directly against a cold window or above a heater. Misting can wet leaves briefly, but it is difficult to maintain a stable room-level humidity that way; if you mist, do not leave water sitting on sensitive or hairy foliage. A pebble tray may create a small local effect, but the pot must sit above the waterline rather than in standing water.
Humidity should not become another care chore without a clear reason. If a plant is growing well in ordinary room conditions, leave it there. If it is consistently struggling and its species genuinely needs more moisture in the air, change the surrounding environment in a controlled way and look for healthier new growth rather than expecting old, crispy leaf tips to repair themselves.
Conclusion
Most houseplant mistakes become easier to correct when you stop treating a symptom as a command. A limp leaf does not always mean “water”; a yellow leaf does not always mean “feed”; and roots at a drainage hole do not always mean “repot today.” Check the root zone, pot, light, and recent changes first, then make one adjustment that addresses the likeliest cause.
For a dependable baseline, use a container that drains, water according to the plant’s mix and growth, give it the light its species can use, and reserve fertilizer and humidity adjustments for conditions that call for them. Keep notes on when you water, move, or feed a plant if the same problem returns. The goal is not to follow a perfect schedule; it is to learn how that plant responds in your home.



