How to Divide Flowering Bulbs: Timing, Steps, and Care
Learn when to divide flowering bulbs, how to gently lift and separate offsets without damaging them, and when to replant or store each type for next spring.
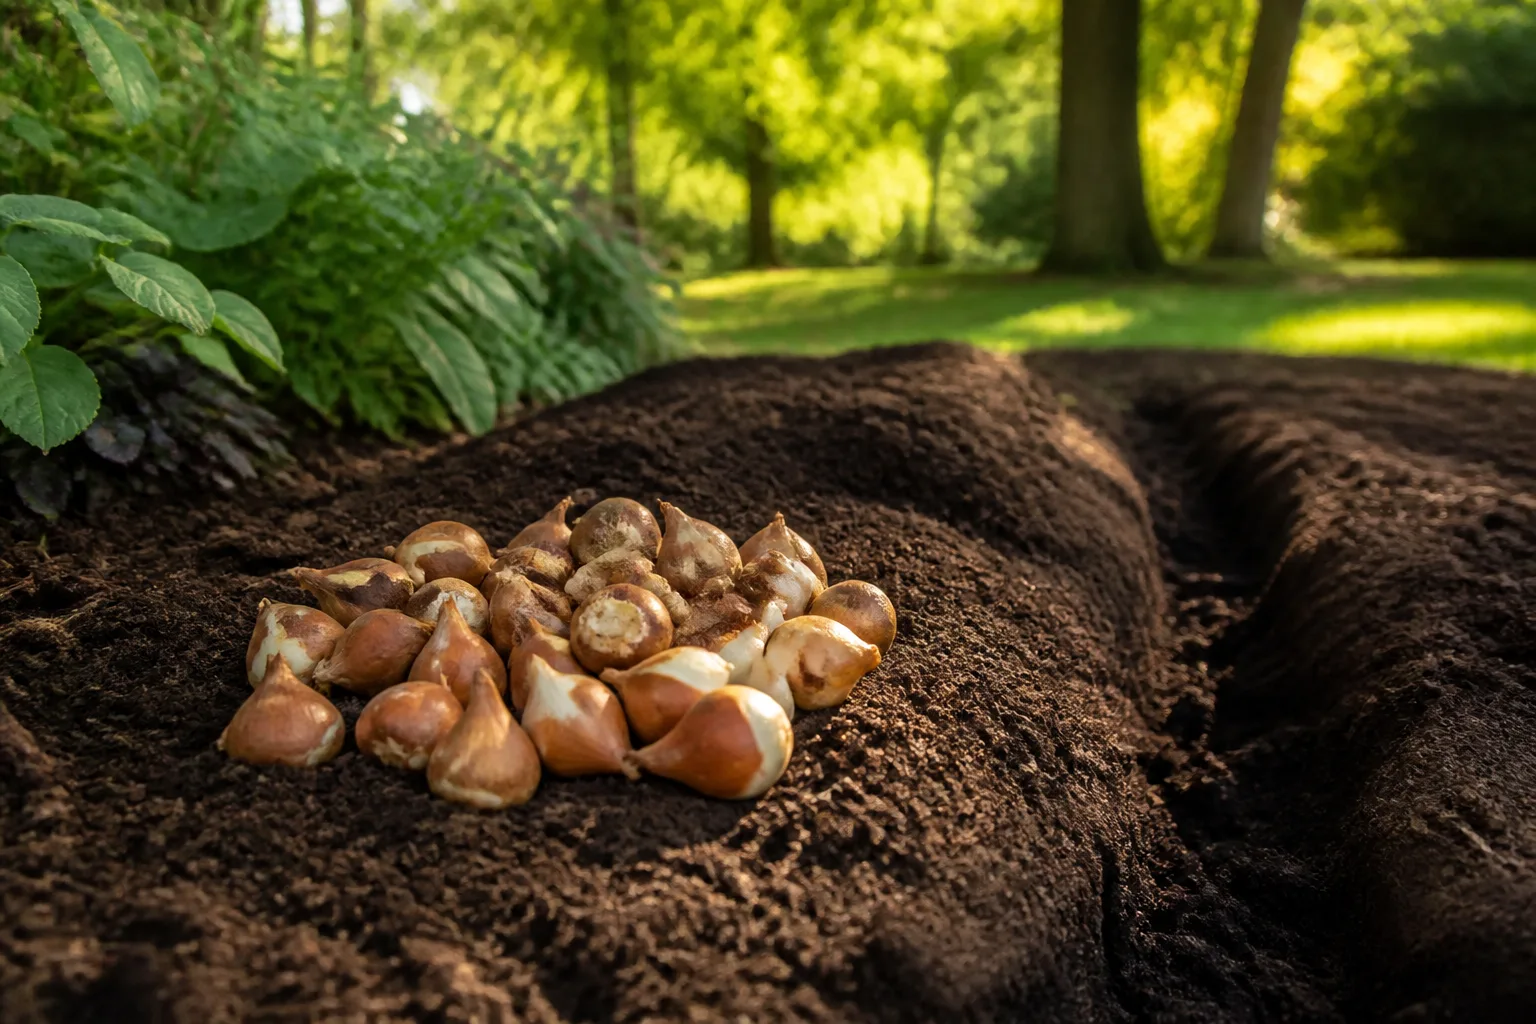
A crowded patch of daffodils or other spring bulbs is usually easy to thin, but timing matters more than force. Wait until the leaves have nearly finished their work, lift a wide section of the clump, and gently separate the small daughter bulbs from the parent. Replant healthy bulbs promptly at the depth suited to their size; keep tiny offsets in a labeled nursery spot until they are large enough to bloom.
You do not need to divide every bulb patch on a three- or five-year schedule. Leave a planting alone while it flowers well and has room to spread. If blooms have dwindled, first check whether the clump is truly crowded or whether shade, waterlogging, drought, or cut-back foliage is the more likely cause.
Does your bulb clump need dividing?
Division is useful when a clump has expanded until leaves and flowers compete for space, when you want to move bulbs, or when a group is so dense that it is difficult to maintain the surrounding bed. A full patch is not automatically a problem: many daffodils, snowdrops, crocuses, and other naturalizing bulbs are meant to form colonies. If flowering remains strong and the group fits its space, there is no horticultural prize for digging it up.
Look at both flowers and foliage. A dense mass of leaves with fewer flowers can point to overcrowding, and a clump that has pushed outward for years may need thinning. The specialist grower Colorblends also notes that lush leaves with declining bloom, or foliage that repeatedly flops after rain, can signal a congested daffodil planting; these are clues to investigate, not proof that every bulb should be lifted (Colorblends’ daffodil division guidance).
Low bloom is a clue, not a diagnosis
Before you dig, check what happened to the foliage the previous spring. Bulb leaves need to remain until they yellow naturally because they use light to replenish the underground storage organ after flowering. If you mowed, tied, braided, or cut the leaves while they were green, the bulbs may simply have gone into the next season with smaller energy reserves. More space will not correct that problem by itself.
Also consider the site. Daffodils and many other hardy spring bulbs need enough light during their growing season and soil that drains rather than staying saturated. A tree canopy that has become denser, a new evergreen hedge, waterlogged soil, or a dry spring can reduce flowering; pest or disease damage can also weaken a patch. The RHS notes that many common bulbs prefer free-draining conditions, while different species have different moisture and light needs (RHS guidance on growing bulbs). Fix the cause you find, and divide only if crowding or relocation is also an issue.
Know what you are lifting
Gardeners often use “bulb” for a range of underground storage organs. A true bulb, such as a daffodil, tulip, hyacinth, or lily, has fleshy layers and a basal plate: the compact bottom from which roots emerge. As a plant grows, it may form smaller daughter bulbs beside the original. Those offsets are the usual material you separate during routine division.
Corms, tubers, and rhizomes store energy too, but their structure and division method differ. Crocuses and gladioli grow from corms; dahlias form tubers; bearded iris spreads by rhizomes. The broad advice to lift carefully and replant promptly still helps, but do not cut or pull these structures as if every “bulb” were identical. Identify the plant first and use a species-specific method if you are handling a corm, tuber, or rhizome rather than a true bulb.
Offsets, bulbils, and tiny divisions
An offset is a small bulb attached to or close beside its parent. When it is large enough to detach with a gentle twist, it can grow as a new plant; the Royal Horticultural Society describes offsets as genetically identical to the parent and notes that small ones may take two to four years to reach flowering size (RHS bulb propagation guidance). That delay is normal, not a sign you divided incorrectly.
Some lilies also produce bulbils on their stems, while snowdrops are commonly divided as a clump rather than pulled apart into dry, individual bulbs. These are different routes to more plants. For routine garden renewal, do not try to slice a bulb into pieces or peel it apart: specialist propagation methods such as scaling or chipping use specific plants and carefully managed conditions, not an ordinary division day.
Choose the right time for each bulb
For most established spring bulbs, schedule lifting after flowering, when the leaves have turned yellow or mostly brown but still mark the planting. This is often late spring or early summer in temperate gardens, but the leaf stage is a better guide than a calendar date. A warmer climate, a late spring, or an early-flowering species can shift the window.
The wait protects next year’s flowers. The blooms have finished, but the green leaves are still gathering and moving energy back into the bulb. The RHS describes dormant bulbs as storage organs and recommends planting many species while dormant; its propagation advice also makes clear that timing varies by method and species. This is why “after flowering” does not mean “the moment the petals fall.”
Most spring bulbs: wait for fading foliage
For daffodils, tulips, and many other spring bulbs, let the leaves collapse and begin to yellow before digging a mature clump. Colorblends recommends lifting daffodils when foliage has collapsed and is mostly, though not completely, brown, usually in late spring or early summer. This stage gives the bulb time to replenish while leaving enough foliage to locate the buried cluster.
You can move a bulb earlier if a renovation or construction project makes waiting impossible, but treat it as an exception. Lift a generous plug of soil, keep as much root and leaf as possible, replant immediately, and water once to settle the soil. The plant may wilt or finish its leaves early, so a weaker display the following spring is possible. If you can wait, do.
Snowdrops and bluebells: move them in the green
Snowdrops and some other small woodland bulbs often establish more reliably when divided “in the green”: after flowering while their leaves are still visible. The RHS recommends lifting leafy clumps when the soil is moist, teasing them apart carefully, and replanting without allowing the roots to dry (RHS instructions for dividing snowdrops in the green). This exception is important because a dry, dormant bulb can be slower to re-establish for some species.
The method is simple but quick: lift the rooted clump with a fork, ease it apart into smaller groups, and plant each group at its previous depth. Keep the foliage intact and water the new spot. Garden designer Lee Burkhill’s practical guide to lifting spring bulbs likewise distinguishes the green stage for snowdrops from the later lifting window used for most daffodils and tulips (Garden Ninja’s bulb-lifting guide). When unsure, check advice for the named species rather than applying a general “wait until brown” rule to every bulb.
Prepare tools and a replanting spot
Have the destination ready before you lift anything. Choose a site with light appropriate to the species and drainage that will not leave dormant bulbs sitting in wet soil. If you are moving bulbs to a new bed, loosen compacted soil first; improve drainage across the planting area where needed rather than making a rich, soggy pocket directly under each bulb. For naturalized groups, think about how the leaves will look after flowering and whether nearby perennials will hide the foliage without shading it too early.
A hand trowel is enough for a small clump; a border fork or spade helps with a larger patch. Use a fork in heavier soil when you can work it beneath the clump, since a sharp spade is more likely to slice through bulbs. Bring a shallow basket or tray so offsets do not roll away, labels for varieties or colors, and water for the new planting. If the soil is bone dry, lightly moistening it beforehand can make lifting easier; avoid working sticky, saturated soil that smears and compacts around the bulbs.
Lift the clump without cutting it apart
Find the outer edge of the foliage and begin several inches beyond it, not right beside the stems. Bulbs and roots often extend farther than the visible leaves, so a narrow dig right under the plant can cut through the very offsets you want to save. Push the fork down around the perimeter, loosen the soil from more than one side, then lever gently underneath until the clump rises as a unit.
Do not yank the leaves to pull bulbs free. Once the soil loosens, lift the clump by supporting the soil and roots. Shake or crumble away loose soil over the bed or a tray so that small bulbs remain visible. If foliage stays attached, leave it on while you inspect and sort; it helps identify the plant and continues photosynthesis if it is still green. A small accidental nick is not the same as a bulb sliced through its base, but badly cut or crushed bulbs are poor candidates for storage.
Separate offsets and check each bulb
Start with your fingers. Gently turn the clump and look for small bulbs beside the parent. A mature offset often separates with a slight twist at its natural connection; if it resists, do not wrench it off. Keep the parent and offset together for now, or plant that pair as a cluster. Forcing a separation can tear the basal plate or leave a large wound that invites rot.
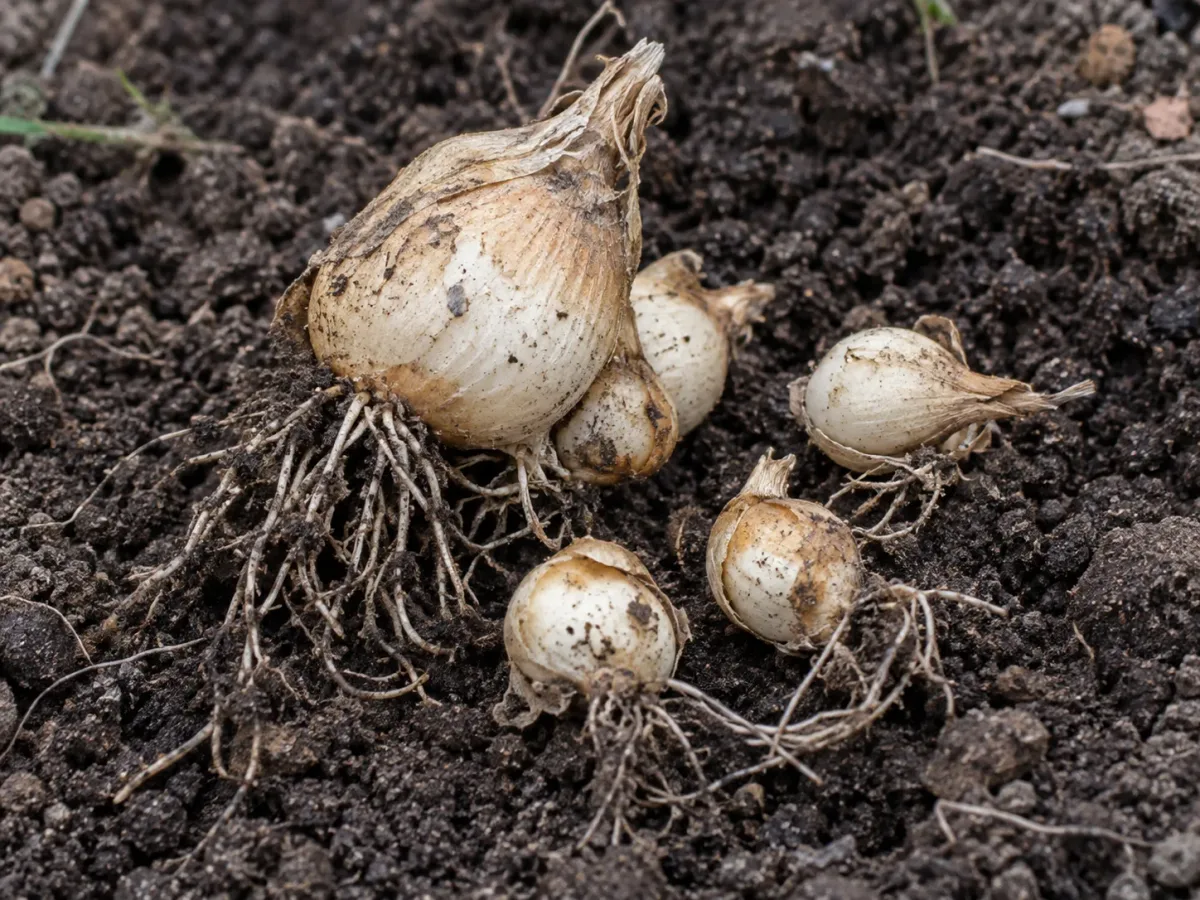
Work over a tray and sort by type and size instead of making one pile. Keep the same variety together, because mixed species can be hard to distinguish after their foliage disappears. If a clump contains bulbs that are easy to detach and others that are still small or fused tightly to the parent, divide only the ready ones and replant the rest as a group. There is no need to make every bulb a separate planting unit.
Keep firm bulbs; discard soft, rotten ones
A healthy dormant bulb can look papery or have a dry outer tunic, but it should still feel firm for its size. Keep firm bulbs with intact bases and no spreading rot. A little surface soil or a dry outer skin is not a reason to scrub or wash them; rough cleaning can damage protective layers.
Set aside bulbs that are soft, mushy, badly shriveled, foul-smelling, or visibly rotten. Do not store a diseased bulb with healthy ones, and do not plant a bulb that is crumbling or cut through the basal plate. If many bulbs show similar lesions or rot, stop and investigate drainage or a disease problem before spreading the material around the garden. Healthy offsets can be replanted; damaged stock does not become healthy through division.
Replant at the right depth and spacing
Replant healthy bulbs as soon as practical, especially if roots are exposed or the bulbs are still leafy. Set each one with its growing tip upward and basal plate downward. If orientation is unclear, lay it on its side; the shoot can usually orient itself, while planting a bulb upside down can delay emergence.
For an established bulb, return it close to its original depth unless you know the species was planted incorrectly. For new offsets, follow the species’ planting guidance and use bulb size as a rough check. The RHS describes bulbs as having varied planting needs, and broad horticultural rules of thumb such as planting at about two or three times bulb height are only starting points, not a substitute for species-specific instructions. The soil should cover the bulb without burying it so deeply that a small offset exhausts itself reaching the surface.
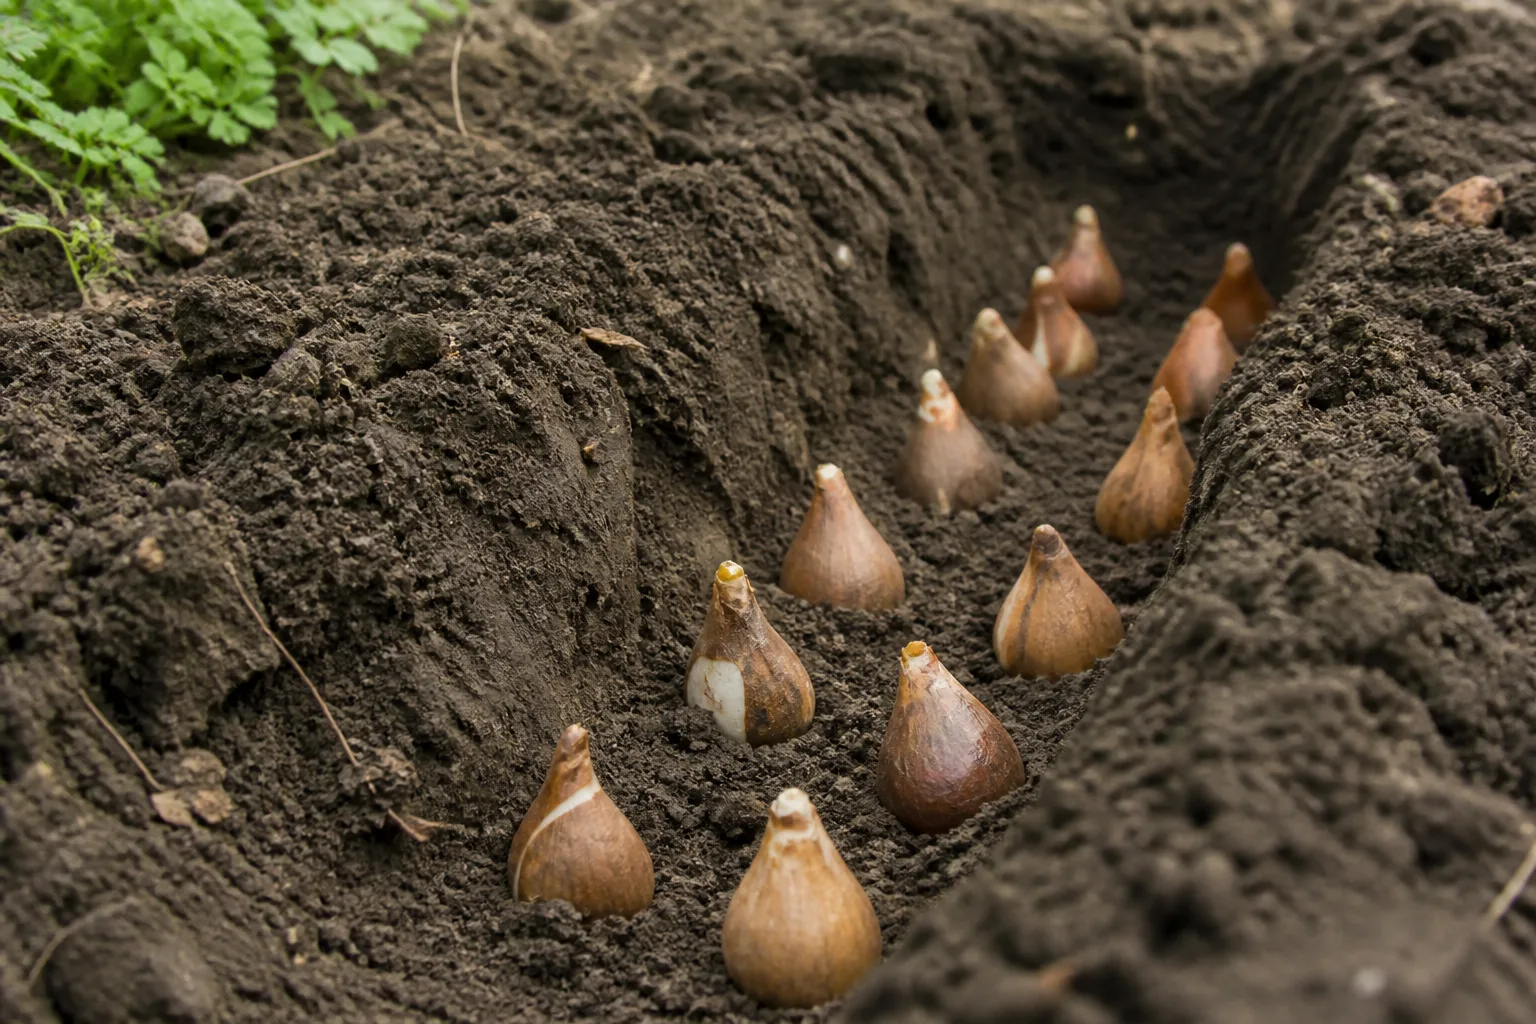
After planting, firm the soil gently and water enough to settle it around the roots. Do not keep dormant bulbs constantly wet; waterlogged soil deprives them of air and encourages rot. In a border, replant bulbs in loose groups rather than a rigid line if you want a natural drift, but maintain enough distance for the clump to grow before it needs thinning again. Label a holding bed, especially if you will not see flowers for a season or two.
Plant by size, not one universal measurement
Large, flowering-size bulbs can usually return to a permanent border with normal spacing for the species. Give them room for leaves to emerge and for offsets to form. If an offset is only a fraction of the parent’s size, do not tuck it at the same deep planting level by habit; use the depth recommended for that species and size, or grow it in a marked nursery bed where you can find it again.
Small bulbs can be planted in shallow groups in the border or potted together in free-draining compost, provided the pot has drainage holes and you can keep the mix from drying out completely while they establish. A nursery row has an advantage: you can tend it without disturbing the display bed, and you can move flowering-size plants later. Whichever route you choose, keep the label and do not assume a green leafless patch means the bulbs failed.
Give small offsets time to reach flowering size
A division does not instantly multiply the flower count. A large offset may be close to blooming size, while a tiny one needs time to build a larger storage reserve. The RHS estimates that small bulb offsets can take two to four years to flower, though the schedule depends on the species, the size of the offset, and growing conditions. The first season may produce only leaves or a small shoot, which is still progress.
For the best chance of a quicker bloom, let foliage complete its cycle, provide the light and moisture the species needs while it is actively growing, and avoid moving the bulbs again. Do not judge a nursery bed by its first spring. If a tiny offset fails to emerge, mark the spot and wait through the normal growth cycle before digging; some bulbs remain dormant between seasons, and repeated searching can damage them. Patience is part of propagating bulbs, not an optional extra.
Store bulbs only when you must
Immediate replanting is usually the simplest option. Store bulbs only when their permanent location is not ready, the bed is being renovated, or planting time for that species has not arrived. This matters because not every bulb tolerates the same dry storage period, and an exposed bulb can lose moisture or rot if packed before it is dry.
For dry, dormant bulbs that can be stored, let surface moisture dry in a shaded, airy place, remove loose soil gently, and keep the bulbs in a labeled mesh bag or ventilated tray. Choose a cool, dry location out of direct sun and rain, then inspect them periodically and remove any bulb that turns soft or moldy. Avoid sealed plastic bags and damp packing material. Replant them during the same appropriate planting season; do not treat summer storage as a way to hold bulbs indefinitely. Colorblends’ daffodil-specific guide recommends airy summer storage and prompt autumn replanting, while species with “in the green” requirements should be replanted right away instead.
Avoid the mistakes that cost next year’s flowers
The biggest mistake is lifting too early and then cutting off the leaves because they look untidy. If green foliage remains, let it yellow naturally; if you need to disguise it, interplant later-flowering perennials rather than tying or braiding the leaves. The leaves may be less attractive for a few weeks, but that short recovery period helps the bulbs recharge.
Other avoidable problems are digging directly into the clump, pulling bulbs by their stems, splitting offsets with a knife, mixing varieties without labels, and planting everything at one depth. Do not divide a healthy group just because a calendar says it is time. If flowering is poor, correct light, drainage, or foliage-management problems too; otherwise the same weak display can return even after the bulbs have more space.
Also resist the urge to store every bulb you lift. Sorting, drying, labeling, and checking bulbs takes time, and storage adds a failure point. A healthy bulb that can go back into suitable ground now is usually easier to manage than one left in a bag until you remember it in autumn.
Conclusion
Divide flowering bulbs when a clump is crowded, needs moving, or has outgrown its space—not simply because several years have passed. For most spring bulbs, wait until the foliage has mostly yellowed so the plant can refill its reserves; divide snowdrops and similar species in the green when that is the recommended method.
Lift from beyond the clump, separate only offsets that come away easily, discard rotten bulbs, and replant healthy stock promptly at a depth that suits its size and species. Keep small offsets labeled and give them time to mature. That measured approach leaves established bulbs to flower again while turning the extras into future blooms.



