Bucket Gardening: Practical Setup, Crops, and Care
Learn bucket gardening from container choice to harvest: pick food-safe buckets, add drainage, choose a light mix, size crops well, and water with confidence.
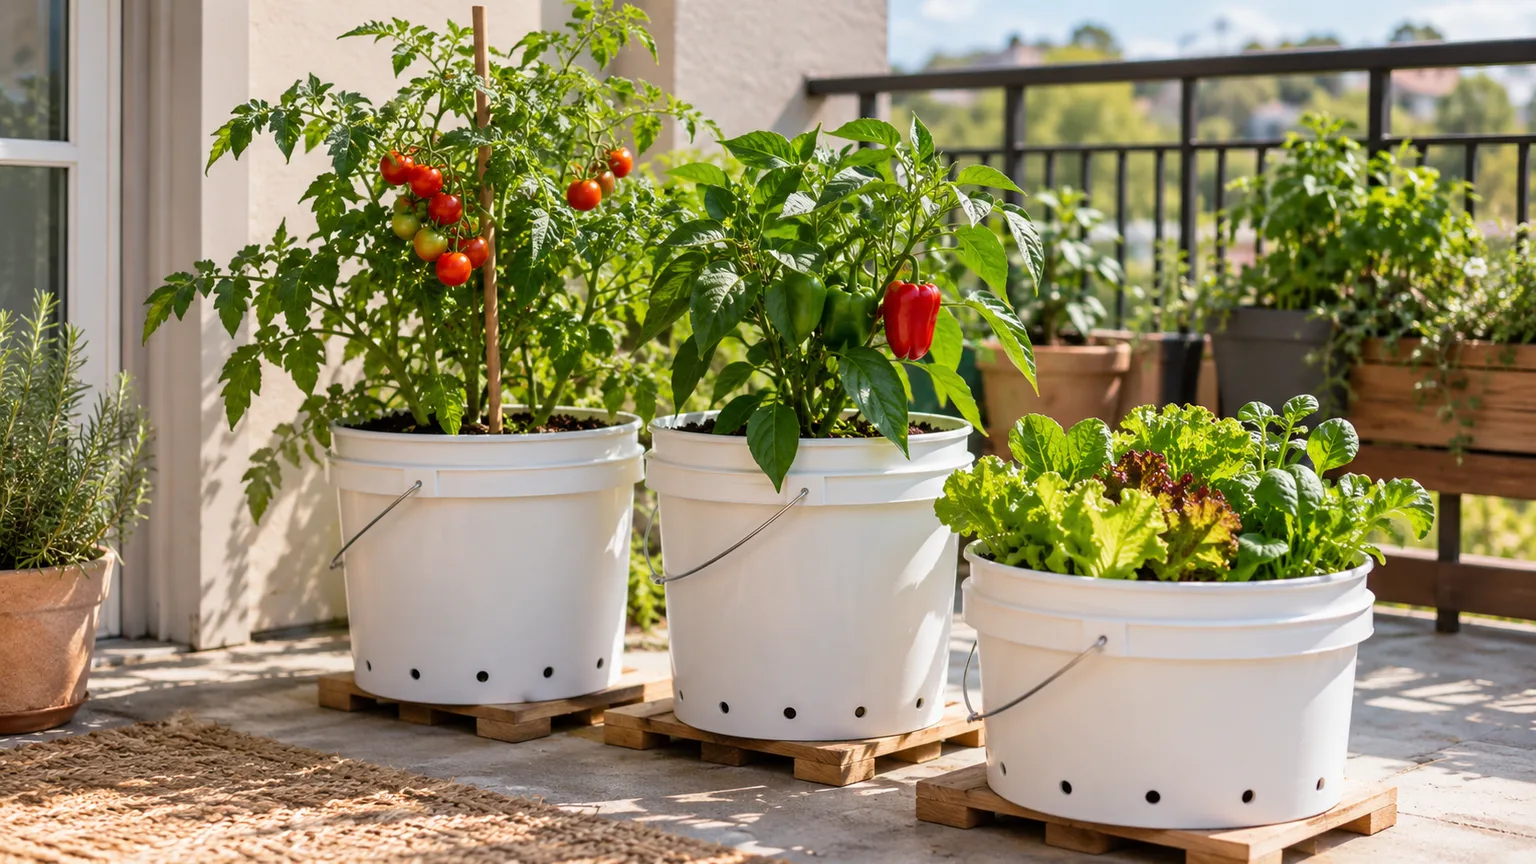
Bucket gardening works when you treat each pail as a limited root zone, not as a compact raised bed. A standard five-gallon bucket can grow one compact fruiting vegetable, but it will not make every crop a small-space crop. Choose a food-contact container with a known history, open drainage, a light container mix, and a crop that fits its mature root system and canopy.
The main trade-off appears after planting: a bucket is convenient, but its small volume dries and loses nutrients faster than garden soil. Set it near a water source and where it can stay once full.
Quick answer: Start with a safe bucket sized for one mature plant
For edible plants, use a bucket labeled for food contact or a used food-service bucket whose previous contents you can verify. Wash it, drill several holes across the base, and set it on feet or slats so water can escape. Fill it with pre-moistened potting mix, leaving an inch or two below the rim to catch water.
Use a five-gallon bucket for one compact tomato, pepper, eggplant, or bush cucumber; reserve smaller pails for herbs and greens, and choose a larger planter for sprawling crops. Check the mix before watering, then soak the root zone until water drains. A gravel layer is not a default fix: its effect depends on the mix, and it takes space from roots.
Decide what a bucket garden can do well
Buckets suit a balcony, paved yard, rental patio, or landing where the ground is unsuitable. They let you choose the medium and move a small container to catch better light or avoid a cold night. One bucket is also a low-cost test of how sun, wind, and reflected heat affect the site before you expand.
The limits matter just as much: a bucket has less water storage and root room than a bed, so roots cannot reach beyond its walls when the mix dries or nutrients wash through the holes. Larger containers hold more moisture, and Colorado State Extension recommends at least five gallons for several full-size vegetables because smaller pots need closer summer care. Treat that as a baseline, not a guarantee; Colorado State Extension’s container guide explains how volume, crop size, watering, and stability interact.
Where bucket gardening solves a real problem
Use buckets for one or two crops you want close at hand, such as a patio tomato, basil, or spring lettuce. A pot can keep mint from spreading into a bed, though a larger one is better for a substantial summer harvest. On a balcony, check the fully watered load and direct drainage so it cannot stain or damage the surface below.
Portability helps most before a plant grows large. A watered bucket is heavier than an empty one, and a stake or cage can make a tall plant catch wind. Choose the final spot before filling; if you need to reposition the container, put it on a sturdy, drained dolly rated for the loaded weight before planting.
When another container is a better fit
Choose a trough for rows of lettuce, radishes, or short carrots. A larger pot or grow bag gives sprawling squash, large indeterminate tomatoes, or potatoes more root room and water storage; an in-ground bed is simpler for several sprawling plants.
A crop can survive in a bucket and still be a poor match for your routine. If it needs a tall trellis, frequent hand-pollination, or repeated watering during hot afternoons, count that work before planting. The GrowVeg guide to container-growing setbacks is useful on the practical failure points: drying, wind, drainage, and choosing a pot too small for the plant.
Choose food-safe buckets before drilling
For vegetables and herbs, buy a pail sold for food storage or reuse a food-service bucket only when you know it held an edible ingredient. Avoid buckets that held paint, pesticides, solvents, detergents, automotive products, or unknown chemicals. Soap and water can clean visible residue; they cannot confirm what an unknown container held or remove every possible contaminant.
Resin codes identify a plastic type, not the bucket’s full safety history. University of Maryland Extension describes #2 high-density polyethylene (HDPE) and #5 polypropylene (PP) as common food-safe plastics, but warns that a bucket used for chemicals is no longer suitable for crops even if it is HDPE. University of Maryland Extension’s container guidance explains those distinctions.
Look for a food-grade or food-contact statement and consider both the label and the bucket’s past use. If either is uncertain, keep that pail for flowers and choose a known food-contact container for crops you plan to eat.
Wash a suitable bucket with warm water and mild dish soap, rinse, and let it dry before drilling. Reject a pail with chemical odor, oily residue, a flaking lining, cracks, or brittle plastic. Even food pails need cleaning; if a container held a diseased plant, clean and disinfect it according to the product label before reuse.
Add reliable drainage before planting
Roots need both water and air. Saturated mix fills the air spaces around roots, so a plant can wilt even when the bucket feels wet. Multiple holes and a small gap under the pail let excess water leave instead of pooling against a patio or saucer.
Drill holes across the base and lift the bucket
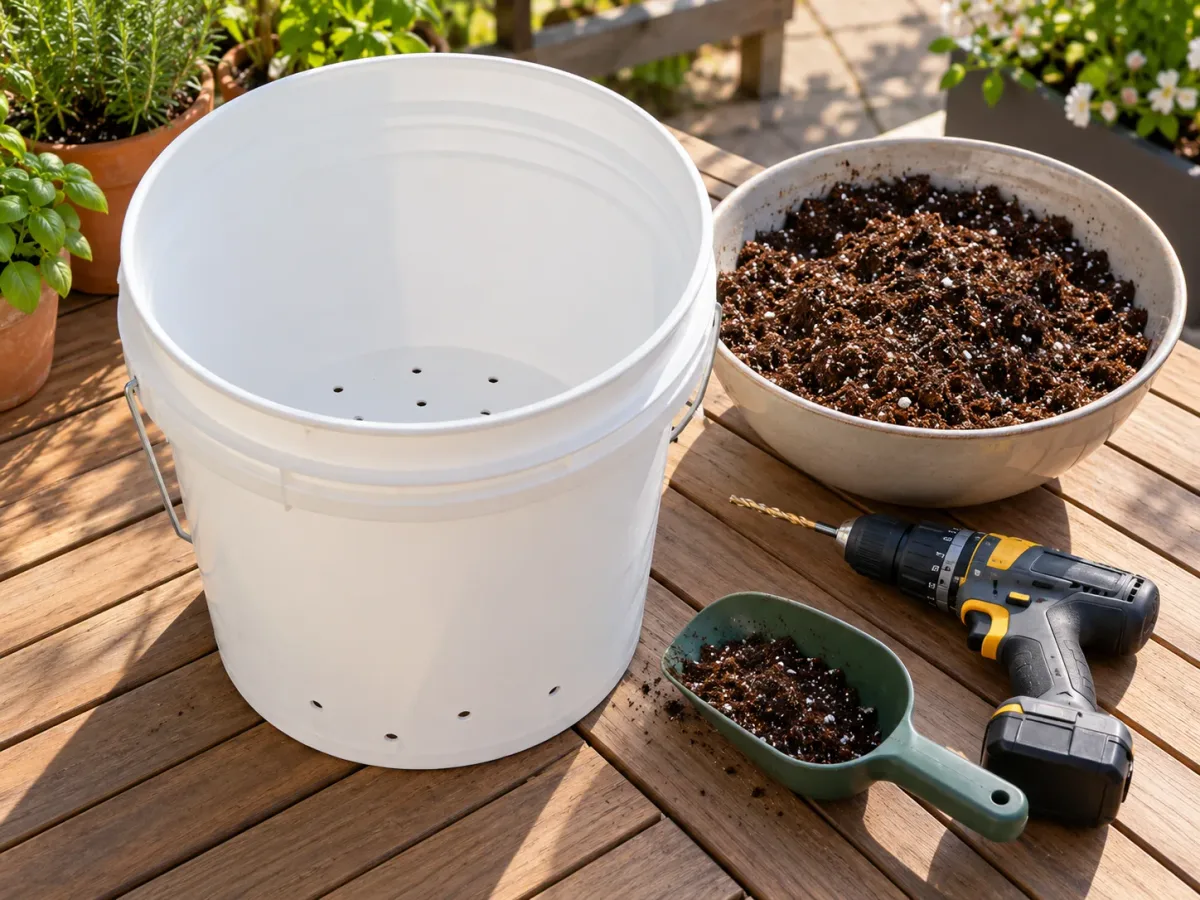
Drill before filling. For a typical five-gallon pail, a useful starting pattern is six to eight evenly spaced holes about a quarter-inch wide across the bottom; hole count is not universal because bit size, bucket shape, and mix affect flow. Test the empty bucket with water: it should drain promptly from several parts of the base.
If water pools, clear a blocked opening or add a few more holes rather than adding material inside the bucket. Illinois Extension also recommends multiple holes and watering until excess drains from the bottom. (Illinois Extension’s container watering checklist covers both points.)
Set the bucket on feet, bricks, narrow slats, or an open stand so the holes stay clear. A removable catch tray can protect a deck, but empty it after watering or rain; leaving water in the tray keeps the lower mix wet and can create standing water where mosquitoes breed. If the pail is brittle or cracks while drilling, replace it instead of trusting a damaged wall with wet mix and a tall plant.
Treat a gravel layer as a trade-off
Advice about gravel under potting mix has changed as researchers have tested it directly. A 2025 PLOS ONE experiment compared several coarse layers with three potting media and found that they usually reduced or did not change the amount of water held in the containers. The study measured water retention, not plant growth, yield, or how often a gardener would need to water; the result also varied with the medium and layer used. (PLOS ONE study of drainage layers in container media.)
Some extension guidance, including Maryland Extension’s container recommendations, still advises leaving the base clear. Its practical concern remains useful in a bucket: stones replace potting mix and reduce root depth in a container that already has little room.
For most bucket gardens, use open holes and a suitable mix first; do not add a gravel layer just because you think it is required for drainage. If a crop or mix has a specific reason for a coarse layer, treat it as a way to alter moisture retention, not as a substitute for holes or a guarantee of healthier plants.
If mix escapes through a drainage opening, cover just the opening with a small piece of rigid plastic mesh or screen. The cover should keep large particles in while leaving an open path for water. If a bucket needs ballast, stabilize it from the outside with a wider base, a secured stand, or a sheltered location; rocks beneath the root zone add weight but do not brace the plant above it.
Use a light, airy container mix
Use a bagged potting or container mix made to hold moisture while leaving air around roots. Ingredients often include coir or peat for water retention, bark or compost for organic matter, and perlite or vermiculite for air space and structure.
Formulas vary, so read the label before adding anything. Oregon State University Extension recommends commercial potting mix over garden soil; Colorado State Extension’s container guidance also explains why native soil is often too dense for pots.
Garden soil can compact inside a small pail, slowing drainage and reducing oxygen around roots; it can also bring weed seeds or disease organisms into the container. Pure compost is not a reliable substitute for potting mix because it may settle, shrink, or hold water unevenly. If you use mature compost, add a modest amount only when the mix or crop guidance calls for it rather than filling the bucket with compost alone.
Before planting, slowly moisten dry mix in a tub until evenly damp; very dry peat- or coir-based mix can repel water and leave a dry center. Fill loosely, leave one to two inches of headspace, and do not compress the medium. Add sand, fertilizer, or water-holding crystals only when the product label or crop guidance calls for them.
Match bucket size to mature roots, not seedling size
A transplant looks small when you buy it; its mature root system and canopy determine whether the bucket will work later. Bucket labels usually state capacity to the rim, while the usable growing volume is smaller once you leave headspace and account for a tapered shape. Use volume, depth, and plant habit together, then follow the seed packet or plant tag for final spacing.
Extension recommendations differ by variety and by how much maintenance the gardener can accept. University of Maryland Extension lists cherry tomatoes as suitable for smaller containers than standard tomatoes, while Colorado State Extension recommends at least five gallons for tomatoes and several other full-size crops. (Maryland’s crop-size table and Colorado State’s container vegetable guide show the range.) That is not a contradiction so much as a reminder that a compact cultivar may survive in less mix, while a larger container is easier to keep watered and productive. The table is a conservative starting point for a typical outdoor bucket garden.
| Usable container | Good starting choices | Practical limit |
|---|---|---|
| 1–2 gallons | Basil, chives, cilantro, thyme, leaf lettuce, baby greens, green onions, short radishes | Small root zone dries quickly; harvest greens young and check moisture often |
| About 5 gallons | One compact tomato, pepper, eggplant, or bush cucumber; a small group of bush beans | Usually one large fruiting plant; add support early and leave room for airflow |
| 10 gallons or a wide, deep planter | Summer squash, larger tomatoes, a bigger potato trial, rows of carrots or greens | More volume holds water and gives roots space; match depth to the crop |
What to plant in a 2-gallon bucket
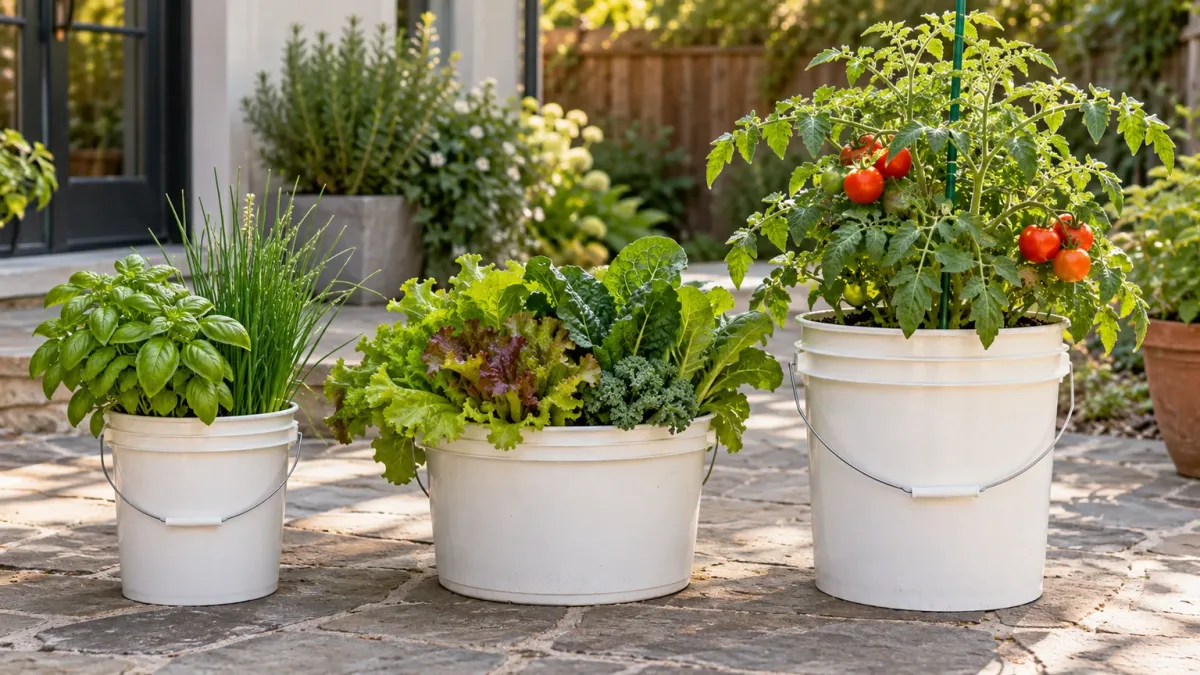
Small pails are most useful for herbs and quick crops. A compact basil, chive, cilantro, or thyme plant can fit if you leave room for roots and keep up with moisture.
A small sowing of lettuce, arugula, spinach, or baby greens can also work; thin seedlings to the spacing on the packet rather than letting a dense mat compete for water. Larger herbs such as rosemary, sage, dill, or mature parsley can outgrow a small bucket and are easier to manage in five gallons or more.
Radishes and short-rooted varieties of carrots can grow in buckets when the depth suits the cultivar. Check the seed packet for the mature root length: a round carrot is a better fit for a shallow container than a long-rooted variety, and a crowded root can fork or stop short. Greens and other cool-season crops can bolt or taste stronger in hot weather, so a bucket is useful because you can give them morning sun and afternoon shade when available.
What to plant in a 5-gallon bucket
One five-gallon bucket per fruiting vegetable is a dependable home-garden rule. A compact or determinate tomato, one pepper, one eggplant, or one bush cucumber can grow in that volume, though a larger pot buffers moisture better.
Plant a single tomato rather than two: the plants would compete for root space, water, and nutrients, and their foliage would be harder to support and ventilate. Colorado State University Extension’s crop-size table notes that large indeterminate tomato vines need larger containers and sturdy support.
Bush beans can be planted as a small group at packet spacing; pole beans need a stable trellis. A cucumber can climb to save patio space, but the trellis does not reduce its water needs.
A compact summer squash may grow in a bucket, but Maryland Extension lists ten gallons as a minimum, so a larger container is easier if you have room. Use the variety name and mature size on the tag, not just the crop name, to decide.
Leafy greens and herbs can use the extra volume, but more soil does not remove the need to thin crowded plants. A five-gallon pail can hold a succession of salad greens or one larger herb; sow a little at a time and replace plants when they bolt or lose quality. A full-size cabbage, broccoli, or cauliflower can be bulky as well as thirsty, so check its mature dimensions and water needs before assigning it a bucket.
What to move to a larger pot or garden bed
Choose a larger container for large indeterminate tomatoes, full-size vining squash, pumpkins, or any plant whose canopy and support system will dwarf the pail. A bucket can grow potatoes, but it offers limited width and volume for tubers; treat it as a small experiment rather than a way to maximize harvest. For more potatoes, use a wider grow bag or planter and follow a crop-specific guide for planting depth and hilling.
Carrots need enough depth for the variety, so long-rooted types are poor fits for a short pail even when its gallon capacity looks large. Corn and large melons also ask for more root room, water, and support than a standard bucket can comfortably provide. Gardening Know How’s bucket-gardening overview is a useful cross-check for which crops gardeners commonly try; use extension size guidance and the variety label to decide which ones are realistic at your site.
Plant and support each bucket in place
Place the empty pail where it will live before adding mix. Most fruiting vegetables need a sunny position; six or more hours of direct light is a helpful starting point, though the seed packet or plant label is the better guide for a specific crop.
If the only spot is partly shaded, try leafy greens or herbs that tolerate less sun rather than expecting a tomato to fruit well. Avoid roof runoff, strong wind tunnels, and places where a hot wall or paving reflects intense afternoon heat onto the container.
Once the pail is clean and drained, pre-moisten the mix, fill it while leaving headspace, and plant at the depth shown on the tag. Water slowly until the root ball and surrounding mix are wet and water runs from the base.
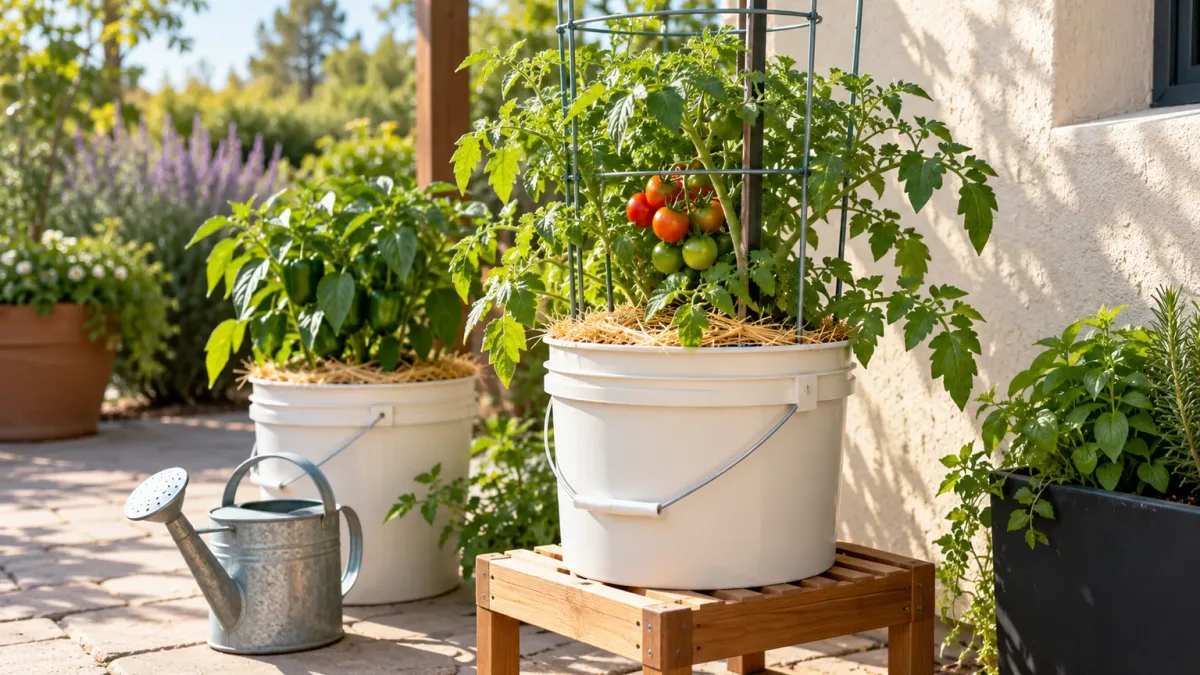
Put a cage, stake, or trellis in when you plant; adding one after roots spread can damage them. For climbers, anchor the support independently or use a wider planter so a narrow bucket is not responsible for keeping a tall plant upright.
One crop per bucket keeps watering and feeding easier to manage. A tomato and basil may be a familiar pairing, but they still compete for water and the tomato’s canopy can shade the herb.
If you mix plants, choose varieties with compatible light and moisture needs and use their recommended spacing; a full rim is not a planting plan. After planting, check the drainage holes again and make sure the bucket has not sunk against the patio.
Water by moisture, with a simple feeding plan
Check buckets daily in warm weather, especially after plants mature, set fruit, or face wind. Press a finger about an inch into the mix, or lift one side of the container to learn how it feels when wet and when dry.
Water when the root-zone mix is beginning to dry, then pour slowly across the surface until water drains from the base. Illinois Extension recommends checking containers daily and using soil feel rather than a fixed schedule; it also notes that thorough watering reaches the bottom of the container. (Illinois Extension’s container-watering guide explains the decision.)
A small bucket may need water every day in hot, dry weather, and a mature plant in a heat wave may need a second check later in the day. That follows from small soil volume, exposed walls, wind, and plant size—not a calendar rule. Morning is a useful time to check because you can restore moisture before the hottest part of the day.
Mulch the surface with a thin layer of clean straw or shredded leaves to slow evaporation, keeping it away from the stem. In tomatoes, blossom-end rot can follow inconsistent moisture or too little water storage; stabilize watering before adding fertilizer or calcium on guesswork. (Colorado State’s container vegetable guide lists inconsistent water as a risk factor.)
Avoid both quick surface sips and standing water. If water runs down a gap between the mix and bucket wall, the medium may have dried enough to repel water; apply a little, wait for absorption, and repeat until the root zone is wet.
If the mix stays soggy for days, check the holes and elevation before adding more water. A wilted plant can have dry roots or oxygen-starved roots, so touch the mix before deciding.
If daily checks are not realistic, consider a purpose-built self-watering bucket with a separate reservoir and overflow instead of sealing drain holes or leaving an ordinary pail in standing water. Maryland Extension describes a bucket-in-bucket design.
Container plants use nutrients quickly, and water passing through the holes carries some soluble nutrients away. Check whether the potting mix already includes starter fertilizer and follow its label for how long it lasts.
Once that supply runs low, use a fertilizer labeled for edible crops at the package rate; adjust for crop or growth stage only when the label instructs you to. Heavy doses can injure roots or accumulate salts in a small amount of mix, so measured feeding is more reliable than guessing.
Manage heat, wind, and wet weight
A dark bucket in direct summer sun can heat the root zone and dry the mix faster. Choose a light-colored food-contact pail when possible; if you already have a dark bucket, shade the sides with an open outer sleeve or shade cloth while keeping the top ventilated and the holes unobstructed. Illinois Extension notes that dark containers absorb more heat and can damage roots, especially in full sun. (Illinois Extension’s advice on dark-colored containers describes the effect.)
Patios and south- or west-facing walls can add reflected heat. Put lettuce, spinach, and other cool-season crops where they get morning light and afternoon shade during hot weather.
Fruiting crops still need the sunlight their variety requires, so shade the sides of the pail or cover the soil surface rather than moving a tomato into deep shade. If a plant wilts repeatedly while the mix is damp, check for a hot root zone, blocked drainage, or roots that have filled the container before watering again.
Wind can tip an empty or narrow pail, and a cage or trellis gives the plant more leverage. Choose a sheltered spot with air moving through the foliage; use a wide base, a secured support, or a grouping that cannot slide. Do not rely on a layer of stones in the bottom to stabilize the bucket, since it reduces root volume and does not stop the upper plant from catching wind.
Plan for the bucket’s full weight before filling it. Five gallons is about 19 liters of volume, and wet mix, a mature plant, and a support make it heavy enough that the handle alone is not a safe lifting plan.
Set the bucket in its final position first or use a stable wheeled dolly rated for the load. If it will sit on a balcony or roof, check the building’s load guidance and arrange containers so water drains without pooling or damaging the surface.
Keep buckets productive through the season
A short routine catches most problems before a crop stalls. After rain or watering, make sure drainage holes remain open and empty catch trays.
Retie a support before stems are heavy with fruit, harvest greens and herbs often, and remove damaged leaves without stripping healthy growth. If a plant slows down, check sunlight, moisture, root crowding, and the potting-mix label before assuming it needs more fertilizer.
At the end of the season, remove spent annuals and inspect the mix. If a crop had a serious disease, discard the old medium rather than carrying the problem into another planting.
Otherwise, refresh or replace mix according to its condition and the next crop’s needs; last year’s mix may have settled and used up its starter nutrients. Wash and dry the pail, store it out of direct sun where practical, and retire it if the plastic has become brittle or cracked.
Conclusion
A reliable bucket garden starts with a food-contact container, clear drainage holes, a light potting mix, and a crop sized for the bucket’s usable volume. Five gallons is a sensible starting size for one compact fruiting vegetable; smaller pails suit herbs and greens, while sprawling and deep-rooted crops are easier in larger containers.
Set the bucket in its final spot, add support before the plant grows, and check moisture often enough to respond to weather rather than follow a rigid schedule. Start with one or two crops you enjoy eating; once you see how your patio handles sun, wind, heat, and watering, you can decide whether more buckets will make the garden easier or just add work.



