Caladium Plant Care: Grow It Indoors Successfully
Learn caladium plant care indoors: choose the right light, keep soil evenly moist, boost humidity, prevent rot, and store tubers through dormancy.
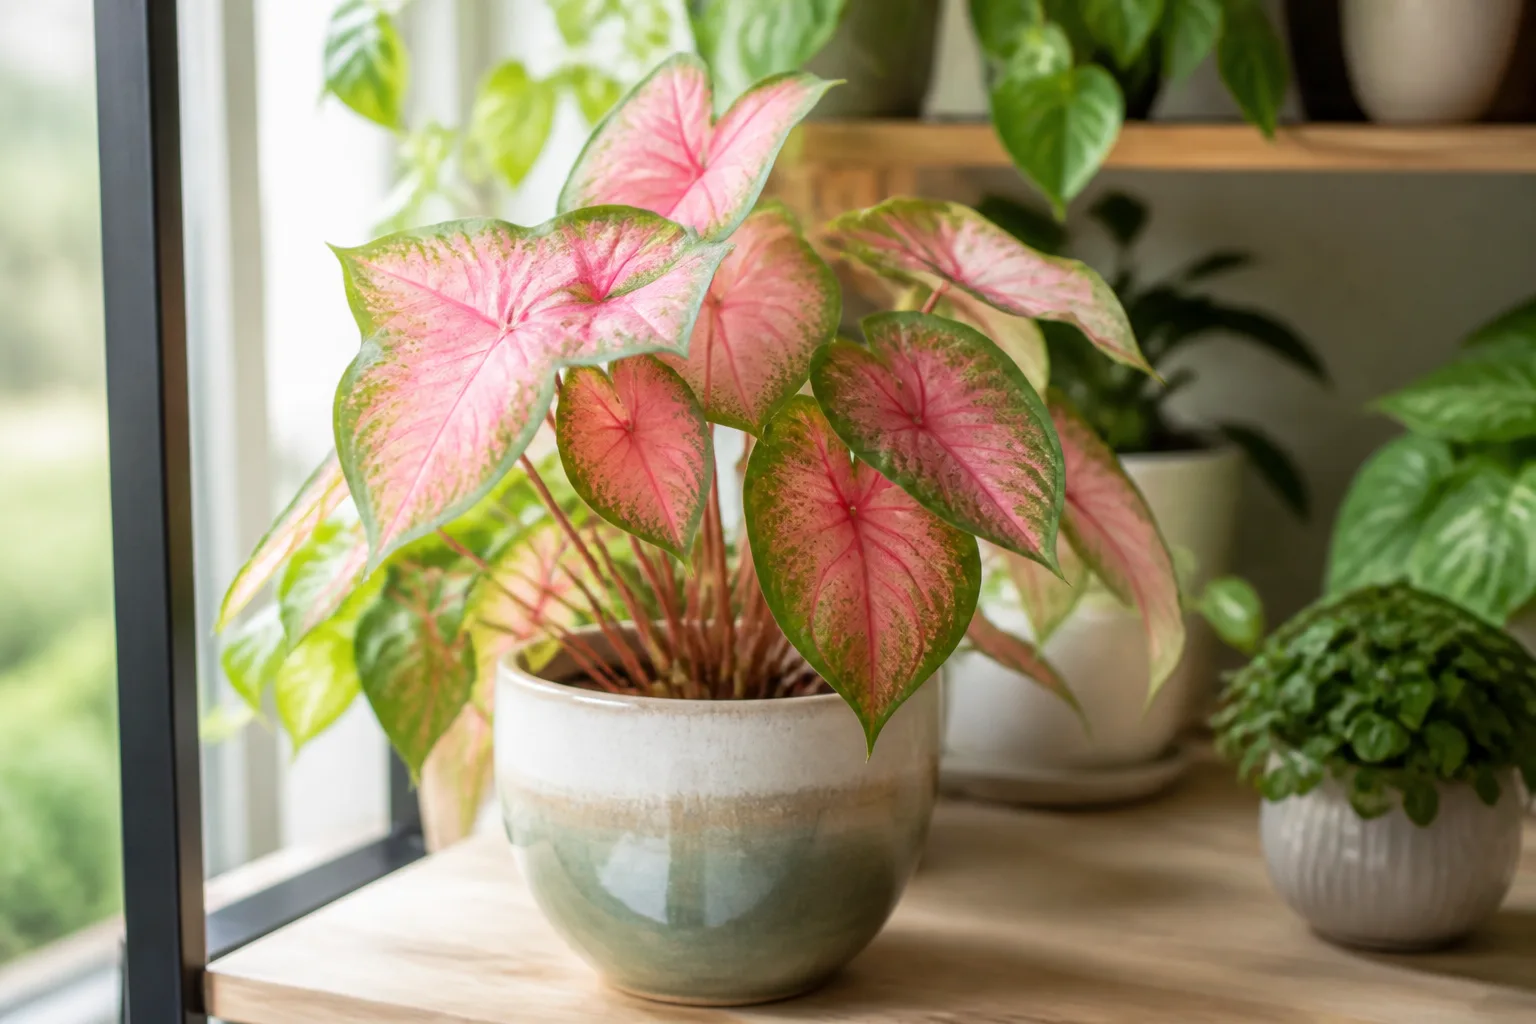
Caladiums are grown for leaves that look painted rather than for flowers: heart-shaped or arrow-shaped blades marked in pink, red, white, and green. They can make excellent indoor container plants, but they are not evergreen houseplants in disguise. A caladium has a seasonal rhythm: warm, humid growth followed by a dry rest in which the leaves disappear and the underground tuber waits.
The simplest way to succeed is to manage that rhythm instead of trying to keep foliage alive at any cost. Give an actively growing plant bright filtered light, warm air, evenly moist but airy soil, and enough humidity to prevent the thin leaves from losing water too quickly. When the plant naturally declines, reduce water and let the tuber rest. The University of Wisconsin Extension and Missouri Botanical Garden both describe this warm-growth, dormant-tuber cycle as normal for caladiums.
What Caladiums Are and Why They Go Dormant
Most cultivated caladiums are selections of Caladium bicolor or hybrids commonly labeled Caladium × hortulanum. They are tropical members of the arum family, Araceae, and the leaves rise on long petioles directly from an underground storage structure. Gardeners commonly call that structure a tuber or bulb; botanically, caladiums are often described as growing from a tuberous corm. The name matters less than the care implication: the plant stores energy below the soil and can regrow after a leafless rest.
There are two useful groups. Fancy-leaf caladiums have broad, heart-shaped leaves on taller petioles and make a dramatic specimen. Strap-leaf or lance-leaf caladiums have narrower leaves, a shorter habit, and often produce more leaves from one storage structure. A small room or windowsill usually suits a compact strap-leaf type better, while a large fancy-leaf plant needs space and protection from traffic, pets, and drafts.
Do not interpret every yellow leaf as a crisis. After several months of growth, a caladium may yellow, collapse, and stop producing leaves as it enters dormancy. That is different from a plant turning yellow while the pot stays cold and wet, or from a plant bleaching after a sudden move into direct sun. The timing, soil condition, and pattern on the leaves tell you which problem you are seeing.
Choose a Caladium That Fits Your Room
Buy a potted plant when you want an immediate display, or buy a dormant tuber when you want more cultivar choice and the chance to control the entire growing cycle. If you are choosing a tuber, larger grades generally carry more growing points and can produce a fuller show sooner. That does not make a large tuber immune to rot; it only gives it more stored energy if the conditions are right.
Match leaf type to placement. Compact ‘Florida Sweetheart,’ ‘Miss Muffet,’ and similar strap-leaf selections are easier to fit on a shelf or small table. Broad types such as ‘White Christmas,’ ‘Red Flash,’ or ‘Carolyn Whorton’ create more visual impact but need a wider clear zone so their fragile leaves do not rub against a wall or get knocked by a passing hand. Cultivar performance is not uniform: UF/IFAS documents newer selections bred for better sun tolerance and disease resistance, but a sun-tolerant label still does not mean a hot, unfiltered south-facing window is safe.
When buying a potted caladium, look for firm petioles, clean leaf undersides, and new leaves emerging from the center. Avoid a pot that smells sour, feels waterlogged, or contains a tuber that is soft at the soil line. A few older leaves can be normal, but widespread limp foliage on arrival usually signals transport stress or a root-zone problem that will require isolation and observation.
Plant Caladium Tubers Indoors the Right Way
Start dormant tubers indoors in spring, or whenever you can provide sustained warmth and several months of good light. Use a clean pot with a drainage hole and a loose, moisture-holding mix. A 6-inch pot is a reasonable starting size for one medium tuber; do not put a small tuber into an oversized container just to avoid repotting. Excess mix around a small root system stays wet longer and raises the risk of rot.
Set the tuber in lightly moistened mix with its eyes—or knobby growing buds—facing upward. Cover it shallowly, roughly 1½ to 2 inches deep, then keep the mix barely moist until shoots appear. Put the pot in a warm spot, ideally around 70°F or warmer at the root zone. Wisconsin Extension recommends starting tubers indoors four to six weeks before the last frost in cool regions, while Garden Design emphasizes waiting for warm air and soil before outdoor planting. Indoors, the same principle applies: a cold windowsill can leave a newly planted tuber motionless in damp soil.
Do not keep adding water because nothing has emerged after a week. Depending on tuber condition, temperature, cultivar, and whether the central eye was removed, sprouting can take several weeks. Probe the mix with a finger; if it is still damp below the surface, wait. A warm, lightly moist pot is a propagation environment. A cold, saturated pot is a rot incubator.
How to Tell Which Way Is Up
The top of a caladium tuber is usually rough or knobby, with visible eyes. The underside is smoother and more rounded. Place the rough side up and cover it lightly. If you cannot identify the top, planting the tuber on its side is safer than guessing; shoots can orient themselves, although emergence may be slower.
Large tubers often have one dominant central eye surrounded by smaller eyes. Commercial growers sometimes remove the central eye to encourage several smaller shoots, but this is a precision cut, not a necessary beginner step. If you divide or de-eye a tuber, use a clean, sharp knife and let cut surfaces dry and callus before planting. Never divide a soft, discolored, or actively rotting tuber.
Give Caladium Bright, Filtered Light
Place an indoor caladium near a bright east or north window, or a little back from a brighter south or west window behind a sheer curtain. The goal is strong ambient light without hot, direct rays striking the thin leaves through glass. Garden Design recommends several hours of filtered light for indoor plants, while NC State Extension and Missouri Botanical Garden describe caladiums as shade or dappled-light plants.
Watch the plant rather than treating “shade” as “dark.” In too little light, new leaves become smaller, stems stretch toward the window, and pink or red markings may look muted. In too much direct light, leaves show bleached tan patches, crisp brown areas, or a sudden washed-out appearance on the window-facing side. Move a damaged plant gradually; sliding it back from the glass is better than making another abrupt light change.
Rotate the pot a quarter turn every week or two if growth leans toward the window. Use a grow light when the room is bright to your eyes but the plant repeatedly stretches or fails to produce new leaves. Keep the light close enough to be useful but far enough away that the leaves do not heat up; the exact distance depends on the fixture, so use leaf response and temperature as your guide.
Water for Even Moisture, Not a Swamp
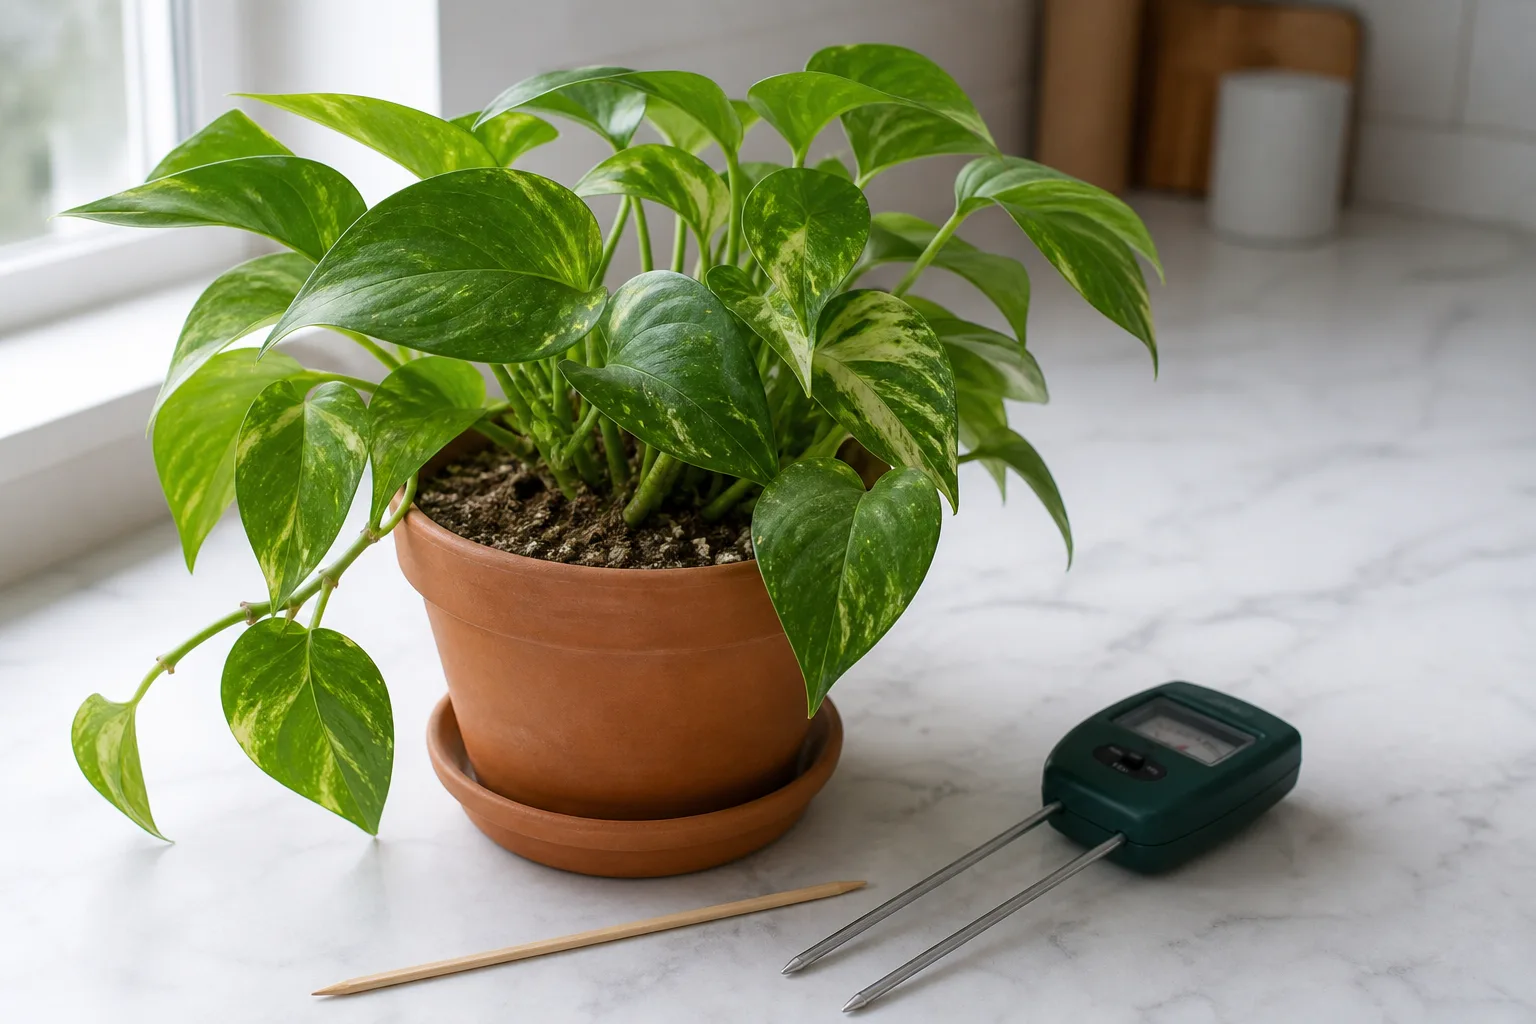
During active growth, water when the top inch of mix feels slightly dry while the deeper root zone still has some moisture. Then water thoroughly until a little drains from the bottom, and empty the saucer or cachepot. This is more reliable than watering every Sunday because pot size, light, humidity, season, and mix change how quickly a caladium dries.
Caladiums dislike drought during growth, but “keep moist” does not mean “keep submerged.” Leaves that droop in a light, dry pot may recover after a complete watering. Leaves that droop in a heavy, cool, wet pot need inspection before more water. Persistent wetness deprives roots of oxygen and can lead to tuber rot, especially when the plant is entering dormancy. Gardening Know How likewise stresses consistent moisture with good drainage rather than saturated soil.
When autumn decline begins, let the interval between waterings lengthen. Once most leaves have yellowed and collapsed, stop routine watering and let the mix dry. Resume only when new growth appears. A dormant tuber uses far less water than a leafy plant, so continuing the summer schedule is one of the fastest ways to lose it.
Use Airy Soil and a Container With Drainage
Choose a quality peat-free or standard houseplant mix amended with roughly 15–25 percent perlite, pumice, or another coarse aeration material. The finished mix should hold enough moisture for a tropical leaf plant but release excess water quickly. Straight, dense garden soil is a poor indoor choice because it compacts in a container and dries unevenly.
Drainage begins with the container, not a layer of stones at the bottom. Use a pot with an actual open drainage hole, and keep the hole clear. A decorative cachepot is fine if you lift the nursery pot out to water and allow it to drain before returning it. If the pot has no drainage, the safest fix is to repot into one that does rather than trying to guess how little water the container can tolerate.
Slightly acidic, organically rich soil suits caladiums, but chasing a precise pH reading is rarely the first fix for an indoor plant. If the plant is declining, check light, temperature, root-zone moisture, and drainage before adding amendments. A healthy caladium in a breathable mix can use nutrients more effectively than one in perfect-pH soil that stays saturated.
Keep the Room Warm and Humid
Caladiums grow best in warm rooms with stable conditions. A practical indoor target is about 70–75°F during the day and 60–65°F at night, ranges also given by Garden Design for indoor culture. Keep the pot away from air-conditioning outlets, heaters, cold window glass, frequently opened exterior doors, and sudden temperature swings. Chilling slows growth and makes wet soil more dangerous.
Humidity helps the thin leaves hold their shape, but it cannot compensate for bad watering. If a hygrometer reads in the dry 30s or 40s, group plants, use a correctly assembled pebble tray, or run a small humidifier nearby. A reasonable working target is roughly 50–60 percent around the foliage, with good air movement. Misting may make leaves look wet for a few minutes, but it is not a dependable way to maintain humidity and repeatedly wet foliage can encourage spotting in stagnant air.
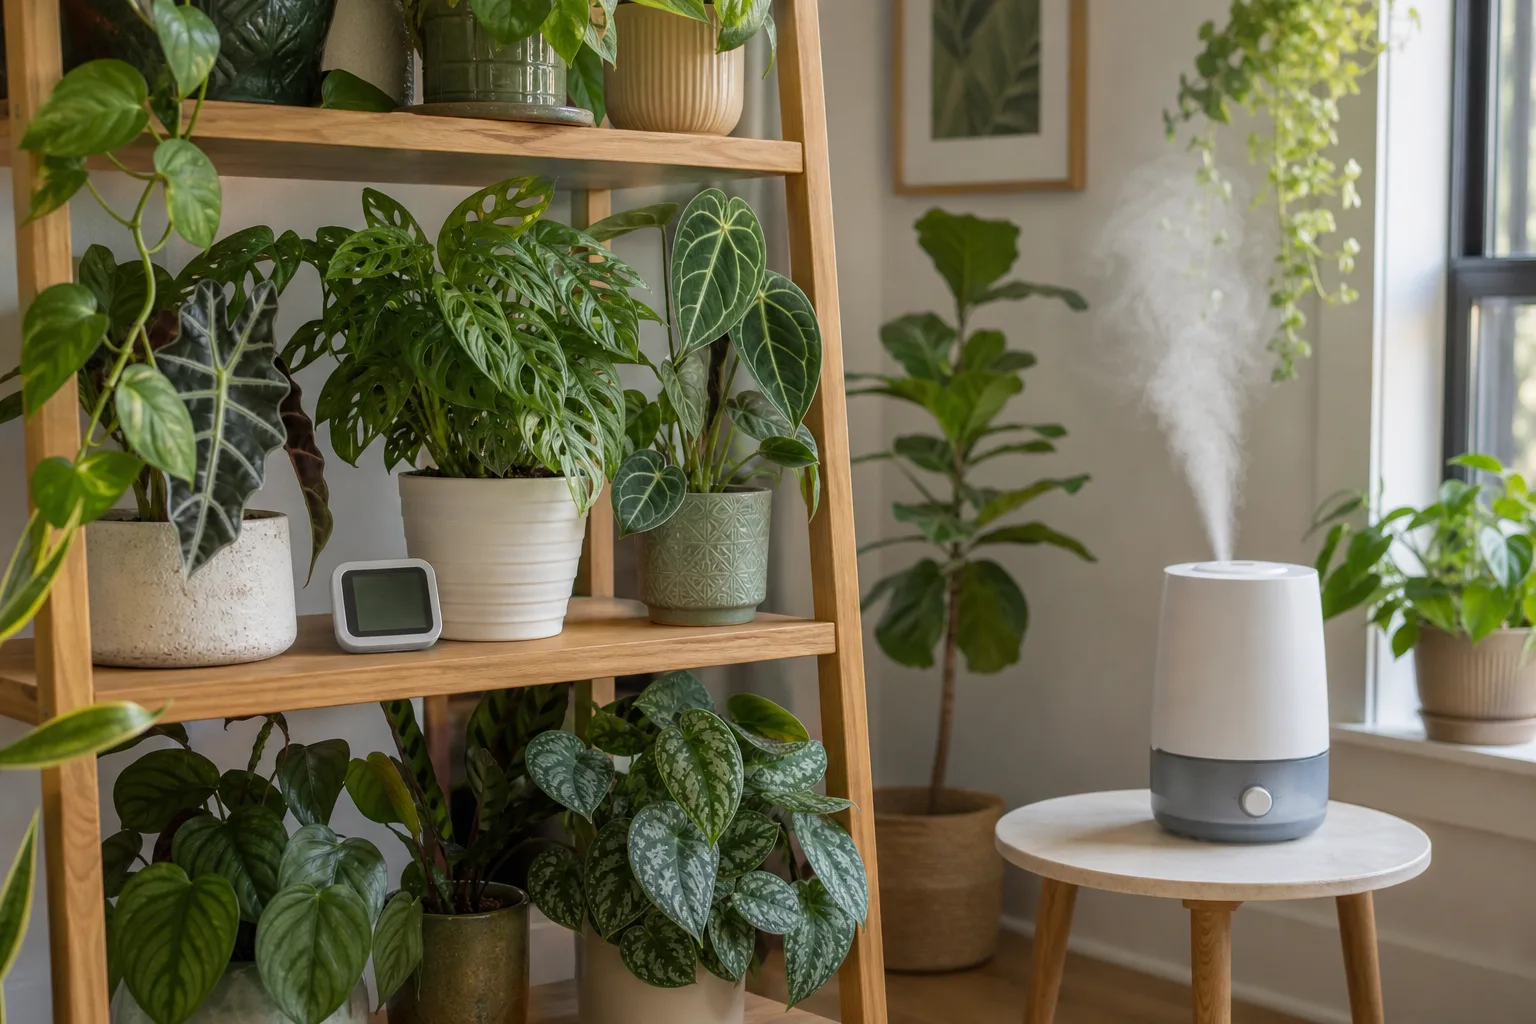
The best location is often a bright bathroom, sunroom, or sheltered plant shelf—not simply the most humid room in the home. A dark bathroom will not provide enough energy for colorful new leaves. Balance humidity with light, warmth, and ventilation so the leaves dry naturally after watering or accidental splashes.
Fertilize Only During Active Growth
Feed a leafy caladium only while it is actively producing leaves. Use a balanced liquid houseplant fertilizer at half strength every two to four weeks, or a controlled-release product according to its label. Container plants have limited nutrient reserves, but more fertilizer does not create better color. Excess salts can burn thin leaf margins, and too much nitrogen may push soft green growth at the expense of the cultivar’s pattern.
Water the mix first if it is bone dry, and never pour concentrated fertilizer onto a dehydrated root ball. Stop feeding as growth slows and leaves begin their seasonal decline. Fertilizer sitting in a dormant pot is not helpful; it is more likely to accumulate while the plant is using little water.
Prune Flowers and Damaged Leaves
Caladiums are foliage plants. If a flower-like spathe appears and you prefer larger, longer-lasting leaves, snip it at the base with clean scissors while it is still small. University of Wisconsin Extension notes that removing the inflorescence lets more of the plant’s energy support foliage and the storage structure.
Remove yellow, brown, torn, or diseased leaves individually once they are no longer contributing much. Cut the petiole close to the soil without tugging on neighboring shoots. Do not shear a healthy plant just to make it smaller; caladiums do not branch like a shrub, and removing too many leaves reduces the energy available to the tuber.
Repot Without Delaying Growth
Repot in spring when new growth is starting, or when roots fill the container and watering becomes unusually frequent. Move up only one pot size. A container that is much wider than the root ball can stay wet around the edges even when the plant looks thirsty above the soil.
If you suspect rot, unpot the plant instead of simply moving it to a larger pot. Healthy roots and tubers are firm; rotten tissue is soft, dark, or foul-smelling. Trim only clearly damaged tissue with a sterilized blade, allow cut surfaces to dry as appropriate, and replant in fresh, airy mix. Recovery is uncertain if the central tuber is extensively soft, so prevention through warmth and drainage is more effective than rescue.
Troubleshoot Yellow, Brown, or Drooping Leaves
Colorful caladium leaves show stress quickly, but one symptom can have several causes. Diagnose in this order: check whether the plant is in its natural seasonal decline, feel the soil, assess the roots or tuber if the pot is staying wet, look at the light-facing side of leaves, then inspect for pests. Changing three things at once makes it difficult to learn what helped.
Yellow leaves
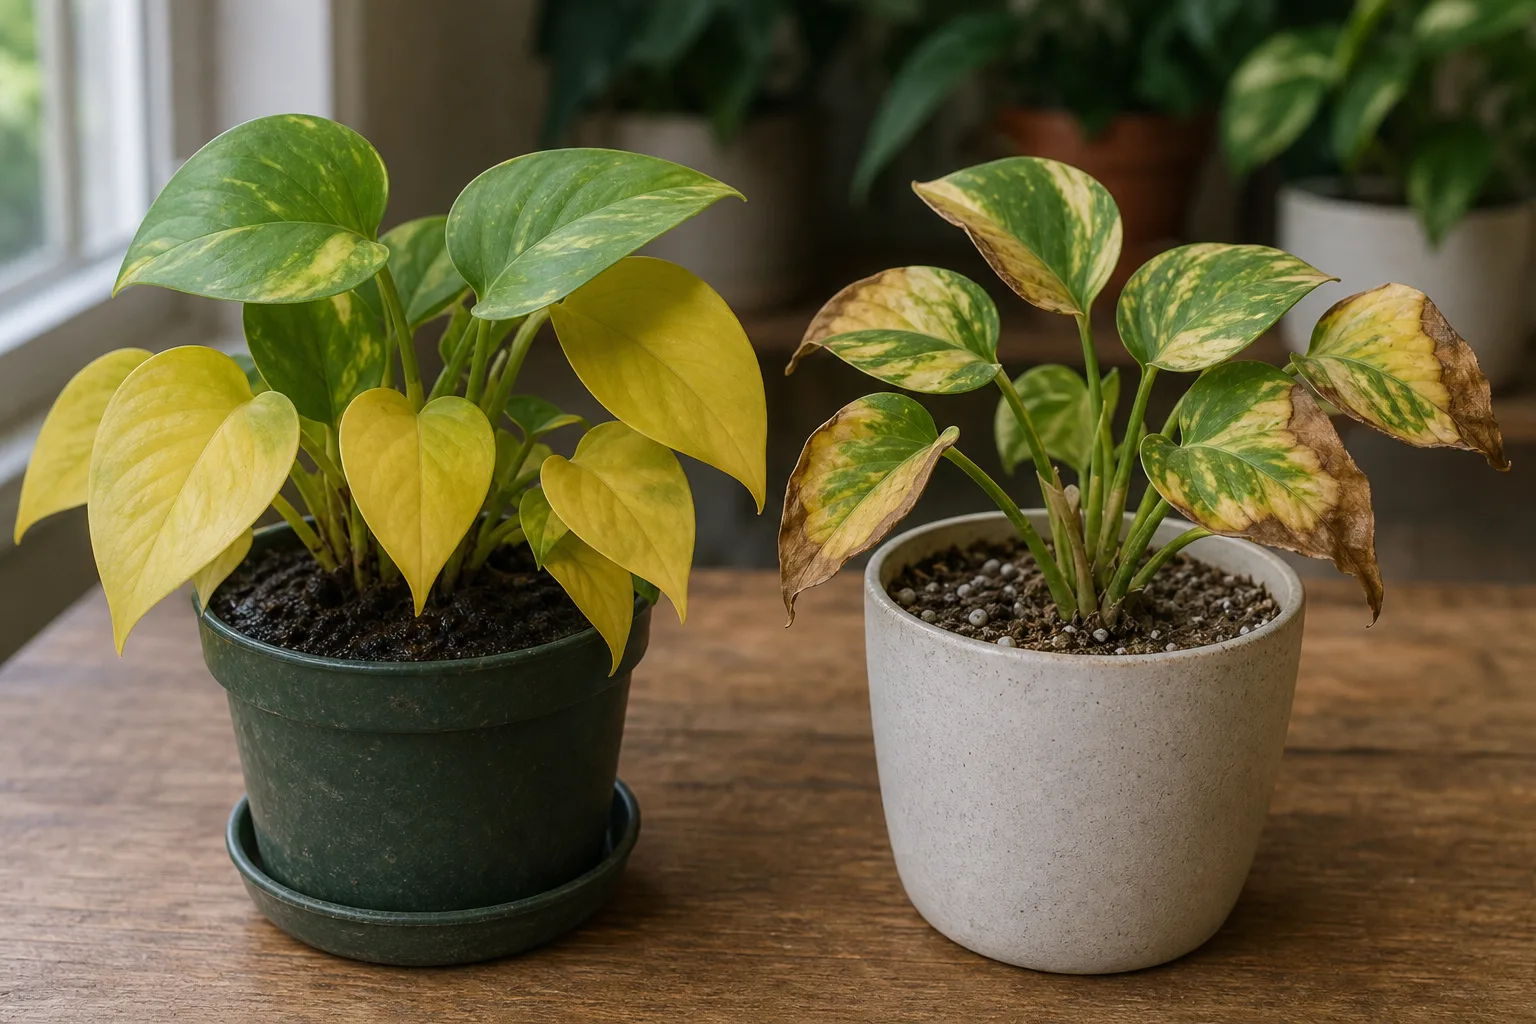
If the whole plant is yellowing at the end of a warm growing season and leaves are collapsing from the outside inward, dormancy may be normal. Reduce water and wait for the plant to finish its cycle. Do not move it into a brighter window or add fertilizer to force leaves that the tuber is preparing to shed.
Yellowing during active growth is more often a water or root-zone signal. A dry, light pot points toward underwatering; a heavy pot with a sour smell points toward saturated mix or rot. Too much direct light can also fade and yellow the window-facing leaves. Correct one condition, then watch the new growth—old damaged leaves will not regain their original color.
Brown edges, bleached patches, and holes
Crispy edges on otherwise flexible leaves usually mean the leaves are losing water faster than the roots can replace it. Check humidity, drafts, heater or vent placement, and whether the pot is drying too far between waterings. A pebble tray or humidifier can help the new leaves, but it will not repair old brown tissue.
Bleached tan patches on the glass-facing side suggest sunscald. Move the plant back from direct rays and keep the transition gradual. Brown margins after recent feeding can indicate fertilizer salt injury, especially when the soil is dry or fertilizer has splashed onto the leaves; flush the mix with plain water if drainage is good and pause feeding.
Small holes, silvery scarring, sticky residue, or fine webbing suggest chewing or sap-feeding pests rather than a humidity problem. Isolate the plant and inspect leaf undersides before treating. Do not spray a stressed caladium in full sun or with a product that is not labeled for the plant and setting.
Drooping leaves or soft stems
First compare the pot’s weight with its normal watered weight. A light pot and limp leaves call for a slow, thorough watering followed by drainage. A heavy pot and limp leaves call for restraint: check the root ball and tuber for rot, improve drainage, and move the plant somewhere warm with bright filtered light.
Cold is an overlooked cause. A caladium can droop after a chilly night even when the soil is moist. Keep it away from cold glass and drafts, and avoid watering on a strict schedule until the root zone warms. If the tuber is soft or the stem base collapses, isolate the plant and remove damaged tissue; a humidifier alone will not solve a rotting tuber.
Manage Pests and Protect People and Pets
Aphids, mealybugs, spider mites, thrips, whiteflies, caterpillars, and slugs can damage caladiums, although healthy indoor plants often have few pest problems. Check new plants before placing them with your collection. Look under leaves, in the folds where petioles emerge, and at the soil line. Early isolation, physical removal, and repeated monitoring are often more useful than reaching immediately for a pesticide.
Caladiums are toxic if eaten. ASPCA lists caladium as toxic to cats, dogs, and horses, with insoluble calcium oxalates associated with oral irritation, pain, swelling, drooling, vomiting, and difficulty swallowing. MedlinePlus describes similar irritation risks for people who ingest caladium or get plant material in the eye. Keep every part—including dormant tubers—away from children and animals, wash after handling, and wear gloves if the sap irritates your skin. If a person or pet chews the plant, contact a poison-control service, veterinarian, or medical professional rather than trying to treat the exposure from a gardening article.
Prepare for Dormancy and Store Tubers
Indoor caladiums commonly enter dormancy after a few months in leaf, even when the room is warm. The sequence is gradual: growth slows, older leaves yellow, petioles weaken, and the plant stops replacing foliage. When that pattern appears without a cold or waterlogged pot, reduce watering and allow the plant to dry down naturally.
You can leave a container-grown caladium in its pot for the dormant period. Stop watering once the foliage has collapsed, remove dead leaves, and keep the container frost-free. For a loose tuber, wait until the foliage has died back, lift it carefully, brush off excess soil, and let it cure in a warm, shaded, dry place for about a week. Then inspect it and store it in dry vermiculite, peat-free packing material, or a breathable paper bag where temperatures remain safely above chilling levels. Extension recommendations vary by climate—from the mid-50s to around 70°F—but the shared rule is consistent: keep tubers dry, frost-free, and not in a cold garage. Missouri Botanical Garden also recommends a dry storage medium for overwintering.
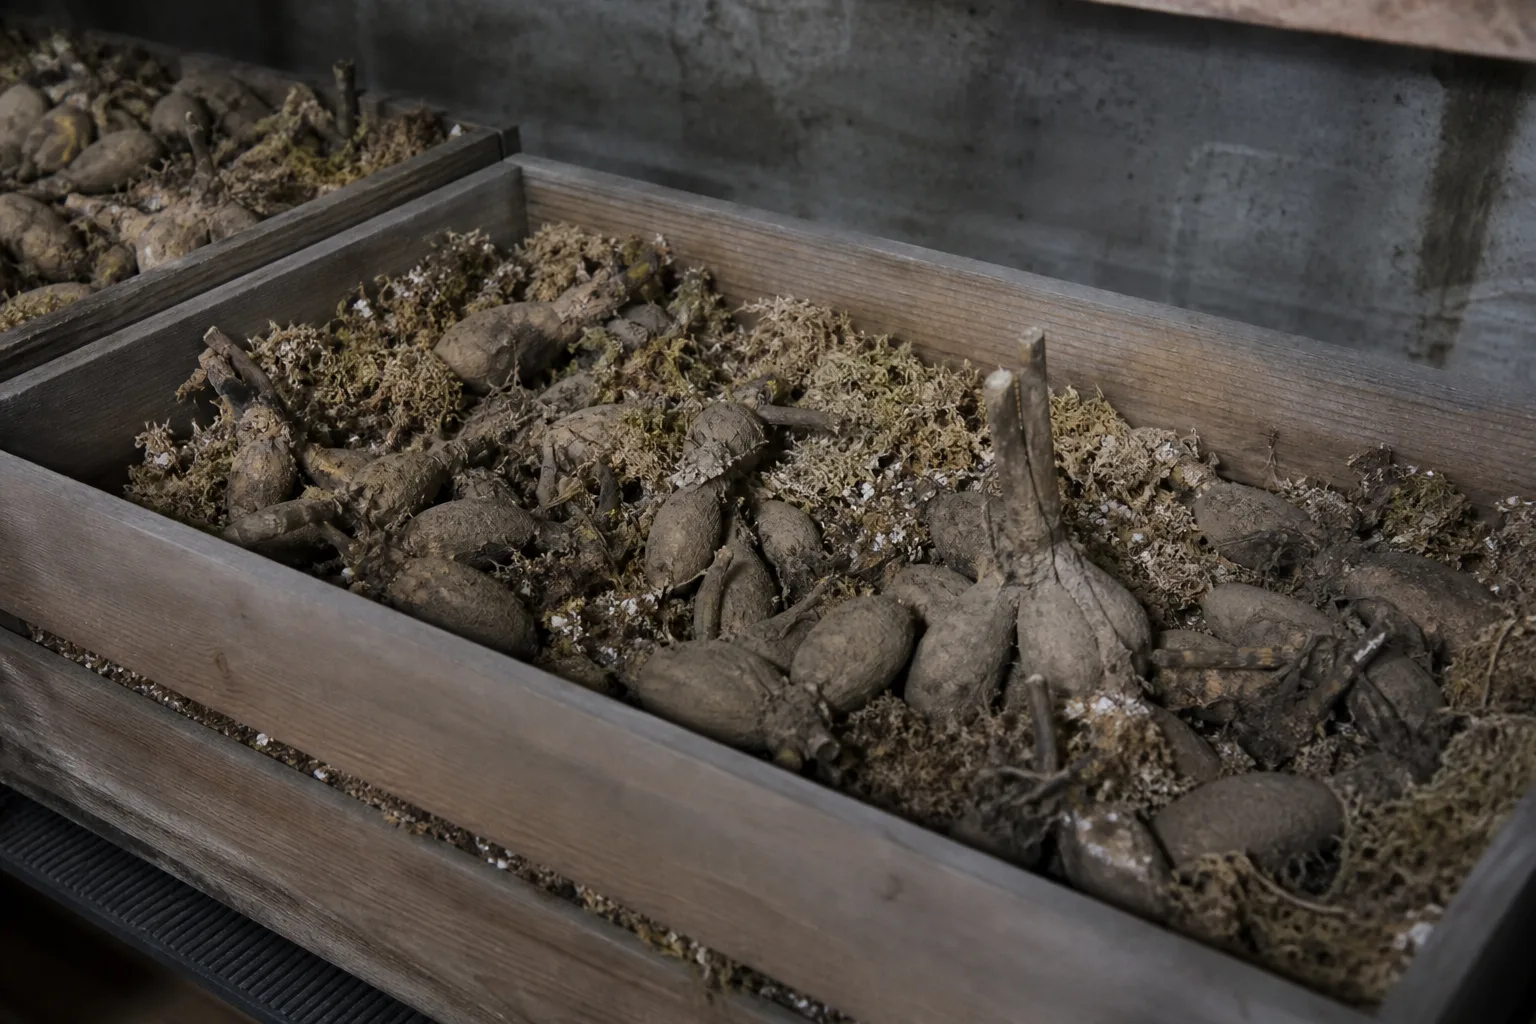
Check stored tubers monthly. A firm, dry tuber can wait; a soft, wet, or foul-smelling one should be separated immediately. Do not store a tuber that is already rotting with healthy material. In spring, bring the tuber into warmth, plant it eyes-up in barely moist mix, and increase watering only after new leaves begin.
Propagate Caladium by Dividing Tubers
Division is the practical way to multiply a caladium. Divide in late winter or spring before active growth, when the tuber is firm and dormant. Each piece must contain at least one viable eye or growing knob; a chunk with no eye cannot produce a new plant. University of Wisconsin Extension recommends dividing corms into pieces with at least one eye and allowing cut surfaces to dry before planting.
Use a sharp, clean knife and make deliberate cuts rather than crushing the tuber. Dusting cuts with random household powders is unnecessary; the key steps are clean tools, sound tissue, a short drying period so cuts can callus, and a warm, well-drained planting mix. Start divisions in separate pots so you can control water and see which pieces sprout. Do not divide a plant that is currently wilted, chilled, or suspected of rot—division adds wounds when the plant most needs stability.
Conclusion
Successful caladium plant care indoors is a matter of timing as much as technique. During growth, give the plant warm filtered light, evenly moist but well-drained soil, steady humidity, and light feeding. During decline, stop treating the fading foliage as a failure: reduce water, let the tuber rest dry, and protect it from cold.
If leaves turn yellow or brown, read the pattern together with the pot’s weight, room temperature, and light exposure. That small diagnostic habit prevents the two most common mistakes—watering a dormant plant and adding more water to a cold, saturated root zone. Work with the caladium’s natural cycle, and one dramatic season of foliage can become a repeatable indoor display.



