How to Grow Common Beans: Plant, Care, Harvest
Learn how to grow common beans from seed: choose bush or pole types, wait for warm soil, water through flowering, solve problems, and harvest tender pods.
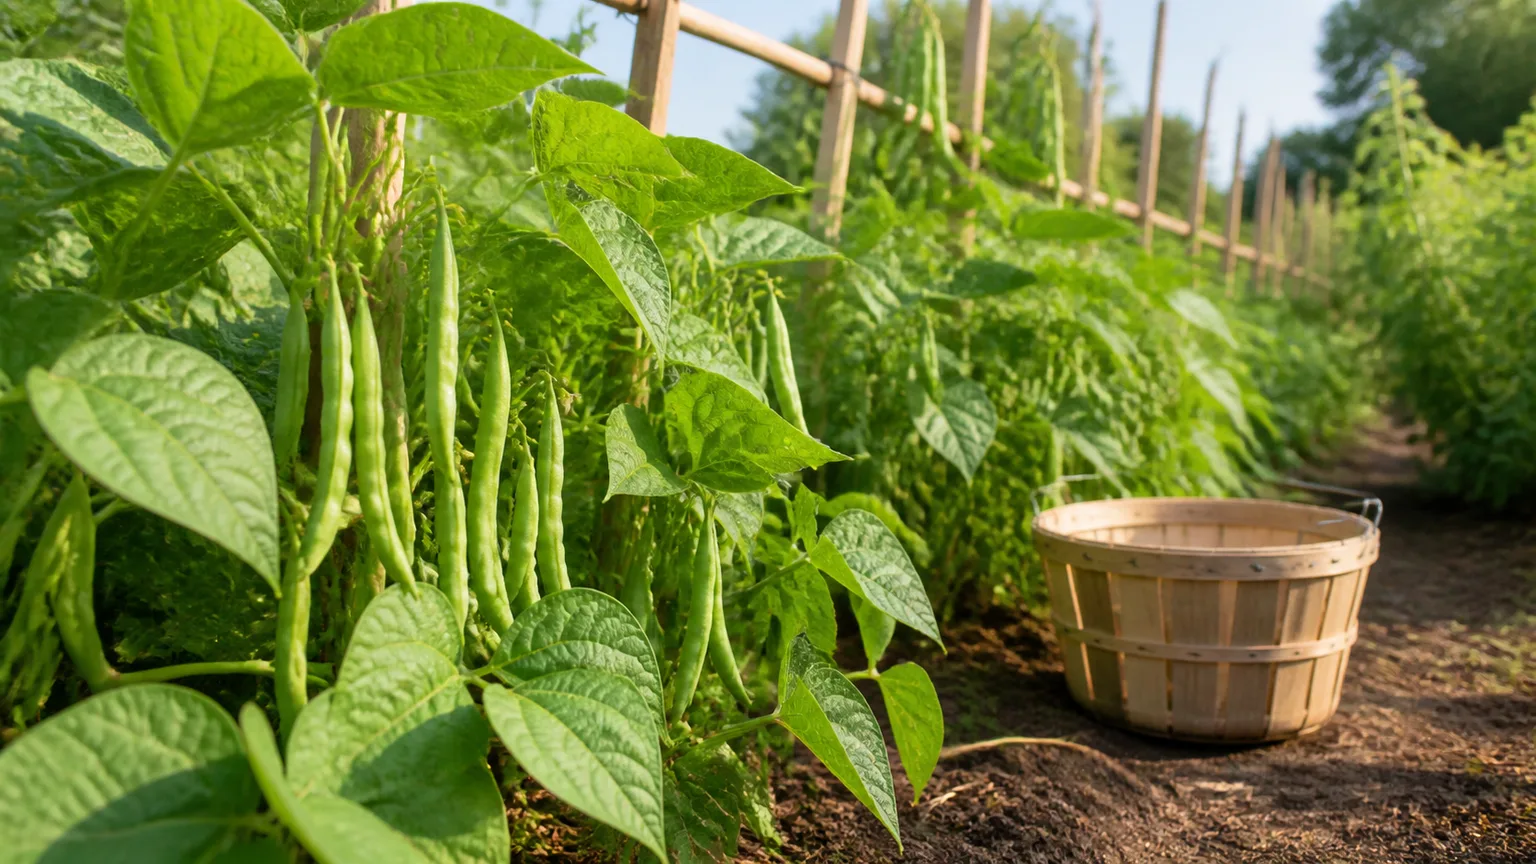
Common beans are quick enough to reward a first-time gardener and varied enough to fit a raised bed, a row along a fence, or a sunny patio pot. The most useful first choice is not pod color; it is whether you want tender pods, fresh shelled beans, or dry beans, and whether you have room for a compact bush or a climbing vine.
The species is Phaseolus vulgaris, which includes snap, shell, and dry beans as well as bush and pole growth habits. Those labels describe different things: the first group tells you what to harvest, while the second tells you how the plant grows. NC State Extension’s plant profile identifies the species as a warm-season legume and notes that bush types suit containers while pole types make use of vertical space.
Choose a bean type for your space and harvest
A seed packet can say “green bean,” “snap bean,” “shell bean,” or “dry bean.” Read the description instead of relying on the color or name alone, because the best harvest stage and growing habit vary by cultivar.
Snap, shell, and dry beans are different harvest goals
Snap beans are picked while the pod is still tender and the inner seeds are small; the whole pod is eaten after cooking. They may be green, yellow, purple, or striped, so “green bean” is a familiar name rather than a complete description of the crop. Look for words such as stringless, filet, wax, or Romano to narrow the texture and shape you want.
Shell beans stay on the plant longer. You remove the seeds when they have filled out but are still soft enough to cook fresh, while dry beans remain until the seeds mature and the pods dry. If you want a continuing supply of tender pods, choose a snap-bean cultivar; a packet sold for dry beans may not deliver the harvest you expect if you pick it early.
Bush, pole, and half-runner habits change the layout
Bush beans stay compact and usually mature in a concentrated flush, making them a good choice for a short season, a small bed, or a gardener who wants one large picking period. Pole beans climb, need a sturdy support, and often produce over a longer stretch if you keep harvesting. Half-runner beans sit between those habits: the vines are less vigorous than full pole beans, but they may sprawl more than a tidy bush cultivar, so give them space or light support according to the packet.
| Habit | Best fit | What to plan for |
|---|---|---|
| Bush | Compact beds, containers, concentrated harvest | Plant a second sowing if you want another flush |
| Pole | Vertical space, repeated picking, longer season | Install a stable trellis before sowing |
| Half-runner | A middle ground when the cultivar is locally adapted | Allow for spread; support if the vines begin to tangle |
Cultivar names can matter more than a general label. Choose one recommended for your region and check its days to maturity, disease-resistance notes, pod use, and mature height. If the season is short, an early bush snap bean may be more dependable than a high-climbing pole bean that needs more weeks to crop.
Match planting to warmth, not just the calendar
Beans are warm-season annuals. A calendar date or the last-frost date is only a starting point: cold, wet ground can slow germination and leave seeds vulnerable to decay, while sowing after the soil warms gives them a quicker start. UGA Cooperative Extension says green beans can be planted after frost danger passes and that soil should be at least 55°F for good germination; it gives an ideal air-temperature range of 65°F to 85°F. Savvy Gardening recommends waiting for warmer soil, around 70°F, because cold, wet soil can rot seed.
Use a soil thermometer in the top few inches if spring is changeable. A practical home-garden rule is to sow once frost risk has passed and the soil is reliably around 60°F or warmer; in heavy or persistently wet soil, waiting closer to 65°F to 70°F is a sensible way to trade a few days of calendar time for more reliable emergence. The difference between a minimum germination threshold and a comfortable sowing target matters: a seed may germinate at a lower temperature without making that the best day to plant.
Beans do not need to be started indoors for most gardens. Their roots are easily disturbed, and they germinate quickly in warm soil, so direct sowing usually avoids the transplant shock and extra work of potting up seedlings. If your season is short and you start them under cover, use a biodegradable pot and transplant the whole root ball gently only after the soil has warmed.
Give beans sun and a loose, well-drained bed
Choose a site with at least six hours of direct sun, ideally more, and soil that drains after rain. Beans tolerate ordinary garden soil better than a waterlogged bed; if puddles linger, use a raised bed or improve drainage before planting rather than compensating with less frequent watering. UGA recommends organically amended soil and points gardeners toward a soil test for lime and fertilizer needs.
Work mature compost into the bed if the soil is low in organic matter, then break up large clods and remove weeds before sowing. A smooth, firm seedbed helps seeds make contact with moist soil, but do not compact it into a hard crust. If the bed has a history of bean disease, rotate beans to a different area and avoid planting them in the same spot year after year.
Beans are legumes, but that does not mean a bean patch automatically fertilizes everything that follows. They can form partnerships with soil bacteria that fix nitrogen, yet growth still depends on suitable soil, moisture, and other nutrients; harvested pods and seeds also remove nutrients. Think of beans as one useful part of a rotation, not a substitute for soil testing or compost.
Sow seeds directly and space them for airflow
Set the support first if you are planting pole beans, then sow into warm, moist soil. Most common beans are planted about 1 inch deep, but use the depth on your chosen packet if it differs. Cover the seed, press the soil lightly into place, and water enough to moisten the seed zone without leaving it saturated.
Spacing depends on the variety and the system. For bush beans, packets commonly call for seeds a few inches apart, later thinned to roughly 4 to 6 inches; allow about 18 to 30 inches between rows so you can reach the plants and leaves can dry. UGA’s current home-garden guidance uses 6 inches between plants and 3 feet between rows. For pole beans, follow the trellis or teepee spacing on the packet; the goal is to keep vines from becoming a dense, damp wall that is hard to inspect and harvest.
Do not pull out extra seedlings if doing so would disturb the roots of their neighbors. Snip crowded seedlings at soil level instead. Beans are easy to sow again if a patch is thin, but replant only after you identify why the first seeds failed: another sowing into cold or saturated ground is likely to repeat the same problem.
Stagger bush-bean sowings for a longer window
Bush beans often set much of their crop over a relatively short period. Sow a small new section every two or three weeks while the weather is suitable, then stop when the remaining days before frost are too few for that cultivar’s days-to-maturity plus a buffer for slow weather. This succession approach spreads the harvest instead of giving you a large flush all at once.
Pole beans are usually picked over a longer period, so repeated sowings may be less important. In a hot climate, a midseason sowing can still be useful if the first planting slows during extreme heat and the later crop will have time to mature as temperatures ease. Check the packet and local planting calendar rather than assuming every variety can be planted through summer.
Set pole-bean support before planting
Pole-bean vines need a support that can hold foliage and wet pods in wind and rain. A trellis, mesh panel, strong fence, or well-braced teepee can work; the right choice depends on the variety’s mature height and how you need to reach the crop. UGA notes that pole beans can grow 6 feet or more, while Savvy Gardening describes many cultivars reaching 6 to 9 feet and emphasizes installing the structure before sowing.
Anchor the frame deeply enough that it will not rock when loaded. Put it where the vines will not shade shorter vegetables for much of the day, and leave a walkway or picking side if the planting is more than one row wide. A tall, flexible net draped between weak stakes may look adequate in May but can sag once vines and rain increase the weight.
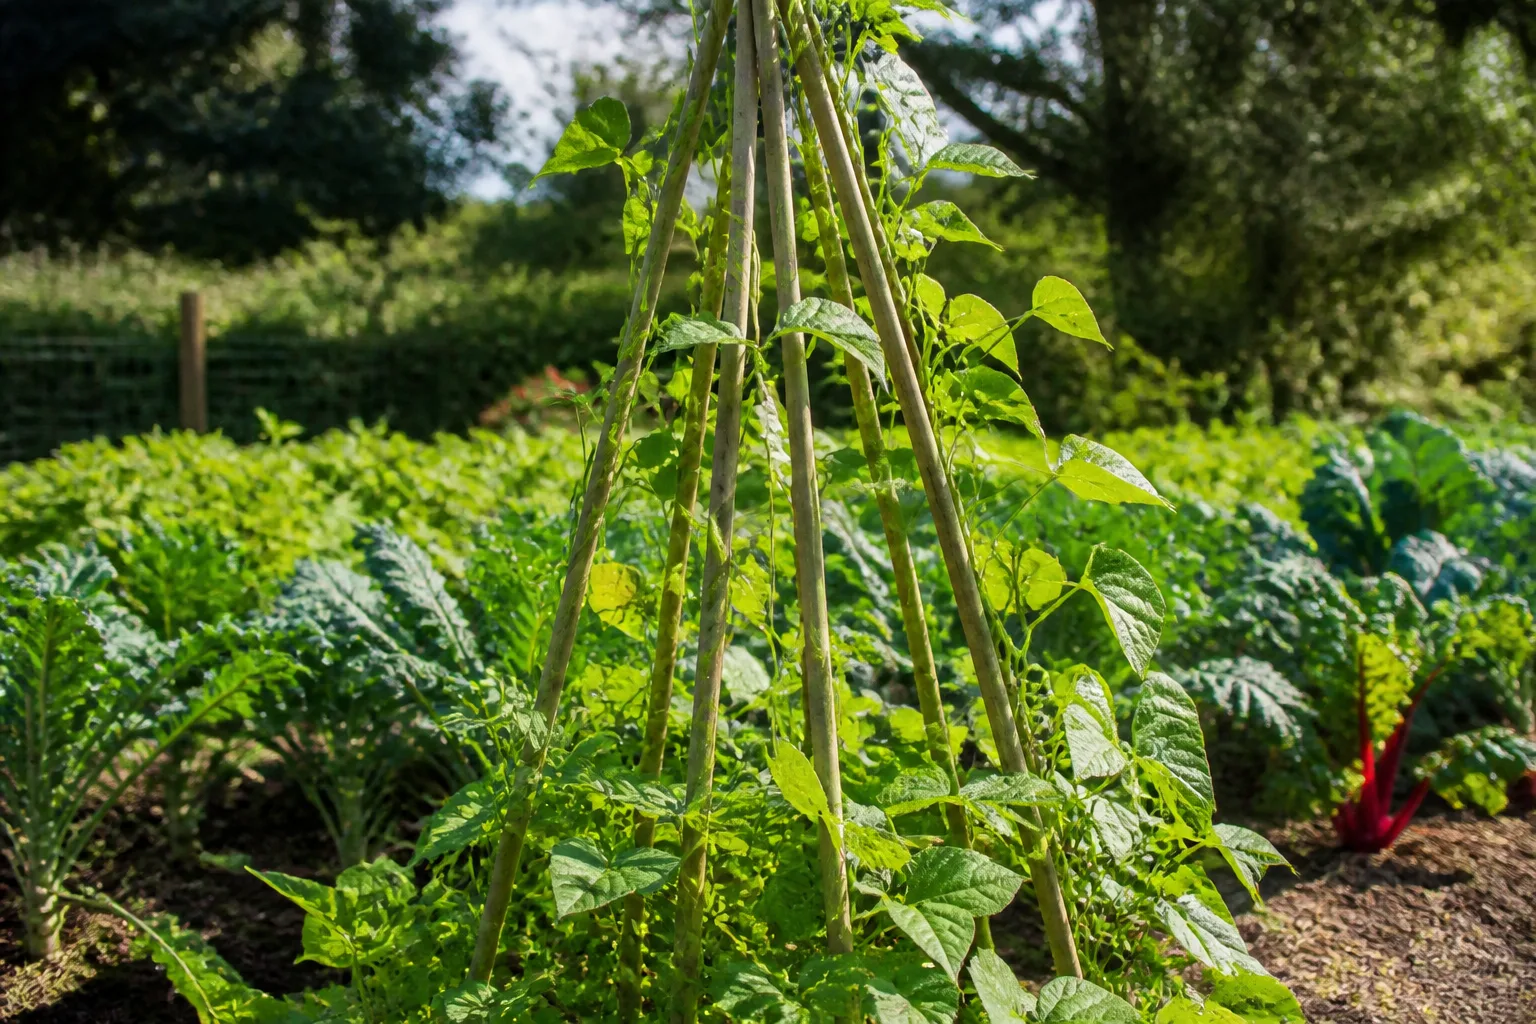
Guide young shoots toward the support while they are small, but do not tie them tightly or force brittle stems around a post. Most pole beans will twine once they contact something suitable. Bush varieties do not need a climbing structure, though a short support can help keep a heavy, wind-flattened plant upright.
Water steadily through flowering and pod fill
Consistent moisture matters most while beans are flowering and forming pods. A useful starting point is about 1 inch of water each week from rain and irrigation, adjusted for heat, soil, and container size; UGA’s advice is to keep the seedbed moist during germination and then water established plants as needed. Savvy Gardening’s green-bean guide also stresses steady watering when flowers and pods are forming.
Check the soil rather than following a rigid daily schedule. If the upper inch is dry and the deeper root zone is only lightly moist, water slowly at the base so the moisture reaches the roots; if the soil is still wet, wait. Sandy beds, raised beds, and pots dry faster than deep loam, while cool cloudy weather and rain reduce the need to irrigate.
Use drip lines, a soaker hose, or a gentle stream directed to the soil. Frequent overhead splashing can spread soil-borne or leaf diseases and leave dense foliage wet for longer. A thin mulch layer helps even out moisture, but keep mulch from pressing directly against stems and do not use it to hide a drainage problem.
If flowers appear but fail to become pods, first check moisture and heat. UGA reports that air temperatures above 85°F can cause flowers to drop or production to slow; drought stress can compound the problem. Keep the root zone evenly moist, avoid a heavy nitrogen feed, and wait out a heat pause rather than trying to force flowers with extra fertilizer. Plants may resume setting pods when conditions improve, but severe heat can shorten the crop.
Feed lightly and let the soil test guide amendments
Beans need fertile soil, not a nitrogen-heavy feeding program. Too much available nitrogen can push leafy growth at the expense of flowers and pods, and a legume’s nitrogen-fixing capacity is not a reason to apply fertilizer blindly. UGA recommends a soil test and gives region-specific fertilizer rates for Georgia; those rates should not be copied as a universal prescription for a different soil or state.
If the soil test shows a nutrient deficiency, follow its recommendation and a fertilizer label written for edible crops. Otherwise, incorporating finished compost before sowing is often enough for a home garden with reasonably fertile soil. Avoid repeated doses of lawn fertilizer or high-nitrogen feeds; dark, lush foliage with few flowers is a cue to review fertility and sunlight before adding more.
Some gardeners use a legume inoculant containing compatible nitrogen-fixing bacteria, particularly where beans have not grown before or where the seed packet recommends it. Inoculant is not a rescue treatment for waterlogged soil, poor drainage, or insufficient sunlight, and it does not replace a soil test. Follow the product directions and avoid applying an unneeded inoculant just because beans are legumes.
Harvest snap beans before seeds swell
The right moment depends on the kind of bean you planted. For snap beans, pick pods when they are firm, crisp, and near the size described on the packet, before the seeds inside swell enough to make the pod bulge. UGA gives a general harvest window of about 45 to 60 days after planting, but cultivar, temperature, and weather can move that date; judge the pod as well as the calendar.
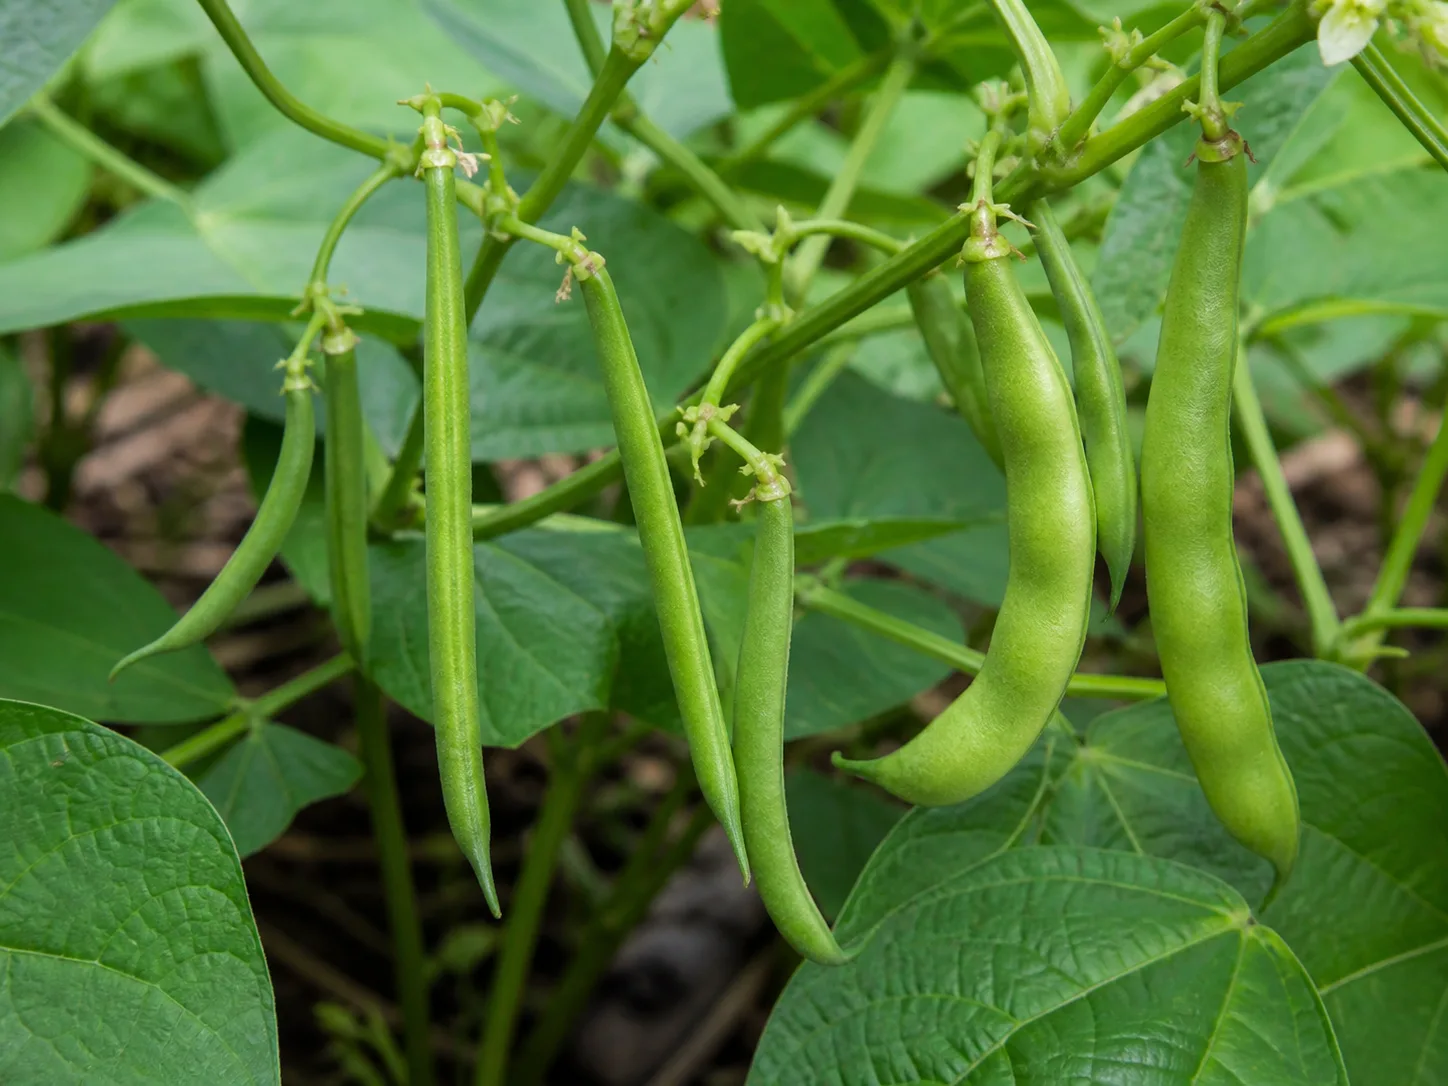
Check plants every day or two once picking begins. Remove mature snap pods promptly because overgrown pods become tougher and can signal the plant to slow new flowering. Harvest when foliage is dry, and use one hand to steady the stem while the other snaps or cuts the pod free; pulling hard can break a branch or uproot a shallow-rooted plant.
For shell beans, leave pods longer until seeds are filled but still soft. For dry beans, let the pods mature until they are dry and brittle, then shell and store the seed only after it is fully dry. These are different harvest schedules, so a gardener who wants dry beans should not keep stripping pods at the tender snap stage.
After picking snap beans, chill them promptly if you are not cooking them the same day and use them while they are still crisp. If your crop produces more than you can eat fresh, blanching and freezing is a practical way to preserve tender pods; for canning or dry-bean storage, follow a tested food-preservation or recipe guide rather than improvising processing times.
Troubleshoot slow germination, lush vines, or dropped flowers
Seeds disappear or fail to emerge. Check whether the soil was cold, saturated, crusted, or too dry during germination. Cold wet seedbeds slow emergence and invite rot; a hard surface crust can trap seedlings below the soil. Re-sow into warmer, well-drained ground, keep it evenly moist rather than soaked, and protect new rows from birds or digging animals if those are the likely cause.
Plants grow leaves but make few pods. Start with sun, heat, and fertility. Beans need a sunny site, and a nitrogen-rich bed can encourage leaves while delaying flowering; temperatures above the crop’s comfort range can also reduce flower set. Do not add fertilizer until a soil test supports it, and give the plants consistent moisture while you wait for cooler conditions.
Flowers fall off. A short pause during hot weather does not always mean the crop is finished. Check whether the bed dried out during flowering, then water consistently at the root zone; if high heat is the main stress, shade is rarely a practical fix for a large outdoor planting, so keep plants healthy and expect production to improve if temperatures moderate.
Pods are sparse or misshapen. Inspect whether plants are crowded, shaded, or repeatedly stressed by dry-to-wet swings. Check leaves for feeding damage and inspect the undersides for insects before spraying. Record the cultivar and sowing date so you can tell whether the issue follows a particular variety or a specific weather window next season.
Prevent pests and disease with scouting and sanitation
Bean pests can include aphids, spider mites, bean leaf beetles, Mexican bean beetles, and Japanese beetles. Look for the pattern of damage: small holes, skeletonized leaf tissue, clusters of eggs or larvae, stippling, or curled new growth. A weekly inspection, especially on leaf undersides and young plants, gives you a chance to identify the problem before reaching for a spray.
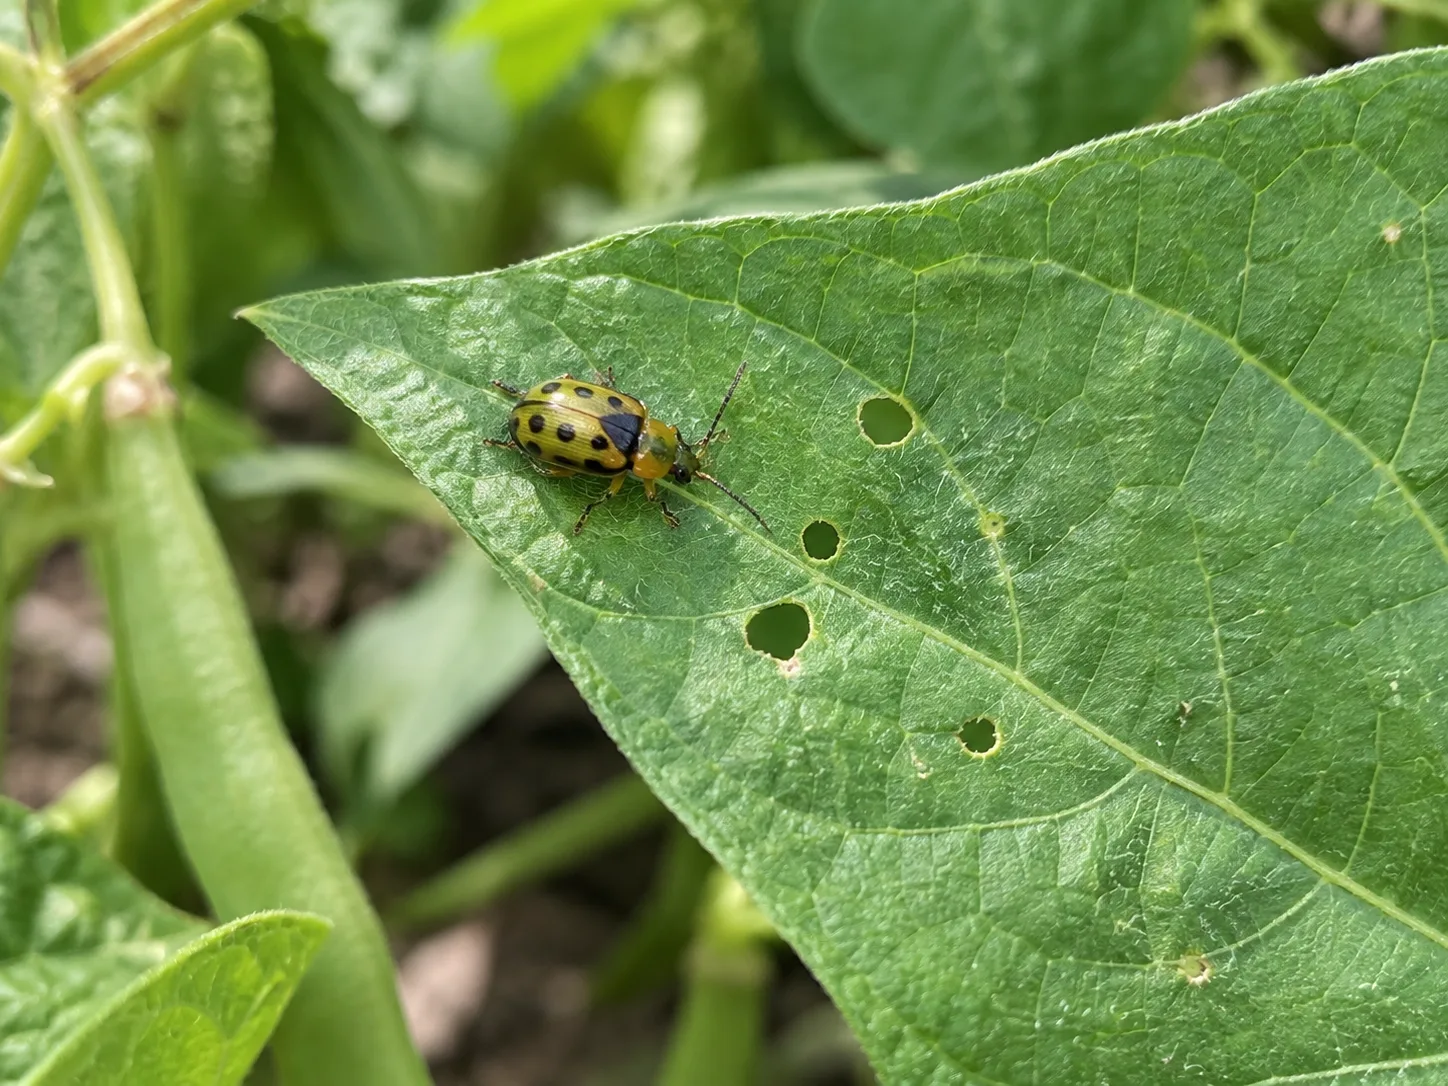
For small outbreaks, hand-pick larger insects and egg clusters, remove badly infested leaves, and use a lightweight row cover over young bush beans if the pest pressure justifies it. A cover must be secured at the edges, checked for heat buildup, and removed when plants outgrow it or access is needed; it can also exclude beneficial insects, so monitor the crop instead of treating it as a permanent guarantee. Tall pole vines are harder to cover, which makes early scouting and sturdy, open spacing especially useful.
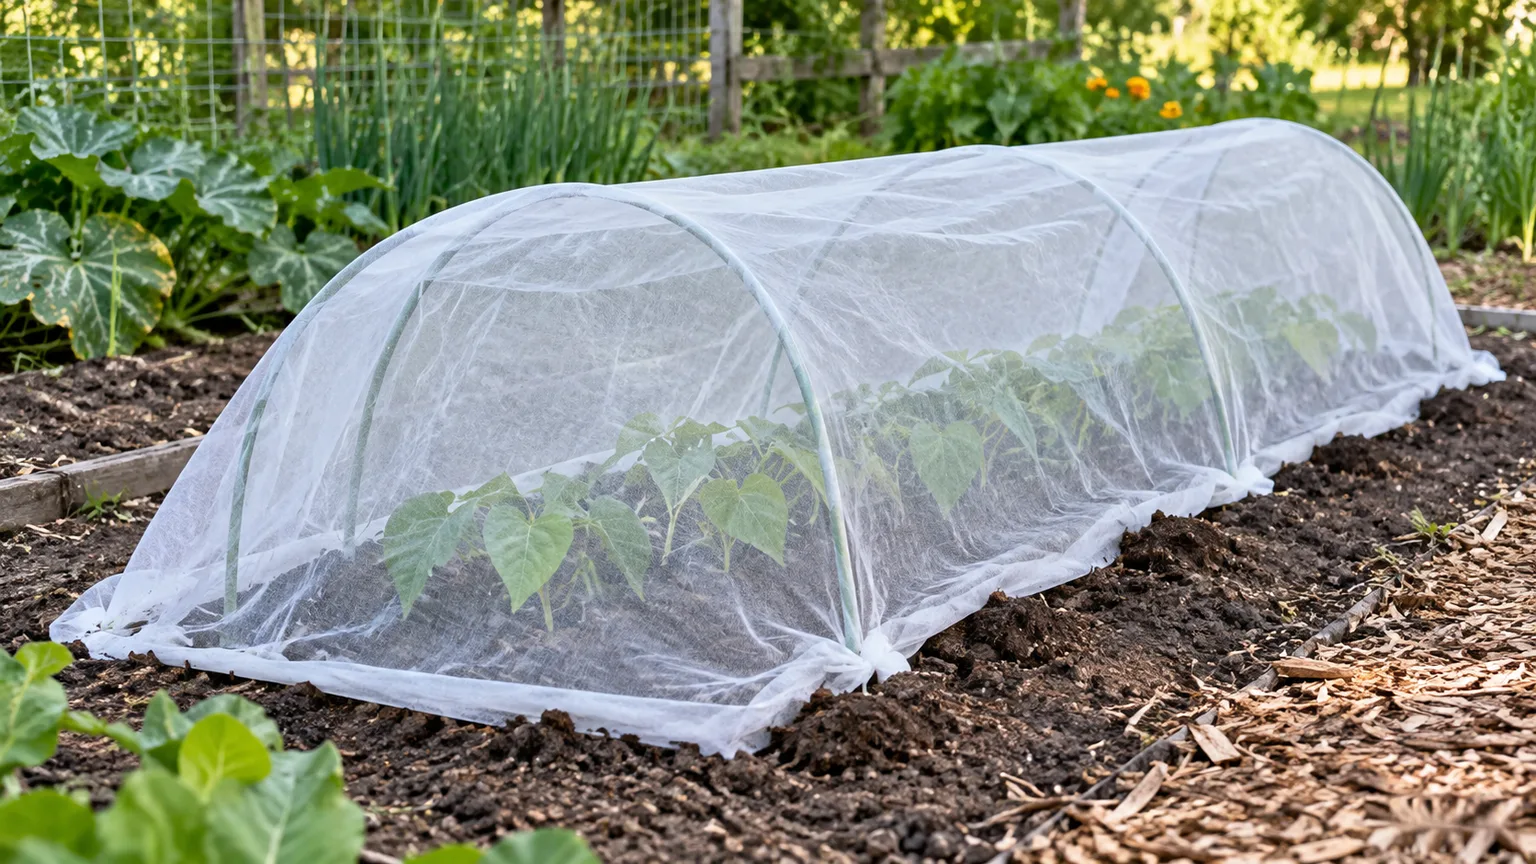
Common bean diseases include rust, anthracnose, bacterial or fungal leaf spots, and viruses. UGA Extension also flags powdery mildew and gray mold among possible problems in home gardens. Spots, yellowing, or mottling do not all have the same cause, so compare the pattern across several leaves before treating; UGA’s green-bean guide outlines the pest and disease range. Reduce risk by rotating bean-family crops, choosing resistant cultivars when a disease has been common locally, keeping foliage dry when possible, and cleaning up infected plant debris rather than composting diseased material in a home pile that may not heat evenly.
Avoid walking through wet vines or spraying on a schedule without identifying the problem. If you use a pesticide, select one labeled for the crop and target pest in your location, follow all label directions and harvest intervals, and protect pollinators and other beneficial insects. Extension offices can help identify a disease or insect from clear photos and a description of the planting conditions.
Grow beans in a container without crowding roots
Choose a bush cultivar for the simplest container setup. Use a pot with drainage holes and enough depth for a stable root zone; a wider container gives more room to space plants and holds moisture longer than a narrow pot. Savvy Gardening suggests pots around 15 inches in diameter for bush beans and larger containers for pole types; Epic Gardening’s container guide similarly recommends choosing a container and variety around the available space.
Fill the pot with a quality vegetable potting mix rather than dense garden soil, and place it where plants receive at least six hours of sun. Sow directly in the container after the weather and potting mix are warm. Containers heat and dry faster than garden beds, so check them more often during flowering and pod fill, but do not leave the pot standing in a saucer of water.
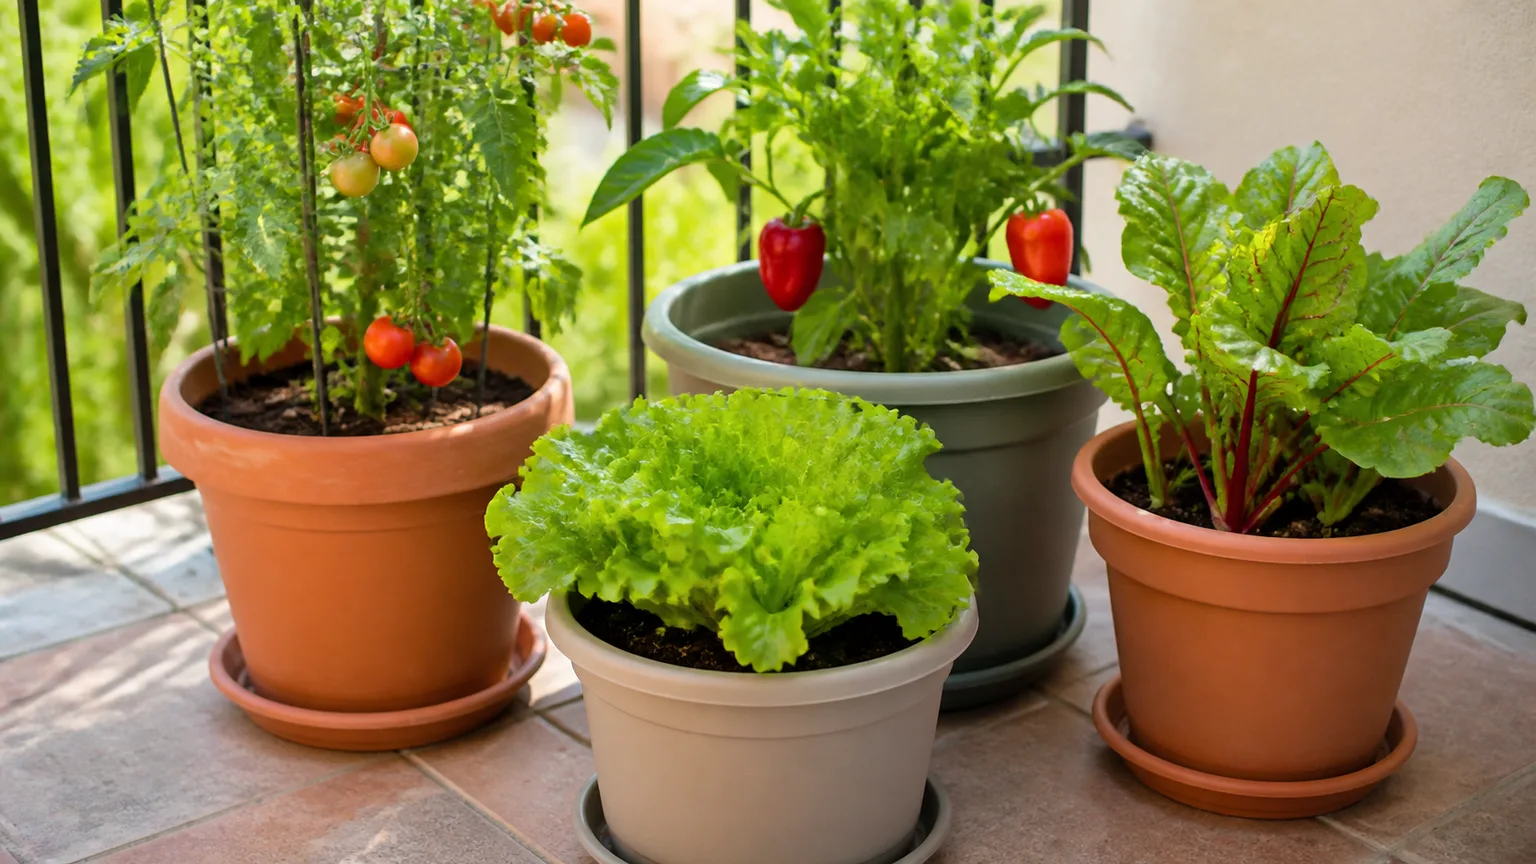
For pole beans, select a large, heavy pot and secure the trellis before sowing. Set it where wind will not topple the combined weight of the container and vines. A compact bush cultivar usually makes a more predictable crop in a balcony pot; the pole type is worth the extra structure when vertical space is available and you can reach both the support and the pods.
Save seed and close the season carefully
To save seed, leave healthy pods on the plant until they dry down, then shell the beans and continue drying them in a warm, airy place away from direct sun. Store fully dry seed in a labeled airtight container in a cool, dark location. Save only from open-pollinated varieties if you want seedlings to resemble the parent; seeds from a hybrid may grow, but the next generation can differ in traits.
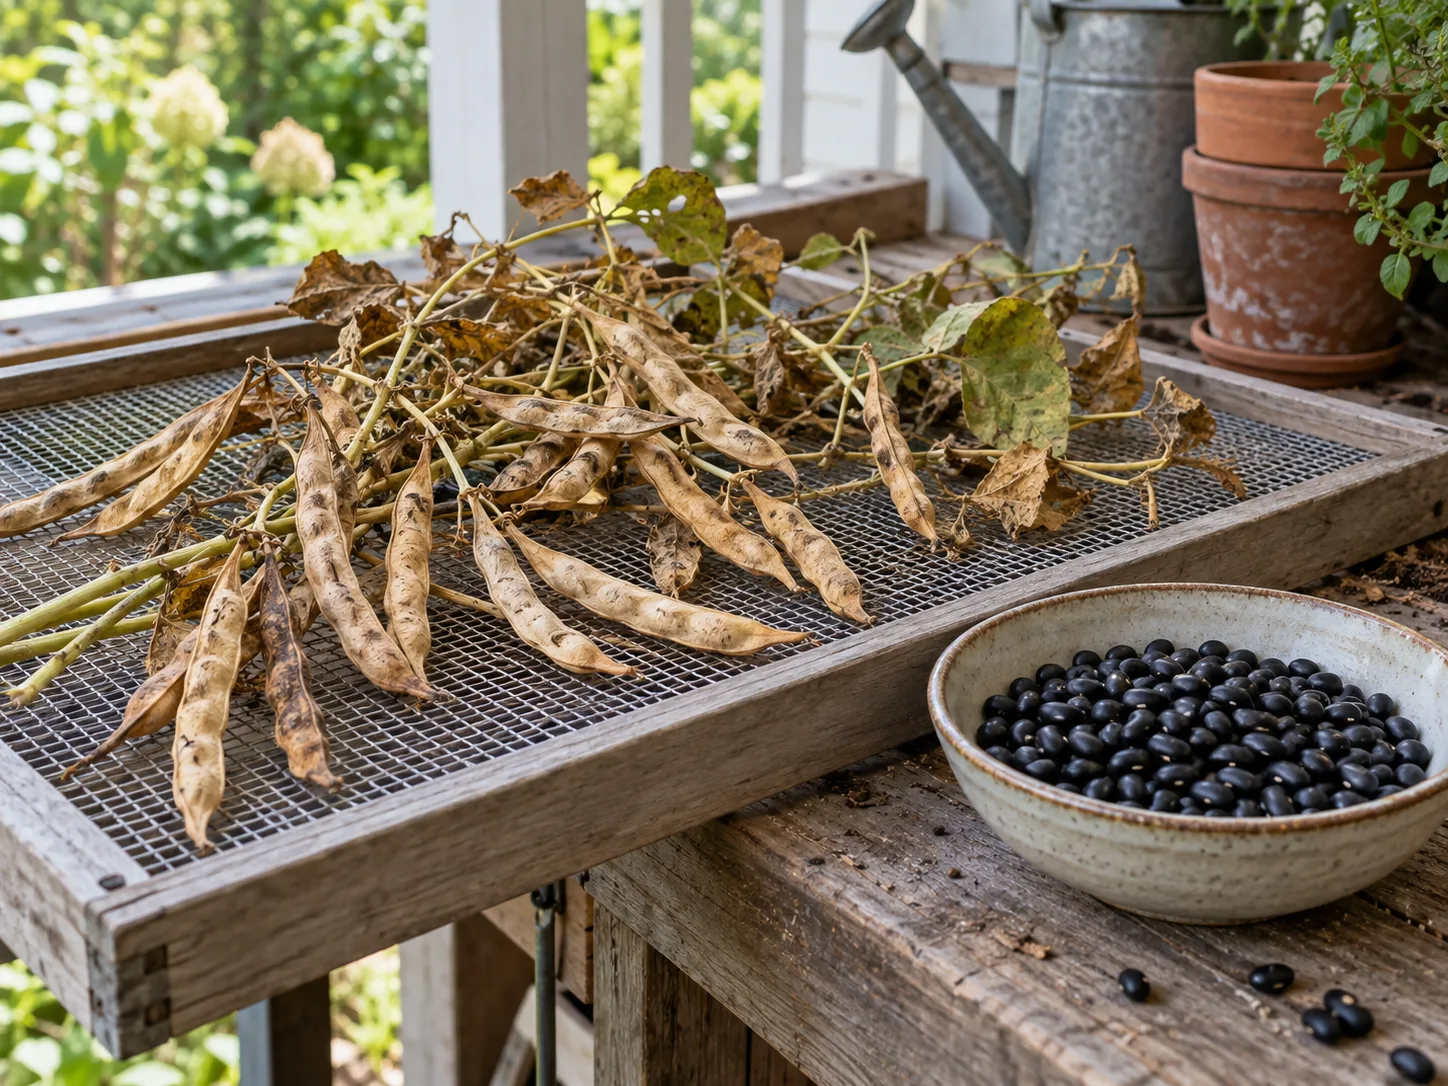
Do not save seed from a plant with serious disease symptoms, and discard moldy or damaged beans. If your goal is to keep a named cultivar pure, keep varieties separated or follow seed-saving guidance for isolation and pollination in your region. A little labeling now prevents the common winter mystery of a jar of beans with no variety or harvest year.
Common beans are annuals and will not return after frost. At season’s end, remove diseased foliage and vines, and leave healthy roots in the soil if you are cleaning up a vegetable bed; do not assume that nitrogen-fixing roots eliminate the need to rotate crops or maintain soil fertility. Plan next year’s beans in a different bed if pests or disease were a problem.
Dry beans have an additional food-safety step. Mature seeds should be cooked thoroughly before eating, especially red kidney beans; low-temperature slow cookers may not reach the heat needed to destroy naturally occurring lectins. Kansas State University Extension summarizes food-safety guidance to soak dry red kidney beans, drain them, and boil them in fresh water rather than relying on a slow cooker.
Conclusion
A reliable bean harvest starts with three choices: what stage you want to eat, whether bush or pole growth fits your space, and whether the soil has warmed enough to sow. Once those are settled, direct sowing, open spacing, steady moisture, modest feeding, and frequent picking carry most of the season.
If the first planting struggles, use the symptoms to find the cause before changing everything. Cold wet soil points to timing, lush leaves with few pods point toward heat, shade, or excess nitrogen, and flower drop during a hot spell calls for steady moisture and patience. Choose a locally suited cultivar, write down what worked, and the next sowing will be easier to time and manage.



