How to Grow Potatoes in Containers in 8 Simple Steps
Learn how to grow potatoes in containers with the right pot, seed spacing, hilling, watering, feeding, harvest signs, and storage tips.
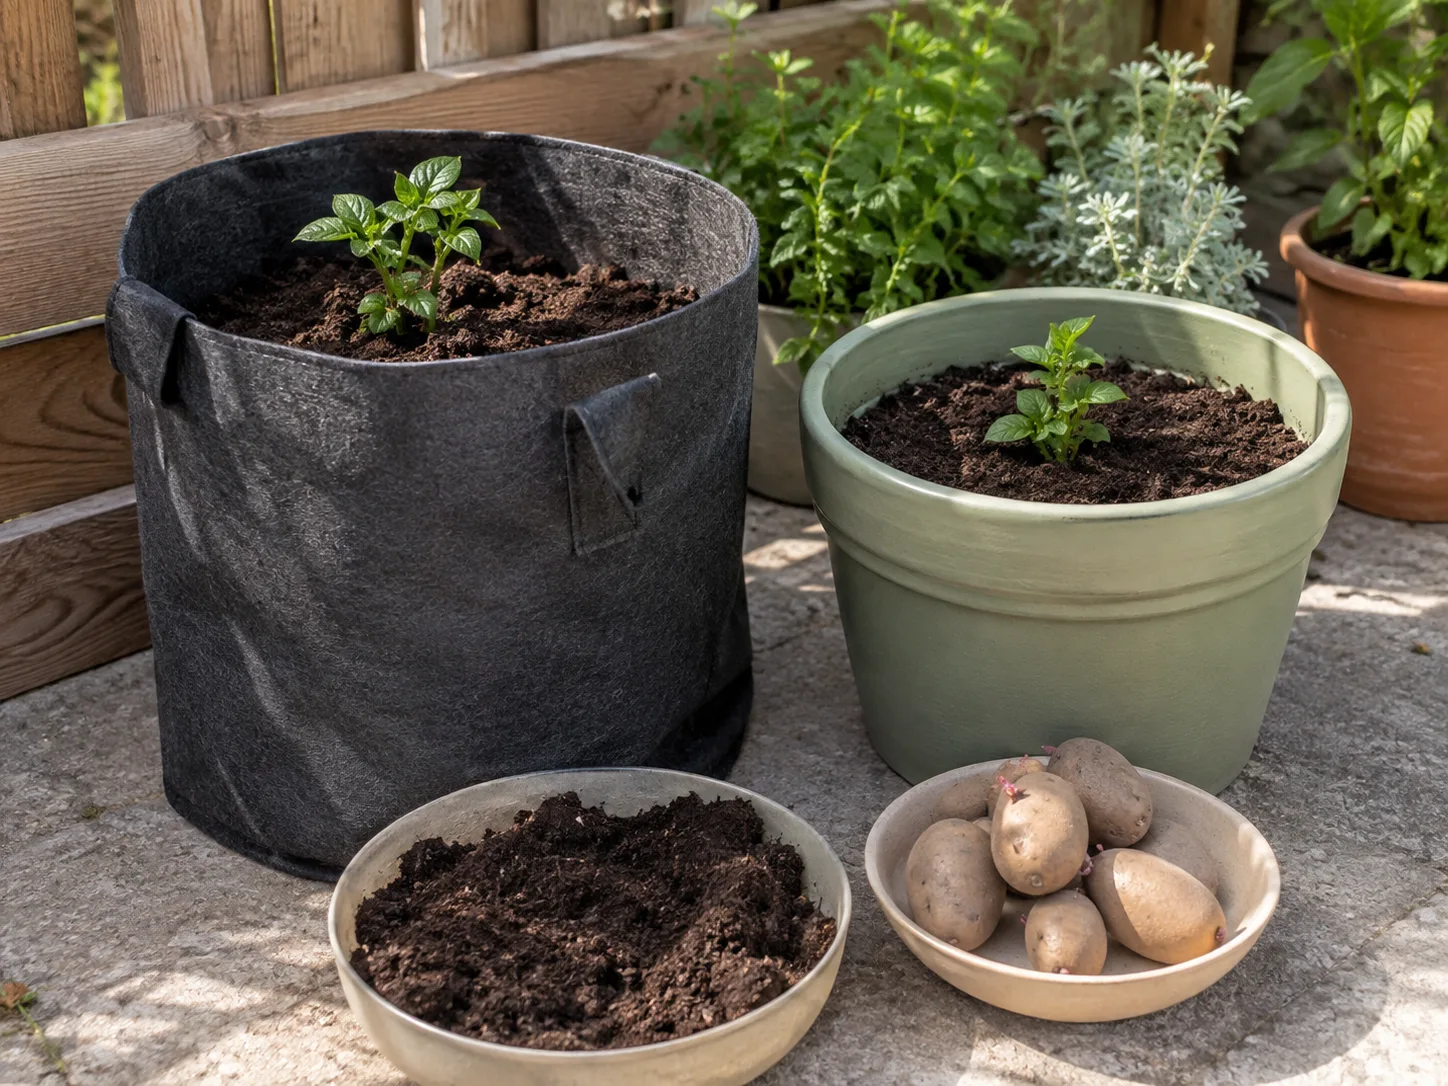
You can grow a useful crop of potatoes without digging a garden bed. A patio, balcony, rooftop, or sunny strip beside the house is enough if you give the plants a deep container, clean seed potatoes, loose growing mix, and a way to keep developing tubers covered.
The method is less about building a tall “potato tower” than managing a living root zone. Start with a shallow layer of mix, let the shoots rise, then add more mix around the lower stems while leaving the leafy top exposed. That gives tubers room and keeps them away from light. The RHS guide to growing potatoes describes the same underlying principle as earthing up.
Decide if container growing fits your harvest goal
Containers are a good choice when your ground soil is heavy, your space is limited, or you want a clean, low-dig harvest. You control the drainage and the starting mix, and you can empty a flexible grow bag onto a tarp instead of spearing tubers with a fork. A container also makes it easier to protect young shoots from a late frost or move a pot away from a heat-reflecting wall.
The trade-off is attention. A pot contains a smaller water and nutrient reserve than a garden bed, so it can dry rapidly in sun and wind or become waterlogged if the holes are inadequate. The best beginner crop is usually a modest one: one large container with a few well-spaced seed pieces, checked often, rather than a crowded tower that promises more potatoes than the root zone can support.
Choose a container that is deep, wide, and drainable
Use a container with at least 5 gallons of soil volume per plant as a conservative baseline. A 5-gallon bucket can work for one plant, but a broad 10- to 15-gallon pot or grow bag is easier to manage. For a fuller crop, a 15- to 20-gallon fabric bag gives more room for hilling and buffers moisture swings, provided you do not fill it with too many seed pieces.
Depth matters because the container must hold the starting layer, several rounds of added mix, and a little headspace for watering. Aim for at least 12 inches of usable depth; 15 to 24 inches is more forgiving. Width matters just as much: a broad container lets you space planting points instead of stacking every plant in the center. The RHS container method uses a container at least 30cm wide and deep and one seed potato per 30cm of pot diameter.
Choose a fabric grow bag, food-safe bucket, large nursery pot, half barrel, or sturdy storage tub with multiple drainage holes. Fabric bags dry faster but are hard to overwater; plastic retains moisture longer but can heat up on dark pavement. If you drill a bucket, add several holes in the base and a few low on the sides, then check that water can actually escape after the mix is added.
Do not use a decorative pot with no drainage, a very narrow container that cannot be watered evenly, or a chemical container that was not made for food-growing use. Set the empty container where it will live before adding mix: damp soil makes even a medium grow bag surprisingly heavy.
Choose a variety and certified seed potatoes
For containers, look first at maturity time and plant size, not just skin color. Early and second-early varieties are convenient because they crop sooner and often finish before prolonged summer heat. Maincrop varieties can work in a deep, wide container, but they occupy the pot longer and need steadier care. The RHS potato guide notes that early varieties are smaller, faster, and particularly suitable for containers, while maincrops are better suited to larger harvests and storage.
Buy firm, disease-free seed potatoes from a garden center or reputable seed supplier. “Seed potato” means a tuber intended for planting, not botanical seed. Certified stock gives you a cleaner starting point and more predictable variety information. Grocery potatoes may be treated to slow sprouting and are not selected as planting stock, so use them only as an experiment rather than the foundation of a container crop.
Choose a variety based on how you plan to eat it. Small early potatoes are excellent for quick meals but usually have thin skins and short storage life. A later variety may give larger baking or roasting potatoes, but it needs more time, more root-zone volume, and a longer stretch of suitable weather. No variety guarantees a large harvest in a small pot; container volume, light, spacing, and moisture still set the ceiling.
When to plant container potatoes
Plant outdoors in spring when the risk of a hard freeze has passed, or plant earlier only if you can move or cover the container. Containers warm faster than ground soil in sunshine, but their exposed sides also cool quickly at night. Young potato shoots are frost-sensitive, so a warm afternoon is not enough reason to ignore the overnight forecast.
In a hot-summer climate, choose an early variety and plant early enough for tubers to form before the worst heat. A container may benefit from late-afternoon protection in extreme heat, but do not solve heat by putting the foliage in deep shade. In a mild climate, a fall planting can work if the variety and local weather allow enough cool growing time. Use the seed packet’s maturity range as a planning aid, not a promise.
Step 1: Prepare seed potatoes
Plant small, egg-sized seed potatoes whole. If a larger tuber has several healthy eyes, cut it into pieces roughly the size of a lime, giving every piece at least one or two good eyes. Use a clean knife and discard any soft, moldy, or badly damaged section rather than trying to rescue it.
Let cut pieces sit in a cool, airy place for a few days so the cut surface dries and forms a light callus. This is especially useful when the mix will be cool or damp. Whole tubers do not need this waiting period.
You can chit, or pre-sprout, seed potatoes before planting. Place them eyes-up in an egg carton or shallow tray in a bright, cool, frost-free spot and wait for short, sturdy sprouts. Chitting is optional; it is most useful for early varieties and short seasons. Long, pale sprouts are fragile and usually signal too much darkness, so handle the tuber rather than pulling on the shoots.
Step 2: Build the growing mix and first layer
Use a quality potting mix formulated for containers, blended with some finished compost if the mix needs more organic matter. The target is a medium that holds moisture but drains freely: it should feel light and springy when damp, not sticky like clay and not so loose that water runs straight through without wetting the root zone.
Avoid filling a pot with garden soil alone. It can compact, carry weed seeds or pathogens, and leave too little air around roots after repeated watering. The University of Nevada Reno’s container-gardening guidance emphasizes choosing a container and growing medium that support drainage and manageable moisture. Finished compost is a better amendment than fresh manure, which can be too strong and release nutrients unevenly.
Mix a balanced vegetable fertilizer into the starting medium only at the product label rate if the potting mix does not already contain feed. Do not add a large dose because potatoes are hungry; excess fertilizer can injure roots and push leaves at the expense of tubers. Set aside enough of the same mix for later hilling.
Add 4 to 6 inches of mix to the container. Water it lightly if it is dusty, but do not turn the base into mud before the seed pieces arrive.
Step 3: Plant with the right spacing
Place the seed potatoes on the mix with the eyes or sprouts pointing upward. Set cut pieces cut-side down, then leave about 6 to 8 inches between planting points when the container is wide enough. A practical starting rule is one plant in a 5-gallon container, two in a 10-gallon container, and two or three in a 15-gallon container; use fewer pieces for varieties known to make large tubers.
Spacing is a yield decision, not a cosmetic one. Crowding can produce a thick canopy and many tiny potatoes because several plants are competing for the same water, nutrients, and loose soil. If you are unsure, plant fewer pieces in the first container and use what you learn about drying rate and plant size to scale up next time.
Do not bury the seed potatoes deep at this stage. The hilling process will add depth gradually, so the starting layer should leave room for several additions without burying the plant’s top growth later.
Step 4: Cover the seed pieces and water in
Cover the seed potatoes with 2 to 4 inches of mix, then level the surface without pressing it hard. Water slowly until the entire starting layer is damp and a little excess drains from the bottom. This settles the mix around the tubers; it is not a signal to keep the pot saturated.
For the first few weeks, check the container before watering. Seed pieces are vulnerable to rot when the mix is cold and wet, so a cool pot may need less water than a sunny, windy one. Shoots can take one to three weeks to appear depending on variety, temperature, and whether the tubers were chitted. A slow start after cool weather is not proof that the planting failed.
Keep the container in its growing position now. Moving a full pot later can snap stems, spill the mix, or damage developing roots. If a late frost threatens after shoots emerge, cover the plant overnight with frost cloth or move a manageable container to a sheltered, frost-free spot.
Step 5: Hill each time shoots gain height
When the exposed shoots reach about 6 to 8 inches, add 3 to 4 inches of fresh mix around the lower stems. Leave the top few inches of leafy growth exposed. Repeat whenever the plant gains another 6 to 8 inches, gradually bringing the mix almost to the rim while keeping 2 to 3 inches of headspace for irrigation.
Hilling does three jobs: it supports tall stems, expands the dark, loose root zone, and keeps developing tubers away from light. The Gardener’s Supply potato grow-bag instructions use the same rhythm of adding several inches as the plant grows, while Homestead and Chill’s container method recommends leaving only a small amount of green growth exposed during each round.
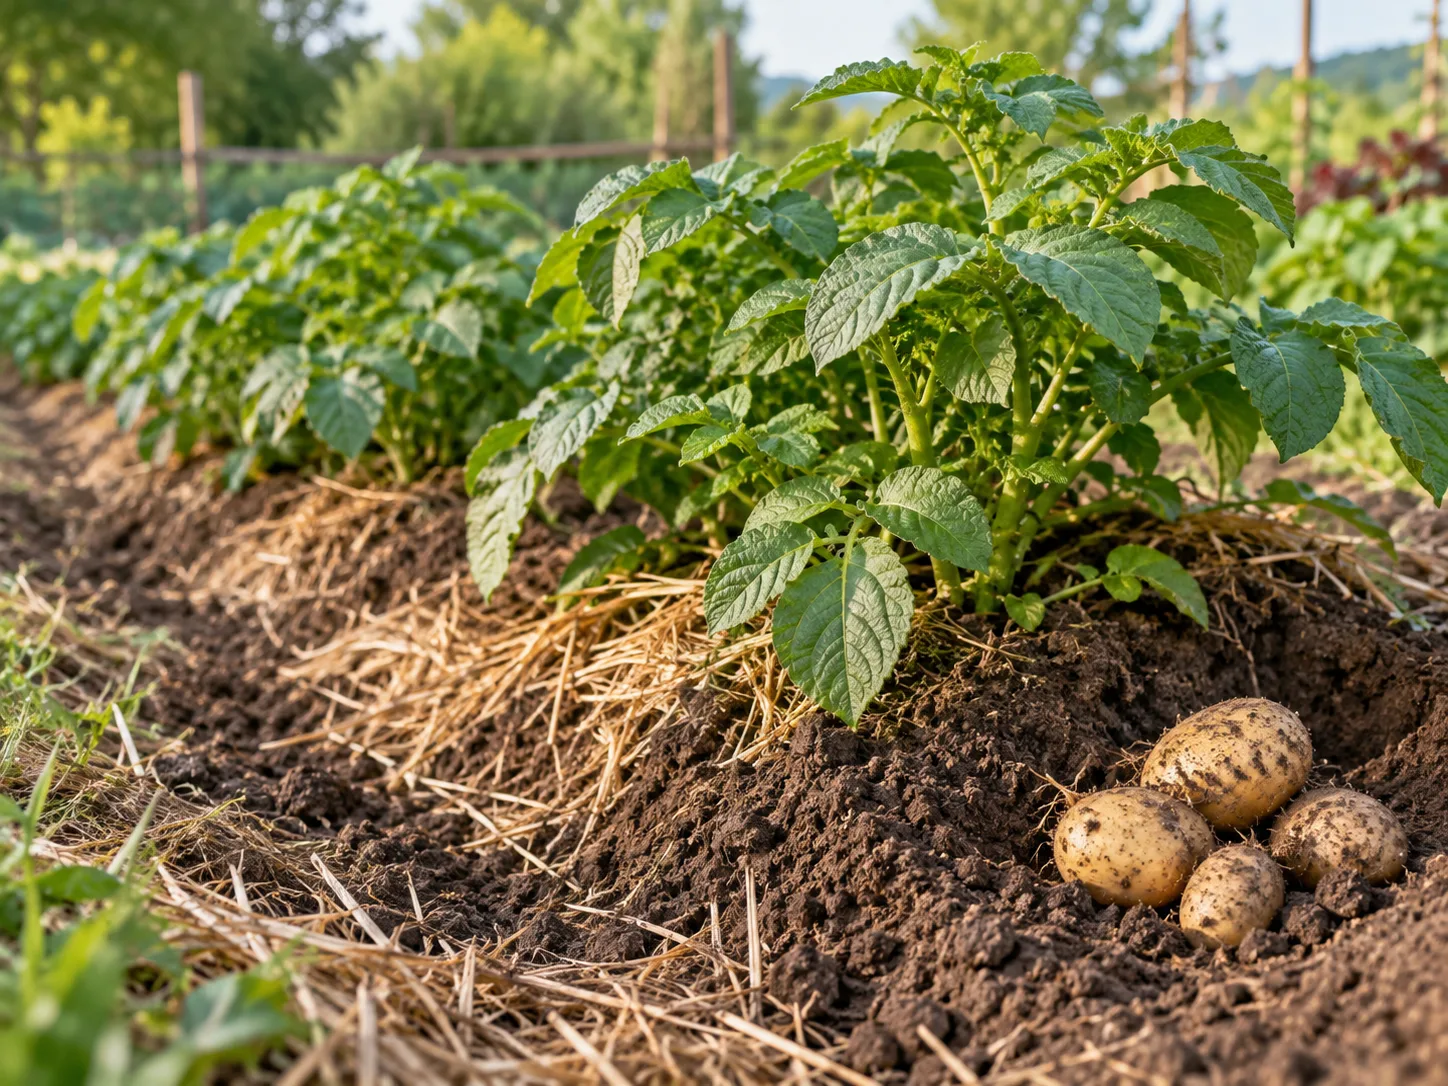
Do not bury the entire plant. Leaves need light to make the energy that ultimately fills the tubers, and a completely buried, wet canopy can become stressed. If you miss a round, add a smaller layer as soon as you can instead of dumping a foot of mix over the plant at once.
You do not need a perfect tower to harvest potatoes. If the container is already nearly full and the plant is still growing, focus on keeping exposed tubers covered and the top leaves healthy. If rain washes mix away and a potato becomes visible, cover it promptly.
Step 6: Manage sunlight, water, and feeding
Aim for 6 to 8 hours of direct sunlight. Full sun is the simplest target, but in a very hot climate, morning sun with protection from the harshest late-afternoon heat can be a sensible compromise. Keep the foliage in bright light and protect the container from reflected heat when necessary; moving the pot into deep shade usually trades heat stress for weak growth and a smaller crop.
Check moisture by pushing a finger 1 to 2 inches into the mix. If it feels dry at that depth, water slowly and deeply until excess exits the drainage holes. Fabric bags and containers on exposed balconies may need daily checks in hot or windy weather; a cool, cloudy week may require much less. “Water every day” is a weather-dependent possibility, not a rule.
The goal is evenly moist, never soggy soil. Repeatedly letting the container become bone-dry and then flooding it can lead to small, cracked, or misshapen tubers, while wet mix with wilting foliage can indicate oxygen-starved roots rather than thirst. Water the soil, not the foliage, when possible, and never leave the pot standing in a saucer of water.
Feed modestly. A balanced container or vegetable fertilizer used according to its label is enough when the mix is fresh and fertile. If the leaves are pale and growth is slow, first check light, moisture, and drainage before adding more fertilizer. If the foliage is extremely dark and lush but the plant produces few flowers or tubers, stop adding nitrogen; more leaves do not automatically mean more potatoes.
Step 7: Prevent common pests and diseases
Inspect the leaves once or twice a week, including the undersides. Colorado potato beetles can strip foliage quickly, while aphids cluster on tender growth. Remove visible eggs, larvae, or adult beetles by hand when practical, rinse small aphid colonies with water, and follow the label of any product you choose rather than improvising a concentration.
Good airflow lowers the chance that wet foliage stays damp in a crowded corner. Give neighboring containers some space and avoid watering late in the day when leaves will remain wet overnight. If you see rapidly spreading dark lesions, collapsing stems, or a strong rotten smell, isolate the container, remove badly affected foliage, and do not compost diseased plant material.
Container growing reduces some soil and animal problems but does not make a crop disease-proof. Poor drainage can rot seed pieces and roots; drought can stop growth; heat can cause wilting even when the soil is moist; and light can reach tubers if hilling is late. Treat each symptom as a check-list prompt rather than reaching immediately for a pesticide or more water.
Step 8: Harvest new or mature potatoes
There are two good harvest targets. New potatoes are young, thin-skinned tubers for immediate eating. Once the plant has flowered or has reached the early variety’s expected window, gently feel around the edge of the container and remove a few potatoes, replacing the mix afterward. Flowering is a useful clue, not a universal deadline: some varieties flower lightly or at a different time.
For a mature harvest, wait for the foliage to yellow, wilt, and die back naturally. Reduce or stop watering as the plant declines, then wait roughly one to two weeks so the skins can firm. The exact interval depends on weather and variety; do not force a harvest by cutting healthy green vines merely because the calendar says the crop should be ready.
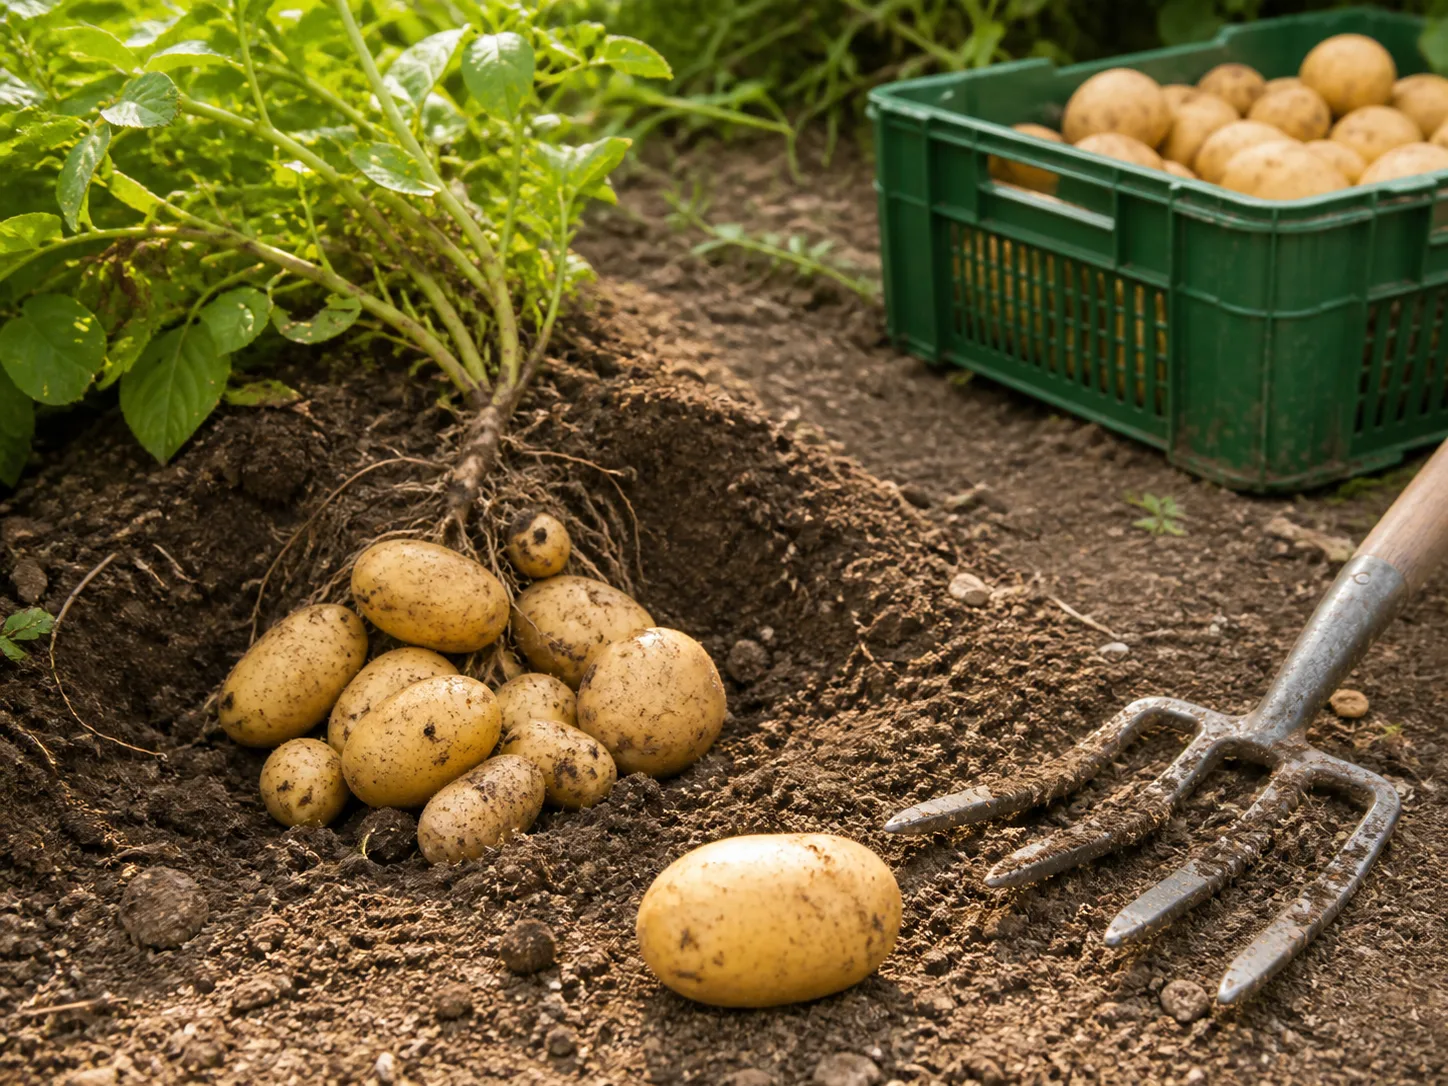
Tip a grow bag or pot onto a tarp, sheet, or wheelbarrow and search the mix by hand. This is gentler than stabbing a small container with a fork. Keep harvested potatoes shaded while you sort them, and set aside any that are cut, soft, leaking, or extensively green. Light exposure can make potatoes green and bitter; the RHS harvesting guidance advises discarding green potatoes rather than treating them as ordinary sound tubers.
Cure and store mature potatoes
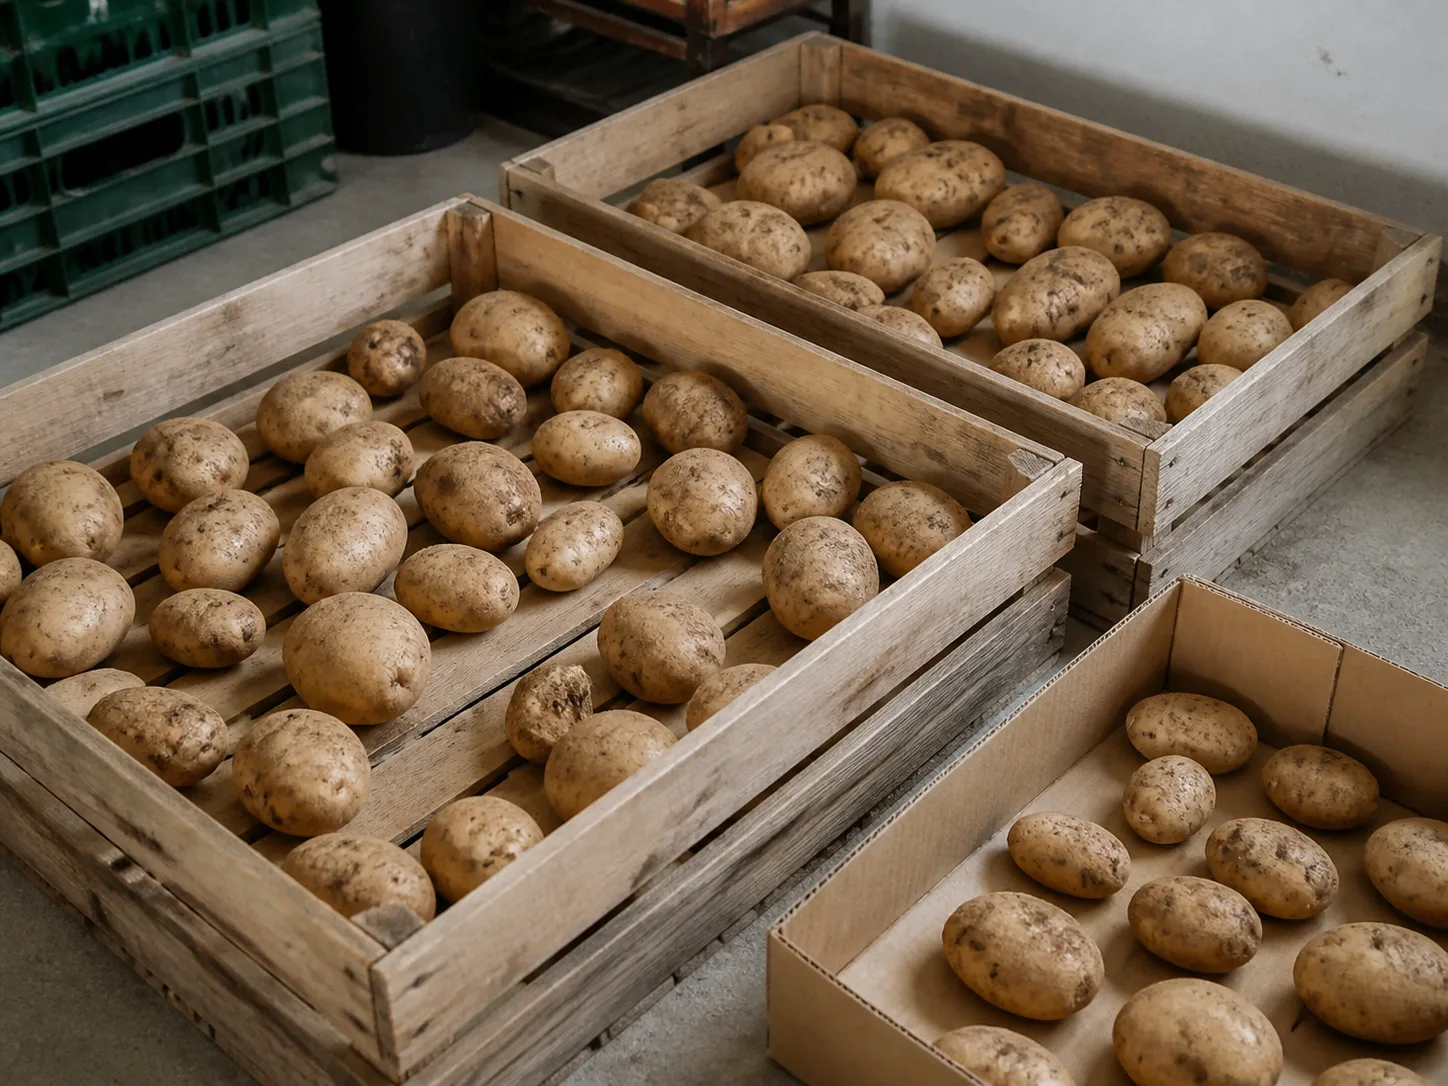
Eat new potatoes soon because their skins are delicate. For mature potatoes, brush off loose soil and let sound, unwashed tubers cure in a dark, dry, well-ventilated place for about one to two weeks. Curing toughens the skin and allows minor surface scuffs to dry before storage.
After curing, store only firm, undamaged potatoes in a breathable paper, mesh, or slatted container. Keep them cool, dark, frost-free, and away from the warmest part of the kitchen. Check the batch every few weeks and remove any potato that softens, leaks, or begins to rot so one failure does not spoil the rest.
Do not wash the whole harvest before storage. Water trapped in a bag or box creates a much less forgiving storage environment. Potatoes with extensive green skin or a strong bitter taste are a food-safety exception: discard them instead of trying to store or serve them.
Troubleshoot leaves, rot, and small tubers
The plant has lots of leaves but few potatoes. Start with the three biggest suspects: overcrowding, weak light, and excess nitrogen. Let the crop mature if it is still early, then reduce the number of seed pieces, improve sun exposure, and use a balanced feed rather than a nitrogen-heavy product in the next container.
The leaves wilt even though the mix is wet. Check drainage holes, standing water, and the temperature of the container before watering again. Wet, hot mix can damage roots; move a dark pot away from reflected afternoon heat while keeping the foliage in strong light, and repot only if the medium is staying saturated.
The seed potato rotted before it sprouted. The likely combination is cold mix, excess water, poor drainage, or a cut piece planted before its surface dried. Start with firm seed stock, let cut pieces callus, water less often before emergence, and confirm the container drains freely.
The potatoes are tiny. Crowding and inconsistent moisture are common causes, followed by insufficient sun, shallow root space, stopping hilling too early, or harvesting before the tubers have sized up. One healthy plant in a larger pot can outperform several plants competing in a small bucket.
The tubers are green. A tuber was exposed to light, usually because mix settled, hilling stopped, or the potato formed too near the surface. Cover exposed tubers immediately during the growing season; after harvest, discard potatoes that are extensively green or bitter.
The foliage turns dark or collapses unexpectedly. Look for leaf lesions, a rotten stem base, soggy mix, or insect damage. Remove clearly diseased material, improve airflow and drainage, and avoid composting suspicious foliage. If the plant is close to natural dieback and the tubers are mature, the timing may be normal; if it happens early, investigate the root zone and weather before harvesting.
Reuse the container safely next season
After harvest, empty the container completely and remove old stems, roots, and volunteer tubers. Wash and dry a reusable pot or bucket before storing it, and inspect fabric bags for tears that could let the next crop dry unevenly.
Do not automatically reuse the same mix for another potato crop. If the plant had rot or disease, the prudent choice is to replace the mix or use it for unrelated ornamentals rather than carrying a problem into the next potato planting. At minimum, rotate the crop and buy clean seed stock; a fresh start is cheaper than spending a season trying to diagnose inherited trouble.
Container potato timing at a glance
Use these ranges to plan space and meals, then follow the variety description and the plant’s signals:
| Crop type | Rough time from planting | Best container use | Harvest cue |
|---|---|---|---|
| Early | 70–90 days | Small containers, quick new-potato harvests, hot-summer regions | Flowering or the variety’s early harvest window |
| Second early / midseason | 95–110 days | Flexible patio crop with a little more sizing time | Flowering for new potatoes; dieback for mature tubers |
| Maincrop | 120 days or more | Deep, broad containers and longer seasons | Natural yellowing and dieback, followed by a curing pause |
Weather, variety, planting condition, and container heat can move these dates. If the plant looks healthy, a calendar estimate is less useful than checking the foliage and test-harvesting one edge of the container.
Conclusion
The reliable way to grow potatoes in containers is to keep the system balanced: enough volume for the number of seed pieces, loose mix with real drainage, six to eight hours of light, steady moisture, modest feeding, and repeated hilling that leaves the leafy crown exposed. Those choices matter more than buying a special potato tower or packing a pot with as many seed potatoes as possible.
Start with one manageable container, choose an early or midseason variety if you want a quicker win, and decide before planting whether you want tender new potatoes or a mature crop for storage. Keep the tubers dark, respond to weather rather than a rigid watering calendar, and harvest gently. Once you know how quickly your container dries and how much space your chosen variety needs, adding a second bag becomes a measured improvement instead of a guess.