How to Grow and Care for Philodendron Gloriosum
Learn Philodendron gloriosum care: bright filtered light, airy soil, rhizome-friendly pots, careful watering, propagation, pest checks, and pet safety.
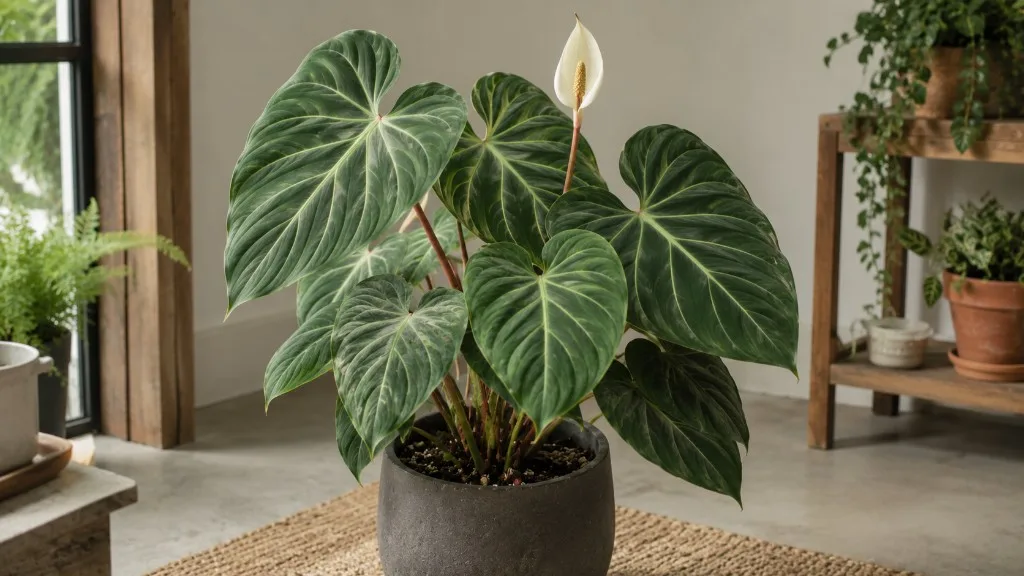
Philodendron gloriosum rewards careful setup more than constant attention. Its large, velvety, heart-shaped leaves and pale veins look dramatic, but the key to keeping them healthy is simple: give the plant bright filtered light, an airy root zone, and room for its stem to travel sideways.
That sideways stem is a rhizome, not a typical climbing vine. Kew Science records the species as native to Colombia and associated with wet tropical habitat, while Denver Botanic Gardens lists its growth form as prostrate. (Kew Science; Denver Botanic Gardens) Once you plan around that growth habit, watering, potting, propagation, and troubleshooting become much more predictable.
Know the Crawler Before You Choose a Pot
Many philodendrons are climbers or self-heading plants, so a tall pot and moss pole can seem like the default solution. Gloriosum is different: new leaves rise from points along a rhizome that creeps horizontally across the surface of the growing medium. The plant can become tall enough to fill a corner, but its most important use of space is usually sideways, not upward.
The leaves are evergreen, cordate, and often strongly veined, with a soft texture that shows dust and water marks easily. A young plant may have smaller leaves and a shorter rhizome than a mature specimen; judge its health by the quality of new growth and the condition of its roots, not by expecting a newly purchased plant to match a show specimen immediately.
This also explains why a moss pole is optional rather than essential. You can add a low trellis for display or support a plant that is leaning, but forcing the active rhizome upward can make the container work against the plant’s natural form. A broad planter with open space ahead of the growth point is usually the more useful investment.
Start With the Right Placement
Place Gloriosum in a bright room where the leaves receive plenty of filtered or indirect light. An east-facing window is often an easy starting point; a bright south- or west-facing window can work when a sheer curtain or distance from the glass softens the strongest midday and afternoon rays. The Royal Horticultural Society recommends bright indirect light for philodendrons and warns that strong summer sun can scorch foliage. (RHS; NC State Extension)
Keep the pot away from a heater, air-conditioner outlet, or a cold pane of glass. A stable location is more useful than moving the plant repeatedly in search of a theoretical perfect spot. If you bring home a plant that has been grown under shade cloth or in a dim shop, increase light gradually over several days so the leaves can acclimate.
Read Light Through the Leaves
Light problems usually develop slowly, which makes them easy to mistake for a feeding problem. If new leaves stay small, the petioles stretch toward one side, or the rhizome produces long bare intervals, first compare the plant’s current light with the amount it received when it was growing well.
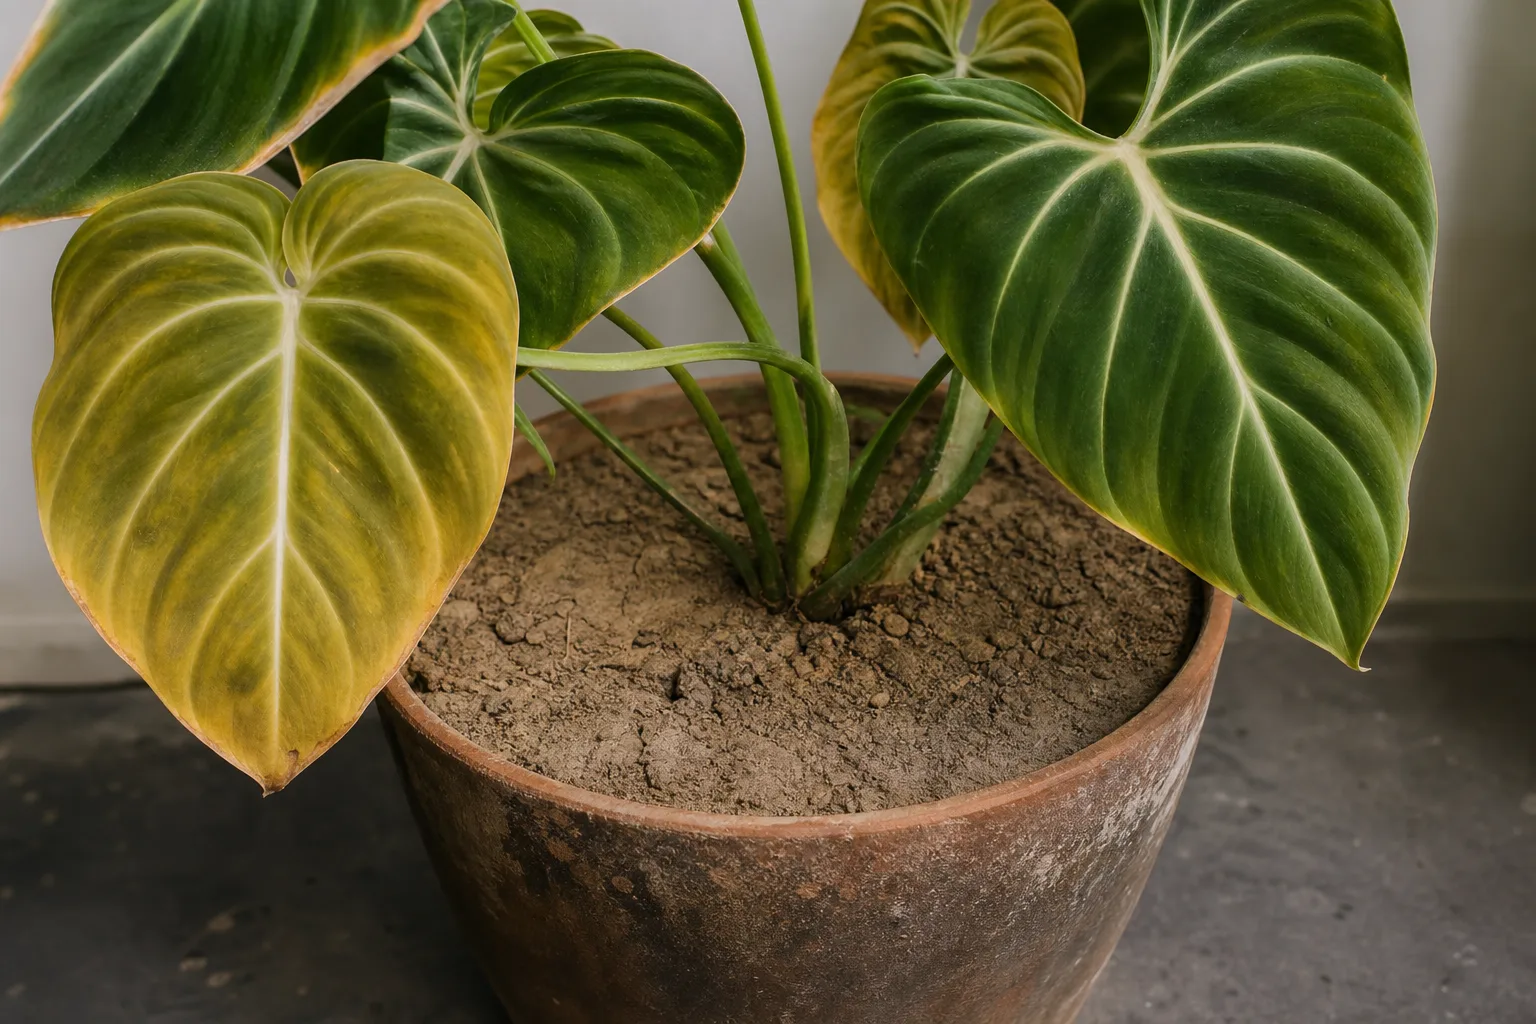
Too much direct light produces pale, tan, or crisp patches that remain damaged even after the plant is moved. Too little light can contribute to yellowing and sparse growth, but yellow leaves are not proof of low light; persistent wet soil, root damage, age, and pests can look similar. Change one major variable at a time and watch the next leaf rather than trying to repair an already scorched one.
Build an Airy, Surface-Friendly Potting Setup
Use a potting mix that holds some moisture while leaving large air spaces around the roots. RHS describes philodendrons as preferring loose, free-draining compost, and NC State Extension similarly emphasizes moist, well-drained soil with organic matter. (RHS; NC State Extension)
The goal is not to make water run through instantly. The goal is to let you water the entire root ball, then have excess leave the pot so the roots are not trapped in a saturated, airless mass. Fine mix that collapses around the rhizome can stay wet too long, especially in a cool room or an oversized container.
A Practical Mix You Can Adjust
Start with a quality indoor potting mix or peat-free houseplant base, then add chunky orchid bark and a porous mineral such as perlite or pumice. A reasonable starting point is two parts potting mix, one part bark, and one part perlite or pumice, but treat that as a starting texture rather than a rule that fits every home.
If the plant sits in bright warmth and dries rapidly, keep a little more moisture-retentive base. If your room is cool, dim, or slow to dry, increase the coarse portion and use a smaller pot. Mix ingredients evenly, pre-moisten dusty media, and check that a handful breaks apart easily instead of forming a dense mud ball.
Avoid burying the rhizome inside the mix just because the roots are visible. Roots can enter the substrate, but the rhizome should rest at or very near the surface, with the growing tip pointing toward the open runway. A buried, constantly damp rhizome is harder to inspect and more vulnerable to rot.
Water by Root-Zone Moisture
Water thoroughly when the upper layer of mix has dried and the deeper root zone is beginning to lose its wet feel. Plant Circle’s practical guide uses the top 2–3 cm as a check, while RHS also advises letting the compost dry before watering and never leaving a philodendron standing in water. (Plant Circle; RHS)
Test in two places rather than trusting the surface alone. Press a finger or wooden skewer into the mix near the edge of the pot, lift the container to notice its weight, and look at the drainage holes if you can. When it is time, pour slowly over the surface until water begins to leave the drainage holes, then empty the saucer or cachepot.
There is no reliable weekly schedule. A plant in bright summer light may dry much faster than the same plant in winter; bark-heavy media, terracotta, air-conditioning, pot size, root density, and leaf area all alter the interval. Record the approximate drying pattern for a month, but still check the plant before every watering.
Diagnose Wet Versus Dry Stress
Drooping leaves tell you that the plant is under stress, not why. A light pot, dry mix well below the surface, and leaves that recover after a thorough drink point toward underwatering. Water slowly, allow the root ball to rehydrate, and do not compensate by keeping the mix permanently wet afterward.
Wet stress is more likely when the mix remains cool and saturated for many days, lower leaves yellow while the pot is still wet, or the root zone smells sour. If decline continues, slide the plant from the pot and inspect the roots and rhizome: healthy roots are generally firm, while brown, mushy, or collapsing tissue calls for removal of damaged material and a fresh, airy setup.
One heavy watering is not the same as overwatering. Thorough watering is useful when drainage is open; overwatering is a pattern of too little air for too long, caused by dense media, poor drainage, low light, an oversized pot, or watering again before the root zone has partly dried.
Keep Conditions Warm, Humid, and Breezy
Keep Gloriosum comfortably warm and protect it from abrupt temperature changes. NC State Extension places philodendrons in a warm indoor range of roughly 65–85°F, while RHS advises keeping them above about 59°F and away from cold drafts, hot radiators, and summer sun through glass. (NC State Extension; RHS)
Moderate to higher humidity can help a large leaf open smoothly and reduce repeated crispy margins, but a high humidity number cannot rescue waterlogged roots. RHS notes that philodendrons can adapt to the lower humidity found in many homes. Use a hygrometer if you are trying to understand a dry room, then address the cause: move the plant away from vents, group plants without crowding them, or use a humidifier that you can clean regularly.
Pebble trays provide only a small local effect and must be set up correctly. Keep the pot on pebbles above the waterline in a tray wider than the pot; do not let the pot base sit in standing water. Misting is short-lived and leaves wet for longer, which can increase spotting when airflow is poor, so it is not a substitute for a stable room environment.
Aim for gentle air movement rather than a strong fan aimed directly at the leaves. Humid, stagnant air and crowded foliage give pests and leaf-spot problems a better opportunity to persist. A little spacing between plants, clean leaves, and a room that exchanges air are useful complements to humidity.
Feed for Steady Growth
Feed during active growth, especially when the plant is producing leaves and the room is bright enough to support that growth. RHS recommends a general houseplant fertilizer during the growing season, and a diluted liquid foliage fertilizer is easy to control for a plant that grows steadily rather than explosively. (RHS)
Follow the product label and begin conservatively if the plant is newly purchased, recently repotted, stressed, or growing in low light. Apply fertilizer to an already-moist root zone, not to bone-dry media. Reduce or pause feeding during a dark, cool period when growth has slowed.
Fertilizer cannot correct poor light, root rot, cold, or compacted media. If new leaves are shrinking, check the light and roots before adding more nutrients. Brown tips, a crust of salts on the mix, or a sudden decline after feeding are reasons to pause and flush the medium with plain water if drainage is good, then resume only at a gentler label rate once the plant is stable.
Pot and Repot Without Burying the Rhizome
Choose a container with reliable drainage holes and enough horizontal runway in front of the active rhizome tip. A long nursery pot, rectangular planter, or wide shallow container can work; the exact shape matters less than leaving room for sideways growth and avoiding a deep reservoir of unused wet mix.
When repotting, move up only modestly. RHS warns that a pot much larger than the root ball stays wet longer and can encourage rot. Spring or another period of active growth is a low-stress time for routine repotting, but a failing, waterlogged root zone should be corrected when necessary rather than left until a particular season. (RHS)
Set the rhizome at the same level it occupied before. Place the oldest section toward the back, the newest growth point toward the open space, and guide roots into the mix without packing media over the stem. Water once to settle the mix, let it drain fully, and give the plant stable light while it re-establishes.
Repot when roots fill the container, the mix has broken down and stays wet, water runs around a shrunken root ball, or the rhizome has reached the edge with no room to advance. Do not repot a healthy, stable plant solely because a calendar says it is time; unnecessary root disturbance costs more than a little patience.
Prune, Clean, and Support the Plant
Pruning is mainly a sanitation and space-management task. Remove a fully yellow, dead, or badly damaged leaf with a clean, sharp blade, cutting the petiole close to its base without slicing the rhizome. A single older leaf turning yellow at the base while new growth is healthy can be normal turnover; do not strip healthy foliage to make the plant look symmetrical.
Wipe large leaves with a soft, damp cloth when dust builds up, supporting the leaf from underneath. Clean leaves show pests earlier and make it easier to distinguish dust from stippling, webbing, scale, or residue. Avoid oily leaf-shine products, which can interfere with the leaf surface and make future inspection harder.
Wear gloves when pruning or dividing. RHS and NC State Extension both flag philodendrons as poisonous or irritating, so wash your hands and tools after handling sap. (RHS; NC State Extension)
Use a support only if the plant needs help staying stable or you prefer the look. A low trellis can guide leaves without changing the rhizome’s direction, but a moss pole is not a requirement for a naturally prostrate plant.
Propagate From a Healthy Rhizome
Propagation is done from the rhizome rather than from a single leaf. Wait until the parent plant is healthy and has a long enough stem to leave a viable growing section behind; a stressed plant with rot, active pests, or only one small growth point is a poor candidate for dividing.
The cutting needs a viable node or growth point, not merely a piece of leaf petiole. Epic Gardening and Plant Circle both describe cutting between nodes on the horizontal rhizome, then rooting an unrooted section in a moist, airy medium. (Epic Gardening; Plant Circle)
A Low-Risk Propagation Sequence
- Prepare a clean blade, a small container with drainage, and a lightly moist rooting medium such as sphagnum moss or a mix of moss and perlite.
- Uncover only as much rhizome as needed. Identify a section with a node or visible growth point and, ideally, a leaf or root; keep enough healthy rhizome, leaves, and roots on the parent to continue growing.
- Make one clean cut between nodes. Do not saw repeatedly through wet tissue, and do not take several pieces just because the stem is available.
- Let the cut surface dry briefly until it is no longer freshly wet. A short callusing period is useful; leaving a cutting exposed for days can dehydrate it.
- Set the cutting on or very shallowly into the moist medium with the node in contact with it and the rhizome not buried deeply. Keep the medium damp, never sodden.
- Put the container in warmth and bright indirect light. A loose clear cover can hold humidity, but include ventilation or open it regularly so condensation does not become a stale, wet microclimate.
- Wait for roots and fresh growth before moving the cutting into a normal aroid mix. Transition gradually and keep the first pot small enough to dry at a reasonable pace.
New leaves can take weeks to appear, especially after division. A cutting that is firm and not losing tissue may be working below the surface, so do not keep unpotting it to check for roots. If the rhizome becomes soft, dark, or foul-smelling, remove the damaged section and reassess whether any viable node remains.
Catch Pests Before They Spread
Inspect the undersides of leaves, the petiole joints, and the rhizome surface at least weekly. NC State Extension lists mealybugs, aphids, scale, thrips, and spider mites among common philodendron problems; RHS also calls out mealybugs, red spider mites, and scale. (NC State Extension; RHS)
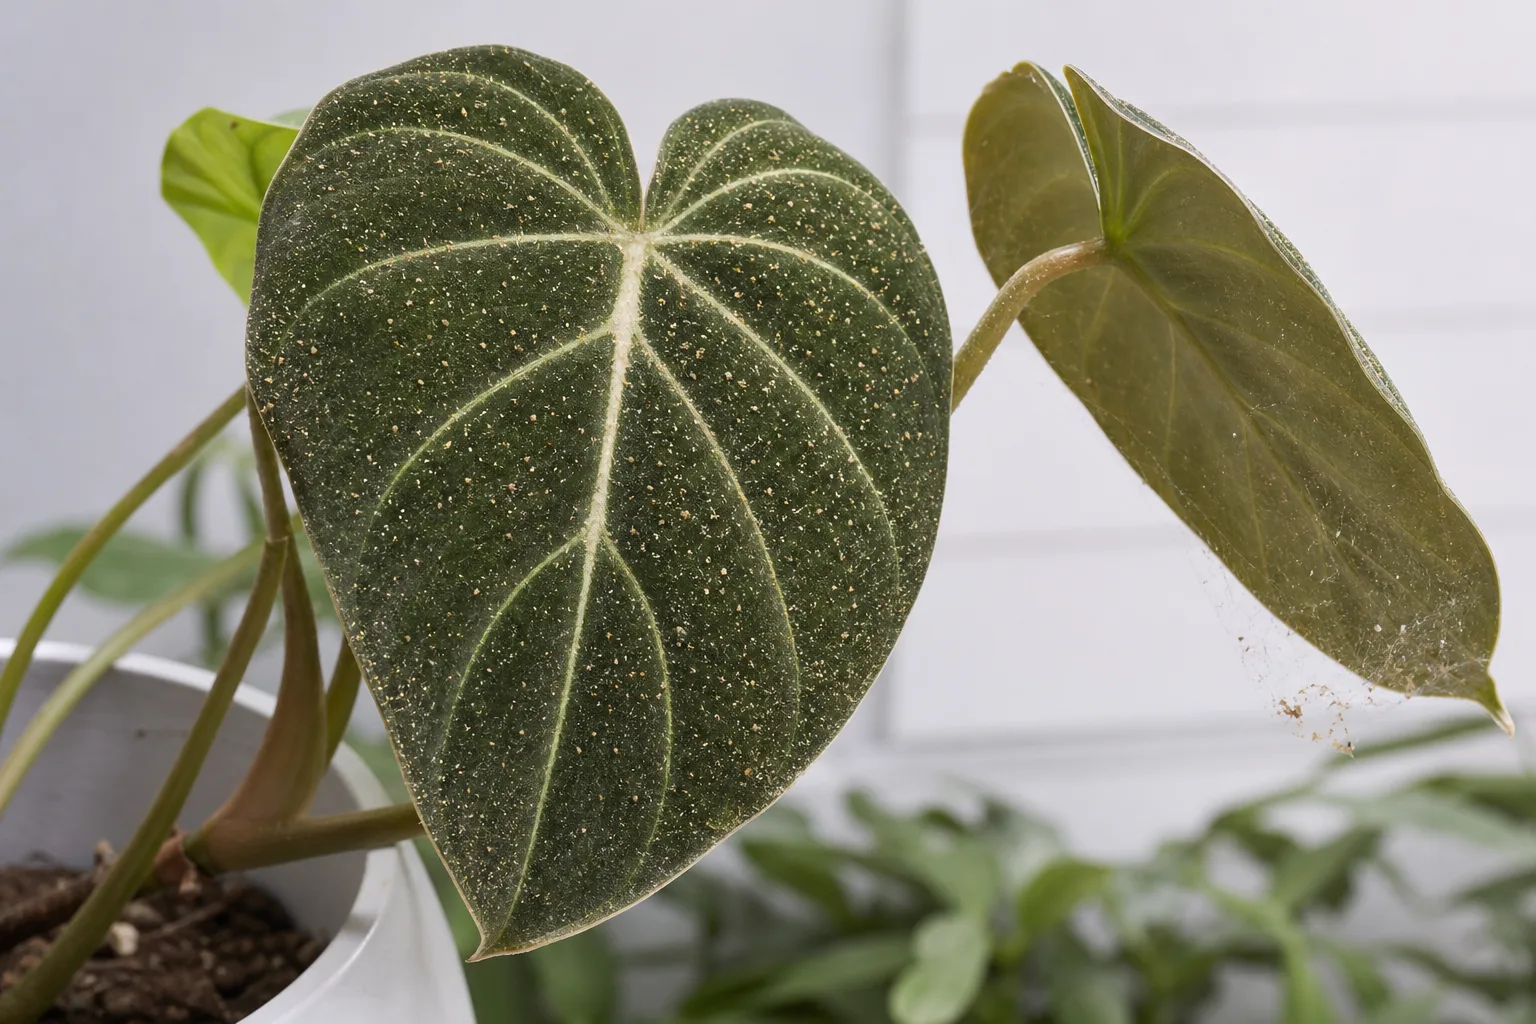
Early signs include fine stippling, silvery scarring, sticky residue, cottony clusters, raised brown shells, distorted new growth, or fine webbing. A magnifying glass helps because several pests are small enough to miss on a dark, textured leaf. Quarantine a suspect plant before it touches a collection, and remove heavily damaged foliage only after checking that it is not the main source of photosynthesis.
Start with physical control: rinse or wipe leaves gently, clean the growing area, and repeat the inspection several days later. If you use a pesticide or horticultural soap, choose a product labeled for the pest and the plant, follow its label exactly, test a small area first, and repeat only as directed. “Natural” does not mean risk-free; some oils and soaps scorch leaves, especially in strong light or hot rooms.
Troubleshoot Yellow, Drooping, or Brown Leaves
Start with the pattern and the root zone rather than applying a single cure. One old leaf at the base turning yellow is different from several new leaves yellowing while the pot stays saturated. Damage that appears only on the window-facing side suggests light stress more strongly than a uniform decline across the plant.
Yellow leaves: check whether the soil is staying wet, the plant has recently been moved, light is weak, or pests are present. If the newest leaves are pale with green veins, do not assume a nutrient deficiency from appearance alone; inspect roots, review water quality, and consider whether the mix has collapsed before feeding.
Drooping leaves: compare a light, dry pot with a heavy, saturated one. Dryness calls for a thorough drink and a better drying routine afterward; wetness calls for stopping automatic watering and checking drainage and roots. Drooping after repotting can also reflect temporary root disturbance, especially if the rhizome remains firm.
Brown or crispy edges: look for a combination of dry mix, dry air, hot sun, fertilizer salts, or a heating vent. The damaged tissue will not turn green again, so correct the cause and trim only the dead edge for appearance once the plant is stable.
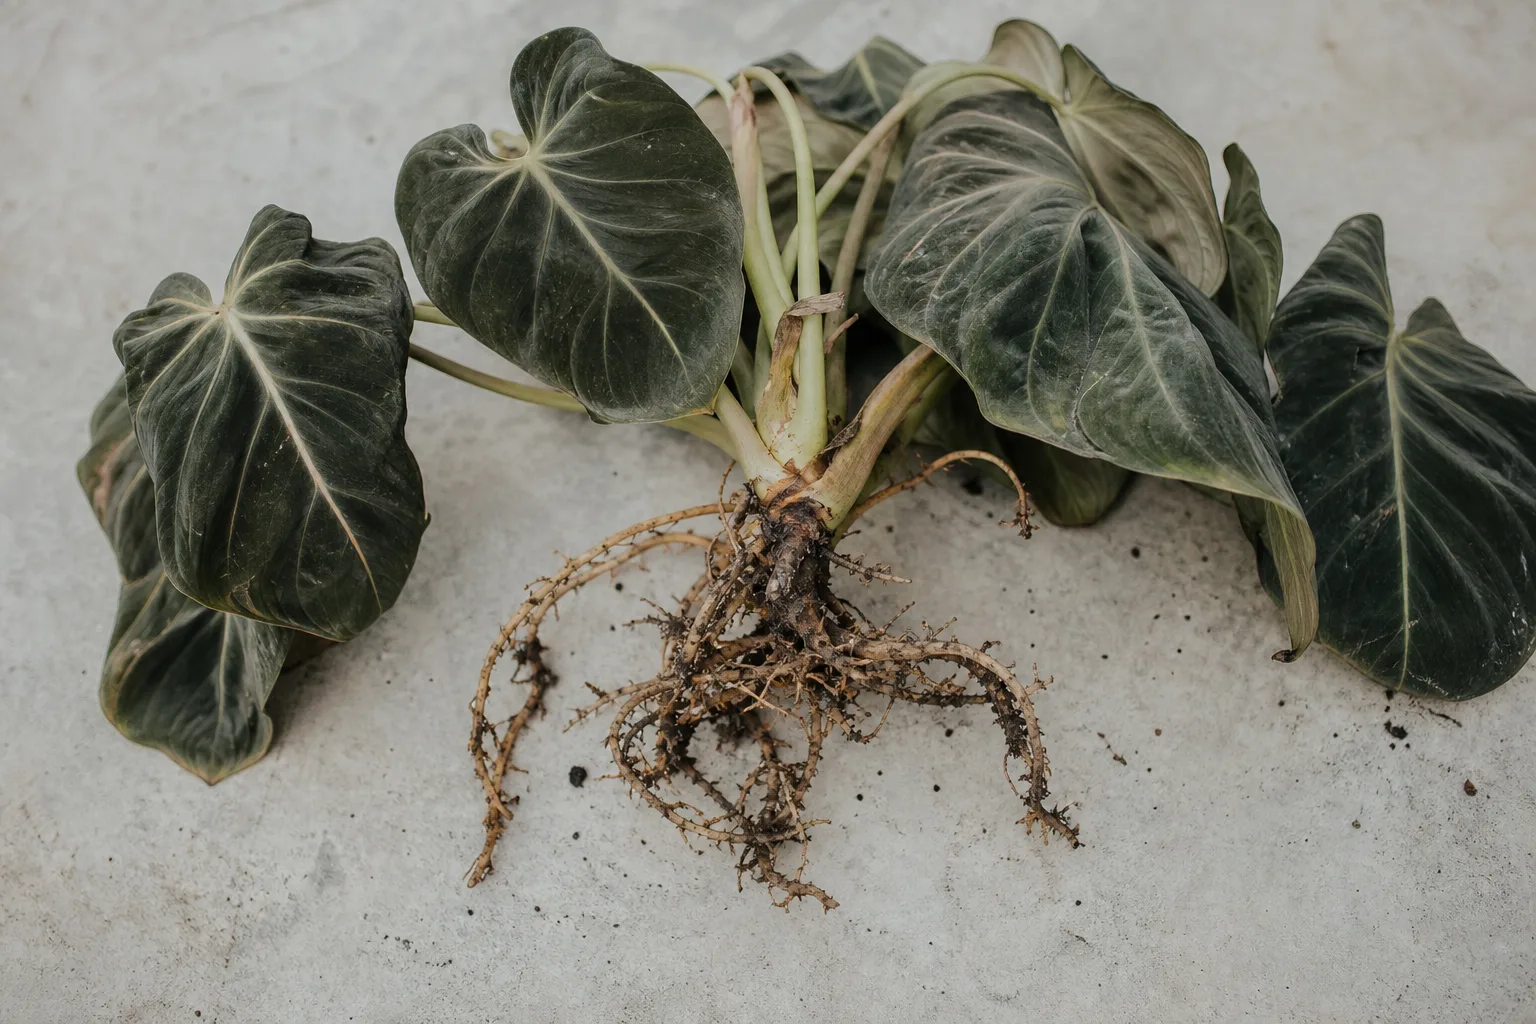
If the rhizome or roots are soft and dark, unpot the plant and remove only tissue that is clearly rotten with a sterilized blade. Repot into fresh, airy medium in a clean pot, keep the rhizome at the surface, and wait until the new setup has partly dried before watering again. A plant with little viable tissue may not recover, so avoid promising a rescue when the growth point itself has collapsed.
When New Leaves Stay Small
Small new leaves usually mean the plant is not yet getting the combination of light, root health, warmth, and consistent moisture needed to invest in larger foliage. Brighten the location gradually, check that the root system is not compacted or rotting, and make sure the rhizome has room to advance.
Do not chase leaf size with heavy fertilizer. Nutrients support growth only when the plant can photosynthesize and absorb water through healthy roots. A stable routine over several new leaves is a better measure than comparing one unfurled leaf with a mature leaf from a different growing condition.
Outdoor Growing and Seasonal Adjustments
Gloriosum is tropical and can be grown outdoors year-round only where temperatures stay warm enough and the site offers filtered light, protection from heavy rain, and excellent drainage. In cooler climates, treat outdoor time as a warm-season option and bring the plant inside before nights become cold, rather than waiting for visible damage.
An outdoor porch or shaded patio can provide stronger light and faster drying than an indoor shelf. Acclimate gradually, keep the pot out of direct midday sun, inspect for hitchhiking pests before bringing it back indoors, and adjust watering because wind and heat can dry the mix faster. A sudden move from a dim room to open sun is one of the quickest ways to scorch velvet leaves.
In winter, reduce feeding as growth slows, move the plant away from cold glass, and expect longer intervals between waterings. Do not water more often to compensate for dry heated air; improve the room environment while protecting the roots from staying wet.
Pet and Child Safety
Keep Gloriosum where children and pets cannot chew it. The ASPCA lists Philodendron species as toxic to dogs and cats because of insoluble calcium oxalate crystals, with possible signs including oral irritation, intense burning in the mouth, drooling, vomiting, and difficulty swallowing. (ASPCA)
Wear gloves for pruning, propagation, and root inspection, and wash tools and hands afterward. If a pet may have chewed the plant, contact your veterinarian or the ASPCA Animal Poison Control Center promptly rather than waiting for symptoms to worsen; do not induce vomiting unless a veterinary professional tells you to.
Conclusion
Successful Philodendron gloriosum care comes down to matching the setup to the plant’s architecture. Give the rhizome horizontal room, keep it near the surface, use an airy mix and a draining pot, and water when the root zone—not the calendar—says it is ready.
Bright filtered light, stable warmth, moderate humidity with airflow, and gentle feeding will support new leaves, but patience is part of the routine. Inspect weekly, change one variable at a time, and treat yellowing, drooping, pests, or brown edges as clues to investigate rather than invitations to add more water or fertilizer.