How to Propagate Monstera Adansonii
Propagate a Swiss cheese plant with the right node, clean cut, and rooting setup. Compare water, soil, and air layering, then troubleshoot rot or stalled roots.
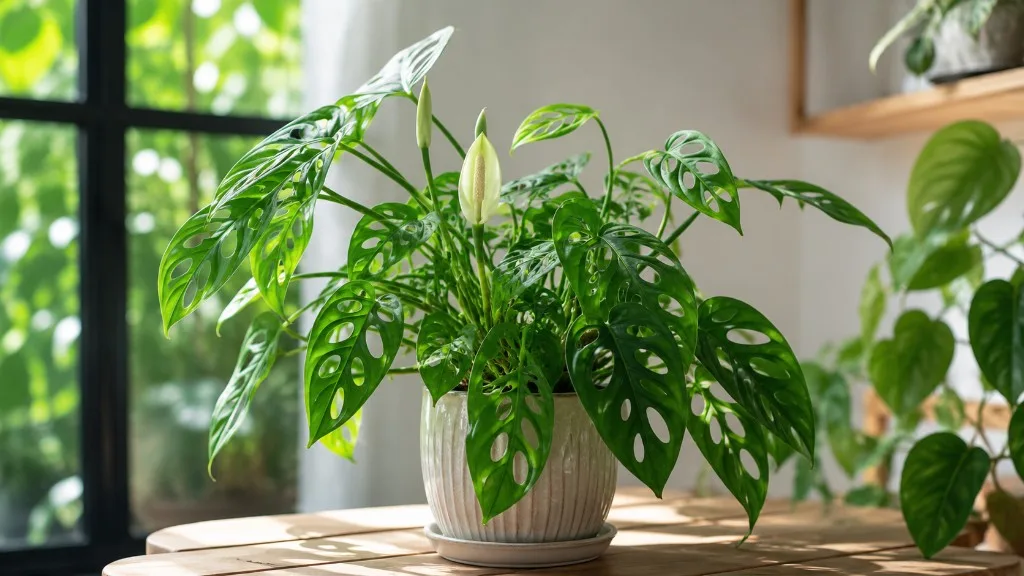
If you want to propagate a Swiss cheese plant, begin by finding a node, not by choosing the prettiest leaf. A node is the small joint on the stem where a leaf, bud, or aerial root emerges; it contains the growth tissue a cutting needs to make roots and a new shoot. Cut below a healthy node, then root the piece in water or an airy medium. If you want the vine to keep feeding the section while roots form, use air layering.
Monstera adansonii is a fast-growing tropical climber, and NC State Extension lists stem cuttings as its recommended propagation strategy. That does not mean every piece of stem will grow: a leaf or petiole without a node may stay green in water for a while, but it cannot develop into a complete plant. (NC State Extension Plant Toolbox)
The quick answer: start with a node
For the highest chance of success, choose a firm, healthy vine with at least one visible node and one attached leaf. Disinfect sharp pruners, cut about a quarter inch below the node, and place that node in water or against a moist, airy rooting medium while keeping the leaf above the moisture line. Give the cutting warmth and bright, indirect light; direct midday sun can heat a jar or dehydrate a leaf before roots form.
Choose water propagation if you are new to cuttings or want to see the roots. Choose direct soil propagation if you would rather avoid a later water-to-soil transition and can maintain steady moisture without making the mix soggy. Choose air layering when the parent has one valuable vine, the node is hard to detach safely, or you want the cutting to stay supplied by the parent until roots are visible.
The first white root and a transplant-ready root system are different milestones. In good growing conditions, you may see the first roots in a few weeks, but the cutting can take longer to make enough branching roots to handle potting. Montana State University Extension gives two to four weeks as a common rooting range for many herbaceous cuttings while stressing that the species and conditions change the timeline. (Montana State University Extension)
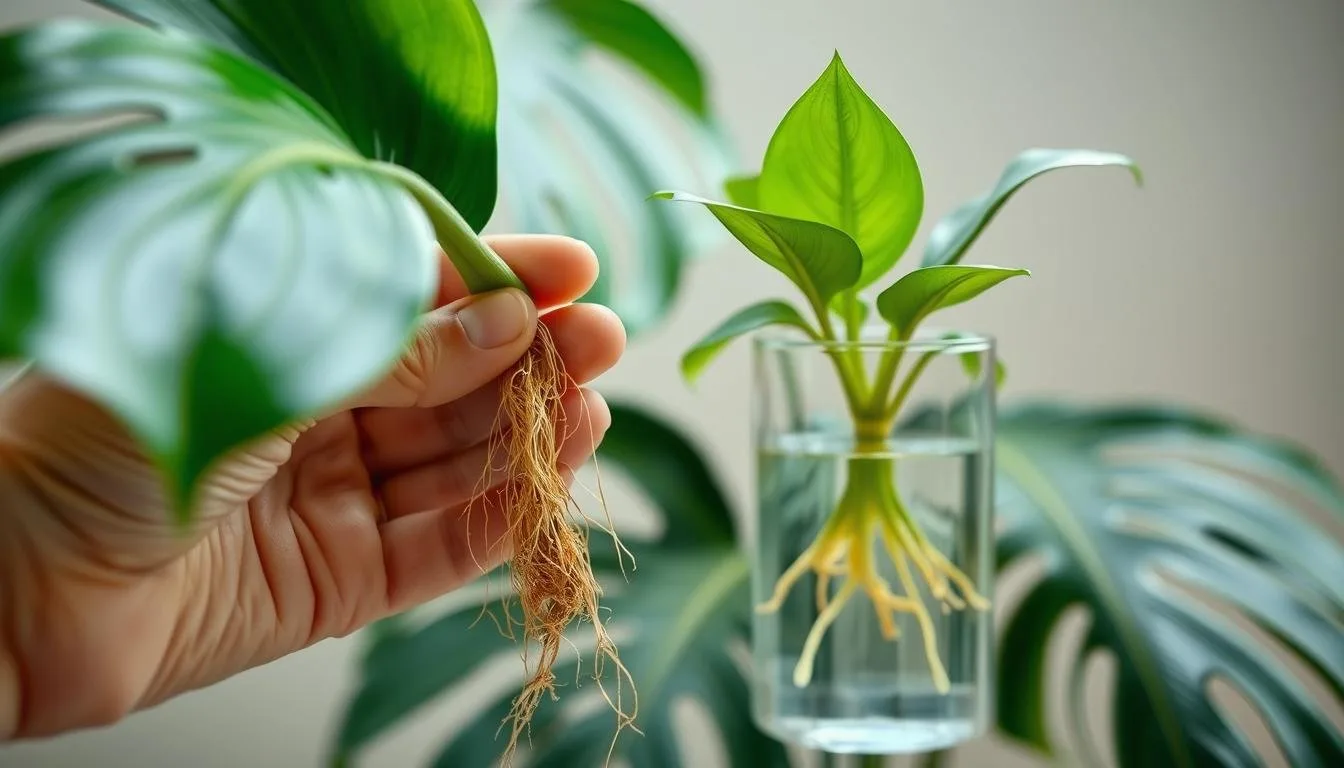
Know the node before you cut
Look along the vine for a joint where the leaf stalk meets the stem. On Monstera adansonii, the node may look like a slight swelling, a narrow ring, a dormant bud, or a small bump that is already producing an aerial root. Turn the vine slowly rather than relying on the front of the leaf; the useful tissue is on the stem, often just behind the petiole.
Node, internode, petiole, and aerial root are not the same
A node is the growth point. An internode is the bare stretch between two nodes. A petiole is the stalk that holds the leaf blade away from the stem. An aerial root is the cord-like root that grows from the stem and helps a climbing Monstera attach to a support. Montana State Extension explains that nodes contain active tissue capable of forming new structures, while internodes contain much less of that regenerative tissue. (Montana State University Extension)
For a cutting, the node is essential; a leaf, long petiole, or bare internode is not a substitute. An aerial root is helpful because it shows that the stem is prepared to root, but you do not need to find one. A cutting with a healthy node and no visible aerial root can still make new roots.
Keep the rules for the parent and the cutting straight. On the parent plant, cut just above a node you want to leave behind so that node can push a new shoot. On the piece you plan to root, cut below the node so the growth point travels with the cutting. One poorly placed cut can leave the parent without the node you intended to activate and leave the cutting with only a leaf stalk.
Choose the right time—and know when to wait
Spring and summer are usually the easiest seasons because warmth, light, and active growth support faster rooting. You can propagate indoors at other times, but a winter cutting on a cold, dim windowsill may sit unchanged for weeks and lose a leaf before it has enough roots. The plant does not read a calendar; it responds to the conditions around the node.
Wait if the parent plant is already struggling with widespread pests, soft stems, root rot, severe drought, or a recent move into a very different light level. A small, healthy cutting is not a good insurance policy if the source plant is actively collapsing. First stabilize the parent, then take a cutting from firm tissue; the exception is rescue work, when removing a clean, viable node may be the best way to preserve part of the plant.
Avoid taking a large number of cuttings from a small plant with only a few leaves. Each leaf helps power the cutting before its roots function, and the parent needs enough foliage to recover. If you want to make an established pot fuller, remove a manageable section, root it, and repeat later rather than stripping the vine in one session.
Gather tools and prepare the parent plant
You do not need a specialized propagation station. Prepare sharp bypass pruners or clean scissors, a clean jar if using water, a small pot with a drainage hole for soil, and a light, airy rooting medium. If you use a humidity cover, add stakes or chopsticks so the plastic does not rest against the leaf.
Clean the cutting tool before you start and again after cutting a questionable or diseased section. A smooth cut is easier for the plant to seal than a crushed stem, and clean blades reduce the chance of carrying soft-rot organisms from one piece to another. Set up the jar or pot before cutting so the fresh end does not sit exposed while you search for supplies.
Water the parent normally in the days before propagation, but do not soak it simply because you plan to cut it. A hydrated, actively growing plant is a better source than a wilted one, while waterlogged soil adds stress and makes disease more likely. Inspect the vine for firm green tissue, intact leaves, and nodes you can clearly separate.
Take a cutting that can actually grow
Choose a section with at least one node and, if possible, one healthy leaf. A longer cutting with two or three nodes gives you more options for positioning and more than one possible rooting point, but a short node-and-leaf cutting is often easier to keep upright and hydrated. Do not bury every leaf or submerge the whole vine to compensate for a short stem.
Make the cut below the lowest node you want on the new plant, leaving a small piece of stem beneath it. Remove any leaf that would sit in water or under the rooting medium. If the cutting has a long petiole, do not confuse that stalk with the stem; the petiole can remain above the setup while the node contacts the water or medium.
Tip, mid-vine, and node-only cuttings
A tip cutting includes the growing end of the vine and usually begins with a leaf close to the newest growth. It is straightforward to handle, but taking it removes the active tip from the parent. A mid-vine cutting comes from between the tip and base; it can be excellent propagation material, especially when it includes multiple nodes, but label the top and bottom before placing it so you do not plant it upside down.
A node-only cutting, sometimes called a wet stick, has no leaf. It can work if the node is viable, but it has no leaf surface to make energy while roots and a new shoot develop, so it is a slower, less forgiving project. For a first attempt, use a node with one healthy leaf rather than testing the limits of a leafless piece.
If you are cutting a long vine into several pieces, pause after each cut and check the next node. It is easy to count the leaf stalk instead of the stem joint and produce a pile of attractive but nonviable leaf cuttings. Keep the pieces oriented as they grew, with the end that was closest to the roots going down.
Water propagation: easiest to monitor
Water is the most approachable method because you can see the node and the roots without disturbing the cutting. It is particularly useful when you are still learning to recognize healthy roots, although the visible setup can tempt you to move or clean the cutting too often.
Set up the jar and care for the cutting
Fill a clean glass with room-temperature water high enough to cover the node but not the leaf blade. If the cutting has several nodes, submerge the lowest one or two and keep the upper nodes, petioles, and leaves above the waterline. A clear container makes inspection easy; an opaque container can also work, but you should still check the node for softness rather than assuming a dark jar prevents every problem.
Place the jar in bright, indirect light. A few gentle morning rays may be tolerable, but avoid hot afternoon sun through glass, which can warm the water and stress a leaf. Keep the cutting away from heating vents, air-conditioner blasts, and cold glass at night; stable warmth matters more than chasing a precise humidity percentage.
Change the water about weekly, or sooner if it becomes cloudy, slimy, or foul-smelling. Rinse the jar and refill it to the same level, then return the node to the water without scraping away every new root. Do not add fertilizer to the rooting water; Montana State Extension notes that stored carbohydrates are generally sufficient for herbaceous cuttings while they form roots. (Montana State University Extension)
Ohio Tropics’ species-specific propagation walkthrough uses the same practical checkpoints: keep at least one node and one leaf on the cutting, change the water at least weekly, and pot up once the roots are established. Treat those points as a useful baseline, not a deadline, because a cool room or weak light can slow the process. (Ohio Tropics)
Watch the node, not just the leaf. Healthy new roots are usually firm and pale, while a brown, hollow, or mushy stem section is a reason to remove the damaged tissue and restart with a clean cut above the rot. A leaf that yellows once during rooting is not automatically a failure, but yellowing paired with a soft node or foul water means the cutting needs immediate inspection.
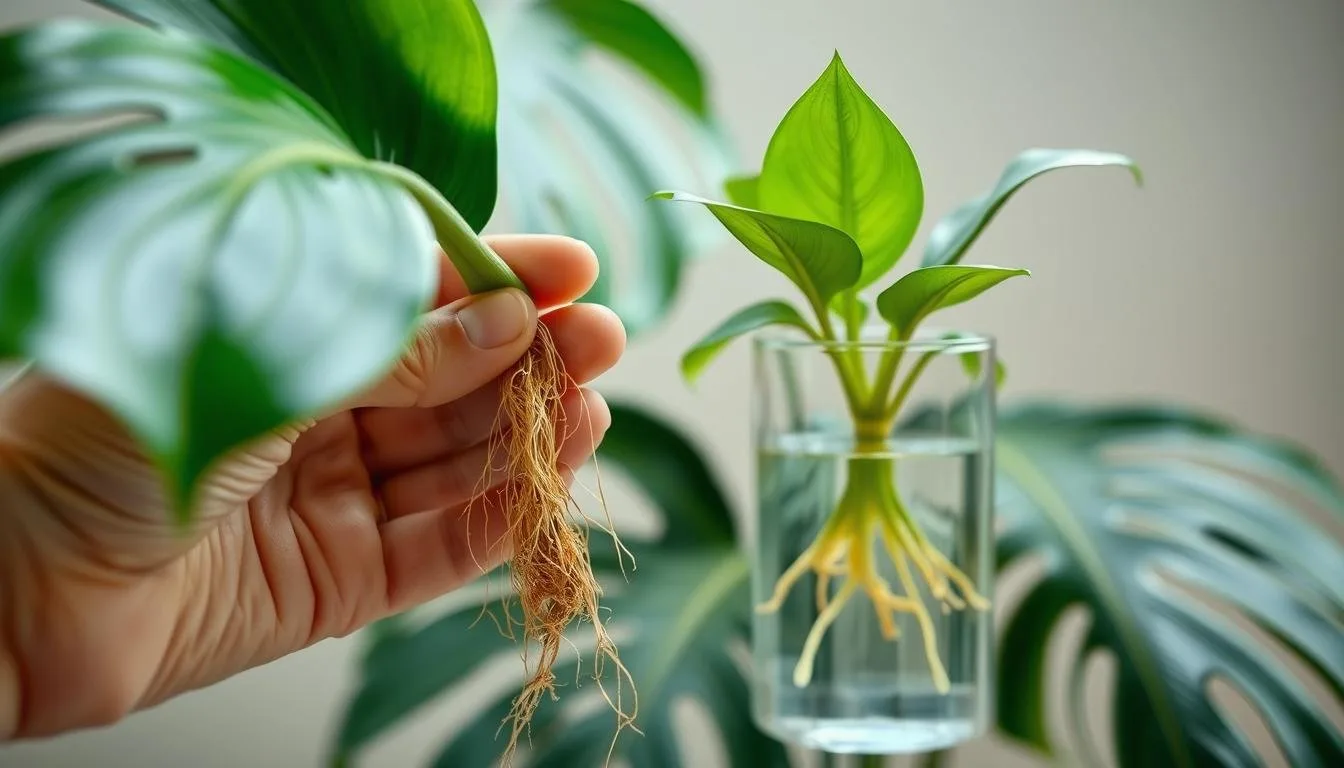
Move a water-rooted cutting into soil
Move the cutting when it has several firm roots and some side branching, not the moment a single hair appears. A useful practical target is roughly 1 to 2 inches of healthy root growth, with more patience needed for a thick or leafy cutting; Montana State Extension recommends transplanting many herbaceous cuttings at that stage to reduce the shock of the move. (Montana State University Extension)
Use a small pot with a drainage hole and a lightly moistened, well-draining houseplant mix. Make a hole first, lower the roots into it without bending them into a tight knot, and position the node just at or slightly below the surface. Press the mix gently around the stem so it is stable, but do not compact it into a dense plug.
Water once to settle the mix, let excess drain completely, and keep the pot in bright, indirect light. For the next week or two, keep the medium evenly moist but not constantly saturated; waterlogged soil has less air for roots and can turn a healthy transition into rot. A little drooping or one older leaf yellowing can happen during the adjustment, especially if the roots were disturbed, but new growth is the clearest sign that the cutting has re-established.
Soil propagation: root directly in the final medium
Direct soil propagation avoids the change from water-grown roots to potting mix. It is a good fit if you have a small pot, can judge moisture by touch, and prefer not to handle fragile roots later. The trade-off is that you cannot see whether the node is rooting, so you must resist the urge to pull the cutting up every few days.
Build an airy mix and a humid microclimate
Use a sterile, well-drained soilless mix such as seed-starting medium or a houseplant mix opened up with perlite and fine orchid bark. The goal is a medium that holds a little moisture around the node but still contains air spaces after watering. If water sits in the pot for days, the mix is too dense for your room, the pot is too large, the light is too low, or some combination of the three.
Moisten the mix before planting so you do not need to blast the cutting with water afterward. Make a hole, set the node into the medium, and bury one node while keeping the leaf and most of the petiole above the surface. If you have a two-node cutting, bury the lower node and leave the upper one available for new growth rather than packing the whole stem underground.
Rooting hormone is optional for a healthy Monstera cutting; it is not a substitute for a viable node, clean tools, warmth, or oxygen in the medium. If you choose to use a labeled product, apply only as directed and keep powder off the leaf. Many vining houseplants root without it, so skip it if the cutting is already fresh and the setup is sound.
To hold humidity, place a clear bag or propagation dome over the pot with stakes supporting it above the leaf. Open the cover every few days to exchange air and inspect for mold, and remove it gradually once the cutting is growing. Keep the medium lightly and evenly moist, never standing in runoff; the cover reduces evaporation, so a watering schedule that worked for an uncovered pot may now be too wet.
Brittany Goldwyn’s Monstera adansonii walkthrough highlights the central soil-propagation trade-off: the cutting can root directly, but you cannot see the progress below the surface. Her practical fix—keep the cover from touching the leaf and open it periodically for air—turns humidity into a controlled aid instead of a sealed, soggy environment. (Brittany Goldwyn)
Give the pot bright, indirect light and warmth. Do not put a covered cutting in direct sun, where the small enclosure can heat rapidly. New growth may take a month or longer depending on season and conditions; gently tugging every week is more likely to damage new roots than to reveal useful information.
Air layering: root the node before detaching the vine
Air layering is the best method when you want to reduce the risk of detaching an unrooted piece from a single, prized vine. The node stays connected to the parent while it forms roots inside moist sphagnum moss, so the cutting continues receiving water and energy from the established root system. Wisconsin Extension describes Monstera propagation by stem cuttings, air layering, and simple layering, and notes that clinging aerial roots can root when they reach a suitable surface. (University of Wisconsin Extension)
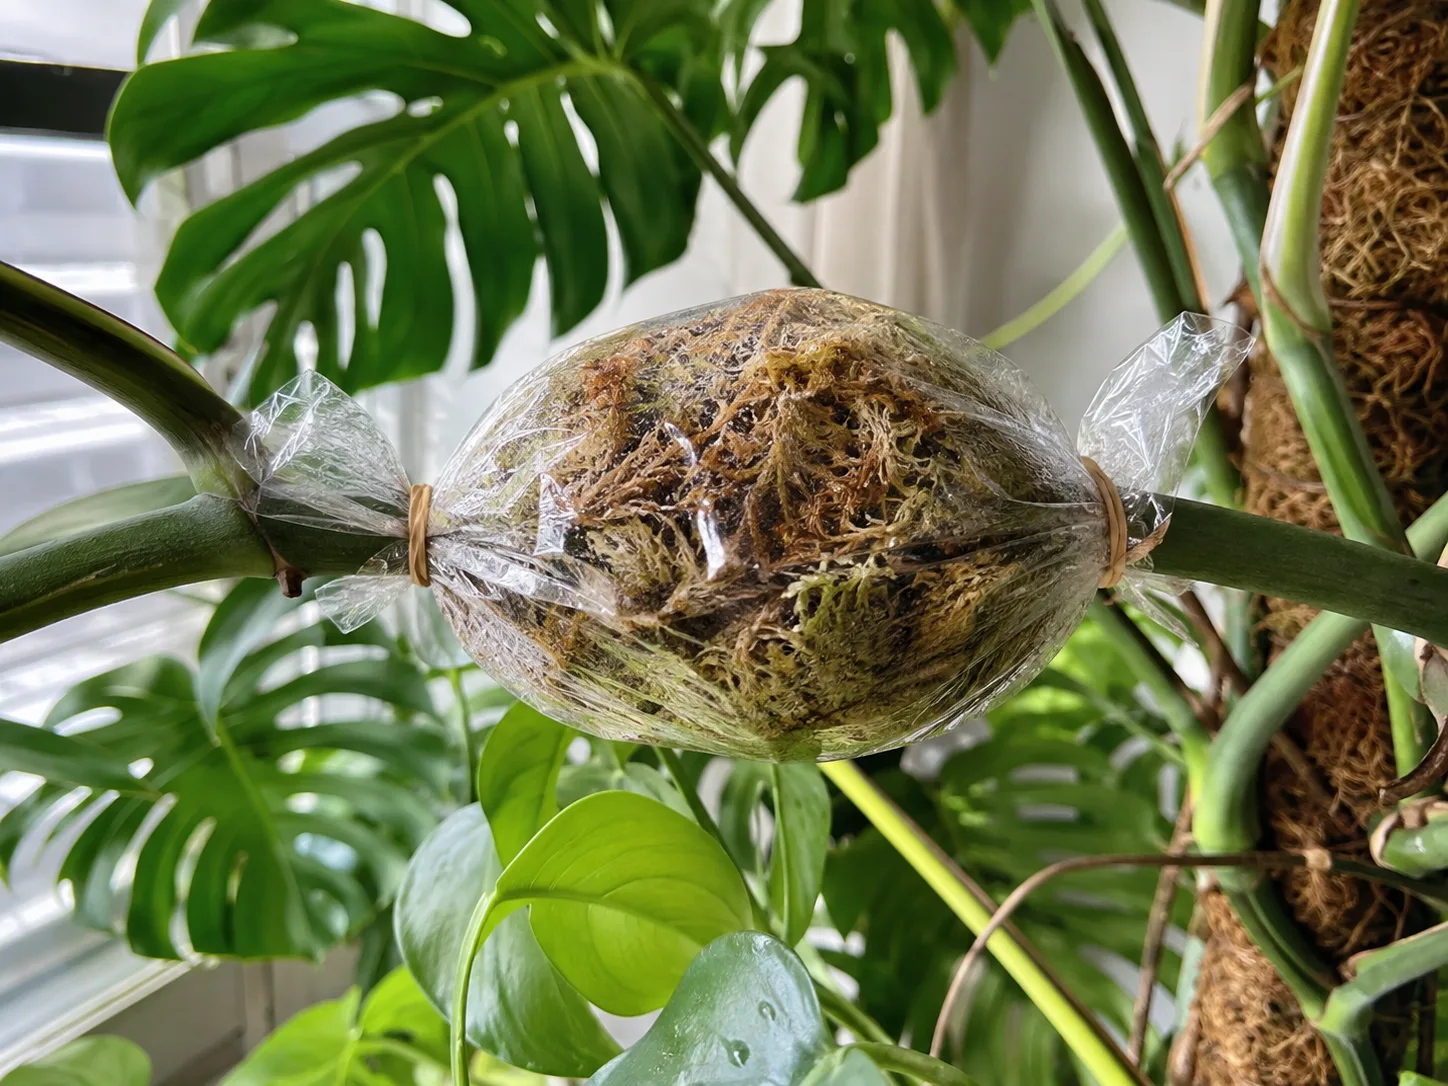
Choose a healthy node with a leaf above it and, ideally, an aerial root already emerging nearby. Soak a small handful of sphagnum moss, squeeze it until damp rather than dripping, and wrap it around the node. Secure the moss loosely with clear plastic wrap or a small clear bag, fastening above and below the ball so the stem is not constricted. The plastic should retain moisture while still allowing you to open it for inspection.
If the node has no aerial root, you can still try layering, but it may be slower and less predictable. Some growers make a very shallow nick in the stem near the node to encourage rooting; do not cut deeply enough to sever the vine or crush the node. The essential job is keeping the node in contact with clean, damp moss while the parent remains attached.
Check the moss every few days at first and re-moisten when it begins to dry. Do not keep it dripping wet, because a sealed, waterlogged moss ball can rot the stem. When you can see several firm roots filling the moss rather than one tiny nub, cut the stem just below the rooted section with clean pruners and pot it into a small, airy mix. Keep the new plant shaded from harsh sun and evenly moist while it adjusts.
Aftercare that turns roots into a plant
New roots are a beginning, not proof that the cutting can handle an adult plant’s routine. Keep a rooted cutting in bright, filtered light, warm indoor conditions, and stable moisture while it produces new leaves. NC State Extension recommends bright indirect light, moist but well-drained soil, warm conditions, and protection from cold drafts for Monstera adansonii; it lists temperatures below 50°F as a risk for the species. (NC State Extension Plant Toolbox)
Water by the medium, not by the calendar. A small pot may dry faster than the parent plant’s larger container, while a covered pot or cool room may stay wet much longer. Check the upper layer and the pot’s weight, then water thoroughly when the mix has begun to dry; let the drainage hole do its job and empty any saucer.
Do not fertilize an unrooted cutting or use fertilizer to force a new leaf. Once the cutting has rooted and is showing active growth, resume a restrained houseplant feeding routine appropriate for your product and season. The plant needs functioning roots and adequate light before extra nutrients can help.
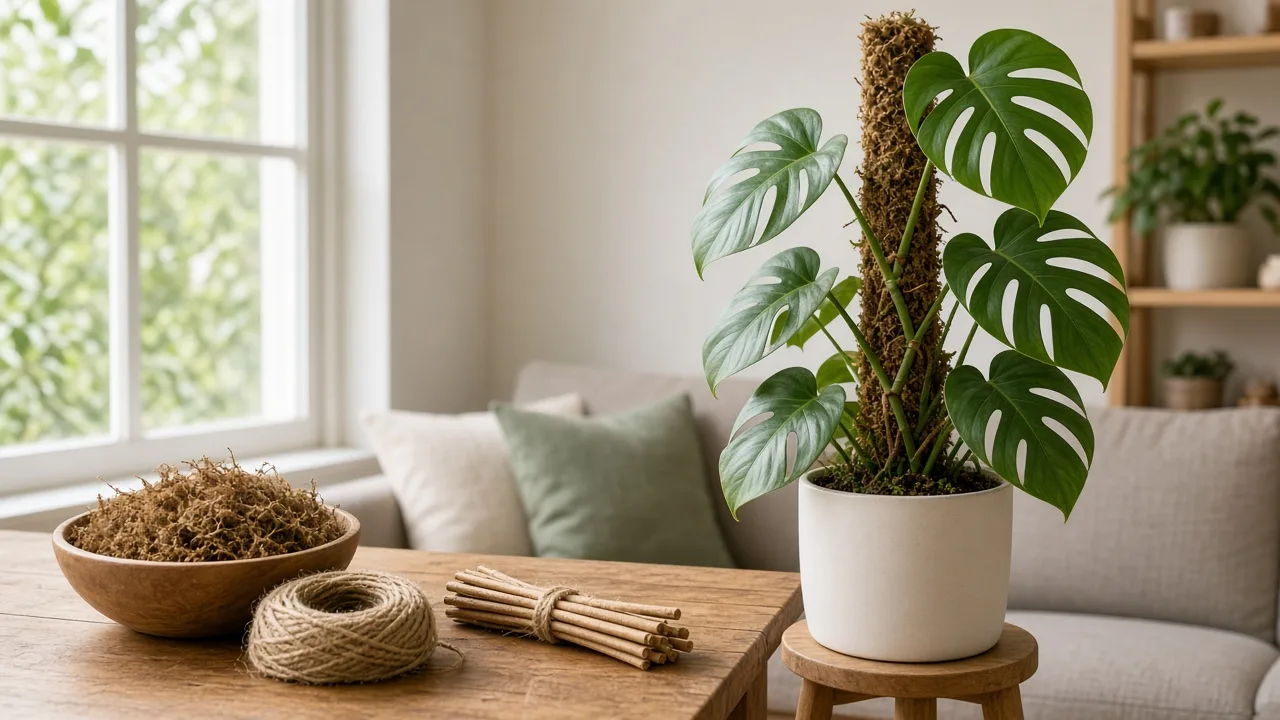
Decide whether the new plant will climb or trail. Monstera adansonii naturally uses aerial roots to attach to trees, and a moss pole or trellis can help a rooted cutting orient upward. If you are training it to climb, install support while the plant is small and tie the stem loosely; do not wind or tie a leaf petiole so tightly that it cannot move.
Troubleshoot yellowing, rot, and stalled roots
Propagation problems are easier to solve when you inspect the stem and setup before changing everything. Use this sequence: check for a node, check whether the node is firm, check the moisture line, then check light and temperature. A yellow leaf by itself is a symptom; a yellow leaf plus a mushy node points to a very different action.
- The leaf is yellow but the node is firm: Reduce disturbance, check that the cutting is not in hot direct sun, and keep the rooting medium appropriately moist. An older leaf may be sacrificed while the cutting redirects resources to roots.
- The stem is brown, soft, or foul-smelling: Remove it from water or soil and cut back to firm tissue with a clean blade. If no viable node remains above the damage, the piece is not recoverable; start again with a healthy section rather than repeatedly replanting rot.
- Roots are not appearing: Confirm the node is actually touching water or medium, then improve warmth and bright indirect light. A leaf-only cutting, a dormant or damaged node, a cold room, and a very dry medium can all look like “slow rooting.”
- Roots appear but the cutting wilts after potting: Check that roots were not crushed, that the pot is not oversized, and that the new mix is lightly moist. Give it several days of stable conditions instead of moving it back and forth between water and soil.
- The soil has mold: Increase air exchange, remove visibly decaying material, and let the surface dry slightly before the next small watering. A humidity cover that touches the leaf or stays sealed in low light is often the real problem.
- The cutting wrinkles: It is losing water faster than the unrooted stem can replace it. Move it out of harsh sun, restore appropriate moisture, and consider water propagation or a looser humidity cover if the node is still firm.
Do not diagnose root rot from a slow week alone. Roots may take longer when days are short or the plant is adjusting, while rot usually brings a cluster of signs: softness, discoloration, odor, collapsing tissue, or water that turns cloudy soon after a change. Fix the specific failure instead of adding more water, more fertilizer, or more products by reflex.
Plant several cuttings together for a fuller vine
One rooted cutting makes one new vine; it does not automatically create a bushy pot. If your goal is a full hanging basket, root several compatible cuttings and plant them together once each has a useful root system. Place the nodes at a similar depth, spread the stems around the pot, and leave room for each leaf to receive light.
You can also root a healthy cutting directly in the parent plant’s container, but check the moisture and root space first. A very large pot that is already slow to dry can keep the new section too wet, while a crowded root ball can make it difficult to position the node. The practical reason to use a small nursery pot first is control: you can see whether the new plant is established before adding it to a more complicated container.
For a climbing display, orient the stems toward the support and tie them loosely as they lengthen. For a trailing display, let the vines fall naturally over the rim. Better light and a stable support will do more for strong, attractive new leaves than cutting every vine to the same length.
Safety and sanitation for people, pets, and plants
Monstera adansonii contains calcium oxalate crystals and is listed by NC State Extension as toxic to people and pets if ingested; its sap can also irritate skin. Wear gloves if you are sensitive, wash your hands after cutting, and keep fresh cuttings, dropped leaves, and used water away from children and animals. (NC State Extension Plant Toolbox)
Keep the work surface clean and do not share unwashed tools between plants. Wipe away sap, discard rotting tissue, and clean the jar before starting another cutting. If a plant has suspicious mottling, widespread pests, or a soft stem, isolate it while you assess it rather than using its cuttings to spread an unknown problem through your collection.
Conclusion
Successful Swiss cheese plant propagation is mostly an exercise in choosing the right piece. Find a healthy node, cut below it for the new plant, keep the leaf above the moisture line, and give the cutting bright indirect light, warmth, air, and time.
Use water when seeing the roots will help you learn, soil when you want the cutting to root directly in its growing medium, and air layering when the parent vine is too valuable to detach before roots form. If the goal is a fuller pot, root several node-bearing cuttings and plant them together; a single shortened vine cannot create a dense cluster by itself.