How to Propagate Plant Cuttings at Home
Learn how to turn plant trimmings into new plants: find a viable node, choose water or soil, prevent rot, and know when a cutting is ready to pot up.
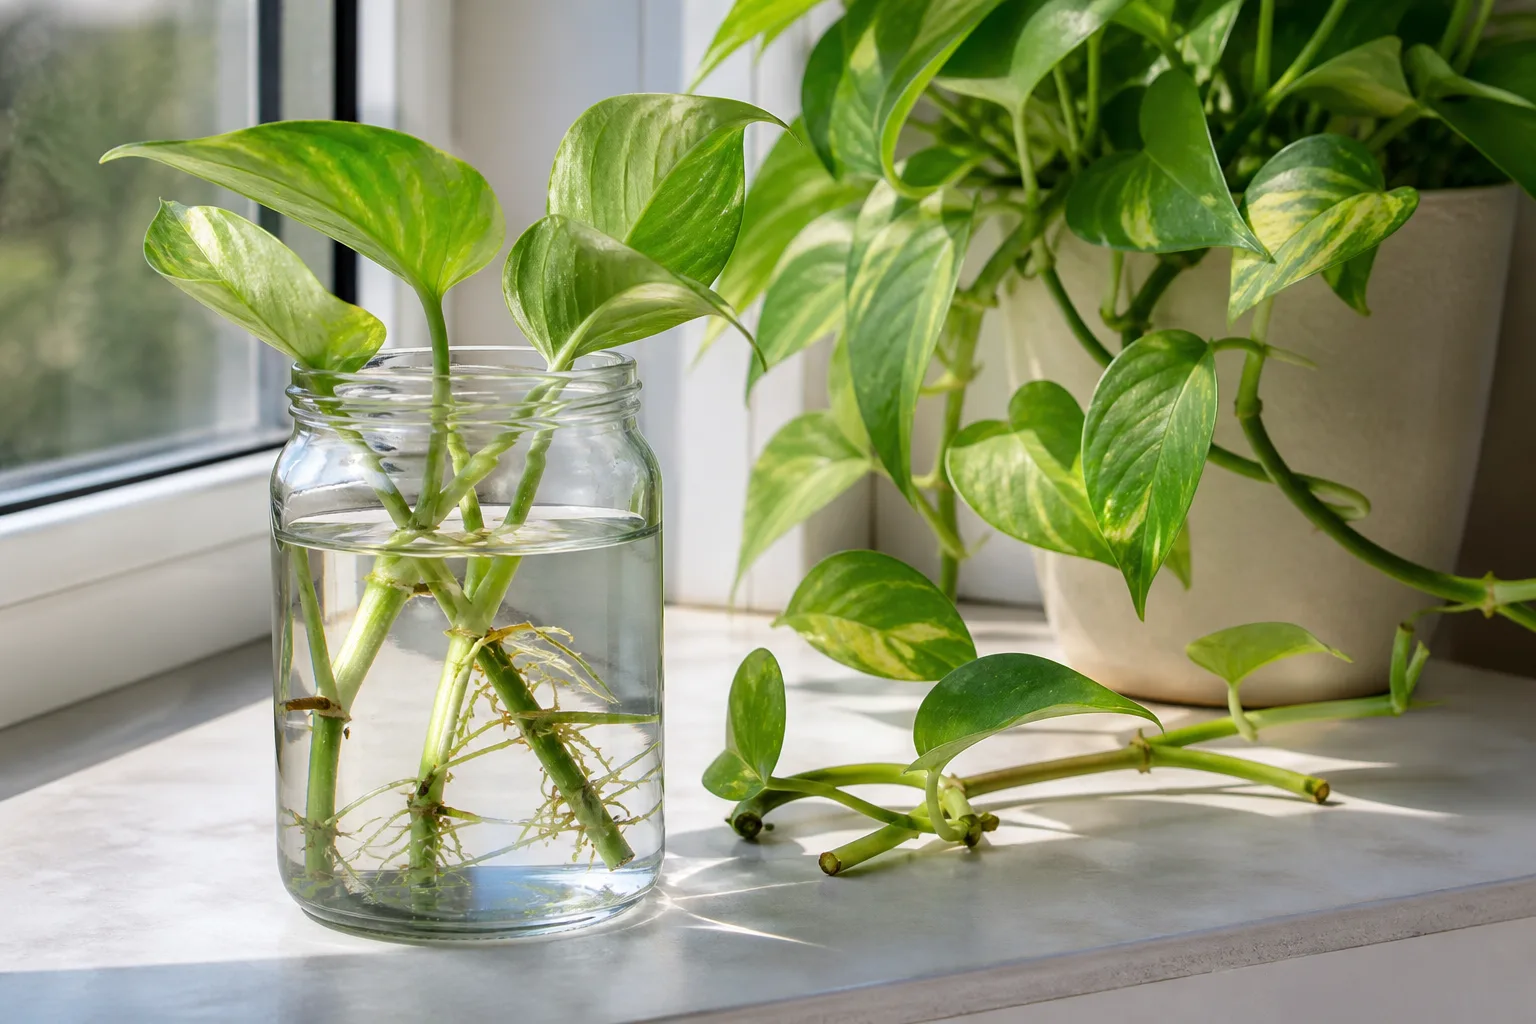
The best propagation material is often the part you were about to put in the compost bin. A healthy stem with at least one node can become a new plant, but a random leaf, diseased section, or mushy piece cannot be rescued by wishful thinking.
The reliable workflow is simple: sort the trimmings, match the plant to a method, make a clean cut, keep the node in the right environment, and wait for roots before asking for new top growth. That sequence matters more than buying a shelf full of propagation gadgets.
Start with a healthy parent plant
Propagation is a multiplication step, not a treatment for a plant that is already failing. Take cuttings from a parent that has firm stems, active growth, and no obvious pests, rot, or spreading leaf disease. A stressed plant has fewer reserves to share, and a cutting taken from an infested plant can spread the problem to every jar on your windowsill.
Pruning is a useful time to collect material because you are already removing lanky, damaged, or badly placed growth. Before you cut, decide what the pruning is meant to accomplish: shorten a bare runner, encourage branching, remove a weak stem, or simply make room. Keep only the pieces that are healthy enough to become plants; do not keep every offcut just because it has a leaf.
Use this quick sorting system after pruning:
- Propagate now: firm green stem, at least one visible node, healthy leaves, no pest or rot symptoms.
- Use another method: leaf with no node, succulent offset, basal pup, rhizome section, or a plant known to root by division instead.
- Quarantine first: material from a plant you are still inspecting for insects or disease. Do not put it beside clean cuttings.
- Compost: black, translucent, foul-smelling, brittle, badly dehydrated, or visibly diseased pieces.
That last category is a success rule, not a failure. Discarding one questionable trimming is cheaper than contaminating a tray of new plants.
Match the plant to the propagation method
The right method depends on where that plant stores its growth potential. The Royal Horticultural Society’s houseplant propagation guide describes propagation from sections of stem, root, leaf, or bud, with the technique changing by plant and season. For common leafy houseplants, stem cuttings are the most approachable starting point, but they are not universal.
Stem cuttings depend on nodes
A node is the joint on a stem where a leaf, aerial root, branch, or bud emerges. It is the key landmark because many vining plants can produce roots from that area. The stretch between two nodes is an internode; an internode may look healthy but, by itself, may not contain the tissue needed to make a new shoot.
Look for a cutting with one to three nodes and at least one healthy leaf. One node can root, especially on an easy pothos or philodendron, but two or three nodes give you more flexibility: one can sit in water or mix while another remains above the surface, and you have a backup if one section fails.
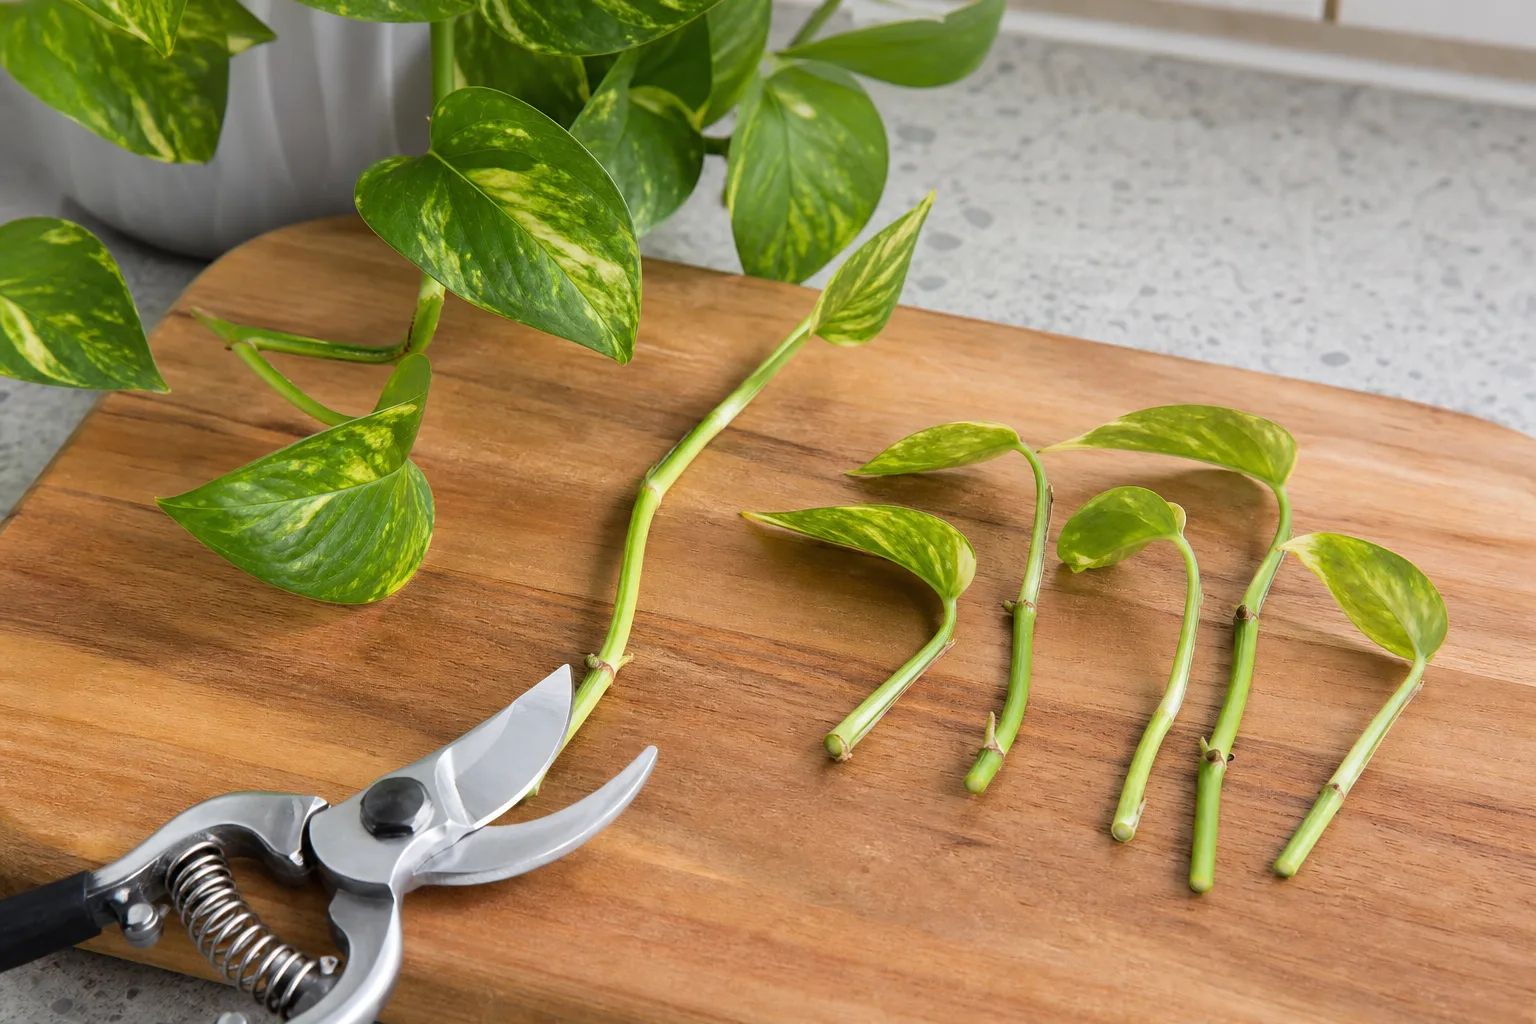
For most leafy stem cuttings, make the lower cut just below a node and keep one or two leaves above it. Do not bury or submerge the leaves. The node goes into the rooting environment; the leaves stay in air and provide energy while the cutting begins to form roots.
When leaf cuttings, offsets, or division win
A leaf without a node usually cannot create a whole new plant in the way a stem cutting can. Some plants, including many succulents, African violets, and snake plants, can make new growth from leaf tissue, but the method is plant-specific and may be slower or may change the look of a variegated cultivar.
Offsets and pups are better choices for plants that naturally make side shoots. Aloe vera is a classic example: separate a rooted offset rather than sticking an aloe leaf in water and waiting for a miracle. Calatheas and many prayer plants are generally more practical to divide at the root clump. Ferns may be divided or grown from spores; a trimmed fern frond is not automatically a cutting.
The RHS propagation techniques guide is useful for this broader decision because it treats cutting, division, layering, grafting, and seed propagation as different tools rather than interchangeable versions of the same recipe.
Choose water or soil before you cut
Water and soil propagation can both work. The better choice is the one that matches the plant and your ability to monitor it.
| Route | Best advantage | Main risk | Choose it when |
|---|---|---|---|
| Water | You can see roots forming | Submerged leaves or stale water can cause rot | You are learning, propagating a pothos-type vine, or want to monitor progress |
| Moist soilless mix | Roots develop in their final environment | You cannot see early progress and heavy mix stays wet | The cutting is prone to transplant shock or prefers a stable, airy medium |
| Moist sphagnum, coir, or perlite blend | Holds moisture while leaving air around the node | It can dry quickly or stay too wet inside a closed setup | You can check moisture and provide gentle humidity |
Water is convenient, not inherently better. The roots produced underwater are adapted to that environment, so a long water-rooted cutting may pause when moved into potting mix. Soil propagation skips that particular transition, but it requires closer judgment because a cutting can look unchanged while rooting below the surface.
Timing matters, too. Many indoor plants can be propagated whenever they are actively growing in a warm room, but a cutting taken during a dim winter stretch may root more slowly than one taken during spring or summer growth. If the parent has stopped making leaves, do not compensate with extra water or fertilizer; wait for better light and stable warmth, or take fewer cuttings and accept a longer rooting period.
Use the parent plant as your guide. If new leaves are unfolding, stems are firm, and the plant is using water normally, it has the reserves to support a small propagation batch. If it is already dropping leaves, sitting in cold wet soil, or recovering from a pest outbreak, stabilize it first. Propagation works best when the cutting is a byproduct of healthy growth—not an emergency plan for a collapsing plant.
Take a cutting that has a real chance
Prepare clean tools and a simple setup
Gather sharp scissors or pruning shears, a clean jar or small pot, a fresh propagation medium, a label, and clean water. A clear container is helpful for water rooting; a small pot with drainage is safer for soil rooting than a large decorative pot that stays wet for days.
Use a blade that cuts rather than crushes. Wipe it with rubbing alcohol before starting and again between plants, especially when working with several specimens. The Fine Gardening guide to propagating houseplants from cuttings emphasizes clean tools and healthy source material for a reason: a damaged cut has a harder time sealing, and dirty tools can move pathogens from one plant to another.
For a soil setup, use a light, fresh soilless mix—something based on perlite, coir, or fine bark rather than dense garden soil. Pre-moisten it so the first watering does not wash the cutting out of place. For water rooting, fill the jar high enough to cover the node but low enough to keep all leaves above the waterline.
Cut, label, and place each trimming
- Find the node before the blade moves. Trace the stem and mark the joint where a leaf or aerial root emerges.
- Make the cut just below the node. Leave enough stem above the node for the leaf and enough below it to anchor the cutting.
- Remove lower leaves. Strip away any leaf that would sit under water or in the mix. Keep one or two leaves at the top; a large leaf can be trimmed in half if it is losing water faster than the cutting can replace it.
- Label the cutting. Write the plant name and date. This becomes especially valuable when several cultivars look similar or when you are testing water and soil side by side.
- Place the node correctly. Set the node into clean water or just below the surface of the moist medium. Do not pack mix tightly around a fragile stem.
Keep the setup warm, bright, and out of harsh direct sun. A bright windowsill with filtered light is usually more useful than a dark shelf or a hot afternoon window. Humidity can reduce leaf stress, but a sealed bag that drips constantly creates a rot chamber; leave ventilation and check the cutting rather than relying on condensation as proof of success.
For the first week, change only one variable at a time. If a cutting wilts, move it away from the strongest light before adding a dome. If the medium stays wet for days, improve drainage before increasing warmth. If the water clouds, clean the jar and inspect the stem before topping it off. This small habit turns propagation into an observation routine instead of a cycle of random interventions.
Set the container where you will actually notice it. A cutting hidden behind a curtain is easy to forget, while a jar in direct midday sun can heat quickly and stress the leaves. Keep the label facing out, leave enough space for roots to develop, and group only cuttings with similar needs. A pothos cutting and a dry-resting succulent should not share the same watering schedule just because both came from pruning.
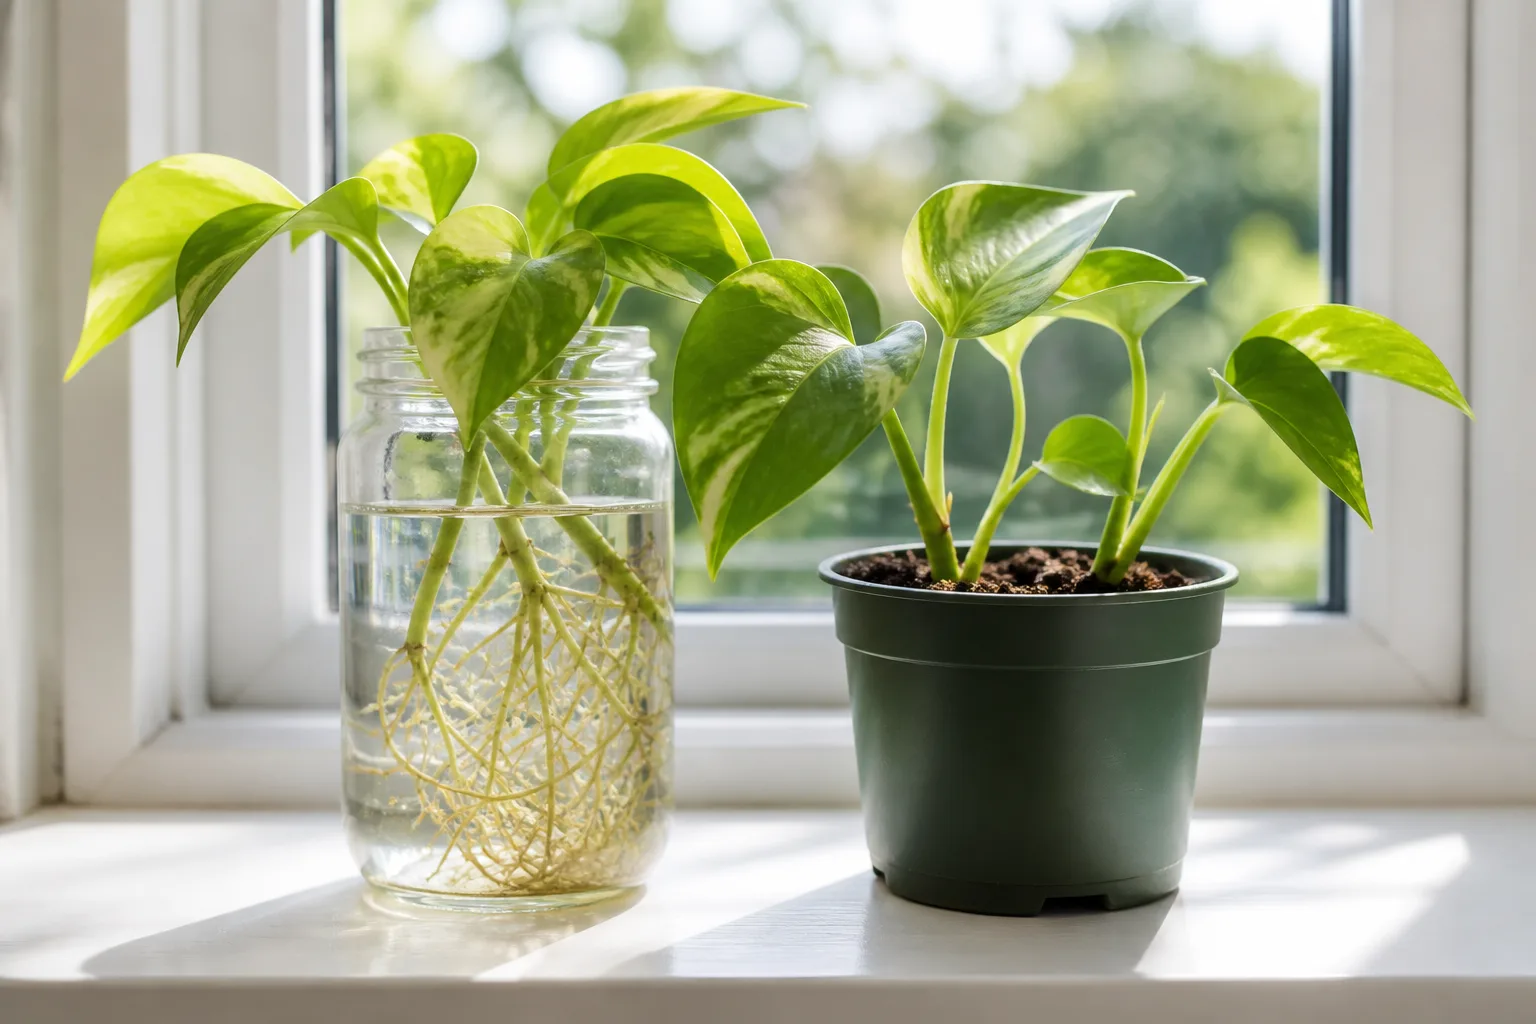
For water cuttings, refresh the water when it becomes cloudy or develops an odor, and rinse the jar if a slippery film forms. Do not add fertilizer while the cutting is trying to make its first roots. The Plant Almanac guide to houseplant cuttings also recommends starting with healthy actively growing material and removing lower leaves so the cutting can focus on rooting rather than maintaining unnecessary foliage.
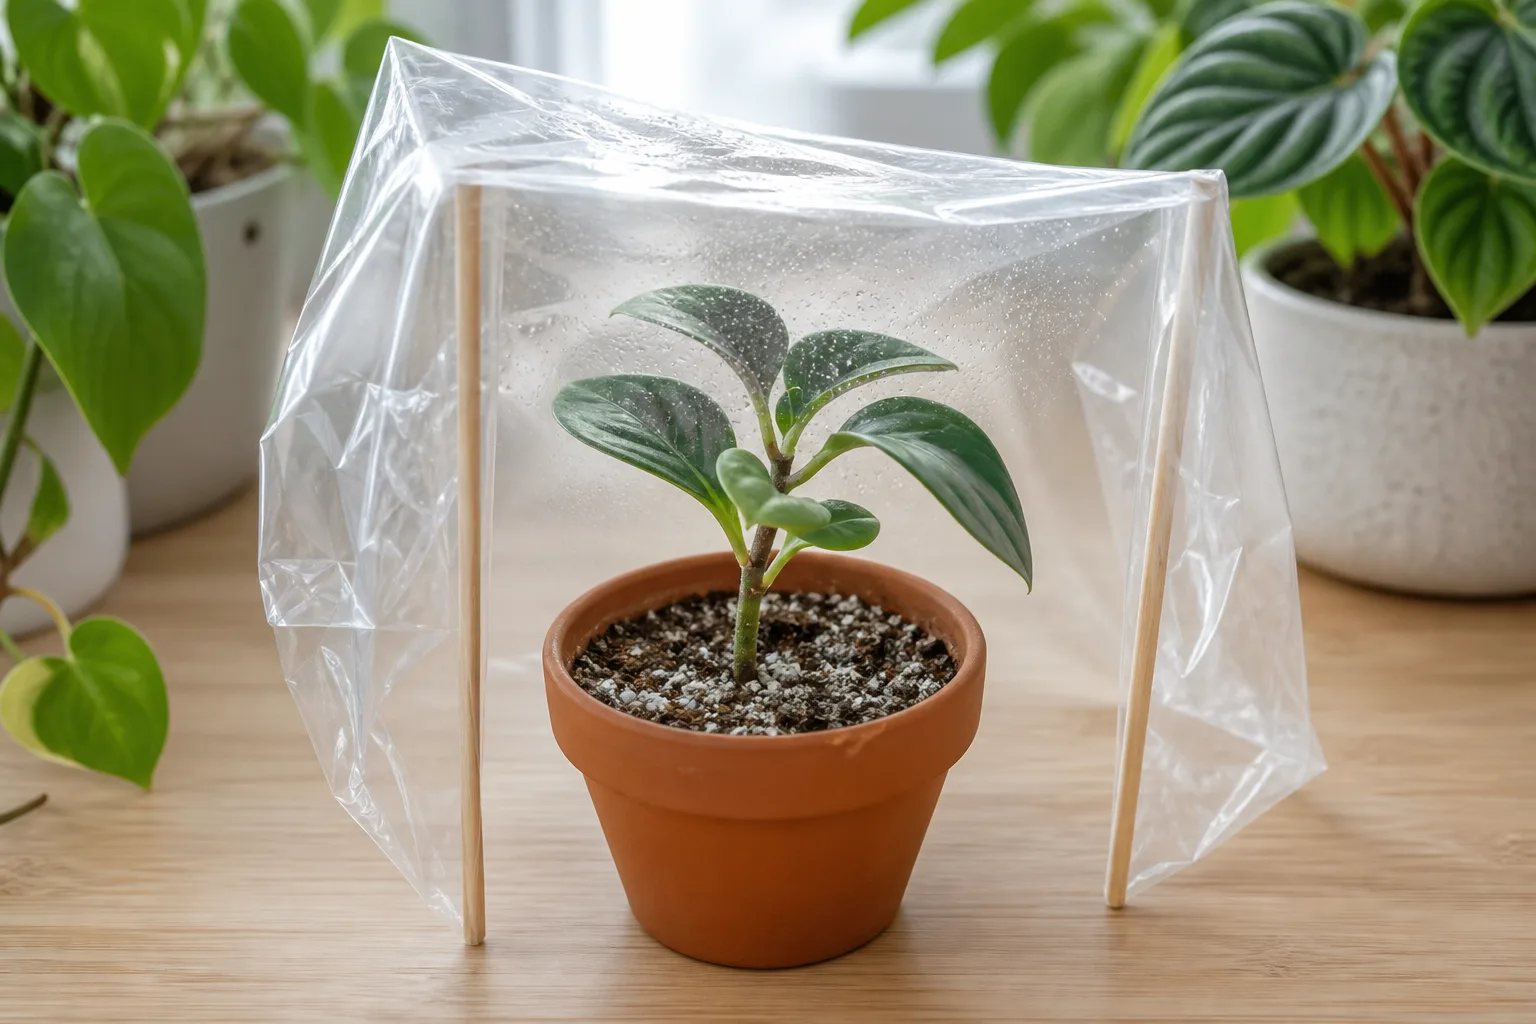
For soil cuttings, keep the medium evenly moist but not saturated. Lift the pot’s cover or bag briefly for air exchange, and check the mix with a finger rather than watering on a fixed calendar. A cutting has no established root ball to buffer a soggy medium, so “more moisture” is not the same as “more rooting.”
Move a rooted cutting into a pot without shock
Do not rush a water cutting into soil at the first white bump. Wait for several firm roots, roughly 1–2 inches long, with enough branching to hold the plant in place. Roots that are long, tangled, or brown from sitting in dirty water are harder to transition cleanly.
Use a small pot with drainage and a loose mix. Make a hole first, lower the roots without bending them into a tight knot, and settle the mix gently around the node. Water once to settle the medium, then return the new plant to bright indirect light and keep the mix a little more consistently moist than you would for an established plant while it builds soil roots.
Avoid fertilizer immediately after potting. New roots are tender, and fertilizer is not a substitute for light, oxygen, or time. Once you see fresh top growth and the plant is using water normally, begin a light feeding routine appropriate for that species.
The best candidates—and the bad bets
Houseplants that usually reward beginners
Start with forgiving plants that have obvious nodes and flexible stems. Pothos, heartleaf philodendron, tradescantia, and coleus are good practice plants because a healthy stem can often root in water or a light medium. Monstera cuttings can root when a node is included, although a single leaf without a node will not grow into a new vine.
Hoya, some begonias, and rubber plants can also be propagated from stem cuttings, but their preferred medium, warmth, and timing differ. A rubber plant cutting usually appreciates a warm, bright setup and a well-draining mix rather than a cold glass of water. Treat the list as a starting point, not a promise that every cultivar will root at the same speed.
The easiest batch to manage is not necessarily the largest batch. Five labeled cuttings that you can inspect every few days are more useful than thirty unmarked stems crowded into one jar, where one rotting piece can foul the water for the rest.
Plants to skip or propagate another way
Skip stem-cutting experiments when the plant’s natural growth pattern points elsewhere. Aloe vera is better started from a pup; many ferns are better divided or grown from spores; and calatheas and prayer plants are usually propagated by division when the clump is large enough to separate cleanly. Succulents often need a dry callus period before they touch moist mix, so treating them like pothos is a common route to rot.
Also skip cuttings from a plant that is actively declining until you understand why. A soft stem may be a symptom of root rot, overwatering, cold damage, or bacterial disease. Propagating the softest-looking section can preserve the problem rather than the plant.
If a plant tag identifies a named cultivar with a patent or other propagation restriction, pause before selling or distributing asexual starts. The practical warning from Gardening Know How’s overview of plant patents and propagation is simple: a plant may be legal to own and grow while its asexual propagation for sale is restricted. Read the tag, identify the cultivar, and get current legal guidance before treating a protected plant as inventory.
Troubleshoot cuttings that fail
Rot, wilt, and no roots
Mushy stem or bad smell: Remove the cutting from the jar or mix and inspect above the damaged section. If a firm, healthy node remains, recut with a clean blade and restart in fresh water or medium. If the rot reaches the node or the entire stem is translucent, discard it and clean the container.
Leaves turning limp or crispy: The cutting may be losing water faster than it can replace it. Reduce harsh light, increase gentle humidity, remove one large leaf if necessary, and make sure the node—not a bare internode—is actually in contact with water or mix.
No roots after several weeks: Check the basics before adding products. Is the plant one that roots from this type of cutting? Is the node present? Is the setup warm enough, bright enough, and airy enough? A healthy cutting can sit quietly for a while, especially in low light or outside the plant’s active growing season.
Rooting hormone is optional for many common houseplants. It can be useful for some slower or woodier cuttings, but it cannot compensate for a missing node, a diseased stem, cold conditions, or saturated soil. If you use it, follow the label and avoid contaminating the container with wet cuttings.
Roots appear but growth stalls
Rooting is not the same as establishment. A cutting may make roots and still need time to produce a new leaf, particularly if it has only one leaf or if the season is dim. Keep conditions stable instead of repeatedly moving it, repotting it, or increasing fertilizer.
If water roots look healthy but the plant wilts after potting, check that the roots are in contact with the mix and that the pot is not oversized. Keep the first pot small, provide bright indirect light, and maintain moderate moisture until new growth shows that the plant is functioning in soil. Old leaves may yellow during transition; a firm stem and healthy new growth are better indicators than one sacrificial leaf.
Share or sell extra plants responsibly
Gift and trade rooted starts
Gifting is the simplest use for a successful batch. Share rooted starts with the plant name, the date you potted them, the propagation method, and the care they are receiving. If the plant is toxic to pets or children, say so rather than assuming the recipient will recognize it.
Keep new plants separate from your main collection for a short observation period. Inspect leaf undersides, nodes, and the pot rim for pests before passing a plant on. A free cutting that arrives with scale or mealybugs is not a good gift; it is a problem transferred to someone else’s shelf.
Sell only what you can identify and support
Selling cuttings can work as a small local activity, but the product is not just a stem. List the exact plant or cultivar when you know it, say whether the cutting is unrooted or established, show the actual condition, and explain what the buyer will receive. Do not use a collector cultivar name as a guess, and do not imply that every node will root.
A useful listing answers the questions a careful buyer would ask: How many nodes are included? Has the cutting been rooted in water or mix? When was it taken? Has it been checked for pests? Is the photograph of the actual cutting or only an example of the mature plant? Clear answers reduce disappointment and help you discover which plants are worth propagating in your own conditions.
Start with local pickup or a plant sale while you learn how your cuttings handle transport. If you ship live plants, check the rules for your destination and the carrier before listing them. USDA APHIS guidance for buying and moving plants shows why requirements cannot be reduced to a universal “just mail it” rule: restrictions vary by plant, origin, destination, and whether the shipment crosses a border.
Do not sell material from a diseased or pest-heavy parent, and do not sell a patented cultivar for asexual propagation without checking whether permission is required. Keep a basic batch record—parent plant, date cut, method, rooting status, and buyer notes—so you can answer questions honestly and stop repeating a method that produces weak plants.
Conclusion
Plant trimmings become useful propagation material when you treat them as a biological decision, not as scrap that must be saved at all costs. Start with a healthy parent, find the node, remove leaves from the rooting zone, choose water or a light medium, and give the cutting stable light, warmth, moisture, and time.
The most important skill is knowing what not to propagate. Compost diseased pieces, divide plants that do not make useful stem cuttings, label every batch, and move rooted starts into soil before they become tangled water-rooted experiments. With that filter in place, one thoughtful pruning session can give you new plants to keep, gift, or—where rules allow—sell responsibly.



