How to Grow and Care for Lady Ferns
Learn how to grow lady ferns with the right shade, soil moisture, planting depth, pruning, and division—and how to diagnose browning before changing care.
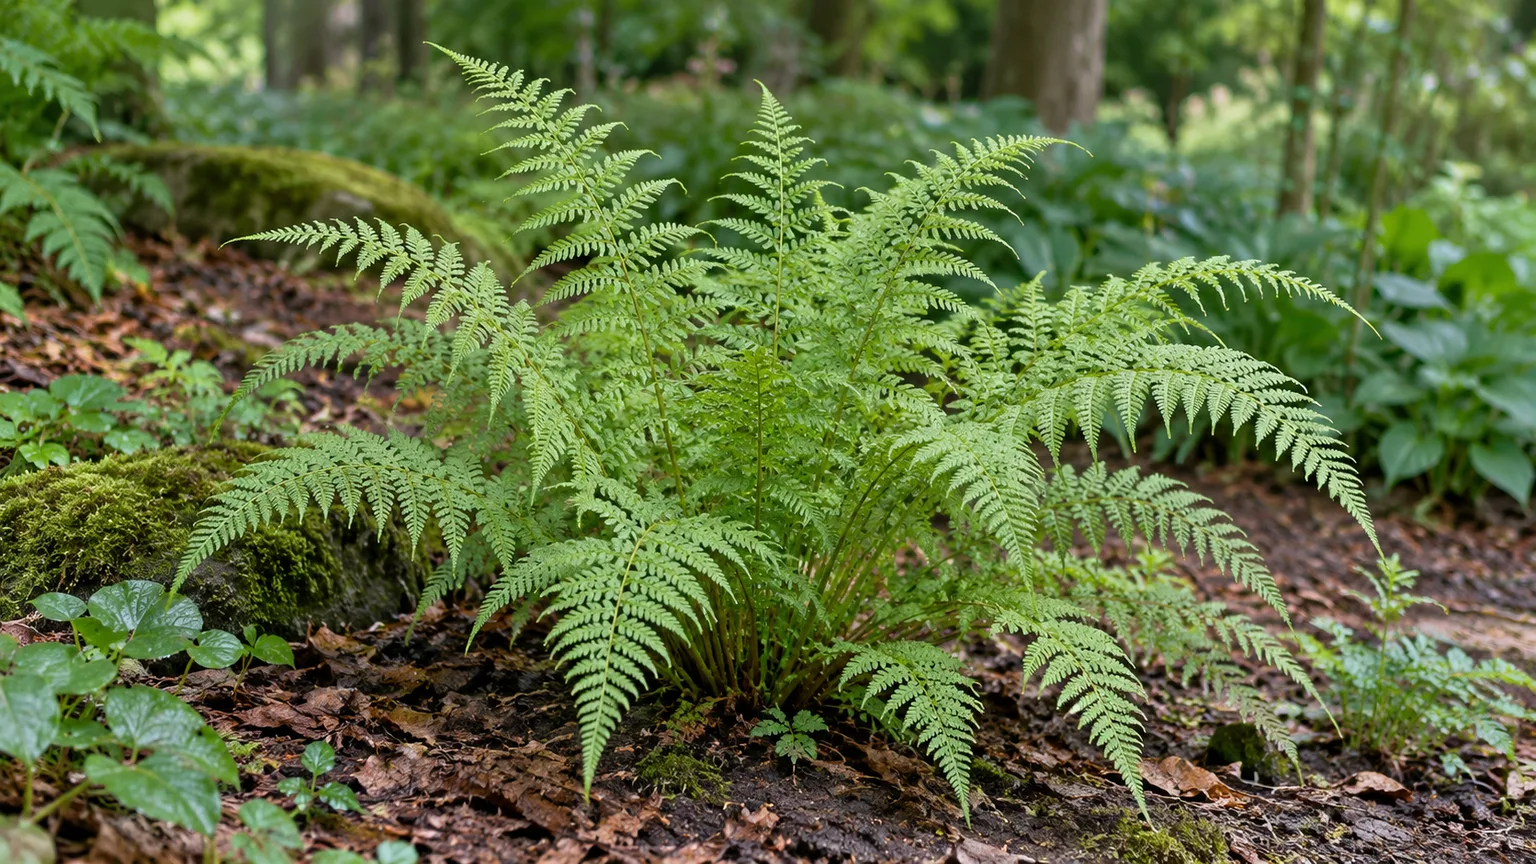
Lady fern (Athyrium filix-femina) brings fine-textured, arching green fronds to a shaded garden where flowers are not the only measure of interest. Give it a sheltered position with dependable moisture and soil that drains, and it can return from its underground crown each spring for years. Most problems trace to the same mismatch: a woodland fern planted where sun, wind, dry soil, or tree roots pull more water than its roots can replace.
Start with bright shade or partial shade, humus-rich soil that does not stay saturated, and regular moisture while the plant establishes. More light can work in a cool climate if soil stays moist, but hot afternoon exposure raises the chance of brown, ragged foliage. A little site assessment before planting prevents more trouble than a strict watering calendar or extra fertilizer later.
Identify the Common Lady Fern Before You Plant
The common lady fern is a deciduous herbaceous perennial. Its fronds rise in a loose, vase-like clump, arch outward, and divide into small leaflets that give the plant its airy, lacy texture. A mature plant commonly reaches about 2 to 3 feet tall and 1 to 3 feet wide; individual fronds can be larger than the overall height suggests because they lean and curve. The NC State Extension plant profile describes this arching habit and the spores carried on the undersides of the leaflets.
Ferns do not flower or make seeds. Each new frond emerges from the crown as a tightly curled crozier, then gradually unfurls; mature fertile fronds carry clusters of spores beneath the leaflets. That life cycle matters when deciding whether to divide a plant or try sowing spores. It also makes identification important: “fiddlehead” is a description of a curled young frond, not a promise that every fern shoot is edible.
Names can be confusing in North America. Some regional plants historically appeared under A. filix-femina or its varieties, while NC State Extension treats Southern lady fern as Athyrium asplenioides, a distinct species native to much of the central and eastern United States. Kew’s Plants of the World Online and the U.S. Forest Service’s common ladyfern review also reflect different regional and taxonomic treatments of the name. If you are planting for local habitat, use a regional flora or native-plant nursery to confirm the species rather than relying on the common name alone.
Choose a Site With Shade, Shelter, and Room
Lady fern is a woodland plant, but “woodland” does not mean every dark corner beneath every tree is suitable. The best planting spots combine filtered light, soil that holds moisture, and enough space for a mature clump to expand without being crushed by a path or neighboring perennials. A sheltered bed also protects long, thin fronds from strong winds, which can split or flatten them even when the plant remains healthy.
Before buying, look at the site during the warmest part of a typical day. Note whether the ground dries quickly, whether a mature tree’s roots dominate the topsoil, and whether runoff leaves the area soggy after rain. Ferns compete poorly with thirsty surface roots, so planting directly under a dense maple, willow, or evergreen canopy may require more watering than the plant label implies. A place near a woodland edge, north or east side of a building, or under an open deciduous canopy is often easier to manage.
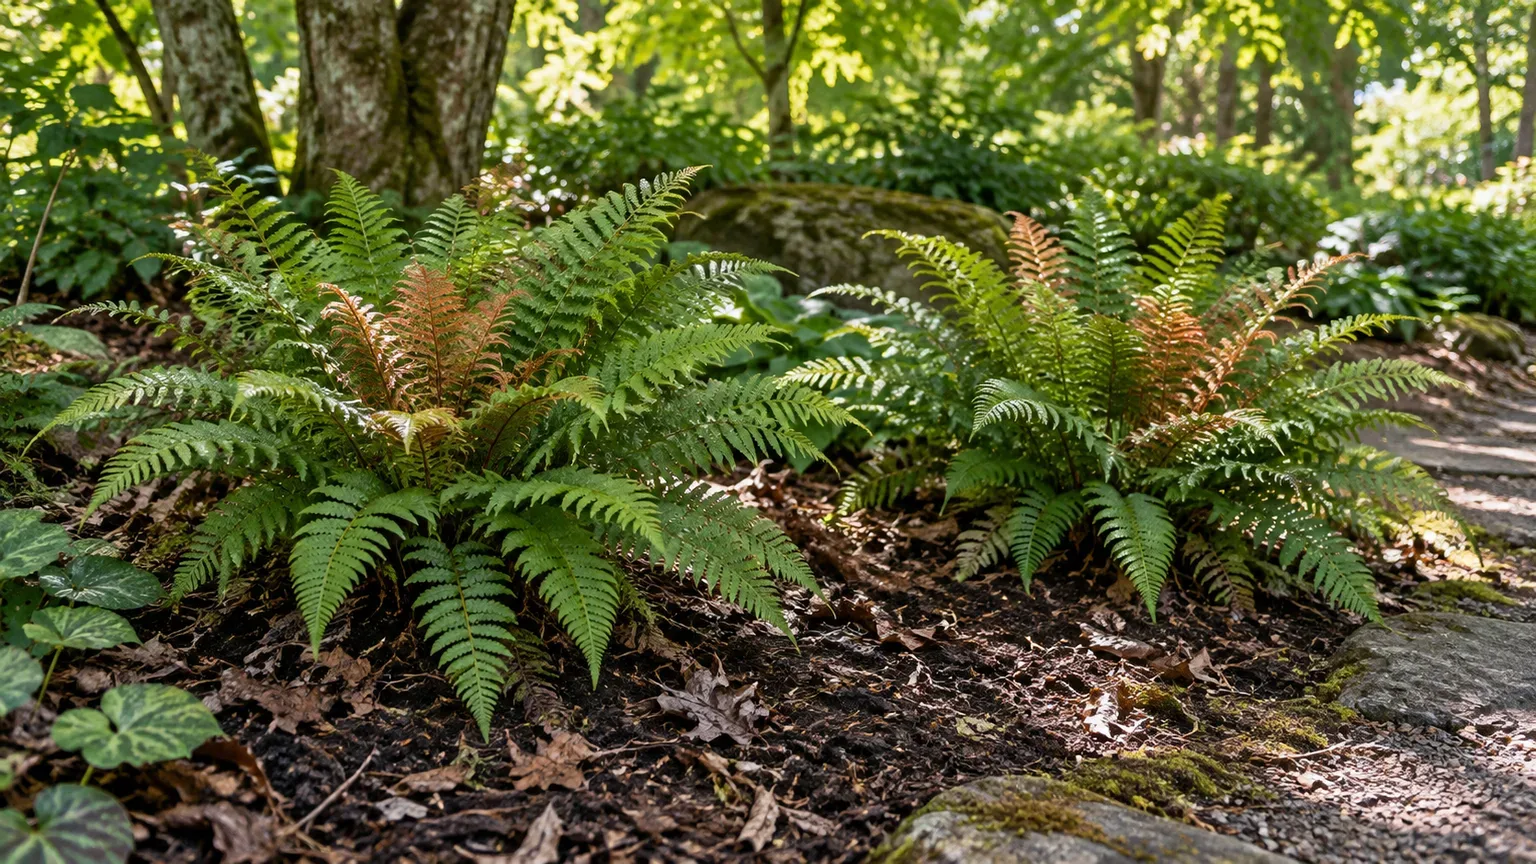
Light: Shade First, With Moisture as the Adjustment
Partial to full shade is the reliable starting point. Morning sun or dappled light can be tolerated, and NC State Extension notes that common lady fern can handle more sun when its soil remains moist. That flexibility is most useful in cooler regions; in places with hot summers, shade through the afternoon generally keeps fronds from drying and bleaching.
Think of light and water as linked controls rather than separate care requirements. If your garden has a brighter site, expect to check soil more often and mulch the root zone. If the location is very dark, the fern may still grow, but the clump can be less full and spores may be less likely to establish nearby. Avoid moving a struggling plant from shade into full sun as a first response to sparse growth; first rule out drought, deep root competition, poor drainage, and a crown planted too deeply.
Soil: Hold Moisture Without Waterlogging the Crown
Aim for soil rich in organic matter that stays lightly moist after watering but lets excess water drain away. The Royal Horticultural Society’s profile recommends fertile, moist, neutral-to-acid soil amended with leaf mold or garden compost. In practical terms, ordinary loam enriched with compost is usually adequate; you rarely need a special fern mix or to change pH for one plant.
The troublesome extremes are fast-drying sand and compacted, persistently wet soil. In sand, incorporate compost across the bed rather than filling only the planting hole, because roots will grow beyond it. In heavy clay, improve the broader bed with organic matter and avoid a low pocket where water collects; simply adding a thin layer of compost to a saturated hole will not fix poor drainage. Keep mulch loose and off the crown, the central point where fronds emerge, so moisture is retained without burying new growth.
When and How to Plant a Lady Fern
Spring is a dependable planting window because a new clump has a full growing season to root in before winter. In mild climates, early fall also works if the soil is still warm and the plant will have several weeks to settle before hard freezes. Avoid planting during a heat wave or drought unless you can provide shade and keep the root ball consistently moist while it establishes.
Prepare the site first: remove weeds, loosen the soil across a wider area, and blend in finished compost or leaf mold if the ground is low in organic matter. Dig a hole no deeper than the root ball and roughly twice as wide, then slide the fern out of its pot without pulling on the fronds. Tease apart only roots circling tightly at the bottom; fern roots are fine and can be damaged by rough handling.
Set the plant so the crown sits at the same level it occupied in the pot. Backfill, firm gently, water the entire root ball and surrounding soil, and apply a thin organic mulch while keeping it away from the center. Give a small nursery plant room: mature width varies, so use the label’s dimensions and leave roughly 18 to 30 inches between clumps when you want them to remain distinct. A closer spacing creates a quicker mass but makes the bed harder to weed and inspect.
Water by Checking the Root Zone
During the first growing season, check the soil every few days during dry or hot weather, then water deeply when the root zone begins to dry. A quick splash on the surface may wet only mulch and the top inch of soil; slow watering at the base gives the root ball time to absorb moisture. The goal is not muddy ground but a steady supply of moisture below the surface, where new roots are developing.
Once established, a lady fern can tolerate short dry spells better than a newly planted one, but repeated summer drought often leaves fronds crisp or tattered. Rainfall, soil texture, shade, wind, and nearby tree roots all change how often watering is needed, so a fixed weekly schedule can overwater one bed and underwater another. Push a finger or narrow trowel into the soil near the root zone: water if it is dry several inches down, and wait if it is still cool and damp.
Water the soil rather than routinely misting the foliage. Outdoor humidity is usually not a controllable care target, and wet leaves do not compensate for a dry root ball. If the bed dries rapidly every summer, a better location or broader soil improvement is more durable than repeated light watering.
Mulch and Fertilizer: Keep the Feeding Light
A loose layer of leaf mold, shredded leaves, or compost helps mimic a woodland floor by slowing evaporation and adding organic matter as it breaks down. Refresh it when it thins, but do not pile it against the crown or cover emerging croziers in spring. A few inches are generally enough; a thick, compacted blanket can trap water and debris where fronds emerge.
Lady fern does not need heavy feeding to make foliage. If the soil is reasonably fertile, top-dress with compost in spring and let rainfall carry nutrients toward the roots. The Chicago Botanic Garden trial summarized by Fine Gardening evaluated lady and painted ferns with minimal routine care; the main cultural requirements were appropriate siting and consistent moisture. If growth is weak despite suitable light and moisture, check planting depth and root competition before adding fertilizer. When fertilizer is warranted by a soil test or known deficiency, use a modest product rate according to its label rather than combining several feeds.
What to Do With Fronds Through the Seasons
In spring, watch for new croziers and clear away only mulch or old leaves that physically cover them. Do not rake aggressively through the crown while shoots are tightly curled; they are easy to snap. Water after a long dry spell and replace mulch lightly once the new fronds have started to rise.
Summer is the period when the plant’s site is tested. Long dry spells, direct afternoon sun, heat reflected from paving, and wind can leave the fronds browned or uneven by late season. The Chicago Botanic Garden’s cultivar trial, reported in Fine Gardening, notes both the need for consistent moisture and the reality that foliage can look tattered by summer’s end. Remove a fully dead or broken frond at its base if it distracts from the bed, but do not shear the entire plant merely because some outer foliage has aged.
In autumn, let healthy fronds remain as long as they still look good. After frost, a deciduous lady fern will lose its foliage, though timing differs with local weather. You can leave spent fronds in place over winter as loose protection for the crown, then remove them before new growth emerges in late winter or early spring. This avoids both a messy spring cleanup and premature cutting of foliage that is still functioning.
Protect the Crown Through Winter
Common lady fern is cold tolerant and grown as a hardy perennial across cold-winter climates; established plants normally overwinter outdoors where the species and cultivar are suited to the region. The fronds may die back, but that seasonal browning does not mean the crown has died. Mark the location if you garden heavily in fall so you do not dig into the crown before the next flush appears.
Winter risk is often greater for a newly planted or container-grown fern than for an established plant in the ground. Freeze-thaw cycles can heave a shallow root ball, while waterlogged winter soil can suffocate roots that need air. A thin mulch after the ground cools can buffer temperature swings; if your soil drains poorly, address the site rather than wrapping the plant tightly. In windy locations, nearby shrubs or a fence can reduce frond breakage and winter desiccation.
Divide an Established Clump in Spring
Division is the practical way to make more plants that retain the parent’s appearance. The RHS recommends division in spring, when the clump is beginning to grow; cool weather and available moisture reduce stress while each portion rebuilds roots. Divide only a healthy, well-established plant that has enough crowns or growing points to leave a viable section on each side.
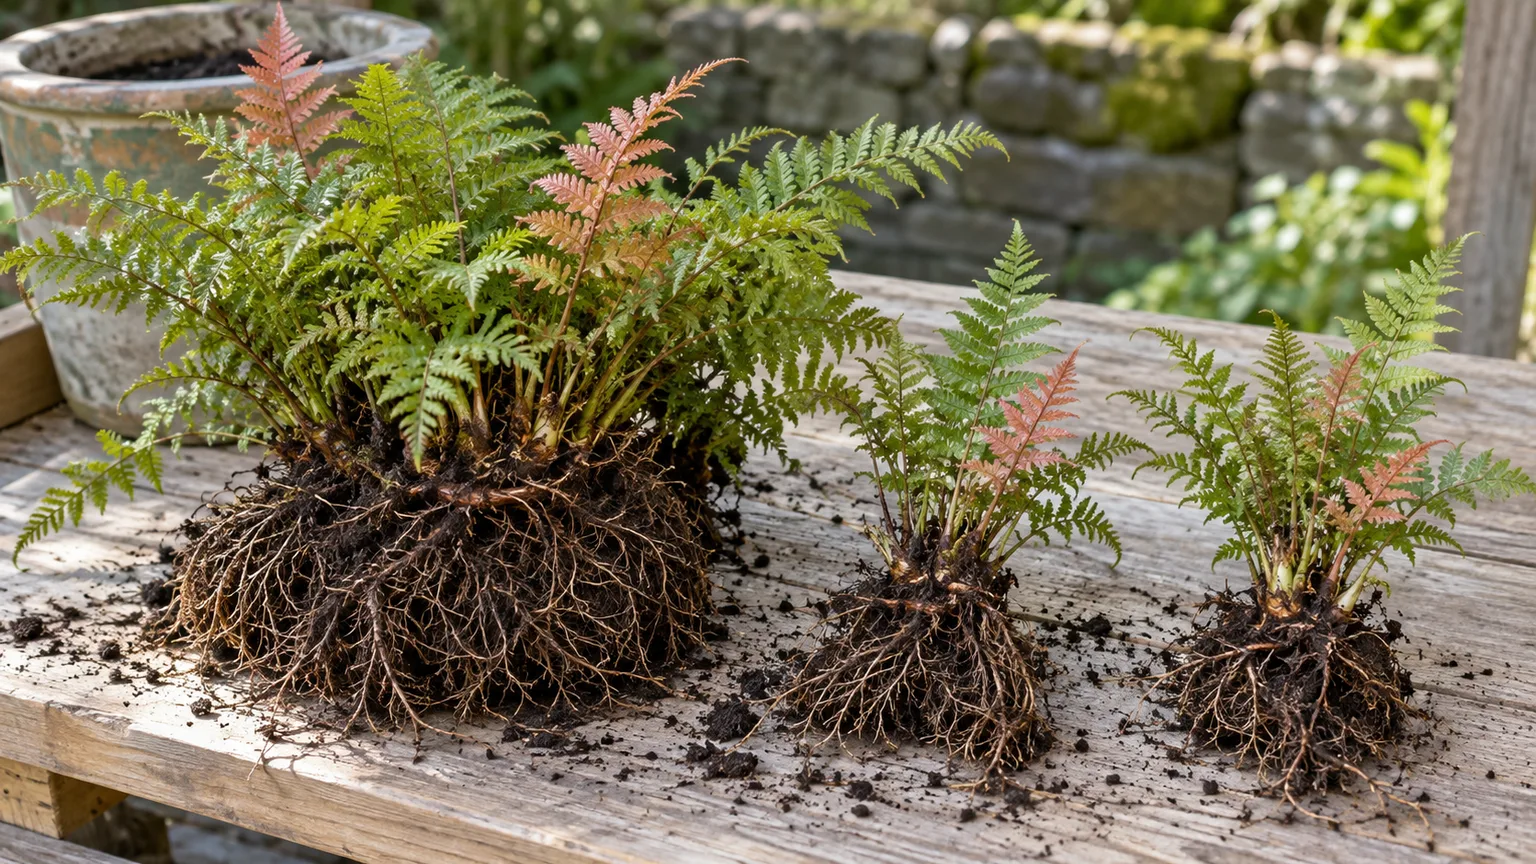
Water the clump a day before lifting it if the ground is dry. Dig around the outside, lift as much of the root mass as you can, and gently loosen soil until you can see where crowns or viable growing points connect to the roots. Pull sections apart by hand where they separate naturally, or use a clean sharp knife through a dense mass; each division needs a crown and a useful amount of roots, not a bare root fragment.
Replant divisions promptly at their original depth, spacing them for the mature width, and water thoroughly. Keep them evenly moist while they reestablish, especially if spring turns warm and dry. A small division may look sparse during its first season because it is rebuilding roots; resist the urge to compensate with frequent fertilizer or to move it again before it has had time to settle.
Grow Lady Ferns From Spores if You Have Patience
Spores are the tiny brown dustlike structures found in clusters on the underside of fertile fronds; they are not seeds. This method suits gardeners who want to raise many plants and do not mind a slow, less predictable process. Ferns pass through a small gametophyte stage before producing the leafy plant, and offspring from named cultivars may not match the parent.
For a home sowing, use clean containers and a fine, low-nutrient sterile medium, keep it damp rather than flooded, and cover the container to hold humidity. Sow ripe spores on the surface instead of burying them, then place the container in bright indirect light. Keep it clean and watch patiently; germination and the appearance of small fern plants can take months, and young growth needs careful handling when transplanted.
The RHS propagation guidance for Athyrium filix-femina lists spores in mid to late summer as an option, alongside spring division. For a garden-ready plant with known traits, division or a correctly labeled nursery plant is simpler. Fine Gardening also reports that sporelings can appear naturally in the garden, but they do not necessarily grow true to a selected cultivar.
Grow in a Container Only if You Can Manage Moisture
A large, sturdy pot can hold a lady fern on a shaded patio or in a courtyard, but containers dry faster and experience greater temperature swings than garden soil. Choose a pot with unobstructed drainage holes and enough width for the crown and roots to grow without crowding. Use a moisture-retentive but free-draining potting mix; ordinary outdoor potting mix amended with composted bark or leaf mold is a better starting point than dense garden soil packed into the pot.
Set the crown at soil level, water until excess drains from the bottom, and check moisture more often during hot weather. Do not let the pot sit in a full saucer of water, and do not rely on misting to prevent browning if the root ball has dried. In cold regions, group containers in a sheltered location or insulate around the pot for winter, because roots in above-ground containers experience colder conditions than roots protected by the ground.
Indoor growing is possible but usually less forgiving than outdoor shade. Heated rooms, vents, low light, and inconsistent watering can produce brown fronds, while a humidifier or pebble tray cannot correct poor drainage or an unsuitable temperature. If you want a fern for a typical living room, compare species selected for indoor conditions rather than assuming a hardy woodland lady fern will behave like a tropical houseplant.
Diagnose Brown, Yellow, or Broken Fronds
A change in one or two old fronds is not automatically an emergency. First look at where the damage starts, whether the soil is dry or saturated, and whether the crown is still producing healthy new growth. Lady fern is generally low in serious outdoor pest and disease problems, according to RHS and NC State Extension; environmental stress is a more useful first diagnosis than reaching for a pesticide.
Separate Drought Scorch From Wet-Root Stress
Crisp brown edges or entire fronds after heat and drought point first to a dry root zone, especially on the sunny or windy side of the clump. Check several inches down before watering; if dry, soak slowly and add a loose mulch layer after moisture has reached the soil. Old scorched tissue will not turn green again, so judge recovery by new fronds and by whether fresh browning stops.
Yellowing combined with soil that stays wet can point to poor drainage or roots receiving too little air. Let the ground drain, check whether the plant sits in a low pocket, and reduce irrigation while the root zone remains damp. Do not respond to every yellow frond by watering more; that can worsen an already saturated site. If a fern collapses in wet ground, moving it into a raised or better-drained position while it is dormant may be more effective than repeatedly adjusting water in place.
Expect Some Summer Wear and Wind Damage
Lady fern’s delicate fronds can break under heavy rain, hail, pets, or strong wind, leaving otherwise healthy crowns with a ragged outline. Cut only fully broken or dead fronds near the base; trimming the tips does not create new growth along the old frond. A sheltered site can prevent repeat damage more effectively than pruning.
Occasional browsing is possible even though some extension references describe lady fern as deer or rabbit resistant. Resistance is not immunity, and browsing also varies with local food availability. If damage appears as clean bites or missing leaflets, look for tracks and repeat patterns before assuming disease; a small barrier may be enough for a young fern.
Choose a Cultivar and Check Regional Native Status
The species has a naturally graceful green form, while cultivars may be selected for a distinctive habit, crisscrossing leaflets, crested frond tips, or colored stems. ‘Victoriae’ is known for crossed pinnae and a more elaborate silhouette; ‘Lady in Red’ is sold for red-toned stems. Cultivar appearance can vary with age and growing conditions, so buy a named plant from a nursery that labels it clearly if a specific trait matters.
A cultivar raised from spores may not retain its ornamental traits. Divide it to preserve the selected plant, and do not assume that any volunteer seedling beneath it will look the same. For a native planting, also distinguish horticultural cultivar choice from local ecological fit: the native fern sold under a lady-fern name can vary by region, and A. asplenioides is a useful eastern and southern U.S. option where its range and site match. Check a local extension or native-plant list for your county before placing it near a natural area.
Lady fern is often described as deer resistant and is usually a low-maintenance foliage plant, but neither quality means zero work. Establishment watering, summer drought checks, and spring frond cleanup remain important. Its best role is a low-competition shade bed, woodland edge, or moist border where the soft texture can be seen and the plant has enough room to mature.
Understand Fiddleheads Before Considering Foraging
The curled young fronds that emerge in spring are called fiddleheads, but that word covers many fern species. The University of Maine Cooperative Extension’s food-safety bulletin warns that nearly all ferns have fiddleheads and not all are edible; its identification and cooking guidance is specifically for ostrich fern, Matteuccia struthiopteris. It also advises against eating raw or undercooked fiddleheads because illness has been associated with them.
Do not harvest lady fern from an ornamental planting based on a common name, resemblance, or a quick phone identification. If foraging is a goal, get a positive species identification from a qualified local expert and follow food-safety guidance written for that exact species and region. The safest routine for a decorative fern is to leave its new fronds intact so they can unfurl and replenish the crown.
Conclusion
Lady fern is easiest to grow when its site does the work: filtered light, moisture-retentive but draining soil, and shelter from hot wind. Plant it at crown level, water deeply through its first season, and use compost or leaf mold as a light mulch rather than trying to force lush growth with heavy fertilizer. Let the clump die back naturally, clean old fronds before new growth emerges, and divide in spring if you want more plants with the same traits.
If the fronds brown, check soil moisture and exposure before changing everything at once. If you are choosing plants for a regional native garden, confirm whether the local species is common lady fern or Southern lady fern; if you are curious about fiddleheads, do not assume they are edible. Those checks turn a graceful but sometimes misunderstood fern into a dependable part of a shade garden.



