How to Propagate a Polka Dot Plant, 2 Ways
Learn how to propagate a polka dot plant from stem cuttings in water or soil, choose the right node, prevent rot, and move rooted cuttings into a pot.
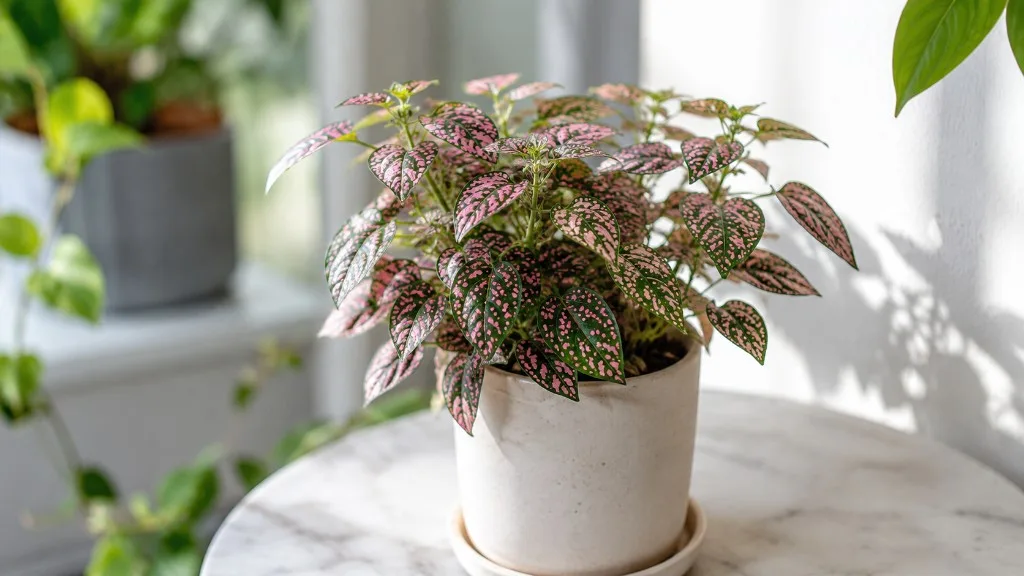
The easiest way to make more polka dot plants is to root a stem cutting. A short piece of healthy Hypoestes phyllostachya can grow new roots in water or directly in a light potting mix, and the cut also encourages the original plant to branch. You do not need a special propagator or an expensive rooting kit; you need a viable node, clean tools, steady moisture, and enough warmth and light.
The two methods feel different in practice. Water propagation lets you watch the roots and is forgiving when you are learning where nodes are. Soil propagation avoids the later move from water into potting mix and can produce a cutting that is already acclimated to its final root environment. Follow the shared preparation first, then choose the method that fits your space and how closely you want to monitor progress.
Which method should you choose?
Choose water if you want to see whether the cutting is alive, have a bright spot out of direct sun, and do not mind potting it once the roots are established. It is particularly useful when you are learning the plant’s anatomy because a clear glass shows which node is submerged and whether roots are forming. The trade-off is that a cutting grown in water must adjust when it begins taking up water from air-filled potting mix.
Choose soil if you already have a clean small pot, can check moisture frequently, and want to skip that water-to-soil transition. Soil makes the root system invisible, so you judge progress through new growth, resistance when the cutting is gently tested, and the passage of time. Neither choice is a magic shortcut: a healthy node and a stable environment matter more than a rooting hormone or a decorative vessel.
The NC State Extension plant profile lists stem cuttings as an easy propagation route and recommends bright, filtered light for good foliage color. That combination—active growth plus light that is bright but not scorching—is the central idea behind both methods.
Before you take a cutting
Do the preparation in one session. Have clean scissors or snips, a clean glass or small pot, room-temperature water, and your potting mix ready before you cut. Soft, leafy stems lose water quickly; leaving a cut piece on a dry table while you search for supplies creates stress that the propagation setup then has to overcome.
Choose a stem that can root
Start with a parent plant that is hydrated and actively growing. Water it normally when the potting mix needs it, but do not take a cutting from a plant that is currently collapsing from drought, sitting in saturated soil, or showing spreading pests or disease. A cutting carries the condition of its source; propagation is not a reliable rescue for a stem with a soft base or badly damaged leaves.
Look for a firm, flexible stem with several healthy leaf pairs. Avoid a stem that is already carrying a flower spike if you have another option. Flowering uses the plant’s resources and flowering shoots are generally less willing to prioritize new roots. The RHS guidance on softwood cuttings also recommends collecting non-flowering material early in the day, when shoots are well hydrated.
Spring and summer are usually the easiest seasons because warmth, light, and active growth work together. Indoor cuttings can sometimes root outside that window, especially under a strong grow light in a warm room, but expect a slower response in a cool, dim winter corner. Treat a calendar date as a probability boost, not a deadline.
Find the nodes and prepare the cutting
A node is the joint where a leaf or leaf pair attaches to the stem. It often looks like a slight swelling or ring, and it is the point most likely to produce new roots. The short stem sections between joints are internodes; cutting only an internode leaves the cutting without the best rooting point.
For a dependable home cutting, choose a piece about 3 to 6 inches long with two or three nodes and one or two leafy nodes at the top. The lower nodes will be in water or mix, while the upper leaves remain above it. A Virginia Tech study of H. phyllostachya found that three-node cuttings rooted more rapidly and developed a more extensive root system than two-node cuttings, which is useful support for choosing a slightly longer cutting when the parent stem allows it.
Make the bottom cut just below the lowest node you plan to use. Remove the leaves from the lower one or two nodes with your fingers or clean snips, but keep the top leaves. No leaf should sit underwater or be buried in the mix; submerged or buried foliage decomposes and turns a clean propagation attempt into a rot problem.
If the remaining leaves are very large, you can remove one or trim a leaf surface modestly to reduce water loss, but do not strip the cutting bare. Leaves provide energy while roots are absent. A short stem with a few healthy leaves is a better balance than a long, leafy branch that wilts before it can root.
Water propagation: step-by-step
Water propagation is a good first method for a new plant parent because it makes the important variables visible. You can see whether the base stays firm, whether the water is cloudy, and whether white roots are emerging from the node. It is also easy to restart with a fresh cutting if the first piece was prepared incorrectly.
Set up the jar
- Wash a small glass or jar and fill it with room-temperature water. A narrow container is useful because it supports the stem without requiring a large water volume.
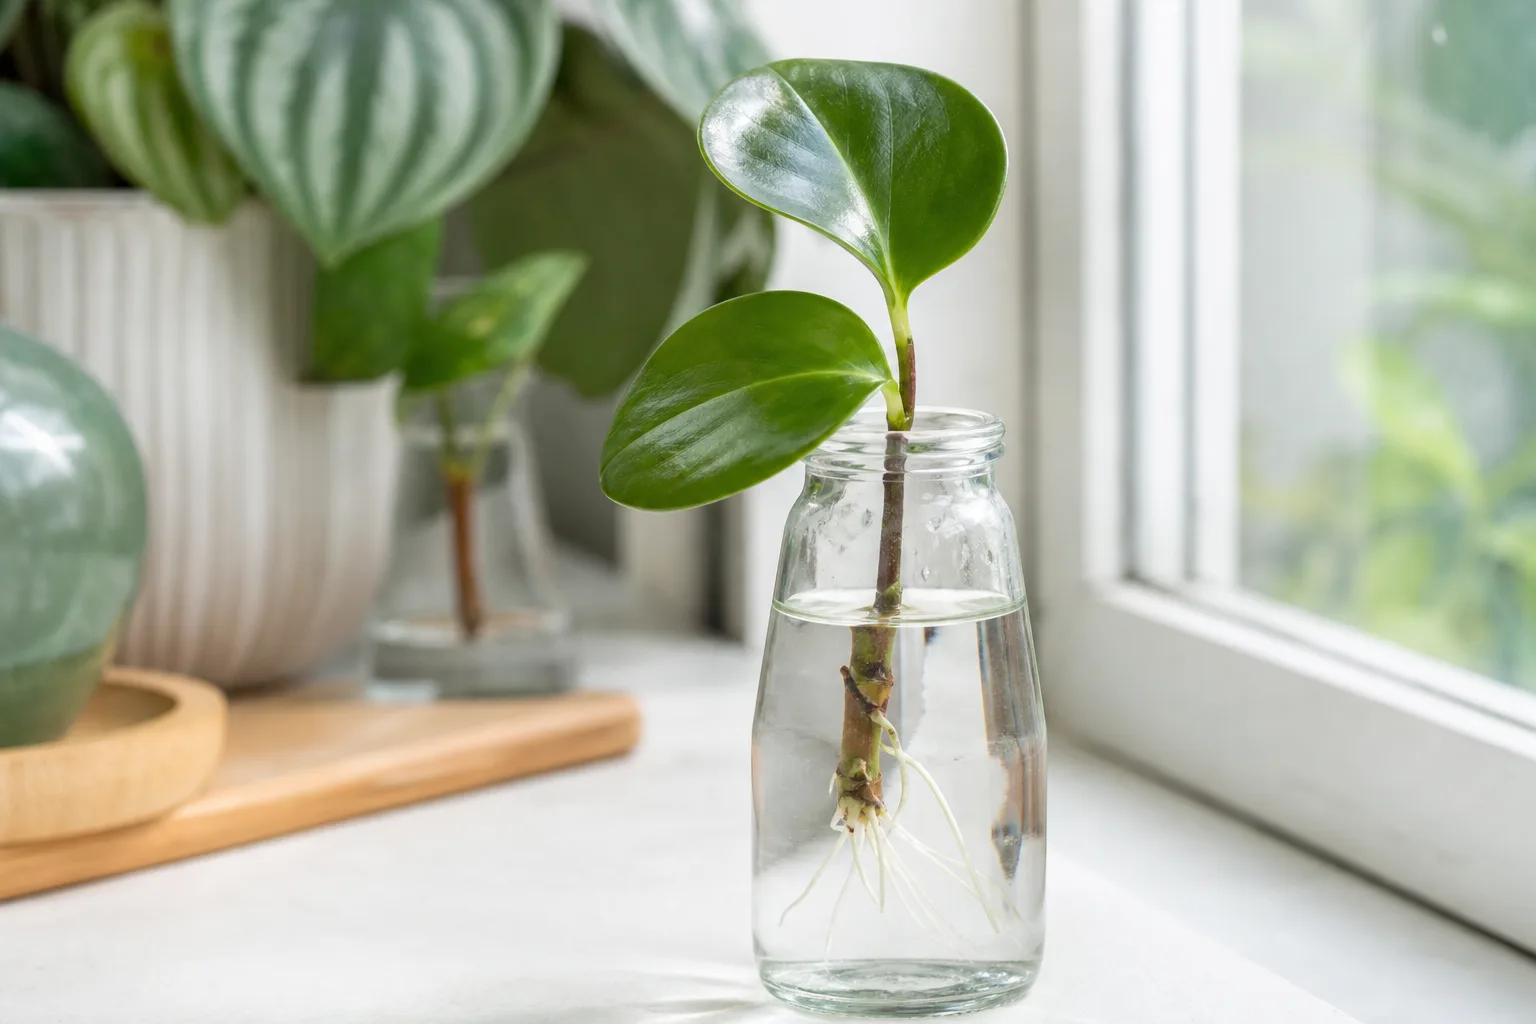
- Put the cutting in immediately after making the final cut. Submerge the lowest one or two bare nodes, but keep every leaf above the waterline.
- Place the glass in bright, indirect or filtered light. A few feet from a sunny window can work better than pressed against the glass, where heat and direct rays can overheat the water and scorch leaves.
- Keep the setup warm and away from cold drafts, air-conditioner blasts, and radiators. Roots form from living tissue; a constantly chilled cutting is not on the same schedule as one in a warm growing room.
- Refresh the water about once a week, or sooner if it turns cloudy, develops an odor, or collects debris. Rinse the container and inspect the base before returning the cutting.
The goal is moisture at the node without a stagnant, dirty environment. Adding fertilizer, sugar, or a strong homemade solution to the jar is unnecessary and can encourage microbial growth. Clean water and good light are the simpler variables to control.
Wait for roots without sacrificing the cutting
Small white roots may appear in roughly one to three weeks, but the range is not a promise. Light level, warmth, season, cutting maturity, and the parent plant’s condition all affect the pace. Practical houseplant guidance from Homes & Gardens describes water propagation as visible and beginner-friendly, while also warning that the move into soil can cause wilting.
Do not pull the cutting out every day to check it. Watch through the glass and inspect the base during water changes. A firm green stem and steady leaves are encouraging even when roots are still short. If a root is only a few millimeters long, leave it alone; repeated handling can tear the new tissue at the node.
Pot the cutting when it has several roots about 1 to 2 inches long, rather than waiting for a tangled mass. Longer water roots are not automatically stronger soil roots, and an extended stay in a jar can leave the cutting more dependent on the water environment. Prepare a small pot and pre-moistened mix first so the transition is quick.
Soil propagation: step-by-step
Soil propagation places the cutting directly where it will live, but the mix must do two jobs at once: hold enough moisture around the nodes and leave air spaces around the developing roots. Dense garden soil or an oversized pot usually stays wet too long. A small container with drainage and a light, moisture-retentive potting mix gives you much more control.
Use the right pot and mix
Use a clean nursery pot or small plastic pot with a drainage hole. Choose a pot only slightly wider than the cutting bundle; a large unused volume of mix dries slowly and can keep the buried stem base wet. If you are planting several cuttings together to make a fuller pot, size the container for that small group rather than for the mature plant it may become.
A standard indoor potting mix loosened with perlite works well. The mix should be damp when you insert the cutting, not dripping. You can use a peat-free cutting compost or another fine, airy mix; the exact brand matters less than its texture and the pot’s ability to drain. The RHS softwood-cutting method likewise emphasizes a clean hole, a moist cutting compost, and bright light without scorching sun.
- Moisten the mix evenly, then fill the pot without packing it hard.
- Make a narrow hole with a pencil or clean stick. This protects the rooting tissue instead of scraping it against dry mix.
- Insert the cutting so the lowest one or two bare nodes are below the surface and the leafy portion remains above it.
- Firm the mix gently around the stem so there are no large air gaps, then water lightly if the mix was not already evenly damp.
- Label the pot if you are testing cultivars or dates. A simple date helps you judge progress without disturbing the cutting.
Rooting hormone is optional. The Virginia Tech study found that H. phyllostachya stem cuttings did not require rooting hormone or bottom heat to produce adequate adventitious roots. Hormone may be useful for a controlled trial, but it cannot compensate for a buried leaf, waterlogged mix, a diseased stem, or a cold, dark placement.
Keep the cutting humid—but not sealed forever
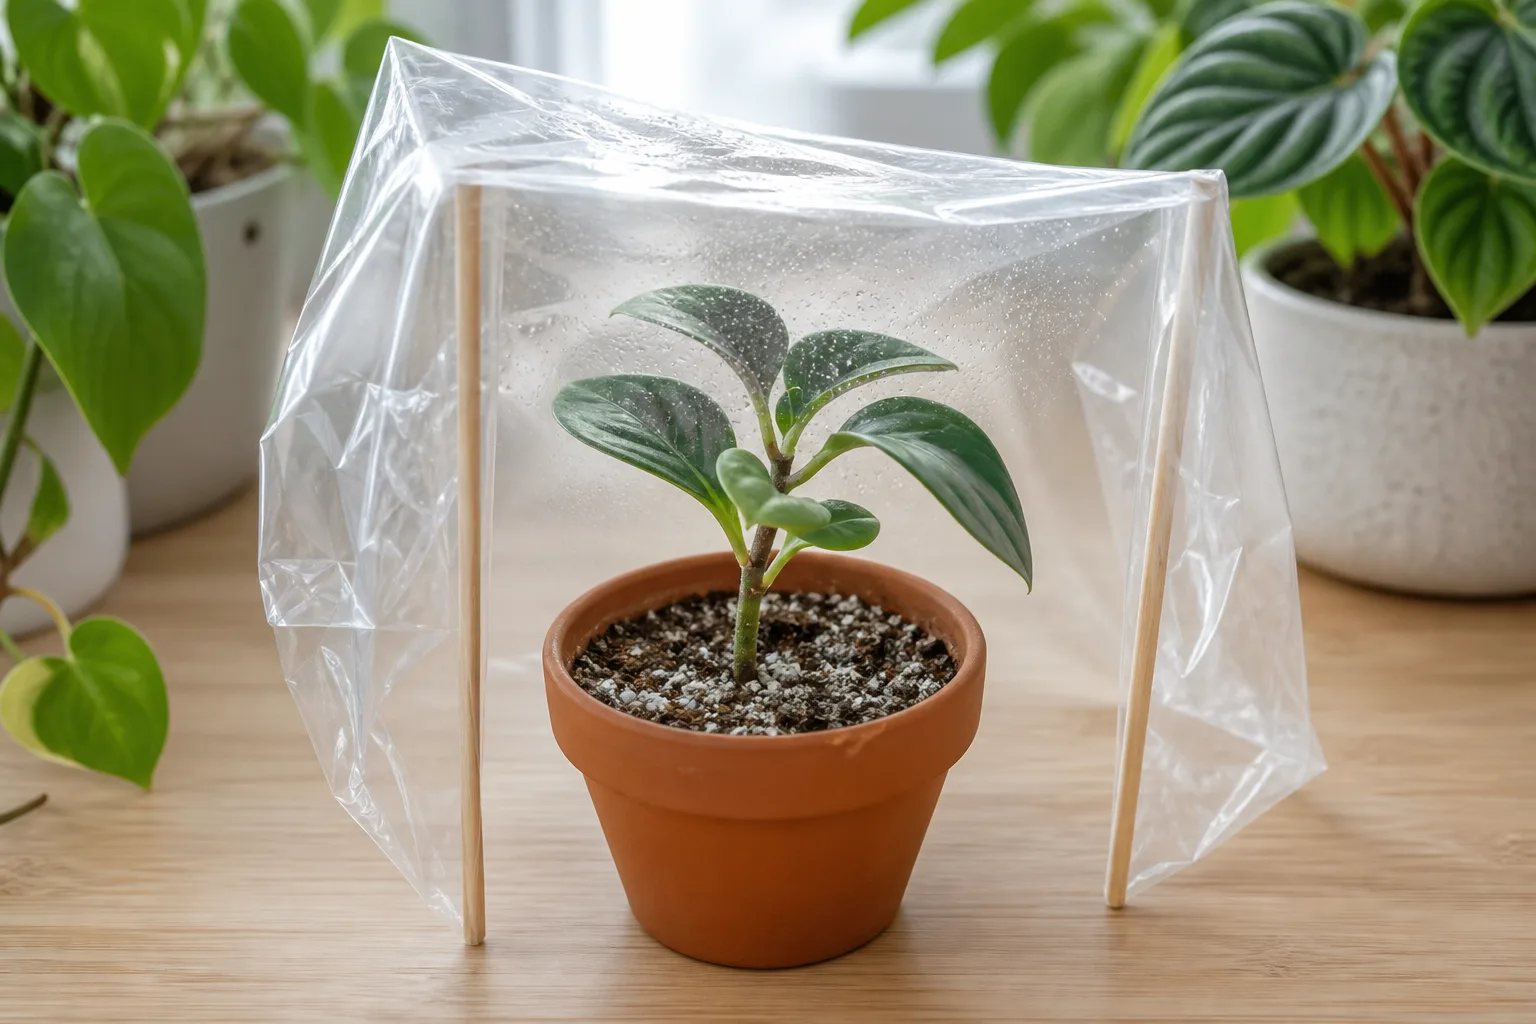
Place the pot in bright, indirect light and keep the mix consistently lightly moist. Check the surface and the upper part of the pot with a finger or a wooden stick; water when it is beginning to lose moisture, not on an automatic daily schedule. The cutting has no roots to replace water lost through its leaves, but a saturated pot removes the air roots need and increases the chance of a soft base.
A clear bag or propagation dome can slow leaf water loss during the first week or two. Keep the cover from touching the leaves, and leave a small gap or open it regularly for fresh air. High humidity is a support, not the whole environment. The Virginia Tech study found that cuttings under intermittent mist developed more extensive roots than those under clear plastic domes, a reminder that humid air with gas exchange is different from a permanently sealed, wet tent.
Begin reducing the cover once the cutting looks stable or you see new growth. Open it for longer periods over several days, then remove it. This gradual change prevents a sudden drop in humidity while allowing the young plant to develop better tolerance of normal room air. If condensation runs down the cover or gray mold appears, ventilate immediately and remove affected material.
Soil-rooted cuttings often show meaningful resistance when gently nudged after about two to four weeks, though a cool or low-light room can take longer. Do not use a hard tug as a daily test. A slight lift that slides out does not prove failure if conditions have been cool; give a healthy-looking cutting more time before disturbing the stem.
Water vs. soil: a practical comparison
Both methods can work for polka dot plant cuttings. The better choice is the one that lets you maintain the right moisture and light consistently.
| Consideration | Water propagation | Soil propagation |
|---|---|---|
| Best for | Beginners who want visible progress | Gardeners who can monitor a small pot |
| What you can see | Water clarity, stem health, new roots | Above-ground health and eventual new growth |
| Main risk | Stagnant water and transfer stress | Wet mix, buried leaves, and stem rot |
| Rooting setup | Bare nodes in clean water | Bare nodes in damp, airy mix |
| Transition | Pot after several roots develop | Already in its growing medium |
| When to choose it | You are uncertain whether the cutting is viable | You want fewer handling steps later |
Do not choose water simply because it is always faster. It is often easier to observe and can feel faster when roots are visible, but the important finish line is a plant that continues growing after potting. Conversely, do not choose soil because it sounds more “natural” if you are likely to forget the moisture check. A neglected soil cutting can dry out before roots form, while a neglected water cutting can sit in stale, oxygen-poor water.
If you have several cuttings, a small experiment is reasonable: put one or two in water and the rest in mix under the same light and warmth. Record the date, keep the variables similar, and compare firmness, root emergence, and post-potting growth rather than judging only the first visible root.
What to do after roots form
The first roots are a beginning, not a signal to move the cutting into a large decorative pot. Use a small container with drainage and a mix similar in texture to the soil method above. For a water-rooted cutting, make a hole large enough to place the roots without bending them into a tight knot, cover them gently, and water just enough to settle the mix.
Keep the newly potted plant in bright, indirect light for the first week. Do not place it in intense direct sun to “help it grow”; the roots have just changed jobs and the leaves are still balancing water loss. Keep the mix evenly but moderately moist while the cutting establishes, then shift toward the parent plant’s normal watering pattern as you see new growth.
A short period of drooping after the move from water to soil can happen. Give the pot good drainage, protect it from hot sun and drafts, and avoid compensating with repeated heavy watering. If the stem remains firm and the leaves improve over several days, the cutting is adjusting. If the base becomes soft or dark, treat that as a rot problem rather than ordinary transplant stress.
Wait for fresh growth before feeding. New leaves indicate that the cutting is functioning as a plant rather than living only on stored energy. When you do resume fertilizer, use a diluted, balanced houseplant feed according to its label and apply it to already-moist mix. Strong fertilizer does not speed a root system that is still recovering.
If you rooted multiple cuttings together, keeping them in one pot can create a fuller-looking plant sooner. Separate them only when you have a reason—such as crowded roots, a desire for individual gifts, or one cutting becoming unhealthy. Disturbing a newly rooted group just to make the containers look tidy adds stress without adding roots.
Why cuttings fail and how to recover
Propagation problems are usually visible before they become mysterious. Read the stem, the leaves, the water or mix, and the timeline together. A single drooping leaf on day one means something different from a black base after three weeks.
Wilting right after the cut
A cutting can wilt briefly because it is losing water through leaves before it has roots. Move it out of direct sun, place it in water or damp mix immediately, and use a loose humidity cover if the room is dry. Do not keep adding water to soil that is already wet; humidity around the leaves and better light are more useful than a flooded pot.
If the leaves recover within a day or two and the stem stays firm, continue monitoring. If the cutting grows crispy edges, develops soft brown patches, or becomes limp from the base upward, it is losing the race against water loss or decay. Remove failing material and restart with a shorter, healthier stem if the parent plant still looks sound.
Black stem, mushy base, or mold
A dark, soft base is a strong warning of rot. In water, discard the cloudy water, wash the vessel, and cut back to firm, healthy tissue if there is enough stem left to leave a node above the new cut. In soil, slide the cutting out, remove wet mix from the base, and inspect it. If the stem is soft through the node, it is safer to discard that cutting than to bury the problem again.
Gray mold or fuzzy growth usually points to stagnant, overly humid conditions or dead leaves touching the mix. Remove dead material, improve air exchange, reduce the cover time, and let the surface regain a little texture between checks. Do not spray a household cleaner or random disinfectant onto living leaves; fix the propagation environment first.
No roots after several weeks
First check the fundamentals: is there a living node in the water or mix, are the leaves above the waterline, is the stem firm, and is the setup receiving bright indirect light? Next consider temperature and season. A cutting in a dim room or on a cold windowsill can remain alive without producing visible roots quickly.
If the stem is healthy, give it another week or two rather than restarting immediately. If there is no change after a reasonable warm, bright period, take a new cutting from younger, non-flowering growth and prepare it with two or three nodes. The Homes & Gardens guide and Nature of Home’s practical propagation guide both place the easiest rooting window in the active growing season, but their timelines should be treated as useful ranges rather than guarantees for every room.
If repeated attempts fail, look at the parent plant before changing products. Leggy growth, faded foliage, or persistent wilting can signal that the plant needs a brighter filtered position and steadier care. Propagation hormone is not the first fix for a light, moisture, or parent-health problem.
Turn pruning into a bushier parent plant
The best cutting is often the piece you remove while correcting a leggy plant. NC State Extension notes that pinching back can keep polka dot plants compact, and the reason is practical: removing the growing tip redirects growth toward side shoots at lower nodes. Instead of cutting one long stem back to an arbitrary height, choose a point just above a healthy leaf pair, leaving several nodes on the parent stem.
Use the fresh tip as a cutting if it meets the health and node rules. After the cut, the parent plant has dormant growth points below the cut that can branch, while the cutting has a chance to become a new plant. If you want a full pot quickly, root several compatible cuttings together rather than expecting one cutting to fill a container by itself.
Light determines whether that new growth stays compact. A plant that receives too little light may produce long gaps between leaves, even if you pinch it repeatedly. Bright filtered light, regular rotation, and pinching only after active growth resumes create a better shape than constant trimming in a dim spot. Avoid removing every green leaf from a parent plant at once; it needs foliage to keep producing energy.
Conclusion
To propagate a polka dot plant, take a clean 3- to 6-inch stem with two or three nodes, remove the lower leaves, and place the bare nodes in clean water or damp, airy potting mix. Water is the more visible learning route; soil avoids the later transition. In both cases, bright indirect light, warmth, a firm healthy stem, and controlled moisture do more work than rooting hormone.
Expect roots on a variable schedule, protect the cutting from direct sun and stagnant conditions, and judge success by firm tissue and continued growth—not by a single promised day. Once the new plant is established, use the next round of tip pruning to keep both the original polka dot plant and its cuttings dense, colorful, and ready to share.