How to Repot an Orchid With Air Roots Without Breaking Them
Learn when to repot an orchid with air roots, which roots to guide or leave outside, how to choose bark and a pot, and how to water after the move at home.
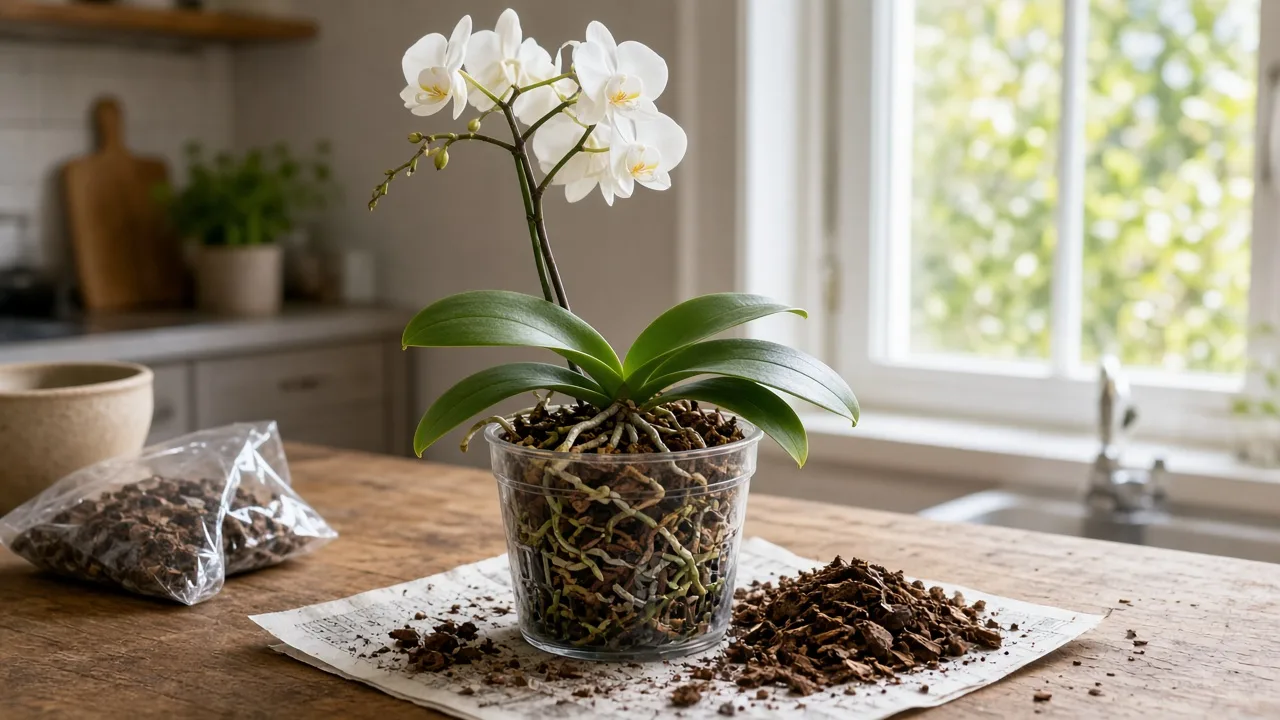
If your orchid has roots spilling over the rim, twisting above the leaves, or reaching through pot openings, you do not need to push every one into the next pot. For a familiar epiphytic house orchid such as a Phalaenopsis, healthy aerial roots can stay in the air. Repot because the medium is breaking down, the roots inside the pot are failing, or the root mass no longer fits—not because a few roots look untidy.
The safest method is to check the plant first, prepare a fresh airy orchid mix, remove only dead or rotted roots, and position each living aerial root where it fits without a sharp bend. Some will settle into the bark; others should remain outside. That is a successful repot, too.
First, Decide Whether the Orchid Needs Repotting
An orchid sending out air roots is often just growing. Exposed roots are normal for many epiphytic orchids: in nature, they cling to a tree or rock rather than growing in garden soil. A root extending beyond a pot is not, by itself, proof that the container is too small or the orchid is unhealthy.
Look at the potting medium and the roots that are already inside the pot. Repot when the bark has broken into fine, compacted pieces, stays wet much longer than it used to, smells sour, or leaves little open space around the roots. A mass of soft or hollow in-pot roots, a plant that has been lifted high by its roots, or a root ball that physically will not fit back into the old pot are stronger reasons to act. The American Orchid Society identifies decomposed mix and a plant outgrowing its container as the main triggers; it notes that a larger pot is not needed when the issue is only old medium. (American Orchid Society: When should I repot?)
The aerial roots help you decide how to arrange the plant, not whether you should repot it. If the medium is still open and fresh, most roots inside are firm, and the plant is stable, leave it where it is and let the visible roots grow. You can inspect the pot again when the medium begins to break down or the plant enters its next active root-growth period.
Choose a Low-Risk Repotting Window
For routine repotting, wait until the flowers fade, then watch for new root tips beginning to grow. New roots can establish in the replacement medium as they extend, which is why orchid societies and extension guides often recommend repotting around the start of active root growth. The calendar varies with the orchid and its indoor conditions: late winter or spring is common for Phalaenopsis, but the plant’s growth cycle is a better cue than a fixed month. (Iowa State University Extension and Outreach; American Orchid Society: Repotting)
Repotting during bloom can shorten the display, so postpone it when the plant is stable and the medium is sound. Do not delay an urgent repair just to preserve flowers if the pot is broken, the medium is collapsing and waterlogged, or active rot is removing the roots the plant needs. The American Orchid Society says a plant in spike or bloom can be repotted when necessary, with the risk that flowers may drop early. Keep handling as gentle as possible and accept that the blooms may not last. (American Orchid Society: Repotting)
There is also a useful difference between an orchid that has just arrived and one already settled at home. Some store orchids are tightly packed in sphagnum moss inside a plastic liner, which can stay wetter than the surrounding bark. Clemson Extension recommends replacing moss after flowering; if it is already soggy or the roots are deteriorating, inspect sooner rather than assuming the flower schedule is more important than the root system. (Clemson Cooperative Extension)
Understand the Roots Before Moving Them
“Air root” describes where an orchid root is growing, not a separate organ that must always stay outside. Many commonly grown orchids are epiphytes, and a root may grow out into open air, along the pot, or into the bark depending on where it finds moisture, air, and support. A research study on epiphytic orchids describes the root’s outer velamen as a structure that can take up water and dissolved nutrients quickly; this helps explain why a firm exposed root is useful even if it never goes into the pot. (Aerial roots of epiphytic orchids: the velamen radicum and its role in water and nutrient uptake)
What growers call an “air root” may not behave exactly like a root that has developed inside damp mix. Over time, roots adapt to the conditions around them, so an older exposed root may not tolerate being packed into wet bark as well as a new root tip. This is one reason to keep placement flexible: preserve healthy roots first and let the plant decide which direction to grow next. Orchid growing conditions vary, so treat the guidance here as a careful approach for common epiphytic house orchids—especially Phalaenopsis—not a rule for every terrestrial orchid or specialist genus.
Read Color and Texture Together
Healthy Phalaenopsis roots are typically firm and rounded. An exposed root may look silvery or white when dry and turn green when wet; an actively growing root often has a fresh green tip. Roots inside an opaque pot may not be green at all. The RHS describes healthy moth-orchid roots as plump, firm, and silvery-white, while Clemson and Iowa State emphasize removing roots that are soft, dead, hollow, brown, or black. (RHS: How to grow Phalaenopsis; Clemson Cooperative Extension; Iowa State University Extension and Outreach)
| What you notice | What it may mean | What to do |
|---|---|---|
| Firm, round root; silver-white while dry or green after watering | Living root, whether it is inside or outside the pot | Keep it; do not prune for appearance |
| Firm root with a green, purple, or reddish tip | New active growth; tip is delicate | Avoid bending or scraping it |
| Flat, hollow, papery, or brittle root | Dead or badly desiccated section | Trace it back; trim only clearly dead tissue with clean snips |
| Soft, slimy, dark root with a bad smell nearby | Possible rot in a wet or degraded root zone | Remove the rotten section and replace decomposed medium |
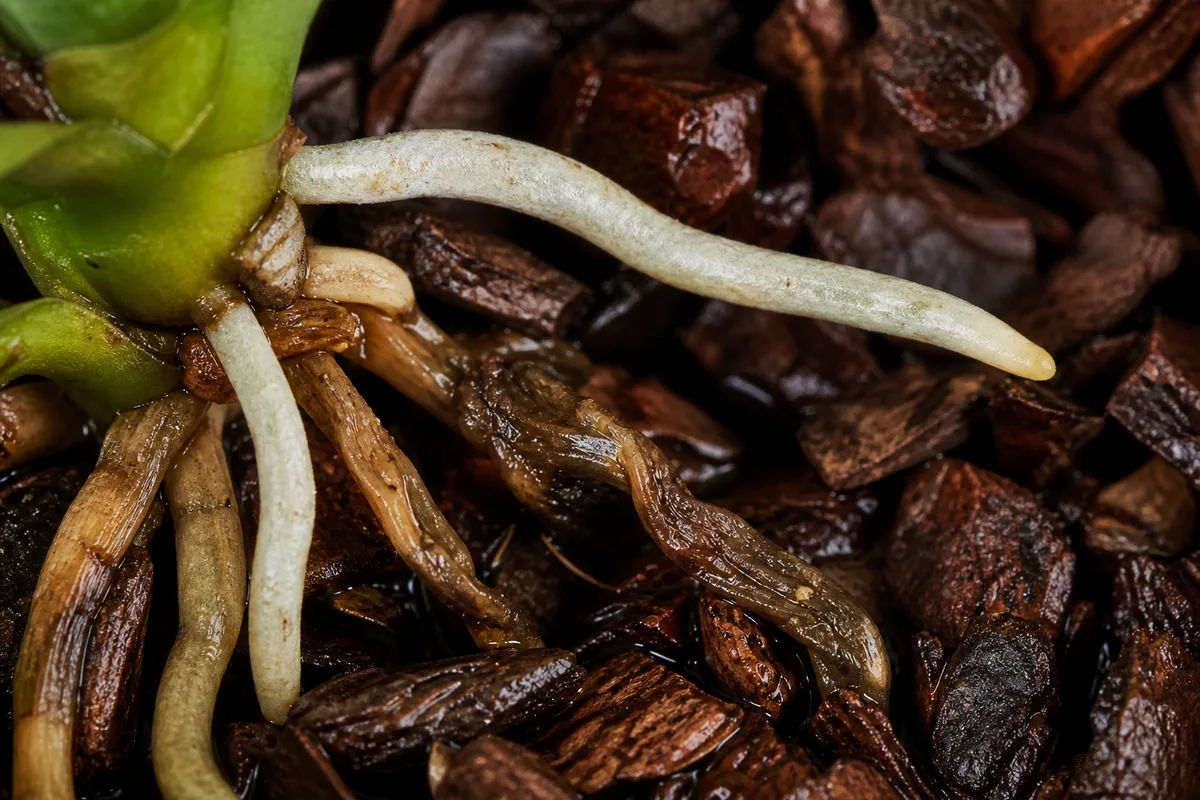
Judge a root by firmness as well as color; a dry, pale aerial root can still be alive.
Color by itself can mislead. A dry but living air root can look pale; bark can stain a root; and an old root may have lost its bright tip without being rotten. If you are unsure, wet the root briefly and feel it gently: a living root usually stays firm, while rotted tissue collapses or feels mushy. Avoid squeezing hard enough to damage the velamen.
Decide What to Do With Each Air Root
Keep firm, living aerial roots. Do not cut them off just to make the plant look neater or to make it easier to fit into a pot. Healthy roots contribute to water uptake and anchoring; some orchid roots also photosynthesize. Removing a root creates a wound and reduces the plant’s working root system. An old, dry-looking root can still be alive, so confirm that it is hollow, brittle, or dead before cutting. (University of Connecticut Home and Garden Education Center; American Orchid Society: Phalaenopsis culture sheet)
Do not treat the new pot as a box that has to hide every root. A crowded orchid may have both roots already acclimated to bark and roots that have grown freely in air. Your job is to preserve both kinds of growth where practical, while keeping the crown and the base of the leaves above the medium. If the plant has a different growth habit, such as a sympodial orchid with pseudobulbs or a terrestrial species, identify its preferred potting method before following a Phalaenopsis routine.
Leave, Lay, or Gently Guide
Use this simple test for each exposed root: Does it already curve toward the pot, and can it rest there without a tight bend? If yes, you can lay it loosely on top of the fresh bark or guide it into an open space while the root is hydrated and flexible. If it resists, points upward, loops around the plant, or would need to be folded to fit, leave it outside. The Royal Horticultural Society specifically advises not burying roots growing out into the air because they may rot under compost. (RHS: How to grow Phalaenopsis)
You do not need to make a binary choice between “everything in” and “nothing in.” Some growers leave every exposed root above the mix; others gently arrange a young root that already points toward the pot. The conservative middle path is to follow the root’s natural curve and leave mature, rigid, or awkwardly placed roots alone. A new green tip is especially easy to snap, so keep it clear of the rim and chopstick as you fill.
If a root barely fits, do not coil it tightly around the pot or bend it backward to gain an inch. Keep it outside and choose a pot sized for the roots that can rest comfortably inside. A few roots remaining above the bark after repotting are expected, not evidence that the job is unfinished. Practical orchid-care guidance also treats leaving roots outside as a normal option when they do not fit without force. (Orchideria: How to repot an orchid with air roots)
Match the Pot and Medium to the Root System
Choose the container and mix together. A larger pot holds more medium, and more medium can stay wet longer. That is useful only if the root mass truly needs the extra room and your growing conditions can dry the mix at a suitable pace. A pot that drains well but is much too large can still keep the root zone wet for too long.
Choose a Snug Pot With Drainage
Use the same pot if it is clean, intact, and large enough for the roots that belong inside it. If the root mass cannot fit without compressing or breaking it, move up just enough to accommodate that mass; do not size up for the leaves, flower spike, or long aerial roots that will remain outside. Iowa State Extension notes that pot size should be determined by the root mass and that many orchids can return to their original container or a pot of the same size. (Iowa State University Extension and Outreach)
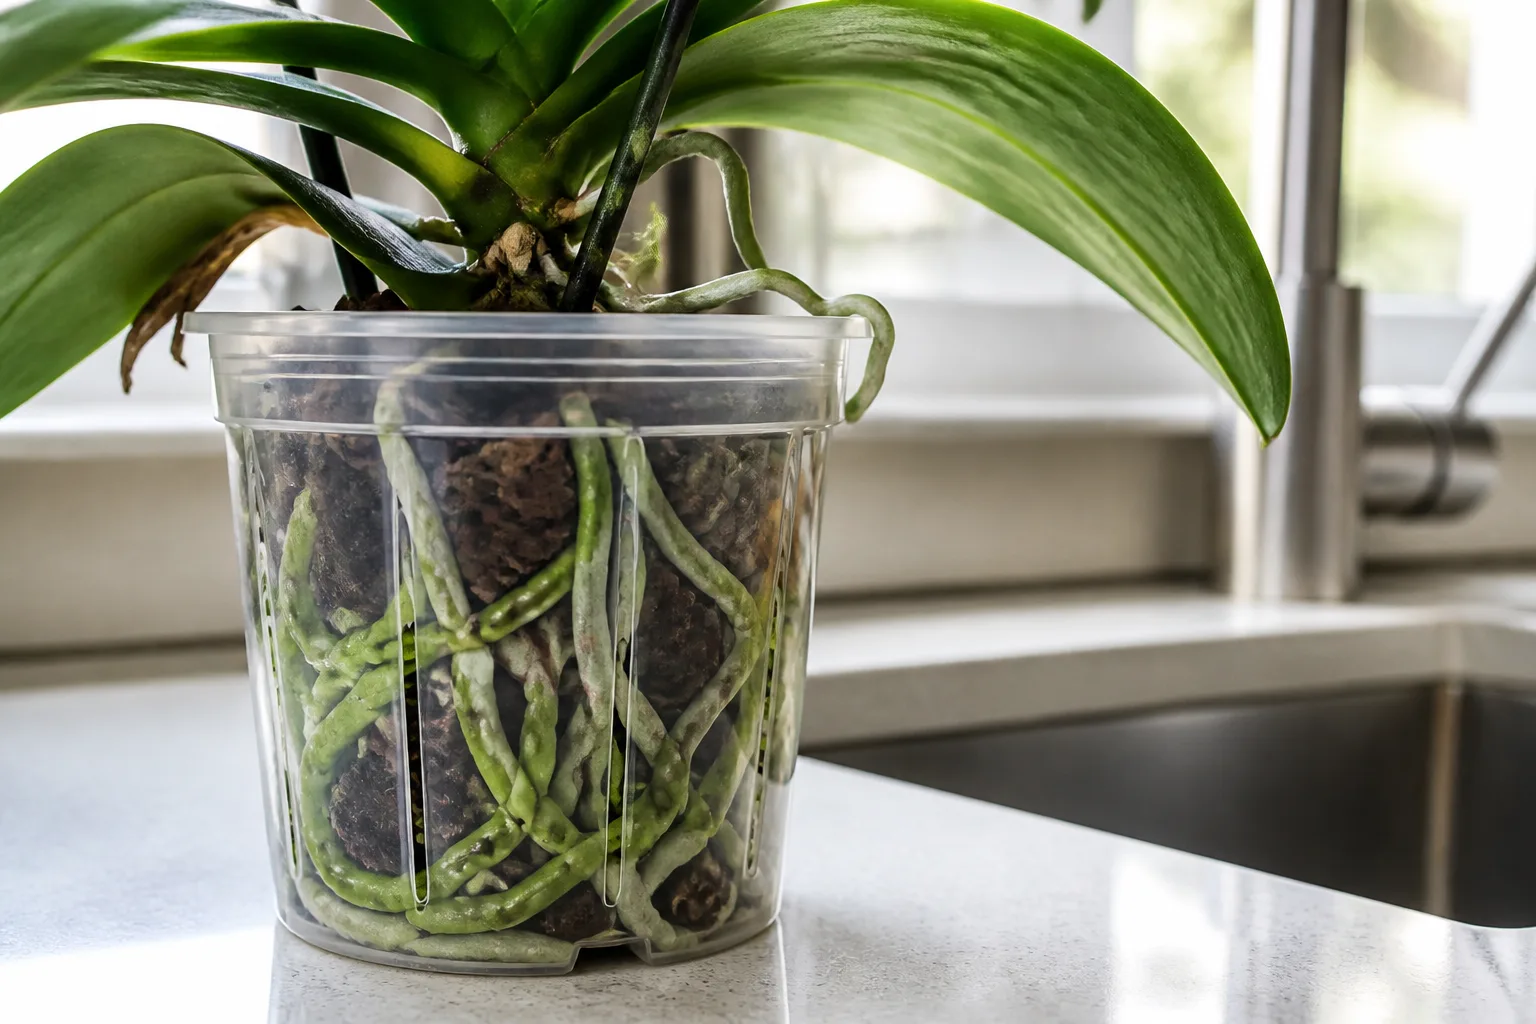
A pot with open drainage holes is essential for the method described here. A clear plastic orchid pot lets you watch root condition and how long the mix stays damp; a slotted pot increases airflow. Unglazed clay is heavier and porous, so it may dry faster, but roots can cling to it and be harder to remove later. The American Orchid Society describes using a clear inner pot slipped inside a decorative outer pot as one common indoor setup. Any cachepot should be emptied after watering so the inner pot is not left standing in water. (American Orchid Society: Phalaenopsis culture sheet; University of Connecticut Home and Garden Education Center)
Skip a bottom layer of pebbles, broken pottery, or gravel as a substitute for drainage. It takes up space without fixing a compacted mix; the orchid’s roots need air pockets throughout the medium and water that can escape through holes. Choose a pot that fits, has drainage, and can be lifted out to dry.
Choose Bark or Moss for Your Conditions
Use a prepared orchid medium rather than ordinary potting soil. Phalaenopsis roots need air as well as water, and chunky bark creates the open structure they are adapted to use. Commercial orchid mixes may combine fir or pine bark with perlite, charcoal, or a small amount of sphagnum moss. Clemson Extension recommends bark mixes for their drainage and airflow, while UConn describes a bark, perlite, and charcoal blend. (Clemson Cooperative Extension; University of Connecticut Home and Garden Education Center)
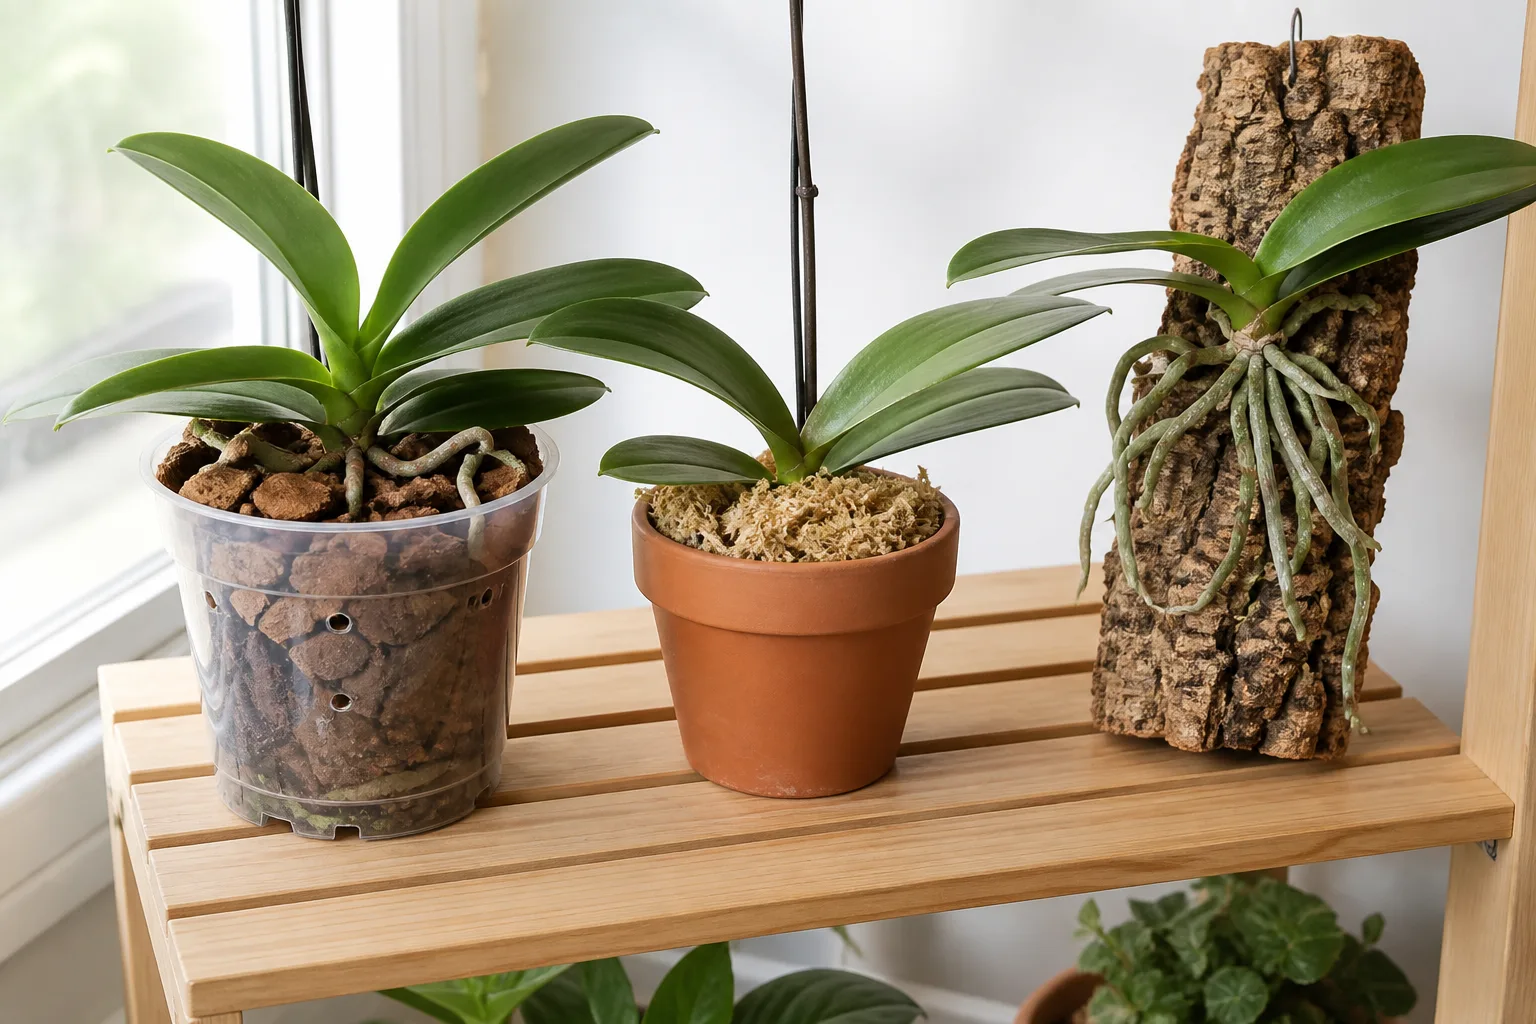
| Medium choice | Useful when | Watch for |
|---|---|---|
| Chunky bark or bark-based orchid mix | You tend to water often, the room is humid, or the pot dries slowly | Pieces that have broken down into dense fines; replace when air spaces disappear |
| Finer bark or a bark mix with some sphagnum | Your home is dry, roots dry quickly, or you cannot water often | Too much tightly packed moss can hold moisture and reduce airflow |
| Mostly sphagnum moss | A grower’s conditions and watering practice are tuned to it | Do not treat it like bark; it may stay damp much longer, especially inside a compact nursery plug |
There is no single bark-to-moss ratio for every home. Match particle size and water retention to the orchid’s root thickness, the pot’s airflow, room humidity, and how quickly you can check the mix. If a store orchid’s roots are embedded in a dense moss plug, loosen and remove that plug rather than burying it inside fresh bark. If you keep moss in the new mix, distribute it loosely instead of packing a wet clump around the crown. The RHS advises using specially formulated bark-based orchid compost for moth orchids and warns that ordinary multipurpose compost is unsuitable. (RHS: How to grow Phalaenopsis)
Prepare the Orchid and Workspace
Set out the new pot, fresh orchid mix, clean snips, a blunt chopstick or pencil, a towel, and room-temperature water. Wash a reusable pot and rinse away residue; use a clean, sharp cutting tool. If you care for several orchids, clean the tool between plants and after cutting rotten roots so you do not carry contaminated tissue to another plant. Orchid societies stress clean tools because unsterile equipment can move pathogens between plants. (American Orchid Society: Handling damage)
Moisten dry bark according to its package instructions before you start. If the orchid’s roots are very dry and stiff, wet the root mass for a few minutes to make it more flexible, then let it drain. You do not need to soak the entire plant for half an hour as a mandatory step; keep water out of the crown and leaf joints, and stop if the roots become pliable. Iowa State Extension recommends soaking dry roots briefly before loosening them. (Iowa State University Extension and Outreach)
If exposed roots have grown through holes in a plastic nursery pot, ease them out only if they slide without force. If a root has fused around a terracotta pot, do not pry it loose with a sharp knife against the root. You can sacrifice a cheap plastic pot by cutting it away; with a valuable orchid fixed to a clay pot, soaking and patient release may help, but a root that will not release safely can remain attached. Saving every pot is less important than preserving a living root.
Repot Step by Step
Work over a clean surface, and pause whenever a root catches. It is safer to leave a root outside or cut an old plastic liner than to tug the plant through resistance. Keep track of which roots were inside the medium before you rinse them; that helps you return them to conditions they already tolerate.
Release and Clean the Roots
- Hold the orchid near its base without gripping the leaves or flower spike. Support the pot, loosen the sides, and ease the root mass out; cut a disposable inner pot if roots have grown through the openings.
- Remove loose old bark and any compacted center plug. Tease away material with your fingers, wetting dry roots briefly when needed. Rinse only enough to see the roots and remove fine debris; do not scrub the velamen or strip every fragment from a root that is firmly attached.
- Keep exposed roots relaxed while you work. If an aerial root has been resting against a clay pot, soften it with water and try a small movement. Do not pull it straight or force it to peel away if it is stuck.
- Clean the reusable container or switch to a slightly larger pot only if the root mass requires it. Set the plant beside the container once to check that the crown will sit at its previous height and the roots can spread without sharp folds.
Trim Only Dead or Rotted Roots
Use clean snips to remove roots that are plainly dead, hollow, papery, mushy, or rotted. On a partly damaged root, cut back only to firm, intact tissue; do not remove every healthy root simply to make the root ball look tidy. Iowa State, Clemson, and the RHS describe cutting away soft, dead, mushy, or hollow roots, but their recommendations about shortening healthy roots are not identical. The conservative method here is to preserve firm living roots—especially exposed roots—and let pot size and placement solve fit problems. (Iowa State University Extension and Outreach; RHS: How to grow Phalaenopsis)
Avoid routine peroxide, cinnamon, or fungicide treatments on a healthy plant; the core job is a clean cut, clean tools, fresh airy medium, and sensible watering. If rot is extensive, the orchid has lost most of its roots, or the stem or crown is also soft, this is a rescue rather than routine repotting. Keep the plant separate from other orchids while you assess it, and use species-specific disease guidance if symptoms continue.
Set the Crown and Fill Without Packing
- Put a small amount of fresh bark in the pot, then position the plant so its stem or crown remains at the same height as before. For a Phalaenopsis, keep the crown and the bases of the leaves above the medium; do not bury the stem to hide air roots.
- Arrange roots that grew inside the pot over the bark. Lay any flexible aerial root that naturally curves toward the medium on top or in a loose gap. Let rigid or upward-growing air roots remain outside, with their tips clear of the pot rim.
- Add bark in small handfuls, rotating the pot so pieces fall between roots. A blunt chopstick can nudge large pieces into open spaces; move the mix, not the roots. Do not ram the chopstick through the root mass or compress the medium into a dense plug.
- Check stability. The plant should sit upright without the root system being crushed. If it wobbles, add a stake or clip to support the stem while new roots establish. Do not use a deeper layer of bark over the crown to hold it down.
The bark should support the orchid without squeezing it. A few visible gaps are normal in a chunky medium; they are the air channels roots need. Finish with the root tips exposed, the crown dry, and any long aerial roots hanging or resting naturally around the pot.
Water and Stabilize the Orchid Afterward
Watering advice after repotting varies. Iowa State Extension and the RHS recommend watering the newly potted orchid thoroughly; the Chicago Botanic Garden advises a full watering followed by a longer interval before the next one. The right interval depends on whether the roots were cut, how wet the new mix is, the pot material, airflow, temperature, and humidity. There is no reliable one-week rule for every orchid. (Iowa State University Extension and Outreach; RHS: How to grow Phalaenopsis; Chicago Botanic Garden: An Orchid FAQ—How to Repot)
For a routine repot with mostly intact roots, thoroughly wet the bark once if it is dry, then let the pot drain completely. Keep water out of the crown and empty any decorative outer pot. After that first watering, check the medium rather than following a calendar: water again when the mix is nearly dry, not while it remains wet in the center. The American Orchid Society cautions that Phalaenopsis should not be left completely dry, but also says to wait until the medium is nearly dry before watering again. (American Orchid Society: Phalaenopsis culture sheet)
If you cut several rotten roots, keep the fresh cuts clean and avoid leaving the plant in saturated moss or water. Let the surface of the cut tissue dry before the next wetting, but do not turn that into a prolonged dry spell for all the living roots. Keep the orchid in stable bright, indirect light with gentle air movement. Skip a strong fertilizer dose on repot day; return to a diluted orchid feeding routine when the plant is taking up water normally and active growth resumes.
Some exposed roots will stay silvery when the medium is still moist because they dry faster than roots in bark. Do not water the entire pot every time an air root changes color. If the aerial roots repeatedly shrivel while the medium is at the right moisture, consider the room’s humidity and airflow; misting gives only brief wetting and is not a substitute for watering the root zone. If you do mist, do it early enough that water does not sit in the crown overnight.
Avoid the Mistakes That Damage Air Roots
- Repotting only because roots look unusual: Aerial roots are normal. Check the medium and in-pot roots before changing the pot.
- Forcing roots under bark: A tight bend can crack a root, and a mature aerial root may not adapt well to continuously damp media. Leave it outside if it resists.
- Cutting healthy roots for appearance: Silver-white does not mean dead. Judge firmness and condition, and remove only dead or rotted tissue.
- Using a pot that is much too large: Extra medium holds extra water. Size the pot for the root mass that can fit comfortably, not for the plant’s leaves or its full aerial spread.
- Using ordinary potting soil or compacted moss: A dense, wet root zone lacks the open spaces epiphytic orchids need. Use an orchid medium that matches your watering routine.
- Burying the crown: Keep the leaf bases and growth point above the bark and dry after watering. Moisture trapped there can contribute to crown rot.
- Following one watering calendar: A warm room and coarse bark dry differently from a cool room and a moss-heavy mix. Check the medium and use the pot’s drainage, not a fixed weekly schedule, as your guide.
- Panicking over a small accidental break: If a healthy root breaks, do not keep cutting it shorter or moving the plant around. Make a clean cut only if the remaining tissue is ragged or rotten, then complete the repot with the roots that remain.
Conclusion
To repot an orchid with air roots, first confirm the plant needs fresh medium or more root space. Remove the orchid gently, distinguish living roots by firmness as well as color, trim only clearly dead sections, and use a snug draining pot with fresh orchid mix. Keep the crown above the medium and guide an aerial root only when it naturally bends into place.
The finished plant may still have roots above the rim. Leave those roots intact, water according to the new medium’s moisture and your room conditions, and let new root tips—not a demand for a tidy silhouette—show you how the orchid is settling in.



