How to Grow Spaghetti Squash From Seed to Harvest
Learn how to grow spaghetti squash from seed to harvest: time planting by soil warmth, space vines, improve pollination, spot ripeness, and store fruit.
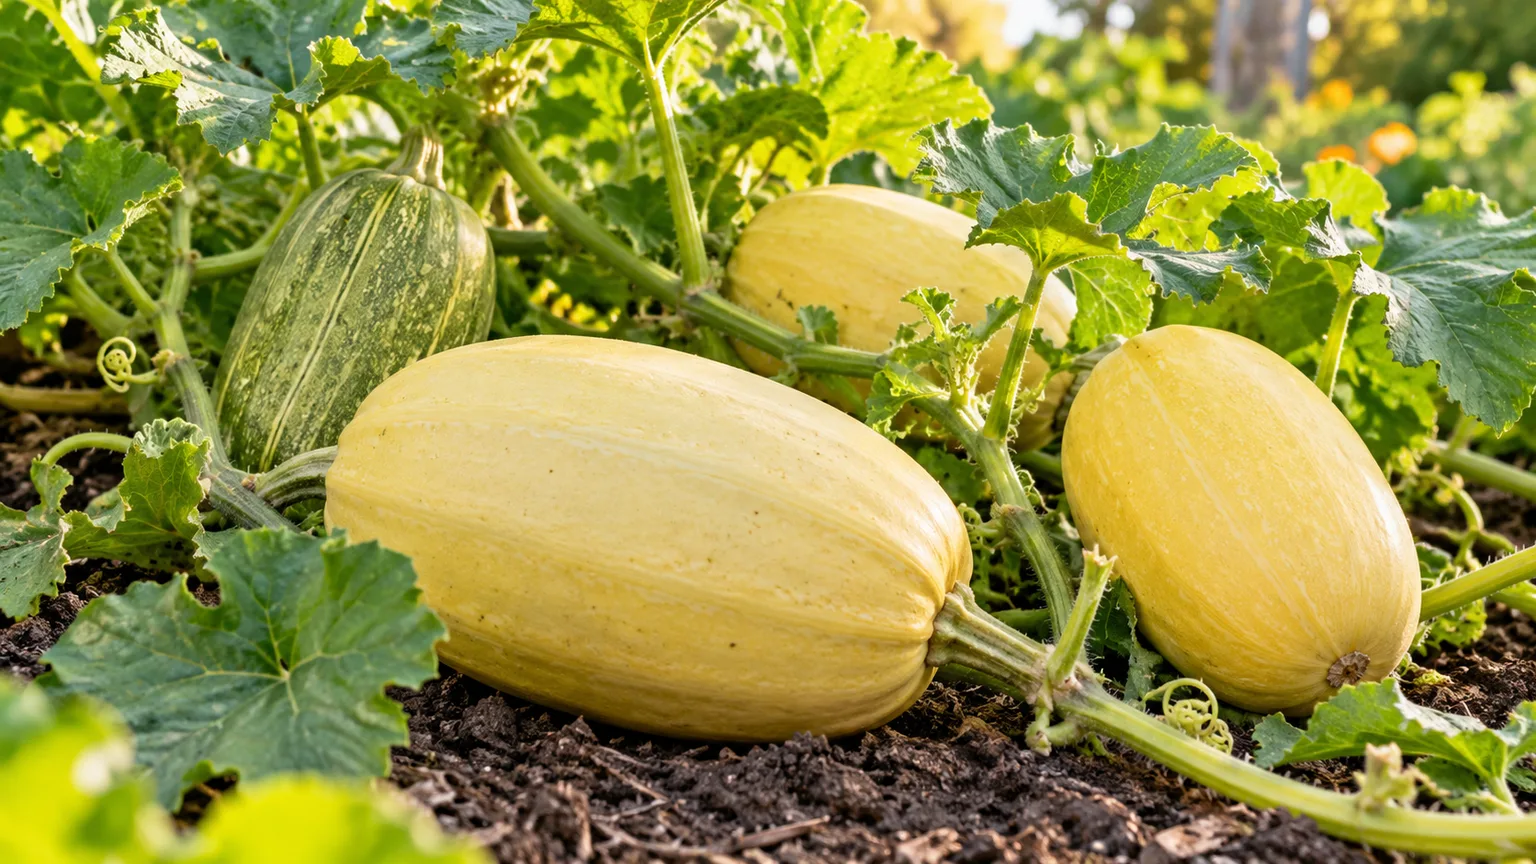
Spaghetti squash is a warm-season winter squash: it grows through summer, then develops a hard rind that lets a mature fruit keep for weeks or months. The plant is an annual vine in the cucurbit family, and its long runners can occupy a surprising amount of garden space. The central growing challenge is not complicated care; it is giving the crop enough warm, frost-free time to finish before autumn weather turns.
Plan backward from your first expected fall frost, choose a variety whose listed maturity window fits, and wait for warm soil before sowing. After that, consistent root-zone moisture, pollinator access, and patient harvest timing do more for a useful crop than frequent feeding or heavy pruning.
Plan for your first frost, not the calendar
Spaghetti squash needs a long stretch of warm weather. Many varieties take roughly 90 to 100 days to mature, and some take longer; treat the seed packet’s “days to maturity” as a planning estimate, not a harvest alarm. Catalogs may calculate days from direct sowing or transplanting, so check the variety description rather than comparing numbers from different companies as if they were identical. Penn State Extension notes that some winter squash need more than 100 days, while practical growing guidance often puts spaghetti squash near that range. Penn State Extension’s winter squash guide and Savvy Gardening’s spaghetti squash guide offer useful cultivar and timing context.
For a simple planning check, count backward from the average first frost by the cultivar’s listed days, then leave extra room for a cool start, cloudy weather, or a slow-maturing plant. If that window is too short, choose an earlier variety or start seeds indoors a few weeks before planting out. Starting far too early usually creates oversized, root-bound seedlings that resent transplanting; a small, sturdy transplant is more useful than a large one.
Frost dates are only one part of the calendar. Squash seeds germinate poorly in cold soil, so direct sow when the danger of frost has passed and the soil is at least about 65°F (18°C). In warm, frost-free climates, use the local pattern of extreme heat and wet weather to choose a growing window, and check the variety’s heat tolerance and maturity estimate. The aim is a long warm season with enough healthy foliage to mature fruit, not simply an early planting date.
Choose a variety that can finish in your season
Look first for days to maturity, then for the vine habit and fruit size that fit your garden. Standard spaghetti squash varieties are usually vigorous vining plants; compact selections such as ‘Small Wonder’ can be better suited to a shorter season or a smaller plot. The exact number of days varies by seed lot, climate, and how the supplier counts maturity, so use the packet’s estimate and watch the fruit itself when harvest approaches.
If your frost-free window is short, do not try to compensate by putting cold-sensitive seedlings outside before the soil warms. A warm, protected start indoors or a faster-maturing variety is a better trade. In a long summer, direct sowing is often simpler and avoids transplant shock.
Give the vines sun, room, and fertile soil
Choose an open spot that receives at least six to eight hours of direct sun. A shaded fence or bed may support leaves but slow flowering and fruit maturation. The vines also need airflow: when foliage stays crowded and wet, disease pressure rises and it becomes harder to inspect the undersides of leaves for pests.
Use fertile, well-drained soil that holds moisture without staying waterlogged. A soil test is the best way to check pH and nutrient levels; a pH around 6.0 to 6.8 is a useful general range for winter squash. Work finished compost into the bed before sowing, especially if the soil is low in organic matter. Avoid planting in a spot where water pools after rain, and do not assume a raised bed is automatically better if it dries out quickly in summer. Penn State Extension gives a similar soil range and recommends fertile, well-drained ground.
Leave more room than the seedling seems to need. A sprawling vine can run eight feet or more, and several plants can quickly shade a small bed. For in-ground planting, spacing around four feet between planting stations is a workable starting point for many vining types; rows may need six feet or more between them so leaves are not packed together. Use the seed packet’s spacing when it differs, especially for a compact cultivar.
Choose rows, hills, or a supported trellis
Rows are easiest to water and inspect if you have space for vines to run along the ground. Hills or low mounds can help in heavy soil that drains slowly, but they dry faster in hot weather, so monitor moisture instead of assuming a mound stays wet. Keep the planting layout simple: a few well-spaced plants are easier to pollinate, weed, and inspect than a crowded cluster.
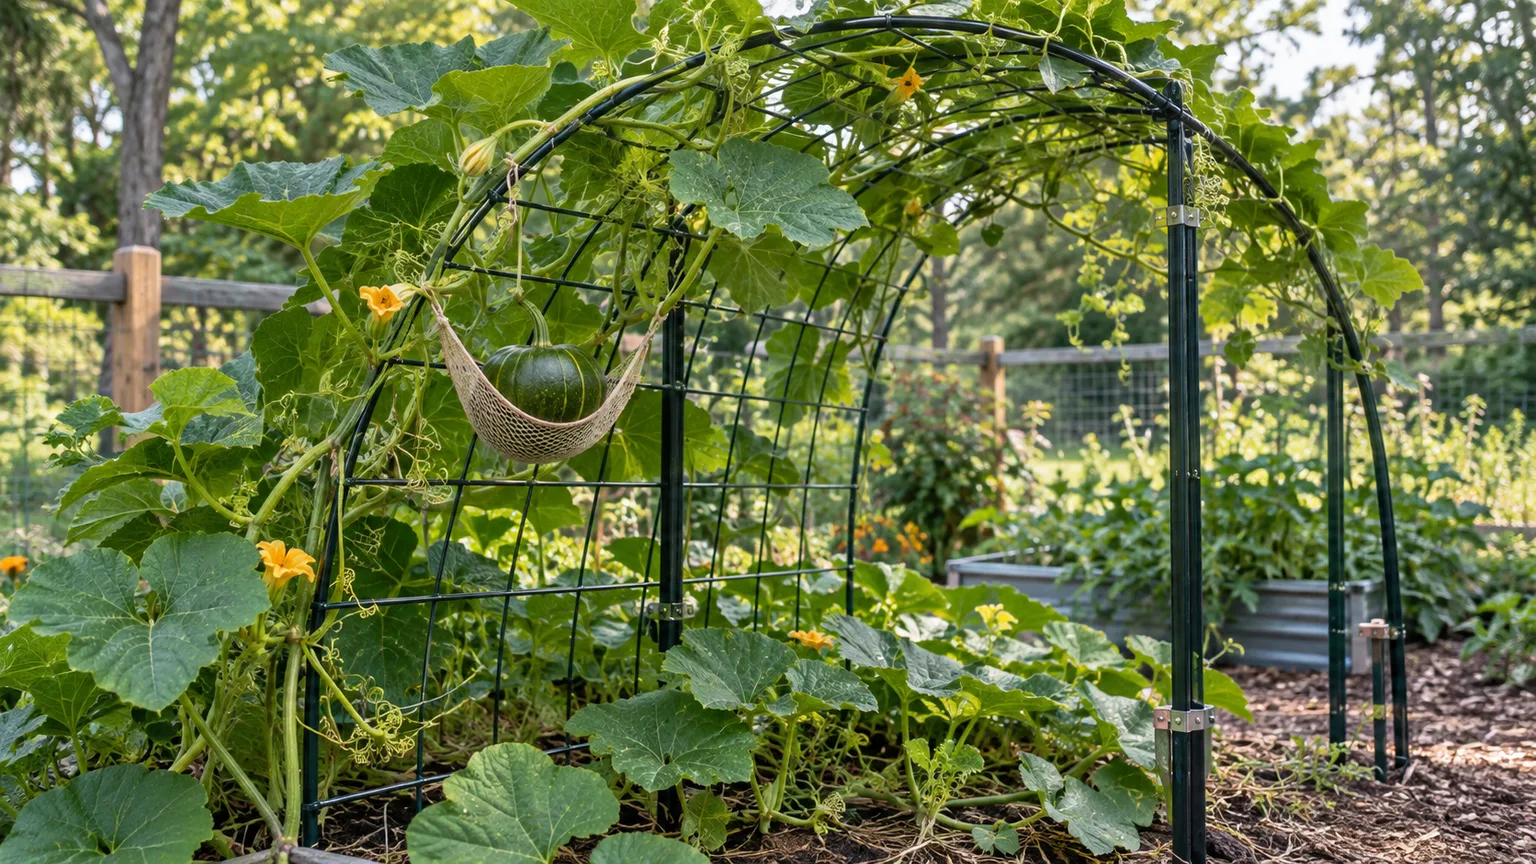
A trellis can free bed space, but it must be sturdy enough for mature vines and fruit, anchored against wind, and wide enough for the runners to spread. Use a rigid grid or strong fencing rather than a narrow stake; tendrils do not reliably grip smooth posts. As fruit enlarges, make a breathable sling from mesh or fabric and attach it to the support so the stem is not carrying the full weight. Ground growing is the safer option if you cannot build a stable trellis or support each fruit. Savvy Gardening’s guide shows practical approaches for training squash along a fence or grid.
Sow after the soil warms—or start indoors briefly
Direct sowing is the low-stress option where the warm season is long enough. Place two or three seeds about one inch deep at each planting station after the last frost and once the soil has warmed. When seedlings have their first true leaves, snip off the weaker ones at soil level, leaving the strongest one or two according to the variety’s spacing directions. Snipping avoids tugging at nearby roots.
In a short-season climate, start seeds indoors about three to four weeks before you expect to plant them outside. Use individual pots with drainage, keep the mix warm and evenly moist, and provide strong light as soon as shoots emerge. Harden seedlings outdoors gradually over about a week, then transplant them after frost danger has passed and soil is warm. Keep the root ball intact and avoid waiting until roots circle the pot; cucurbits can lose time when their roots are disturbed. Savvy Gardening recommends brief indoor starting for genuinely short seasons because direct-sown plants often establish faster when transplanting is unnecessary.
Weed carefully while plants are small, before the expanding leaves cover the ground. Once vines run, shallow cultivation is safer than digging near the crown: squash roots spread near the surface and can be damaged by a hoe. A light mulch suppresses weeds and reduces soil splash, but wait until the soil is warm before laying down straw or leaf mulch.
Keep moisture steady and feed by soil need
A squash plant can tolerate short dry spells better than a cycle of drought followed by heavy soaking. Uneven moisture during flowering and fruit enlargement can stress the plant, and shallow watering encourages roots to stay near the hot surface. Check soil several inches below the mulch; if it is dry there, water slowly enough to moisten the root zone rather than wetting only the top layer.
Water at the root and mulch after warm-up
Rainfall and temperature determine how often you need to irrigate. As a general starting point, winter squash may use about one to two inches of water per week from rain and irrigation, with more needed during hot, dry, windy weather and less in cool or rainy conditions. Penn State Extension recommends that weekly range and favors drip irrigation because wet foliage can increase disease risk. Adjust it to your soil: sandy beds drain quickly, while heavy soil can stay wet and suffocate roots.
Water near the base of the plant in the morning, using a soaker hose or drip line if available. Do not keep the leaves wet overnight. Once the ground has warmed, mulch with clean straw, shredded leaves, or another garden-safe material, keeping it a few inches away from the crown. Mulch helps smooth moisture swings, suppress weeds, and keep fruit from sitting directly on damp soil.
Use compost first; avoid forcing leaf growth
Spaghetti squash is vigorous, but a bigger vine does not always mean a better harvest. Excess nitrogen can push soft leaf and stem growth, delay fruit maturity, and make it harder for a short-season plant to finish. Start with compost and a soil test; if a test shows a nutrient shortage, use a vegetable fertilizer according to its label rather than applying a high-nitrogen product by habit. Penn State Extension cautions that excess nitrogen can delay maturity and reduce storage quality.
If leaves are pale or growth is weak, first check soil moisture, drainage, sunlight, root damage, and pests. A plant struggling because its roots are waterlogged or a borer is inside the stem will not be rescued by extra fertilizer. Avoid adding phosphorus simply because squash flowers need it; soil testing can tell you whether the bed actually needs it.
Guide vines without damaging them
Let runners spread across mulch, lawn edges, or a designated bed path rather than repeatedly redirecting them once they are long. If a vine must be moved, lift and reposition it gently while it is still flexible; dragging a mature vine can split the stem or loosen developing roots. Some runners form roots where nodes touch moist soil, helping the plant stay anchored and take up water.
You do not need to prune healthy vines to make the squash larger. Leaves supply energy to developing fruit, so cutting them back aggressively can reduce the plant’s ability to mature what it has already set. Remove leaves only when they are dead, badly diseased, or blocking necessary access, and use clean pruners. Keep weeds down near young plants, then let the squash canopy shade the soil once it fills in.
When fruit rests on soil, slide a flat piece of straw, a dry board, or a tile beneath it while it is still small enough to lift without twisting the stem. This keeps the rind off persistently wet ground and makes inspection easier. Do not move large fruit late in development; a torn stem or cracked rind can shorten storage life.
Read the flowers to judge pollination
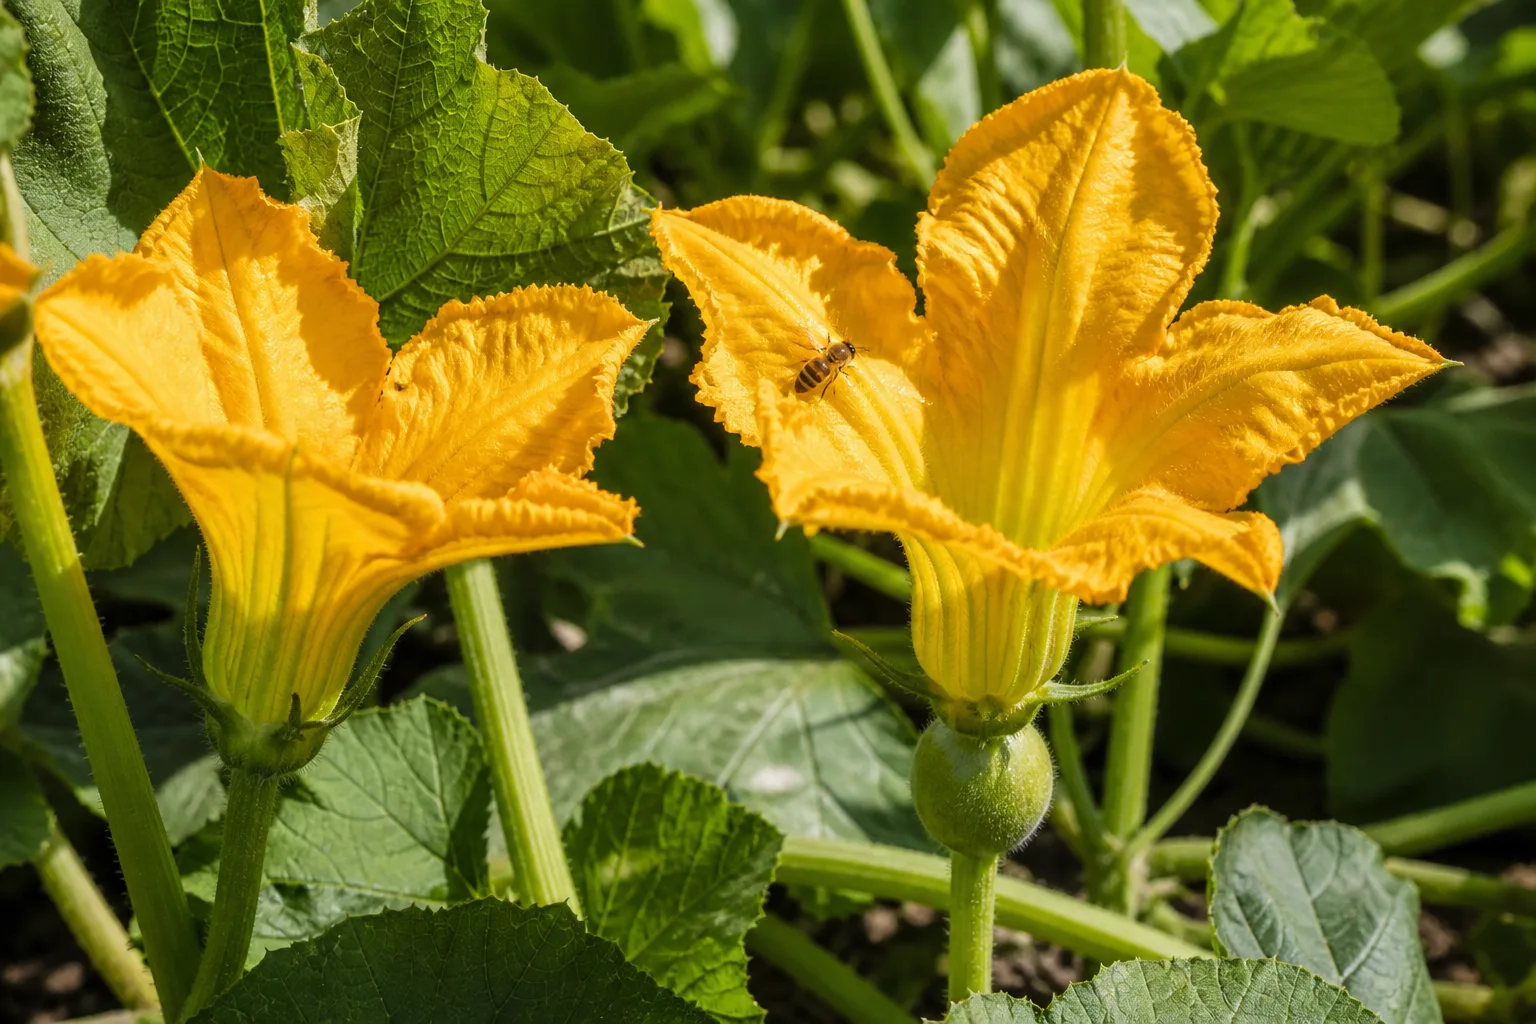
Squash plants produce separate male and female flowers on the same plant. Bees and other insects transfer pollen between them, and the flower is receptive for a short time, often just the morning it opens. If you see large yellow flowers but no fruit yet, look closely at the stem behind each bloom before deciding there is a problem.
Tell male and female flowers apart
A male flower sits on a thin stem. A female flower has a small swollen ovary directly behind the petals; it looks like a miniature squash. Early in the season, plants often produce male flowers first, so flowers that close and drop without forming fruit are not necessarily evidence of failed pollination. Utah State University Extension explains that separate male and female blooms need pollen transfer for fruit set, and that first flowers are commonly male.
After female flowers appear, watch the tiny ovaries for several days. A pollinated ovary usually begins to enlarge. If it yellows, shrivels, or drops soon after the flower closes, insufficient pollen transfer is one possibility; also check for heat stress, irregular watering, or damaged vines. The plant needs healthy leaves and steady moisture as well as pollen.
Hand-pollinate in the morning if needed
Hand-pollination can help when bees are scarce, rainy weather keeps them inactive, or female flowers keep aborting despite healthy plants. Do it early, while both flowers are newly open. Pick a fresh male flower, peel back its petals to expose the pollen-bearing center, and gently brush that center across the stigma in the middle of the female flower. A small clean artist’s brush can do the same job if you do not want to remove the male bloom.
Use pollen from a male flower on the same plant or another spaghetti squash plant. Keep row covers over seedlings if they are protecting against pests, but remove them when flowers need access to pollinators; if you must keep a cover in place, hand-pollinate and close it again afterward. The same basic hand-transfer method is described by BBC Gardeners’ World Magazine.
Troubleshoot fruit that never develops
If the first blooms fall without a squash behind them, wait for female flowers. A plant may produce a run of male flowers before females open, and those male blooms naturally drop after flowering. This is part of the plant’s sequence, not a sign that the plant needs fertilizer.
If female blooms appear but no fruit grows, inspect them in the morning for bee activity and try hand-pollination for several days. Then check water and weather. Dry soil during flowering, intense heat, waterlogged roots, or a vine damaged by insects can all interfere with fruit development. Restore even moisture, keep foliage and roots healthy, and avoid disturbing the plant while it is setting fruit.
If a tiny squash starts to grow and then turns yellow and soft, the flower may not have received enough pollen to support full development. Poor pollination is common, but it is not the only cause; severe moisture stress, heat, or vine injury can produce a similar result. Do not respond by dumping on fertilizer or watering constantly. Check the soil several inches down, look for pest damage at the crown and stems, and watch the next few female flowers. One failed fruit does not mean the entire plant is lost.
Manage squash pests and mildew early
Check the crop at least twice a week once runners begin to spread. Turn over leaves and inspect the base of each plant, where insects or eggs can hide. Early, small interventions are easier than treating a large vine after the leaves collapse. Rotating cucurbit crops to a different bed in later seasons can also reduce repeated pest and disease pressure.
Check for squash bugs and vine borers
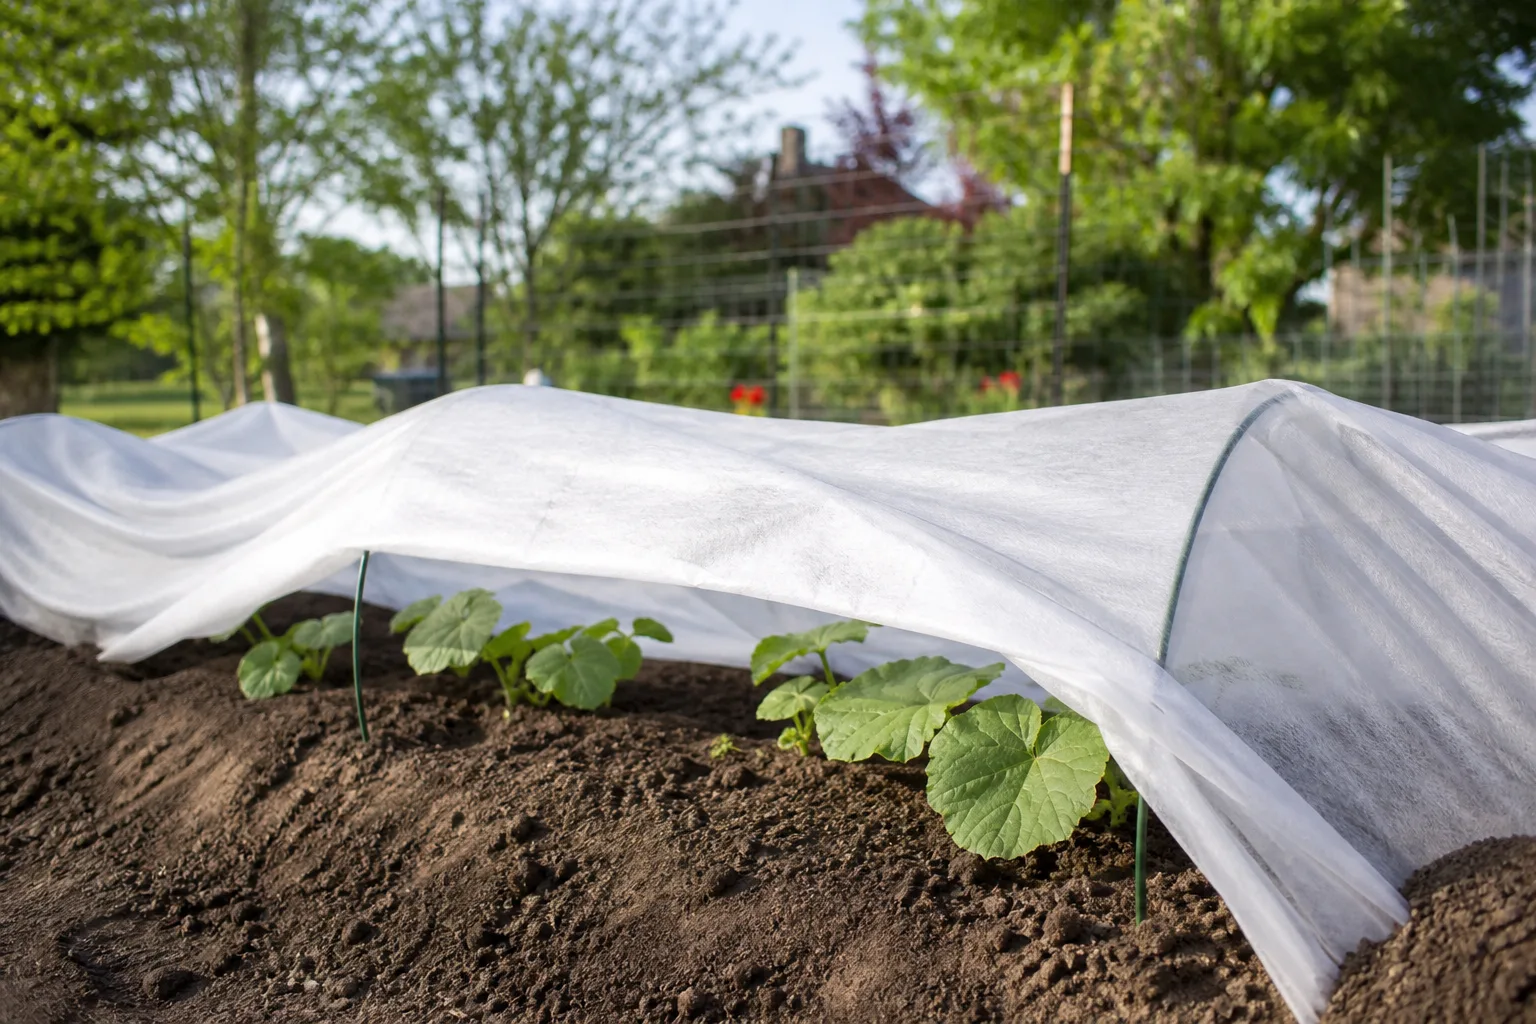
Squash bugs feed on leaves and can cause speckling, wilting, and dieback. Look for clusters of bronze-colored eggs on leaf undersides and stems; scrape them into soapy water or crush them before they hatch. Hand-pick adults and young nymphs, and remove plant debris at the end of the season where pests might shelter. Floating row covers can keep adult insects away from young plants, but uncover flowering vines so bees can reach the blooms unless you hand-pollinate.
Squash vine borers are harder to spot because larvae tunnel inside stems. A sudden wilt on one runner, sometimes with a hole and sawdust-like frass near the stem base, calls for a close inspection. If you find a larva, a careful lengthwise slit can expose it for removal; avoid cutting deeply or severing the stem. Mound moist soil over healthy vine nodes to encourage additional rooting, but do not bury an already rotting or infected section. If the main crown is badly damaged, save any fruit already growing and remove the failing vine.
Cucumber beetles chew leaves and blossoms and may spread disease. Use row covers before flowers open, remove them for pollination, and clean up heavily infested plants. Penn State Extension lists squash bugs, cucumber beetles, and vine borers among common winter-squash pests, and recommends practical measures such as row covers and crop rotation. If a pesticide becomes necessary, use only a product labeled for the crop and pest, follow its directions, and protect pollinators by avoiding applications to open flowers.
Reduce mildew without spraying bees
Powdery mildew can appear as pale, dusty patches on older leaves, especially late in the season. Do not panic at the first spot: some decline is normal as fruit matures, and removing every spotted leaf can strip the plant of energy. Keep foliage spaced, water at soil level, and remove badly affected leaves only when infection is spreading early or the leaf is largely dead. Downy mildew and other leaf problems can look different, so ask a local extension service to identify an unfamiliar outbreak before choosing a treatment.
Resistant varieties, airflow, and good watering habits are more useful prevention than a routine spray. Never assume that “organic” means harmless to bees or that a home remedy will cure a disease; apply any labeled treatment only when the diagnosis and timing justify it. Penn State Extension notes that powdery and downy mildew are common in squash and emphasizes variety choice and airflow as parts of management.
Harvest only when the rind is mature
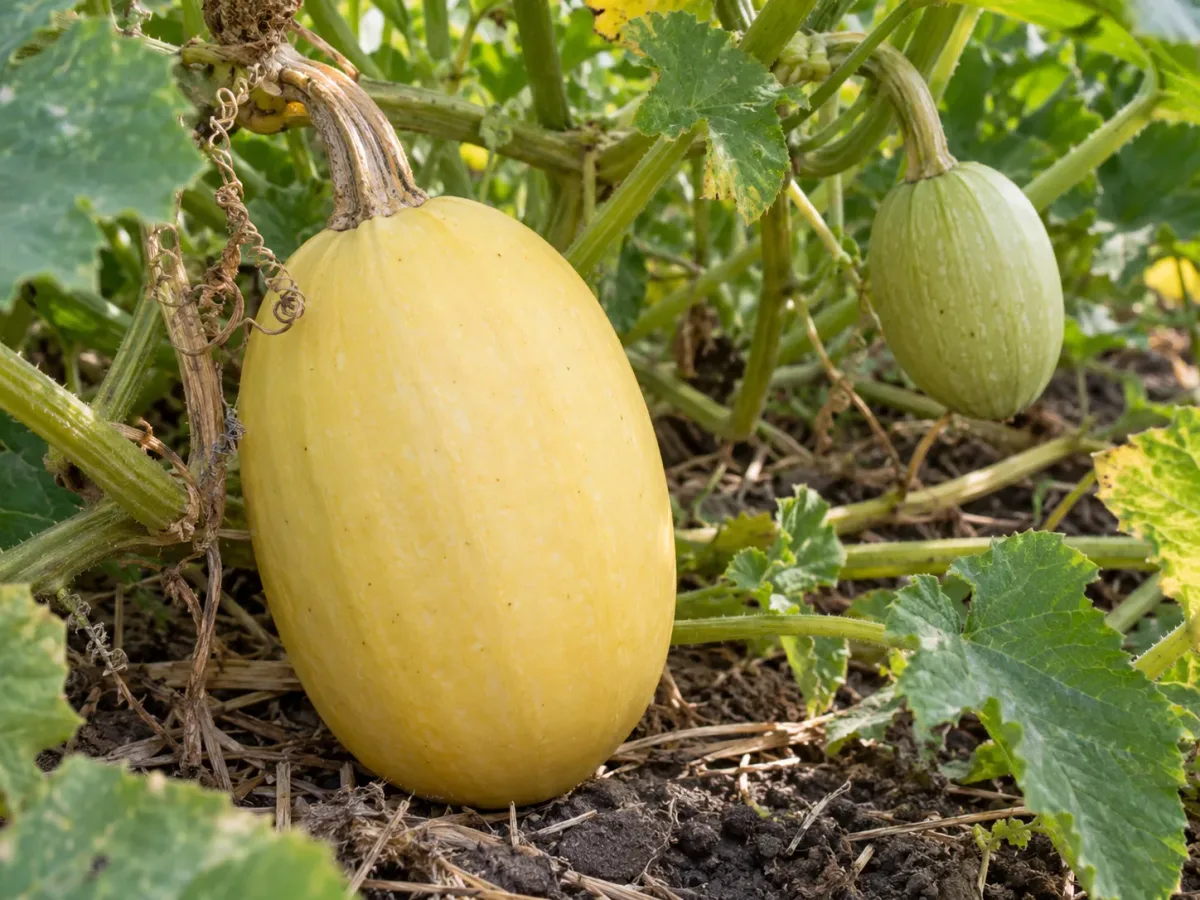
Use several signs together rather than relying on a calendar, one color, or the plant’s first dying leaf. Spaghetti squash typically shifts from green toward cream, pale yellow, or a deeper yellow as it matures, but the exact color depends on the variety. A mature rind feels firm and resists a light fingernail press; the stem often becomes dry and corky, and the vine may begin to decline naturally.
Cut the fruit with clean pruners, leaving about one to two inches of stem attached. Do not twist or pull it free, and do not carry it by the stem. A broken stem leaves an easy route for rot, while bruises and punctures can shorten storage life. Handle squash as carefully as an apple even though the rind looks tough.
A hard freeze can damage vines and fruit, so harvest mature squash before one is forecast. If an immature fruit must come off to avoid freeze damage, bring it indoors and use it soon; it may change color after picking, but it will not reliably gain the full flavor or storage quality of fruit that matured on the vine. Winter squash are non-climacteric: they need to reach maturity before harvest. The University of Minnesota Extension’s harvest guidance explains why squash and pumpkins should be allowed to finish on the vine rather than treated like fruit that ripens after picking.
Cure and store fruit for winter use
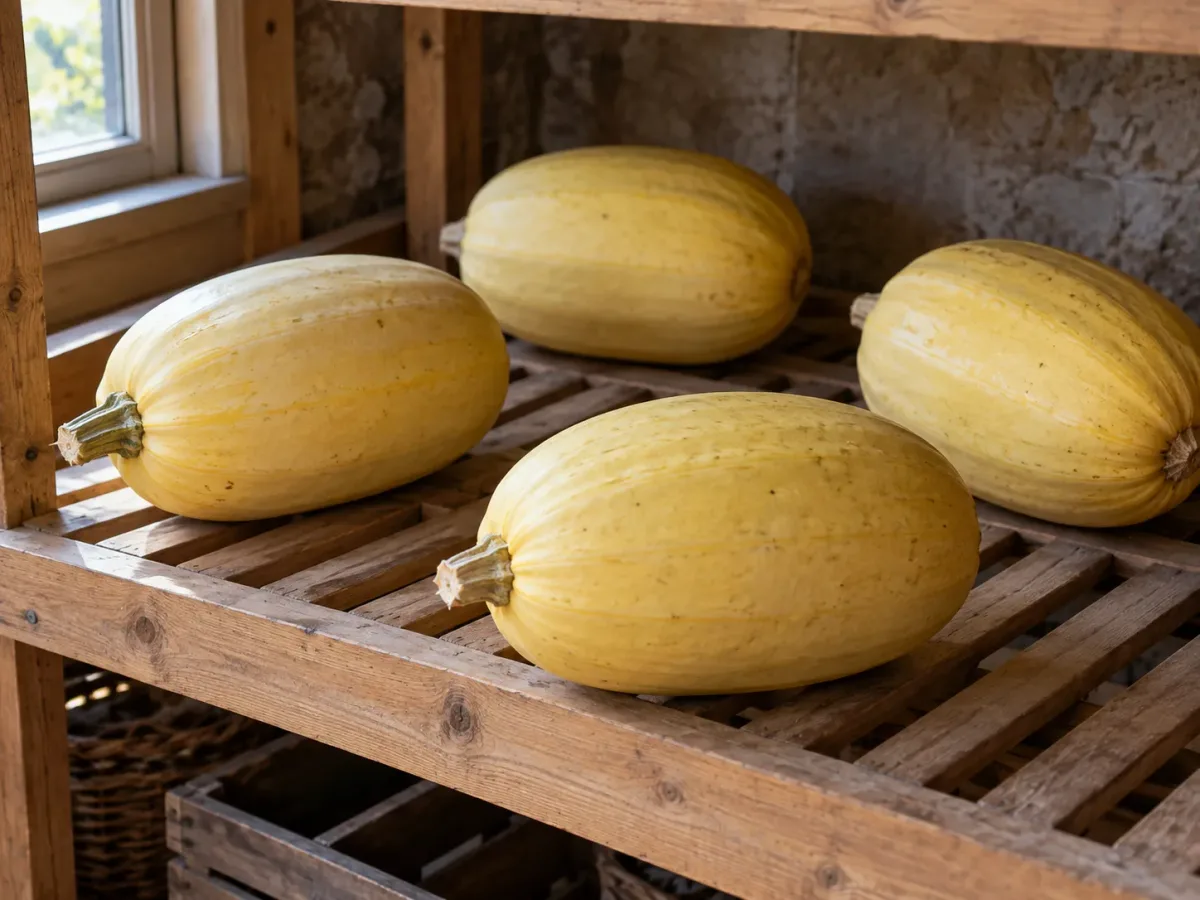
Curing is a warm, dry-down period that helps a mature squash develop a tougher outer rind; it does not turn an immature green fruit into a fully ripe one. Cure only firm, intact fruit. Wipe off loose soil with a dry cloth, let surface moisture evaporate, and place squash in a single layer in a warm, well-ventilated spot for about a week or two. Extension recommendations for winter squash commonly use temperatures around 80 to 85°F (27 to 29°C) during this stage; if you cannot create ideal conditions at home, prioritize warmth, airflow, and keeping fruit dry rather than building a humid curing chamber. Penn State Extension’s storage guidance explains curing and the risks of storing bruised fruit.
After curing, store squash in a dry, ventilated place around 50 to 60°F (10 to 16°C). A cool pantry or basement may work; a damp shed that freezes at night will not. Avoid refrigeration for whole squash and avoid temperatures below about 50°F, which can cause chilling damage. Check fruit regularly and use any with soft spots, cuts, or broken stems first. Sound, well-matured spaghetti squash often keeps for about two to three months, though cultivar and storage conditions change that window. GrowVeg’s spaghetti squash growing and cooking guide also notes that careful curing and storage matter because this squash does not keep indefinitely.
Conclusion
Start with the season: choose a variety that can mature before frost, sow into warm soil, and give the vine sun, drainage, and room. Keep water steady, use fertilizer only when soil conditions call for it, and let bees reach the flowers; if fruit set stalls, distinguish normal male blooms from female flowers and hand-pollinate on a dry morning.
Wait for a hard rind and mature color before harvesting, then cut rather than pull and handle each fruit gently. A mature squash cured and stored in a cool, dry, ventilated place can extend a summer garden into fall meals; an immature fruit picked before frost is best treated as an immediate-use crop, not winter storage.