How to Care for Roses in Spring: Pruning and Feeding
Spring rose care starts with the right timing. Learn when to prune, uncover, water, and feed roses, plus how to spot black spot and aphids early in your garden.
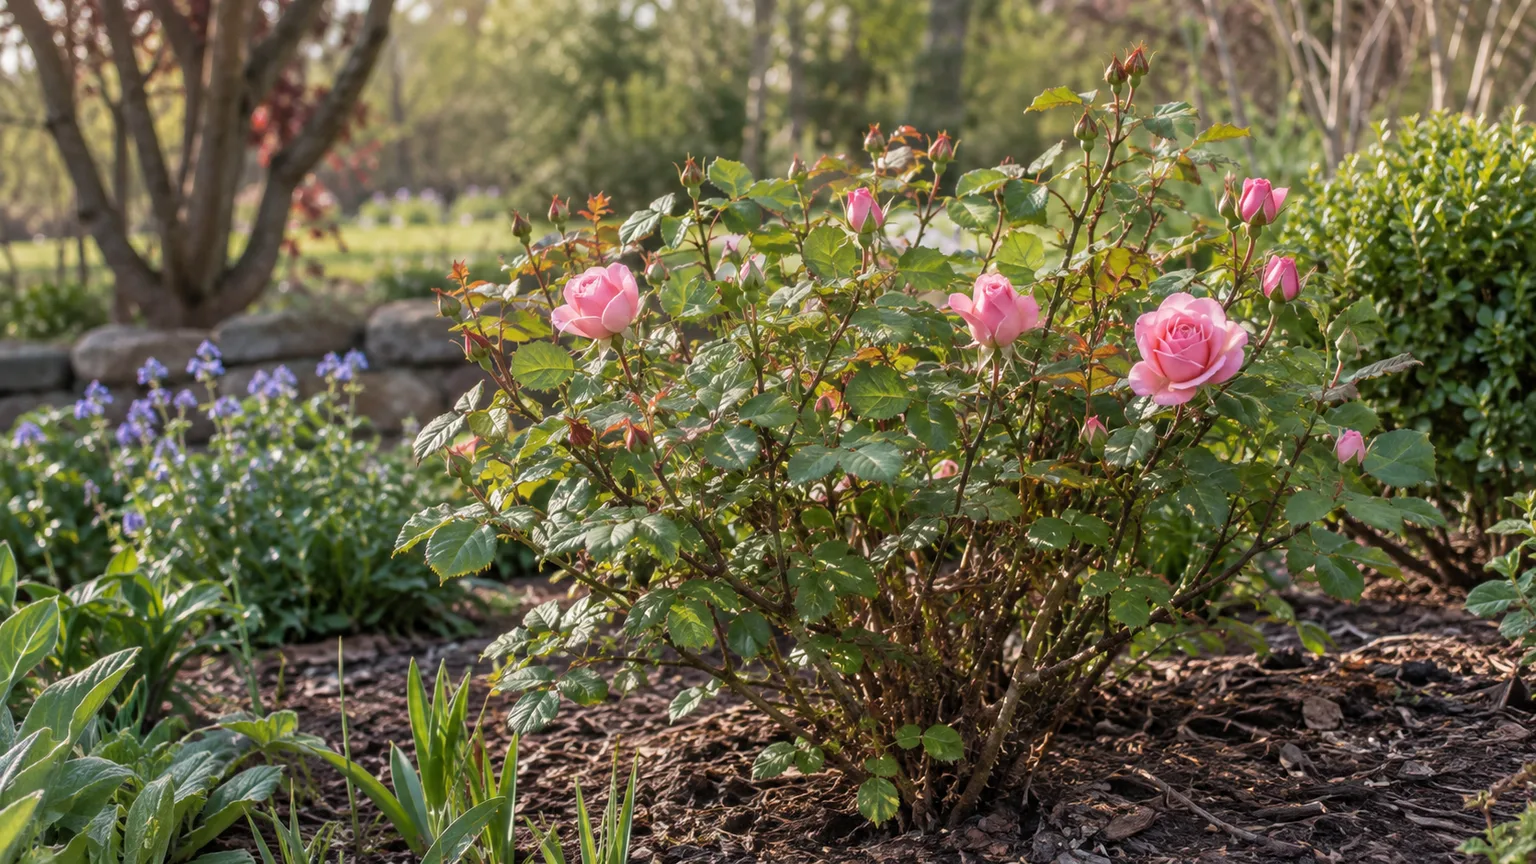
Spring rose care works best as a short sequence of decisions, not a bundle of chores to finish on one calendar weekend. Check what kind of rose you have, wait for the right point in its growth cycle, uncover it in stages if it was protected, then prune, feed, mulch, and monitor according to its needs. A once-blooming rambler, a repeat-flowering shrub, and a newly planted bare-root rose should not all receive the same cut or watering schedule.
Use the plant and your local conditions as cues. Buds beginning to swell show that growth is waking up; a forecast of hard freezes may mean leaving some protection in place a little longer.
The Royal Horticultural Society’s rose-pruning guide describes late winter or early spring as a common pruning period for many roses, while emphasizing that the method depends on rose type. Savvy Gardening’s guide to when to cut back roses also uses bud development and local weather risk as practical timing cues. In much of the United States, local climate and cultivar matter more than a date on a generic calendar.
Start by identifying the rose type
Before picking up pruners, look for a plant tag, old photos, or a purchase record. Rose names are helpful, but even a broad distinction—repeat-blooming bush, once-blooming shrub, climber, or rambler—prevents the most consequential spring mistake: removing canes that carry this year’s flowers. If you cannot identify the variety, observe when it blooms this season and make conservative cuts until you can learn more.
Also note whether the plant is newly planted or established and whether it is grafted. A grafted rose has a swollen union near the base; live shoots from below that point may belong to the rootstock rather than the named rose.
Do not mistake those vigorous rootstock shoots for useful new canes. A young rose still establishing roots generally needs less structural pruning than a mature plant that has outgrown its space.
Repeat-blooming bush roses
Hybrid teas, grandifloras, floribundas, and many modern shrub roses flower on growth made during the current season and commonly bloom more than once. Spring pruning can shape these plants, remove winter damage, and encourage healthy new shoots. The amount to remove depends on the rose’s vigor, winter injury, and the size you want—not on a universal rule that every bush must be cut to the same height.
Some shrub roses are bred to stay compact and need only light shaping and deadwood removal. Others tolerate harder pruning. Check the cultivar’s care information where possible, and avoid reducing a recently planted or weak rose simply to make it look tidy.
A sound framework with living buds is more valuable than a dramatically shortened bush.
Once-blooming shrubs and ramblers
Old garden roses and some ramblers produce their main flush on stems that grew the previous year. Pruning those canes hard before flowering can remove many of the buds you are trying to enjoy. For a once-blooming rose, do the main shaping just after its spring or early-summer flowers fade; in spring, remove only clearly dead, broken, or diseased wood and any hazard that cannot wait.
The University of Arkansas Extension’s rose-pruning guidance distinguishes once-blooming roses, which are pruned after flowering, from repeat-blooming types. Treat that timing as a useful principle rather than a regional calendar instruction: local flowering time shifts with climate, and a rose’s bloom habit is the key.
Remove winter protection gradually
If you mounded soil or compost over the crown, wrapped the plant, or used another winter covering, uncover it in stages as severe cold becomes less likely. Start by loosening or removing the outermost material on a mild stretch, then keep an eye on the forecast.
If a hard freeze is predicted while tender growth is exposed, temporary protection may still be worthwhile. There is no single nighttime temperature that safely signals removal in every garden; wind, soil temperature, exposure, and the rose’s stage all matter.
Once the main freeze risk has passed for your area, clear the mound from around the crown and graft union so light and air can reach the base. Do not scrape soil aggressively against emerging buds or tug on canes that are caught in a wrap. For climbing roses tied to a support, loosen winter ties carefully and replace frayed or constricting ties before new shoots lengthen.
Clean the bed and inspect before you cut
Remove fallen leaves, old flower debris, and loose prunings from beneath the plant. This cleanup is especially useful if the rose had black spot or another foliar disease last year, because infected leaves can remain a source of spores. Pull mulch away from the base long enough to see the lower canes and the graft union, then check whether canes rub, crack, or show darkened dieback.
Look closely at the plant before interpreting every brown or bare section as dead. A cane can be weathered on the outside yet alive beneath the surface, while a green-looking tip can hide damage farther down.
On a small test area, make a light scratch with a clean fingernail or blade: green tissue under the bark suggests life, while dry brown tissue calls for a cut back toward healthy cane. If you are unsure, wait for bud growth to clarify the boundary rather than removing a major structural cane too early.
Use sharp bypass pruners for small canes and loppers for thicker ones; anvil pruners can crush stems. Wear sturdy gloves and long sleeves, and clean sap or debris from blades between plants.
If a cane is diseased, clean the tool before moving to another rose. Gather suspect leaves and canes rather than leaving them in the bed, and follow local guidance on disposing of diseased material.
Choose the pruning window by buds and local weather
For many repeat-blooming bush roses, prune in late winter or early spring as buds swell but before vigorous shoots make the plant difficult to shape. In a cold climate, that may be later than in a mild coastal garden.
The RHS guide commonly places many bush-rose pruning tasks in February or March in its UK context; that is a seasonal example, not a North American date prescription. A locally appropriate window is when the harshest winter weather has eased and the plant is approaching active growth.
If the rose has already leafed out, do not panic or make a severe cut simply because you missed an ideal week. Remove dead and damaged wood, then shape selectively while preserving healthy shoots. A late cut can delay flowering on some varieties, but a rose is usually better served by a thoughtful, modest correction than by an abrupt haircut made to match a schedule.
Newly planted roses are another exception. Follow the nursery’s planting instructions and remove only broken, dead, or clearly damaged growth unless the plant’s type calls for a specific initial cut. The first spring is about establishment as much as form; repeated heavy pruning can remove the foliage the young plant needs to build energy.
Prune repeat-blooming bush roses in a deliberate sequence
Stand back before cutting and decide what you want the mature shape to be: an open, balanced shrub with enough room for air and light, not a hollow plant stripped of nearly every cane. Work from the base upward and remove the obvious problems first. Then step back again before making shaping cuts; this pause helps keep a vigorous rose from being pruned more heavily on one side just because that side is easier to reach.
Place each final cut close to a healthy bud, often called an eye. The RHS recommends cutting no more than about 5 millimeters (roughly a quarter inch) above the bud, with a slight slope away from it.
Keep the cut clean and avoid leaving a long stub, which can die back, or cutting so close that the bud is damaged. On an established bush, select outward-facing buds where practical to encourage growth away from the center.
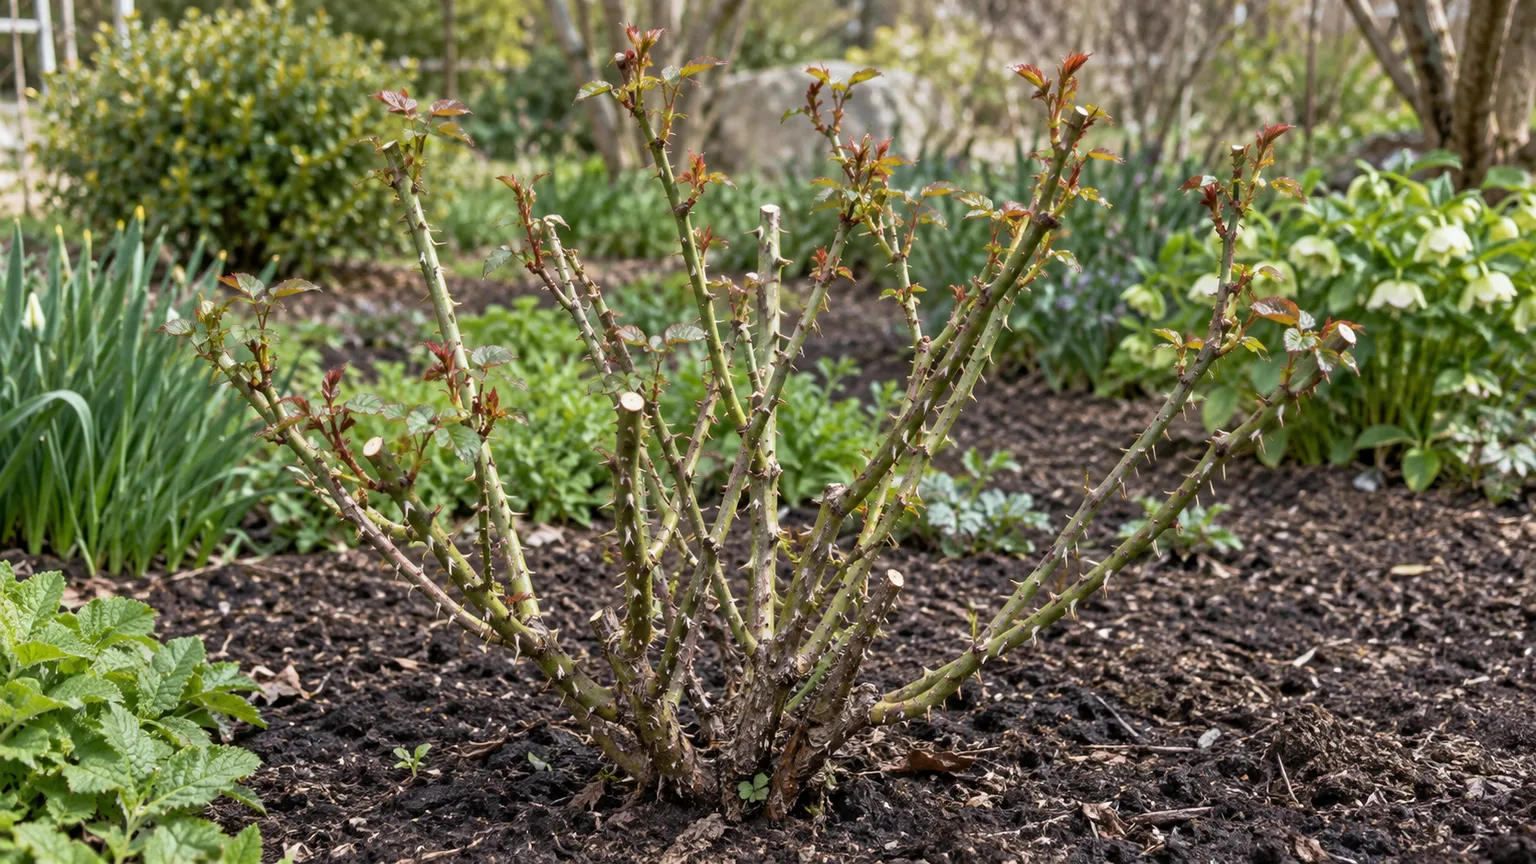
Remove dead, damaged, and diseased canes first
Start with canes that are broken, shriveled, blackened, or clearly dead. Follow each damaged section downward until you reach firm, living cane; when a test cut shows brown or gray tissue at the center, continue lower until the pith looks healthy and pale.
Cut back to a healthy bud or a sound branch junction. If the damage extends to the base, remove the cane there without injuring the crown.
Next remove very weak, pencil-thin shoots if they are unlikely to support flowers, along with canes that are badly scarred or rubbing against each other. Do not remove every small shoot automatically: a young rose may need its healthy foliage, and some shrub varieties naturally have finer stems. Prioritize structural defects and disease over a cosmetic preference for a perfectly even outline.
Thin crossings and shape for outward growth
After sanitation, assess the center of the bush. Remove one of a pair of crossing canes when rubbing is likely to wound bark, favoring the healthier and better-placed stem.
A few well-spaced canes allow air and light through the plant and make it easier to spot pests, but opening the center is not an excuse to strip away sound growth. Keep a balanced framework and preserve outward-facing branches that point into open space.
How much you shorten healthy canes depends on the type and vigor. A strong hybrid tea may be reduced more than a large shrub rose that is meant to keep its natural arching form.
If the cultivar is unknown, remove no more than necessary to correct winter damage and awkward growth, then observe how it blooms. You can refine its shape after flowering or next dormant season with better information.
Adjust the cut for climbers, ramblers, and old roses
Climbing roses are trained on a framework of longer canes rather than treated like ordinary freestanding bushes. In spring, remove dead, damaged, or diseased canes and tie healthy main stems to the support.
Shorten side shoots according to the cultivar’s instructions, but do not cut all long canes to a low height simply because a bush-pruning diagram recommends it. Spreading and tying flexible canes more horizontally can encourage flowering shoots along their length.
Ramblers often grow vigorously and many flower once on older wood. Preserve healthy older canes that carry the coming bloom, and do substantial thinning after flowering if the plant has become tangled.
Repeat-flowering climbers differ: they can often be shaped during dormancy or early spring while retaining the main framework. The RHS pruning guide offers type-specific methods; if the label is lost, a conservative spring cleanup is safer than guessing at a hard renovation.
For a large, mature shrub rose, gradually replace the oldest poorly flowering stems at the base rather than cutting the whole plant down at once. Renovation over more than one season preserves flowers and reduces shock. If a rose has become unsafe, diseased throughout, or impossible to support, a more substantial renovation may be justified, but confirm its flowering habit first and plan for a temporarily reduced display.
Feed after growth resumes and refresh mulch
After pruning, remove the old mulch if it is matted or contaminated with diseased leaves, then top-dress the root area with compost or well-rotted organic matter. Keep the material a few inches away from canes and the graft union; a dense, wet pile against the crown can hide damage and keep the base too damp. A surface layer helps moderate soil temperature and moisture, but it should not bury the plant.
Roses benefit from fertile soil, yet more fertilizer is not automatically better. Once active growth begins, use a balanced rose or general-purpose fertilizer only if the plant needs it, and apply it at the label rate for the product and your soil.
A soil test is more useful than stacking several amendments when you have a persistent nutrient concern. The RHS rose-pruning guidance recommends feeding and mulching after pruning in its rose-care sequence; timing and product should still fit local soil and the label.
Avoid mixing a routine spring cocktail of fertilizer, lime, bone meal, blood meal, Epsom salts, or other amendments. Each changes the soil in a different way, and an unnecessary dose can create nutrient imbalance or encourage soft growth.
If a rose has yellow leaves or weak growth, check moisture, drainage, light, disease, and the possibility of rootstock competition before assuming it needs a stronger feed. Correct the actual constraint instead of trying several products at once.
Water slowly at the root zone
Spring rain often supplies enough moisture, so check the soil before watering. Push a finger or narrow trowel a few inches into the root area; if that layer is dry, water slowly at the soil line until moisture reaches below the surface.
If it is still cool and damp, wait and check again. A newly planted rose needs closer monitoring while its roots establish, whereas an established bush can usually draw from a wider area of soil.
Use a watering can, drip line, or soaker hose to wet the bed without repeatedly soaking foliage. Slow watering is especially helpful on compacted or sloping ground, where a fast stream can run off before it reaches roots. Water early in the day when possible so accidental splashes on leaves can dry, and adjust for rainfall, soil texture, wind, and exposure rather than following an unchanging weekly schedule.
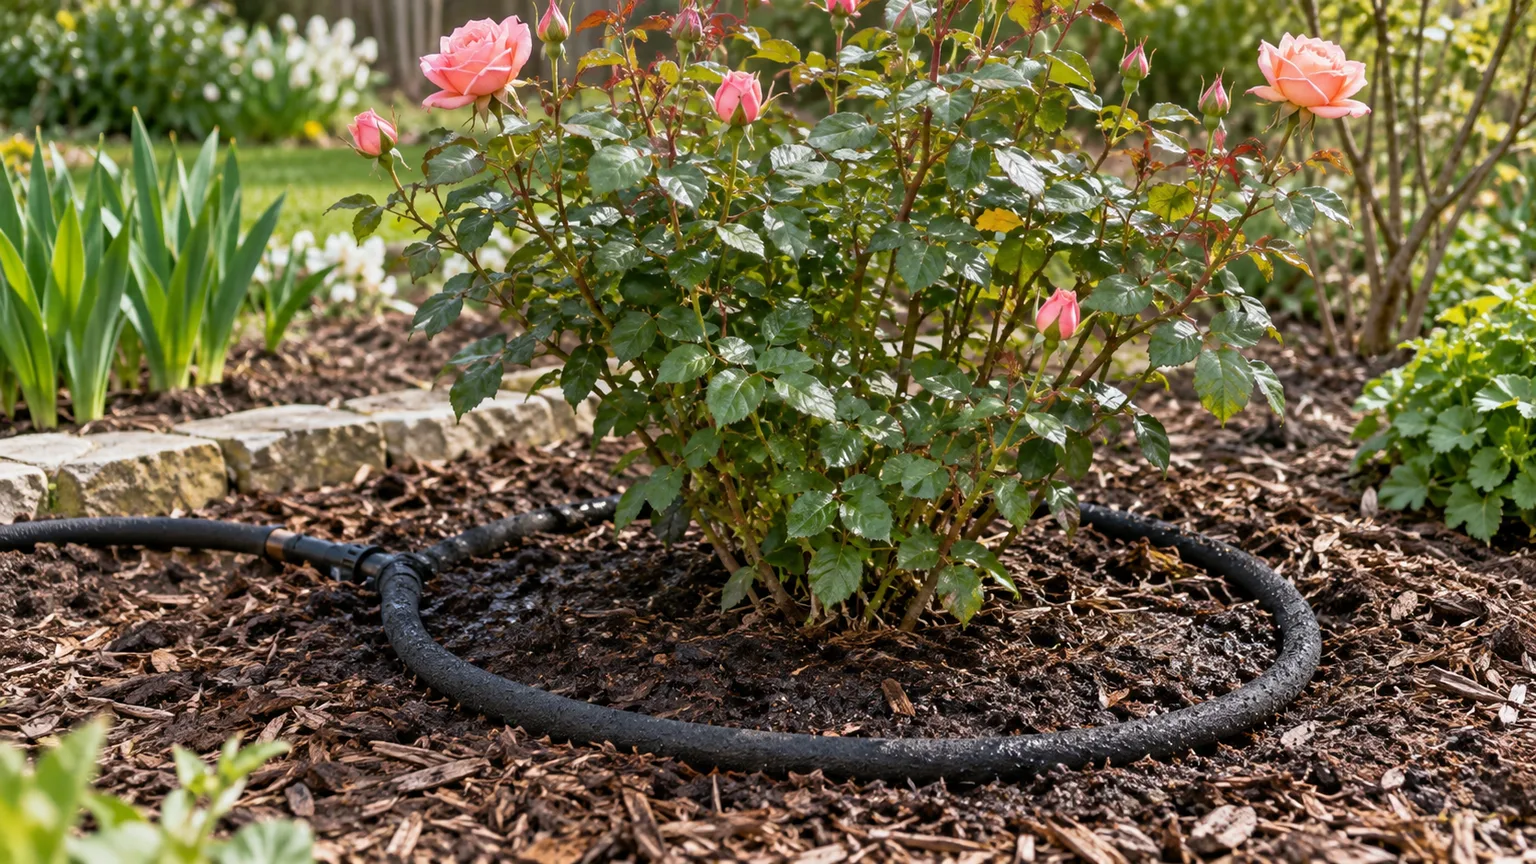
Container roses are the main exception to an easy in-ground routine because pots can dry quickly, particularly in sun or wind. Check the potting mix more often and water when the upper layer is drying, but confirm that the container drains freely.
Do not leave a rose standing in a full saucer. If spring rain has been steady and the container remains heavy and wet, let excess moisture drain instead of adding water by habit.
Scout for black spot, mildew, and aphids
Inspect new leaves, tender shoot tips, and the undersides of foliage every week as growth develops. Early scouting is easier than trying to diagnose a badly defoliated rose later.
Notice whether symptoms are limited to one cane or plant, whether they follow wet weather, and whether insects are clustered around buds. Those details help distinguish a disease problem from normal leaf aging or a watering issue.
Prevention starts with a suitable site and clean habits: give roses adequate sun and spacing, remove old diseased leaves, and water the soil rather than routinely wetting the canopy. The Clemson Cooperative Extension rose-disease guide describes black spot as a major rose disease and notes that long periods of warm, wet weather favor it. Its management recommendations are written for South Carolina conditions, but the general practices of sanitation, airflow, and avoiding prolonged leaf wetness are useful starting points elsewhere.
Black spot: start with sanitation and dry foliage
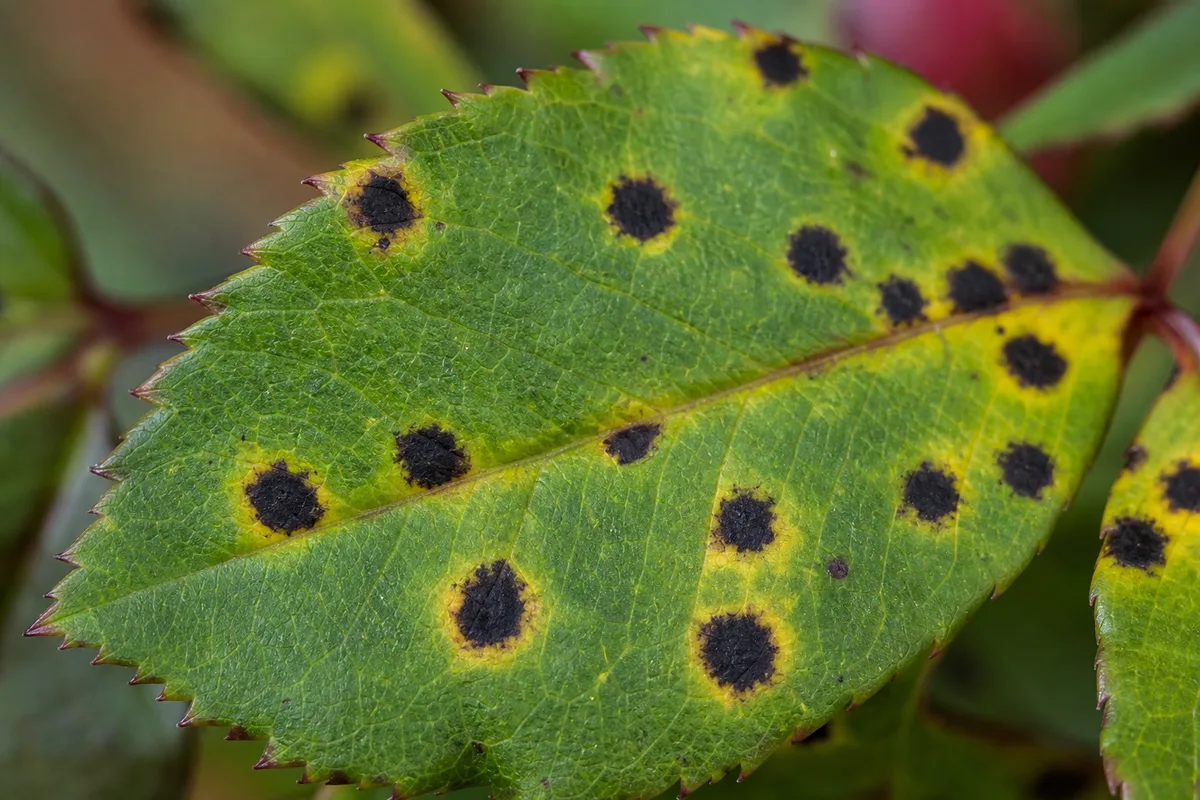
Black spot commonly appears as round dark lesions, often with yellowing around them, followed by premature leaf drop. It can weaken a rose through repeated defoliation. A close look at the lesion pattern and the weather history is more useful than immediately treating every yellow leaf as a fungal disease.
Remove affected leaves as they appear and clear fallen foliage from beneath the bush. Do not compost heavily infected debris in a home pile that does not heat reliably. Water at the base, improve spacing if neighboring growth is crowding the plant, and consider a disease-resistant variety when replacing a rose that suffers year after year.
Avoid routine preventive sprays as a default spring chore. If black spot repeatedly causes serious damage despite cultural steps, confirm the diagnosis with a local extension resource and use only a product labeled for roses and the disease in your area, following all label directions.
Aphids: inspect new tips before deciding to treat
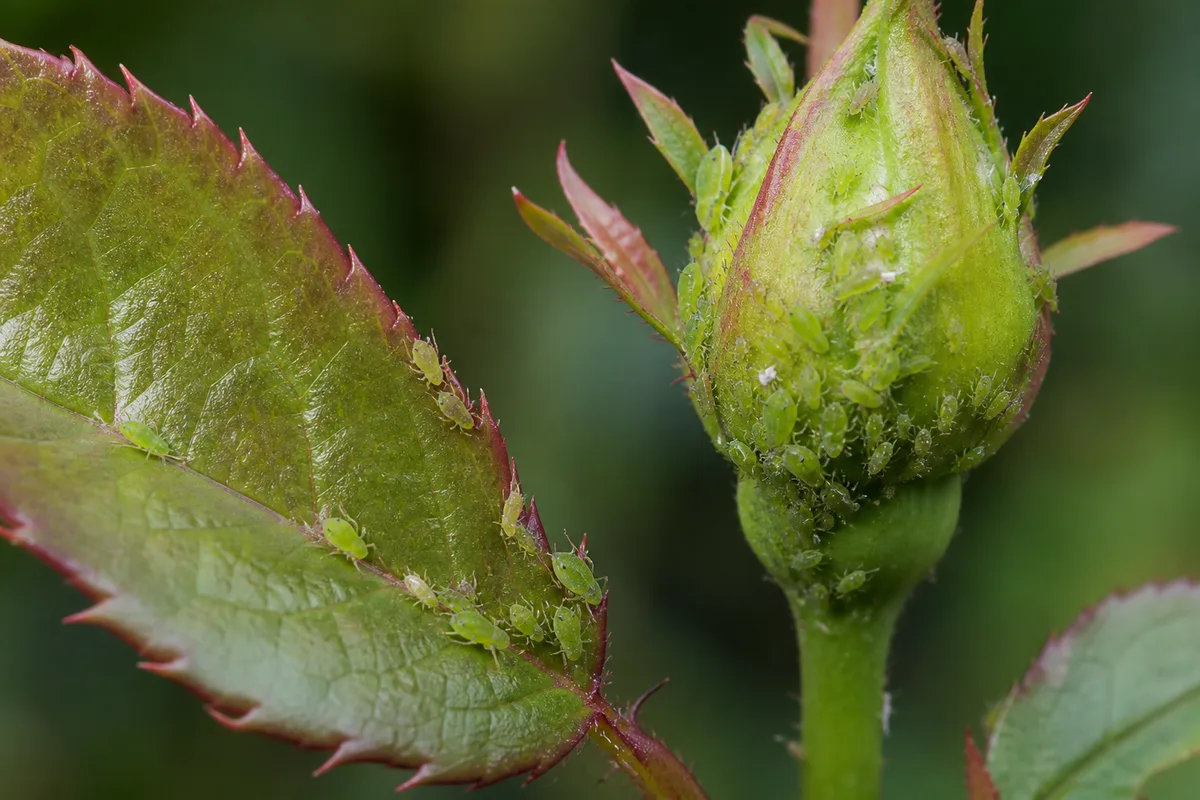
Aphids gather on soft new growth, buds, and the undersides of leaves. Small numbers may not justify treatment, particularly when lady beetles, lacewings, or other predators are present. Check whether shoots are still growing normally and whether the insects are increasing, rather than reacting to the first cluster you see.
For a localized colony, pinch off a badly infested tip or dislodge aphids with a controlled stream of water while supporting the shoot. Recheck in a few days.
Avoid broad-spectrum insecticides that can harm beneficial insects, and do not apply oils or soaps without checking that the product is labeled for roses and suitable for the current temperature and plant condition. Correct identification matters: distorted growth can also result from frost, herbicide drift, or disease.
Avoid common spring rose-care mistakes
The most common error is treating every rose as a hybrid tea. A hard early cut can erase the flowers on an old rose or once-blooming rambler, while barely pruning a vigorous repeat-blooming bush can leave a tangled, damaged framework. If the label is missing, choose a gentle cleanup now and learn the bloom habit during the season before making a major structural cut.
Other avoidable problems include uncovering a rose just before a hard freeze, cutting above a long stub instead of near a healthy bud, and leaving diseased leaves under the plant. Routine overhead watering late in the day can keep foliage wet for hours, and a fixed fertilizer or pesticide schedule can create trouble where none existed. A soil-moisture check, weekly inspection, and product label are better guides than a calendar reminder to apply something.
Do not confuse a rose’s first flush of new shoots with proof that all winter risk has passed. New leaves can be damaged by a late frost, but that does not mean every emerging tip needs to be covered at the first cool night. Watch local forecasts and protect vulnerable growth when a meaningful freeze is expected; avoid repeatedly wrapping a plant in a way that traps moisture or breaks tender stems.
A practical order for the first month
In the first mild window, identify the rose, inspect the graft union and framework, and clear old leaves from the bed. If winter protection is in place, begin removing it gradually while keeping material available for a forecast freeze. Mark plants whose type is uncertain so you can avoid a hard cut until you know whether they bloom on old or new wood.
When buds swell and the severe-cold period has eased, prune repeat-blooming bush roses in this order: dead or damaged canes, diseased growth, weak or crossing stems, then selective shaping. Leave once-blooming roses and ramblers largely intact until their flowers fade. Tie climbers to their supports, keeping their main canes, and take a step back between cuts to preserve a balanced framework.
After pruning, refresh the surface mulch, keep it clear of the crown, and feed only when appropriate for the plant and soil. Water if a soil check shows that the root zone is drying; otherwise let spring rain do the work.
Then inspect leaves and shoot tips weekly. This steady routine makes it easier to catch black spot, aphids, winter dieback, and drainage issues while they are still manageable.
Conclusion
Successful spring rose care comes down to matching each task to the rose and its stage of growth. Uncover protection gradually, prune repeat-blooming bushes after the harshest weather eases, save once-blooming roses for post-flowering pruning, and make every cut to healthy tissue near a sound bud. Finish with a clean bed, restrained feeding, moisture checks, and regular scouting rather than automatic sprays or rigid schedules.
If you remember one principle, let observation lead: the buds, canes, soil, forecast, and bloom habit tell you more than a date or one-size-fits-all recipe. That approach protects this season’s flowers while giving the plant room to make healthy new growth.



