How to Sprout Palm Trees From Seed
Learn how to sprout palm trees from seed with species-aware advice on fresh seed, cleaning, soaking, warmth, moisture, timelines, and safe transplanting.
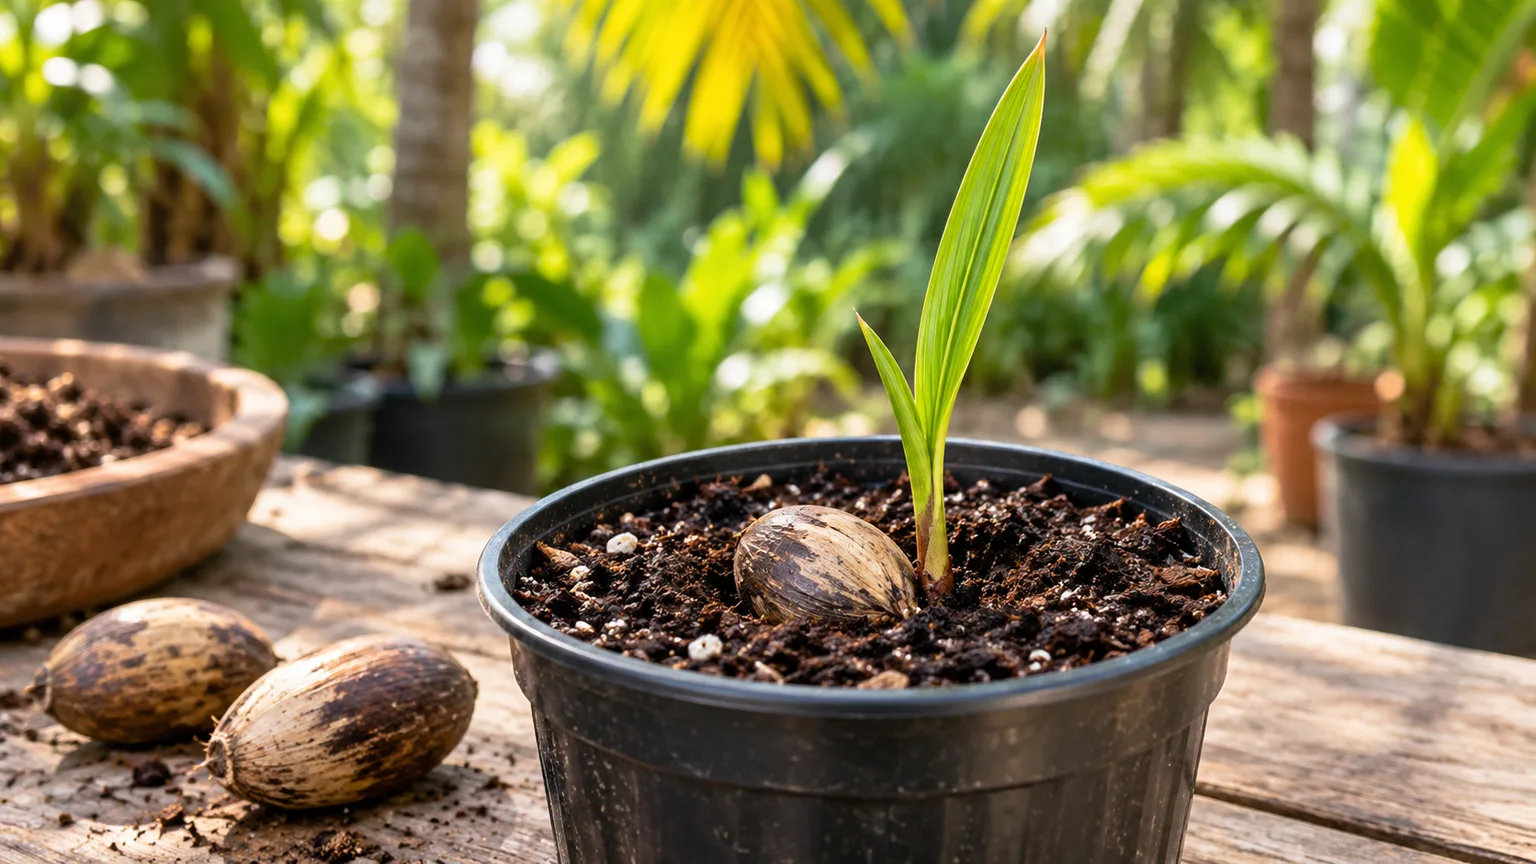
Palm seeds reward steady conditions and patience, but “plant it shallow, keep it warm” is only a starting point. Species differ in fruit cleaning, seed longevity, germination structure, heat response, and the length of time they can sit before a shoot appears. A date palm may send a root down before any leaf is visible; a coconut begins germinating inside its fibrous fruit; another palm may wait through months of warm, moist conditions.
The reliable approach is to identify the palm if you can, begin with a fresh and correctly prepared seed, then make small, labeled batches so you can learn without risking the whole lot. Keep the medium airy and evenly moist, choose a container with enough depth for the palm’s root pattern, and resist pulling up a seed just because it has not sprouted on a houseplant timetable.
Start With a Palm That Fits Your Climate and Goal
Before collecting or buying seeds, decide where the eventual palm will live. Many palms sold as houseplants are tropical outdoor trees in their native climates, and a seedling can outgrow a windowsill even if it begins in a small pot. Check the mature size, light needs, and cold tolerance of the exact species; “palm” covers plants adapted to very different habitats, from shaded forest floors to open, hot landscapes.
Seed is a good choice when you enjoy the process, want several seedlings, or are growing a species that is difficult to propagate by division. It is a less predictable route when you want a particular cultivar or a fruiting tree soon: seedlings can vary, and palms often take years to reach maturity. If your goal is a specific landscape result, compare the cost of fresh seed with the time and uncertainty of raising a seedling before you start.
Write down the botanical name and seed source on a label before the seed goes into water or soil. Common names can refer to more than one species, and care advice for a coconut or date palm should not automatically be applied to an areca or parlor palm. A species name makes it possible to find a meaningful germination temperature, maturity cue, or dormancy exception instead of relying on a generic palm recipe.
Find Fresh, Mature Seeds and Check the Seed Lot
The simplest reliable source is a healthy, correctly identified palm with fruit that has matured on the plant. UF/IFAS Extension advises collecting most palm seeds when the fruit is fully colored and ripe or soon after it falls, while documenting exceptions: queen palm seeds may germinate better from green fruit, and royal palm seed from immature fruit may germinate faster but ultimately have lower germination, according to UF/IFAS Extension’s palm germination research. Those differences are a good reason to check species-specific instructions rather than treating color as a universal rule.
If you buy seed, ask when it was harvested, whether the species requires cleaning or storage, and whether the supplier has a current germination rate for that lot. Palm seeds can lose viability quickly: UF/IFAS Extension reports that latan seeds may remain viable only a few weeks, whereas properly stored areca seed may last much longer. Freshness is not a guarantee, but a clear harvest date and named species give you a better starting point than an unlabeled packet of unknown age. Gardening Know How’s palm germination guide also cautions that a float test is inexact and that palm germination can take months or longer.
Do not use the float test as a pass-or-fail verdict. Some sound palm seeds float naturally, and some floating seeds still germinate; sinking is not proof that an embryo is alive. If you have a large lot and can spare a few seeds, a cut test is more informative: a healthy sample has firm endosperm and a complete, undamaged embryo, while soft, spongy tissue or a shriveled, discolored embryo points to poor viability. Cutting destroys the sample, so never use your only seed for this check.
Clean Palm Fruit Without Harming the Seed
For most palms, remove the fleshy fruit layer, or mesocarp, before sowing. Fruit pulp can hold moisture around the seed and invite mold as it breaks down, so clean the seed until no sticky fibers remain, then rinse it well. A short soak can soften stubborn pulp; rub it away gently rather than gouging the seed coat, which protects the embryo inside.
Wear gloves when handling fruit from palms known to have irritating pulp. UF/IFAS Extension specifically cautions that some fishtail palms (Caryota), many Chamaedorea, royal palms (Roystonea), and sugar palms (Arenga) can contain calcium oxalate crystals in the fruit tissue. If the species is unknown, avoid bare-handed scrubbing and do not touch your face while cleaning; wash tools and the work surface afterward.
Coconut is the major exception to the ordinary cleaning rule. The seed germinates within the fibrous fruit, so do not husk it as though it were a date pit or small berry-like palm fruit. Cleaned seeds from other species can usually be sown soon after preparation; if you need to store them, research storage for that species first, because cold storage can injure tropical palm seed and viability varies widely.
Decide Whether Soaking or Scarification Makes Sense
A clean-water presoak can help some palm seeds take up moisture, but it is not a universal germination switch. UF/IFAS describes one to seven days as a common range, with fresh water changed daily, and documents species that respond positively as well as species that show no benefit or may respond negatively. If reliable instructions for your palm recommend soaking, use that duration, drain the seed, and sow it promptly instead of leaving it in water indefinitely. The palm-specialist guide at Mission: Palm Trees likewise emphasizes fresh seed and a moist but well-drained mix; treat its general method as a starting point and retain species-specific precautions.
Soaking is most useful when it softens leftover fruit tissue or when the species is known to respond to imbibition. It will not revive a dead embryo, compensate for cold media, or make a deeply dormant species sprout on demand. Avoid additives, concentrated growth regulators, or improvised chemical baths; the extension research notes that gibberellic-acid treatment can produce distorted, excessively elongated seedlings, even where it speeds germination.
Scarification is even more selective. It means thinning a hard, water-resistant seed coat, not cracking every palm seed with pliers. For an identified species with a hard endocarp, trial a small number first and abrade only the outer layer; damage to the tiny embryo can ruin the seed. Do not use acids as a home shortcut. For most beginners, correct cleaning, fresh seed, and steady warmth are safer first adjustments than cutting or sanding a seed whose structure they cannot identify.
Choose a Container That Fits the Palm’s Germination Habit
Use individual pots with generous drainage holes when seeds are large, expensive, slow to establish, or likely to develop long roots. A deeper pot also reduces the need to disturb seedlings later, especially when you are growing palms that move their seedling axis downward. Avoid shallow decorative containers without drainage: they make it difficult to keep the mix moist without leaving the seed in stagnant water.
Small, inexpensive seeds can be started in a wider pot or tray if you intend to transplant them while roots are still short. Space them so you can lift one seedling without pulling on its neighbors. A tightly packed tray can be efficient for a nursery batch, but the roots become difficult to separate as they lengthen; for a home grower, fewer seeds in individual deep containers often save more seedlings than a crowded sowing.
A clear cover or bag can slow moisture loss, but it should not seal a saturated pot in stale air. Leave a little ventilation and check the medium regularly. If condensation constantly drips down the sides or the mix smells sour, open the cover, improve air exchange, and let excess water drain before resealing loosely.
Use a Moist, Airy Mix and Sow at the Right Depth
Palm seed medium should hold enough water to prevent drying while still allowing excess water and air to move through it. UF/IFAS notes that a 1:1 mix of peat moss and perlite has worked in nursery propagation; a peat-free home mix can use coir with perlite or another stable, coarse component. The exact recipe matters less than the result: the medium should feel evenly damp, not muddy, and should not collapse into a dense plug after repeated watering.
Sowing depth depends on seed size, species, light, and how quickly the surface dries. Under shade or a humidity cover, a large seed may simply be pressed into the mix with its top visible. In brighter conditions, a little more cover can prevent the seed from drying, but burying it too deeply can hide the first signs of germination and make it harder to monitor. If a species has a known remote germination habit, choose a deep container even when the seed itself is planted shallowly.
A practical starting method for an unidentified but labeled palm is to place one seed per deep pot, orient it as the supplier recommends, and cover it only lightly with the mix. Water until the medium is uniformly moist and let the pot drain completely. If you have several seeds, try different depths in a small side-by-side batch rather than changing the whole lot at once; record what you did so the result tells you something useful.
Hold Steady Warmth and Moisture Without Stagnation
Warmth is essential for most palm seeds, but no single thermostat setting fits every species. UF/IFAS gives a broad 70–100°F range and says 85–95°F often gives good results under nursery conditions. A 2023 study of Carpentaria acuminata and Canary Island date palm found different favorable day-and-night temperature regimes for those two species, a useful reminder that a general range is a starting point rather than a guarantee. Keep a heat mat thermostat-controlled and measure the temperature at the pot or medium level; avoid direct sun through plastic, which can overheat a small container.
Keep the mix consistently moist through the first stages of germination. Check with a finger or wooden label rather than watering automatically every day: small pots dry quickly in warm air, while covered pots may need water much less often. If the surface dries before the seed begins to swell, re-moisten gently; if water sits on the surface or the pot remains heavy and sour-smelling, improve drainage and reduce watering.
Light needs also depend on species and stage. Seeds do not all require bright light to germinate, and some palms naturally begin under canopy shade. After a shoot appears, give it bright, appropriate light for the species, increasing exposure gradually rather than moving a tender seedling straight from a covered propagator into intense midday sun. Warm roots, even moisture, and fresh air are a better combination than maximum humidity at any cost.
Set a Realistic Germination Timeline
Palm germination is measured in species-specific windows, not a universal number of days. In the examples summarized by UF/IFAS Extension, Mexican fan palm (Washingtonia robusta) may begin in under two weeks and areca palm in three to four weeks, while parlor palm (Chamaedorea elegans) can take several months to begin and then continue germinating sporadically for more than a year. The extension publication also notes that a substantial share of palm species can take over 100 days and still have low total germination.
| Example | What to expect | What that means for the grower |
|---|---|---|
| Mexican fan palm | Some seeds may begin in under two weeks | Check moisture and temperature, but do not assume every seed will emerge together |
| Areca palm | Some lots begin in roughly three to four weeks | Keep the batch warm and labeled; seed age still affects results |
| Parlor palm | Germination may start after months and continue sporadically for over a year | Do not discard sound seeds just because early seeds have emerged |
| Coconut | Early growth begins inside the fibrous fruit | A viable, intact coconut needs species-appropriate space and warmth |
These are reported examples, not guarantees or cutoffs. Seed age, maturity, storage, parent plant, and growing conditions can shift results even within one species. Label each pot with the species and sowing date, then inspect on a schedule that does not require digging up the seed; if it remains firm and the conditions are right, patience is often more useful than repeated disturbance.
Recognize Remote and Adjacent Germination
The first palm structure to emerge may not look like a leaf or an ordinary root. In remote germination, the cotyledonary petiole grows away from the seed, often downward, and the seedling axis develops some distance from it. Date palms, Mediterranean fan palms, Chinese fan palms, and Mexican fan palms are examples. That long first structure is part of the palm’s normal development, so do not tug on it or pull the seed out to see what is happening.
In adjacent germination, a small swollen structure called a button appears next to the seed, and the root and shoot emerge near it. Areca, Alexandra, and coconut palms are examples. The visible button is not a separate seed or a reason to split the seedling from the seed; the seed still supplies nutrients while the first roots and leaf develop.
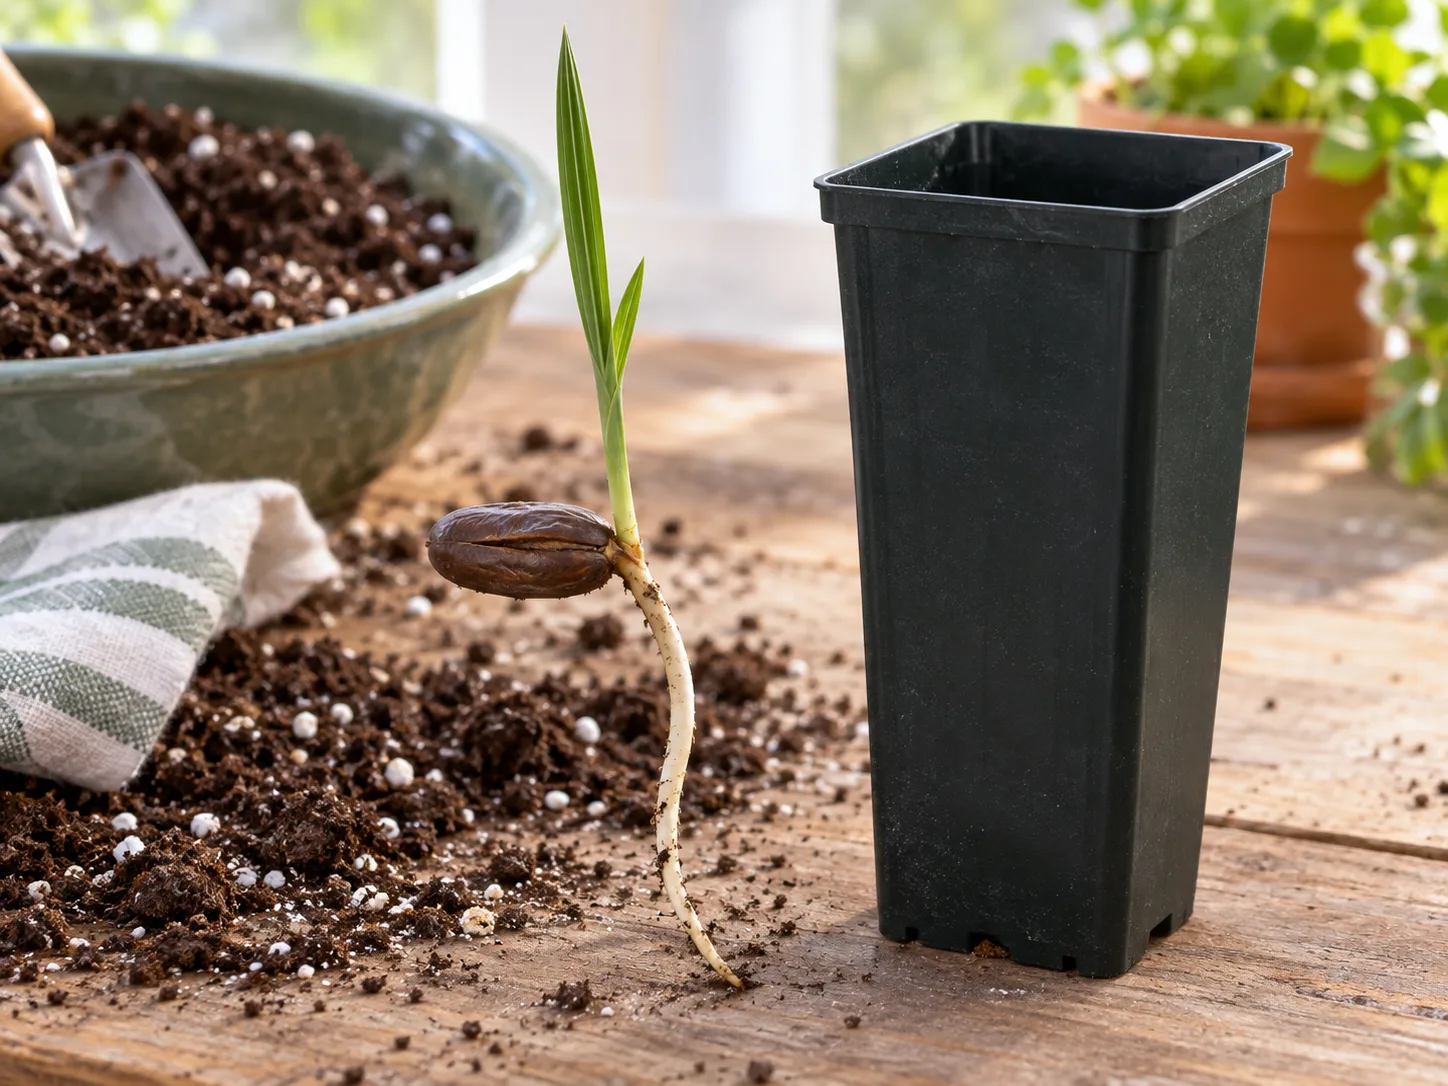
Recognizing the two patterns changes how you handle the pot. A remote germinator may need a deep root run before a leaf appears, while an adjacent germinator may form a compact button close to the seed. UF/IFAS’s palm seed germination guide illustrates both forms and names common examples; use it or species-specific guidance to interpret what you see instead of treating every emerging structure as a problem.
Troubleshoot Mold, Rot, and Seeds That Seem Stalled
A little surface fuzz on old fruit residue is a signal to improve cleaning and airflow, not a reason to pour a strong chemical over the pot. Remove visible loose debris, let the surface breathe, and keep water from pooling. If the seed itself is soft, blackened, foul-smelling, or collapsing, it is likely rotting; isolate and discard that seed so it does not contaminate the rest of the batch.
If nothing appears, work through the basics in order. Confirm that the seed is the species you think it is, ask whether it was fresh or stored correctly, measure the medium temperature, and make sure it is moist but not waterlogged. Then check the depth and whether the species needs a dormancy treatment. A floating seed alone is not a reason to throw it away, and an unopened pot after a few weeks is not proof of failure if the species is known to germinate slowly.
Do not repeatedly unpot seeds to check whether a root has started. Each inspection can break a delicate cotyledonary petiole or expose a new root to drying. If you want to compare conditions, sow a few seeds in clear-sided propagation containers or transparent bags with a sterile, damp medium, then move them into deep pots as soon as the root pattern is visible; otherwise, label opaque pots and let time do its work.
Transplant Before Roots Tangle, but Keep the Seed Attached
Transplant when the seedling can be handled without forcing the roots, not on a calendar date or because it has reached an arbitrary number of leaves. UF/IFAS notes that palms may be moved soon after germination or after one to two leaves form; the goal is to transplant before roots circle the container or become tangled with neighboring seedlings. Choose a warm growing period so the roots can resume growth quickly.
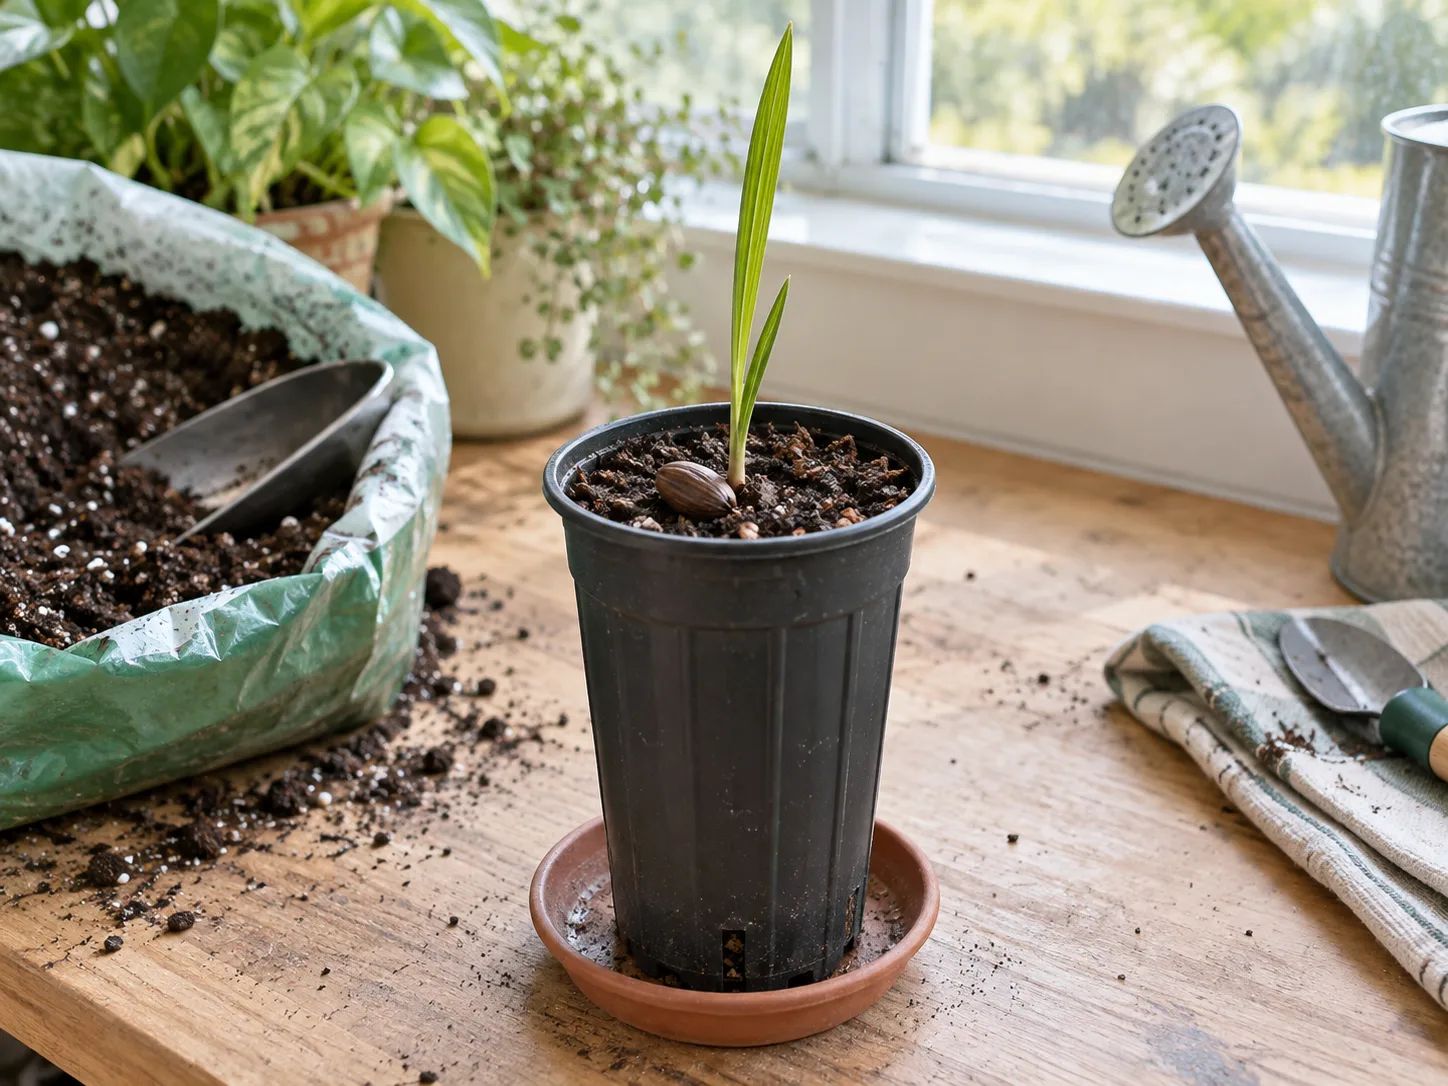
Lift the seedling by the seed or surrounding mix rather than pinching the delicate stem. Set the root system in a pot deep enough to accommodate its natural length, and place the point where the stem transitions into the root system at the soil surface. Do not bury the seedling deeper to make it stand upright, and do not cut off the seed while it remains attached; in remote germinators, the seed may sit at or just above the mix surface.
Avoid trimming a long palm seedling root to fit a short pot. Select a taller container instead, and let the root curve gently only if the root system cannot be accommodated straight. A slightly larger pot than the root ball is usually easier to keep evenly moist than a huge pot full of wet mix, so balance root depth with manageable drainage.
Care for the Palm Seedling Through Its First Growth
After potting, keep the seedling warm and evenly watered while it establishes. The seed’s endosperm supplies food during early development, so there is no need to fertilize a newly emerged palm immediately; UF/IFAS recommends waiting at least two months after germination begins before supplementary feeding. Once the seedling is actively growing, use a dilute, balanced palm fertilizer only as directed on its label, and avoid trying to force growth with extra fertilizer.
Provide light appropriate to the species. An understory palm may need filtered light, while a palm adapted to open sun can be introduced to brighter conditions gradually. Watch the newest leaf and the mix, not just the older seed leaf: some first palm leaves are simple and strap-like before later leaves develop a more recognizable divided form. A slow first year does not necessarily mean the seedling is failing.
Water when the surface begins to dry, then let the pot drain; do not leave it standing in a saucer of water. Check the root zone rather than misting the leaves as a substitute for watering. Keep the seedling away from cold drafts, hot glass, and abrupt swings between a warm propagator and a cool room, since a small palm has little capacity to recover from repeated stress.
Move Outdoor Palms Gradually and Respect Their Climate Limits
If the species can grow outdoors in your region, harden it off before permanent placement. Over a week or two, increase outdoor time and light exposure in stages, beginning in sheltered shade. A seedling raised indoors or under a dome can scorch in strong sun even if mature palms of the same species tolerate an exposed site.
Plant into the landscape only when nights and soil are warm enough for active root growth and the palm’s cold tolerance suits the local climate. Give it drainage and enough space for its eventual size; moving a young plant into a site that becomes cramped or frost-prone creates years of avoidable problems. Keep a tropical palm in a container if winter protection is feasible, but plan for its mature size and light requirements rather than assuming it will stay a tabletop plant.
Growing from seed is slow even when the seedling itself is healthy. A palm raised indoors may remain a foliage plant for a long time and may never fruit in a cool climate; that does not make the project unsuccessful if your goal was propagation and observation. Set the goal honestly—seedling, container specimen, or landscape palm—before investing years in an unsuitable site.
What to Expect From Date Pits and Coconuts
A date pit from an intact fruit is a reasonable small-scale germination experiment if it has not been cooked or otherwise damaged, but it is not a shortcut to a productive date palm. The seed’s age and handling are usually unknown, and seed-grown offspring do not reliably reproduce the fruit traits of the named parent. Start several pits if you have them, use one per deep pot, and treat the result as a long-term foliage project unless you live in a climate suitable for mature date palms and are prepared for the years involved.
Coconut is different because the whole fibrous nut is part of the germination setup; Gardening Know How’s coconut growing guide also treats the intact nut as the starting point. Do not halve or husk it for a standard seed-starting method; use an intact, viable coconut and provide a warm, spacious, well-drained place. A grocery-store coconut that has been processed or stored cold may not be viable, and a seedling that does emerge needs a genuinely tropical climate and substantial space to mature.
The practical lesson is the same for both: identify what you have, preserve the seed structure the species needs, and do not promise yourself a tree that will thrive where the climate cannot support it. For a beginner, one labeled, fresh seed batch in a warm, airy setup is a better experiment than several unmarked pits crowded into wet soil.
Conclusion
To sprout palm trees from seed, begin with a correctly identified, fresh seed and prepare it according to its species—not by applying the same float test, soak, or planting depth to every palm. Clean most palm fruits, use a draining mix, hold steady warmth and moisture, and expect germination to range from weeks to well over a year.
Once a root or shoot appears, learn whether the palm germinates remotely or adjacently before moving it. Use a deep enough pot, keep the seed attached, avoid burying the root-shoot transition, and transplant before roots tangle. Those careful, repeatable steps will not guarantee that every seed sprouts, but they give each viable seed a far better chance to establish.