How to Grow and Care for Blue Atlas Cedar
Blue Atlas cedar care starts with the right cultivar and a well-drained site. Get practical advice on establishment, training, pruning, winter care, and browning.
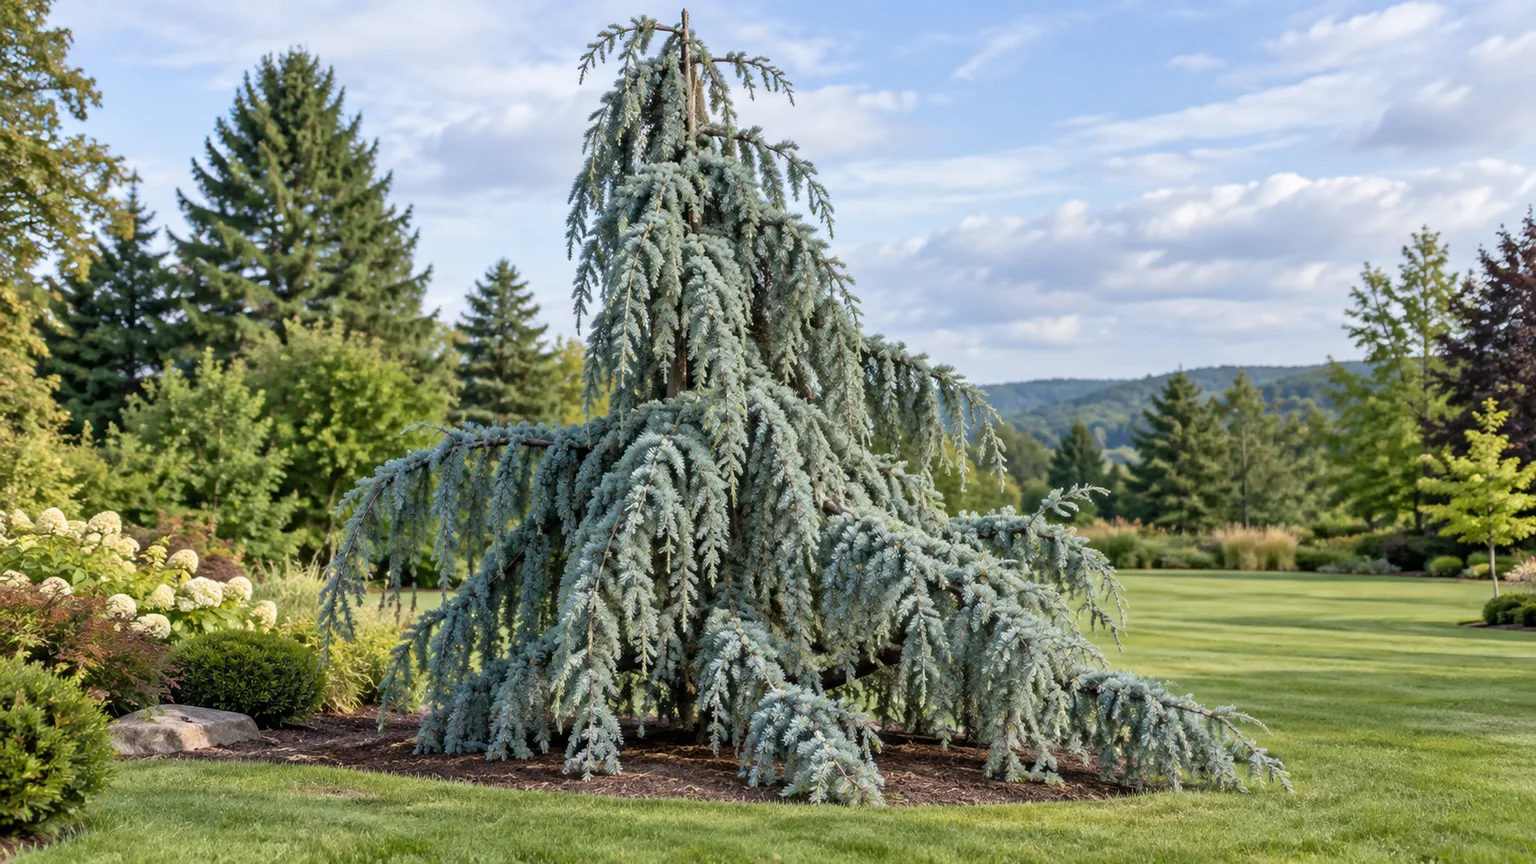
The first care decision is not how often to water. It is which Blue Atlas cedar you have room for. The straight species, Cedrus atlantica, can become a broad tree roughly 40 to 60 feet tall and 30 to 40 feet wide. The dramatic cascading plant usually sold as weeping Blue Atlas cedar is the cultivar ‘Glauca Pendula’; NC State Extension lists that form at about 10 to 12 feet tall and wide, though its eventual outline depends on how its leader is trained and how much room its branches get. Those are different landscape commitments, so read the plant tag before choosing a spot. NC State Extension’s species profile and NC State Extension’s ‘Glauca Pendula’ profile describe the distinction.
Once the cultivar and mature footprint are clear, the rest is straightforward: give the tree sun, soil that drains, and consistent moisture while its roots establish. Protect the young leader from wind, train it only if you want a particular height or shape, and resist pruning it into a tight outline. The blue foliage and unusual form are the reason to plant this cedar; crowded roots and repeated corrective cuts work against both.
Is a weeping Blue Atlas cedar right for your site?
‘Glauca Pendula’ is a focal-point tree, not a compact evergreen hedge. Its branches can sweep close to the ground and spread well beyond the nursery pot, while its leader may grow sideways or downward unless you support it. Choose a place where the silhouette can be seen from more than one angle and where branches will not be forced against a path, wall, driveway, or neighboring plant as they extend.
Think in three dimensions before planting. Mark the likely trunk position, then estimate the mature branch radius around it; a 10- to 12-foot spread means allowing several feet in every direction, with extra room if you want a long cascade or an espalier. Keep it out from under power lines and away from foundations and narrow beds. If your yard has room only for a narrow upright evergreen, a fastigiate cultivar or a different species is a better fit than trying to prune a weeping cedar into a shape it does not naturally hold.
The tree also needs a site where water can leave the root zone. A low pocket that stays saturated after rain is a poor match, even if it looks like the easiest place to keep the plant watered. Blue Atlas cedar tolerates some heat and dry weather after establishment, but drought tolerance does not compensate for a root ball that dries repeatedly in its first seasons.
Identify the cultivar before you plant
Plant labels often shorten names to “blue Atlas cedar,” which can refer to the species, a blue-foliaged group, or the weeping cultivar. Those names do not guarantee the same size or habit. The safest check is the full botanical name on the tag: Cedrus atlantica is the species; ‘Glauca’ identifies a blue form; ‘Glauca Pendula’ identifies the pendulous form.
| Plant label | Typical habit | Planning implication |
|---|---|---|
| Cedrus atlantica | Upright when young, broad and horizontal with age | Plan for a large specimen tree; NC State lists about 40–60 feet high and 30–40 feet wide |
| ‘Glauca’ or Glauca Group | Blue or silvery-blue needles, usually conical when young | Still a large cedar; do not assume blue foliage means a dwarf plant |
| ‘Glauca Pendula’ | Steel-blue needles and strongly drooping branches | A sculptural specimen whose height and outline are shaped by its leader and supports |
These figures are useful for rejecting a cramped site, not promises that every nursery plant will stop at a particular measurement. Rootstock, local climate, training, and the age of the plant affect its form. The Royal Horticultural Society’s Blue Atlas cedar profile describes the Glauca Group as a large conifer that needs space, while NC State gives more specific dimensions for ‘Glauca Pendula’.
What ‘Glauca Pendula’ changes
The species name does not mean every branch will hang down. In ‘Glauca Pendula,’ the flexible leader lacks the strong upward habit many gardeners expect from a young tree. Left unsupported, it may travel along the ground; staked upward, it can make a taller, more tree-like feature before its side branches cascade. A low, spreading specimen and a tall, trained specimen can therefore be the same cultivar, but they need different clearance and support plans.
Confirm the nursery’s exact label and ask how the plant has been trained so far. A container specimen with a short, upright stake may have an established leader that can continue upward. A plant grown low and wide may need a different support strategy—or may be best allowed to keep that horizontal habit. This is one reason to buy a well-labeled specimen in person when a specific form matters.
Choose light and exposure
Give a Blue Atlas cedar full sun when possible, roughly six or more hours of direct light. The NC State profile for ‘Glauca Pendula’ lists full sun; the broader species can tolerate partial shade, but low light can leave a young specimen less dense and diminish the visual effect of the blue-gray foliage. If your site gets intense afternoon heat, observe nearby plants and the soil before deciding that shade is necessary; persistent damp shade can create more trouble than a bright, airy position.
Wind exposure matters as much as sunlight for a newly planted weeping form. Young branches and an unsupported leader can flex or break before the root ball anchors. A sheltered garden edge or a temporary wind screen can help during establishment, but do not squeeze the cedar between buildings or dense shrubs to create shelter. Air movement and the tree’s full mature space still matter.
The blue color varies among seedlings and cultivars. NC State notes that Atlas cedar foliage ranges from green to silvery blue, and the RHS describes the Glauca Group as variable. If strong blue color is the reason you are buying the plant, select a clearly labeled blue form rather than assuming every Atlas cedar will develop the same shade.
Give roots drainage and room
Good drainage is more important than chasing a particular pH number. Atlas cedar grows in a range of soil textures, including clay and sand, if excess water drains away; the RHS lists chalk, clay, loam, and sand as suitable soil types and recommends well-drained conditions. NC State describes deep, well-drained loam as favorable while noting broader tolerance. In practice, avoid compacted fill, a planting basin that collects runoff, and sites where the root zone stays muddy well after nearby soil has drained.
Check the site after a soaking rain. Does water stand in the proposed planting area, or does the soil remain slick and saturated the next day? If so, select a better-drained location or correct the site before buying the tree. Raising a tree slightly can help only when water still has somewhere to drain; building a small mound over a persistently wet clay bowl does not solve a drainage problem.
Do not acidify the soil automatically. The RHS profile lists the Glauca Group as tolerant of acidic, neutral, or alkaline pH. A soil test is useful if the site has a known nutrient or pH issue, but a cedar that is otherwise growing normally does not need an arbitrary dose of sulfur, compost, or fertilizer. Preserve the existing soil structure and avoid turning the planting hole into a rich pocket that holds water differently from the surrounding ground.
Plant the tree at the right depth
Plant in spring or early fall when the soil is workable and the weather gives roots time to establish before severe heat, drought, or freezing ground. Water the root ball before planting if it is dry, and keep it shaded while preparing the hole. Dig a hole broad enough to loosen soil beyond the root ball but no deeper than the root system needs; a wide planting area encourages roots to move outward instead of circling in a narrow pocket.
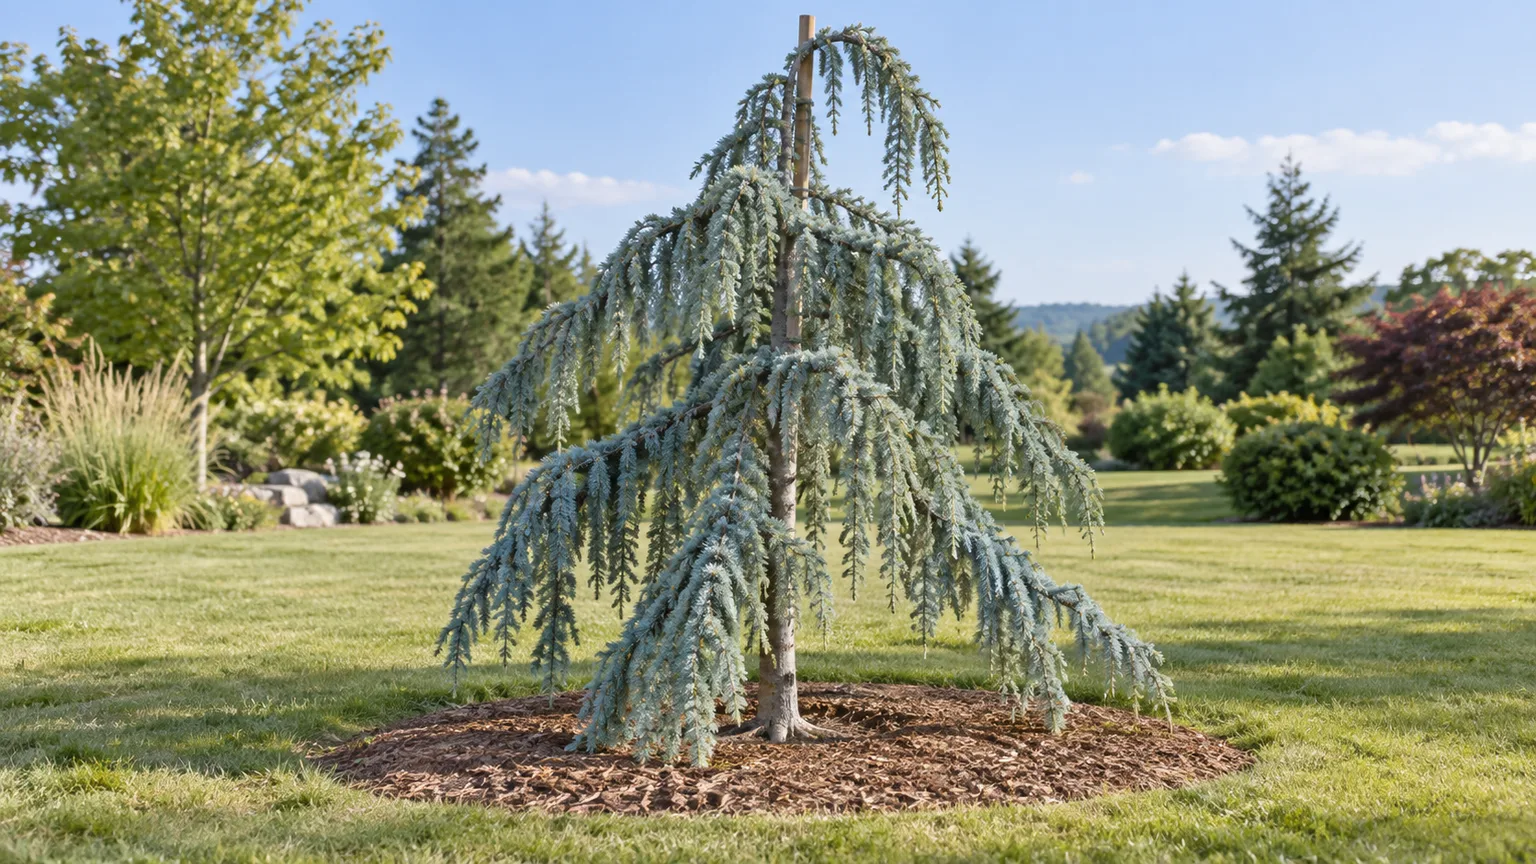
Set the root flare, backfill, and mulch
Locate the first structural roots at the base of the trunk before setting the plant. Nursery trees can arrive with soil or potting mix piled over this root flare. Remove that excess until you can see where the trunk broadens into its roots, then set the flare at or slightly above finished grade. If the flare is buried, the tree can sit too low, hold moisture against the trunk, and appear to sink further as loose backfill settles.
For a container tree, slide off the pot and inspect the outside and bottom of the root ball. Loosen a few circling roots so they point outward, but do not tear apart a root mass that holds together well. For a balled-and-burlapped tree, follow the nursery’s guidance on the basket and wrapping; remove twine and any material that can constrict the trunk, and avoid leaving a wire rim where roots need to grow. Fine Gardening’s tree-planting guide likewise emphasizes exposing the root collar, setting it slightly above grade, and using staking only when the tree or root ball needs it.
Backfill with the soil you removed, firming it gently to eliminate large air pockets without compacting it hard. Water thoroughly so the soil settles around the roots. Spread 2 to 4 inches of mulch over the root zone, extending it outward rather than building a volcano against the trunk; leave several inches bare around the stem. Mulch buffers soil moisture and temperature, but direct contact keeps bark damp and hides the root flare.
Water through establishment
For the first growing season, check moisture in the root ball and the nearby backfill at least weekly, and more often during hot, windy weather or in sandy soil. Push a finger or narrow trowel several inches down: if the root ball is dry at that depth, water slowly enough to soak it rather than running off the surface. If it is still moist, wait and check again. The surface can look dry while the lower root ball remains wet, or look damp while the original potting mix has dried into a hydrophobic plug.
Do not rely on a fixed “once a week” schedule. A young tree in a small root ball can dry quickly in heat; a large root ball in clay can stay wet for days. Water at the root zone, not just the surrounding lawn, and use rainfall as part of the total. As the tree establishes, lengthen the interval between watering sessions and soak more deeply when dry spells persist. The goal is a gradually expanding root system, not permanently wet soil.
After establishment, Atlas cedar has useful drought tolerance, but it still benefits from supplemental water during long, hot, rainless periods. Watch new growth and soil moisture instead of waiting for the whole canopy to discolor. If needles turn brown while the soil is wet, adding more water is the wrong first move; check drainage and roots before changing irrigation again.
Stake or train the central leader
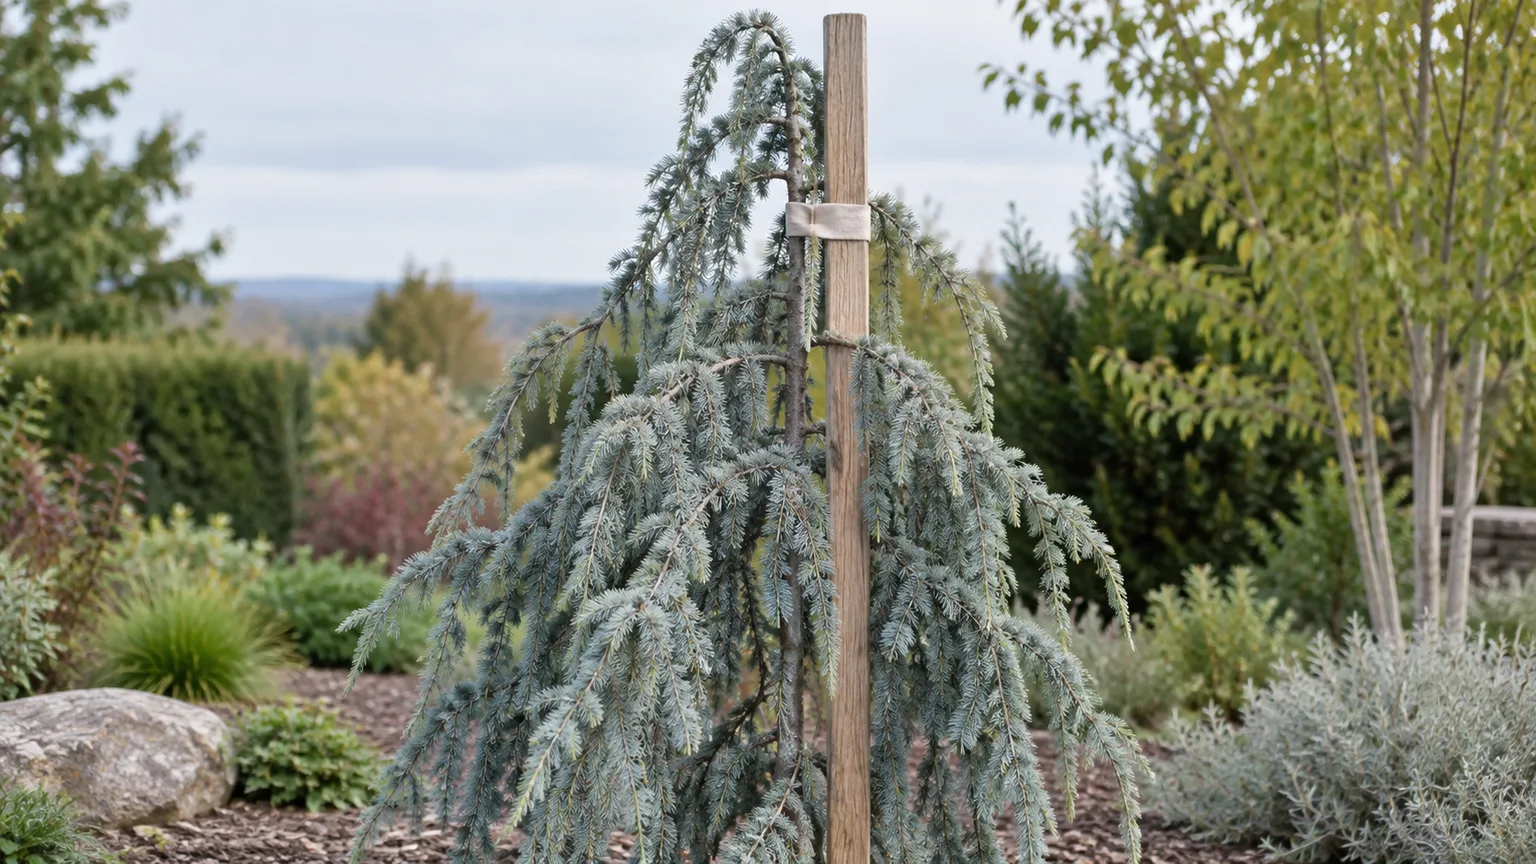
Staking has two different jobs here. A temporary stake can stabilize a newly planted tree when the root ball rocks, the site is windy, or the trunk cannot stand upright. A training support gives ‘Glauca Pendula’ a chosen direction and height. Decide which job you need before tying the plant; unnecessary rigid staking can prevent natural trunk movement, while a leader left unsupported may never rise above the ground.
Choose the strongest central shoot as the leader and guide it gradually toward the intended height. Use a sturdy post or a proper tree support set beyond the root ball, and attach the leader with a broad, flexible tie that allows slight movement. Check ties every few weeks during rapid growth. Loosen or reposition anything rubbing the bark, and remove temporary ties as soon as the trunk and root ball can support themselves. A tie left in place can girdle the leader as it thickens.
For a free-standing cascading shape, support only the section needed to establish the desired trunk line, then allow side branches to drape naturally. For an espalier, place the support far enough off a wall or fence to preserve airflow and tie selected branches loosely along the frame. The cultivar’s effect comes from its flexible growth; forcing every shoot into a tight formal outline creates years of corrective pruning. The cultivar-specific NC State profile describes the leader’s upward training and the space the branches need, while GardenGuides’ account of training this weeping cedar illustrates why supports and ties need regular inspection.
Prune to preserve the cascading form
This cedar does not need routine shearing. Start by removing dead, broken, or clearly diseased branches, then step back and decide whether a live branch truly blocks access or conflicts with the planned form. If the tree is healthy and the only complaint is that it looks sparse or irregular when young, leave it alone. Young ‘Glauca Pendula’ can look unconventional before its leader and branch framework develop; cutting it to make it look like a standard conical evergreen removes the trait you bought it for.
The cleanest time for planned structural work is generally late winter or early spring before the new season’s growth, when the framework is easy to inspect. Remove a branch at its junction rather than leaving a stub, and use sharp, clean tools. If a branch is large, high, under tension, or over a target, have an arborist handle it. A small tree may be manageable from the ground, but a ladder and chainsaw turn cosmetic shaping into a safety risk.
Cut selectively and stay in live growth
Conifers often do not produce new shoots from old, bare wood. That makes deep heading cuts risky: if you cut past the last green needles on a branch, the shortened section may stay brown rather than filling back in. Keep cuts within the live, green portion and take only enough to correct a real conflict. Gardening Know How’s practical guidance for weeping conifers also warns against cutting off a central leader or pruning into barren branches; apply that general conifer advice cautiously alongside the cultivar-specific NC State profile.
Do not repeatedly top the leader to hold a chosen height. That can create an awkward junction and redirect growth unpredictably. If you want a low serpentine or cascading specimen, decide that early and train it with support rather than cutting back the central shoot year after year. When a mature tree has become too large for its site, selective pruning cannot turn a large cedar into a small one; replacing it with a better-sized plant may be the more sustainable decision.
Prepare for wind, snow, and winter
The species is evergreen and keeps its foliage year-round, but young trees still need protection from exposure while their roots anchor. A windward screen can reduce stress in an open site; it should be permeable and temporary rather than wrapped tightly around the branches. Inspect the support after storms, because movement can loosen ties, rub bark, or tilt the root ball.
Heavy snow can break branches, particularly where a long weeping limb carries a wet load. If snow bends a branch, avoid yanking it when frozen or sharply flexing it upward; let some snow melt or gently support the branch from below if it can be reached safely. Remove only broken wood that can be cut from the ground with a hand tool. If the leader or major scaffold splits, have the plant assessed before cutting away structural wood.
Use the hardiness information for the exact cultivar, not a generic cedar listing. NC State rates ‘Glauca Pendula’ for USDA Zones 6a–8b, while its species profile extends to warmer zones. That difference is a reason to check cultivar-specific guidance and local experience, especially at the colder or hotter edge of a range. USDA zones describe average annual extreme minimum winter temperatures; they do not guarantee that a tree will tolerate poor drainage, summer heat, wind, or a sudden freeze after warm weather.
Diagnose browning before treating it
Brown needles are a symptom, not a diagnosis. First note which growth is affected: a few older needles close to the trunk, the tips of individual shoots, one entire branch, or several sides of the crown. Then check when the change began, whether it is spreading, how wet the soil is below the mulch, and whether the tree recently experienced drought, heat, wind, or snow damage.
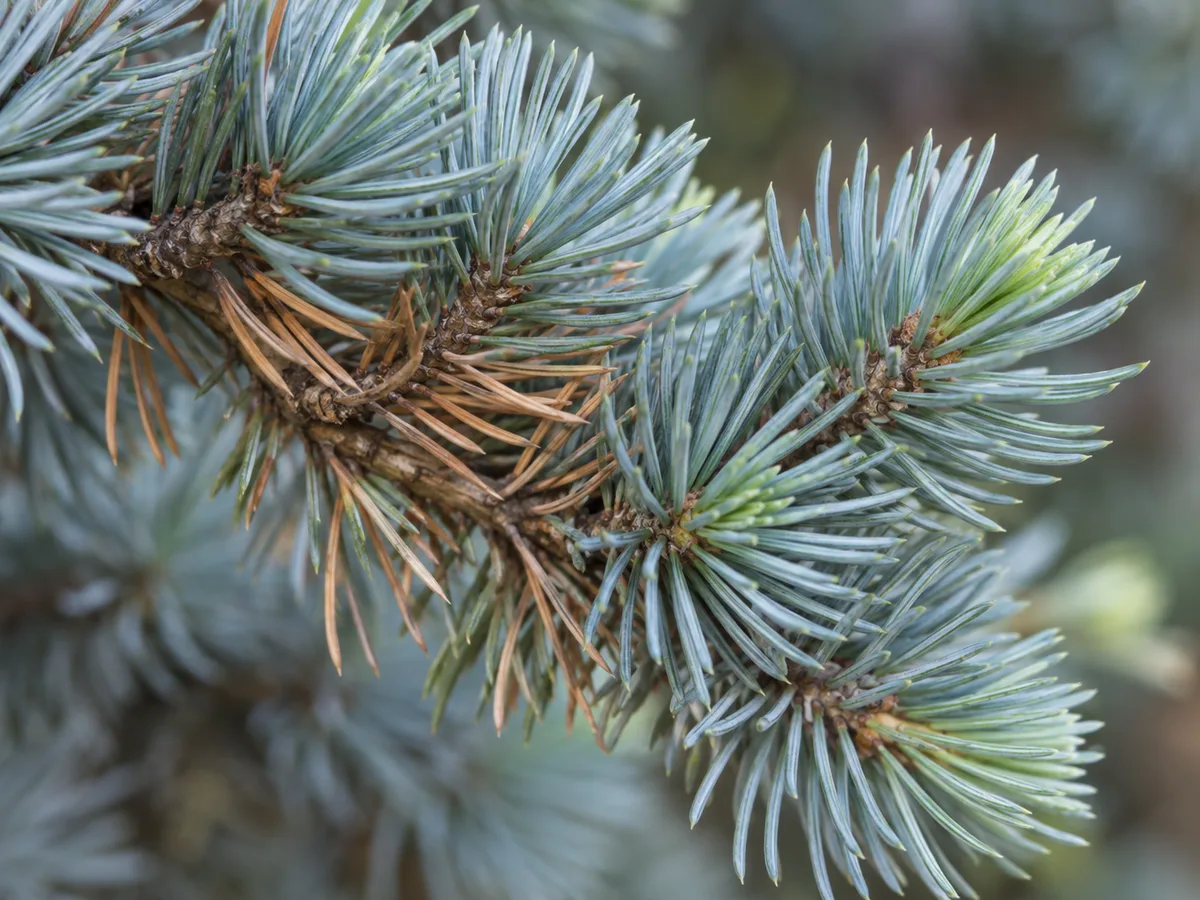
Small amounts of older interior needle loss can be part of normal evergreen turnover, especially when the outer tips remain healthy. The University of Wisconsin Extension’s seasonal needle-drop guide explains that older needles discolor and fall as part of an evergreen’s cycle, while current growth remains healthy; the amount and timing vary by species. By contrast, browning that advances from shoot tips, appears on current-season growth, or kills whole branches deserves closer inspection. The Pacific Northwest Plant Disease Management Handbook’s entry on cedar needle blight describes tip and needle symptoms associated with fungal blight; NC State also lists pine needle scale among potential problems for Atlas cedar. Neither possibility can be confirmed by color alone.
Separate normal inner needle drop from decline
| Pattern | What it suggests | First check |
|---|---|---|
| Scattered older needles browning inside the canopy, with healthy outer growth | Possible normal aging and seasonal shedding | Compare how much of the canopy is affected and whether new growth stays healthy |
| New shoot tips brown or die back, often beginning at branch ends | Possible tip blight, winter injury, or other shoot damage | Inspect affected shoots closely and collect fallen or cut debris; seek local diagnosis if it spreads |
| Broad yellowing or browning while the root zone stays wet | Root stress, including possible root rot | Pause irrigation and check drainage and planting depth before adding water |
| Branches decline where ties or supports rub the bark | Mechanical injury or girdling | Remove constricting ties carefully and assess whether the leader remains sound |
| Fixed scale-like insects, sticky residue, or repeated localized decline | Possible scale infestation or another pest | Confirm the pest with a close inspection or extension office before treating |
The useful next step is to correct a clear cultural problem first: water a dry root ball, stop irrigating saturated soil, uncover a buried flare, or remove a constricting tie. Do not spray a fungicide because one branch is brown. Blight diagnosis depends on symptoms, timing, and the organism involved, and a treatment that misses the cause can add expense without protecting new growth. If browning progresses, photograph the whole tree and close-up shoots, then send them to a local extension service or certified arborist.
Fertilize only when soil or growth points to a need
An established Blue Atlas cedar usually does not need a routine annual fertilizer dose. If the tree has normal color and steady new growth, leave the soil alone. If it declines despite correct light, moisture, and drainage, first check planting depth, root injury, girdling roots, compaction, and irrigation; fertilizer will not repair a damaged root system or a waterlogged site.
Use a soil test when the symptom pattern or site history suggests a nutrient problem, then apply only what the result calls for. Avoid high-nitrogen lawn fertilizer around the root zone, especially when it would push soft growth ahead of winter. Newly planted trees often need stable moisture and protection from competition more than extra nutrients.
Propagate with the right expectations
Blue Atlas cedar can be grown from seed, but seed is a poor shortcut when the goal is an exact weeping cultivar. Seedlings are genetically variable and will not reliably repeat ‘Glauca Pendula’s’ blue color, branch habit, or trained silhouette. Collecting a cone and sprouting its seeds may produce an Atlas cedar, not necessarily a matching weeping tree.
For a plant that matches its label, buy a nursery-grown, correctly identified cultivar or learn the propagation method used by a specialist. The RHS lists seed and semi-hardwood cuttings for the Glauca Group, while NC State’s cultivar profile lists seed as a propagation strategy; those are not guarantees that every seedling will preserve a named selection. Grafting and cuttings require attention to compatibility, timing, and aftercare, so home propagation is best treated as an experiment rather than a dependable way to duplicate a mature specimen.
Container culture is also temporary for most garden plants. A small ‘Glauca Pendula’ may spend time in a large nursery pot, and specialized bonsai growers can maintain Atlas cedar in a deliberately restricted root environment. For a landscape specimen, however, a container will eventually constrain roots, water balance, and support. Plan to plant it in the ground while it is young rather than trying to keep a full-size tree permanently pot-bound.
Conclusion
Blue Atlas cedar care begins with the label. If the plant is Cedrus atlantica ‘Glauca Pendula,’ plan for a sunlit, well-drained site with space for a trained leader and low, cascading branches; if it is the straight species, allow room for a much larger tree. When those expectations match the garden, plant with the root flare at grade, water according to soil moisture while roots establish, and keep mulch and ties away from the trunk.
After that, make fewer corrections rather than more. Support the leader only when you want to guide it, inspect ties before they constrict, and prune within live growth to remove a specific problem. If the inner canopy sheds a few older needles, observe the pattern; if tips or whole branches keep browning, check soil moisture and seek a diagnosis before treating. The tree’s best form comes from a suitable site, sound establishment, and enough room to grow into its unusual shape.



