How to Plant Fall Bulbs for Spring Blooms
Plant fall bulbs by soil temperature and species, not a fixed calendar date. Get depth, spacing, container, storage, and late-planting advice.
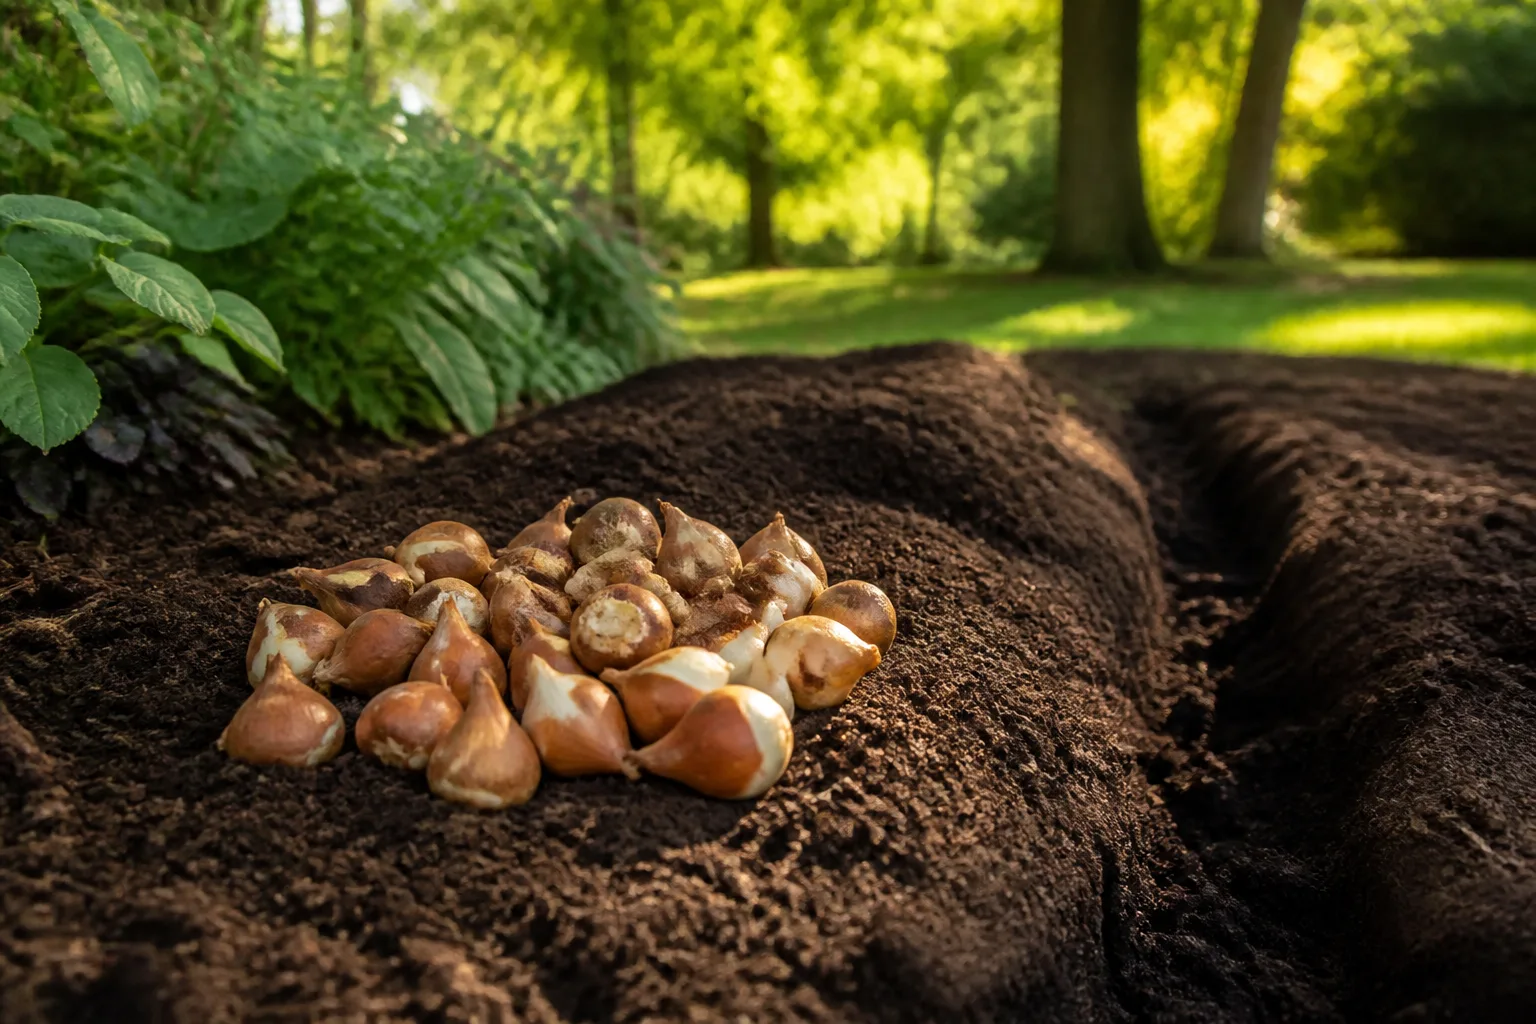
If you want daffodils, tulips, crocuses, hyacinths, or other spring flowers, plant their hardy bulbs in fall while the ground is cool but still workable. The right week depends on your region, the weather in your yard, and the species: a calendar date that suits a northern garden may be too early or too late somewhere warmer.
Start by checking the bulb label and your local extension service’s planting advice. Then look at the soil, not just the forecast. It should be cool enough that bulbs can establish roots without being pushed into active top growth, but not frozen or waterlogged. This guide walks through that decision and the planting details that determine whether bulbs return with strong flowers.
What “fall bulbs” actually means
Gardeners use “bulb” as a catchall for several underground storage organs. Tulips, daffodils, hyacinths, and snowdrops grow from true bulbs; crocuses grow from corms; and some plants sold as bulbs have tubers or rhizomes. These structures store energy through an unfavorable season, but they do not all have the same hardiness or planting calendar.
For this job, “fall bulbs” means hardy spring-flowering types that are planted in autumn and normally spend winter outdoors. They put down roots while the soil is cool, then use winter conditions to prepare for spring growth. The Clemson Cooperative Extension Home & Garden Information Center’s spring-bulb guide explains that these plants root again in fall and winter after their summer dormancy.
Do not confuse them with tender summer-flowering plants such as dahlias, gladiolus, and cannas. Those are usually planted after frost danger passes; in cold-winter regions, gardeners often lift and store their tubers, corms, or rhizomes after the growing season. Some can stay in the ground in mild climates, so check the plant’s hardiness and local advice instead of treating every “bulb” the same way.
Read local weather and soil, not a universal date
A hardiness zone estimates the average annual extreme minimum winter temperature. It helps you judge whether a plant is likely to survive winter, but it does not tell you when the soil in your specific bed has cooled enough for planting. Sun exposure, recent rain, elevation, nearby pavement, and the amount of shade can all make the soil in one yard behave differently from the yard next door.
Use this sequence. First, check the planting window recommended by your local cooperative extension or trusted regional garden organization. Second, follow the supplier’s advice for the species and cultivar you bought. Third, if the recommendation uses soil temperature, measure at the intended planting depth with a soil thermometer and check more than once; a warm afternoon air temperature does not mean the soil has cooled, and one cold night does not mean it has.
Clemson’s regional advice, for example, recommends waiting until soil at planting depth stays below 60°F for many spring bulbs and notes that coastal South Carolina planting can extend into late December or January. That is a useful illustration of why a single national date fails; it is not a universal threshold for every bulb or climate. The RHS likewise separates planting periods by bulb group, but a seasonal schedule still needs to be checked against local conditions.
The practical target is cool, well-drained soil that remains workable long enough for roots to establish before hard freezes. Avoid planting into warm, wet soil just because bulbs are in stores, but do not wait until the ground is frozen solid.
Match planting time to the bulb species
Different spring bulbs are not interchangeable. Some are planted earlier in autumn, while others do better once the soil has cooled further. The intervals below are broad seasonal cues for temperate climates, not a replacement for a regional planting guide or the cultivar’s label.
| Bulb or corm | General fall cue | Practical note |
|---|---|---|
| Snowdrops and crocuses | Early to mid-autumn, while the soil is workable | Small corms and bulbs are easy to lose in a bed; plant them in visible groups. |
| Daffodils | Mid-autumn in many regions | They often naturalize well where the cultivar is suited to the climate and drainage is good. |
| Hyacinths | After the soil begins cooling | Plant gloves can help if handling the bulbs irritates your skin; follow the label for depth. |
| Tulips | Later in autumn in many regions | A cooler planting window can reduce premature growth; return performance depends heavily on cultivar and climate. |
| Alliums and grape hyacinths | Usually in autumn | Flowering time and bulb size vary widely, so use the packet’s depth and spacing. |
The RHS guide to choosing and planting bulbs in autumn distinguishes among the planting periods for spring-flowering bulbs, tulips, and hardy summer-flowering bulbs. That variation matters more than a generic “plant bulbs in October” rule. For example, if you buy bulbs early, you can keep them ventilated in a cool, dry place until the recommended window rather than forcing them into warm soil.
Species and cultivars differ in how much winter cold they need. In warm-winter climates, choose bulbs adapted to your region or buy bulbs the supplier says have received the required chilling; do not refrigerate every type for an arbitrary number of weeks.
Choose spring bulbs for your climate and display
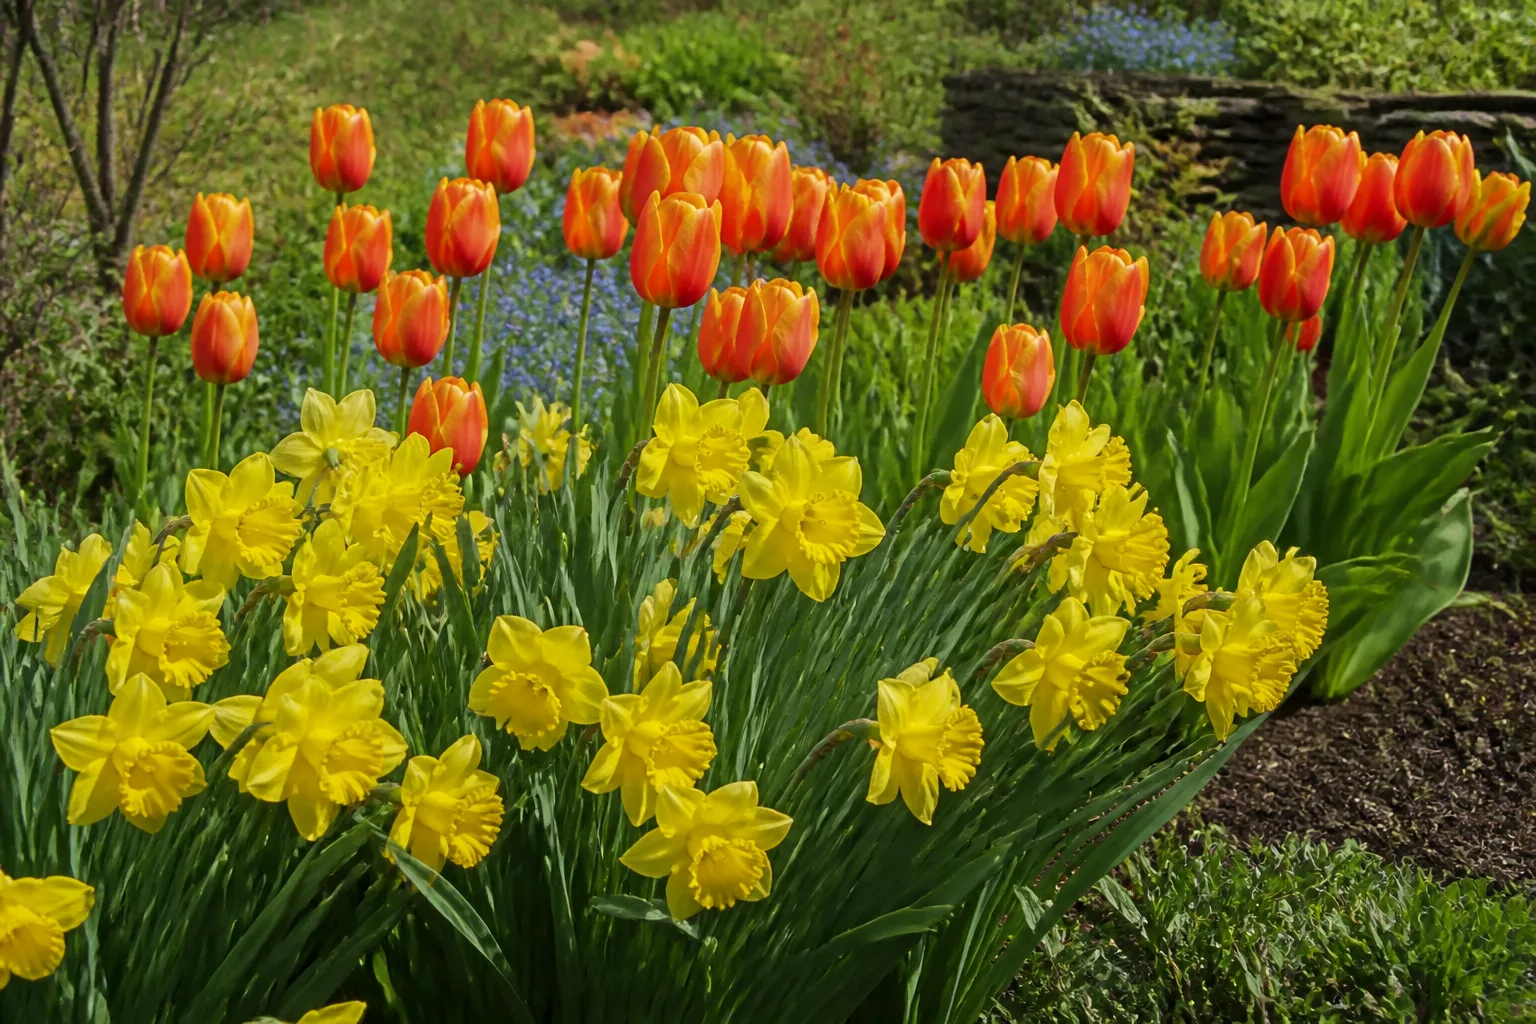
Pick plants for the winter they will actually experience and the display you want. If you want dependable bulbs that spread in a suitable climate, look for species or cultivars described as naturalizing and suited to your hardiness zone. Daffodils, crocuses, and snowdrops are common choices for drifts, while tulips can provide a more formal, high-impact show. Whether a particular tulip returns well depends on the cultivar, drainage, summer conditions, and winter chill; some gardeners treat less-persistent tulips as a one-season display.
Think about bloom sequence, not only color. Early crocuses and snowdrops can open before later daffodils, while tulips and alliums may extend the show into mid- or late spring. Combine early, midseason, and late selections so the bed does not peak all at once.
Look at foliage, too. Spring bulbs need time after flowering to recharge, so their leaves will remain visible as the rest of the garden begins filling in. Plant among perennials that emerge later, or use deciduous-tree beds that receive spring sun before the canopy fills out. The RHS recommends companions that can help soften the look of fading leaves later in the season. Avoid planting bulbs where you will need to mow or dig through their foliage before it yellows.
Buy firm bulbs and store them correctly
Choose bulbs that feel firm and heavy for their size, with intact outer skins and no soft, wet, or moldy patches. A small dry outer layer is normal; a mushy base or spreading dark area is a reason to leave that bulb behind. Bigger bulbs of the same cultivar often have more stored energy and may make a stronger first display, but size alone does not compensate for poor drainage or a variety unsuited to your climate.
If you buy before the soil is ready, keep bulbs in their ventilated packaging in a cool, dry place away from direct sun and heat. Do not seal them in a plastic bag, where trapped moisture can encourage rot. Check the label for storage instructions, because some types dry out faster than others and special handling may be needed.
If you need to chill bulbs for a warm climate, follow the supplier’s directions and keep them away from ripening fruit. Clemson Extension notes that ethylene released by fruit can prevent bulbs from flowering. Keep the storage area clean, cool, and dry, and inspect the bulbs periodically; discard any that turn soft or show active mold rather than storing them with healthy bulbs.
Pick a sunny, well-drained place
Most spring bulbs perform best in sun or light shade, especially while they are growing leaves and flowers. A bed under a deciduous tree can be an excellent location: it receives light before the tree leafs out, then the bulbs can go dormant as the canopy becomes dense. A spot that is deeply shaded year-round is less likely to give a strong show.
Drainage is just as important as light. Bulbs sitting in saturated soil can rot before they ever emerge, so avoid low pockets where water collects after rain or snowmelt. If the site is wet for days after a storm, choose a raised bed, a better-drained border, or a container instead of trying to compensate with frequent fertilizer.
Avoid foot traffic that compacts the bed and mark the planting area on a garden map; bulbs disappear underground for months, and it is easy to forget where a new grouping was placed.
Fix drainage before you plant
Do not put a layer of gravel under each bulb hole and assume it will drain. A pocket of gravel surrounded by dense soil can hold water at the boundary instead of moving it away. Improve the whole planting area or move the bulbs to a better site. Clemson Extension advises using organic matter to improve poorly drained beds and notes that raised beds or drainage improvements can help where water is persistent.
In heavy clay, loosen a broad area rather than digging isolated holes that become little basins. Incorporate finished compost or another soil amendment appropriate for your soil test and local recommendations. Avoid adding sand in small amounts to clay; it can make a dense, cement-like mix rather than improve structure. If your garden remains soggy despite reasonable bed preparation, choose bulbs that tolerate the conditions or plant in a raised bed with reliable drainage.
Do not over-fertilize at planting. A soil test is the best way to know whether phosphorus or other nutrients are needed. Bone meal is not a universal requirement and will not fix waterlogged soil, wrong planting depth, or bulbs that need more winter chill. If you add compost, blend it through the bed instead of making a rich pocket directly under each bulb.
Set depth and spacing for each type
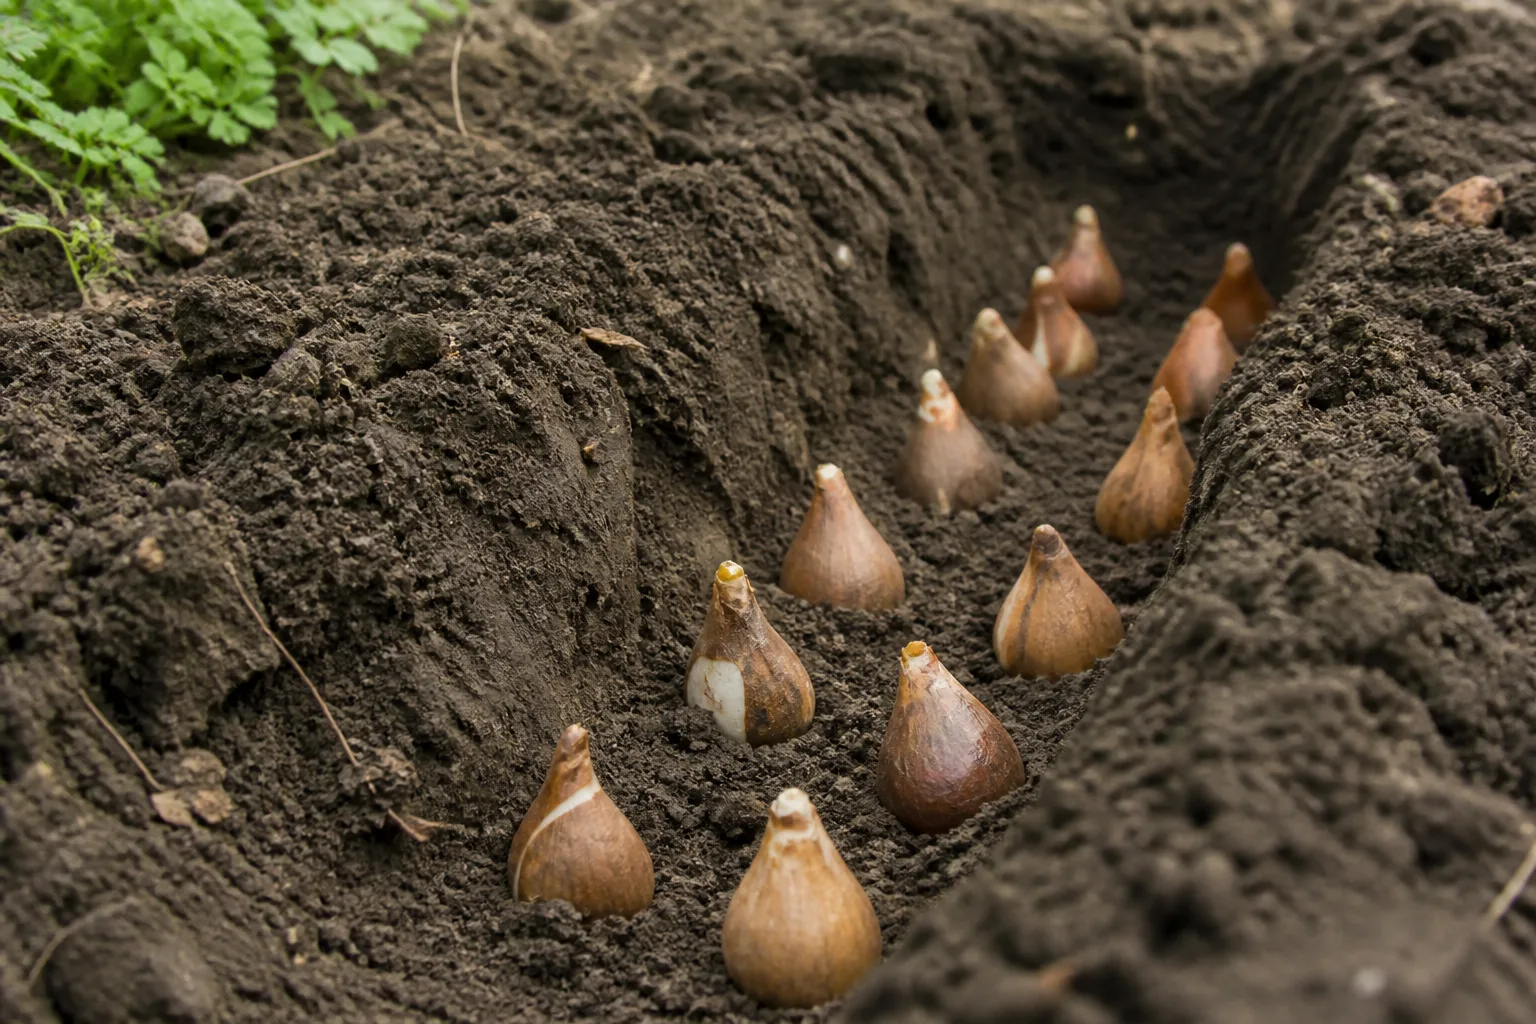
Use the package instructions whenever they are available because bulb size and cultivar can change the recommendation. If the label is missing, a common rule is to plant larger bulbs deeper than smaller ones, often around two to three times the bulb’s height; reliable regional guides may give a different measurement convention. Clemson Extension gives a general guideline of three to four times the bulb’s width, measured from its base, and lists tulips and daffodils around 6 to 8 inches deep, hyacinths 4 to 6 inches, and crocuses about 3 inches. The important point is to measure consistently from the soil surface and follow the specific label where it differs.
| Bulb or corm | Example depth | Spacing guide |
|---|---|---|
| Crocus | About 3 inches | Roughly 3 to 4 inches |
| Hyacinth | About 4 to 6 inches | Roughly 3 to 6 inches |
| Daffodil | About 6 to 8 inches; less for small species | Roughly 3 to 6 inches |
| Tulip | About 6 to 8 inches | Roughly 4 to 6 inches |
| Allium | Varies substantially by bulb size | Use the cultivar label |
These examples are not universal measurements for every named variety. Planting too shallow can leave bulbs exposed to temperature swings and may contribute to weak flowering; planting too deep can delay emergence or make it harder for a small bulb to reach the surface. In loose sandy soil, some regional guides recommend adjusting depth, while heavy soils may need a shallower setting. If you have conflicting instructions, favor the bulb supplier’s cultivar-specific label or your local extension office.
Spacing controls the effect as well as plant health. For a dense display, plant bulbs closer than you would space mature perennials, but do not pack them so tightly that they press against one another. Larger bulbs need more room than small crocuses. A few inches between bulbs gives each plant space while keeping the clump visually full.
For a compact tulip patch, Country Living’s report on Alan Titchmarsh’s planting gives one practical example: he uses groups of five bulbs spaced a few inches apart. Treat that as a design starting point, not a fixed rule; cultivar size and the density you want should guide final spacing.
Plant in groups and layer bloom times
Plan the arrangement before digging. For a natural look, place bulbs in loose drifts or odd-numbered clusters rather than single rows. For a formal bed, use repeated blocks or bands of one cultivar. If you want a low-maintenance display, repeat the same groups in more than one section of the garden so a single missed or eaten cluster does not leave the whole border empty.
Dig one broad hole for a group when the soil is loose enough to set each bulb at the correct depth, or use individual holes in compact soil so you can control placement. Set each bulb with its basal plate—the flatter root end—down and the pointed end up. If there is no obvious point, place it on its side; shoots can still orient upward. Keep the bulbs spaced, cover them with the soil you removed, and firm gently so no large air pockets remain.
Water the bed after planting if the soil is dry. This settles soil around the bulbs and begins root growth, but avoid soaking a site that drains slowly. Add a simple label with the species, cultivar, and planting month if you want to compare bloom timing later. That small record helps you distinguish a bulb that is slow from one that has disappeared or failed.
For succession, layer early and late bloomers only when their sizes and care needs allow it. In a pot this is called lasagna planting; in the ground, adjacent patches are simpler because each variety can be set at its proper depth.
Plant bulbs in containers
Containers are useful when the garden soil drains poorly, space is limited, or you want flowers near a patio or doorway. Choose a pot with drainage holes and use a free-draining potting mix. Do not use a sealed decorative cachepot outdoors unless the planted container can drain and excess water can be emptied after rain.
Plant bulbs more closely in pots than in a garden bed for a fuller display, but keep them from touching one another and the container walls. Follow the cultivar label for depth, leaving enough soil beneath the bulbs for roots and above them for shoots. You can layer early, midseason, and late bulbs at separate depths to extend flowering, but keep the planting simple if you are new to it: mixed bulbs with different depth or chilling needs can be difficult to manage in one pot.
Keep the pot outdoors in a location that receives the winter conditions the bulbs require. In cold regions, pots may freeze more severely than garden soil because cold surrounds the container; a sheltered, unheated spot or protection around the pot may be necessary. Do not bring a hardy bulb pot into a warm room for winter, which can trigger premature growth. Check periodically during dry weather and water enough to keep the mix from becoming bone dry, while ensuring it never stays waterlogged. RHS container guidance similarly emphasizes drainage, close grouping, and keeping the compost moist during dry spells.
Naturalize bulbs in lawns and under trees
Small bulbs can be planted in lawn or beneath deciduous trees for a less formal spring display. Snowdrops, crocuses, and suitable daffodils are common choices. Scatter bulbs loosely before planting rather than arranging every one in a straight line; the result looks more like a drift and less like a row of buried markers. Choose varieties suited to your region and allow room for clumps to expand over time.
Under deciduous trees, spring light can be plentiful before the canopy closes. Avoid cutting through established tree roots when digging. If the area is root-filled, use smaller planting tools and choose a place where you can make shallow holes without damaging major roots. Do not pile soil against the tree trunk or alter the grade around established trees just to create a bulb bed.
The trade-off with lawn planting is mowing. Leave the area uncut after flowers fade until the foliage has yellowed and died back; leaves are still feeding the bulbs during that period. If you mow too soon, the patch may return with weaker flowers or fewer blooms. The RHS advises allowing bulb foliage to die back naturally before cutting grass planted with spring bulbs, so plan a mowing route around the display or reserve a strip where a longer spring pause is acceptable.
Protect bulbs from rodents
Squirrels, chipmunks, voles, and other animals may dig or eat some bulbs, especially tulips and crocuses. A freshly dug patch is often the first clue that animals have found them. Daffodils are less attractive to many rodents, though no plant is guaranteed to be untouched in every yard.
Physical barriers are the most direct protection. Plant bulbs in wire baskets designed for bulbs, or lay a sturdy mesh barrier over the planting area and cover it with soil or mulch. Make sure the mesh openings are large enough for the shoots to pass through but small enough to deter the animals you are dealing with; a wide chicken-wire opening may stop a squirrel’s digging but not smaller rodents. Clemson Extension recommends enclosing bulbs in wire mesh when animal damage is a recurring problem.
If digging continues, identify the pest and choose a barrier suited to it; one product will not solve every animal problem. Mixing less-preferred bulbs among vulnerable types may deter feeding, but is not a guarantee.
Water and mulch after planting
After setting and covering the bulbs, water once if the ground is dry. The goal is to moisten the soil around them and help settle the planting—not to keep the bed wet all winter. In many regions, fall and winter rainfall provides enough moisture. If you are in a dry climate or experience an extended warm, dry spell, check soil moisture below the surface and water when the root zone is dry.
A light layer of mulch can moderate temperature swings, limit mud splash, and reduce weeds. Clemson Extension recommends 2 to 3 inches for its regional planting conditions. Do not bury small bulbs under an excessively deep blanket or pile mulch against trunks and crowns. In warmer areas, mulch can also slow soil cooling, so follow your local timing advice and apply it after the soil has cooled rather than using it to force early planting.
Fertilizer is a separate question from watering. Bulbs carry stored energy, and many will flower without a heavy dose at planting. If you want repeat bloom, use a soil test and a product labeled for bulbs or follow local extension guidance; more fertilizer is not automatically better. Phosphorus can accumulate when bone meal is added without need, and no fertilizer can compensate for a bulb planted in wet soil or a warm climate without the required chilling.
If you missed fall, plant late only while soil is workable
The first frost does not automatically close the planting window. If the soil is still workable and the ground is not frozen, plant the bulbs promptly at their recommended depth and water if the soil is dry. A cold night above ground is not the same as frozen soil below it. In a mild climate, planting can continue later than it would in a region where the ground freezes early.
If the soil is frozen solid, do not force a trowel through it or leave bulbs exposed in a hole. Keep bulbs in a cool, ventilated, dry place and check their labels or ask the supplier whether that cultivar can be stored until a brief thaw. Bulbs are living material and storage tolerance varies. A bulb that dries out, molds, or begins to grow in a warm room may be less likely to establish.
Late planting can still produce flowers, but it is less predictable: roots have less time to establish, and a bulb may bloom later, make a smaller flower, or fail to flower its first season. If outdoors is no longer practical, pot suitable bulbs and give them the cold period specified by the supplier. An unchilled, late-planted bulb is a chance to salvage the planting, not a guaranteed show.
Leave foliage long enough to refill the bulbs
After the flowers fade, remove the spent flower head if you do not want the plant to set seed, but leave the green leaves intact. Those leaves are still photosynthesizing and moving stored energy back into the bulb. Cutting them off, braiding them, or tying them tightly while they are green reduces the plant’s ability to recharge for next year.
Wait until the foliage yellows and dies naturally before mowing or removing it. Clemson Extension recommends leaving tulip and daffodil leaves for at least six weeks after bloom or until they turn brown. The exact pace depends on weather and variety, so judge the leaves rather than following a fixed date. You can hide the fading foliage behind later-emerging perennials, but avoid digging into the area while the bulbs are dormant.
If a group becomes crowded, do not dig it while leaves are still green. Wait until the foliage has withered, then lift, divide, and replant healthy bulbs according to their season and local conditions. Some bulbs return reliably for years; others are shorter-lived or poorly suited to the local climate. Replace those that decline rather than assuming that fertilizing harder will make every cultivar perennial.
Troubleshoot weak or missing flowers
When leaves appear but flowers do not, start with what happened in the previous growing season. Bulbs planted too shallowly may flower poorly; bulbs crowded into a dense clump may need division; foliage cut off too early may not have replenished stored energy; and heavy shade can reduce flowering. Clemson Extension also identifies prolonged wet soil and inadequate winter chill as common causes of poor performance.
If bulbs rot or disappear, inspect drainage and look for animal digging. A mushy bulb or foul-smelling soil points toward excess moisture or decay; a clean empty hole may indicate a pest. If the plants make leaves but only short stems, check whether the bulb received the cold period it needs and whether it was planted at the recommended depth. In warm climates, choose bulbs sold for that region, and ask whether they have been pre-chilled when the species requires it.
If the first-year flowers are good but the display fades in later years, the variety may not naturalize well in your location. Tulips are especially variable in their return performance. Try a species or cultivar recommended for perennializing in your region, improve drainage, allow the leaves to die down, and divide crowded clumps only after dormancy. Keep a planting map and note which selections bloom well; replacing only the underperformers is easier than replanting the entire bed.
Conclusion
Plant fall bulbs when local soil has cooled enough for the species, but while the ground remains workable. Use regional extension advice and the bulb label to refine timing, then give bulbs well-drained soil, correct depth, and enough time for roots to establish before winter. A single date or hardiness zone cannot do all of that work for you.
Choose hardy spring-flowering bulbs for autumn planting and keep tender summer-flowering types on their separate spring schedule. Plant groups at the right depth, protect them from animals where needed, and let foliage fade after bloom. Those simple decisions give bulbs the best chance to turn a fall planting session into a spring display.



