Holes in Plant Leaves: 5 Causes and Fixes
Read leaf holes by their edges, pattern, timing, and clues such as frass or slime, then protect your garden with targeted, low-risk fixes.
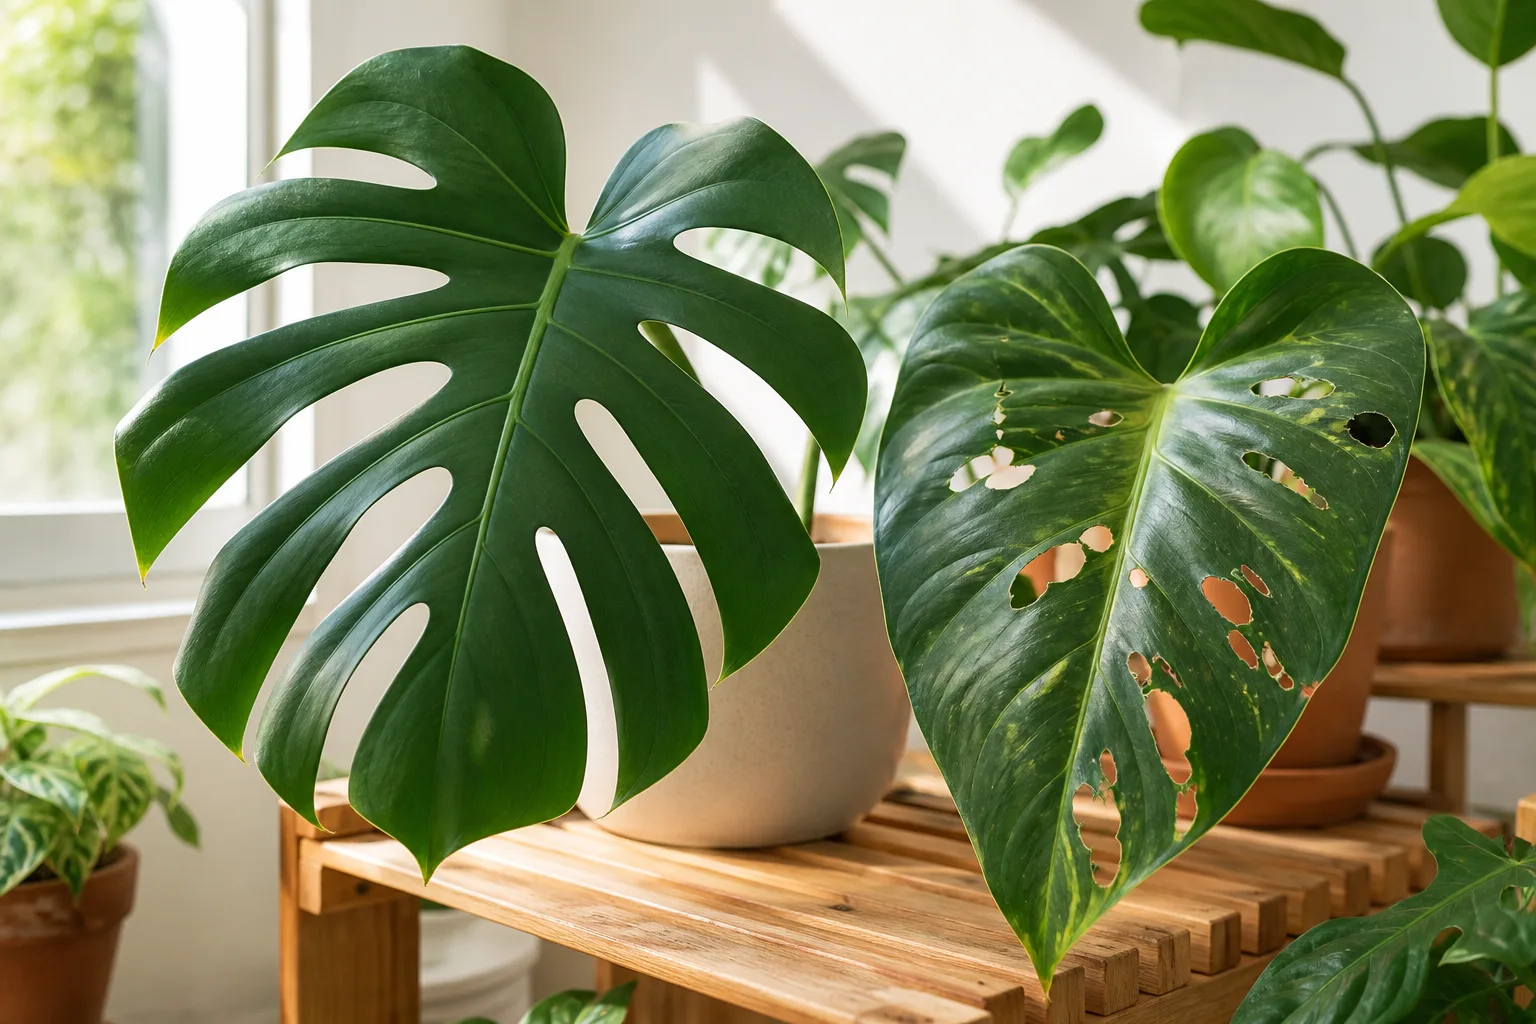
Holes in a leaf are a clue, not a diagnosis. A smooth-edged opening with a slime trail points you toward a very different response than a trail winding between the leaf layers, a neat row of scallops along the margin, or a brown spot that has fallen out.
Start by studying the pattern, timing, and evidence around the damage before reaching for a spray. Most plants can tolerate a few missing patches, while seedlings, leafy vegetables, and a plant losing new leaves need faster protection. The five most useful categories are slugs and snails, caterpillars and sawfly larvae, chewing insects, wildlife, and leaf-spot or shot-hole disease.
Start by reading the pattern, not the hole
Inspect the plant in daylight first, then repeat the check after dark or early in the morning if the damage appeared overnight. Look at both sides of several leaves, the soil surface, nearby stems, and the underside of pots or boards. A single hole can be old wind damage; a fresh trail of holes moving through new growth means the cause is still active.
Use these questions to narrow the suspects:
- Are the edges ragged, smooth, or scalloped? Ragged bites suggest chewing; smooth holes with slime suggest slugs or snails; repeated notches along an edge can point to a weevil or another margin feeder.
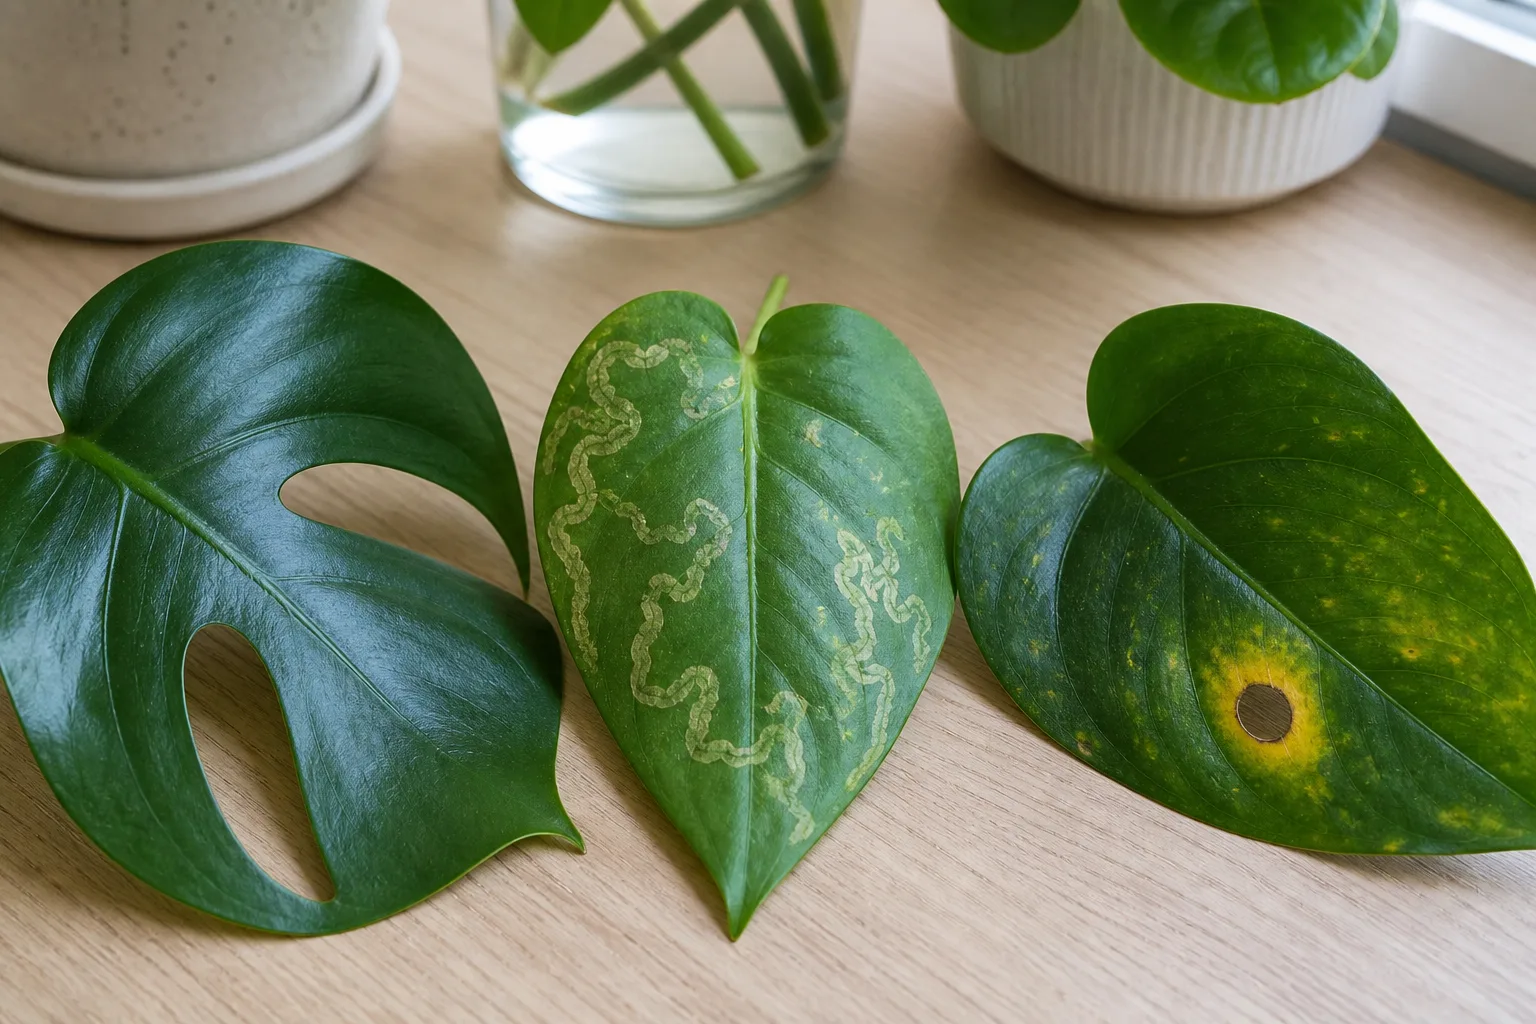
- Are there tiny round holes, winding tunnels, or a lacy “skeleton”? Pepper-like holes fit flea beetles; pale serpentine trails fit leaf miners; tissue missing between veins fits some beetles or larvae.
- Is there frass, webbing, slime, or an egg cluster? Black or green droppings under a feeding site support a caterpillar diagnosis. Silvery mucus supports slugs or snails.
- Did the damage happen overnight, after rain, or on the sunny outer side? Weather and wildlife follow different timing from nocturnal slugs, daytime beetles, and larvae hidden under leaves.
- Is the plant otherwise healthy? Yellow halos, brown spots, wilting, and leaf drop raise the possibility of disease or root stress rather than a simple bite.
The Royal Horticultural Society recommends monitoring plants, using good garden hygiene, choosing plants suited to the site, and using physical barriers and cultural controls before relying on pesticides. That sequence is useful here: confirm the problem, reduce the conditions that favor it, then treat only the confirmed target. (RHS guidance on preventing pest and disease problems)
The five causes at a glance
| Likely cause | Typical pattern | Best first check | Most useful first response |
|---|---|---|---|
| Slugs or snails | Irregular or smooth holes, often low on the plant | Look after dark for slime and hidden mollusks | Remove shelter, hand-pick, and protect seedlings with a barrier |
| Caterpillars or sawfly larvae | Ragged edges, chunks missing, skeletonized tissue, frass | Turn over leaves and inspect stems | Hand-remove; use a crop-labeled biological control only when the pest fits |
| Chewing insects | Tiny peppered holes, lace-like leaves, notches, or ragged bites | Look for adults, larvae, eggs, and fresh feeding | Use row cover, hand removal, or a pest-specific treatment |
| Wildlife | Large pieces missing, whole shoots browsed, tracks or droppings | Check the plant’s height and nearby paths | Use netting or fencing sized for the animal |
| Leaf spot or shot-hole disease | Brown or tan spots, halos, yellowing, then dead tissue drops out | Inspect the spot pattern and recent wetness | Remove diseased debris, keep foliage dry, and confirm before spraying |
The table is a starting point rather than a promise of certainty. Several pests can make irregular holes, and a wet-weather disease can overlap with insect damage. When two clues conflict, prioritize the freshest evidence: a live pest, new frass, a slime trail, or a spot that is still expanding.
1. Slugs and snails
Slugs and snails are common suspects when leaves are damaged between dusk and dawn, especially after rain or in a bed with dense mulch, boards, pots, or other cool hiding places. They favor tender seedlings and low foliage, but they can climb into containers and up stems when conditions stay moist.
What slug damage looks like
Slug and snail holes may be large, irregular, and relatively smooth along the edge. A silvery trail on the leaf, pot rim, path, or soil is stronger evidence than the shape of the hole by itself. Check under leaves and along the soil line with a flashlight; the animals often disappear by daylight rather than leaving a visible culprit on the leaf.
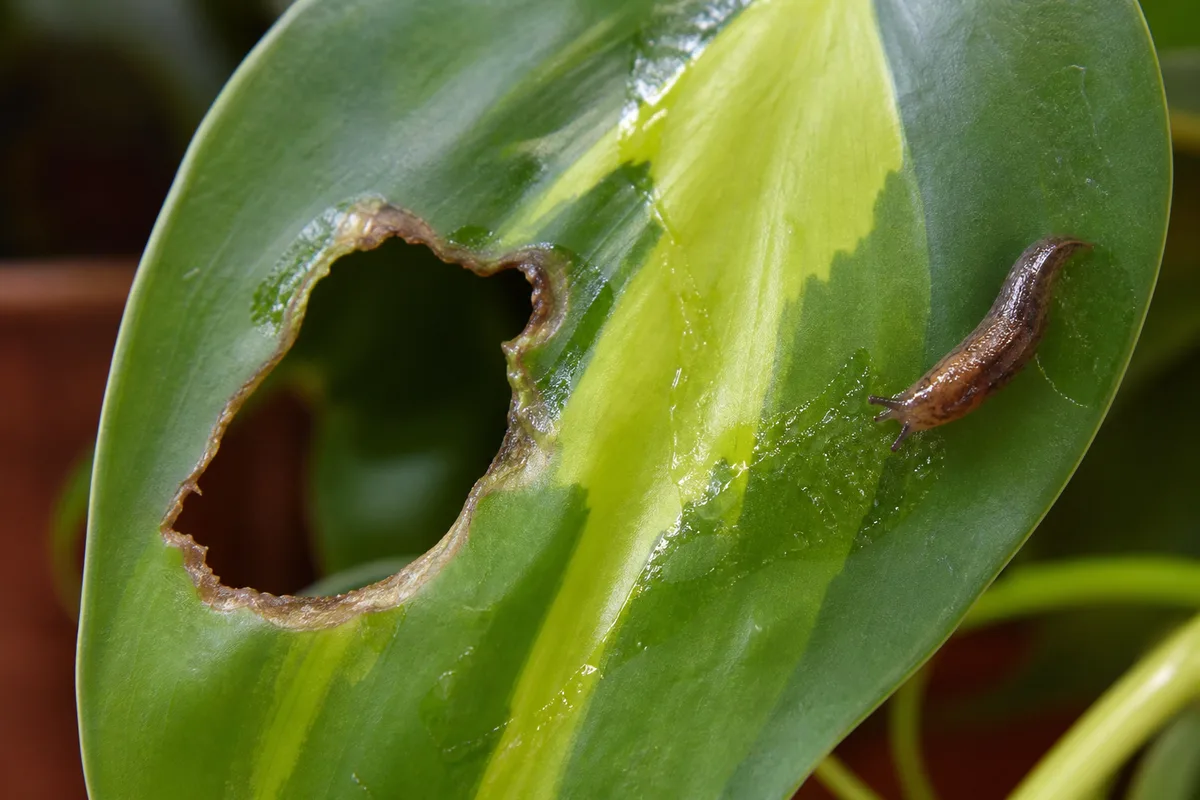
The timing also helps separate mollusks from daytime beetles. If you find new damage every morning but no insect during the afternoon, make a night inspection before deciding the plant needs an insecticide. Gardening Know How recommends checking the underside of leaves and using clues such as shiny trails, while Fine Gardening describes slugs as cool-weather or nighttime feeders that shelter under boards, debris, pots, and dense vegetation. (Gardening Know How on diagnosing leaf damage; Fine Gardening on slug control)
How to reduce slug damage
Begin with the area around the plant, not a blanket spray. Remove boards, dead leaves, dense weeds, and unused pots that provide daytime cover; thin mulch where it is pressed against tender stems; and water early in the day when practical so the soil surface has time to dry before the active night period.
Hand-pick slugs during a few consecutive evening checks and move or dispose of them according to local practice. A simple board or inverted pot can act as a daytime hiding place that you inspect each morning. Beer traps may show whether slugs are active, but they need frequent checking and can also catch non-target organisms if placed carelessly, so they are a monitoring tool rather than a complete garden strategy.
For valuable seedlings, use a physical barrier that leaves no easy bridge from wet soil to foliage. A cloche, fine netting, raised container, or carefully positioned copper barrier can help, but keep the protected area free of trapped slugs and check the edges after rain. Avoid scattering salt around plants: it can damage soil structure, roots, and nearby foliage while failing to solve the shelter and moisture problem.
2. Caterpillars and sawfly larvae
Caterpillars can remove bites from the edge of a leaf, chew irregular holes through the middle, or strip a young plant rapidly. Look for frass below the feeding site, webbing, eggs, or a larva curled along the midrib. Some are obvious in daylight; others match the leaf or hide underneath it.
Tell caterpillars from sawfly larvae
Sawfly larvae are often mistaken for caterpillars, but that matters because a treatment that targets caterpillars may not work on sawfly larvae. Rose slugs are a familiar example: they can scrape away the surface of a leaf and leave a translucent window or a thin skeleton rather than the deeper, ragged bites of a caterpillar.
Count legs only if you are comfortable getting close, and use a local diagnostic guide when the distinction matters. In practice, the safest first move for either group is to inspect leaf undersides and physically remove the larvae. A strong jet of water can dislodge small larvae from sturdy plants, but do not blast fragile seedlings or repeatedly wet foliage late in the day.
Protect leaves without removing every helpful insect
Hand-picking is often enough when there are only a few larvae, especially on an ornamental plant that can tolerate cosmetic damage. Wear gloves, drop the pests into soapy water if that is your chosen disposal method, and recheck the plant because eggs may hatch after the first removal.
For vegetables and herbs, cover the crop with a lightweight row cover before moths or butterflies lay eggs, but remove or open it when the crop needs pollination. Netting is most useful when it is installed early and secured at the soil line; a loose cover that touches the leaves can still allow insects to feed through the mesh.
If the plant is losing new growth, use a product only after identifying the target and confirming that the label allows it on that crop. Bacillus thuringiensis products can target certain caterpillar larvae, but they do not treat every leaf-chewing insect and should not be presented as a universal “bug spray.” Preserving birds, predatory insects, and parasitoid wasps is part of long-term control; the RHS entomology team emphasizes that garden pests and wildlife need to be considered together rather than divided into “good” and “bad” life forms. (RHS entomology research and advice)
3. Chewing beetles and other insects
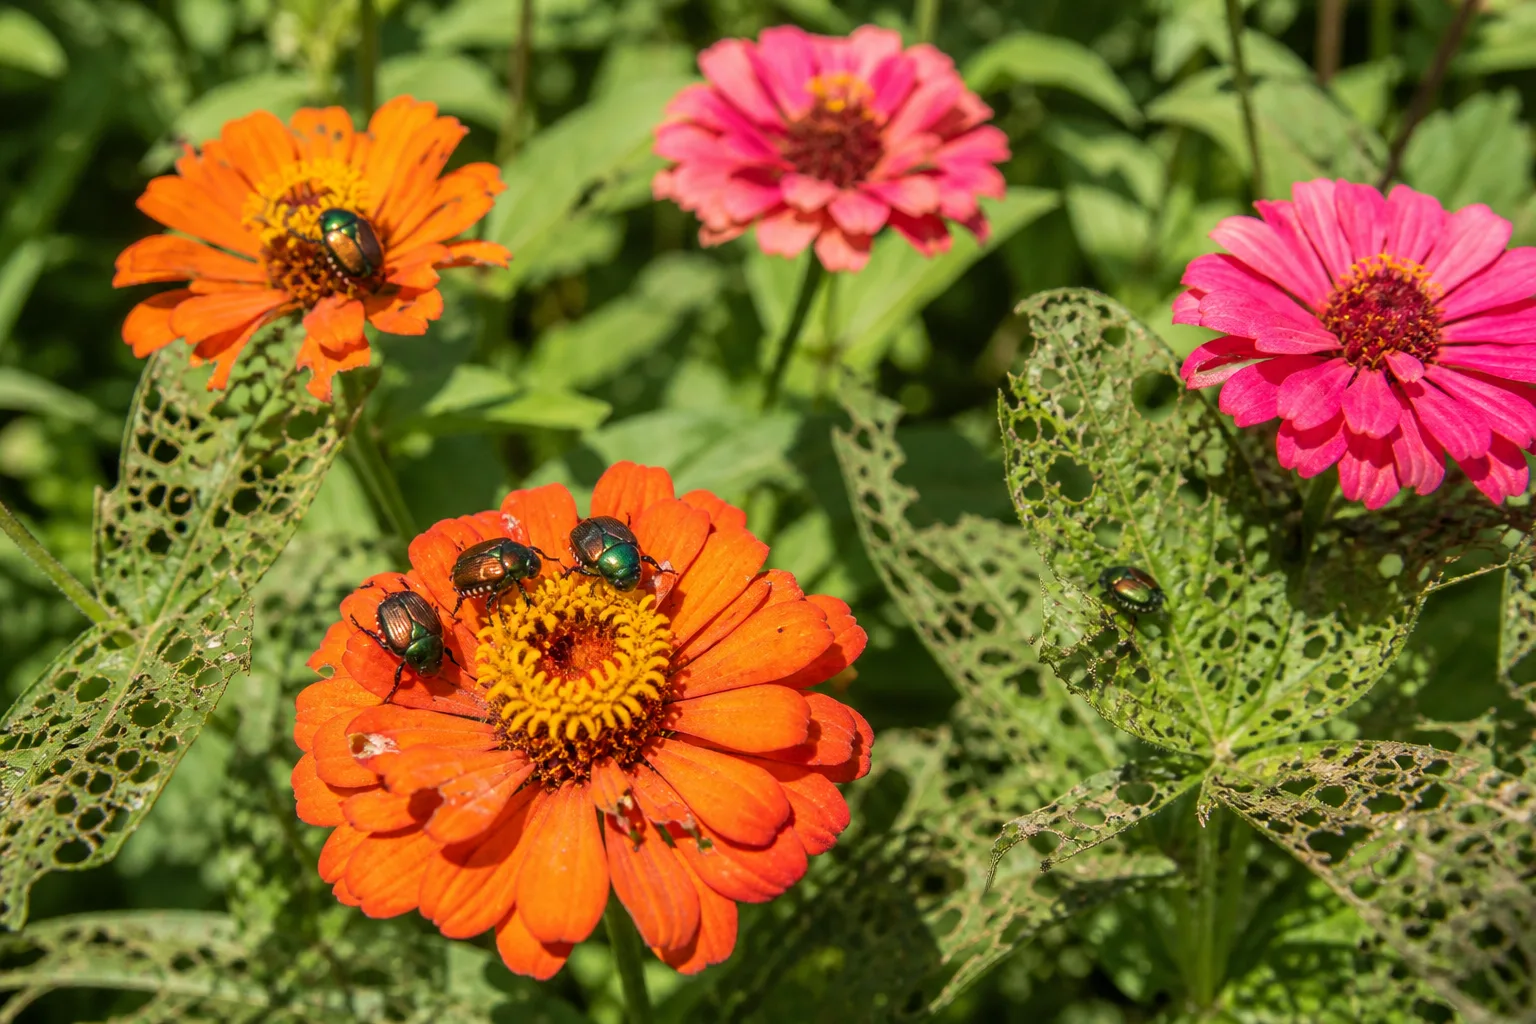
Beetles, earwigs, grasshoppers, and some larvae use chewing mouthparts that leave holes, notches, or a lace-like leaf. The exact pattern and the plant being eaten matter more than the word “insect.” A brassica seedling with dozens of tiny holes needs a different response from a rose with a few Japanese beetles sitting in the flowers.
Flea beetles, leaf miners, and the tiny-hole clues
Flea beetles make many tiny, round holes that look as if the leaf has been peppered. They are especially damaging to small seedlings because a young plant has less leaf area to spare. Hold a hand over the foliage and move slowly: the adults may jump away when disturbed. Row cover installed at planting is often more dependable than trying to catch every fast-moving beetle, provided the crop does not need open pollination while it is covered.
Leaf miners create pale winding trails or blotches inside the leaf rather than chewing straight through from the surface. The larva is protected between the leaf layers, so spraying the leaf surface is rarely the first useful action. Remove the most affected leaves, keep weeds and volunteer plants from serving as alternate hosts, and monitor new growth; if the pattern is severe or recurring, ask a local Extension service to identify the miner and its host range.
Japanese beetles, earwigs, and grasshoppers
Japanese beetles often gather in warm daylight and eat tissue between the veins, leaving a lacy or skeletonized appearance. Hand-picking in the cool morning can reduce a small cluster. Avoid placing a pheromone trap immediately beside the plant you want to save, because attracting more adults into the area can defeat the purpose of the trap.
Earwigs feed at night and may leave ragged holes in soft leaves or petals, but they also eat aphids and other small insects. If only a few are present, observe before treating. A rolled piece of damp newspaper or a small shelter can reveal whether they are responsible; remove the shelter and its occupants if the population is damaging a priority crop.
Grasshoppers can chew leaves, flowers, stems, and fruit, often leaving large irregular gaps without slime or frass. Fine mesh is useful for a small crop, while tall weeds and unmown edges may provide habitat that makes a barrier harder to maintain. For any insecticide, read the full label for the crop, harvest interval, pollinator precautions, and re-entry instructions; “natural” does not mean harmless to every insect or plant.
4. Wildlife browsing
When an entire leaf, shoot, flower bud, or plant disappears, look beyond insects. Deer can browse the top and sides of a plant, rabbits often work close to the ground, and woodchucks, squirrels, chipmunks, and other animals can create large irregular losses in a vegetable bed.
Wildlife damage often looks more like tearing, clipping, or browsing than a pattern of separate feeding holes. Check for tracks, droppings, clipped stems, paw marks, or a consistent feeding height. The time of day can help, but do not assume a nocturnal animal just because the damage is discovered in the morning; many animals feed at dawn or dusk.
Use the scale of damage to choose a barrier
Protect the crop that matters most rather than trying to make the whole property wildlife-proof. Fine netting can protect leafy greens from some birds and small animals, chicken wire with a buried or secured edge can deter rabbits and digging, and a taller, firmly anchored fence is needed for deer. The exact height and mesh depend on the species, local wildlife, and whether the animal can jump, dig, climb, or push under the barrier.
Check barriers after storms and as plants grow into them. A net that rests directly on foliage can still allow browsing through the mesh, while a gap at ground level turns a fence into a suggestion. Motion lights or scent repellents may provide short-term help, but they habituate or wash away; physical exclusion is usually the more reliable long-term investment.
Avoid using poisoned food or unlabelled household mixtures around edible crops, pets, or wildlife. If a large animal is persistent, aggressive, or damaging a protected species, contact the relevant local wildlife or agricultural authority instead of escalating on your own.
5. Leaf spot and shot-hole disease
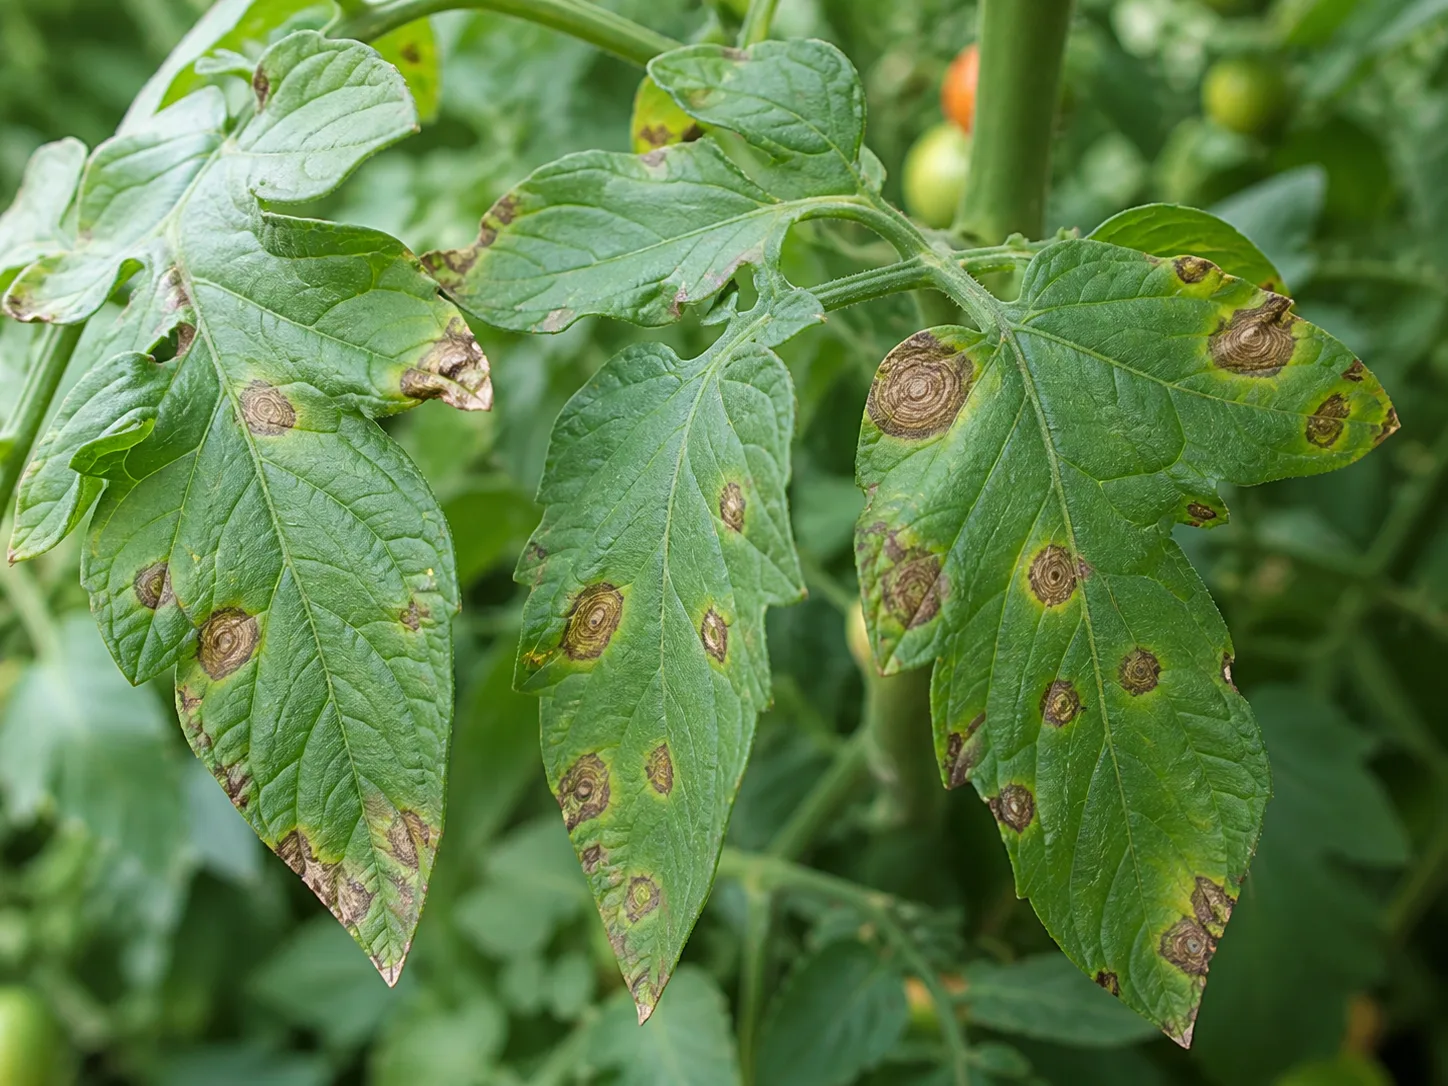
Not every hole was eaten. Some fungal or bacterial leaf spots begin as brown, tan, or purple lesions. As the dead center dries, it can crack or fall away, leaving a clean-edged opening that resembles insect damage. This is commonly called a shot-hole effect, and it is especially worth considering on stone fruits, cherries, and plants with a history of recurring leaf spots.
When a “hole” is not chewing damage
Disease is more likely when the holes are surrounded by discoloration, appear in clusters of spots, or come with yellowing, wilting, premature leaf drop, or stem lesions. The pattern may follow lower leaves first or spread after repeated rain and overhead watering. In contrast, a fresh chewing pest usually leaves a sharp missing edge without a halo, though real gardens can show both problems at once.
Begin with sanitation and moisture management. Remove leaves that are collapsing or clearly diseased, pick up fallen debris, clean pruners between plants, space growth for airflow, and water the soil rather than repeatedly wetting the foliage. The RHS notes that mulching can reduce soil splash and that good spacing, air circulation, and careful watering can reduce disease pressure, but also cautions that these steps are not failsafes.
Do not apply a fungicide just because a leaf has a hole. Fungicides cannot repair dead tissue, do not control chewing insects, and may be unnecessary for a mild, cosmetic outbreak. If the pattern is spreading, the plant is declining, or the diagnosis would change whether you remove the plant, take clear photos and a representative sample to a local Extension diagnostic service; product choice and legal use vary by crop and location.
A practical seven-day response plan
The fastest safe response is a short investigation followed by targeted exclusion. This plan works for a garden bed, a container on a patio, or a small group of houseplants that has been moved outdoors, with the barrier and treatment adjusted to the setting.
Days 1 and 2: inspect and confirm
On day one, photograph the whole plant and one close-up of a fresh hole. Note which leaves are affected, whether the damage is getting larger, and whether new growth is involved. Turn over leaves, look at the soil surface, and inspect nearby pots, boards, mulch, and stems for pests, eggs, frass, slime, webbing, tracks, or droppings.
That evening, use a flashlight to check for slugs, snails, earwigs, and caterpillars. The next morning, compare the same leaves. If no new damage appears and the plant remains vigorous, monitor instead of treating. If new holes appear, mark the plant as active and identify the smallest barrier or removal step that can interrupt the damage.
Days 3 through 7: exclude, correct, and reassess
For a seedling or edible crop, install a secured row cover or fine netting if the suspected pest is flying or jumping. For slugs, remove shelter and make a night patrol; for wildlife, protect the bed with a species-appropriate fence or net; for disease, improve airflow, reduce leaf wetness, and clean up fallen material.
Recheck every day for a week. The test is not whether old holes disappear—they will not—but whether new damage slows and fresh leaves emerge clean. Remove only leaves that are dead, collapsing, heavily diseased, or no longer useful; a green leaf with a few holes still contributes energy to the plant.
If the plan fails, change one variable at a time. A row cover that does not help may have a gap or may be covering the wrong pest. A slug trap that catches nothing may be operating when slugs are sheltered, and a fungicide that does nothing may simply confirm that the “disease” was actually a beetle, weather injury, or wildlife browsing.
Conclusion
The right answer to holes in plant leaves starts with evidence. Slime and overnight feeding suggest slugs or snails; frass and hidden larvae suggest caterpillars; peppered holes, lacy tissue, or jumpy adults point toward chewing insects; missing shoots and tracks suggest wildlife; and halos, spreading spots, or dead tissue dropping out raise the possibility of disease.
Once the pattern is clear, protect the highest-value plants first with hand removal, a well-fitted cover, a barrier, better watering and sanitation, or a crop-labeled treatment. A few cosmetic holes are often a tolerable part of a living garden. The goal is not a leaf with zero marks—it is a healthy plant, a controlled problem, and a response that does not create a larger one.



