Insulin Plant Pruning Guide: What to Cut First
Insulin Plant Pruning Guide: What to Cut First
Insulin Plant Pruning Guide: What to Cut First
First action: Walk the clump and remove only fully yellow, brown, soft, or dried-out stems and leaves with clean sharp scissors—finish that cleanup before you thin healthy canes or cut spent flower stalks for shape. Insulin Plant (Costus igneus, accepted as Chamaecostus cuspidatus) grows from underground rhizomes; damaged tissue is usually water, light, or cold stress, not a cue to shear the whole pot.
For whole-plant context—filtered light, moisture, and rhizome health—see the Insulin Plant overview.
Reviewed by LeafyPixels Review Board · Author: sai-ananth
Quick answer
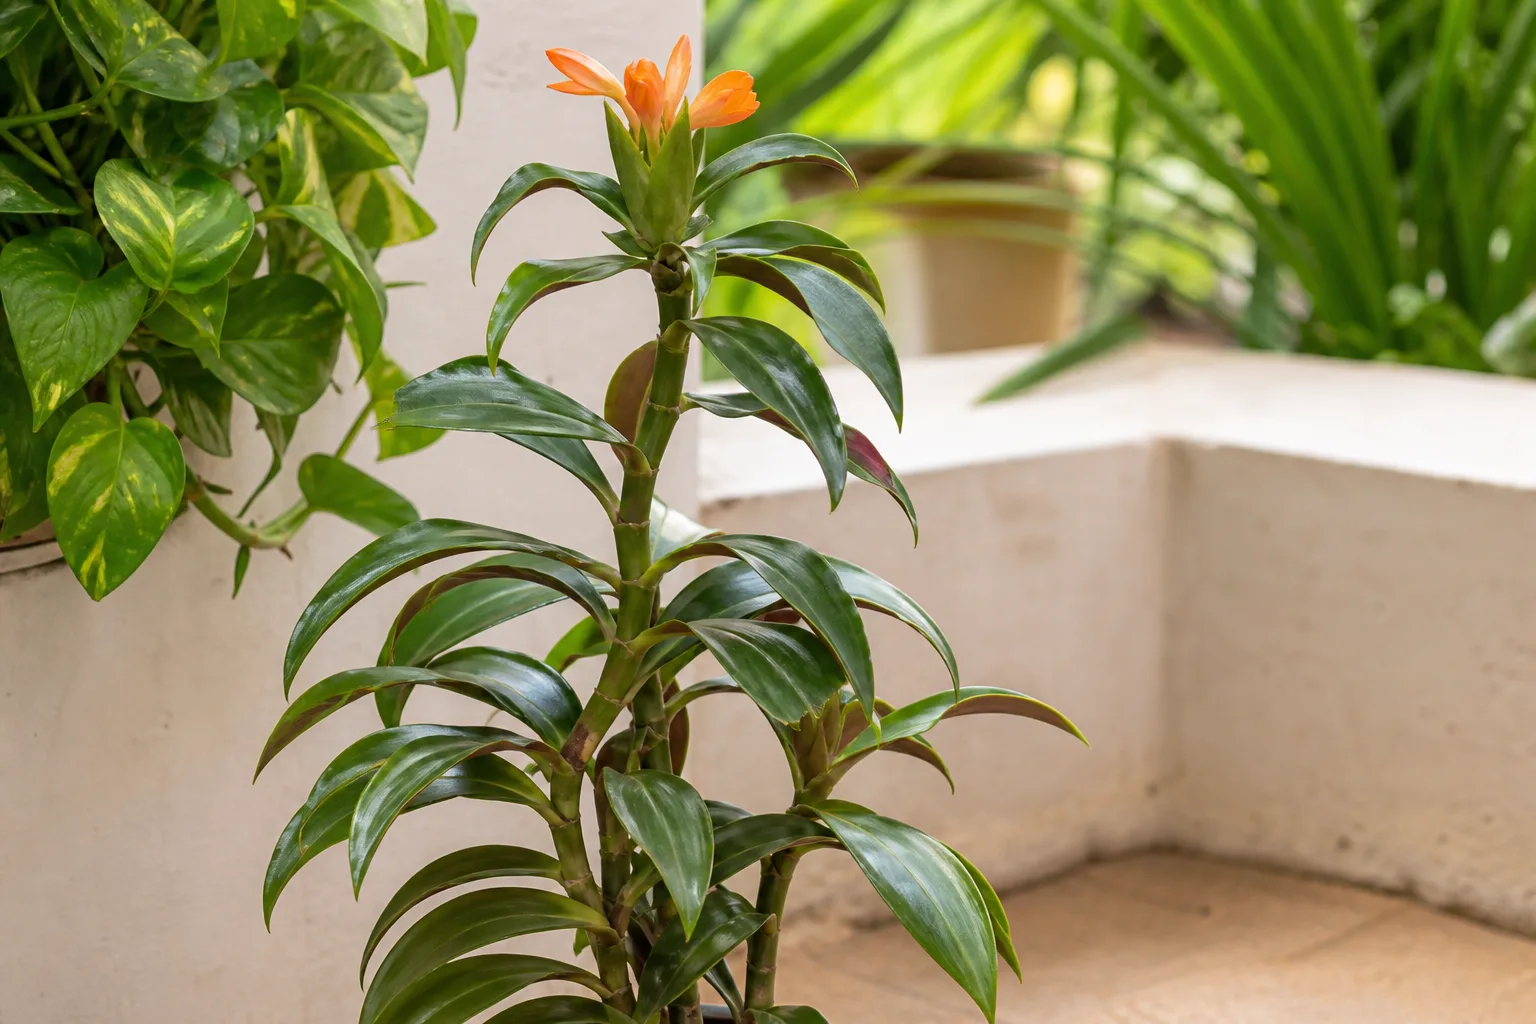
Prune Insulin Plant to clear failing foliage, remove spent orange flower heads, thin a crowded clump, and shorten floppy spiral stems—not to “fix” soggy soil or harsh sun. UF/IFAS describes Costus igneus as a tropical perennial with dark green spiral leaves (often purple underneath), arching clumps from underground rootstocks, and orange flowers on cone-like heads at stem tips during warm months. (UF/IFAS Extension)
Cut failed stems at soil level, leave healthy rhizome buds alone, and limit live stem removal to about one-third of the clump per session on a vigorous plant. Pruning neatens the silhouette and improves airflow, but it cannot replace bright filtered light or an evenly moist, well-draining mix—soft stem bases and yellow lower leaves return quickly if rhizomes stay wet in dim light.
What pruning does for Insulin Plant
Insulin Plant is a rhizomatous Costaceae perennial—Kew accepts the species as Chamaecostus cuspidatus, with Costus igneus as a heterotypic synonym—native to eastern Brazil and grown widely in warm Indian homes. (Kew POWO) UF/IFAS notes plants reach about two feet tall (sometimes taller in open ground), with the tallest stems falling over and lying on the ground, and multi-stem clumps arising from underground rootstocks. (UF/IFAS Extension)
Unlike a woody shrub, this plant does not need formative leader training. New shoots emerge mainly from the rhizome and from buds along green stems. Pruning jobs that matter:
- Cleanup removes yellow, brown, soft, or collapsed stems and leaves whenever you spot them.
- Spent-flower removal cuts old terminal flower stalks after the orange blooms finish.
- Thinning takes out a few overcrowded uprights so light and air reach the center of the clump.
- Size control shortens tall, leaning spiral stems that flop over the pot rim—usually by cutting those stems to the base rather than tip-shearing the whole plant.
Pruning cannot rescue rhizome rot or reverse sunburn. If many stems are soft at the base, check watering and drainage first—see the soil guide—and delay hard thinning until firm new shoots appear.
Where new growth comes from
Run your finger down a healthy stem: leaves spiral around a thick green cane, and flowers form at the tip on a cone-like head. After a stem finishes flowering or declines, the plant’s next flush usually rises as a new shoot from the rhizome, not as a bushy fork from a mid-stem stub. That is why cleanup cuts go to soil level on failed canes, while tip pinches on soft new growth are secondary and used mainly to reduce flop, not to create a dense hedge.
UF/IFAS Gardening Solutions notes that spiral gingers (Costus and related Costaceae) reproduce through underground rhizomes and that, unlike true culinary gingers, Costus can also be rooted from stem cuttings. (UF/IFAS Gardening Solutions) Healthy pruning waste with nodes can feed propagation when conditions are warm—optional, not required.
What to check before you cut
Spend two minutes assessing before cosmetic thinning:
- Rhizome and stem firmness — squeeze the base of a few uprights. Soft, mushy, or sour-smelling tissue means cleanup plus a watering review, not a full reshape.
- Live vs spent growth — green, firm spirals stay; fully yellow, papery brown, or dried flower stalks go.
- Light and lean — stems stretching toward a window and flopping over often need better placement before you cut half the clump.
- Recent stress — skip hard thinning if the plant was just repotted, chilled below about 10°C [Flagged: no authoritative source found for this claim], or sitting in waterlogged mix.
- Tools — sharp bypass pruners or clean scissors. Sterilize blades between plants if you have been working on diseased material.
Decide the goal: cleanup only, spent-flower removal, or intentional thinning for size.
When to prune Insulin Plant
Best window for thinning and size control
Time heavier thinning for warm active growth—spring through early autumn in most Indian climates—when new basal shoots are already visible. Clemson’s general pruning guidance starts with removing dead, diseased, or injured growth first, then shaping; that order fits this herbaceous clumper well. (Clemson HGIC)
UF/IFAS Gardening Solutions notes that spiral gingers in cooler Florida winters can go dormant and return with warm weather. (UF/IFAS Gardening Solutions) In North Indian winters, keep cuts light: remove only clearly dead or soft tissue until nights stay reliably warm.
Cleanup anytime
Yellow lower leaves, browned tips from dry indoor air, soft rotting stems, and dried flower heads can come off whenever you find them. Do not wait for a calendar date if a stem is collapsing at the base.
After flowering
Orange blooms appear on terminal cone-like heads in warm months. (UF/IFAS Extension) Once a head is spent and dry, cut that flowering stem back to soil level or to just above a firm lower leaf node if the lower stem is still green and useful. Leaving spent heads does not usually harm the plant, but it makes the clump look tired and can harbor mites in dry rooms.
The first cut to make
Remove only dead, damaged, yellow, soft, or spent growth first. Work around the pot so you can see every stem. Cut each failed cane cleanly at soil level—do not leave a long stub that will rot into the crown. Pull loose yellow leaves at the petiole base rather than tearing half-green blades.
After cleanup, step back. If the clump already looks open and upright, stop. If healthy stems still flop over the rim or crowd the center, move to thinning next—not fertilizer, not a same-day repot, and not a second aggressive pass.
How to prune Insulin Plant step by step
- Sanitize and stage tools. Sharp scissors or bypass pruners; wipe blades clean. Clear space so you can see the full clump silhouette.
- Cleanup pass. Yellow, brown, soft, and spent flower stalks only—cut to soil level.
- Thin crowded uprights. On a dense pot, remove the oldest or most leaning stems at the base so remaining spirals have light and air. Prefer removing whole stems over shearing every tip.
- Optional size control. For tall stems that always flop, cut those individuals to the base rather than topping every cane at the same height.
- Optional cuttings. If you want more plants, take healthy mid-stem pieces with nodes for propagation in warm weather; discard soft or diseased material.
- Stop at about one-third live stems on a healthy clump. Bag debris; keep cut material off the soil surface if mites have been an issue.
Where exactly to cut
- Failed or spent stems: cut at soil level, flush with the mix surface without digging into the rhizome.
- Yellow leaves on an otherwise healthy stem: remove the leaf at the base of the petiole; leave the cane if it is still firm and green.
- Soft tip damage only: cut 5–10 mm above the next healthy leaf node so a clean green stub remains—only when the rest of the stem is firm.
- Never carve into firm rhizome flesh “to reshape” the crown. Rhizomes are the plant’s reserve; damage them and you risk rot.
How much you can safely remove
On a vigorous, warm-season clump:
- Light maintenance: yellow leaves and spent flowers anytime.
- Moderate thin: up to about one-third of live upright stems in one session.
- Hard renewal: possible on a crowded, healthy plant by removing the oldest stems to the base, but leave several firm green shoots and wait for new basal growth before another hard pass.
If the plant is newly moved, cold-stressed, or showing soft rhizomes, stick to cleanup only.
Pruning damaged, yellow, or dead growth
Yellow lower leaves after overwatering or low light are common. Cut them off once they are mostly yellow; do not strip half-green leaves hoping that forces recovery. Soft mushy stem bases are emergency cleanup—remove to firm tissue at soil level, improve drainage and light, and watch for new basal shoots over the next weeks.
Brown crispy margins from harsh midday sun or dry air are leaf damage, not a reason to scalp the plant. Trim only fully dead leaf tissue, then correct placement using the light guide.
Aftercare after pruning
Keep care boring for one to two weeks:
- Maintain the usual watering rhythm—evenly moist, never waterlogged around rhizomes.
- Hold fertilizer until you see new basal shoots; feeding a stressed cut plant does not speed recovery.
- Keep the pot in bright filtered light or gentle morning sun with afternoon shelter.
- Do not repot on pruning day unless the mix has failed or rhizomes are circling badly.
Recovery timeline and signs it worked
In warm, humid weather, expect new spiral shoots from the rhizome within about two to four weeks after a moderate thin. The clump looks fuller again in roughly four to eight weeks. Signs pruning helped: firm new basal shoots, remaining stems that stay upright, fewer yellow leaves appearing, and better airflow through the center.
Signs it was too aggressive or badly timed: no new shoots after a month of warmth, remaining stems flopping harder, soft bases spreading, or sour soil smell. In that case, pause further cuts, correct moisture and light, and wait.
Mistakes to avoid
- Shearing every tip like a hedge instead of removing whole failed stems at the base.
- Leaving long stubs of soft tissue that rot into the crown.
- Hard thinning a plant with soft rhizomes or chronically wet soil.
- Cutting into healthy rhizomes while “cleaning” the pot.
- Stacking pruning, repotting, and heavy fertilizer on the same day.
- Expecting pruning to fix leggy stretch without moving the plant into better filtered light.
When not to prune
Skip hard thinning when nights are cold, growth has stalled for winter, the plant was just transplanted, or most stems feel soft at the base. Cleanup of clearly dead tissue is still fine. Wait for firm new growth before size-control cuts.
Related Insulin Plant guides
- Insulin Plant overview — habit, placement, and whole-plant care
- Insulin Plant light — filtered light vs scorch and stretch
- Insulin Plant watering — moisture for rhizomes after cuts
- Insulin Plant soil — drainage that prevents soft stem bases
- Insulin Plant propagation — division and stem cuttings from pruning waste
- Insulin Plant repotting — when crowding, not pruning, is the real issue