Repotting Monstera Thai Constellation: Pot Size & Timing
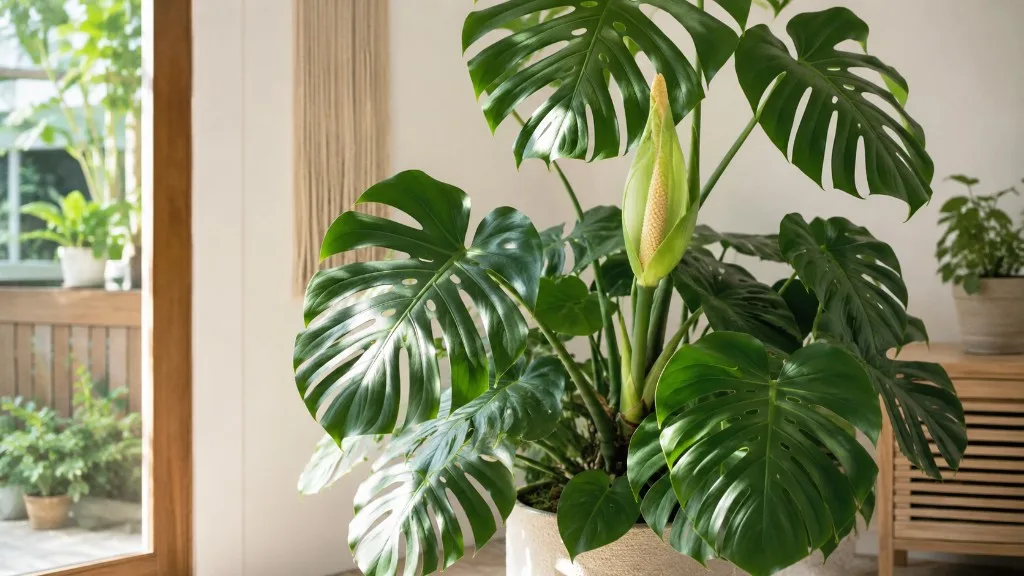
Repotting Monstera Thai Constellation: Pot Size & Timing
Repotting Monstera Thai Constellation: Pot Size & Timing
Monstera Thai Constellation repotting is not a race to give an expensive plant the biggest pot you own. It is a root-zone decision: repot when roots, mix, drainage, or support have become the limiting factor, then change as little else as possible. This cultivar is still Monstera deliciosa, a climbing aroid in the Araceae family, and NC State Extension lists ‘Thai Constellation’ among its variegated cultivars while noting that variegated forms need more light than darker green types (NC State Extension).
The cultivar-specific risk is water management after the move. Cream sectors have less green tissue, Thai Constellation grows a little slower than the species, and the plant often lives in decorative pots chosen for display rather than drainage. The RHS describes Monstera deliciosa ‘Thai Constellation’ as a tropical evergreen climber that is slightly slower growing than the species with closer leaf spacing (RHS). That does not make repotting difficult, but it does make oversized pots and wet aftercare less forgiving.
Quick answer: repot only when the root zone asks for it
Repot in spring or early summer when you see real root-bound signs: roots circling the pot, roots emerging from drainage holes, water channeling through without evenly soaking the mix, a wobbly moss pole that cannot be stabilized, or stalled active-season growth after light, watering, and fertilizer are already correct. NC State Extension specifically recommends pruning or repotting Monstera deliciosa in spring when needed (NC State Extension).
Choose a pot only one size larger, usually about 1-2 inches wider than the current container, with open drainage holes. Fill with a fresh chunky aroid mix that drains freely but still holds some moisture around the roots. Re-anchor the moss pole during the same session if the vine is already climbing; do not repot this week, move the plant to a new window next week, and fertilize the week after. Change one variable, then read the next new leaf.
Do not repot on arrival day unless the plant is in sour mix, the pot is broken, pests are obvious in the media, or root rot is active. A new Thai Constellation needs quarantine and a few dry-down cycles first. The overview guide covers first-month settling; use that before assuming a fresh nursery plant needs a larger container.
Repot, top-dress, or wait?
The best repotting decision is often the least dramatic one. A large Thai Constellation on a pole can be stressed more by unnecessary root disturbance than by living one more season in a slightly snug pot. UConn’s Monstera factsheet gives a useful guardrail: Monsteras are more tolerant of being pot bound than over-potted, and should be repotted only when roots have reached the bottom and sides of the pot (UConn Home and Garden Education Center).
| Choice | Use it when | What you do | Main risk |
|---|---|---|---|
| Wait | Plant is stable, drying normally, and roots are not circling hard | Keep care steady and recheck in 4-8 weeks | None, if growth remains healthy |
| Top-dress | Surface mix is crusted, stale, or compacted but roots are not packed | Remove the top 1-2 inches of mix and replace with fresh chunky blend | Does not fix bottom-root binding |
| Full repot | Roots circle tightly, drain holes are crowded, the pole is unstable, or mix has failed | Move one pot size up, refresh mix, and re-seat support | Shock or rot if the new pot is too large |
| Emergency repot | Sour smell, mushy roots, collapsing stems, or wet mix that will not dry | Trim rot, use clean pot and fresh mix, and reduce watering | Existing root loss may limit recovery |
Decision checklist
Before you unpot, ask four questions. Is the plant actively growing or at least warm and bright enough to recover? Are there two or more root-bound signs, not just one old yellow leaf? Is the next pot only modestly larger? Can you keep it in bright indirect light and skip fertilizer for several weeks afterward?
If any answer is no, top-dress or wait unless rot is forcing your hand. Penn State Extension’s repotting guidance recommends spring as a good time to repot houseplants and emphasizes choosing a container only slightly larger than the current one (Penn State Extension). That advice matters more for Thai Constellation because excess fresh mix around a small root ball can stay wet while the variegated canopy is slow to pull water.
Root-bound signs that matter
Roots coming from drainage holes are useful evidence, but they are not the only evidence. Water that races down the pot edge and exits immediately suggests channeling through a root mat or hydrophobic old mix. A plant that tips because the canopy and pole outweigh the pot may need a stability upgrade even if root growth is only moderate. A root ball that slides out as a dense molded cylinder is usually ready for a larger container.
Do not confuse normal lower-leaf aging with root binding. One older leaf yellowing while new growth remains firm is not a repot command. Multiple lower leaves yellowing while the pot stays wet, cream sectors brown, and the mix smells sour is a diagnostic problem, not a routine upsize.
Why Thai Constellation repotting is less forgiving
Thai Constellation’s repotting rules are mostly standard Monstera deliciosa rules. The difference is that the cultivar makes mistakes visible sooner. Pale sectors scorch, crisp, or brown before the green parts always look alarming, so a root-zone mistake can look like a variegation problem. In reality, the fix is usually the same: better light, better drainage, smaller pot jumps, and patient aftercare.
Penn State Extension describes Thai Constellation as fuller and more compact because of shorter internodes compared with other variegated forms (Penn State Extension). A compact plant can look dense and valuable above the soil while the root system still needs a modest pot, not a huge decorative planter. That visual mismatch is why many growers over-pot it.
Stable variegation still changes water use
Thai Constellation’s cream pattern is stable compared with chimeric Monstera Albo, but stable does not mean fast. Less green tissue means the plant depends heavily on bright indirect light to use water at a healthy pace. If the plant sits in moderate or dim light after repotting, the fresh outer ring of mix can remain damp for far longer than expected.
Pair this page with the light guide before deciding that a slow-drying repot needs another drink. NC State says to water Monstera deliciosa thoroughly, then let the top quarter to one-third of the container dry before watering again (NC State Extension). After repotting, that dry-down depth matters more than any old calendar.
Compact growth, support, and pot leverage
Thai Constellation often becomes top-heavy before it looks root-bound. Large leaves, short internodes, and a moss pole create leverage on the pot. Wisconsin Horticulture Extension notes that Monstera needs a tree-bark or strong moss-covered support sunk into the pot so aerial roots can attach (Wisconsin Horticulture Extension).
If the support wobbles, do not solve it by burying the stem deeper. Set the pole firmly to the bottom of the new pot, keep the original soil line, and backfill around both root ball and pole. A stable pole protects petioles and aerial roots; a buried stem invites rot.
Best season, pot size, and mix
Spring through early summer is the safest window because warmth and lengthening days support root recovery. Late summer can work if your room is bright and warm, but avoid full repots during heat waves or immediately after pest treatment. Winter is for emergencies: active rot, a broken pot, or severe binding that causes repeated wilting even when the plant is correctly watered.
Use a pot with drainage holes and a fresh, airy mix. Penn State recommends a well-draining soilless potting mix rich in organic matter for Monstera and notes that charcoal, bark, or perlite can improve drainage and airflow (Penn State Extension). For this plant, that translates to the same bark-and-perlite structure in the soil guide: moisture-retentive enough to support roots, chunky enough that the pot never stays swampy.
The one-size-up rule
The practical default is simple: move from a 6-inch pot to a 7- or 8-inch pot, from an 8-inch pot to a 10-inch pot, or from a 10-inch pot to a 12-inch pot only when the root ball justifies it. Do not move an 8-inch Thai Constellation into a 14-inch ceramic planter because it “will grow into it.” It may eventually, but the unused mix can stay wet long enough to rot the roots first.
UConn’s warning that Monsteras tolerate being pot bound better than being over-potted is the clearest source-backed reason for restraint (UConn Home and Garden Education Center). A snug but oxygenated root ball is easier to manage than a small root system surrounded by cold wet mix.
Drainage, no gravel layer, and cachepots
Drainage holes are non-negotiable. Clemson Extension explains that overwatering is a leading cause of potted plant death because saturated roots cannot take up oxygen, and it recommends watering thoroughly until water exits the bottom, then emptying the saucer (Clemson Cooperative Extension). A cachepot is fine only when the inner nursery pot drains freely and you remove standing water after every soak.
Do not add a gravel layer under the mix as a drainage fix. A gravel layer does not replace drainage holes or a well-structured mix; it shortens the usable root zone and can leave water perched above the layer. If a decorative pot has no drainage, keep the plant in a fitted nursery pot inside it and lift the nursery pot out to water.
Field note: dry-down after a conservative repot
Use observations like this as a calibration example, not a universal promise. In one indoor Thai Constellation repot scenario, a plant on a 3-foot pole moved from an 8-inch nursery pot to a 10-inch pot in spring, using a bark-heavy aroid mix and bright east-window exposure. Before repotting, water channeled through in under a minute and the root ball lifted out as a firm cylinder. After the repot, the first full soak took about 9 days to reach the top 2 inches dry, then settled near 7-10 days during active growth.
The useful detail is not the exact number of days. The useful detail is the method: one pot size up, same light position, no fertilizer, and dry-down tracked by skewer and pot weight for the first month. If your freshly repotted Thai Constellation still feels cool and heavy after 14 days in warm bright conditions, check pot size, mix density, cachepot water, and root health before watering again.
Step-by-step full repot
Work when you have time and a clear surface. A tall Thai Constellation with a pole is awkward, so set up before you remove the plant.
- Water lightly the day before if the mix is bone dry. Slightly moist mix holds together better than dust-dry peat. Do not start with a soggy pot.
- Prepare the new pot and mix. Add a base layer of mix so the old soil line will sit about 1 inch below the rim.
- Set the pole position before the root ball. If adding or replacing a pole, place it to the side where the vine naturally climbs.
- Slide the plant out gently. Support the stem base and pole together. Do not yank attached aerial roots.
- Inspect roots. Healthy roots are firm white, cream, or tan. Rotting roots are brown or black, soft, and often smell sour.
- Tease only the outer circling roots. Penn State advises gently teasing densely matted or circling roots before backfilling (Penn State Extension). Keep the central root ball mostly intact unless old mix is failing.
- Trim only dead or mushy roots. Use clean scissors. Do not prune healthy roots just to fit a smaller decorative pot.
- Place at the same depth. Keep the stem and crown where they were. Burying the vine deeper is not stability.
- Backfill in stages. Use a chopstick to settle mix around roots without compacting it. Penn State cautions that mix should not be firmed so hard that it restricts air and water movement (Penn State Extension).
- Water once, thoroughly. Let water drain freely and empty the saucer. Then return to moisture checks, not a fixed schedule.
Keep the plant in bright indirect light for the first week. Avoid direct afternoon sun on a temporarily droopy plant, but do not move it into a dark recovery corner.
Moss pole and aerial root plan
Repotting is the best time to fix a weak moss pole because you can anchor the pole to the bottom of the container. UConn notes that moss poles are commonly used to mimic the porous natural surfaces Monsteras climb in the wild, and that successful attachment can increase leaf size dramatically (UConn Home and Garden Education Center). A pole sitting loose in the top inch of mix cannot support a mature Thai Constellation for long.
If aerial roots are attached to an old pole, move the plant and pole together when possible. Cutting or ripping every attached root sets back the vine and removes anchors. If the old pole is too short but sound, add an extension above it. Replace the pole only when it is rotten, unstable, or impossible to secure.
Guide flexible aerial roots toward the damp pole or let them hang. Do not coil thick healthy aerial roots into the bottom of the pot under wet mix. Wisconsin notes that aerial roots attach to supports and that watering the moss-covered support helps them obtain water and nutrients (Wisconsin Horticulture Extension). That is your target: aerial roots on moist support, not buried in a soggy lower layer.
First-month aftercare
The first month is about stability. Keep the plant in bright indirect light, away from harsh direct sun and cold drafts. Water only when the root zone has dried to the same standard used before repotting: usually the top 2 inches in smaller pots or the top quarter to one-third in larger containers. Use a skewer if the plant is too large for a finger test.
Skip fertilizer for at least four weeks. Fresh roots and trimmed surfaces do not need extra salts. If a new leaf unfurls firm and the pot is drying predictably, resume conservative feeding through the fertilizer guide. If leaves droop while the mix is still wet, do not feed; diagnose water and roots first.
Expect the old watering rhythm to change. A fresh chunky mix may wet more evenly, while a larger pot may hold moisture longer. Your old “every seven days” habit is irrelevant until you observe two or three new dry-down cycles.
Post-repot troubleshooting
| Symptom | Likely meaning | First action |
|---|---|---|
| Slight droop for a few days | Mild transplant stress | Hold steady light, check moisture before watering |
| One older lower leaf yellows | Normal adjustment or old-leaf senescence | Monitor new growth; do not repot again |
| Pot stays wet for 14+ days | Too-large pot, dense mix, low light, or cachepot water | Improve light, check drainage, pause watering |
| Cream sectors brown while mix is damp | Root stress plus low uptake | Probe mid-depth and inspect roots if spreading |
| Stem base softens | Possible rot | Unpot and triage immediately |
| New leaf emerges smaller | Stress, lower light, or root reset | Stabilize care until next leaf cycle |
Mild transplant shock can clear within one to two weeks in warm, bright conditions, but that is an observation range, not a guarantee. Root establishment often takes four to six weeks. Judge success by the next firm new leaf and a predictable dry-down rhythm, not by old damaged cream tissue repairing itself.
Root rot emergency repot
Emergency repotting is different from routine repotting. If the pot smells sour, the stem base softens, or roots are black and mushy, the goal is to remove failing tissue and reset the root environment. UConn describes root and stem rot symptoms as wilting, soft brown or black roots, and rotting tissue at soil level, and says correct watering plus well-draining media are essential (UConn Home and Garden Education Center).
Remove the plant, trim only soft rotten roots, discard all sour mix, and use a clean pot. If root loss is severe, use the same pot size or even a slightly smaller one rather than sizing up. Place in bright indirect light, water cautiously after the initial settling soak, and skip fertilizer for about six weeks or until firm new growth confirms recovery.
Wear gloves when handling cut tissue and sap. ASPCA lists Swiss cheese plant as toxic to cats and dogs because of insoluble calcium oxalates (ASPCA), and RHS also marks Thai Constellation as harmful if eaten and a skin or eye irritant (RHS). If a pet chews the plant, contact a veterinarian or poison-control service rather than relying on a plant-care article.
When to use this page vs other Monstera Thai Constellation guides
Use this page when the decision is about container size, root condition, moss-pole anchoring, aerial-root handling, or first-month aftercare. If the plant is newly purchased and you are not sure whether to disturb it, start with the Monstera Thai Constellation overview and quarantine guidance.
Use watering when the problem is dry-down speed, wet soil, cream-sector browning on damp mix, or whether the pot is ready for another soak. Use soil when you need the actual chunky mix recipe or drainage test. Use light when the plant sits in a corner and the pot stays wet too long. Use fertilizer only after roots and light are stable again. Use propagation if a rot emergency leaves you salvaging node cuttings.
Related Monstera Thai Constellation guides
- Monstera Thai Constellation overview - whole-plant context, stable variegation, and first-month settling.
- Watering - dry-down checks after pot size or mix changes.
- Soil and potting mix - bark, perlite, drainage, and mix-density troubleshooting.
- Light - brightness that helps variegated tissue use water after repotting.
- Fertilizer - when to resume feeding after roots settle.
- Propagation - node cuttings, air layering, and salvage after severe rot.
- Pruning - size control that should not be stacked with repotting.
- Monstera deliciosa repotting - species-level baseline without Thai-specific variegation cautions.
Conclusion
Repot Monstera Thai Constellation when the root zone, mix, or support system proves it is time - not because the plant is rare, expensive, or newly home. The safest routine upgrade is one pot size up in spring, fresh chunky mix, firm moss-pole anchoring, aerial roots guided to support, and a quiet first month with bright indirect light and no fertilizer.
The rule that protects this cultivar is restraint. Thai Constellation’s stable variegation means you are not repotting to preserve a pattern; you are protecting roots so the next leaves can express that pattern cleanly. If you can choose between a slightly snug pot and a too-large wet one, choose the snug pot and recheck later.