How to Prune Rangoon Creeper: Timing & Safe Cuts
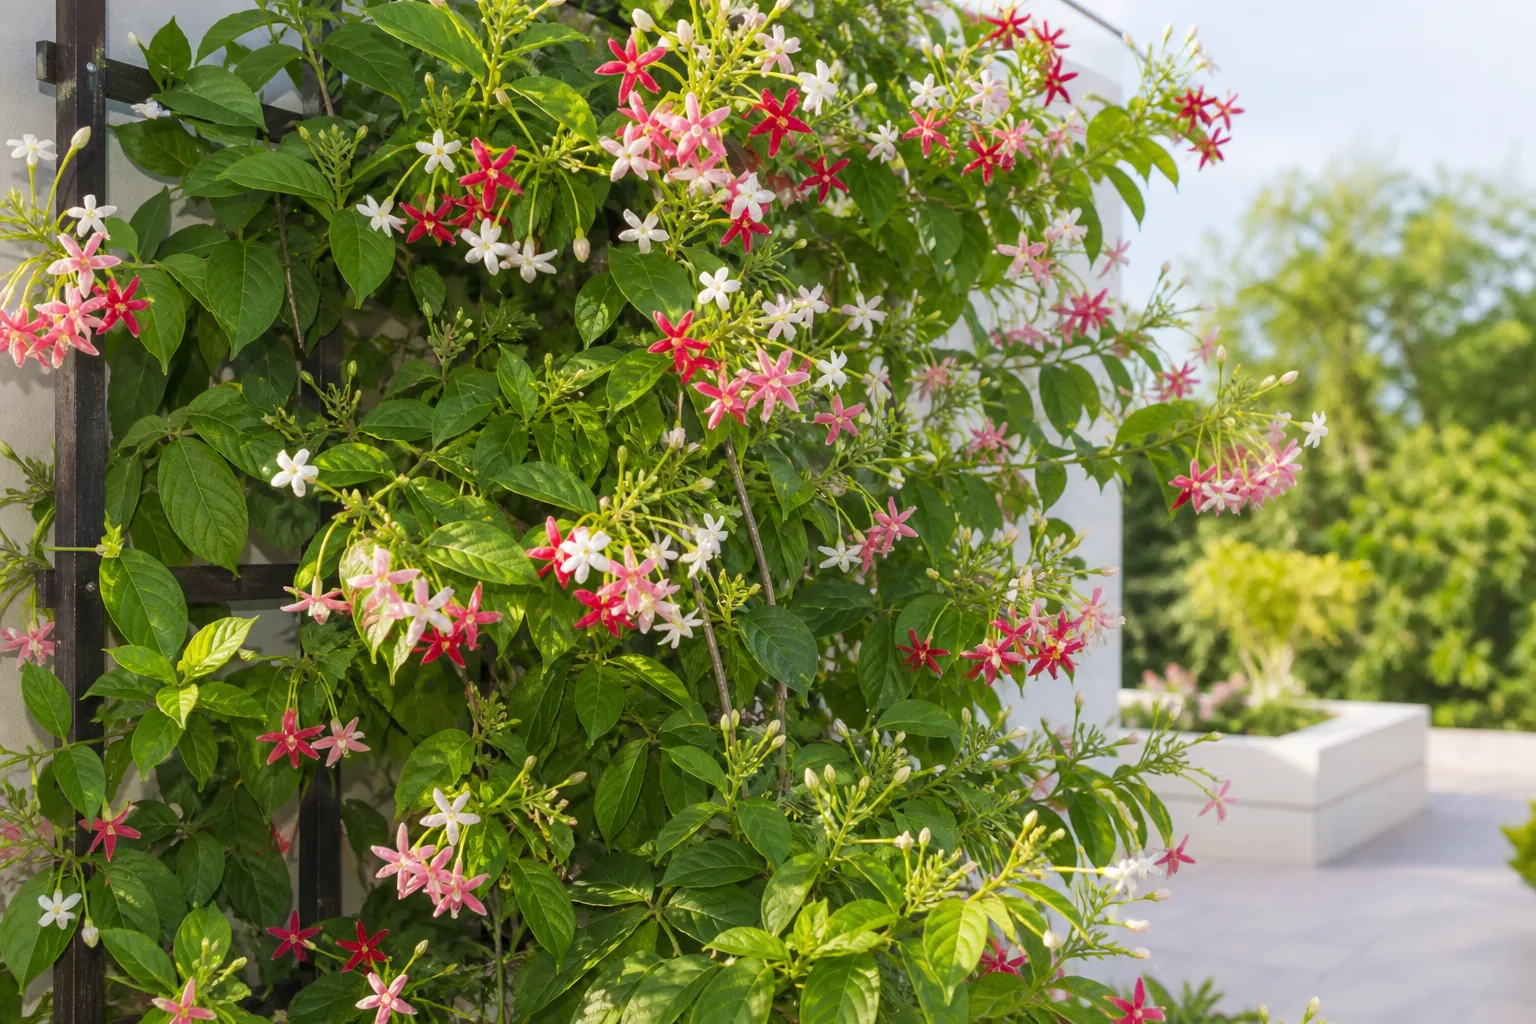
Rangoon Creeper Pruning Guide: Timing, Cuts, and Recovery
Rangoon Creeper Pruning Guide: Timing, Cuts, and Recovery
First, trace one dead, broken, or badly damaged stem back to healthy wood and remove it. Do not begin by shearing the whole outer canopy. That single cleanup cut reveals Rangoon Creeper’s woody framework so you can decide whether the vine needs training, selective shortening, or a staged renovation.
Quick answer
Rangoon Creeper (Combretum indicum, also called Madhumalti and formerly Quisqualis indica) is a large woody climber, not a compact trailing houseplant. Kew accepts the species as a wet-tropical climber, while Singapore NParks describes a hook-climbing woody vine up to about 8 m. Pruning is therefore mainly about keeping heavy stems on a safe support, opening tangled growth, and controlling reach without removing every potential flowering tip.
Make major size-control cuts at the start of warm active growth or shortly after a main flowering flush. At other times, limit work to dead, damaged, crossing, or unsafe stems. For a healthy established vine, treat one-third of the live leafy canopy as a conservative ceiling rather than a target; take less from a container plant or any vine under stress.
Pruning can produce a more branched, manageable framework, but it cannot correct a dim position or unhealthy roots. If new shoots remain thin and widely spaced, improve the conditions in the Rangoon Creeper light guide before cutting again. If leaves wilt while the mix stays wet, use the watering guide and diagnose the root zone before reshaping.
What pruning does for Rangoon Creeper
Rangoon Creeper climbs by extending flexible young shoots that later become woody and heavy. Left unattended, those shoots can knot at the top of a trellis, cross into gutters or cables, and leave the lower support bare. Selective pruning redistributes the vine across its structure and keeps future maintenance within safe reach.
The main pruning jobs are distinct:
- Sanitation: remove dead, split, diseased, or badly damaged wood.
- Training: redirect flexible young shoots and remove growth heading toward unsafe areas.
- Post-flush shortening: reduce overlong shoots after a major flower display.
- Structural thinning: remove crossing, crowded, or poorly placed stems at their origin.
- Renovation: rebuild an overgrown woody framework over more than one session.
Do not combine all five jobs automatically. Frequent training prevents many hard cuts, while renovation deliberately sacrifices more canopy and may postpone the next display.
When to prune Rangoon Creeper
Major shaping during warm active growth
Choose the beginning of a warm growth period for major framework changes, especially if the vine has become too large for its support. In frost-free tropical gardens, plant activity matters more than a calendar month: look for firm swelling buds and the start of new extension. In cooler subtropical areas, wait until cold damage and frost risk have passed.
A second useful window follows a main flowering flush. You can see which stems carried flowers, remove spent clusters, and shorten excessive extensions before they become harder to handle. Avoid repeated tip trimming throughout bud formation: the Flora of China account records flowers in terminal spikes or panicles, so indiscriminate clipping of shoot ends can remove the very positions expected to bloom.
What can be removed immediately
Remove completely dead, hanging, split, or structurally unsafe growth whenever it appears. Make emergency cuts before a heavy stem damages a roof edge, railing, cable, or the support itself. Safety takes priority over flowers.
Delay routine shaping when the vine is wilting, losing many green leaves, sitting in saturated soil, or recovering from a recent move or repot. Correct the underlying problem first unless tissue is actively rotting or breaking.
Inspect the framework before cutting
Stand far enough back to see where each main stem begins and ends. If the vine covers a pergola or wall, inspect both sides and confirm that no stem is tied to electrical cable, plumbing, a weak railing, or a neighbour’s tree.
Then check:
- Live nodes and leaf pairs. Rangoon Creeper has opposite leaves, so nodes are easy to spot where each pair attaches to a shoot.
- Stem condition. Young live shoots bend; older live stems are firm beneath the bark. Dead tips are brittle and dry.
- Flowering ends. Preserve unopened terminal clusters unless safety or urgent size reduction matters more than that flush.
- Crossing and congested stems. Keep the better-positioned branch and remove its weaker competitor at the junction.
- Support access. Decide where replacement shoots can be tied before removing the stem currently filling that space.
The RHS climber guidance emphasizes matching the support and training method to a climber’s mature size and attachment habit. For Rangoon Creeper, pruning and training are one job: a cut creates replacement growth, and that growth needs a safe route.
Tools and safe handling
Use hand snips for soft green tips, bypass pruners for finger-thick stems, and a pruning saw for old wood too thick for a clean one-handed cut. Never twist heavy stems until they tear. Lower long or elevated sections in manageable pieces, and use a qualified professional where access requires climbing or work near utilities.
Clean blades before starting and after cutting suspect tissue. Iowa State University Extension recommends sanitizing pruning shears with alcohol or a bleach solution; follow the stated concentration and contact guidance rather than mixing products. Wear gloves, collect fruits, seeds, and clippings, and keep them away from children and animals because reliable companion-animal safety evidence for this species is limited.
Where to make each cut
Dead or damaged growth
Trace a dead tip downward until the stem is firm and living. Cut just above a healthy node. If an entire side stem is dead, remove it at its branch junction without cutting into the raised collar of the parent stem.
For a split branch, remove the damaged side cleanly rather than tying together a weak fork expected to carry a heavy canopy. Retain and train a sound nearby shoot as its replacement.
Overlong live shoots
Follow the shoot down to an outward-facing leaf pair or side branch near the desired boundary. Make a clean cut about 5–10 mm above that node. Cutting through the node removes the buds needed for regrowth; leaving a long leafless stub creates dead wood beyond the last useful bud.
Do not shear every shoot to one flat plane. Selective cuts at different depths preserve leaves inside the canopy and keep the vine’s natural layered shape. They also avoid producing a dense shell of short new shoots at the outer edge.
Spent flower clusters
Snip a faded cluster at its short stalk if tidiness or fruit prevention is the goal. If the supporting shoot also exceeds its allotted space, shorten that shoot separately above a healthy node. This distinction avoids turning simple deadheading into an unnecessary structural cut.
Step-by-step pruning
- Put on gloves, clean the tools, and secure access to both the vine and its support.
- Make the first cut on one dead, broken, or badly damaged stem.
- Remove remaining dead wood and any stems attached to unsafe structures.
- Mark the intended height and width before cutting healthy growth.
- Thin crossing or inward-growing stems at their origin.
- Shorten overlong live shoots 5–10 mm above outward-facing nodes.
- Preserve unopened terminal flower clusters unless size or safety takes priority.
- Stop before roughly one-third of the live leafy canopy is gone.
- Tie retained young stems loosely to their planned routes and collect every clipping.
Step back after every few cuts. The goal is a supported framework with space between stems, not a bare trellis or an evenly shorn wall.
How much can you safely remove?
For routine structural pruning, keep live-canopy removal to about one-third or less on a vigorous, well-rooted plant. This is a conservative working limit, not a species-specific scientific threshold. A young container plant, recently transplanted vine, or specimen with yellowing and wet soil should receive only sanitation cuts until it stabilizes.
Renovate a severely overgrown vine in stages. First remove unsafe wood and reduce the most awkward third. Let replacement shoots harden and cover the retained framework before taking another section in a later growth cycle. Cutting every old stem near the base at once can leave uncertain regrowth and a long gap in screening and flowering.
Training for fuller, more manageable growth
Spread several retained leaders across the support instead of allowing one stem to dominate the top. Tie flexible shoots with soft loops that leave room for thickening, then remove or loosen ties before they bite into bark. Weekly redirection during fast growth prevents the need for repeated hard pruning.
For a young plant, pinch only selected soft tips after each has made several leaf pairs. The side buds below the pinch can then compete, helping fill an empty section of trellis. Do not pinch every tip at once, especially when flower clusters are expected at shoot ends.
Pruning cannot make a shaded vine compact for long. If replacement shoots immediately stretch toward the light, adjust placement using the light guide rather than beginning another cutting cycle.
Aftercare and recovery
Keep the vine in its established light and do not combine a major pruning with same-day repotting or heavy feeding. Water by soil condition; canopy reduction may make a container dry more slowly because fewer leaves are using water. The Rangoon Creeper soil guide helps when the mix remains wet long after pruning.
In warm active growth, healthy buds may begin to swell and extend over the next several weeks. Treat that as an observation window, not a deadline. Cool weather, low light, root damage, and severe cuts all delay visible recovery.
Good recovery looks like:
- firm buds and new side shoots below selected cuts;
- retained leaves staying stable and green;
- cut surfaces drying without blackening downward;
- replacement growth following the support rather than tangling behind it;
- later terminal flower clusters on mature new shoots.
Pause further pruning if green leaves fall rapidly, stems soften, cut ends blacken downward, or the root zone stays wet unusually long. More cuts do not correct root or stem decline.
Can pruning cuts be propagated?
Healthy softwood tips removed during active growth may be useful for propagation; NParks lists softwood stem cuttings as a propagation method for the species. Keep only pest-free, non-flowering material with intact nodes. Discard dead, diseased, split, or heavily woody offcuts rather than trying to rescue them.
Use the Rangoon Creeper propagation guide for cutting preparation, rooting medium, humidity, and aftercare. A pruning cut is raw material, not a guarantee of a rooted plant.
Common mistakes to avoid
- Shearing the entire outer canopy repeatedly.
- Cutting off every terminal shoot while expecting uninterrupted flowers.
- Leaving long bare stubs or cutting through healthy nodes.
- Removing more than one-third simply because the vine grows quickly.
- Hard-pruning a wilted, waterlogged, recently repotted, or cold-stressed plant.
- Pruning stretched growth without improving light.
- Allowing replacement shoots to wind around gutters, cables, or weak railings.
- Leaving fruits, seeds, and woody clippings where children or animals can reach them.
Pruning controls architecture; it does not cure poor drainage, weak light, or damaged roots. Return to the Rangoon Creeper overview when the problem extends beyond shape and access.
Related Rangoon Creeper guides
- Rangoon Creeper overview — growth habit, support, safety, and whole-plant priorities.
- Rangoon Creeper light guide — correct stretched growth before reshaping.
- Rangoon Creeper watering guide — adjust irrigation after canopy reduction.
- Rangoon Creeper soil guide — diagnose slow drainage before pruning a stressed vine.
- Rangoon Creeper propagation guide — root suitable healthy pruning tips.
- Rangoon Creeper repotting guide — avoid stacking root work with structural pruning.
Conclusion
Prune Rangoon Creeper selectively and train it frequently. Begin with one dead or damaged stem, preserve healthy nodes and promising terminal flower clusters, and reserve major reduction for warm active growth or the end of a main bloom flush. Keep routine live-canopy removal below one-third, stage renovation, and judge success by firm well-placed replacement shoots before making another cut.