Begonia Leaves Turning Yellow: Causes and Fixes
Begonia leaves turning yellow? Learn how to read the pattern, check roots, light, pests, disease, and nutrients, then choose the right fix indoors or out.
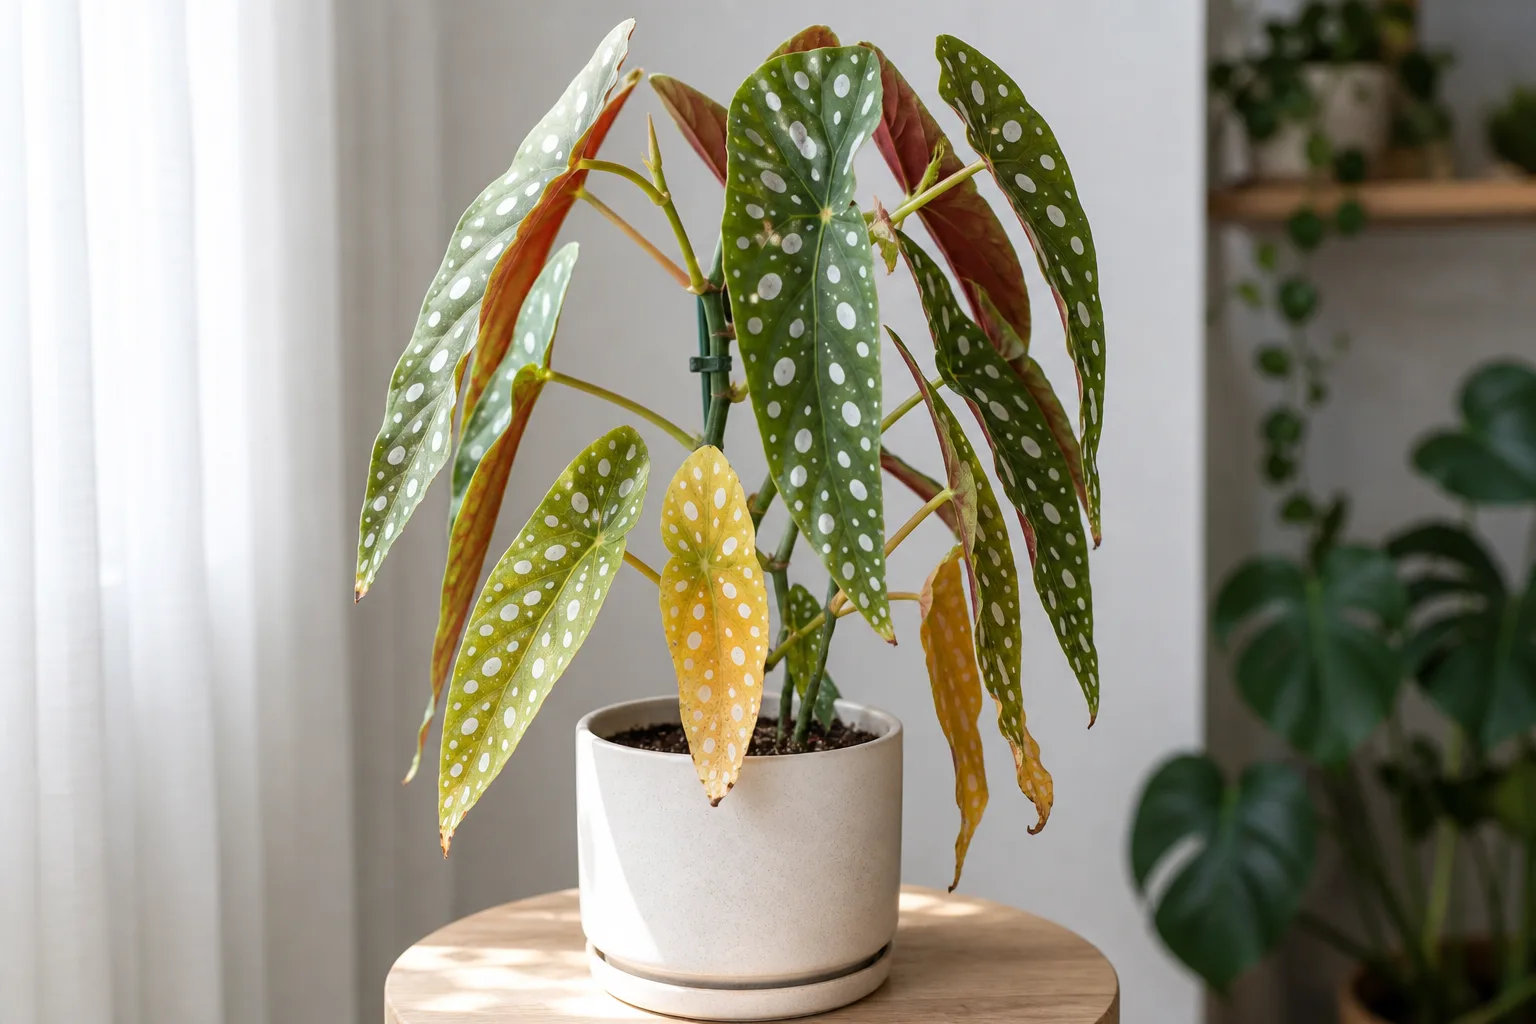
Yellow begonia leaves are a symptom, not a diagnosis. One older leaf turning yellow can be normal aging, while a whole plant fading, developing water-soaked spots, or dropping leaves points to a problem with roots, light, pests, disease, temperature, or nutrition.
The safest first move is to inspect the plant and its root zone before changing several things at once. Most begonias prefer moisture without saturation, bright filtered or dappled light, warmth, and air movement, but a rex begonia in a living room does not behave exactly like a tuberous begonia in a patio pot. The NC State Extension Begonia profile notes that many cultivated begonias prefer partial shade, humid conditions, moist but well-drained soil, and protection from cold, while also warning that overwatering makes them vulnerable to root rot.
Start with the leaf pattern, not a guess
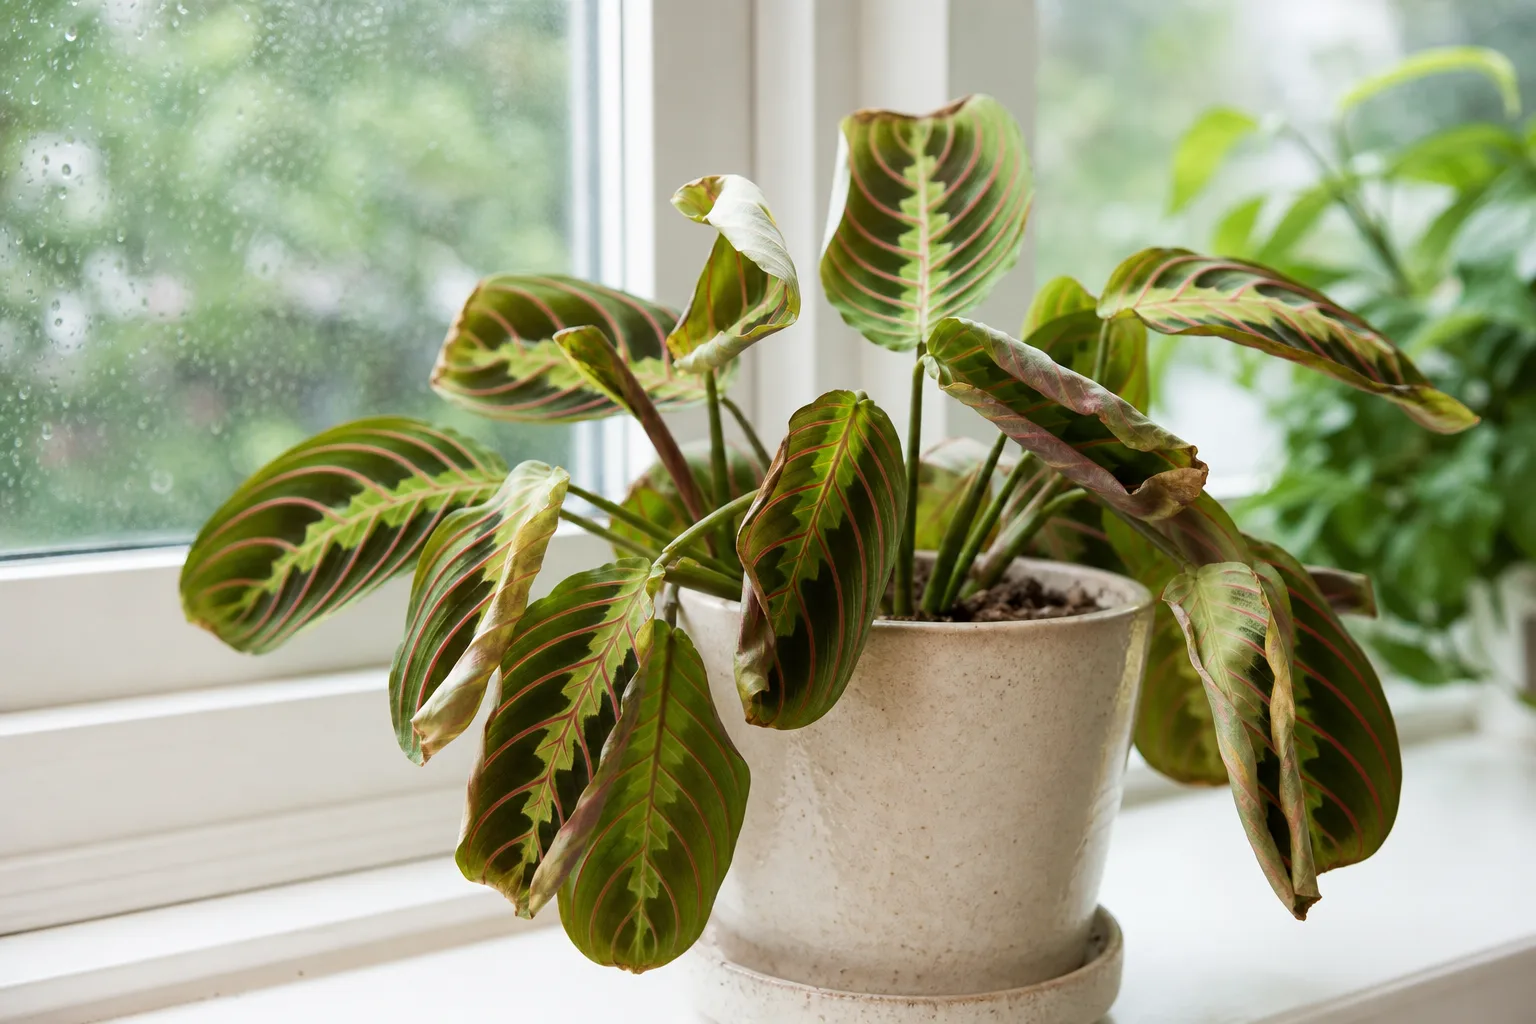
Before you reach for fertilizer or a watering can, look at which leaves are yellow, where the color starts, and what appears alongside it. Yellowing that begins on the oldest lower leaves and progresses gradually is more consistent with aging or a root-zone problem than with a sudden sun injury, which often appears as bleached, tan, or crisp patches on the side facing the light.
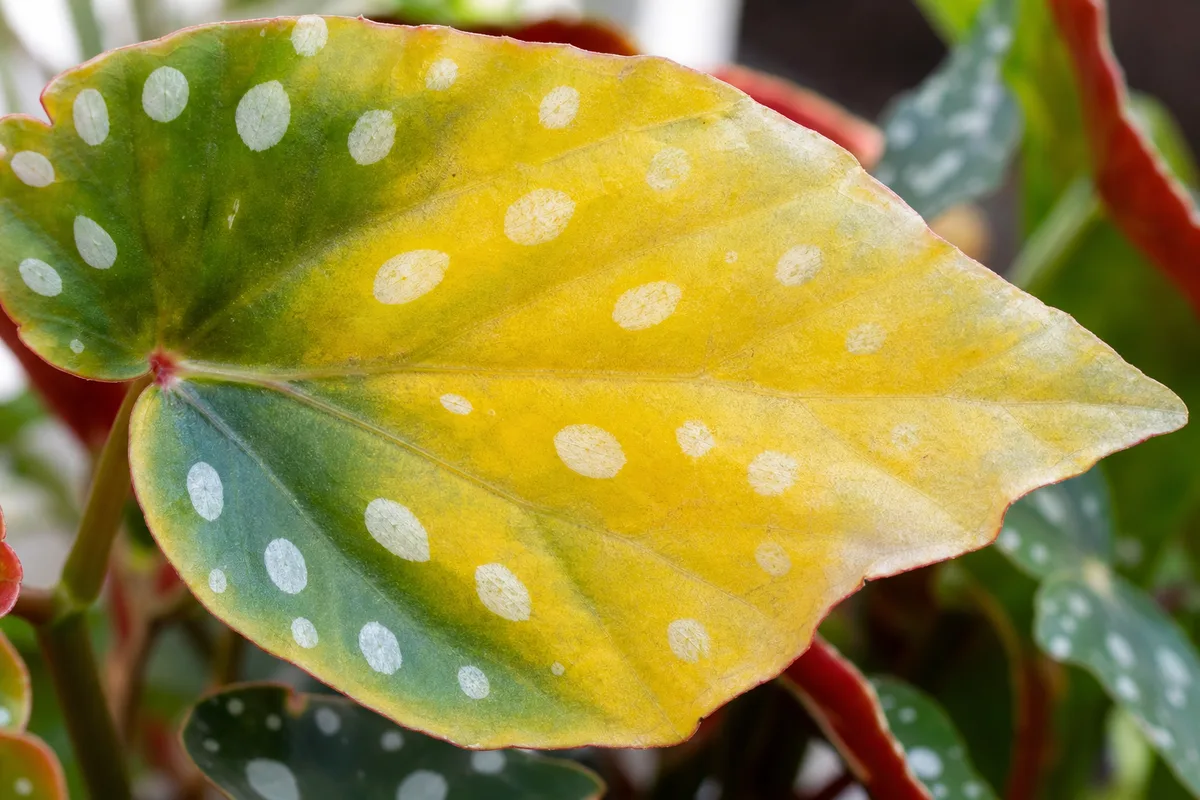
A yellow leaf is useful evidence, but the pattern around it is what narrows the diagnosis.
Use these visual clues as a starting point rather than a rigid identification. A plant can have two problems at once—for example, wet roots that reduce growth and a nearby window that adds heat—so the strongest diagnosis is the one supported by several signs.
| What you see | Most useful first suspicion | Check next |
|---|---|---|
| One or two oldest leaves yellow, with firm stems and healthy new growth | Natural leaf turnover or mild care stress | Whether yellowing is spreading to newer leaves |
| Several lower leaves yellow while the mix stays wet for days | Overwatering, blocked drainage, or root rot | Drainage holes, pot weight, and roots if decline continues |
| Whole plant is pale, stretched, and growing slowly | Too little light or a nutrient problem | Distance from the window, leaf age, and feeding history |
| Bleached patches, yellow-to-brown edges, or a window-facing side looks damaged | Too much direct sun or heat | Recent move, hot glass, and afternoon exposure |
| Fine pale speckles, bronzing, webbing, sticky residue, or insects | Sap-feeding pests | Leaf undersides, stems, and new growth |
| Yellow halos around wet-looking spots, fuzzy gray growth, powder, or mosaic rings | Disease or another leaf disorder | Isolate the plant and keep foliage dry while identifying it |
The RHS describes this broad condition as chlorosis, a term for leaf yellowing with many possible causes. Its chlorosis guide emphasizes that leaf age, the location of yellowing on the blade, and companion symptoms such as wilting, leaf fall, stunting, or dieback are often more informative than color alone.
The fast triage: five checks before you treat
Do the checks in the same order each time so a dramatic leaf does not send you into a chain of unnecessary fixes. Start with the least disruptive observations, then move to an intervention only when the evidence supports it.
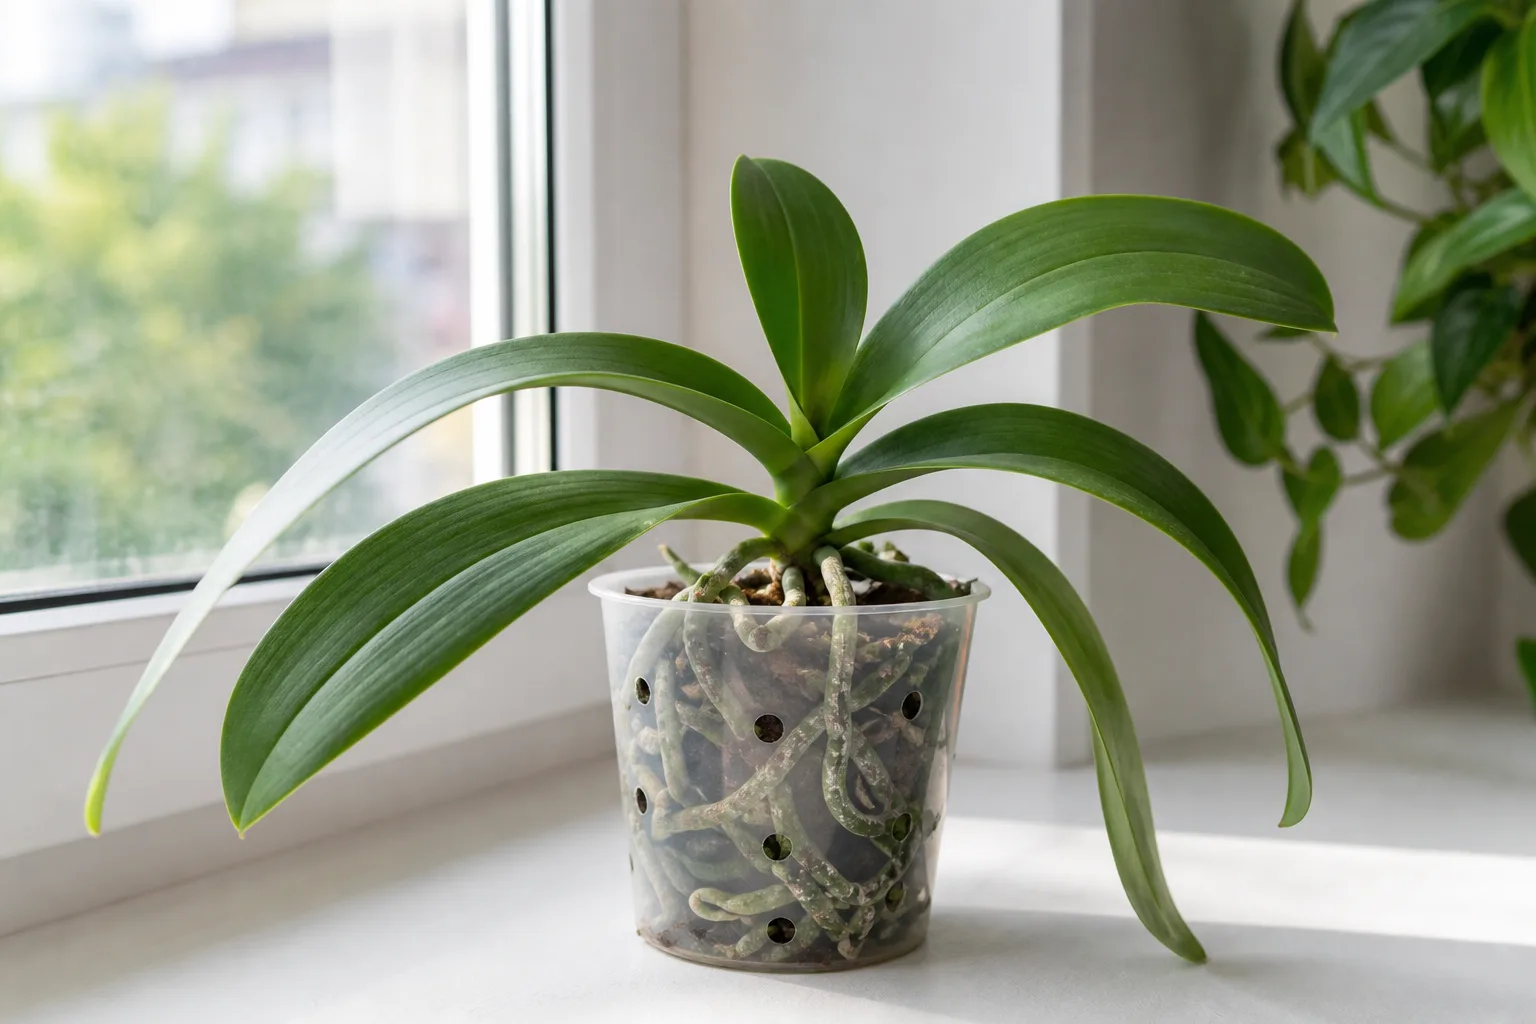
- Feel the root-zone moisture. Push a finger or wooden stick into the mix rather than testing only the dry surface. A pot can look dry on top while remaining wet around dense roots, or it can be dry all the way down even when a decorative cache pot hides the evidence.
- Confirm that water can leave the container. Lift the inner pot, look for open holes, and empty any saucer or cache pot after watering. A pot without drainage cannot be made safe by adding stones at the bottom; the water still occupies the lower root zone.
- Check the light and recent changes. Note whether the plant was moved, placed against hot glass, put outside, or left in a dark room during a season change. A sudden change can damage leaves even when the final location would otherwise be suitable.
- Inspect both sides of the leaves and the stems. Use a hand lens or shine a phone light across the surface. Look for stippling, fine webbing, cottony deposits, scale-like bumps, sticky honeydew, silvery scarring, gray fuzz, or water-soaked spots.
- Inspect roots only when the story points there. Unpotting is justified when the soil has stayed saturated, stems are soft, the plant is collapsing, or yellowing is spreading despite corrected surface care. Do not tear apart a stable plant because of one old yellow leaf.
Take a photo before making a change and write down the date, watering, light exposure, and any treatment. That simple record makes it easier to tell whether new leaves are improving instead of judging the plant by foliage that was already damaged.
Read the roots and pot before changing your watering
Roots need both water and air. When soil stays saturated, water fills the spaces that normally hold oxygen, and the root system becomes less able to function; the RHS explanation of waterlogging links prolonged saturation with yellowing, leaf loss, dieback, and declining vigor. Begonias are particularly unforgiving of a pot that remains heavy and wet because their fleshy stems and fine roots can deteriorate before the top growth makes the cause obvious.
If you remove the plant, support the root ball and inspect rather than rinsing aggressively. Healthy roots are usually firm and cream, tan, or light brown depending on the mix; color by itself is not proof of disease. Roots that are soft, slimy, collapsing, foul-smelling, or easily stripped of their outer tissue are much stronger evidence of rot, especially when paired with wet soil and a limp plant.
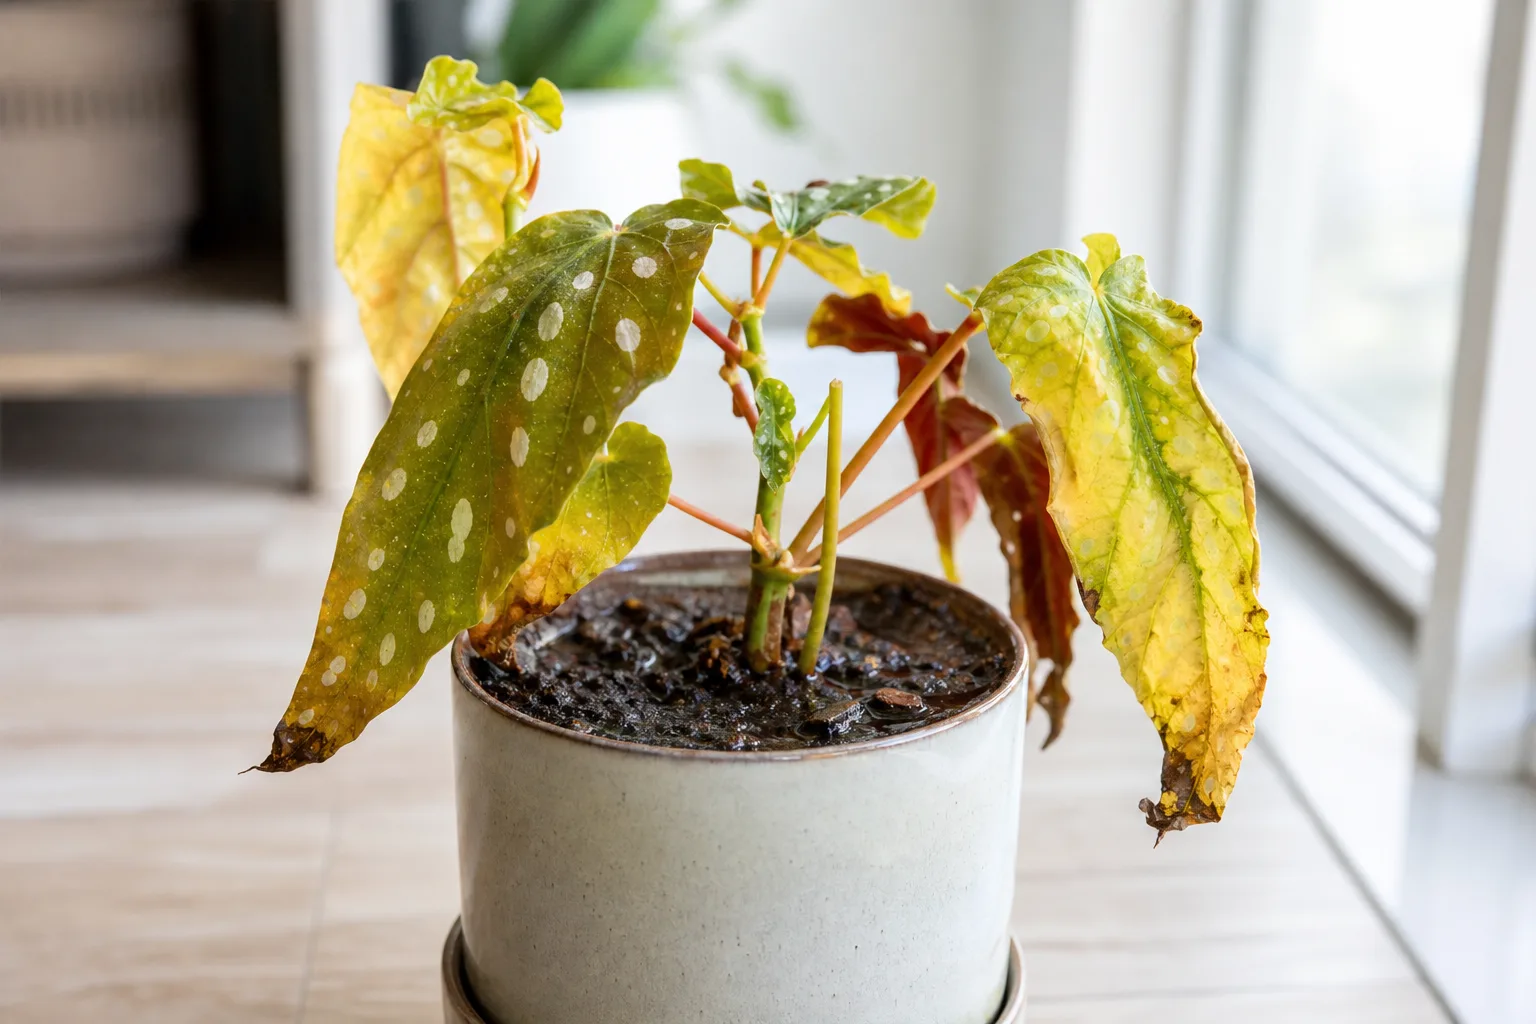
Persistent wet soil, yellowing, and weak or collapsing stems justify a closer root inspection.
Overwatering and poor drainage
Overwatering is not simply the amount of water poured on one day. It is the combination of water application, slow drying, pot size, soil structure, drainage, light, temperature, and humidity. A begonia in a large decorative pot in a dim room may remain wet much longer than the same plant in a small nursery pot near bright filtered light.
For a mildly overwatered plant with firm stems, stop watering until the upper part of the root zone has dried to the point appropriate for its type, then resume smaller, better-timed irrigations. Move the inner pot out of standing water and clear blocked holes. If the mix is compacted or the pot stays heavy for an unusually long time, repot into fresh, airy mix in a container only slightly larger than the root ball.
For confirmed rot, trim only roots that are clearly dead with clean scissors, discard the old saturated mix, and use a clean pot with open drainage. Keep the crown and stem bases at the same level they were growing; burying a begonia’s crown deeper creates a damp pocket that can accelerate decline. The Connecticut Agricultural Experiment Station’s Begonia guidance describes root-rot symptoms as general wilt, collapse, browning roots, and yellowing or death of outer leaves, and stresses prevention because recovery becomes difficult after infection is established.
Do not water by a fixed weekly schedule. Water when the plant and mix have reached the right degree of dryness for that cultivar and setting, then water thoroughly enough to wet the root ball and let the excess drain. Tuberous begonias need particular caution because waterlogged soil can rot the tuber; foliage begonias may need more even moisture, but they still need oxygen around the roots.
Underwatering or a dry root ball
Begonia leaves can yellow after repeated drought, although severe dryness more often produces curling, limp foliage, crispy margins, flower drop, or sudden leaf loss. The useful distinction is whether the entire root ball is dry and the pot feels unusually light, not whether the top half-inch looks dry.
If the mix has pulled away from the pot or water runs straight down the sides, the root ball may be hydrophobic. Water slowly around the surface, wait a few minutes, and repeat until the mix is evenly moistened and excess exits the holes. A severely dry plant may need to stand in a shallow basin briefly to re-wet from below, but remove it as soon as the mix is moist and let it drain fully.
After rehydrating, do not move a drought-stressed begonia into strong afternoon sun or soak it every day. Keep light bright but filtered, let the container drain, and watch the newest leaves. Existing yellow or crisp tissue will not repair itself; the goal is to prevent the next leaf from entering the same decline.
Light can make yellowing look like a watering problem
Begonias occupy a middle ground: they need enough light to make sturdy growth, but many types scorch in harsh direct sun. BBC Gardeners’ World Magazine’s begonia guide recommends dappled or partial shade outdoors and a bright room without strong direct sunlight for foliage types.
Too little light
Low light usually produces a general loss of green, long spaces between leaves, weak stems, slow drying of the pot, and smaller or less vigorous new growth. In a dark room, a begonia may use water more slowly, so a watering routine that was safe in summer can become chronic overwatering in winter.
Move the plant closer to a bright window or supplement light, but make the change gradually if it has been in deep shade. A bright sheer-curtained window, an east-facing exposure, or a few feet back from a strong west or south window can work better than either a dark corner or hot glass. Recheck moisture after the move because increased light can change the drying rate.
Too much direct sun
Sun injury tends to show as bleached yellow areas, tan patches, crisp edges, or damage concentrated on the window-facing or exposed side. It can appear after moving a houseplant outdoors, removing a curtain, or placing a shade-loving begonia against glass during a hot afternoon.
Move the plant back from the window or add a sheer curtain. For outdoor begonias, choose morning sun with afternoon shade, dappled light beneath an open canopy, or a sheltered patio rather than assuming every “full-sun” label applies to every begonia group. Some bronze-leaved wax begonias and selected tuberous cultivars tolerate more sun than delicate rex types, so the plant’s identity matters.
Do not cut off every leaf with a pale patch immediately. If the tissue is still mostly green and functioning, it is still contributing energy while new growth develops. Remove leaves that are fully yellow, dry, or badly damaged after the light correction is in place.
Pests cause stippling, patches, and pale leaves
Sap-feeding pests can drain color from a begonia without leaving one dramatic lesion. Spider mites often create fine yellow stippling or a dusty bronze cast, especially on the undersides of leaves; heavy infestations may produce delicate webbing. Aphids cluster around tender tips, mealybugs look cottony, scale appears as fixed bumps, and thrips can leave silvery scarring with dark specks of excrement.
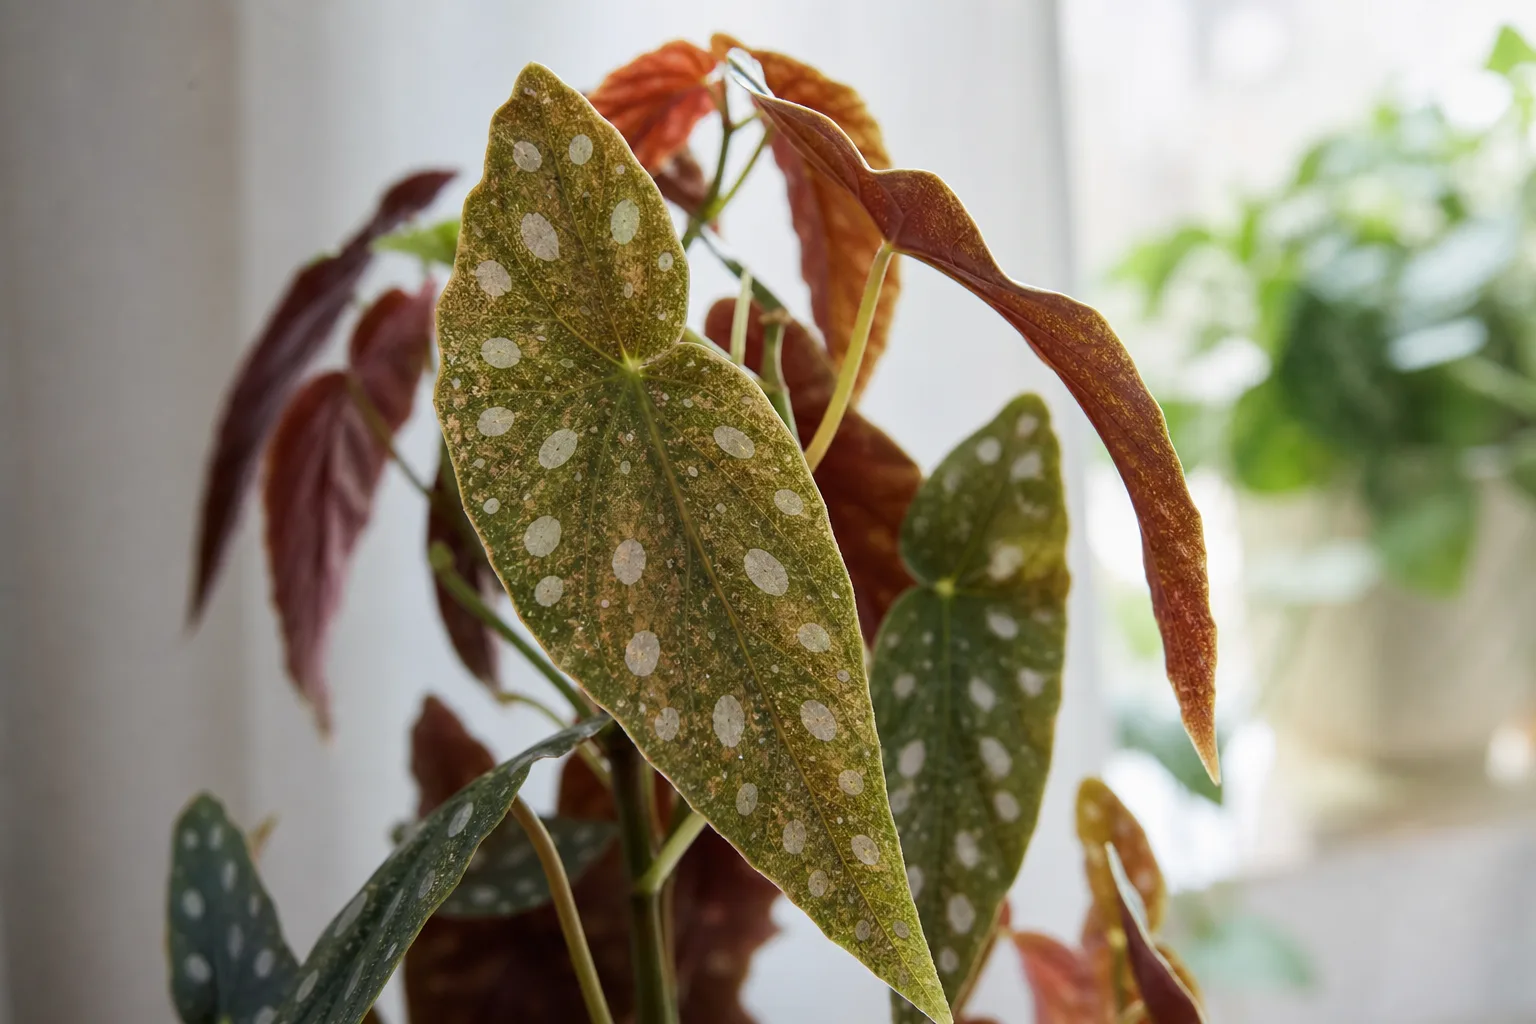
Inspect the undersides and newest growth when yellowing is stippled rather than evenly distributed.
Hold a sheet of white paper under a leaf and tap it gently. Moving pinpoints suggest mites or other small insects, but the test is not a complete diagnosis. Check several leaves, stems, and the growing tip; a single clean leaf does not rule out a developing infestation.
For an indoor plant, move it away from neighboring plants while you inspect and treat. If the plant tolerates it, rinse leaves and stems with a gentle stream of lukewarm water, concentrating on undersides without leaving the foliage wet overnight. Begonias can be sensitive to insecticidal soap, so test any product on one inconspicuous leaf and follow the product label before treating the whole plant. The practical guidance in Epic Gardening’s Begonia problems guide also cautions that washing and patch testing matter for these leaf-sensitive plants.
Repeat inspection and treatment according to the product label and the pest’s life cycle rather than declaring success after one spray. Remove the worst leaves only after you have checked for insects and confirmed that the plant still has enough healthy foliage to recover. Do not use a pesticide as a substitute for correcting a dry, hot windowsill or a pot that never drains.
Diseases and oedema need different responses
Disease-related yellowing usually brings extra evidence: water-soaked tissue, defined spots, halos, fuzzy growth, distorted new leaves, mosaic patterns, rapid collapse, or a smell from rotting tissue. The Penn State Extension Begonia diseases table and Connecticut Agricultural Experiment Station’s disease notes distinguish several of these patterns, which is why “yellow leaves” is too broad a label for treatment.
Defined spots, halos, or water-soaked tissue call for a disease check rather than automatic feeding.
Bacterial leaf spot and Botrytis
Bacterial leaf spot can begin as translucent or water-soaked spots with yellow halos. Penn State notes that infected plants may decline one leaf at a time, while Connecticut guidance recommends keeping foliage dry, improving airflow, and removing symptomatic leaves. Isolate a suspect plant, avoid overhead watering, and do not propagate from tissue that may be infected; bag and discard clearly diseased leaves rather than placing them in a home compost pile.
Botrytis blight is more likely when spent flowers or leaves stay wet in cool, cloudy, humid conditions. Look for tan or brown leaf spots, rotting flowers, and dusty gray fungal growth. Remove fallen petals and dying tissue when the plant is dry, space plants so air can move through them, and water at the soil line in the morning when outdoor conditions allow.
Powdery mildew, foliar nematodes, and viruses
Powdery mildew produces a white, flour-like coating on leaves, flowers, or stems; the tissue beneath can yellow or die. It is not the same as ordinary high humidity around a healthy rex begonia. Reduce crowding, improve ventilation, keep leaves dry, and use only a product labeled for the plant and disease in your location if cultural measures are not enough.
Foliar nematodes can cause water-soaked blotches, yellowing, necrosis, leaf drop, and stunting. Because these organisms move in water films, splashing and overhead irrigation can spread the problem. Repeated patterned decline across leaves, especially with water-soaked areas on the undersides, deserves plant-diagnostic advice rather than a guess at fertilizer.
Viruses can create mosaic mottling, pale rings, distorted leaves, and stunted growth, but similar-looking patterns can also result from pests or environmental stress. If the pattern is spreading through new growth and does not match watering or light changes, isolate the plant, avoid taking cuttings, and consider a local diagnostic service. A suspected virus is a reason to protect the rest of a collection, not an invitation to spray several unrelated products.
Oedema is a different problem again. The Missouri Botanical Garden’s oedema guidance describes raised, hard, corky areas that can develop when roots take up water faster than the leaves can release it, often under cool, cloudy, or low-light conditions. Improve light and air circulation, allow the root zone to approach the appropriate dryness before watering again, and avoid wet foliage; fungicide will not correct a noninfectious water-balance problem.
Nutrient deficiency is possible—but don’t start with fertilizer
Yellowing can reflect a nutrient problem, especially in a plant that has been in the same depleted mix for a long time, but yellow leaves are not proof that food is missing. Damaged roots can fail to absorb nutrients, and unsuitable pH or waterlogged soil can make available nutrients functionally inaccessible.
The pattern can offer a clue. The RHS nutrient-deficiency guide explains that iron, manganese, or magnesium deficiencies often show as yellow tissue between green veins; iron tends to affect younger leaves first, while magnesium and manganese more often begin on older leaves. Nitrogen deficiency tends to cause more general yellowing, commonly starting on older leaves, and potassium deficiency may be more pronounced along leaf edges.
Treat those patterns as hypotheses, not a diagnosis from a color chart. If the plant is wet, limp, recently repotted, infested, or declining at the crown, fix the root or health problem first. Fertilizer cannot revive rotten roots and can increase salt stress around a weak root system.
Once the plant is actively growing, the root zone drains normally, and the pattern still suggests depletion, use a complete fertilizer at the label rate rather than doubling the dose. Container plants may need feeding during active growth, while outdoor begonias in fresh, fertile soil may need less. Stop or reduce feeding during cold, dark, or dormant periods unless the product and the specific plant’s care requirements say otherwise.
Indoor and outdoor begonias need different troubleshooting
Indoor yellowing is often a container-and-environment problem. Decorative pots hide standing water, heating and air-conditioning alter humidity, windows can supply either too little light or intense heat, and a newly purchased plant may be adjusting to a different light level. Check the nursery pot inside the cache pot, let the saucer empty, and inspect new arrivals for pests before placing them beside established plants.
Outdoor yellowing has a wider set of triggers. Rain can keep a heavy bed saturated, compacted soil can drain slowly, slugs can damage leaves, wind can shred tender foliage, and a sudden hot spell can turn a formerly safe location into a leaf-scorching one. Gardeners’ World recommends growing begonias in dappled or partial shade and keeping tuberous types out of waterlogged soil; use that principle to adjust the site rather than applying an indoor watering rule to a rain-fed bed.
Many begonias are tender. The NC State profile gives 55°F as a lower limit that many cultivated types do not tolerate well, while other extension and horticultural guidance notes that frost and cold can cause rapid collapse. Bring containers to protection before frost, and acclimate indoor plants to outdoor light over several days instead of placing a dim-grown begonia into direct midday sun.
What to do with yellow leaves
Yellow tissue will not turn green again after the cause is corrected. The plant may still benefit from a leaf that is partly green, so remove a leaf when it is fully yellow, collapsing, dry, or clearly diseased rather than stripping every leaf that is less than perfect.
Use clean, sharp scissors and cut the petiole close to its base without gouging the stem. Disinfect the blade between plants, and be especially careful when leaf spots, pests, or possible viruses are involved. Bag and discard diseased material; do not take cuttings from a plant that may be carrying a systemic problem.
Then correct the cause in a deliberate order:
- Isolate the plant if pests or disease are possible.
- Check moisture at root depth and verify that excess water can drain.
- Inspect roots if the mix is persistently wet, the stems are soft, or decline is rapid.
- Adjust light gradually and protect the leaves from hot direct sun.
- Inspect again for pests after several days, since small infestations can be easy to miss.
- Feed only after healthy roots and active growth make a nutrient issue plausible.
That sequence prevents a common cascade in which a gardener waters a dry-looking surface, adds fertilizer to a stressed root system, moves the plant into harsh sun, and then blames the next yellow leaf on a new problem.
Recovery timeline and signs of success
Judge recovery by new growth and the direction of change, not by expecting damaged leaves to become perfect. A successful correction usually looks like no new yellowing for a sustained period, firmer stems, a root ball that dries at a sensible pace, less leaf drop, and new leaves that match the plant’s normal color and size.
Already yellow leaves may remain attached for a while or drop after the plant reallocates resources. That is not necessarily treatment failure. Keep care steady long enough to observe the next flush of growth, but keep checking the root zone and leaf undersides instead of abandoning the investigation after one improved day.
If yellowing continues for several weeks despite stable moisture, appropriate light, no visible pests, and healthy roots, revisit the plant’s identity and growing medium. Rex, cane, wax, and tuberous begonias have different tolerances, and a soil or fertilizer routine designed for one group may be wrong for another. Persistent mosaic patterns, repeated leaf spots, rapid collapse, or unexplained stunting are good reasons to contact a plant clinic or extension service with clear photos and a sample history.
Advanced crown or stem rot has a poor outlook because the growing points may already be compromised. When the crown is soft and the entire plant is collapsing, repeated repotting can spread contaminated material and waste the remaining healthy plants; isolate it, remove it from the collection, and follow local diagnostic advice before attempting propagation.
Common fixes that backfire
Several popular “quick fixes” make yellowing harder to diagnose. Avoid watering on a calendar, misting foliage as a substitute for correcting dry air, or leaving a begonia in a full cache pot after watering. High humidity around rex begonias can be useful, but constantly wet leaves and stagnant air encourage fungal problems; a humidifier, plant grouping, and ventilation are safer than a damp canopy.
Do not move a plant straight from deep shade into strong sun, and do not fertilize a plant whose roots are waterlogged or rotting. Do not assume a layer of gravel in a sealed pot creates drainage, and do not repot into a much larger container just because the leaves look unhappy; extra unused mix stays wet and can lengthen the problem.
Finally, do not treat every pale spot as a pest or every yellow leaf as a disease. Check the underside, root zone, and growing conditions together, patch-test products because begonias can be sensitive, and use the label for any pesticide or fungicide. A careful diagnosis is slower than a blind spray, but it is far more likely to protect both the begonia and the plants around it.
Conclusion
When begonia leaves turn yellow, start with evidence: leaf age and pattern, root-zone moisture, drainage, light exposure, and the undersides of leaves. Overwatering and poor drainage deserve the first check, but pests, sun stress, low light, nutrient access, disease, oedema, temperature, and natural leaf aging can look similar until you inspect the details.
Correct one likely cause at a time, remove only foliage that is fully yellow or diseased, and watch the newest growth for signs that the plant has stabilized. A begonia does not need a perfect leaf to recover; it needs breathable roots, suitable filtered light, clean foliage, and steady care matched to its type and setting.