How to Grow Black Beans in Your Garden
Grow black beans from seed with a season-aware plan for variety, warm soil, spacing, water, pest checks, harvest timing, indoor drying and storage.
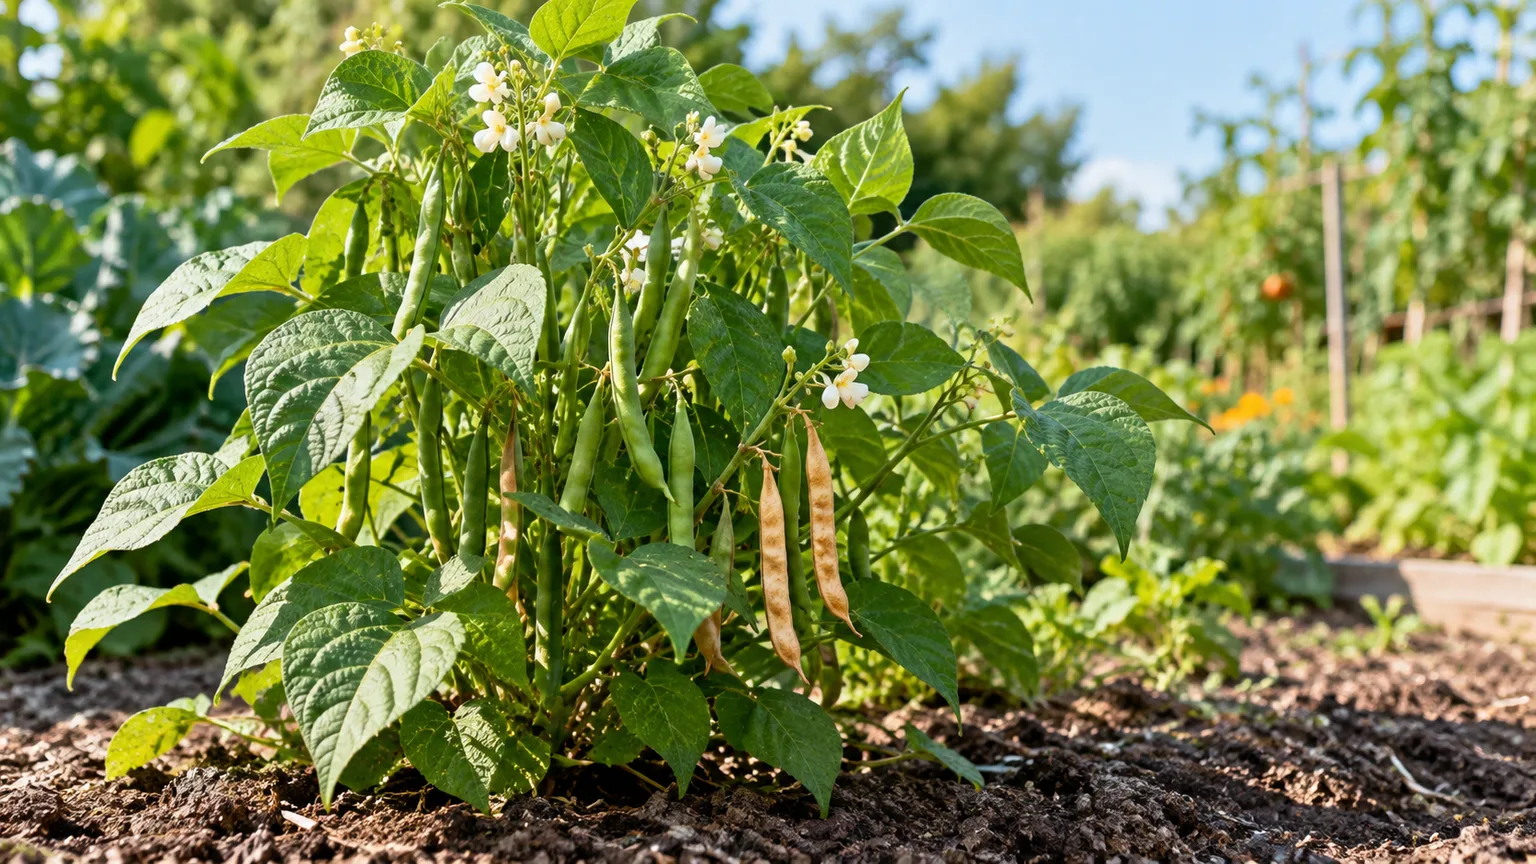
Black beans are common beans grown for the mature seeds inside their pods. The plant is much like a green bean; the key difference is that you let its pods fill and dry instead of picking them young. A successful crop depends less on pampering than on giving the seeds warm soil early enough for the pods to finish before fall weather turns wet or cold.
Start with the maturity estimate on the seed packet and count backward from your usual first fall frost. Many black turtle beans take roughly 90 to 110 days from sowing to dry harvest, and rain, heat or a cool spring can stretch that window. That makes variety choice and planting time more consequential than small adjustments to fertilizer.
Black beans are grown for dry seed
Black beans are one kind of Phaseolus vulgaris, the common bean species that also includes many snap and shell beans. In a dry-bean crop, the plant’s job is to fill mature seeds and let the pods cure; the tender green pod stage is not the main harvest. Keep that goal in mind when choosing varieties, watering late in the season and judging readiness.
The seed packet’s “days to maturity” is an estimate, not a deadline. Some black turtle types mature in about 95 to 105 days, while extension guides give a broader 70-to-110-day range for dry beans generally; catalog counts may also describe harvest at a different stage. Use the packet as your planning baseline, then follow the pods and local weather. Savvy Gardening’s black-bean guide and Utah State University Extension’s bean guide explain the range and the difference between dry beans and immature snap beans.
A dry-bean crop also takes more garden space and patience per meal than a crop picked as green pods. Utah State University Extension estimates roughly 20 to 25 pounds of dry seed from 100 feet of row under its growing conditions; a short home-garden row will yield much less, and variety, weather and pest pressure can change the result. Grow a manageable trial row the first year, then scale up if the harvested amount justifies the space and shelling time.
Choose a variety that can finish in your season
Black Turtle is a commonly sold black bean and is often a compact bush or semi-runner type, but black-seeded beans do not all share one growth habit. Check the packet for bush, semi-vining or pole growth, the dry-bean maturity estimate, and whether the seed is sold for garden planting. The plant’s habit and maturity date matter more than the words “black bean” alone.
If your summer is short, prioritize an early dry-bean variety from a seed supplier that serves your region. Bush types usually flower and mature in a more concentrated flush, which can help when fall frost is a firm deadline. Pole types occupy less ground for a longer crop, but their pods may mature over a wider period; that staggered harvest can be useful in a long season and frustrating in a damp autumn. Homes & Gardens’ black-bean guide describes Black Turtle as a common home-garden option and notes that black beans are sold in both bush and climbing forms.
Do not assume the packet’s number guarantees the full crop will be dry by that day. Add a buffer for the last pods to mature and dry, especially where nights cool early or late-summer rain is frequent. When choosing between two packets, the earlier reliable variety is often the safer bet in a short-season garden.
Wait for warm soil and settled weather
Sow black beans outside after frost danger has passed and the soil has warmed to at least 60°F; 65°F or warmer gives the seed a more dependable start. A soil thermometer is more useful than planting by a date on the calendar because a sunny raised bed can warm before a wet clay bed. Utah State University Extension says beans germinate best above 60°F and emerge in about a week when soil is roughly 65 to 85°F; Oregon State University Extension warns that seeds in cooler soil can crack and become vulnerable to soilborne microbes.
Cold, saturated soil is the combination to avoid. A bean seed absorbs water before it can grow; if it stays cold and oxygen-poor, it may rot rather than emerge. Waiting a few extra days for warm soil is usually better than trying to win a week on the calendar and reseeding after patchy emergence.
For a late planting, calculate whether the remaining frost-free period is long enough for the packet’s dry-bean maturity estimate plus a drying buffer. A late sowing can still work in a warm region, but a crop planted after midsummer often will not dry outdoors before frost in a cool climate. If the window is tight, choose the earliest cultivar available or save the bed for a faster crop.
Give plants sun, drainage and workable soil
Choose a place with at least six hours of direct sun, preferably more, and soil that drains after rain. Beans tolerate a range of garden soils, but they stall in compacted ground or a bed that remains waterlogged. A loose loam with organic matter holds enough moisture without shutting air away from the roots.
A pH around 6 to 7 is a useful target for common beans. Do not add lime, sulfur or fertilizer by guesswork; use a soil test if pH or fertility is a concern. If the soil is heavy, improve its structure with finished compost and a raised bed or broad, shallow mound rather than digging a small pocket of rich potting mix into clay. The pocket can collect water and leave roots sitting in a saturated basin.
Prepare the bed before sowing by removing perennial weeds and breaking only the surface crust. Beans do not need a highly enriched bed, and fresh manure or a heavy dose of nitrogen can push leafy growth at the expense of pods. The aim is a well-drained, moderately fertile root zone, not the richest soil in the garden.
Decide between bush and pole growth
Bush black beans need no trellis and are easier to cover when a brief cold night is forecast. Their main trade-off is a more concentrated harvest and a larger footprint per climbing plant. A semi-runner plant may sprawl or lean under a heavy pod load, so a short stake or open cage can keep pods off wet soil.
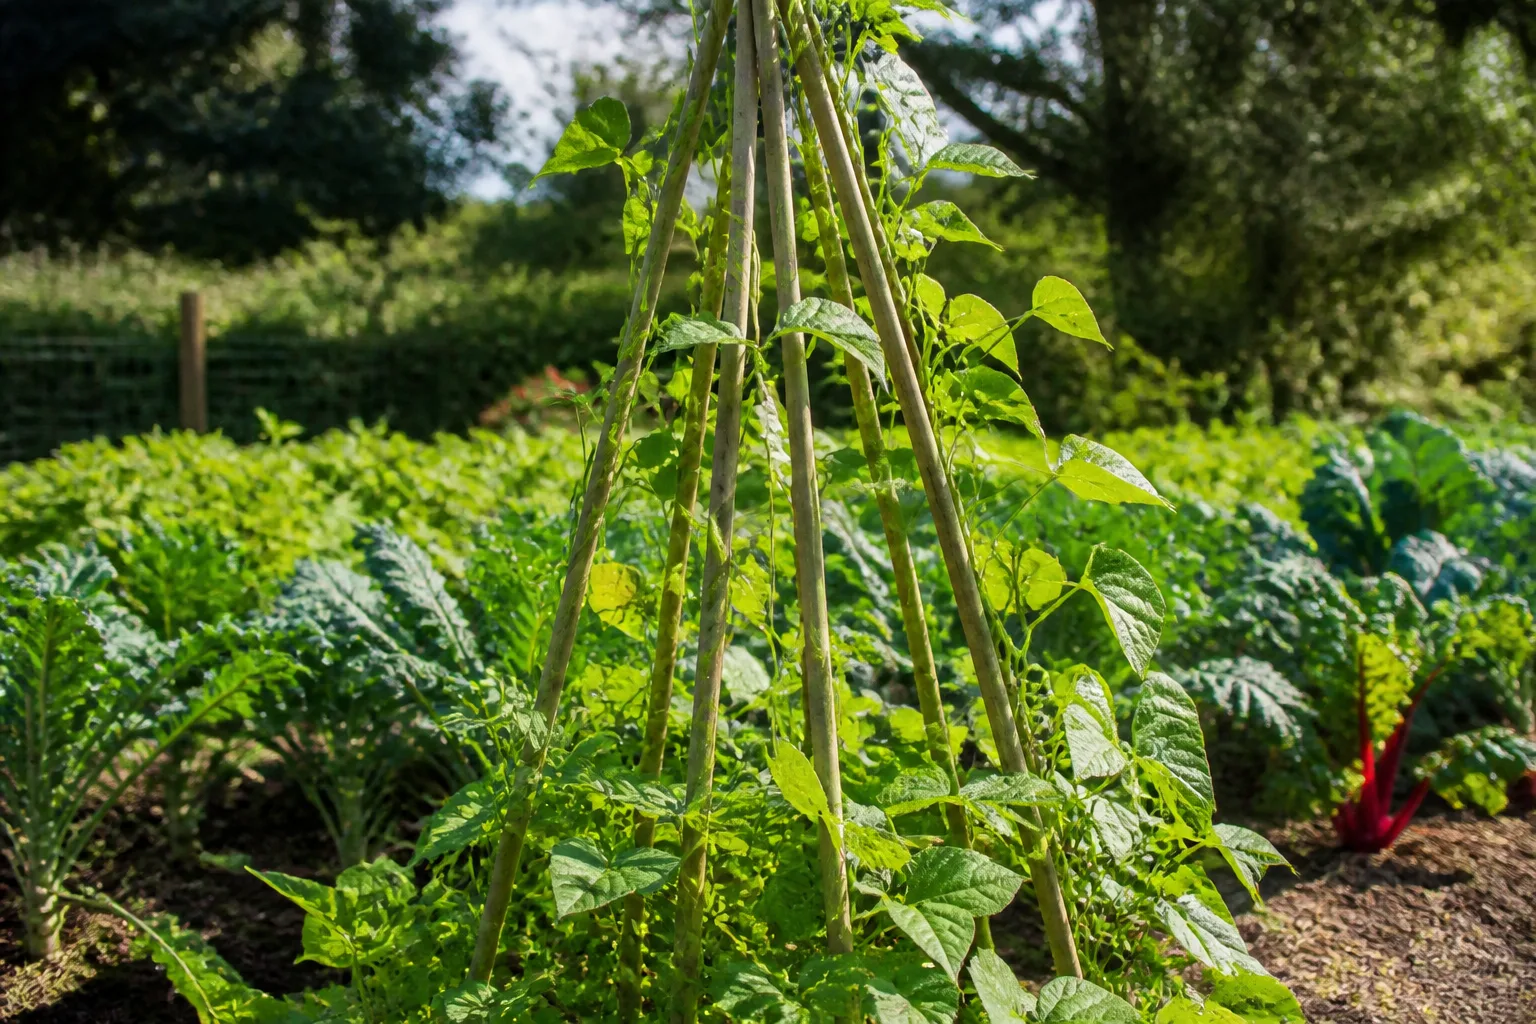
Pole black beans climb and can make better use of a narrow bed, but they need a strong support installed before sowing. Put the trellis where it will not shade shorter crops, and make it sturdy enough to hold wet foliage and pods in wind. Utah State University Extension notes that supports make pole beans easier to harvest as well as keeping vines upright.
| Growth habit | Best fit | What to plan for |
|---|---|---|
| Bush | A simple row or a short-season garden | No tall support; harvest is more concentrated |
| Semi-runner | A compact bed where a little support is possible | Short stakes or a cage can prevent lodging |
| Pole | A narrow bed or long frost-free season | Install a stable trellis before planting; pods may mature over time |
Most gardeners growing Black Turtle beans can start without a trellis, but the packet is the final word. If the label says pole or climbing, support it from the start rather than trying to thread a mature vine through a structure later. The existing bean teepee setup below illustrates one workable support shape.
Sow seeds where they will finish
Direct-sow black beans in the bed or final container. Bean seedlings grow quickly but can sulk when their roots are disturbed, and moving a seedling adds extra handling without much benefit once the soil is warm. If you need a very early start, sow into individual biodegradable pots and transplant the intact root ball while the seedling is small; otherwise, direct sowing is simpler.
Make a hole about one inch deep, drop in one seed, cover it loosely and water gently. If germination is often uneven in your bed, sow a spare seed a few inches away and thin the weaker seedling once both are established; do not leave a double clump that will compete through the season. Keep the seed zone evenly moist until emergence without turning it into mud.
Install any trellis before sowing and place the seed at the distance recommended for that variety. Keep row labels with the planting date and variety name. That small record will tell you whether a slow crop came from a late-maturing variety, a cold start or an unusually early fall.
Set spacing for the plant habit
For bush beans, a practical starting point is seeds about 2 to 3 inches apart and rows 18 to 24 inches apart; thin or leave them according to the seed packet and how dense the canopy becomes. Pole beans generally need more room between plants along the support so air can move through the vines and you can reach pods from both sides. Seed catalogs vary because some describe sowing distance while others describe final plant spacing, so follow the cultivar’s instructions when they differ.
Spacing has a useful middle ground. Crowded plants shade weeds but also hold humidity and make it harder to spot pests or pick pods; overly wide rows waste ground and expose more soil to weeds. Leave enough room to reach into the planting without stepping on wet soil or tearing neighboring stems.
Grow black beans in a container with realistic expectations
Black beans can grow in a pot, but a container is a small crop rather than a pantry plan. Use a pot at least 12 inches wide and deep with open drainage holes, and fill it with a quality container mix rather than garden soil. A bush or compact semi-runner variety is the easiest fit; a pole variety works only if the pot can be anchored and a trellis is added before the vine grows.
Keep the container in full sun and check moisture more often than you would in a bed. Pots heat and dry from the sides, so a brief hot spell can stress flowers even when the ground nearby stays damp. Water until the mix is evenly moist and excess drains from the base, then check again when the surface begins to dry.
Do not pack a pot with extra plants just to increase yield. Give each plant the spacing its packet recommends and expect a handful of dry beans rather than a large supply. If the goal is to stock the pantry, use a garden row; if the goal is to learn the crop or harvest a few seeds, a pot is a reasonable trial.
Water through flowering, then ease off as pods dry
Keep the root zone evenly moist from emergence through flowering and seed fill. Beans need the most consistent water when they set flowers and fill pods; heat and drought at that stage can cause flowers to drop or pods to remain small. Utah State University Extension suggests about an inch of water per week as a general benchmark, but rain, soil texture, mulch and container size determine how often a garden actually needs irrigation.
Check the soil before watering instead of following a fixed weekday schedule. If the top few inches are dry and the soil below is only slightly moist, water deeply; if the bed is still wet, wait. A hose or drip line directed at soil keeps foliage dry and lowers the chance of spreading leaf disease while you work among the plants.
As pods begin turning yellow and the seeds near maturity, reduce watering. Do not abruptly abandon a still-flowering plant in extreme heat, but avoid keeping the bed wet once most pods are filling and drying. Extra late-season irrigation can delay dry-down and make pods more vulnerable to mold during rainy weather. Savvy Gardening’s black-bean guide also recommends increasing attention to water during pod development, then easing off as pods yellow.
Skip high-nitrogen feeding; inoculate only when it makes sense
Black beans are legumes. Compatible soil bacteria can form nodules on their roots and convert nitrogen from the air into forms the plant can use, so an established crop often needs less added nitrogen than a heavy-feeding leafy vegetable. That does not mean beans manufacture a complete fertilizer or instantly feed neighboring crops; the result depends on functioning nodules, soil conditions and what plant material stays in the bed.
Start with a soil test and use compost if the soil needs organic matter. If beans have not grown in the bed for several years, or past beans formed few nodules and stayed weak, a bean-specific Rhizobium inoculant may be worthwhile. Follow the inoculant label and apply it at planting; inoculants for peas or other legumes may contain different bacterial strains. Colorado State University Extension’s dry-bean fertility guide explains that inoculation is most useful where the correct bacteria are absent or nodulation has been poor.
Avoid feeding a thriving black bean plant with a high-nitrogen lawn fertilizer or manure tea. Too much available nitrogen can produce vigorous leaves and vines while delaying flowering and maturity, exactly the wrong trade when autumn is approaching. If growth is pale or stunted, first check drainage, root health, temperature and soil test results rather than assuming the plant needs more nitrogen.
Control weeds without disturbing roots
Keep the row weed-free while bean seedlings are small. Beans grow quickly once warm, but young plants compete poorly with aggressive weeds for light and water. Pull weeds while they are tiny or use a shallow hand tool; deep hoeing can cut feeder roots near the surface and slow the crop.
After seedlings are established and the soil has warmed, add a light layer of clean straw, leaf mold or another weed-free mulch. Leave a little space around the stems so the crown does not stay wet. Mulch helps the bed hold moisture through flowering and reduces soil splash onto lower leaves, while still allowing air to circulate around a dense bush canopy.
Prevent heat and wet-weather setbacks
Black beans want warm weather, but prolonged extreme heat can still interrupt pod set. If flowers fall during a hot, dry spell, protect the root zone with mulch and water consistently before and during flowering; a temporary afternoon shade cloth can help in unusually punishing heat, but do not leave plants in deep shade. Utah State University Extension notes that temperatures above about 95°F combined with dry soil can cause flowers to abort.
A cool, rainy stretch creates a different problem: slow roots, fungal and bacterial disease, and pods that dry unevenly. Avoid stepping into a wet bean bed, since handling wet leaves can spread disease. Keep vines and pods off the ground where possible, and use a sunny, ventilated site so morning dew can dry.
These weather problems often change the best harvest plan. In a dry inland garden, pods may cure fully on the plant; in a humid or rainy region, waiting for every pod to become brittle outside can invite mold or shattering. Harvest mature pods in stages and finish their drying under cover when outdoor conditions stop cooperating.
Scout for bean pests and disease early
Look at both sides of leaves once or twice a week, especially while plants are young. Bean leaf beetles make small round holes in leaves and may chew pods; aphids cluster on tender growth; slugs and cutworms can destroy seedlings before a row fills in. The first few weeks after emergence are when a quick check can prevent a small patch of damage from becoming a missing stand.
Use clean seed, rotate the bean bed away from beans and other legumes for a few years, and avoid overhead watering. Give plants enough space to dry after rain. These habits reduce risk but do not guarantee a pest-free crop, so keep an eye out even in a well-prepared garden.
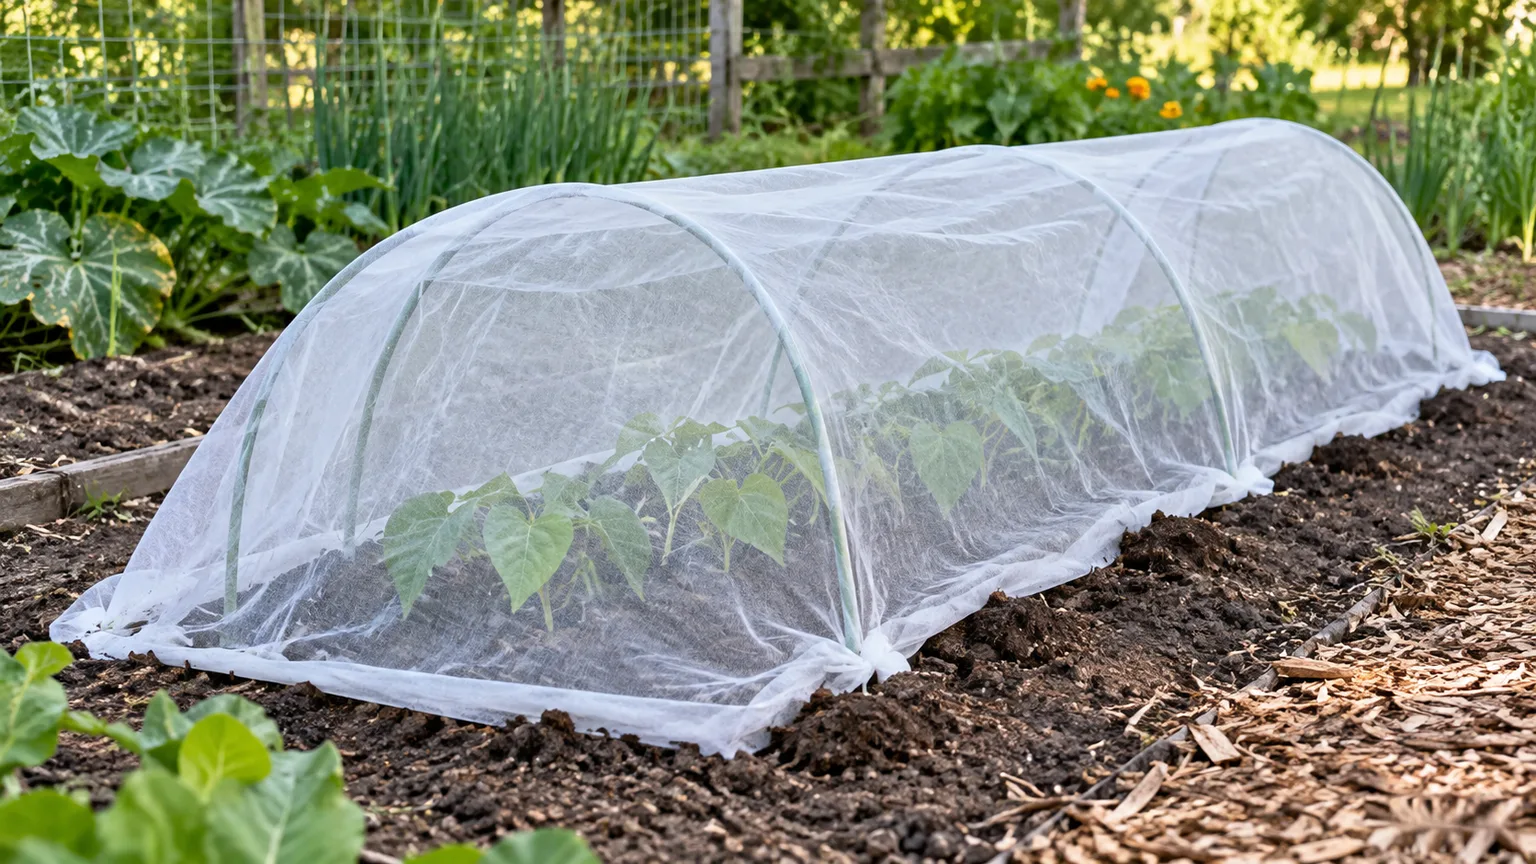
If you use a row cover to exclude beetles or protect seedlings, anchor the edges and remove it when plants need access to pollinators or when the covering begins to crowd the foliage. Use a breathable fabric and monitor temperature under it on hot days. The existing row-cover example shows how a low tunnel can protect young beans while leaving enough room for growth.
Match the response to the damage
For a few beetles or slug visitors, hand-pick them and check again the next morning. For aphids, a firm stream of water can knock small colonies off tender stems; avoid spraying stressed plants in hot sun. Do not reach for insecticidal soap until you have identified the insect and confirmed that the product label permits use on edible beans, then follow its directions.
Water-soaked leaf spots that spread to stems or pods, or white mold on stems in a humid canopy, call for sanitation rather than a quick spray. Remove badly affected plants, do not compost diseased material in a cool home pile, and avoid working among healthy plants while foliage is wet. Rotate the next bean crop to a different bed; repeating beans in the same damp spot lets some pests and pathogens build up.
Harvest when pods are dry and brittle
Do not harvest dry black beans by the green-bean rule. Wait until most pods have turned straw-colored or brown, feel dry and papery, and begin to rattle when shaken. Open a few pods: mature seeds should be hard, full-sized and their characteristic color. If the pod is still green and the seeds are soft, leave it to mature unless frost or prolonged rain is imminent.
Bush plants may mature in a more concentrated flush, while climbing types can carry pods at several stages at once. Pick the dry pods individually as they are ready, rather than forcing the entire vine to finish at the same time. Use scissors or snips if pods resist, since yanking a brittle stem can shake mature beans onto the soil.
Check the forecast as the harvest window approaches. A hard frost or repeated rain is a reason to salvage mature pods before the ideal dry day, not to wait for every last seed to cure outdoors. Keep green, immature pods separate from dry pods; they can be shelled and used fresh if the seeds are fully formed, but they are not ready for long-term dry storage.
Finish drying under cover if rain or frost threatens
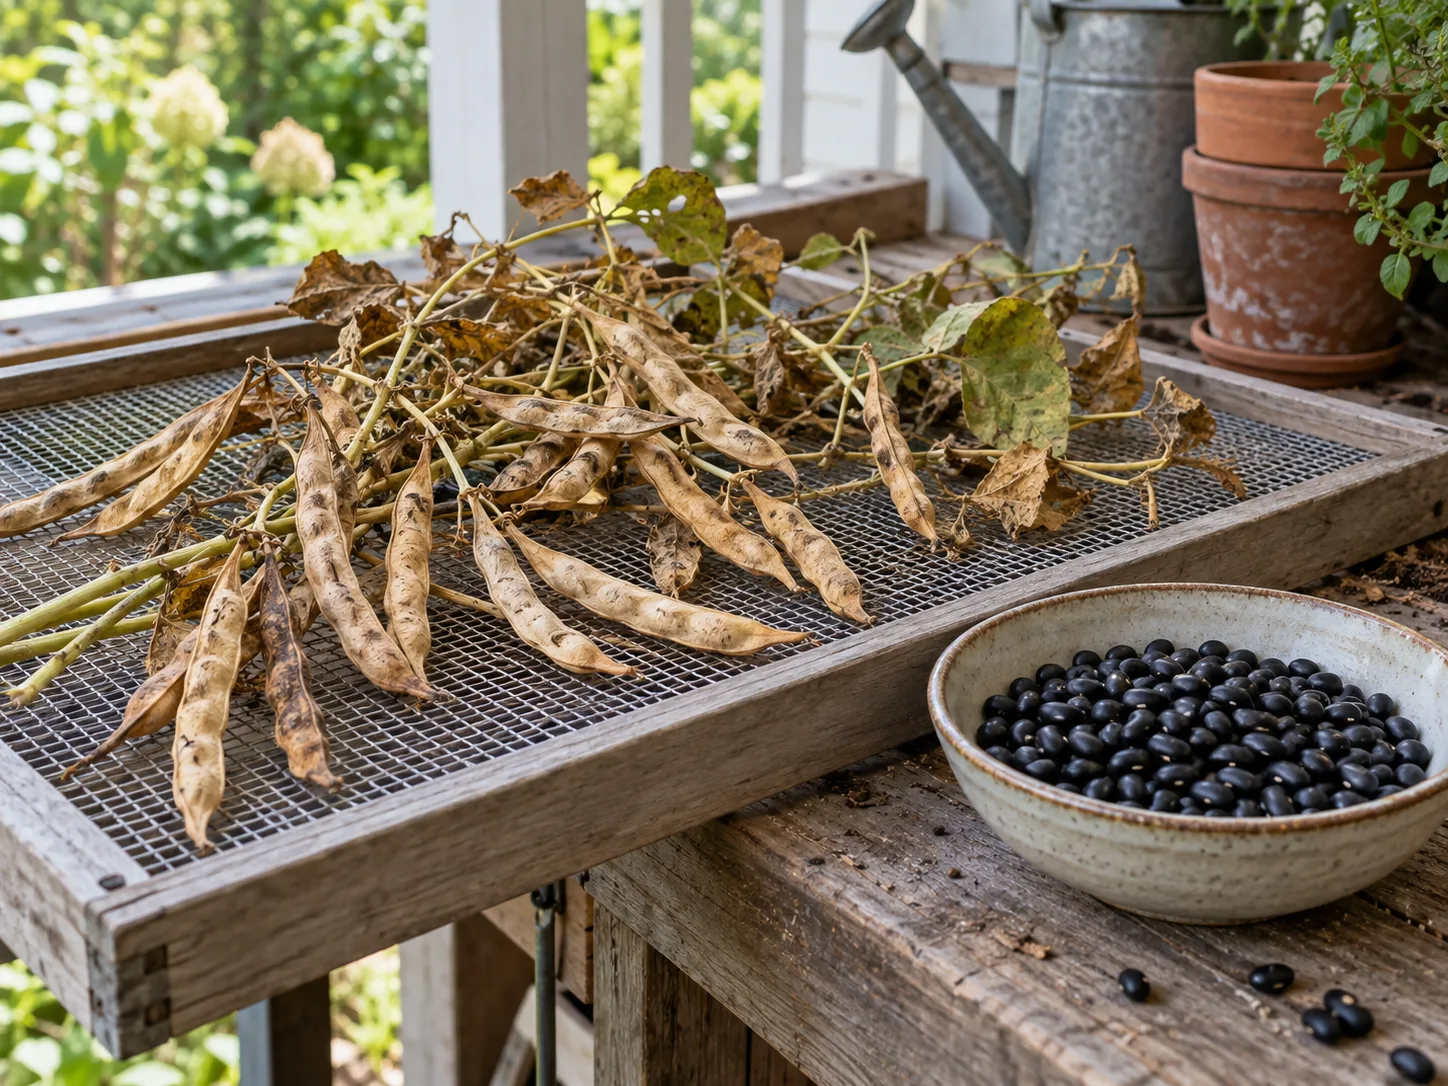
Cut bush plants at the base or clip mature pods on a dry day, after morning dew has evaporated. Leave roots in the ground if the plants are healthy; this avoids disturbing the bed and leaves root material to break down. Do not pull up wet plants and pile them into a dense heap, where trapped moisture encourages mold.
If many pods are still attached and turning but the forecast is wet or frosty, hang the cut plants upside down in a dry shed or covered porch with good airflow. Spread loose pods in a single layer on screens or shallow trays. A fan on low can improve air movement in a stagnant room, but avoid direct heat that may damage seed intended for planting.
Bring the pods inside before persistent rain, then let them finish until brittle. Some seeds will mature a little further after cutting if the pods were already well-filled and starting to yellow, but green, flat pods will not suddenly become a full crop off the plant. Sort them separately and use immature seeds fresh rather than mixing them with the dry beans.
Shell, clean and store beans completely dry
Shell pods over a wide bowl or tray to catch seeds as brittle valves split. For a small harvest, open each pod by hand; for a larger batch, place pods in a clean cloth sack and gently thresh, then remove the light chaff by pouring beans between bowls outdoors on a calm day. Inspect the seeds as you work and discard beans that are moldy, cracked or badly stained.
Let shelled seeds dry in a shallow layer for several more days in a warm, airy spot before sealing them. A bean that still dents, feels leathery or sticks to a fingernail needs more drying time. Store fully dry seeds in a clean, airtight jar in a cool, dark, dry cupboard and label the variety and harvest year. If condensation appears inside the jar, spread the beans back out and dry them again.
For cooking, treat homegrown black beans like other dried beans and cook them thoroughly before eating. If you want to pressure-can plain beans, follow a current tested process from the National Center for Home Food Preservation; dried beans are a low-acid food and are not safely preserved by an improvised boiling-water canning method.
Troubleshoot poor emergence and low pod set
If only a few seeds emerge, check the soil temperature and moisture first. Seeds may rot in cold, wet soil, while a crusted clay surface can prevent seedlings from breaking through. Older seed can also lose vigor; if the row is sparse, reseed gaps while the remaining frost-free season still allows the crop to mature.
If leaves are lush but flowers are scarce, suspect excess nitrogen, too much shade or a variety whose maturity window is longer than your season. If flowers form but fall without pods, look for dry soil around bloom time, intense heat, or other stress before adding fertilizer. Beans are self-pollinating, so a missing bee is not usually the cause of a whole row’s poor set.
If pods stay green late in the season, stop feeding, taper water once seeds are filling, and compare the remaining days with the packet’s maturity estimate. When frost or rain is near, clip the best-filled pods and dry them under cover; do not keep irrigating a mature crop in an attempt to make it finish faster. If pods mold in storage, the beans were probably sealed before they were completely dry, so discard affected seed and dry the sound remainder again before storing.
Conclusion
To grow black beans successfully, choose a variety that fits your frost-free window, sow it into warm soil, and keep the root zone evenly moist through flowering and seed fill. Then use the pods—not a fixed calendar date—to decide when to harvest and when to bring them under cover.
A few plants make a satisfying first crop, but dry beans take time to mature, dry, shell and store. Plan that finishing work before fall rain arrives, and your first row will teach you exactly how much space and which variety are worth growing again.



