5 Early Signs of Spider Mites on Houseplants
Learn five early signs of spider mites, confirm moving specks with a white-paper test, and take practical first steps before damage spreads across plants.
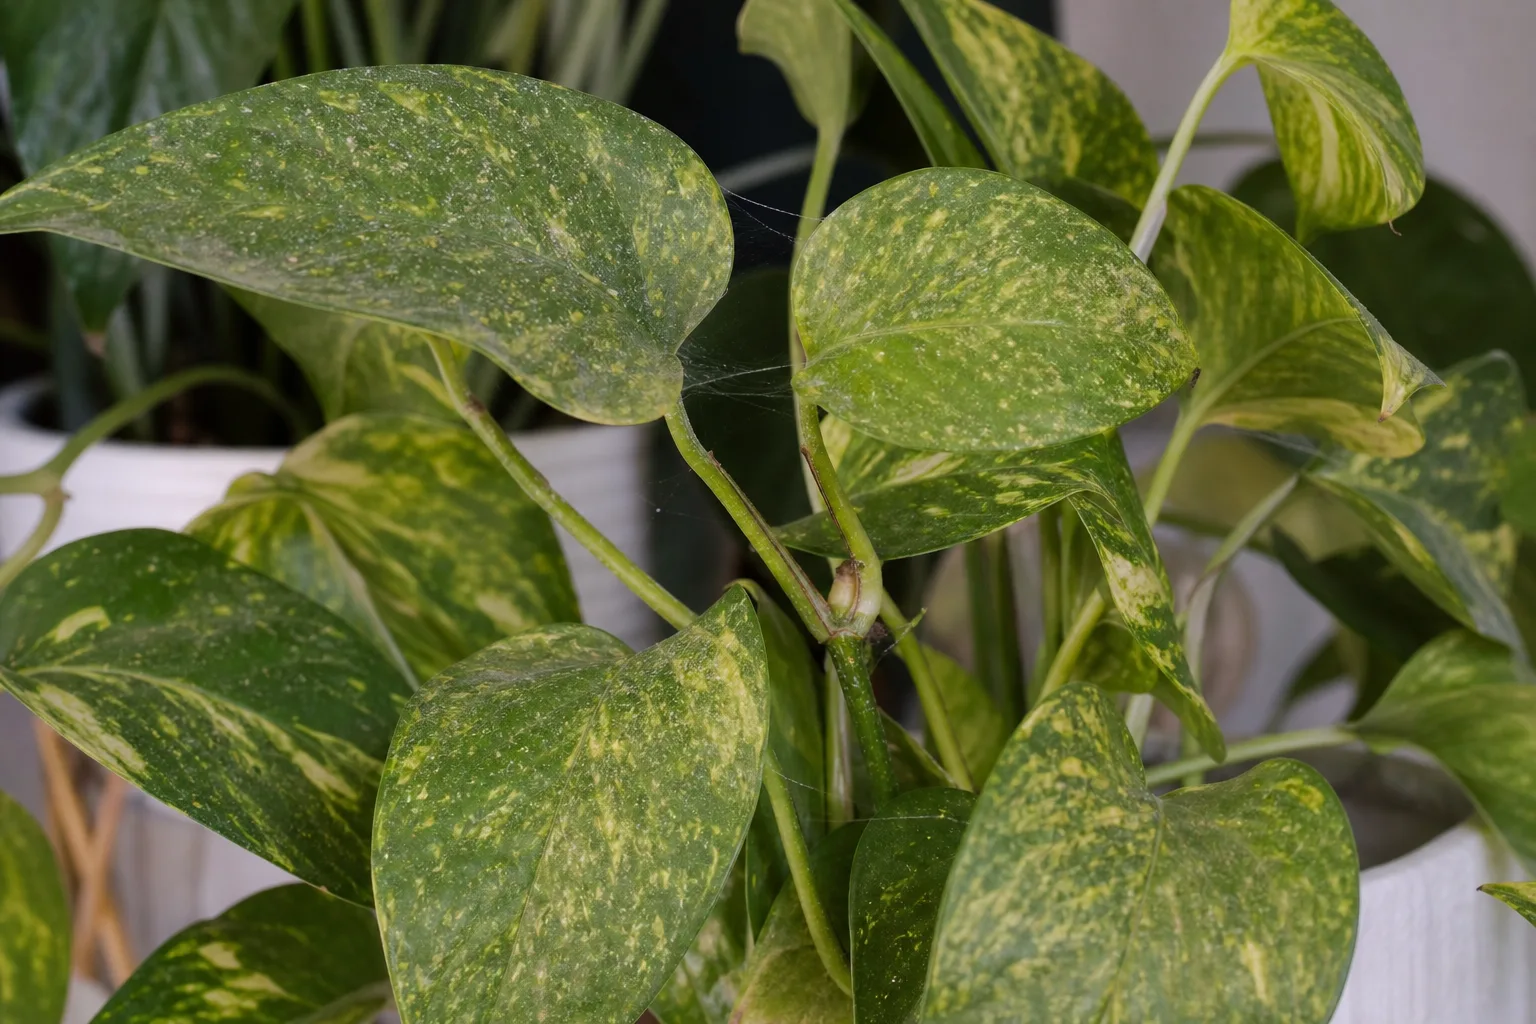
Spider mites are easy to miss because the first damage can look like dry air, dust, or a watering problem. Check the undersides of leaves for colonies, then look for a pattern: tiny pale feeding marks, moving specks, and—once a population has grown—fine silk around leaf joints. A white-paper tap test can help confirm mites before you treat.
The order matters. Pale stippling can be an early warning, while heavy webbing and leaves dropping are signs the plant has been under pressure for longer. Spider mites feed by puncturing individual plant cells, so you may see mottled foliage before the mites themselves; UC IPM’s twospotted spider mite guide describes tiny pale specks as the initial feeding injury.
Start with a 60-second check before you treat
Hold a sheet of white paper under a leaf or short stem that has pale specks. Tap the foliage firmly several times, wait a few seconds, and watch the paper in bright light. Spider mites show up as tiny dots that move slowly; dust and dried mineral spots do not crawl away. Iowa State University Extension recommends this simple shake-or-tap method because mature mites are only about 1/50 inch long and can be difficult to see unaided.
Test more than one place. Tap a leaf with visible damage, one nearby leaf that looks normal, and a lower or inner leaf where airflow is poor. If you have a 10× hand lens, inspect the underside for tiny oval bodies, round eggs, and pale shed skins; you do not need to identify the species to make a sensible first response.
Treat the paper test as a useful clue, not a perfect laboratory diagnosis. A single speck can be another tiny arthropod, and newly hatched mites may be almost invisible. Confidence goes up when moving specks appear alongside matching stippling or fine webbing on that same plant. If the leaf looks clean and the paper shows nothing moving, repeat the check in a few days rather than spraying every plant in the room on suspicion alone.
Five early signs of spider mites
Spider mites usually feed on leaf undersides, but their damage shows through the upper surface. The clearest diagnosis comes from two kinds of evidence at once: a characteristic leaf pattern and a direct clue such as moving mites, cast skins, or silk. Each sign below has a different level of certainty, so use the whole pattern rather than treating one symptom as proof.
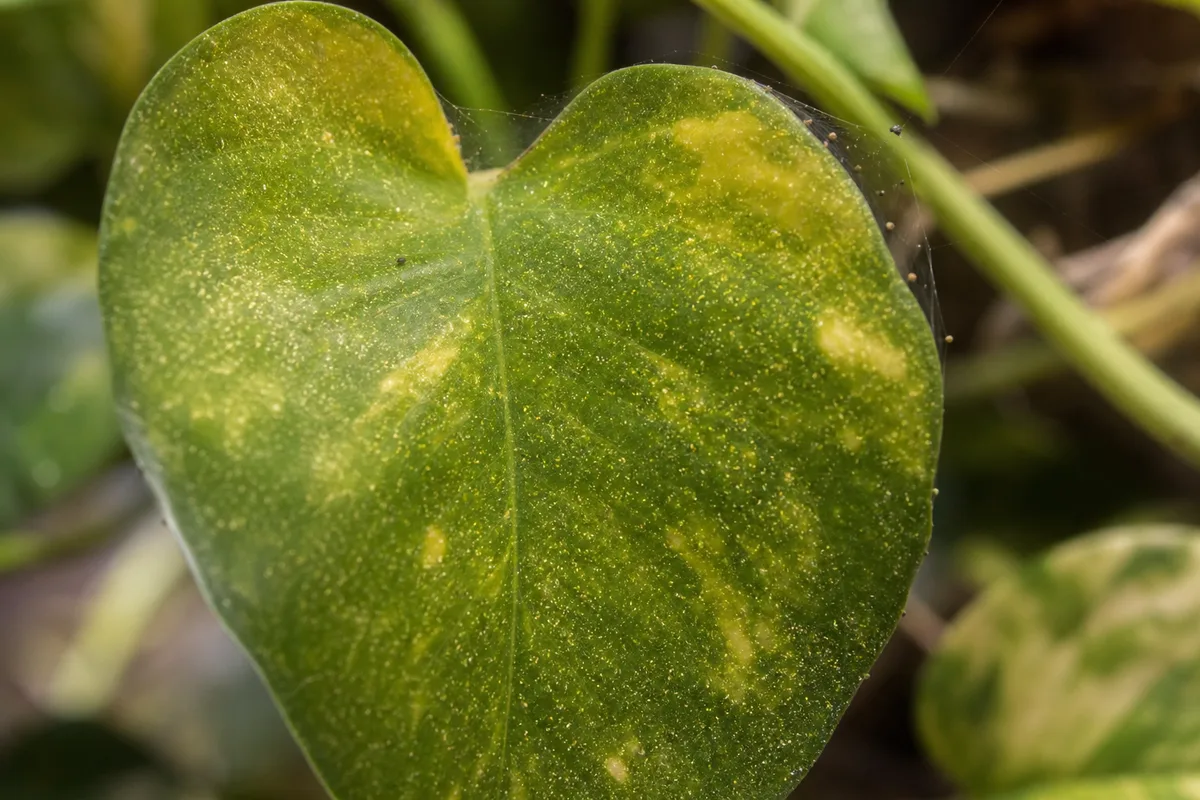
1. Pinpoint pale stippling on the leaf surface
The earliest common injury is a scatter of tiny cream, yellow, or pale green dots. Each dot is a cell that has lost contents after a mite fed; from a short distance, the marks can make a leaf look faded or finely sanded. They often show up first along veins or on older leaves where a colony has been feeding, but the exact pattern varies with the plant and infestation.
Look across the leaf in angled light, then turn it over. The stippling usually remains part of the tissue when you wipe the surface, unlike dust or dried spray residue. Savvy Gardening’s houseplant guide also describes pale markings between veins as an early clue that can appear before a large mass of mites is visible.
Stippling is a reason to inspect, not a verdict. Thrips, certain plant viruses, chemical injury, and some nutrient or environmental problems can also discolor foliage. When dots are paired with living specks on a paper test, mites become a much stronger explanation.
2. A dull, dusty-looking or bronzed cast
As many small feeding marks accumulate, the leaf can lose its healthy sheen and take on a dusty, gray-green, yellow, or bronze cast. This is not actual dust produced by the mites. It is the combined effect of damaged cells and pale stippling, and it may be easier to notice when a plant sits beside an unaffected plant of the same type.
Run a clean fingertip or soft cloth over the leaf. Loose dust should move; mite injury will remain in the tissue. You can clean dust off a healthy leaf, but wiping cannot reverse cells that have already been punctured. If the leaf looks dull yet has no stippling or other pest evidence, check watering, light, and normal leaf aging before blaming mites.
The pattern can become a broad silvery or bronze patch as separate marks merge. This is a more concerning clue than a little surface dust, but it still needs confirmation: RHS guidance on indoor sap-feeding pests notes that red spider mite feeding creates fine pale mottling on upper leaf surfaces, while other pests can cause different discoloration and residue.
3. Fine silk tucked into leaf joints
Spider mites spin fine silk, often where a leaf blade meets its stalk, along a stem, or between leaves that touch. At first, it may look like one or two delicate strands caught in a crease rather than a blanket over the plant. That location is useful: check the undersides around the attachment point instead of assuming every web in a room came from a spider mite.
Visible webbing is a strong warning, but it is often not the earliest sign. The mites can be feeding for a while before they produce silk you can see clearly, and extensive webbing generally means a colony has had time to build. Do not wait for the whole plant to look draped in silk before checking for stippling or running the paper test.
One loose strand across a gap, with no leaf injury and no moving specks, is weak evidence. A close, fine mesh at several leaf joints plus stippling and mites under the foliage is much more persuasive. The University of Minnesota Extension treats webbing as an infestation clue and cautions that feeding symptoms can be confused with drought stress.
4. Tiny moving specks, eggs, or cast skins underneath
Turn over leaves and look along veins, midribs, and the base of the petiole. A hand lens may reveal tiny oval mites, round eggs, and pale shed skins that look like flecks of flour. Adult two-spotted spider mites are usually yellowish green or straw-colored with two darker blotches, but color varies with species and life stage; “red spider mite” is a common name, not a reliable color test.
Without magnification, you may see only the movement. Tap a damaged leaf over white paper and watch for small, slow-moving dots. A mite can be less than half a millimeter long, so avoid trying to identify it by color alone or expecting to see a spider-shaped animal at normal viewing distance.
Direct evidence is the best reason to act. If you see several moving specks where leaf damage is developing, isolate the plant and inspect its neighbors. If the only evidence is a few pale flecks that do not move, clean the leaf and check again; a cautious recheck is better than applying a product the plant may not tolerate.
5. New leaves that stall, curl, or emerge misshapen
When feeding continues, tender growth may unfold slowly, curl, or appear smaller and less vigorous than the plant’s previous leaves. Flower buds can also fail to develop normally on susceptible flowering plants. This sign is less specific than stippling or live mites, and it usually means the plant is already carrying meaningful stress rather than offering the earliest possible warning.
Compare new growth with the plant’s recent baseline. One odd leaf after a move, repot, pruning, or change in light does not diagnose spider mites. Several successive leaves that emerge distorted, paired with stippling on older foliage or webbing at the growing tip, justify a close underside inspection.
If you catch the problem at this stage, the plant may still recover, but damaged cells will not turn green again. Judge progress by whether new growth is clean after the mites are controlled, not by whether old mottled leaves regain their original appearance.
Yellowing and leaf drop usually mean damage has progressed
Yellow leaves get attention, but they are poor evidence on their own. Chlorosis means a loss of green color; it describes a symptom, not one particular cause. Overwatering, underwatering, low light, root trouble, nutrient issues, natural aging, and many pests can all produce yellowing, so check the soil and growing conditions as well as the leaf undersides.
Spider-mite injury can turn from pale speckling to broad yellow or bronze areas as more cells are damaged. Older leaves may dry and fall, and the plant can lose vigor when too much foliage is affected. The combination is more useful than yellow alone: progressive mottling plus fine silk or moving mites supports a mite diagnosis; a yellow leaf with no other clue does not.
Look at where symptoms start and how they spread. A single oldest leaf yellowing while the rest of the plant grows normally may be routine turnover. A quick run of mottled leaves, especially across several plants near a warm, dry window or vent, should trigger a systematic check. Do not compensate for suspected mites by keeping the pot constantly wet; correct the plant’s watering schedule to its needs, because waterlogged roots add a separate stress problem.
Spider mites or a lookalike?
Several houseplant problems can produce pale or stippled leaves, but they leave different clues. Use the table as a short sorting tool; if the symptoms remain ambiguous, photograph the leaf, inspect it with magnification, or ask a local extension service or reputable nursery for identification before choosing a pesticide.
Compare the pattern, pest, and residue
| What you notice | More consistent with | What to check next |
|---|---|---|
| Fine pale dots plus slow-moving specks under leaves; fine silk may appear later | Spider mites | Tap several damaged leaves over white paper and inspect the undersides |
| Silvery scratches or scarring, sometimes with tiny dark specks of residue | Thrips | Check folded new growth and flowers; do not expect mite-style silk |
| Cottony clusters or fixed bumps on stems and leaf joints; sticky residue may follow | Mealybugs or scale | Inspect stems and nodes; look for honeydew or sooty residue |
| Loose gray material that wipes away, with no persistent tissue mottling | Dust or dried residue | Clean one leaf, then compare it with an untreated leaf after a few days |
| General yellowing or limp leaves without stippling, movement, or silk | Water, root, light, or temperature stress | Check soil moisture, drainage, light exposure, and recent care changes |
Spider mites are arachnids, not insects, but a homeowner does not need a microscope to separate every species. The practical difference is the combination of injury and direct signs: mites tend to hide below leaves, while a white-paper test can reveal movement that a simple visual check misses. Iowa State’s houseplant pest guide explains that their feeding causes mottling and that the paper test can make these tiny pests easier to find.
Ordinary spider silk can confuse the picture. A larger, open web bridging a gap is more likely to belong to a harmless spider, particularly if leaves have no stippling and no mites appear on paper. Spider-mite silk is usually finer and close to the foliage, but web shape alone is not decisive; look for feeding damage and live mites before removing a helpful spider or spraying a plant.
What to do during the first 48 hours
You do not need to spray immediately to make useful progress. Isolate the plant, check the surrounding collection, remove badly affected material that you can spare, and rinse accessible leaf undersides. Then decide whether a labeled contact product is warranted based on the plant’s tolerance and what the follow-up inspection shows.
Isolate the plant and map its nearby contacts
Move a confirmed or strongly suspected plant away from the collection. Keep leaves from touching other plants, and avoid carrying an infested plant through foliage or setting it on a shared potting bench. Mites can crawl short distances and may move with plant contact or air currents; isolation reduces easy routes but does not instantly make the room pest-free.
Inspect every plant that touched it or sat close by, especially those on the same shelf, beside the same window, or near a heater. Use the same white-paper test on plants that show stippling; do not treat unaffected plants automatically. Wipe the shelf and nearby surfaces, empty fallen leaves, and clean tools before using them on another plant.
Write down the date and which leaves showed live mites. That small record gives you a baseline. New marks on a leaf that was already damaged are not proof that a treatment failed; fresh stippling on previously clean growth or live mites on a later check is more useful evidence.
Remove what you can and rinse leaf undersides
For a small colony, physically removing mites is a sensible first step. If the plant tolerates it, take it to a sink, shower, or outdoor shaded spot and rinse both leaf surfaces, paying particular attention to undersides, stems, and tight joints. Use a steady stream strong enough to dislodge pests but not so forceful that it tears delicate leaves or breaks stems; support fragile foliage as needed.
On a plant with a few badly damaged leaves, prune only what is dead, heavily webbed, or beyond recovery. Put cut material directly into a bag and discard it rather than carrying it across the room. Do not strip off most of the canopy to remove every marked leaf: the plant still needs healthy foliage to recover, and stippling cannot be washed out once the tissue is injured.
Rinsing reduces the population; it does not guarantee every egg or mite is gone. If the plant is too large to move, wipe sturdy leaves with a soft damp cloth or use a sprayer over a basin, then clean the basin and surrounding floor. Colorado State University Extension’s houseplant pest guidance recommends repeated washing as a physical control and stresses that spider-mite management can take persistence.
Choose a careful follow-up and keep inspecting
If live mites remain after rinsing, consider a product specifically labeled for spider mites and for use on that plant or indoor ornamental setting. Insecticidal soap and horticultural oil work by contact, so coverage of leaf undersides matters; they do not leave a dependable long-lasting shield against mites that hatch later. Minnesota Extension emphasizes direct contact and repeat applications when needed.
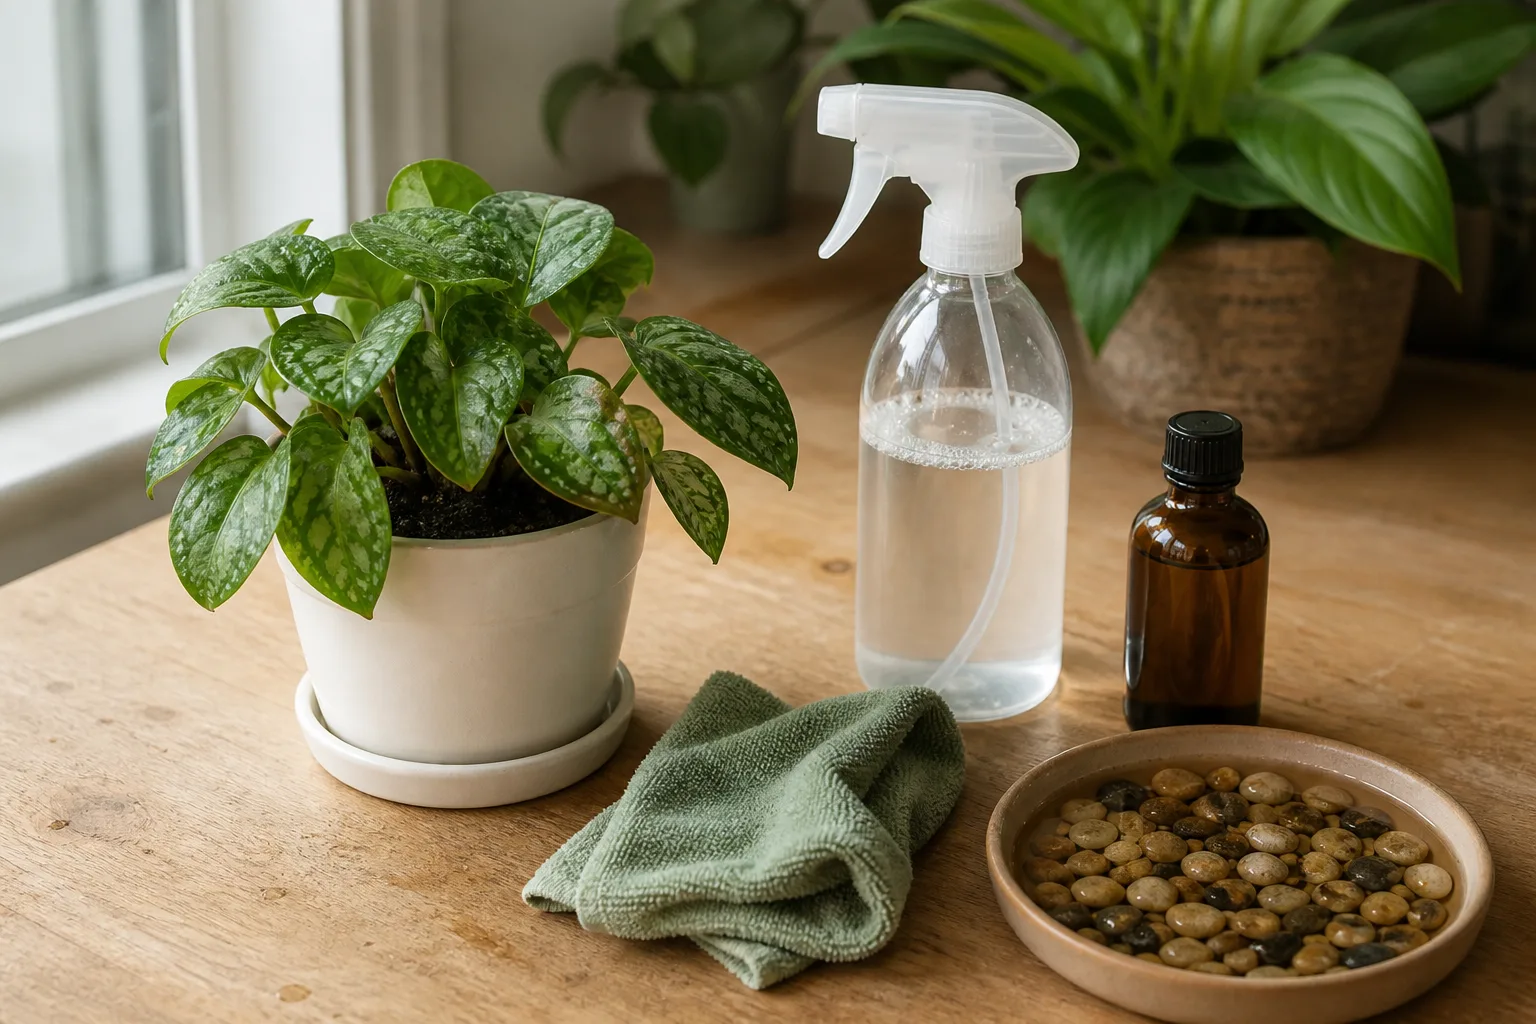
Read the entire label, including temperature, sun, plant-sensitivity, indoor-use, and reapplication instructions. Test a small section of foliage first and wait the label’s stated interval for injury before treating the whole plant. Some plants with delicate, hairy, waxy, or otherwise sensitive leaves react poorly to soaps or oils; “natural,” “organic,” and “plant-based” do not mean harmless to every leaf.
Do not substitute dish detergent or an improvised soap mix. Household cleaners vary and may strip the leaf surface or burn foliage; Colorado State’s insecticidal-soap guidance advises against home remedies made from household soaps and recommends testing sensitive plants and following label directions. Avoid spraying a heat-stressed or sunlit plant, and never mix products unless the labels expressly permit it.
Follow the product’s repeat schedule rather than guessing a universal interval. Many contact products miss eggs or hidden mites, and development speeds up in warmth: UC IPM reports that two-spotted spider mites can develop from egg to adult in about eight days at an average 82°F, compared with about 28 days at 60°F. The exact pace depends on conditions, but one application is rarely a sound reason to stop checking.
During the next few weeks, inspect the plant every few days while an active infestation is being managed, then weekly after signs disappear. Check the same marked leaves and at least a few clean leaves each time. If live mites keep appearing despite thorough, correctly timed coverage, reassess the identification, product label, plant tolerance, and whether a heavily infested neighbor is reintroducing them.
Prevent a repeat without stressing the plant
Prevention starts with observation, not a calendar spray. Check leaf undersides when watering or cleaning, and give special attention to plants near heaters, sunny windows, or other spots that become hot and dry. Warm conditions can speed spider-mite development, but a warm room by itself does not prove that mites are present.
Keep each plant watered according to its species and potting mix so it is not repeatedly drought-stressed. Do not keep soil soggy as a mite deterrent, and do not move every plant into shade if it needs bright light. A more suitable temperature and humidity may help a susceptible plant cope, but raising room humidity is not a substitute for removing and monitoring an established colony.
Inspect new purchases and plants returning indoors from a patio or garden before placing them beside the collection. If you can, keep them separate while you watch for stippling, webbing, or moving specks through a couple of inspections. Clean dust from broad leaves with a soft cloth or water when the plant tolerates it; cleaner foliage makes new pale damage easier to spot and helps you see the pest itself.
Avoid routine broad-spectrum insecticide use as a preventive measure. Some insecticides can kill predatory mites and other beneficial organisms, and some products are not effective against spider mites. The safer approach is regular scouting, prompt isolation when evidence is strong, and a targeted control that is labeled for the plant and setting.
When it is reasonable to discard a plant
You can often save a plant with some stippling if the stems and growing points remain healthy and you can reach the leaf undersides. Recovery is less attractive when nearly every leaf is heavily webbed, the plant has lost most of its usable foliage, or its dense structure makes thorough treatment unrealistic. Consider the plant’s value, size, replacement difficulty, and risk to nearby plants—not just the number of yellow leaves.
If you decide to discard it, cover the foliage before carrying it through the home, bag it securely, and follow local disposal rules. Clean the shelf or floor where it stood and inspect nearby plants again over the following weeks. Do not leave an infested cutting, fallen leaves, or a discarded potting bench beside the collection; one source plant can keep restarting a cycle that seemed to be over.
Conclusion
The first useful warning is usually a fine scatter of pale stippling, not a dramatic web. Turn the leaf over, tap it over white paper, and look for slowly moving specks; silk, cast skins, and a worsening bronze cast add confidence, while yellowing alone does not identify the pest.
Once you have a credible sign, separate the plant, inspect its neighbors, rinse what you can reach, and use only a product labeled for the plant if mites persist. Keep checking after the leaves look cleaner: spider-mite damage does not vanish, and a clean inspection of new growth is a better sign of recovery than waiting for old marks to disappear.



