How to Grow and Care for Geraniums All Season Long
Grow zonal, ivy, regal, and scented geraniums with a simple plan for light, watering, feeding, pruning, propagation, pests, and overwintering before frost.
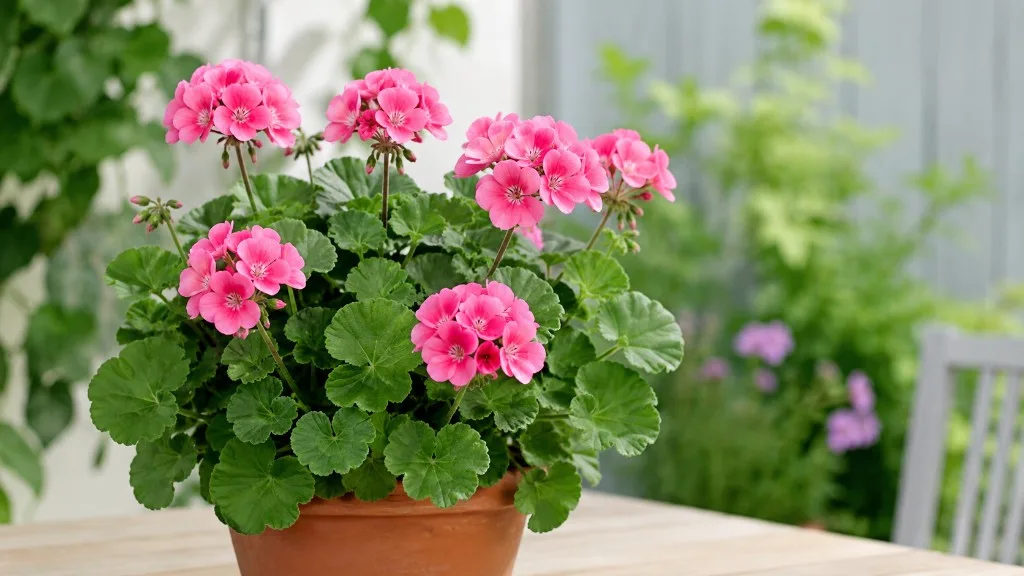
The bright “geranium” in a summer pot is usually a Pelargonium: a frost-tender plant that can flower for months when it gets enough light, drains freely, and is not kept constantly wet. It is often sold as an annual, but you can keep a favorite through winter by moving it indoors before frost or rooting a few cuttings.
The useful routine is simple: identify the type, give it bright light, water when the potting mix is beginning to dry, remove spent flower stems, and protect it from freezing weather. The details change a little between upright zonal plants, trailing ivy types, regal varieties, and scented-leaved Pelargoniums, so start with the plant’s label rather than assuming every “geranium” behaves the same.
Identify the Geranium You Have
In everyday garden language, “geranium” usually means a Pelargonium. Botanically, Pelargonium and Geranium are related genera in the Geraniaceae family, but they are not interchangeable.
The popular Pelargoniums sold for summer color are generally tender; hardy cranesbills in the genus Geranium are outdoor perennials with different planting, pruning, and winter care. If your plant is a hardy border cranesbill, use a guide written for that group, such as our hardy geranium growing guide.
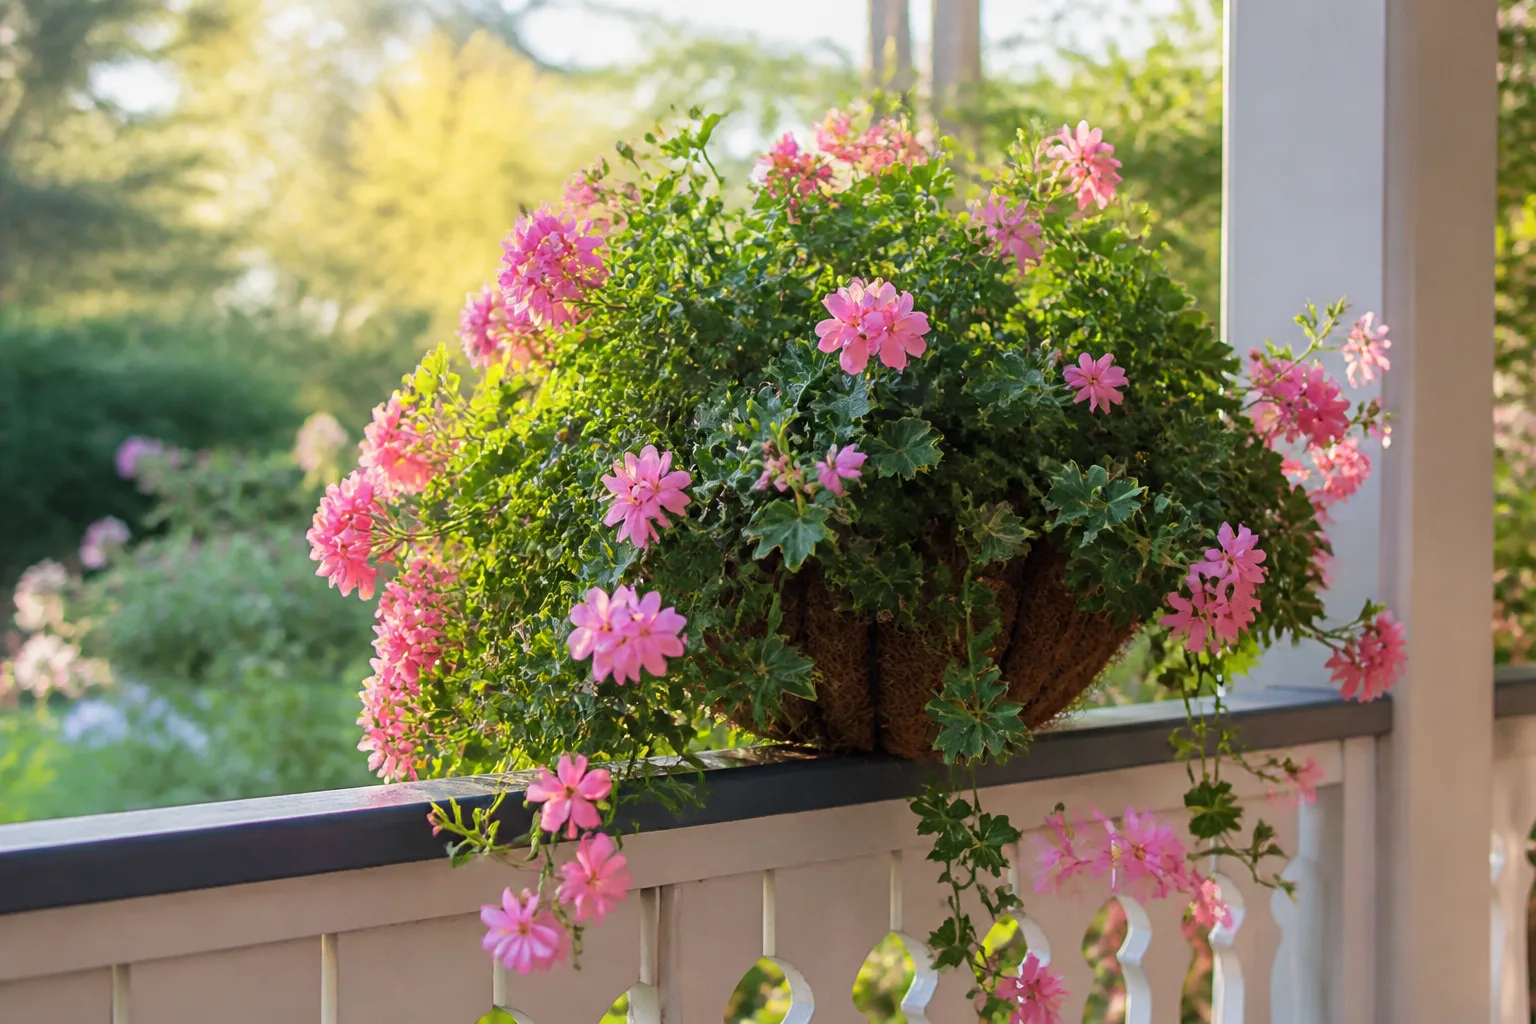
Most gardeners encounter four broad Pelargonium groups. Zonal geraniums grow upright, often with a dark band or “zone” on rounded leaves; they are the familiar bedding and patio-pot type. Ivy-leaved geraniums have trailing stems and suit baskets or the edges of containers.
Regal geraniums have larger, ruffled flowers and often appreciate some protection from harsh midday sun. Scented-leaved types are grown as much for aromatic foliage as for their smaller flowers. NC State Extension describes these groups and notes that many Pelargoniums are tender perennials commonly grown as annuals. (NC State Extension Gardener Plant Toolbox, RHS growing guide)
The type matters most when choosing a position: ivy forms need room to trail, regals may prefer a little shade, and scented-leaved types reward a place where you can brush the foliage. The basic needs still overlap—light, drainage, and protection from frost—but a plant label can save you from pruning or placing a cultivar in a way that fights its natural habit.
Choose a Site and Plant After Frost
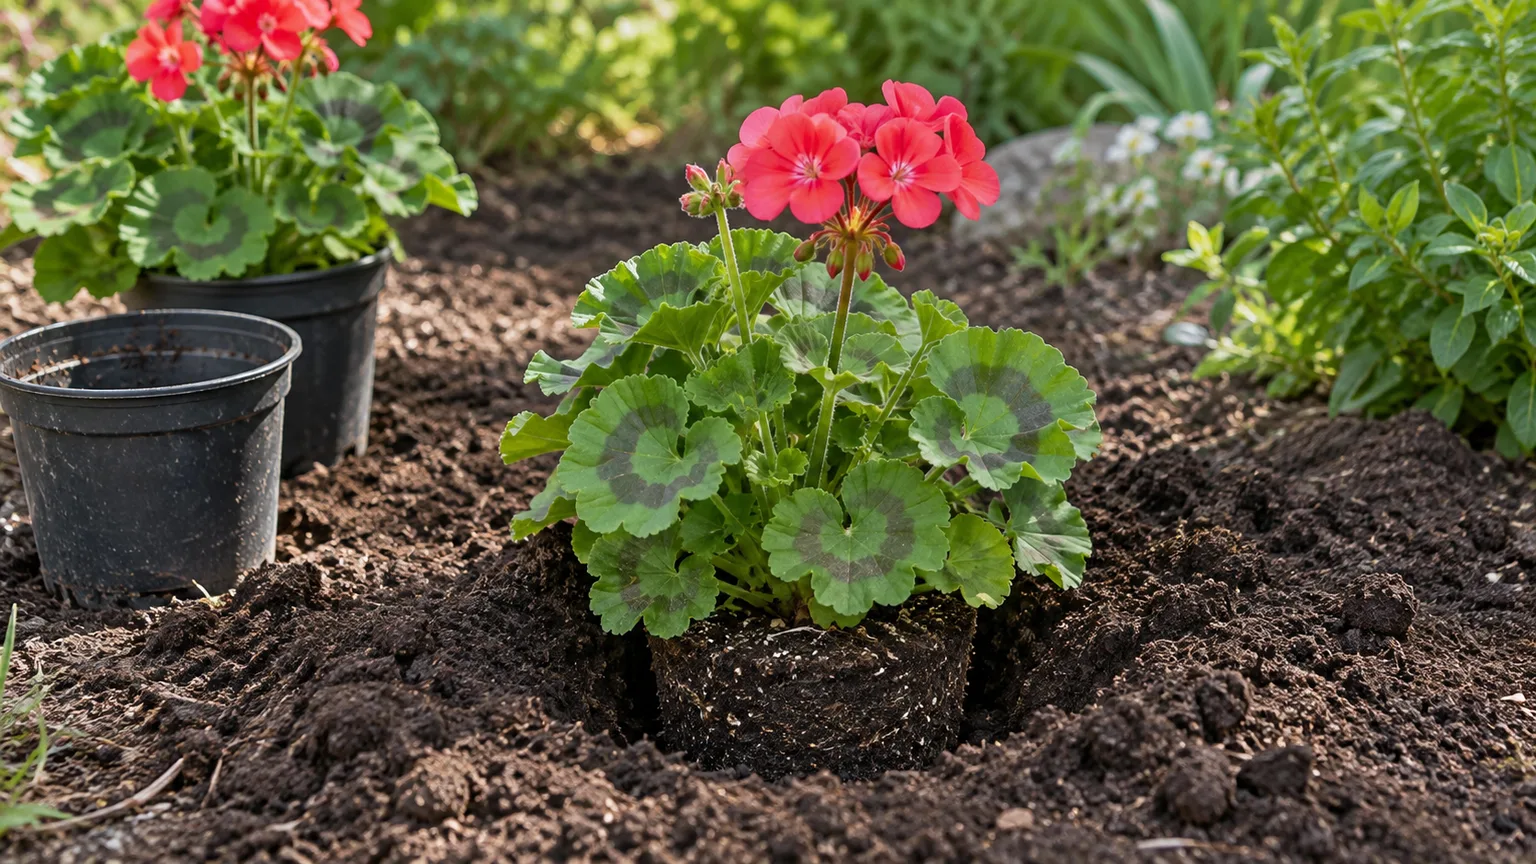
Treat Pelargoniums as warm-season plants. In cold-winter regions, wait until the danger of frost has passed before setting nursery plants outside.
A late cold snap can damage tender leaves and stems, so use your local forecast and frost date rather than a fixed calendar day. If a plant has been indoors or in a greenhouse, acclimate it to outdoor sun and wind over several days; moving it straight from sheltered shade into strong sun can scorch foliage.
For an in-ground bed, choose a spot that does not stay soggy after rain. Set each plant at the same depth it grew in its nursery pot and space it according to its mature size or label.
Crowding a row may look full sooner, but it slows drying around leaves and flowers and makes it harder to spot pests. In containers, combine upright plants and trailers only when the pot has room for both their roots and mature spread.
Match Light to the Type and Climate
Most garden Pelargoniums flower best in a sunny position. Aim for several hours of direct sun, then watch the plant: compact growth and regular buds indicate the light is working.
A shaded plant may stay green but stretch toward brightness and produce fewer flowers. If your site receives intense afternoon sun during very hot weather, give plants morning sun and light afternoon shade; the goal is bright growth without prolonged heat stress.
There is no single exposure for every variety. The RHS notes that many Pelargoniums prefer full sun, while regal cultivars do better in partial shade and zonal types tolerate some shade. In a hot-summer garden, a little afternoon protection can be more useful than insisting on all-day exposure; in a cool or cloudy place, prioritize the brightest available position. (RHS growing guide)
Start With Drainage, Not a pH Number
Use a loose, free-draining potting mix for containers and a garden bed that sheds excess water. Pelargonium roots need air as well as moisture.
A mix that stays saturated can cause yellow leaves, wilting, and root or stem rot even if the plant appears thirsty above the soil. Garden soil alone is usually too dense for a pot; use a quality container mix and a pot with open drainage holes.
Choose a container just large enough to hold the root ball with some room for growth. Oversized pots contain more unused mix that dries slowly, while a root-filled small pot may dry quickly in sun and wind. Either can work if you check moisture rather than watering by a rigid schedule.
Empty any saucer after watering so the pot does not sit in standing water. For a bed, improve heavy soil before planting by addressing drainage across the site; adding a small amount of compost to a poorly drained planting hole will not correct a persistently wet location.
Water When the Root Zone Is Drying
Water according to the mix, weather, and container—not “twice a week” by default. Push a finger into the top inch or two of mix; if it still feels cool and damp, wait and check again.
When that upper layer is drying, water slowly until excess drains from the bottom, then empty the saucer. This wets the full root ball and avoids the shallow, frequent sips that leave some roots dry while the crown stays damp.
Pots in full sun, wind, or small hanging baskets may need checking more often than plants in a bed, especially during hot weather. Newly planted geraniums also need closer attention while roots establish. In cooler, cloudy weather and during winter, the mix dries more slowly, so stretch the interval.
Established Pelargoniums tolerate a short dry spell better than waterlogged roots, but repeated severe drying can stall growth and shorten flowering. NC State Extension recommends well-drained soil and moderate moisture, with container-grown plants allowed to dry between waterings. (NC State Extension Gardener Plant Toolbox)
If the plant wilts, check the soil before adding water. Dry mix plus a light pot points toward thirst; wet, heavy mix plus drooping or yellowing leaves points toward a root problem, not a need for more water. A temporary midday droop in intense heat can also improve as temperatures fall, so check again in the evening before changing the routine.
Feed for Steady Growth and Flowers
Start by checking the potting mix label. Some mixes contain fertilizer that feeds plants for several weeks, so adding more immediately can burn roots or create excess leafy growth.
Once that initial feed is used, container plants can receive a balanced liquid fertilizer at the rate and interval on its label during active growth. Do not feed a dry root ball; water first, then apply fertilizer as directed.
Garden-bed plants in reasonably fertile soil may need little or no supplemental feeding. If a plant is healthy and flowering, fertilizer is not a bloom switch.
If it has pale, slow growth after light and water are correct, a modest, labeled feed may help; if it has lush leaves but few buds, stop feeding for a while and check its light and temperature. Heavy nitrogen can favor foliage over flowers, while stronger doses do not correct shade, heat, or damaged roots.
Deadhead and Pinch to Keep Plants Full
Remove the whole flower stalk when its cluster fades, cutting or snapping it where the stalk meets the main stem. Pulling off petals alone leaves a stub that can decay and does not tidy the plant.
Regular deadheading keeps the display neat and prevents spent flower heads from sitting against leaves during wet weather. Nature & Garden gives the same practical advice to cut back at the stem and clear fallen leaves and petals, which can otherwise hold dampness around the crown. (Nature & Garden geranium care guide)
To make a young plant branch, pinch the soft growing tip just above a leaf joint. That encourages side shoots and a bushier shape, though it may delay the next flowers briefly while new branches develop.
If an older plant becomes lanky, shorten long stems to a healthy leaf node during active growth and give it brighter light; avoid removing so much foliage that it cannot recover. Ivy types can be pinched to branch near the rim of a basket, while their natural trailing stems can be left intact if you want a cascading shape.
Propagate Pelargoniums From Stem Cuttings
Taking cuttings is a practical way to preserve a color or cultivar and to start a compact young plant for next season. Choose a healthy, non-flowering shoot with firm growth and no signs of pests, spots, or rot. Cut a tip a few inches long just below a leaf joint with clean snips, remove the lower leaves, and let the cut surface dry briefly while you prepare a small pot of fresh, free-draining propagation mix.
Insert the bare lower stem into the mix, firm it gently, and water enough to settle the medium. Keep the pot warm in bright indirect light—not dark and not baking in direct sun—and keep the mix lightly moist rather than wet. A clear cover is optional; if you use one, leave room for air and remove it if condensation stays heavy.
Rooting hormone is optional for an easy-rooting stem cutting. The RHS recommends softwood cuttings from spring through autumn; NC State also describes taking stem cuttings in summer and growing them under cover until frost has passed. BBC Gardeners’ World likewise favors summer for its warmth and light and notes that water-rooted cuttings can be less reliable than those started directly in compost. (RHS growing guide, NC State Extension Gardener Plant Toolbox, BBC Gardeners’ World guide to geranium cuttings)
Do not tug repeatedly to test for roots. After several weeks, look for new growth and gently check whether the cutting resists a light pull. Once it is rooted, move it to a slightly larger pot and introduce it gradually to stronger light.
If the stem turns black, mushy, or collapses, discard it and start again with a healthier shoot and cleaner, less wet mix. Seed is another option for seed-grown varieties, but a cutting is the better choice when you want a clone of a named plant.
Grow Geraniums Indoors
Pelargoniums can grow indoors, but a bright window is essential if you want compact growth and flowers. A sunny south- or west-facing window may work in a cool season; in a hot room, protect leaves from scorching glass and provide airflow.
Rotate the pot periodically so one side does not lean toward the light. If stems stretch and flowering drops, move the plant to a brighter position before increasing fertilizer.
Use a pot with drainage and water less often than in summer outdoors because indoor light, wind, and evaporation are lower. Check the mix with a finger and let it begin to dry before watering again.
Keep the plant away from cold drafts and heating vents, which can cause abrupt temperature and moisture swings. Before bringing an outdoor plant inside, inspect leaf undersides and stems for insects, remove spent blooms and damaged leaves, and isolate it briefly from other houseplants so hitchhiking pests are easier to notice.
Overwinter Plants Before Frost
Pelargoniums are tender perennials, but in many climates frost makes them function like annuals. If you want a plant to return, move it before freezing weather reaches it; do not wait for leaves to blacken.
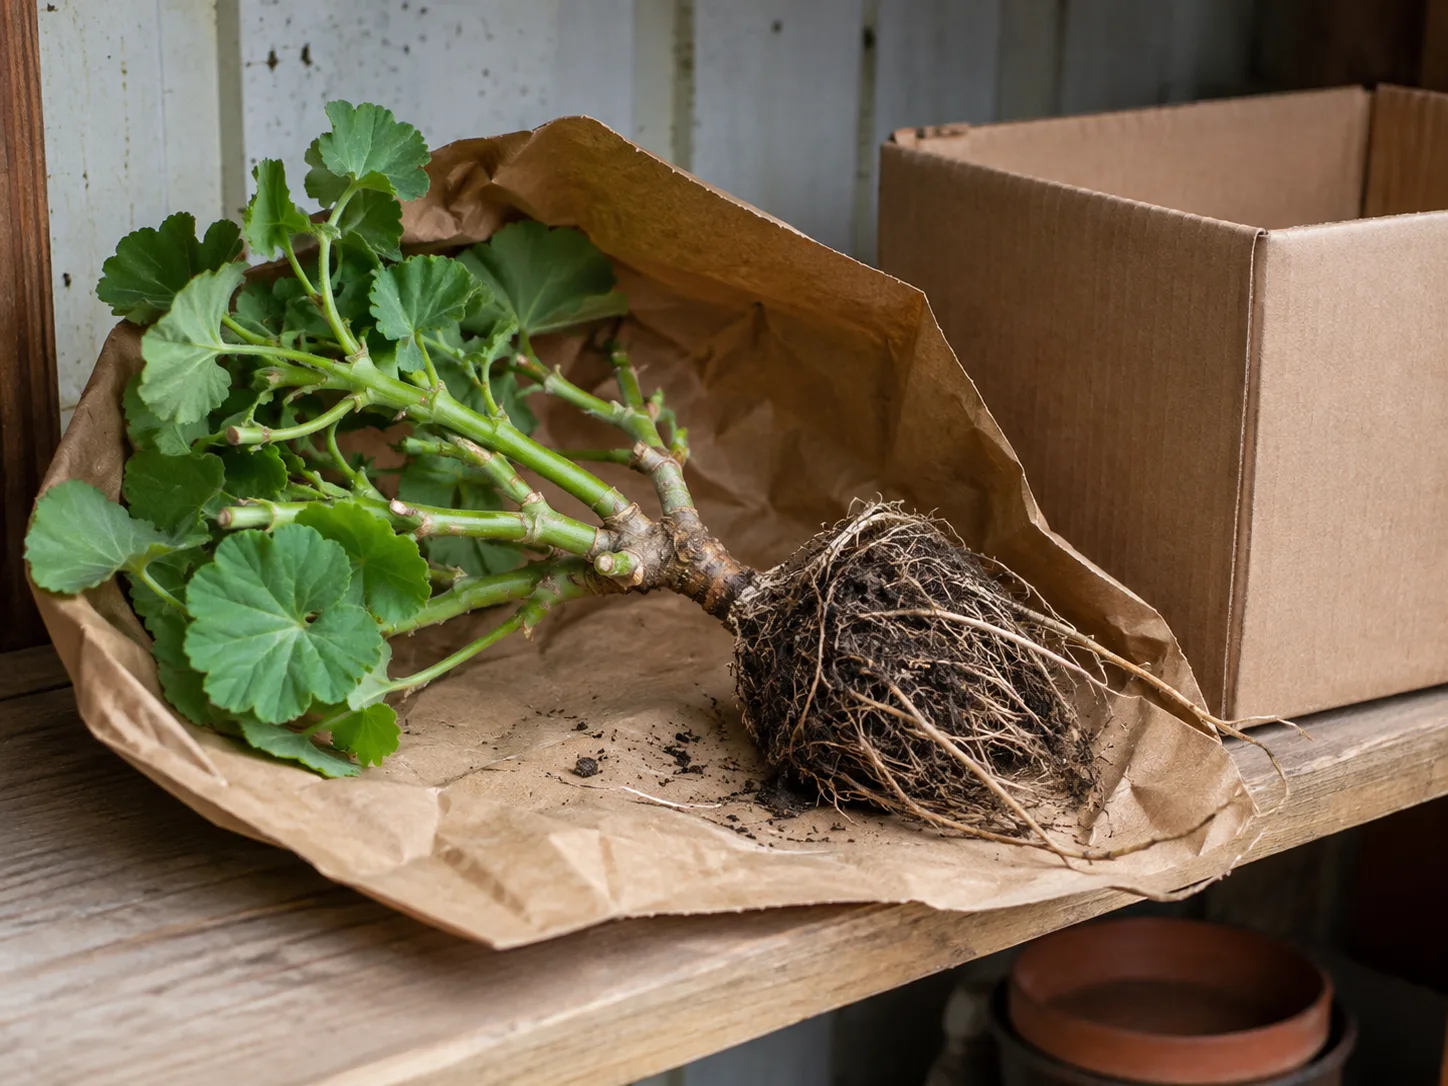
The Royal Horticultural Society describes three common approaches: keeping container plants growing under cover, taking cuttings, or storing suitable woody plants bare-root. The first two are generally easier to manage at home; bare-root storage is less reliable and best treated as an experiment. (RHS growing guide)
Choose the Method That Matches Your Space
Bright indoor growth: Bring the potted plant into a bright, airy, frost-free room. Remove damaged material, check for pests, and keep watering modestly as the plant slows. It may continue growing, but a dim, warm room often produces weak, stretched stems; if you cannot provide strong light, cuttings or a cooler resting setup may be easier.
Cool, semi-dormant storage: If you have a bright, frost-free greenhouse or similar space, cut the plant back enough to fit and reduce watering substantially. Keep the mix on the dry side, but do not let a leafy plant shrivel completely.
Avoid a cold, damp cellar or closed garage where stagnant air and wet mix invite rot. NC State’s Pelargonium profile describes cool greenhouse overwintering and a minimum temperature around 40°F; actual tolerance varies by plant and storage conditions, so keep it frost-free rather than testing its limit. (NC State Extension Gardener Plant Toolbox)
Take cuttings: For a space-saving backup, root several healthy tips in late summer or early fall and keep the small plants in a bright window through winter. This method is especially useful if the parent is large, woody, or not worth carrying indoors. Label the cuttings by color or variety before the flowers disappear.
Bare-root storage: Lifting and storing a whole plant without potting mix takes less space, but it can fail if stems or roots dry out or rot. Try it only with a robust specimen, inspect it periodically, and keep a cutting as insurance. If the plant is sentimental, the small cutting is usually a safer backup.
Restart Growth in Spring
As days lengthen, check stored plants for firm stems and fresh shoots. Remove any soft or blackened growth, refresh the potting mix if it has compacted, and resume watering gradually as active growth returns. A plant that was held cool and nearly dormant should not be plunged into heavy watering and fertilizer all at once; let roots take up moisture first, then feed only after new growth is underway.
Before moving a wintered plant outside, harden it off over several days to a week or two. Begin in a sheltered, shaded spot, then increase sun exposure and outdoor time gradually.
Wait until frost risk has passed before leaving it outside overnight. If it is leggy, pinch the tips after it is actively growing so it can branch before the main flowering season.
Diagnose Common Geranium Problems
Start by checking the plant’s identity, light, and root-zone moisture. A leaf symptom alone rarely tells you exactly what is wrong, and treating the wrong cause can make decline worse. First note whether the trouble affects one old leaf or the whole plant, then feel the mix and inspect the underside of leaves and the base of the stems.
Yellow Leaves, Wilt, and Root Trouble
One or two old lower leaves may yellow as a plant grows; remove them if they are fully spent. When many leaves yellow or the whole plant wilts, compare the soil and roots before watering. Dry, shrinking mix and limp growth suggest drought stress.
Persistently wet mix, sour odor, brown or mushy roots, or a darkened stem base point toward root or stem rot. The Connecticut Agricultural Experiment Station describes general wilt and collapse with browned roots and crowns as possible signs of rot and emphasizes prevention through drainage and avoiding overwatering. (Connecticut Agricultural Experiment Station)
| What you notice | Check first | Useful first response |
|---|---|---|
| One old lower leaf turns yellow | Whether the rest of the plant is growing normally | Remove the fully spent leaf and keep monitoring |
| Several leaves yellow while the pot feels heavy | Drainage, standing water, and root firmness | Empty the saucer; let excess moisture drain and inspect roots if decline continues |
| Leaves droop while the mix is dry and the pot is light | How far the root ball has dried | Water thoroughly, let it drain, then resume checking moisture rather than following a schedule |
Treat the table as a starting point, not a color-only diagnosis: look at soil moisture, roots, and light together. If decline continues after correcting moisture, inspect drainage and the crown before pruning or feeding.
For a waterlogged plant, empty the saucer, clear blocked drainage holes, and allow the mix to dry somewhat before the next watering. If roots are mostly firm, repot into fresh, free-draining mix and remove only the mushy parts with clean snips.
If the crown is black, roots are extensively soft, or collapse is spreading, discard the plant rather than taking cuttings from diseased tissue. For dry soil, water thoroughly and then use the same finger-check routine; do not compensate by leaving the pot submerged.
Raised, corky bumps on the undersides of leaves can be oedema, a moisture-balance problem rather than an insect infestation. It is particularly associated with ivy Pelargoniums when the mix remains wet while light is low and weather is cool or cloudy. Let the surface dry more between waterings, increase light and airflow, and avoid confusing the bumps with scale insects. (Connecticut Agricultural Experiment Station, NC State ivy Pelargonium profile)
Few Blooms and Leggy Stems
If leaves are healthy but flowers are scarce, check light first. A plant that is shaded or stretching toward a window usually needs a brighter position, not a stronger fertilizer.
In a very hot spell, some varieties pause flowering; protect the plant from harsh afternoon heat and wait for cooler weather rather than repeatedly feeding it. Also check that it is not newly transplanted, severely pot-bound, or producing lush growth after frequent high-nitrogen feeding.
Leggy stems usually mean low light, a plant that was not pinched when young, or an older plant that needs renewal. Move it to brighter light, pinch or trim above a leaf node, and water according to the mix. If the base has become woody and bare, take healthy tip cuttings while you still can and replace the parent if it does not respond.
Spots, Pests, and Gray Mold
Inspect flower clusters and leaf undersides for aphids, whiteflies, and spider mites, especially after moving a plant indoors. A small infestation can often be managed by isolating the pot and rinsing insects from foliage; repeat inspections because eggs or hidden insects may remain.
If a pesticide or horticultural soap is needed, use a product labeled for the plant and pest, follow its directions, and test a small area first. Avoid applying treatments in direct hot sun or when pollinators are visiting open flowers.
Gray fuzzy growth on spent flowers or nearby leaves can be Botrytis gray mold, which is favored by damp, crowded conditions. Remove affected flowers and fallen debris when dry, give plants more space and airflow, and water the soil rather than soaking blooms. Brown, wedge-shaped leaf lesions, blackened stems, or rapid collapse are more serious warning signs of bacterial blight described by the Connecticut Agricultural Experiment Station; isolate the plant, clean tools, and do not propagate from it. (Connecticut Agricultural Experiment Station, RHS growing guide)
Keep Pelargoniums Away From Pets
The ASPCA lists Pelargonium species as toxic to dogs, cats, and horses, with geraniol and linalool identified as toxic principles and vomiting, appetite loss, depression, or dermatitis among possible signs. Place pots where animals cannot chew the foliage or flowers. If a pet eats a Pelargonium, contact a veterinarian or animal poison-control service rather than waiting for symptoms or trying a home remedy. (ASPCA Animal Poison Control: Geranium)
Conclusion
For dependable geranium care, start with the label: a zonal, ivy, regal, or scented Pelargonium has slightly different placement needs, while a hardy cranesbill belongs to another genus altogether. Plant tender Pelargoniums outside only after frost, give them the brightest suitable site, use a well-drained mix, and water when the root zone is beginning to dry rather than following a fixed weekly schedule.
Deadhead spent stalks, pinch young growth if you want a fuller plant, and check light before adding fertilizer when blooms slow. If you want to keep a favorite for next year, bring it under cover before frost or root a few healthy cuttings as insurance. When leaves yellow or stems wilt, inspect the mix and roots first; a quick diagnosis is more likely to help than another dose of water.