How to Grow and Care for Oncidium Orchids: A Complete Guide
Oncidium orchid care varies by hybrid. Match light, water, temperature, and repotting to the plant’s growth and roots, not a calendar, for better blooms.
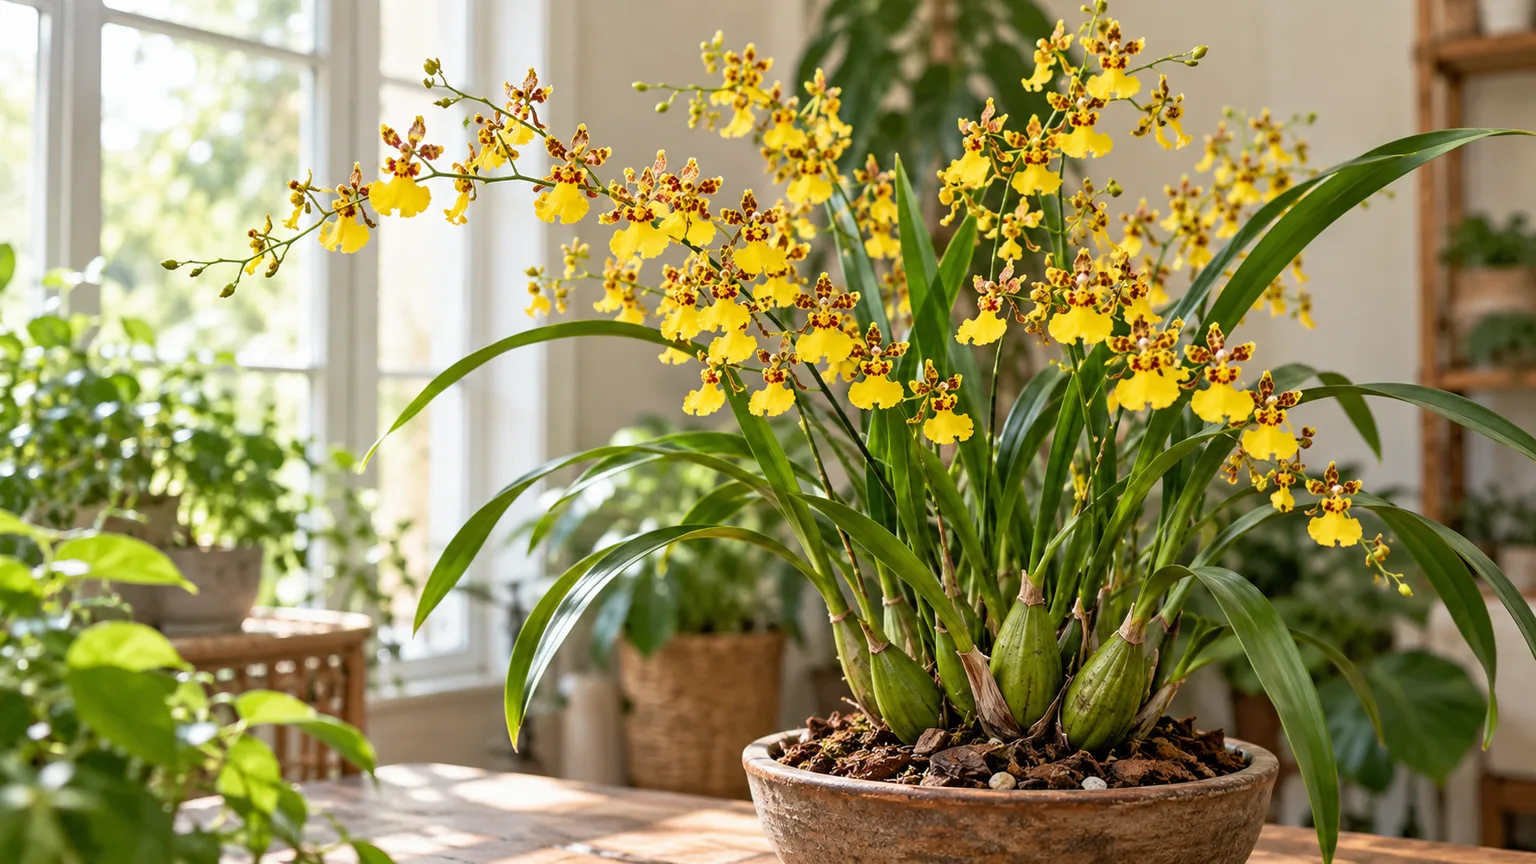
An Oncidium can look easy to care for and still frustrate a grower when it refuses to flower. The key is to stop treating every orchid with “Oncidium” on its tag as the same plant: the genus and its hybrids include different temperature and moisture preferences. For common warm- to intermediate-growing dancing lady types, begin with bright filtered light, an airy potting medium, thorough watering that drains freely, and a routine guided by new roots and pseudobulbs rather than the calendar.
Oncidiums are epiphytic orchids, so their roots need air around them instead of ordinary potting soil. Their swollen pseudobulbs store water, but that does not make every Oncidium drought-proof. The American Orchid Society (AOS), North Carolina State Extension, and Royal Horticultural Society (RHS) all emphasize that care should reflect the plant type and the speed at which its medium dries; use those principles to read the plant in front of you rather than copy a fixed schedule. The AOS Oncidium culture sheet and North Carolina State Extension’s Oncidium profile are useful references for the genus, while the RHS guide to warm-growing Oncidiums offers a more specific temperature profile.
Start With the Oncidium You Actually Have
“Dancing lady orchid” usually refers to the bright, branching sprays of small flowers that make many Oncidium hybrids popular as houseplants. A mature plant often carries long, narrow leaves above oval, swollen pseudobulbs; its flower spike can branch and hold dozens of small blooms. Common colors include yellow with brown markings, but hybrids can be white, pink, red, orange, or purple, and some cultivars such as ‘Sharry Baby’ and ‘Twinkle’ are grown for fragrance as well as flowers.
A pseudobulb is a thickened stem that stores water and nutrients. Oncidiums grow sympodially: each new shoot develops along a rhizome, matures into a pseudobulb, and may produce the next flower spike. This pattern matters when watering, repotting, and dividing because a plant’s newest growth is not just another leaf; it is the next generation of the clump.
Read the label before setting a temperature target
The genus is diverse enough that a single thermostat number can mislead. The AOS describes its Oncidium group broadly as intermediate to warm, with typical culture ranges around 55–60°F (13–16°C) at night and 80–85°F (27–29°C) during the day, while the RHS warm-growing guide gives 65–77°F (18–25°C) by day and 55–63°F (13–17°C) at night. These are culture references for different groupings, not proof that every species or intergeneric hybrid requires those exact conditions; if the tag names a cool-growing species or its parentage, follow the grower’s advice.
For an unidentified supermarket hybrid, do not impose an extreme temperature drop or a cold winter rest. A moderate indoor room with a gentle nighttime dip is a safer starting point, and the plant’s response over a full growth cycle is more informative than a single cool evening. If the label is vague, ask the seller whether the plant is warm, intermediate, or cool growing before you redesign its environment.
Oncidium Orchid Care at a Glance
| Need | Practical starting point | What to observe |
|---|---|---|
| Light | Bright east or west exposure; add gentle morning sun if leaves tolerate it | Medium green leaves, firm growth, no bleached patches |
| Temperature | Moderate indoor warmth; a mild nighttime drop suits many common hybrids | New growth develops without heat stress or cold damage |
| Water | Soak the medium thoroughly, then let it approach the drying point for that mix | Roots and medium—not a set number of days—tell you when to water |
| Potting | Fine-to-medium bark or another airy orchid mix in a draining pot | Fresh mix drains quickly but does not leave fine roots dry for long |
| Humidity | Moderate room humidity with gentle airflow | Leaves dry promptly; the crown and pot are not constantly wet |
| Fertilizer | Dilute orchid fertilizer during active root and pseudobulb growth | New growth is steady; tips do not brown from accumulated salts |
Think of this table as a first-week setup, not a permanent prescription. A plant in a small plastic pot, warm dry room, and coarse bark will need water on a different rhythm from one in a deeper pot or a humid growing cabinet. Adjust one factor at a time, then watch new roots, leaf texture, and pseudobulb development before deciding whether the change helped.
Give Oncidiums Brighter Light Without Scorching Them
Many Oncidiums need more light than a Phalaenopsis, but “more” does not mean leaving the leaves against hot afternoon glass. The AOS says light requirements vary by type and that many grow with one to five hours of sun daily; thicker-leaved mule-ear and equitant forms can generally tolerate brighter conditions than thinner-leaved types. A bright east window is a useful starting place for a common dancing lady hybrid, while a west or south window may need a sheer curtain or more distance during hot months.
Watch the plant at the time of day when the light is strongest. If direct rays warm the leaves noticeably, filter the window and increase exposure gradually rather than moving the orchid into full sun all at once. A light meter can help compare two shelves, but the reading matters only at leaf level and for the part of the day the plant receives that light.
Leaf color can help you adjust placement, though it is not a diagnosis by itself. Dark, very lush green growth may mean the plant is receiving too little light to flower; a reddish cast or pale, bleached patches can signal excessive exposure or heat. Medium green leaves, stable growth, and the gradual maturity of a new pseudobulb are more useful together than color alone, because nutrition, root health, and the cultivar also affect appearance.
Match Temperature to the Plant, Not a Calendar
Many common Oncidium hybrids grow well in an ordinary home, especially when days are warm and nights are somewhat cooler. The RHS warm-growing group is listed around 65–77°F (18–25°C) by day and 55–63°F (13–17°C) at night; the AOS gives a warmer daytime range for the broader Oncidium culture group. This difference is a reason to prioritize the plant label and hybrid information, not to average the two sources into a strict target for every orchid.
A modest nighttime temperature decrease may help some plants initiate a spike as a mature growth finishes, but do not chill an orchid to force a bloom. Keep it away from cold glass, heating vents, and sudden blasts from air conditioning, and remember that warm air increases water loss. If a hot room cannot cool at night, maintain good airflow and check the pot more often without keeping the mix saturated.
Oncidiums can spend a warm season outside in frost-free conditions, but outdoor placement requires a slow transition. Move a potted plant into bright shade first, protect it from hard rain and strong midday sun, and bring it inside before temperatures approach the minimum for its particular hybrid. A sheltered patio can improve light and air movement; an exposed balcony can dry a pot quickly and scorch leaves.
Water by the Roots, Pot, and Growth Stage
Oncidium watering is where a universal “every few days” or “once a week” rule fails. AOS guidance says to water thoroughly and let the medium dry at least halfway through the pot, while its indoor advice describes a lightly moist—not waterlogged—root zone. The difference reflects the many root types and setups within the group; for a common potted hybrid, water enough to wet the whole mix, let excess drain away, and do not leave the container sitting in runoff.
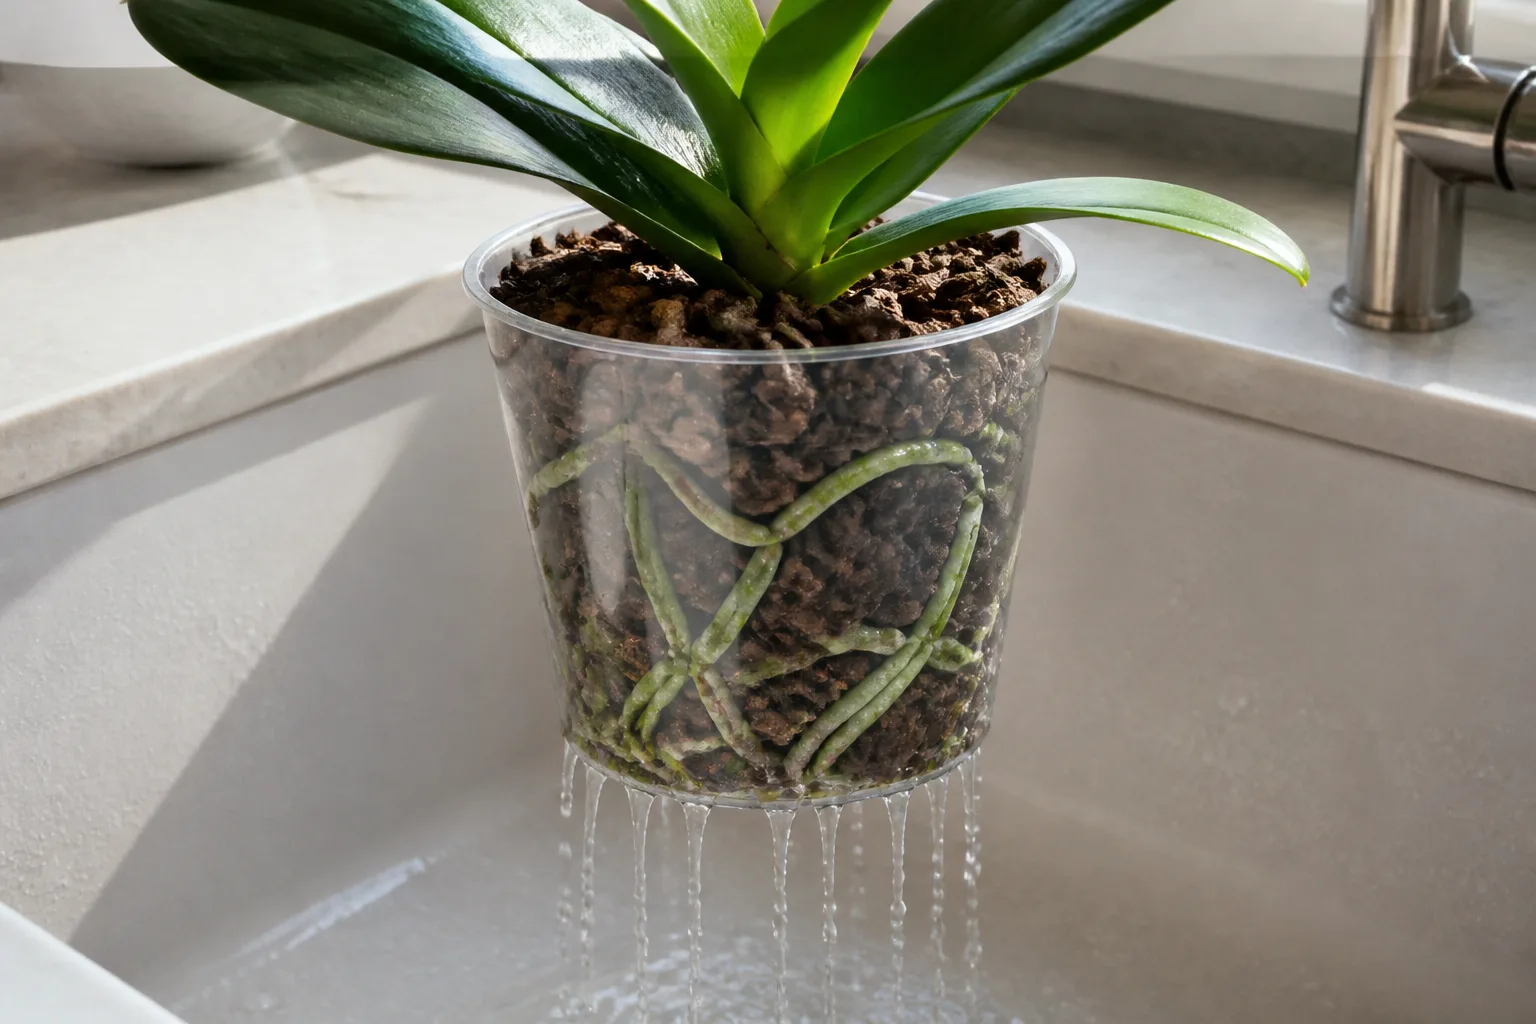
The new pseudobulb helps explain when the plant needs steadier moisture. During active growth, when you can see roots emerging and a new shoot expanding, a fine-rooted Oncidium usually uses water more quickly. Once the pseudobulb has matured, the plant may use less; still, let the actual medium and roots set the next watering rather than allowing the pot to become bone dry for a long interval.
Use this three-part check before watering
First, check the medium in more than one place: the surface may look dry while the center of a dense pot remains wet. Second, look at the roots you can see; firm pale or green roots are different from dark, mushy roots that have lost their function. Third, consider the container and the recent weather: a shallow basket with coarse bark dries faster than a compact plastic pot in a cool, still room.
When watering, use room-temperature water and flush it through the pot until it runs from the drainage holes. Avoid wetting the leaves and the base of a new shoot if possible, then empty the saucer or cachepot. This approach replenishes the root zone while limiting the stagnant wet pockets that encourage rot and leaf spotting.
A wrinkled pseudobulb can point to insufficient water, but adding water immediately is not always the fix. If the medium is already wet and roots are black or soft, the plant may be unable to take up water because of root loss; increasing watering then compounds the problem. Check roots and medium first, and change the watering interval only after you know which one is failing.
Choose an Airy Medium and a Pot That Drains
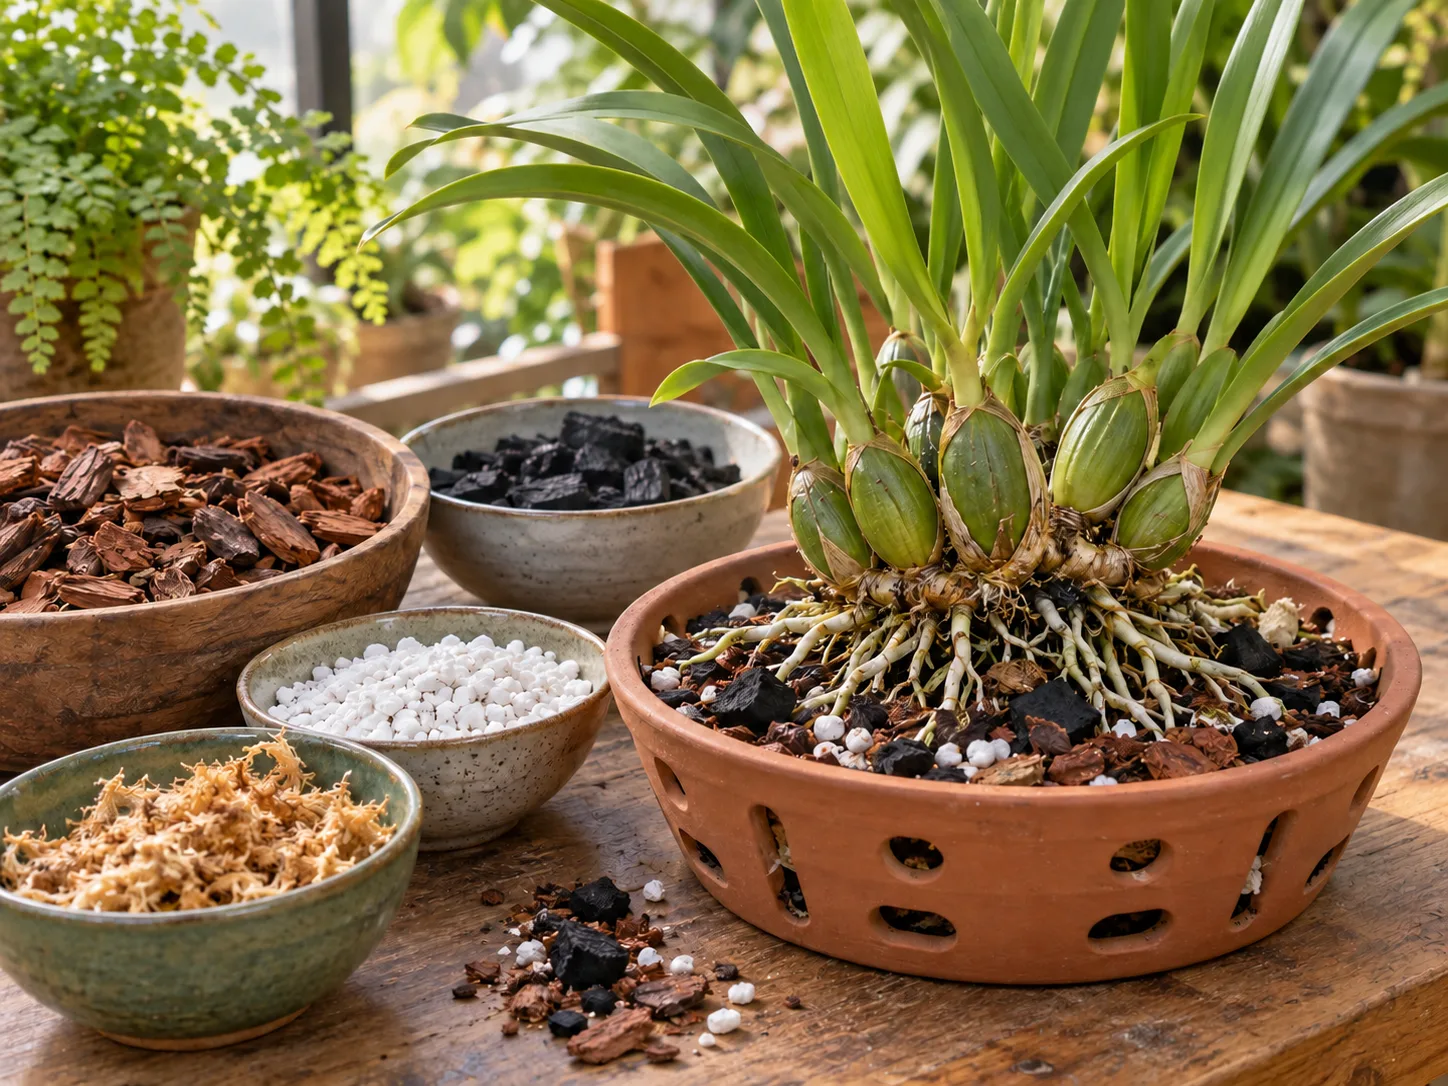
Do not use ordinary houseplant soil, garden soil, or a fine potting mix that packs tightly around Oncidium roots. These orchids grow on trees in nature, using their roots for anchorage and moisture uptake in an airy environment. A commercial orchid bark mix is a practical base; fine roots may do better in a finer-grade mix than a large-chunk blend made for thick-rooted orchids.
The AOS lists options for indoor culture that include tree-fern fiber, a mixture of sphagnum and fine bark or tree-fern fiber, and sphagnum used on its own when it is not left sitting in water. The best choice depends on the home: bark dries faster in a warm, humid, well-ventilated space, while a small amount of moisture-retentive material can help in a dry room. Avoid selecting a mix because of a recipe alone; choose one whose wet-to-dry pace you can manage with your normal routine.
A pot needs generous drainage holes and should be only large enough to hold the roots and a little space for new growth. Oncidiums do not need a deep decorative container, and potting up into a much larger vessel can leave the center wet for too long. Keep the newest pseudobulb oriented toward the open side of the pot so the next growth has room to develop.
Balance Humidity With Moving Air
Oncidiums usually appreciate moderate humidity, but published targets are not identical across all the types grouped under this name. The AOS gives 30–60% as a general range and cautions that very humid conditions need airflow, while the RHS warm-growing guide suggests roughly 55–75% and says humidity should not fall below 40%. In a typical room, aim for stable moderate humidity, then watch whether new leaves expand normally and roots remain healthy rather than chasing the highest possible reading.
A small room humidifier can be more consistent than repeated misting, especially when indoor heating dries the air. Keep it clean, place it far enough away that leaves are not constantly wet, and use a small fan across the room if air stalls. A shallow pebble tray may raise humidity very locally, but it will not correct dry air across an entire room and must never let a pot sit in standing water.
Feed Lightly While New Growth Is Active
Fertilizer supports the leaves and pseudobulb that must mature before many Oncidiums can flower. The AOS recommends feeding regularly during active growth, with the formulation adjusted to the medium; its culture sheet distinguishes bark-grown plants from orchids in other media or on slabs. For a home grower, a complete orchid fertilizer diluted to a conservative strength is easier to manage than repeatedly changing formulas in response to a plant that is not yet blooming.
Apply fertilizer to an already moist root zone, follow the product label, and occasionally flush the pot with plain water to move accumulated salts out of the bark. Brown tips can be caused by too much fertilizer or poor water quality, but do not assume fertilizer is the only cause; inspect roots and watering too. Reduce or pause feeding when growth slows and light is low, and avoid strong “bloom booster” doses as a substitute for adequate light and a mature pseudobulb.
Encourage Flower Spikes by Growing Mature Pseudobulbs
An Oncidium that will not rebloom often lacks one of the conditions needed to mature its next growth. Start with the newest pseudobulb: did it grow to a healthy size, or did it stall while the plant sat in dim light, damaged roots, or a mix that stayed wet? A small or immature plant may simply need time, so buying a blooming-size orchid is the clearest route to flowers sooner than trying to force an undersized division.
For common warm- to intermediate-growing hybrids, give strong filtered light, regular moisture during active growth, appropriate feeding, and a gentle day-to-night temperature change if the room naturally provides one. AOS notes that many Oncidiums flower as each new growth matures and that some can flower more than once in a year; RHS notes that warm-growing plants often flower in autumn to winter, while modern hybrids may flower at other times. Treat those as patterns rather than a deadline because species, hybrid, and growing conditions alter timing.
The number of flower sprays depends on the size and maturity of the clump, not on fertilizer alone. The scent is also cultivar-specific: ‘Sharry Baby’ is known for a chocolate-like fragrance, while ‘Twinkle’ and some species are described as sweet or citrusy. Orchid Bliss’s Oncidium guide discusses pseudobulbs, windowsill light, and fragrant selections; use those practical observations alongside the more formal culture targets from the AOS and RHS.
Cut Spent Spikes Only After They Are Finished
Do not cut a green, active spike simply because the last flowers have faded. Oncidium flower spikes usually dry and turn brown after their blooms finish; once fully dry, remove the spike near its base with clean, sharp shears. If any part remains green, leave it in place until the plant’s pattern is clear, unless the spike is diseased or physically damaged.
Faded flowers can be removed for tidiness, but deadheading does not guarantee that the same spike will produce another flush. The next dependable bloom usually comes from healthy new growth maturing under suitable conditions. Keep the leaves and pseudobulbs intact; they are the plant’s working tissue and stored reserves, not spent flower material.
Repot When Fresh Roots Can Reestablish
Repot when the bark has broken down, the pot no longer drains well, the roots are failing, or the plant’s new growth is pushing the clump beyond the container. Do not repot solely because a date on a calendar arrived or because a few healthy roots extend over the rim. RHS and AOS guidance both point toward repotting as new growth begins, when new roots can quickly establish in fresh medium; if the plant is in flower, wait unless the current mix is actively harming it.
Use a pot only modestly larger than the root mass, not a large container intended to accommodate several years of imagined growth. Remove loose old medium gently, trim only dead or mushy roots with sterilized shears, and preserve the firm living roots. Set the newest pseudobulb toward the growing side of the pot and leave the back bulbs supported rather than burying the base of the plant.
A low-stress repotting sequence
- Prepare the clean pot, fresh orchid mix, and sanitized cutting tool before unpotting the plant.
- Loosen the old medium carefully and rinse it away only if doing so will not tear healthy roots.
- Remove dead, soft, hollow, or papery roots; retain roots that are firm even if they are stained by bark.
- Position the rhizome so the newest growth has room to extend, then work the mix around the roots without packing it tightly.
- Water according to the condition of the roots and medium, then resume normal care as new roots begin to grow.
Fresh roots are brittle and easy to injure, so avoid unnecessary handling or repeated repotting. If the orchid is healthy and the medium drains, leaving it slightly snug is usually less disruptive than moving it into a much larger pot. A newly repotted plant may pause while it settles; judge success by new root tips and growth, not by whether an older leaf changes appearance.
Divide a Mature Clump, Not a Small Plant
Division is the practical home method for multiplying a large Oncidium. Wait until the plant has enough pseudobulbs to make more than one substantial section; AOS and RHS guidance use at least three pseudobulbs per division as a useful minimum. A small division can survive but may need a long recovery before it flowers again, so do not split a modest plant just to produce extra pots.
Divide at repotting as new roots begin. Use a sterilized knife or shears to separate the rhizome, then pot each section in an appropriately sized container with fresh, airy mix. Label the divisions and provide bright filtered light, steady but not saturated moisture, and moderate humidity as roots establish.
Growing Oncidiums from seed is not a quick household shortcut. Orchid seeds are extremely fine and lack the stored food that makes many garden seeds easy to start; successful propagation generally depends on sterile laboratory conditions and specialized growing media. For a home grower, division is more predictable and keeps the new plant true to the parent hybrid.
Diagnose Problems Before Changing the Routine
Several Oncidium symptoms have more than one possible cause, so use the medium and roots to distinguish them before changing watering or fertilizer. The table gives a first check, not a guaranteed diagnosis; consider whether the symptom is spreading and whether it is affecting old leaves, new growth, or the whole plant.
| Sign | First checks | Sensible next step |
|---|---|---|
| Wrinkled pseudobulb | Is the medium dry, or are roots soft and failing in wet mix? | Water if the roots are sound and the mix has dried; correct rot or media problems before adding water |
| Accordion-folded new leaves | Did a leaf expand through a dry spell, low humidity, or root trouble? | Stabilize moisture and moderate humidity; inspect roots before increasing irrigation |
| Dark green leaves, no spikes | Is light weak, or is the plant still immature? | Increase bright filtered light gradually and wait for a full pseudobulb to mature |
| Reddish, bleached, or scorched patches | Does direct sun or hot glass strike the leaf? | Filter or move the plant; avoid abrupt changes to deep shade |
| Black, mushy roots or soft pseudobulb | Does the pot stay wet, drain poorly, or contain decomposed bark? | Remove decayed tissue with sterile tools and repot only if the medium or roots require it |
| Brown tips | Are fertilizer salts, hard water, or root damage plausible? | Flush the mix, check product strength and water quality, and inspect roots |
A pseudobulb may remain wrinkled even after care improves because old tissue does not always plump back to its original shape. Use new root tips, leaf expansion, and the next pseudobulb to judge recovery. Do not repeatedly change the location, fertilizer, and watering schedule at once; the plant cannot show you which intervention worked.
Inspect for pests and spreading leaf damage
Check the undersides of leaves, new growth, and flower spikes for mealybugs, scale, aphids, thrips, and spider mites. Isolate a newly infested orchid, physically remove small pest clusters where practical, and use only a product labeled for the plant and pest in your location, following its directions. Avoid blanket pesticide use and keep any treatment off open flowers unless the label specifically allows it.
Dark spots can result from infection or injury, and the visual pattern alone may not identify the cause. Keep water from sitting on leaves, improve gentle air movement, clean tools between plants, and watch whether the spots spread; rapidly worsening soft tissue deserves prompt isolation and removal of affected material with a clean blade. If symptoms continue despite corrected conditions, a local orchid society or extension service can help assess a photo and the plant’s growing history.
Conclusion
Successful Oncidium care comes down to balancing light, moisture, airflow, and the plant’s actual growing type. Give a common dancing lady hybrid bright filtered light, a draining epiphyte medium, and thorough watering that follows how quickly its pot dries; then use the new pseudobulb to judge whether the routine is supporting the next bloom cycle.
When something goes wrong, inspect roots and medium before reaching for more water, fertilizer, or a larger pot. Repot as fresh roots begin, divide only a mature clump, and follow the cultivar’s label when temperatures or humidity targets differ. That steady, observation-led approach gives an Oncidium the conditions to keep growing—and, in time, to send up those branching sprays again.