How to Grow and Care for Comfrey
Learn how to grow and care for comfrey with the right site, water, propagation, pruning, harvest, winter care, and safety steps to contain its roots.
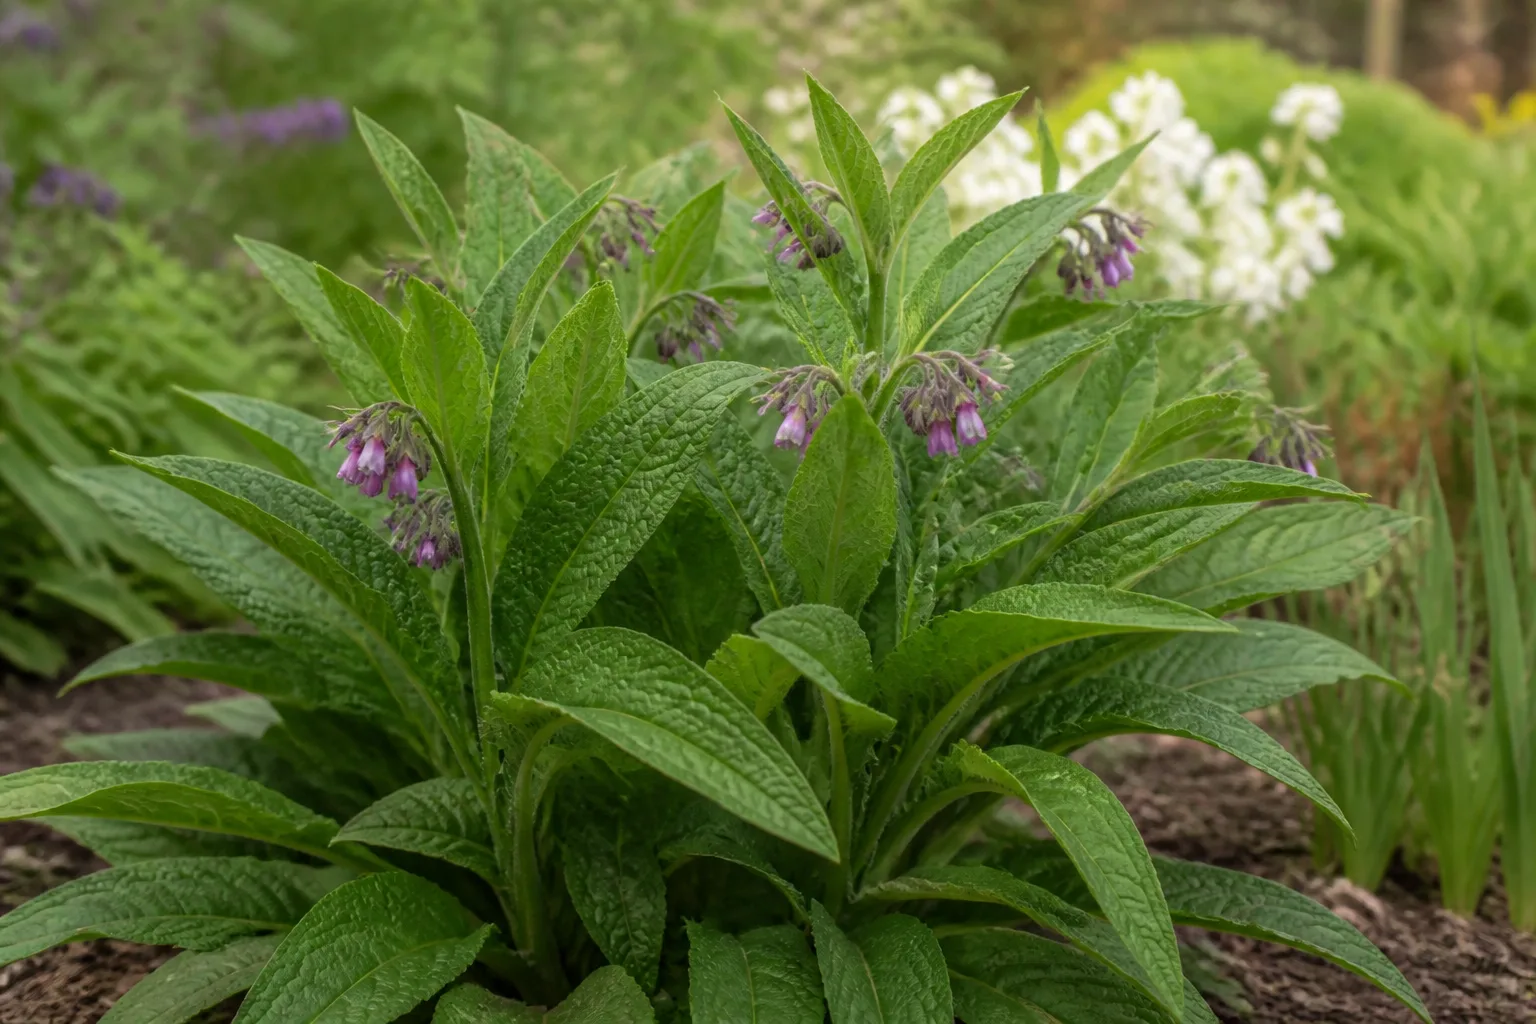
Comfrey is easy to grow, useful in a working garden, and surprisingly difficult to remove once it is established. That combination is the key to caring for it well: give it enough moisture and room to make a strong clump, but choose the planting site as if you were making a long-term decision. Deep roots, root fragments, and, in some types, viable seed can turn a small planting into a permanent patch.
The plant usually sold as common comfrey is Symphytum officinale, a coarse, hairy perennial in the borage family. It makes large leaves and nodding bell-shaped flowers, tolerates sun or part shade, and is hardy across a broad range of climates. NC State Extension lists it for USDA hardiness zones 4a through 8b and notes its rapid spreading habit, while Washington State University Extension describes the deep roots that make established plants difficult to eradicate. NC State Extension’s plant profile and Washington State University’s comfrey fact sheet are useful references for those baseline traits.
Before you plant, decide what you want from comfrey. It can provide a long flowering season for bees, large leaves for mulch and compost, and material for a homemade liquid plant feed. It is not a culinary herb, a safe tea plant, or a carefree choice for a tightly packed ornamental border. Every part should be treated as unsafe to eat, and rough leaves can irritate skin, so grow it where children and pets are unlikely to browse it.
Decide Whether Comfrey Belongs in Your Garden
Comfrey makes sense when you have a dedicated corner, orchard edge, pollinator border, or contained bed where a vigorous perennial can stay for years. It is especially useful in a garden that already has a compost system and a clear place to use fresh foliage as mulch. A mature clump can shade the soil beneath it and compete strongly with nearby weeds, but that same vigor can crowd less competitive plants.
It is a poor fit for a small mixed bed, a narrow strip beside a neighbor’s garden, or a site close to a stream, drainage ditch, or natural area. Common comfrey is an exotic plant in the United States, and the Invasive Plant Atlas records it on invasive-species lists in at least some regions. The atlas also cautions that its distribution map is incomplete, so “it is not listed where I live” is not proof that it is harmless. Check your state or local invasive-plant list before buying it, and favor a contained planting when the status is uncertain. The Invasive Plant Atlas of the United States provides a useful starting point.
The safety decision is separate from the spread decision. Comfrey’s pyrrolizidine alkaloids are associated with serious liver injury when the plant is ingested; NC State Extension lists the poison severity as medium and identifies all major plant parts as poisonous. Do not eat the leaves, roots, flowers, or seeds, do not brew them as tea, and do not use home-grown comfrey as a self-medication. Keep harvested leaves and fermenting feed away from pets and livestock as well as people. If someone or an animal may have eaten it, contact a medical professional, veterinarian, or poison-control service promptly rather than waiting for symptoms.
Identify the Plant Before You Plant It
Common comfrey forms a clump of broad, pointed leaves covered with stiff hairs. The lower leaves can be very large, with smooth or nearly smooth edges, and their bases run down the stem as narrow wings. The flowering stems rise from the center and carry small, drooping, bell-shaped flowers in curled clusters. Colors range from dull pink and bluish-purple to cream or white.
That description matters because young comfrey can be confused with foxglove before either plant flowers. The two are not interchangeable: foxglove is also poisonous, and an uncertain plant should never be harvested for a tea, poultice, or garden feed. Comfrey’s stiff, bristly texture, smooth margins, winged stems, and later curled flower clusters are better identification clues than a fuzzy first-year rosette. Washington State University specifically warns about this look-alike problem. If you did not plant the specimen or cannot identify it confidently, leave it alone and ask a local extension office for help.
Comfrey is also easy to confuse with borage and with other Symphytum species. The family resemblance is real, but their growth habits and uses differ. Treat the label on a nursery plant as important information, especially if you want a sterile cultivar or intend to keep the patch away from an edible garden.
Choose the Right Comfrey Type
There are two practical choices for most gardeners. Common or true comfrey, S. officinale, is a fertile species that can make seed and is often grown for its flowers and foliage. Russian comfrey, usually sold as Symphytum x uplandicum, includes the cultivar ‘Bocking 14,’ a sterile clone widely used for garden mulch and liquid feed. BBC Gardeners’ World recommends ‘Bocking 14’ for this purpose because it does not set seed around the garden. BBC Gardeners’ World comfrey profile also notes the plant’s moist-soil preference, wildlife value, and vigorous growth.
Sterile does not mean non-spreading. ‘Bocking 14’ will not give you a crop of seedlings, but a small piece of crown or root can still grow into a new plant. That makes the cultivar a better choice when reseeding is your main concern, not a reason to plant it casually in an open border. Buy a named, accurately labeled plant from a reputable nursery if cultivar identity matters.
Other species and hybrids vary in height, flower color, leaf width, and vigor. For a small garden, the most useful label information is not the bloom color; it is whether the plant is fertile, how large it becomes, and whether you have a realistic plan for containing the root system.
Pick a Site That Is Moist but Contained
Give comfrey full sun to part shade. In a cool or mild climate, more sun supports dense growth and better flowering. In a hot climate, a site with morning sun and afternoon shade can reduce heat stress, especially when the soil dries quickly. A position at the back of a border, beside a compost area, or near an orchard path is usually easier to manage than a spot in the middle of delicate perennials.
The best soil is deep, fertile, rich in organic matter, and consistently moist without staying stagnant. Comfrey tolerates clay and less-than-perfect soil, but hard, compacted ground makes planting and later removal harder. Improve the site before you plant by removing perennial weeds and working in a modest layer of finished compost. Do not build a wet pocket and call it a comfrey bed: if rain leaves standing water for days, raise the bed or choose a site with better drainage.
Allow roughly 2 to 3 feet between plants if you want access for weeding, harvesting, and eventual digging. Tighter spacing creates a faster-filling mass, but it also leaves less room to inspect the crown and more root material to deal with if you change your mind. Keep the planting several feet from the edge of a natural area and avoid placing it where a mower, tiller, or floodwater could carry pieces elsewhere.
Prepare the Soil and Plant Comfrey
Spring is the easiest planting window because the soil is warming and new roots have a full growing season to settle. You can also plant in fall while the ground is workable, provided the division or transplant has time to establish before hard freezes. Utah State University Extension reports that comfrey can be planted through much of the growing season, but spring establishment is the most dependable choice for a home garden. Utah State University Extension’s peer-reviewed comfrey fact sheet gives useful depth and spacing guidance.
For a nursery transplant or crown division, dig a hole wider than the root ball and set the crown about 2 inches below the soil surface. Backfill with the soil you removed, firm it gently, and water slowly so the soil settles around the roots. Do not bury the crown under a deep mound of mulch; a wet, covered crown is more likely to decline than a crown surrounded by a thin, breathable mulch layer.
For a root cutting, lay it horizontally at about 2 to 4 inches deep. Use the shallow end in heavy clay or a bed that holds moisture, and the deeper end in loose sandy soil. Mark the location. A buried root piece can look like nothing is happening for weeks, and an unmarked bed makes both watering and later weeding unnecessarily risky.
After planting, remove competing weeds by hand or with shallow cultivation. Avoid deep digging near the new plant. The same root pieces that make comfrey reliable to propagate are the pieces that can multiply a patch when a shovel chops through it.
Water Comfrey Through Establishment
Keep new plants evenly moist while they produce roots and shoots. Water deeply when the surface begins to dry rather than giving a little splash every day; then check the soil again before watering. A finger pushed 2 inches into the soil is a better guide than a fixed calendar, because sun, soil texture, rainfall, and container size change the drying rate.
Once established, comfrey’s deep root system gives it meaningful drought tolerance, but drought tolerance is not the same as a preference for dry soil. A mature plant usually needs supplemental water during a prolonged hot, dry spell, especially if it is heavily harvested. If leaves droop immediately after a hard rain but the soil is wet, wait before watering again. Heavy-rain droop can be temporary, while repeated wilting in wet soil points to poor drainage or root trouble.
Mulch helps hold moisture and suppress weeds. Use a thin layer of compost, shredded leaves, or another clean organic mulch, keeping it a few inches away from the crown. Refresh it in spring rather than piling fresh wet material directly over the plant as it goes dormant.
Feed Comfrey Without Overfertilizing
Comfrey usually does not need a demanding fertilizer schedule in a home ornamental bed. Start with fertile soil, add a small amount of finished compost in spring, and watch the plant. Dark green, sturdy growth means the basic plan is working. Pale leaves, weak regrowth, or repeated harvesting from poor soil are reasons to test the soil and follow the test recommendation—not a reason to scatter fertilizer by guesswork.
There is a difference between growing a useful garden clump and maximizing a forage-style leaf yield. Repeated cutting removes biomass, and commercial production may use additional nitrogen to replace what is removed. In a home garden, excess nitrogen can produce soft, floppy growth and does not solve poor drainage, insufficient light, or a plant that has been cut too hard. If you harvest several times each season, return a layer of compost after the main flush and let the plant rebuild before taking more.
The leaves themselves are often used in compost or as a garden feed because the deep-rooted plant brings up nutrients and stores them in its foliage. That is a recycling use, not proof that comfrey is a complete fertilizer. Homemade liquid feed has variable strength, so use it as a supplement and keep your soil fertility program grounded in the needs of the plants receiving it.
Prune, Deadhead, and Mulch on a Simple Calendar
In spring, remove only dead material that is easy to pull or cut away from fresh shoots. Let a new plant build leaves before taking a large harvest. Those leaves are the plant’s solar panels, and a small crown with too much foliage removed can spend the rest of the season replacing leaves instead of developing a strong root system.
After the first flush of flowers, cut flowering stems back to roughly 6 inches above the ground if you want fresh basal growth and a tidier clump. Established plants often recover quickly and may flower again. Cut selectively when you only need to reduce height or open a path; there is no benefit to shearing a healthy plant repeatedly just because it grows fast.
Deadhead common comfrey before seeds mature if you want to reduce volunteer seedlings. Gather the flower stems carefully, bag them if they already hold developing seed, and do not toss them into a compost pile that you intend to spread around the garden. A sterile cultivar removes the reseeding issue, but not the root-fragment issue.
When the top growth dies back in fall, cut away collapsed stems if they are diseased or in the way. Leave healthy plant material as a light mulch only when you are certain it contains no viable roots and no rust symptoms. Otherwise, put it in the compost pile after chopping, or dispose of it according to local guidance. Add a protective layer of mulch over the root zone in cold climates, but keep the crown itself from sitting under a wet, airless mound.
Propagate Comfrey from Root Cuttings or Divisions
Vegetative propagation is more reliable than seed for most gardeners. Root cuttings are inexpensive and can turn one established plant into several new plants; crown divisions are faster because each piece already includes active buds. Utah State University Extension reports that root cuttings commonly form buds in about 3 to 6 weeks, while crown divisions may emerge in about 10 days under suitable conditions.
Use clean tools and wear gloves. Choose an established, healthy plant and propagate it in spring as growth begins, or in fall after the top growth has slowed. Before you cut, decide exactly where each new piece will go. A propagation session is also a containment risk: every root fragment left on the ground is a potential plant.
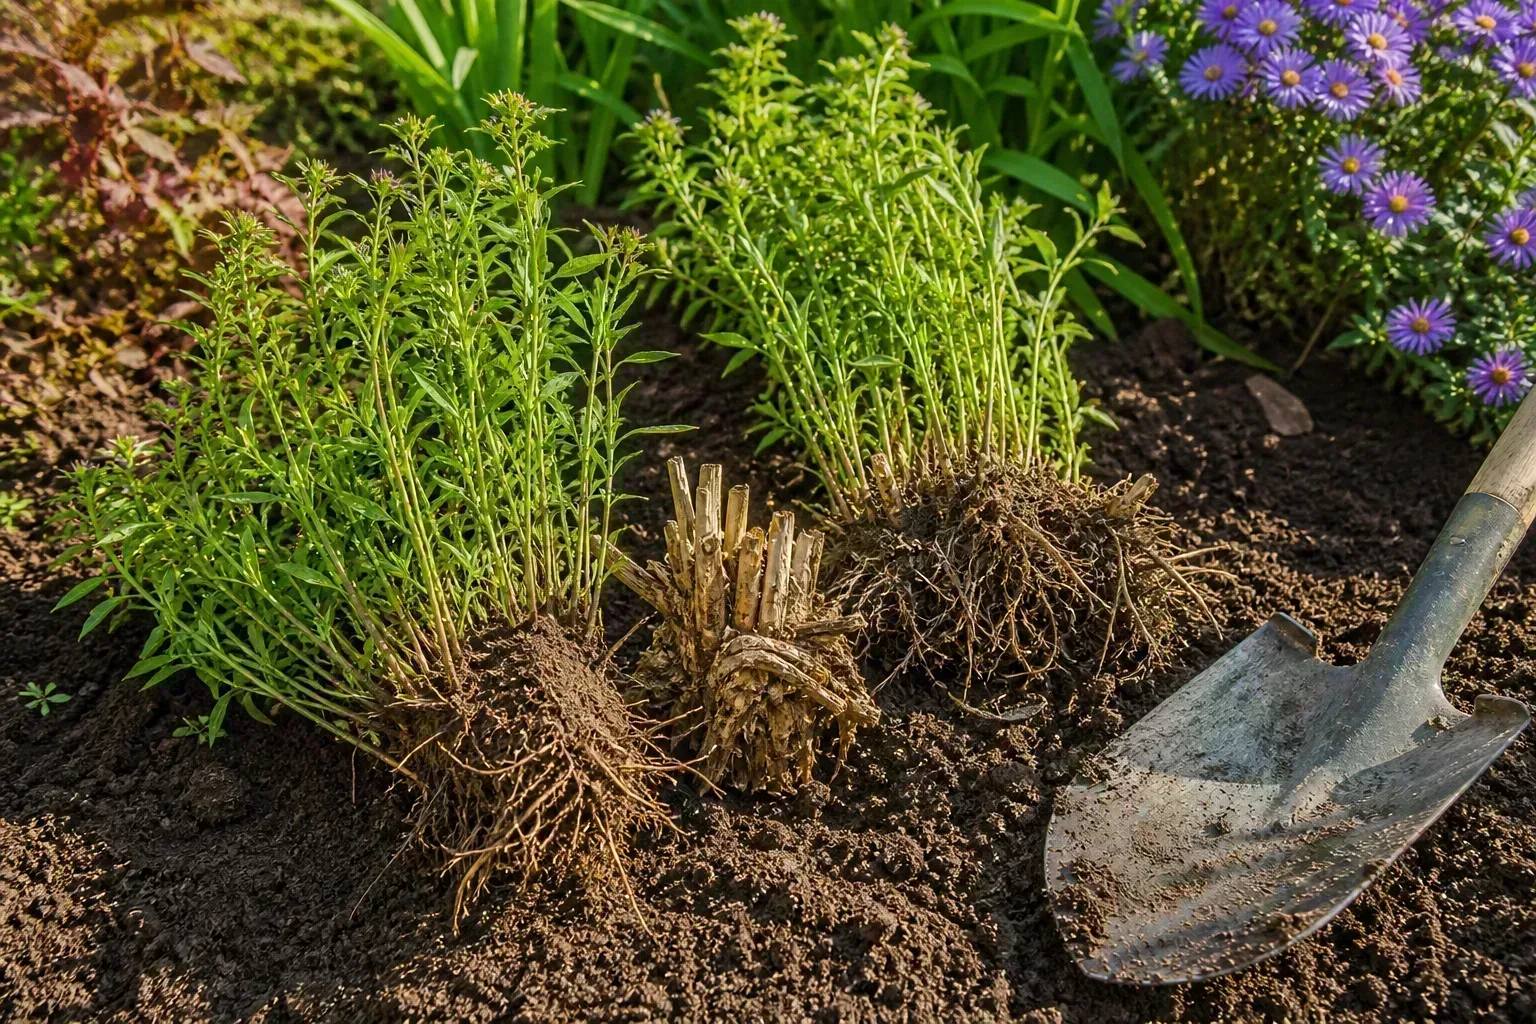
Root-cutting method
- Water the parent plant the day before if the soil is dry, then expose one side of the crown without turning the whole bed over.
- Cut several healthy root sections about 2 to 6 inches long. Longer, thicker pieces generally establish faster, but even small pieces may sprout, so gather every leftover fragment.
- Lay each cutting flat in a prepared bed or a deep starter pot. Cover it with 2 to 4 inches of soil, using shallower placement in heavy clay and deeper placement in sandy soil.
- Water once to settle the soil, then keep it moderately moist. Do not keep the pot saturated while you wait for buds.
- Mark the row and leave it undisturbed until shoots appear. Root cuttings may take several weeks to show growth; gently tugging on them only breaks new roots.
If you start cuttings in containers, use a free-draining potting mix and a pot with drainage holes. Move a well-rooted plant to its permanent site while it is still manageable. Do not leave a cutting tray beside a compost area where spilled soil and root pieces can escape unnoticed.
Crown-division method
- Dig around the edge of a mature clump when the soil is moist but workable.
- Lift enough of the crown to see active buds and roots. Slice it into sections with a sharp spade or knife, making each section large enough to support itself.
- Replant each division upright with the crown about 2 inches below the surface and allow 2 to 3 feet for spread.
- Water thoroughly and keep the soil evenly moist until new growth is obvious.
Crown division is the better choice when you want a larger plant quickly or when you are moving a clump. Root cuttings are the better choice when you want several starts from a small section. Seed is possible for fertile comfrey, but it needs a period of cold before germinating, can be slow and uneven, and will not preserve a named sterile cultivar. Buy a labeled plant or use a known division when predictability matters.
Harvest Leaves for Mulch, Compost, and Liquid Feed
Wait until a new plant has completed at least one full season of establishment before harvesting heavily. For an established clump, cut leaves when they are roughly 12 to 18 inches tall, gathering the stems and cutting about 2 inches above the ground. Leave enough young foliage for photosynthesis, particularly if the weather is hot or dry.
In good growing conditions, an established plant can regrow in about 2 to 4 weeks, but the calendar should follow the plant rather than control it. If regrowth is short, pale, or slow, stop harvesting and improve water, light, or soil fertility first. A practical limit is one substantial cut followed by a full recovery period, with additional cuts only while the plant remains vigorous.
Fresh leaves make a fast-wilting mulch around established plants. Lay them on the soil surface, not against tender stems, and expect them to collapse into a thin layer. Chopping the leaves helps them break down in compost. Keep roots, crown pieces, seed heads, and any rust-infected material out of a compost pile that will be used elsewhere; a compost heap is not a guaranteed root-fragment sterilizer.
Make a low-risk comfrey liquid feed
BBC Gardeners’ World uses a simple no-water method: harvest the leaves, remove flowers and tough stems, chop the leaves, and pack them tightly into a watertight container. Weigh the mass down with a clean stone or brick, cover the container if possible, and check it every few weeks. As the leaves break down, they release a dark, strong-smelling liquid. BBC Gardeners’ World comfrey-feed instructions recommend collecting that liquid and diluting it before use.
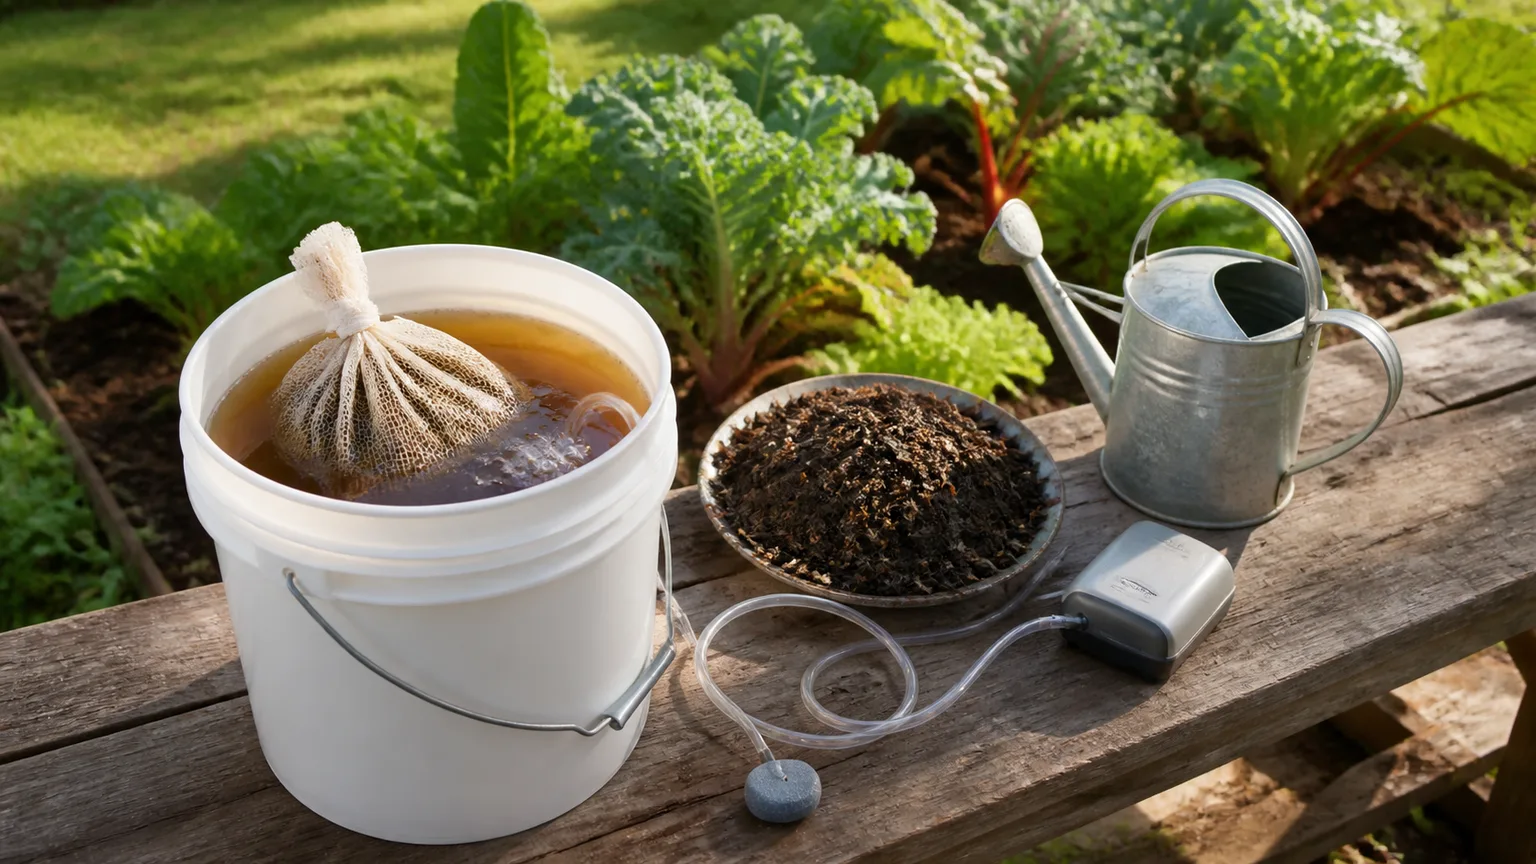
Use about 1 part collected comfrey liquid to 10 parts water as a starting dilution, and add more water when the extract is exceptionally dark or concentrated. Apply it to the soil around established plants during active growth. Avoid splashing it onto edible leaves, keep the container clearly labeled, and store it where children, pets, and livestock cannot reach it. The mixture is a garden input, not a drink, medicine, or safe animal feed.
Do not assume that a stronger brew is better. The nutrient content varies with plant age, dilution, storage, and the amount of water released during breakdown. Use the feed occasionally, watch the receiving plant, and continue to rely on finished compost, soil testing, and a crop-appropriate fertilizer when a specific nutrient deficiency has been diagnosed.
Manage Slugs, Rust, and Other Problems
Comfrey is generally trouble-free once established, but “rarely bothered” does not mean never inspected. Walk around the clump after wet weather and look at both leaf surfaces, the crown, and the soil line.
Slugs and snails: Ragged holes and shredded leaf edges are the usual clues, especially on young foliage. Check at dusk or after rain, remove hiding places such as boards and dense debris near the crown, and hand-pick where practical. Protect new divisions while they establish. If you consider a slug product, use only one labeled for the site and follow the label; do not apply an unverified home mixture to a bed that may later supply mulch for edible crops.
Comfrey rust: Small orange-yellow spots or pustules on the undersides of leaves, followed by weak growth, are a more specific warning. Rust is uncommon in many U.S. plantings, but University of Wisconsin–Madison notes that Melampsorella symphyti can overwinter in roots and reduce the performance of old plantings. University of Wisconsin–Madison’s comfrey crop guidance supports a cautious response: remove badly affected plants, bag the material, clean tools, and do not spread infected roots or leaves through compost.
Drooping after rain: A heavy storm can flatten large leaves temporarily. Check the soil before watering and give the plant time to recover. If the crown stays soft, the soil smells sour, or leaves collapse repeatedly in wet ground, improve drainage rather than adding fertilizer.
Weak regrowth: Slow recovery usually points to a young root system, drought, dense shade, repeated cutting, or depleted soil. Stop harvesting, water deeply when needed, clear competing weeds, and wait for a full flush of healthy leaves before cutting again. If the plant remains weak in a suitable site, replace it rather than trying a series of random products.
Overwinter Comfrey and Control an Established Patch
Comfrey is deciduous and normally dies back above ground in winter, then returns from the crown in spring. In a cold climate, a 2- to 3-inch layer of loose mulch over the root zone can reduce temperature swings. In a wet climate, use less mulch and keep it away from the crown so winter moisture does not remain trapped.
Control begins before you need to remove the plant. Cut flowering stems before seeds mature, collect every root fragment during digging, and keep soil containing comfrey roots out of shared compost and fill. Never rototill an unwanted patch: the machine can turn one clump into many rooted pieces.
To remove a small patch, work when the soil is moist, dig around the entire crown, and lift slowly. Sift the excavated soil by hand for thick root pieces, bag the roots, and revisit the area every few weeks through the growing season. New shoots are useful evidence that a fragment remains; remove them while they are small. One hurried digging session often fails, while repeated removal gradually exhausts what is left underground.
Michigan State’s MISIN guidance describes common comfrey escaping from gardens onto moist, disturbed ground and emphasizes that roots regrow from fragments. Michigan State MISIN’s species account is a helpful reminder to act early, particularly near ditches, streambanks, or wet meadows. For a large, old stand or a patch in sensitive wet ground, contact your cooperative extension office or a licensed land-care professional before using chemical control.
Can You Grow Comfrey in a Container?
Yes, but a container is mainly a containment tool and a temporary growing space, not an ideal permanent home. Comfrey develops a deep, extensive root system and can fill a small pot quickly. A large, heavy container with drainage is more practical than a light nursery pot, and a 5-gallon container should be treated as a bare minimum for establishment rather than a guarantee that the plant will remain happy forever.
Containers are useful for starting root cuttings for the first season or keeping a single named cultivar beside a compost station. Place the pot where it receives the light and moisture the plant needs, water when the upper soil dries, and expect more frequent watering than an in-ground clump. Check the drainage holes and the ground beneath the pot for escaped roots, and do not set it directly on soil if containment is the reason you chose a container.
Do not bury a potted comfrey plant in the ground and assume the pot will stop it. Cracks, drainage holes, and roots growing over the rim can defeat the plan. If you need a permanent barrier, use a purpose-built raised bed or a container that can be inspected and lifted safely.
Conclusion
The best comfrey care plan starts before planting: choose a contained site, verify the plant’s identity, and decide whether you want a fertile common type or a sterile cultivar such as ‘Bocking 14.’ Give it sun or part shade, deep moist soil, spring compost, and steady water while young. After establishment, harvest selectively, prune after the first flowering flush, and use leaves for mulch, compost, or a carefully diluted soil feed.
Keep the plant away from eating animals, handle it with gloves, and never ingest it. If you later need to remove it, dig when the soil is moist, collect every root piece, avoid tilling, and follow up on regrowth. Comfrey is rewarding when its vigor is useful and manageable; it becomes a problem when the planting site is treated as temporary.



