How to Grow Orange Daylilies: Planting, Care, and Control
Learn how to grow orange daylily (*Hemerocallis fulva*), from sun and planting depth to dividing, watering, pet safety, and controlling its vigorous spread.
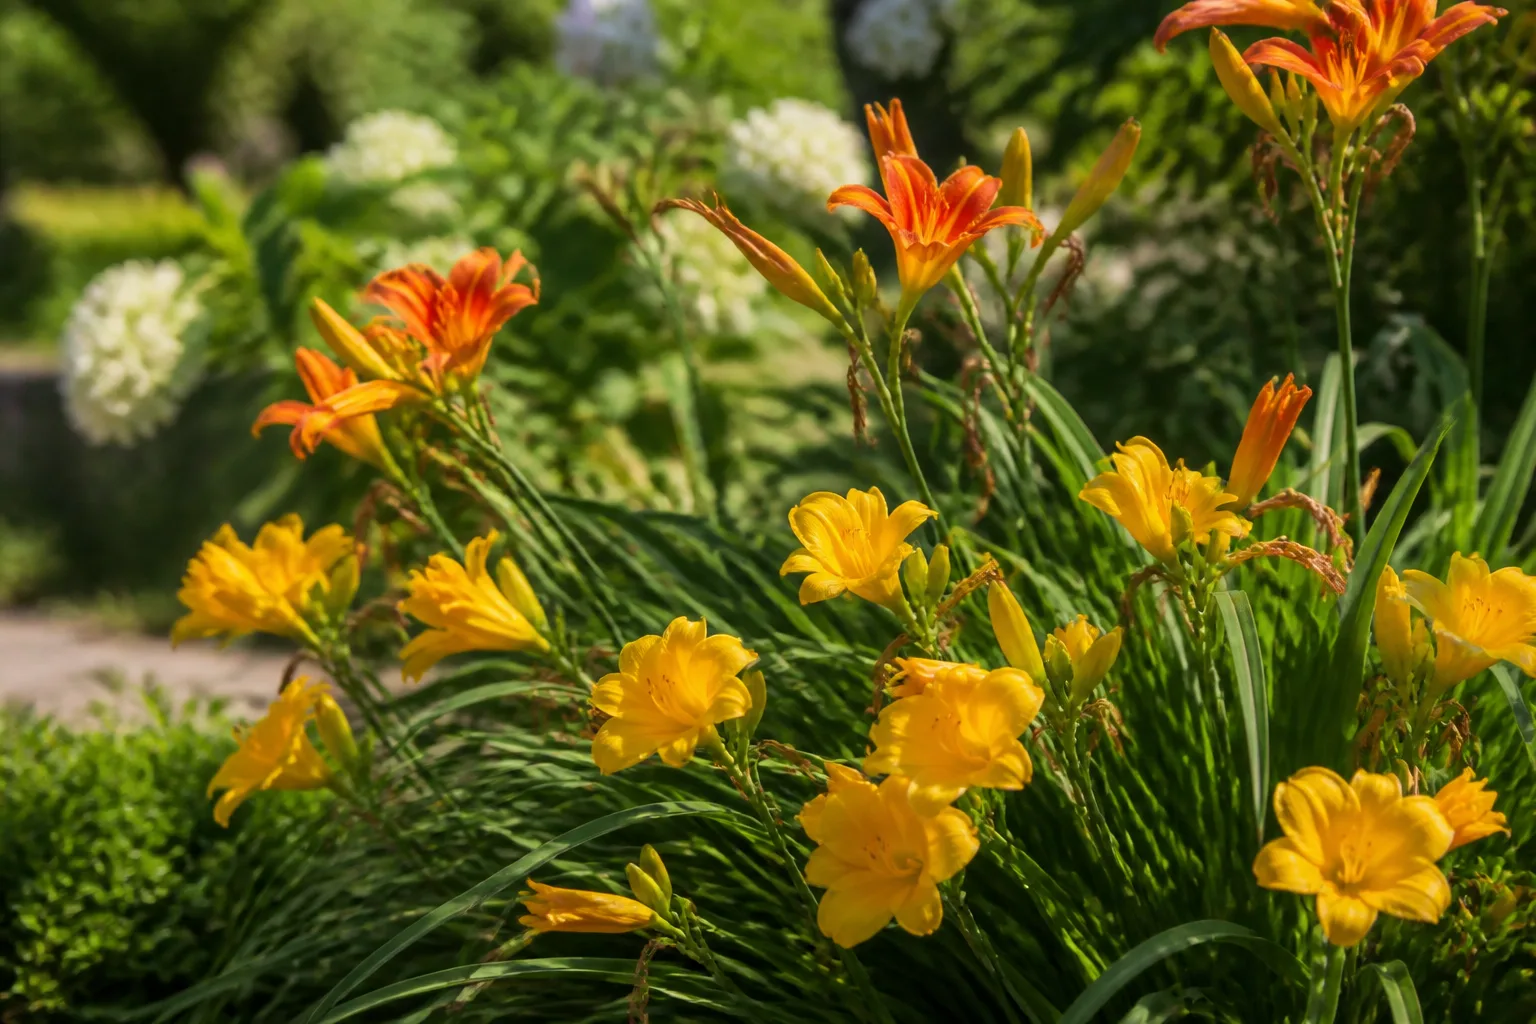
Orange daylily (Hemerocallis fulva) is a tough, summer-flowering perennial with arching green leaves and tawny orange blooms. It can settle into a sunny border with little fuss, but its vigor changes the planting decision: underground roots can push a clump outward, and fragments moved during digging can start new growth elsewhere. Before choosing a spot, confirm the plant’s identity and check whether your local invasive-plant guidance recommends against planting it.
Once that decision is made, successful care is straightforward: give the crown a well-drained site with sun, water new plants while they establish, and divide only when crowding or weak flowering makes it useful. Unlike true lilies, daylilies grow as basal clumps rather than leafy stems from a bulb, and the individual flowers last one day even though a scape carries a succession of buds.
First, Confirm You Have Hemerocallis fulva
The common names “orange daylily,” “tawny daylily,” “common daylily,” and “ditch lily” usually refer to Hemerocallis fulva. North Carolina State Extension describes a clump about 2 to 2.5 feet wide, with strap-shaped leaves and a leafless flower stalk that can rise several feet above the foliage. The flowers are tawny orange, trumpet-shaped, and often have a yellow throat; each opens for a day before the next bud takes its turn. North Carolina State Extension’s plant profile is a useful reference when a label gives only a common name.
A label matters because a garden center may use “daylily” for hundreds of hybrids with different flower colors, heights, and seasonal habits. Many modern daylilies are cultivars or hybrids, not the species H. fulva, and a yellow Stella de Oro or a reblooming hybrid is not interchangeable with the vigorous orange species described here. If a plant came from an old garden or roadside clump, treat the identification as provisional until you see its flowers and growth habit.
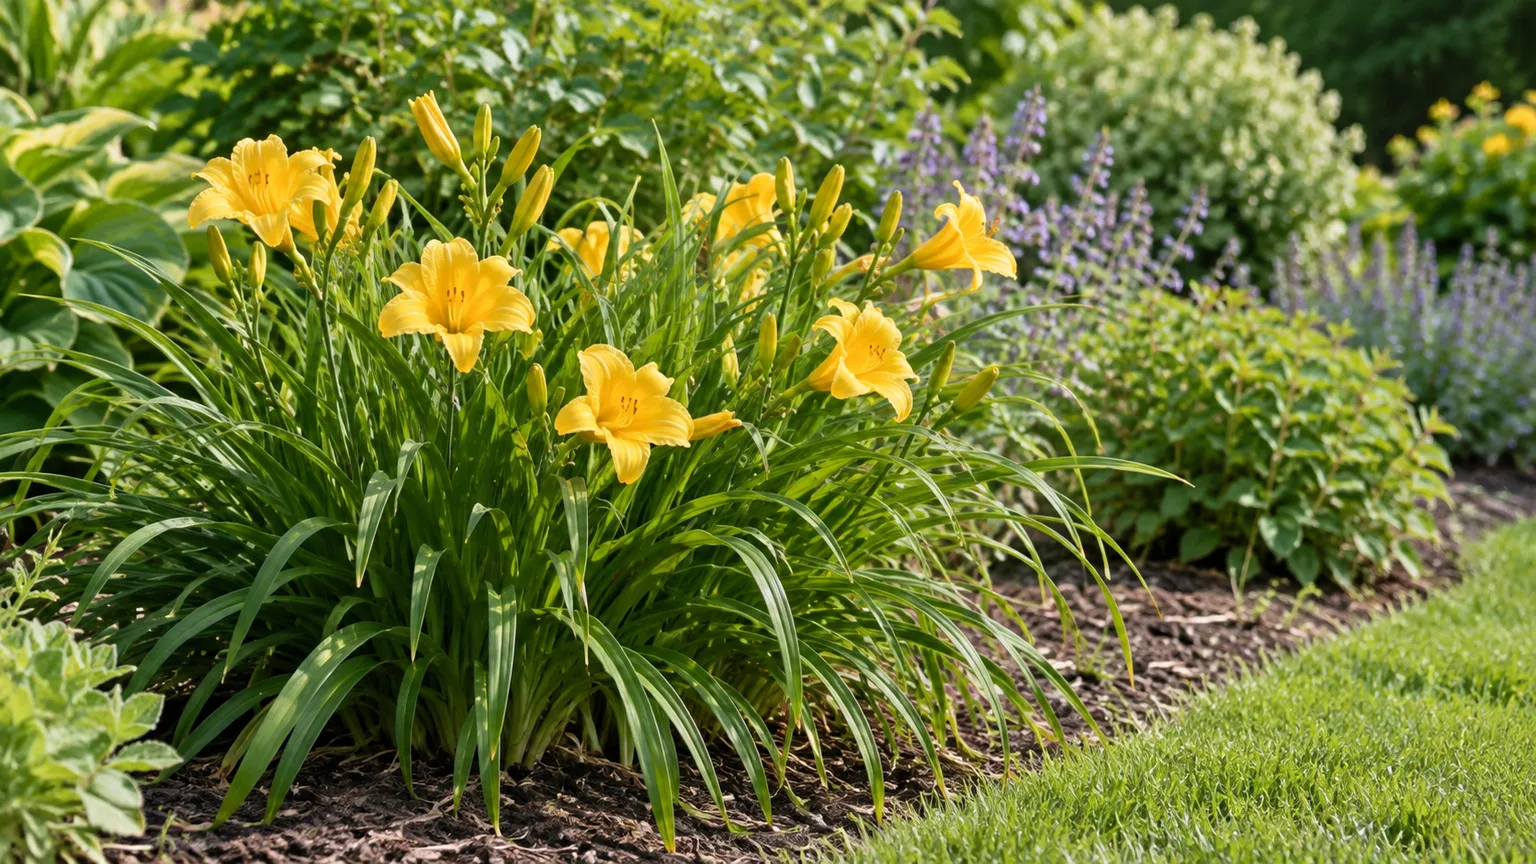
Stella de Oro is a yellow-flowered hybrid, not orange daylily; the shared basal clump helps show the daylily growth habit.
Orange daylily versus true lilies and hybrid daylilies
A daylily sends all its leaves up from a basal crown; its flower stalk is bare. A true lily (Lilium) carries leaves along the flower stem and grows from a scaly bulb, so the two plants differ in structure even when both have orange, trumpet-shaped flowers. Tiger lilies usually have strongly recurved, dark-spotted petals and leafy stems; orange daylily flowers face upward and are typically unspotted. Never identify an orange flower from color alone.
Hybrid daylilies share the basal clump and leafless scape, but their flowers may be yellow, red, pink, or patterned, and some cultivars rebloom. The care advice for sun, drainage, and division often overlaps, yet the tendency to spread and the local ecological concern can be especially important for H. fulva. If your plant has a label, keep the botanical name with your garden notes rather than relying on “lily” as the whole identification.
Should You Plant Orange Daylily in Your Region?
This is the question to settle before preparing a bed. Orange daylily is native to Asia and has naturalized across parts of North America; MISIN reports it spreading through underground stems and fleshy roots, with roadside populations often setting little or no seed. A plant that stays manageable in a contained border can form dense colonies where roots escape into a meadow, ditch, woodland edge, or other natural area. MISIN’s species account explains why moving root fragments can create new patches.
“Invasive” is a local designation, not a universal answer for every state, county, or site. Check your state invasive-species list, county extension office, and any restrictions that apply where you garden; do not rely on an old claim that the plant is invasive everywhere or harmless everywhere. If guidance advises against planting it, choose a noninvasive daylily cultivar or a locally appropriate native perennial instead.
Avoid planting H. fulva beside a stream, natural area, roadside ditch, or property edge where roots or discarded divisions could move beyond the bed. A mower edge is not a reliable barrier, and routine deadheading does not stop a clump from advancing underground. If you already have it, the goal is to keep every crown and root within the area you can inspect and maintain.
Choose Light and Soil With Spread in Mind
For the strongest flowering, choose a site receiving around six hours of direct sun on most days. North Carolina State Extension lists full sun to partial shade for H. fulva; in bright, hot regions, morning sun with some protection from intense afternoon heat can reduce leaf scorch. The plant will survive with less light, but a shaded clump may produce foliage and few flower stalks, so do not use deep shade as a growth-control method.
Drainage is more important than a perfect soil recipe. Orange daylily tolerates average or poor soil, but the crown and roots should not sit in waterlogged ground; persistent saturation can weaken the plant and encourage rot. If the bed stays wet after rain, choose a raised or better-drained location rather than planting into a low pocket and trying to fix it with frequent amendments. A layer of compost can improve a lean garden bed, but avoid turning the planting hole into a rich, soft pocket surrounded by hard soil that traps water.
Think through access as well as growing conditions. Leave room to reach the back of the clump, inspect its edge, and dig a division without disturbing nearby perennials. If you cannot maintain the perimeter or remove stray shoots, select a less spreading plant for that location.
When to Plant and How to Set the Crown
Plant container-grown or divided daylilies in spring or early fall, when soil is workable and the plant has time to establish before severe heat or freezing weather. Early spring gives roots time to grow before summer bloom; early fall is also practical if several mild weeks remain. In very hot climates, avoid transplanting into baking soil during the peak of summer unless you can provide careful follow-up water and temporary protection.
Prepare a hole wider than the root spread, loosen compacted soil around it, and set the plant so the crown—the point where the leaves meet the roots—sits level with the surrounding soil. Spread the roots outward rather than folding them into a narrow hole, backfill, and water slowly to settle the soil. Burying the crown deeply is a common avoidable mistake: it can delay establishment and leave the base persistently damp, while a crown left high and exposed can dry out.
If you are planting a bare-root division, soak only long enough to rehydrate roots that have dried during storage, then plant promptly. Do not let a division sit in a bucket for days or leave it in full sun while you prepare the bed. BBC Gardeners’ World’s daylily guide also emphasizes moist, fertile, well-drained soil and keeping the crown at the surface when planting.
Spacing that gives a clump room
Use the plant’s likely mature width, not the small size of the division in your hand, to plan spacing. A gap of roughly 2 to 2.5 feet between H. fulva crowns leaves room for a mature clump, airflow, and inspection; if you want a faster massed effect, understand that the clumps will meet and need more frequent boundary checks. The North Carolina State Extension profile lists a typical width of about 2 to 2.5 feet, but soil, light, and growing time affect the result.
Do not plant a row against a fence or hedge if you cannot reach the far side. Daylily foliage can hide small shoots, and root systems are harder to remove once intertwined with neighboring plants. For a deliberate colony, set a defined boundary and plan to divide or remove outward-facing sections before they invade adjacent ground.
Watering Without Keeping Roots Soggy
Water a new planting thoroughly, then keep the root zone evenly moist while roots begin growing. For the first several weeks, check the soil with a finger or trowel rather than watering automatically every day: if the upper few inches remain moist, wait; if the root zone has dried, water deeply enough to reach it. Weather, soil texture, and exposure change the schedule, so a fixed weekly rule is less useful than checking the soil.
Once established, H. fulva tolerates some drought and usually needs supplemental water only during extended dry periods. Water at the base in the morning when possible, especially while flower stalks are forming, and avoid shallow splashes that wet only the surface. If leaves droop in dry weather but the soil below the surface is dusty, water; if they yellow while soil remains soggy, improve drainage and reduce watering rather than adding more.
Container plants dry faster than plants in the ground, especially in heat or wind. Check pots more often, but still let excess water drain freely; a saucer full of standing water can leave the roots oxygen-starved. A plant that needs daily watering in a small pot may be better moved to a larger container or planted in the ground only where local spread guidance permits.
Fertilizer and Mulch: Less Is Usually Enough
Routine heavy feeding is rarely needed for a resilient clump growing in ordinary garden soil. Start with compost or a modest layer of organic mulch, then observe the plant through a full growing season before reaching for fertilizer. If growth is weak and a soil test or extension advice points to low fertility, use a balanced product according to its label rather than guessing at a dose.
Too much nitrogen can push soft leaf growth without solving the actual cause of poor flowering, which may instead be shade, drought during scape development, or an overcrowded clump. Do not use fertilizer as a substitute for checking light and drainage. Keep mulch a few inches away from the crown so the base does not remain wet, and do not mound soil over the crown as the bed settles.
A light mulch helps conserve moisture and makes the bed edge easier to see, but it will not stop rhizomes. If you need strict containment, use an accessible planting area or a container and inspect the boundary; mulch is for soil care, not a root barrier.
What to Expect From the Summer Flowers
Orange daylily usually flowers in summer, but the exact start and length of the display vary with climate, weather, and the age and condition of the clump. Individual flowers last one day; a mature scape carries multiple buds that open in sequence, so the plant does not go out of bloom after the first flower fades. The display may be shorter than that of a selected reblooming hybrid, and the species should not be sold to yourself as a repeat-blooming variety unless the plant is correctly identified.
The flowers rise above the fountain of foliage on leafless scapes. After the last buds on a stalk have opened, the bare stalk can look untidy; cutting it back does not damage the plant once flowering is finished. Keep the green leaves, though: they continue to support the crown after bloom and should not be sheared off simply because the flowers are gone.
Deadhead for tidiness, not guaranteed rebloom
Remove fading flowers if you want a neater border or want to keep petals from collecting on nearby paving. Since each bloom lasts a day, a large clump can make daily deadheading a chore; it is optional rather than a requirement for keeping the plant alive. Remove the flower stalk at its base after the buds on it are spent, taking care not to cut into the surrounding leaves.
Deadheading is not a dependable way to force orange daylily to bloom again. If the plant sets seed pods, removing them may redirect some energy, but the naturalized roadside forms described by MISIN are often sterile and spread mainly by roots, not seeds. For better flowering next year, focus first on sufficient light, consistent moisture during active growth, and dividing a genuinely crowded clump.
Seasonal Maintenance and Winter Care
In spring, remove foliage that has fully browned over winter, clear debris away from the crown, and check whether the clump has crossed the boundary you set. If you find new shoots beyond the planting area, lift them while small and remove their attached roots; mowing the leaves repeatedly can hide rather than solve the spread. Mark the desired edge so you can compare it during the growing season.
During summer, water new plants and established clumps in long dry spells, remove spent scapes after their buds finish, and inspect leaves and buds when flowers appear misshapen. Avoid cutting healthy leaves after flowering, because the plant is still building energy for the next season. In fall, let foliage fade naturally if it is not diseased or obstructing the bed; once it is brown, remove it for a clean appearance or leave some cover in place until spring.
Cold weather usually sends this herbaceous perennial into dormancy, with the crown surviving underground and leaves returning when growth resumes. Do not confuse seasonal dieback with plant death: scratch gently near the crown or wait for the normal spring growth period before digging it up. In regions with wet winters, drainage and an unburied crown are more useful protections than a thick, wet pile of mulch.
Divide Crowded Clumps Without Spreading Root Pieces
Divide when the clump has expanded beyond its allotted space, the center becomes congested, or flowering declines despite adequate sun and moisture. There is no need to split a vigorous plant on an arbitrary schedule; unnecessary division creates more planting material and more opportunities to move the roots. Work when the soil is moist and workable, often in spring or after flowering in early fall, leaving enough mild weather for the divisions to re-establish.
Water the plant the day before if the ground is dry. Dig around the clump wider than the visible leaves, lift the root mass with a spade or garden fork, and shake or wash away enough soil to see its structure. Separate the plant into manageable fans, each with healthy leaves, a crown, and a substantial portion of attached roots; use two forks back-to-back or a clean, sharp spade when the roots are too dense to pull apart.
Inspect the edge of the hole and the loosened soil before you finish. Orange daylily roots can be thick and fleshy, and overlooked pieces may regrow; avoid chopping the entire bed with a rototiller, which can scatter viable fragments.
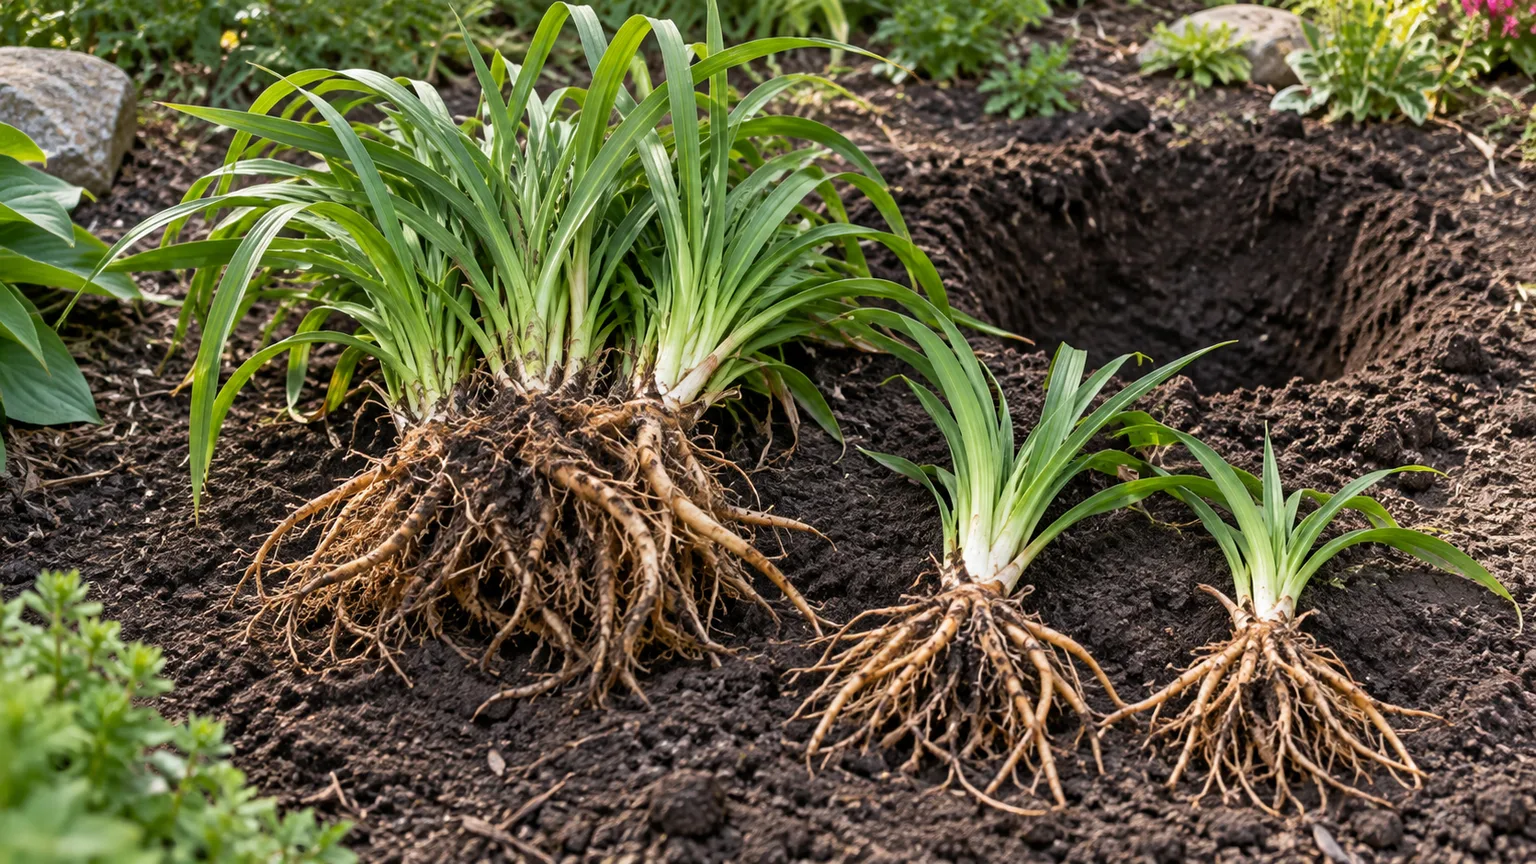
Gardening Know How’s practical daylily guide describes division as a way to renew vigorous clumps, while MISIN’s spread guidance underscores why root handling matters for this particular species.
Replanting and division aftercare
Replant only the divisions you can responsibly contain, keeping the crown at soil level and allowing the mature clump room to widen. Water each new planting thoroughly and keep the soil from drying during establishment; if conditions are hot, provide temporary afternoon shade while the roots recover. Do not put extra divisions in a roadside ditch, woodland edge, or another site where they can escape into natural ground.
Dispose of unwanted roots according to local green-waste rules. Do not put live roots or divisions in an open compost pile or dump them at the edge of a property, where they may root again; MISIN advises bagging removed material and preventing its movement with soil or fill. Check the replanted clump and the original bed edge for stray growth over the next few seasons.
Can You Grow Orange Daylily in a Pot?
A large container can make the plant easier to observe and can reduce uncontrolled expansion, but it does not erase the need for local invasive guidance. Choose a wide, sturdy pot with several drainage holes and enough room for the roots and foliage; use a free-draining potting mix rather than heavy garden soil. Set the crown at the surface, water thoroughly after planting, and expect to check moisture more often than you would in the ground.
A pot also creates maintenance work: roots fill the available space, the plant may need division, and any fragments escaping through drainage holes can establish in the ground. Put the pot on a hard surface where you can inspect beneath it, and do not empty old potting mix into a garden or natural area if it contains live roots. If your region discourages this species, growing it in a pot may still be inappropriate; choose a permitted, noninvasive daylily instead.
Troubleshoot Yellow Leaves, Weak Bloom, and Bud Problems
Start with the plant’s stage and the soil before making a change. A leaf that yellows in late fall may simply be completing the normal seasonal cycle, while widespread yellowing in active growth deserves a closer look at water, drainage, and root health. Compare affected leaves with the clump’s overall condition and recent weather rather than treating every color change as a fertilizer problem.
Yellow or brown foliage
If the entire plant yellows while the soil stays wet, check for poor drainage, overwatering, or a crown planted too deep. Pause irrigation, clear mulch away from the crown, and see whether water drains from the site after rain; where it pools, moving or raising the plant is more effective than waiting for a wet bed to improve. If only older leaves brown as temperatures cool, and new growth is otherwise healthy, seasonal dieback is more likely.
Brown leaf tips or bleached patches can follow drought or intense afternoon sun, especially in a newly planted clump. Check moisture several inches down and water deeply if the root zone is dry; if soil is already moist, look for exposure to hot reflected surfaces and provide afternoon shade where practical. Remove only damaged leaves, not the whole green fan.
Few flowers or distorted buds
A clump that grows leaves but sets few scapes often needs more sun or has become crowded. Count the hours of direct light, check whether nearby shrubs have filled in, and compare the clump’s size with its allotted space before adding fertilizer. If a dense mature clump has declined, divide it and replant only the number of fans you can keep contained.
Inspect distorted or unopened buds before spraying anything. Weather, physical damage, or an insect problem can all change the flower, so look for repeated damage across several buds and check nearby plants; if the issue persists, take clear photos to a local extension office for diagnosis. Avoid applying a broad-spectrum pesticide without identifying the cause and confirming that a treatment is appropriate for the plant and local pollinators.
Keep Cats Away From Daylilies
ASPCA lists daylilies (Hemerocallis spp.) as toxic to cats and identifies vomiting, loss of appetite, lethargy, kidney failure, and death among possible clinical signs. The risk is not limited to a particular flower color, and this source applies to the genus, not just orange-flowered plants. If cats can reach your garden, keep daylilies out of their access or choose a different perennial rather than relying on a fence or on the assumption that an outdoor cat will ignore the foliage.
If you suspect a cat has chewed any part of a daylily, contact a veterinarian or animal poison-control service immediately; do not wait for symptoms to appear. The ASPCA’s daylily listing identifies the plant as toxic to cats and provides its current poison-control contact guidance. Keep the botanical name or a photograph available when you call so the plant can be identified accurately.
Conclusion
Orange daylily is easy to grow once you give its spreading habit the same attention as its flowers. Confirm that you have Hemerocallis fulva, check local invasive-plant guidance, and plant it only where you can monitor the edges; where it is unsuitable, choose a less aggressive daylily or a native alternative.
For a contained planting, set the crown at soil level in sun and well-drained soil, water while it establishes, and leave healthy foliage in place after bloom. Divide only when the clump needs room or vigor, handle every root fragment carefully, and keep cats away from all daylilies. Those few decisions lead to a healthier display and a garden that remains manageable.



