How to Grow and Care for Sugar Cane
Learn how to grow sugar cane from stem cuttings, with practical advice on sun, soil, watering, containers, winter protection, pests, and harvest.
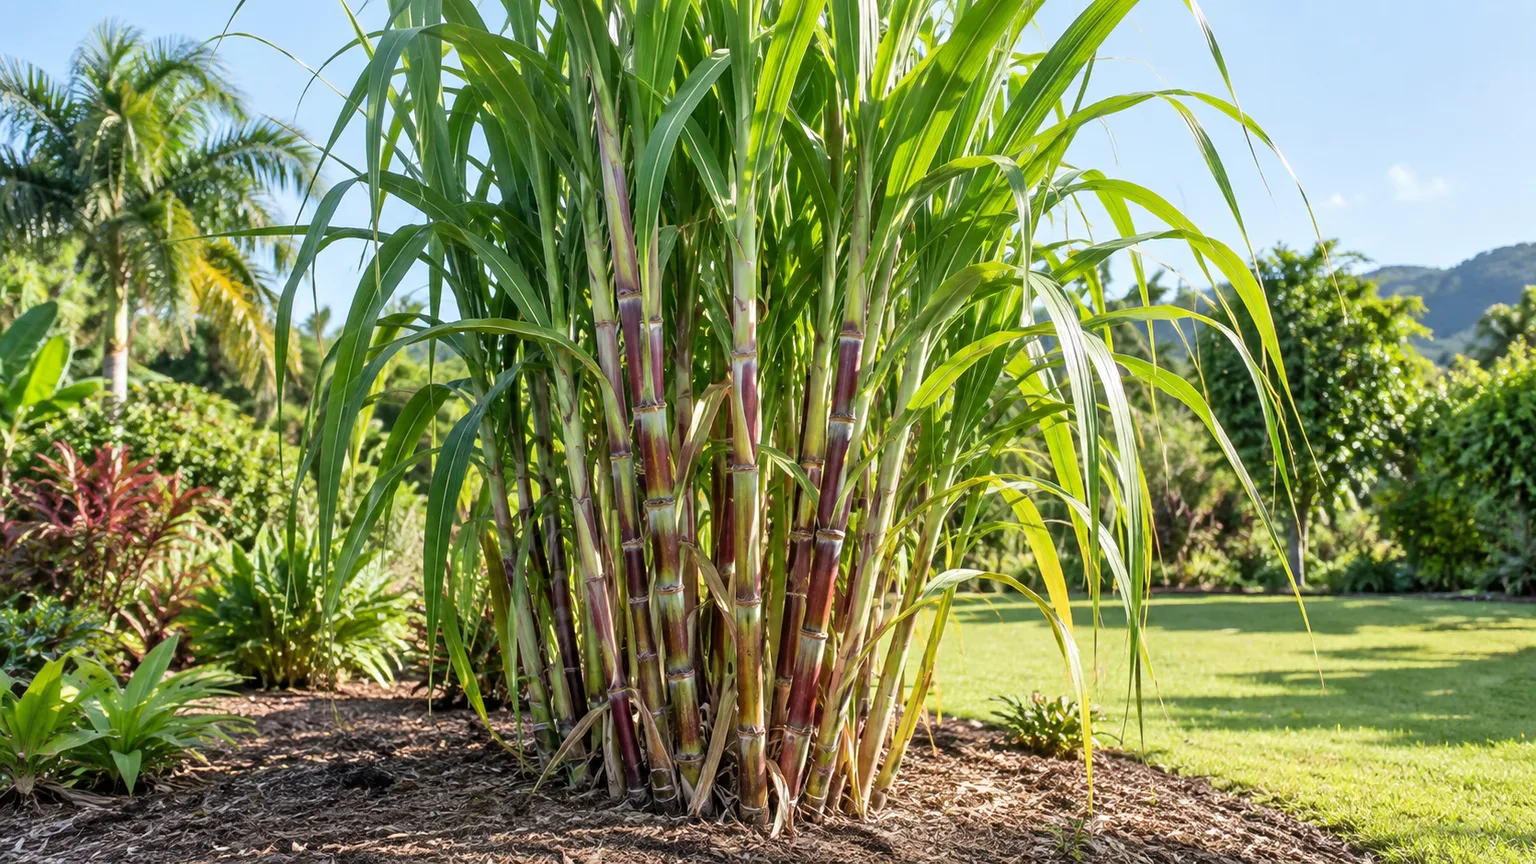
Sugar cane (Saccharum officinarum) is both an edible crop and a dramatic ornamental grass. In a warm garden it can make a tall screen or windbreak; in a cooler climate, one large pot can deliver a season of fast, architectural growth. The plant is not difficult, but it is easy to underestimate its height, sharp leaf edges, water needs, and sensitivity to cold.
The most reliable way to grow it at home is from a fresh stem section with living buds, not from seed. Give the cane full sun, warm soil, regular moisture, room to spread, and excellent drainage. If you live below the plant’s reliable hardiness range, treat it as a seasonal container plant or plan to protect it before freezing weather rather than hoping an established clump will shrug off winter.
One more decision changes everything: are you growing for foliage and screening, or do you want stalks to chew or juice? Ornamental cane can receive lighter feeding and less intensive harvest management. An edible planting needs clean source material, careful pesticide choices, and a harvest plan that fits the slow maturation of a warm-season grass.
What Sugar Cane Needs Before You Plant
Sugar cane is a large, tufted perennial grass in the Poaceae family. Its jointed stalks resemble bamboo, but the thick canes contain sweet sap and the leaves are long, arching, and capable of leaving a painful cut. In tropical or semi-tropical conditions, the species can reach 15 to 20 feet; in a cool climate where it grows for one season, it is more likely to finish around 5 to 8 feet. The Missouri Botanical Garden Plant Finder lists it as winter hardy in USDA zones 9–10 and notes its need for consistently moist, well-drained soil.
Sugar Cane at a Glance
| Need | Practical target |
|---|---|
| Plant type | Warm-season, clumping perennial grass |
| Botanical name | Saccharum officinarum |
| Family | Poaceae |
| Reliable in-ground range | USDA zones 9–10, with local microclimate variation |
| Light | Full sun; more sun means sturdier, fuller canes |
| Soil | Fertile and moisture-retentive, but never chronically soggy |
| Starting material | Fresh cane set or stem section with several healthy nodes |
| Mature scale | About 5–8 feet as a cool-climate annual; 15–20 feet in tropical conditions |
| Main hazards | Freezing temperatures, sharp leaves, sprawling stalks, root rot |
Those figures are planning numbers, not a promise. Variety, day length, water, fertility, planting depth, wind, and the length of your warm season can shift the final size. A cane that stays short in a marginal climate may be healthy; a cane that grows tall and leans in shade may be telling you the site is wrong.
Choose Food Cane, Ornamental Cane, or Container Cane
If your priority is a harvest, look for a locally adapted food or chewing variety from a reputable nursery or grower. If your priority is appearance, heirloom canes offer colored bands, unusual nodes, waxy coatings, or purple foliage. The University of Hawaiʻi’s Hawaiian Sugar Cane resource documents the diversity of traditional cultivars, a useful reminder that “sugar cane” is not one visually identical plant.
You can also grow a general-purpose cane as a living screen, but do not plant it where children, pets, or visitors brush past the leaves. Keep a clear path around the clump for watering and cutting. A narrow side passage, the edge of a frequently used patio, and the mouth of a play area are poor locations even if they receive ideal sun.
For a first attempt, a container is often the smartest choice outside zones 9–10. You give up some ultimate size, but you gain control over drainage, winter placement, and the plant’s ability to root into unwanted areas. Choose an in-ground bed when you have a genuinely warm climate, several feet of clearance, and a use for a tall, permanent clump.
Pick a Site by Climate and Space
Start with the cold question, not the fertilizer aisle. Sugar cane likes heat and will stop growing when temperatures are too cool; freezing weather can kill leaves and damage the crown. A sunny microclimate beside a south-facing wall may extend the season, but reflected heat does not make a zone 7 site equivalent to a tropical one.
Choose the brightest site you have, ideally with full sun for most of the day. Inadequate light produces thin, stretched stalks with less leaf mass and poor mechanical strength. The result is often mistaken for a watering problem because the leaves droop, but adding water cannot replace the structural growth that strong light supports.
Allow at least 3 to 6 feet of working space around a backyard clump, more if your cultivar is vigorous. The canopy can arch well beyond the base, and mature stalks become difficult to cut from inside a dense thicket. If the goal is screening, plant the cane where its height helps you without blocking a window, shading a vegetable bed, or dropping abrasive leaves over a walkway.
Wind matters because tall, water-filled stalks act like a sail. A protected bed, a sturdy fence several feet away, or a mixed planting that reduces wind speed can help. Do not crowd cane against a wall so tightly that air cannot move; the combination of wet foliage and poor circulation increases disease pressure.
Plant Cane Sets in Warm Soil
Plant in spring after the danger of hard frost has passed, once the soil is reliably warm. In tropical climates, you have a much longer window, but the principle remains: a cutting that sits in cold, saturated soil is more likely to decay than to root. A soil thermometer is useful in marginal regions; warm air for one afternoon is not the same as warm soil around the bud.
In-Ground Planting Method
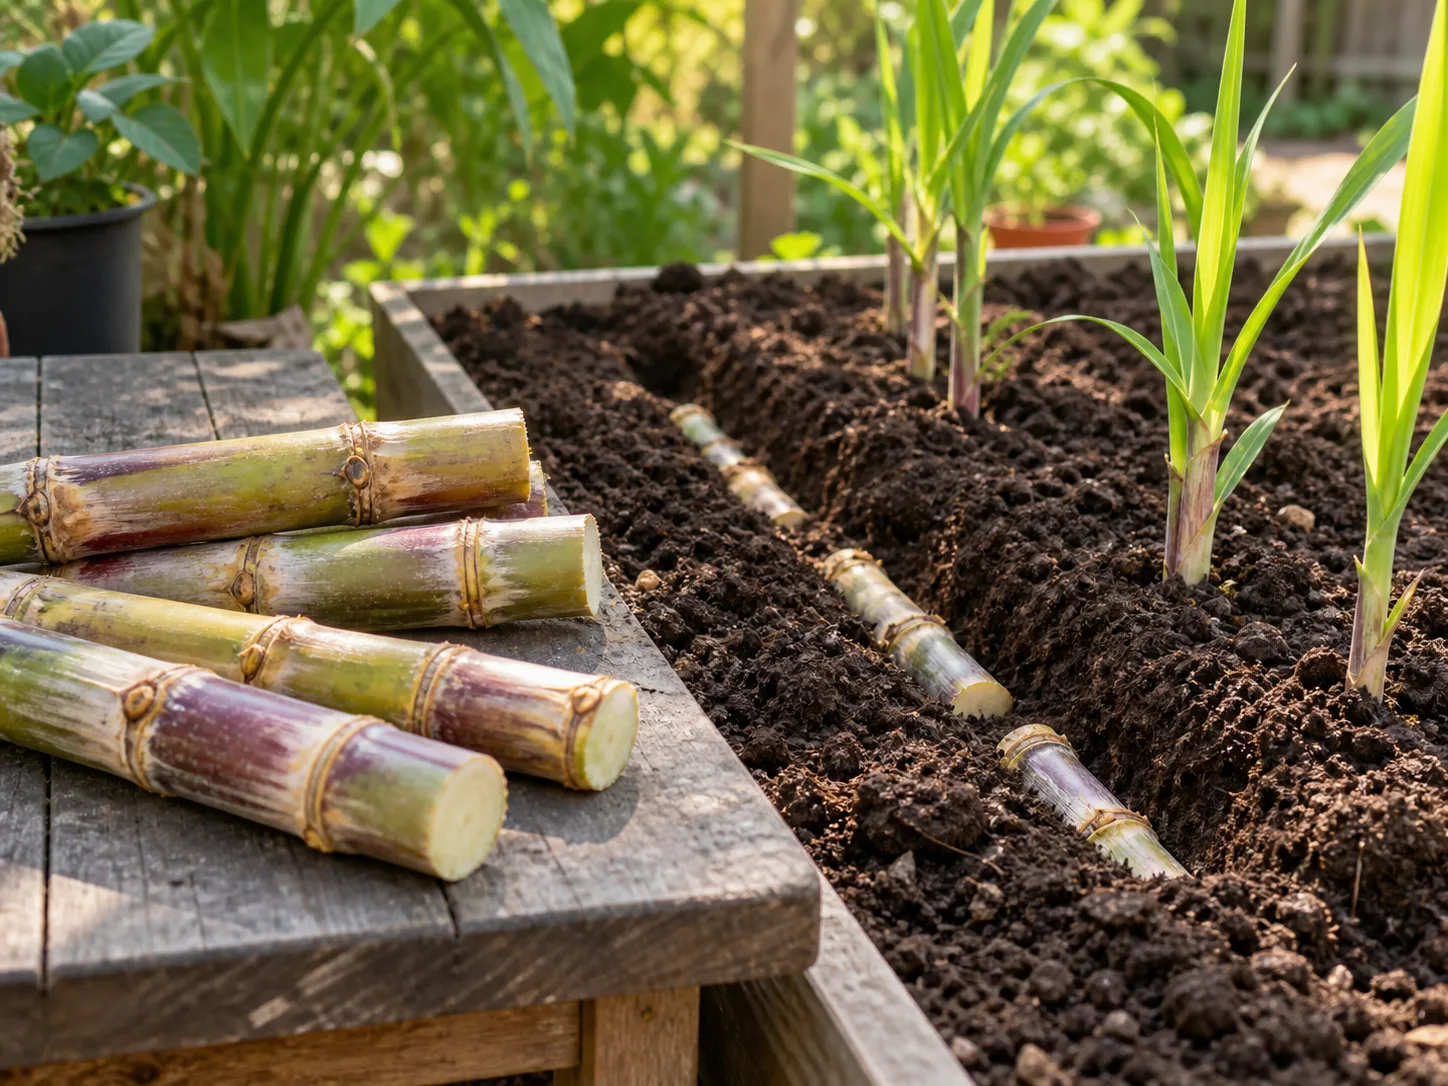
Use a plump, clean stem section roughly 1 to 2 feet long with several intact nodes. A node is the jointed ring on the stalk, and the small bud near it is the growing point. Avoid cane that is shriveled, blackened, moldy, split through the buds, or so old that the nodes feel dry and hollow.
Prepare a bed that drains after heavy rain. Work compost into the planting zone if the soil is thin or depleted, but do not turn a poorly drained hole into a bathtub by filling it with rich material. If water sits in the furrow for hours after rain, raise the bed or choose a different site before planting.
For a small home planting, dig a furrow several inches deep, lay the cane horizontally, and cover it with enough soil to keep the stem moist while leaving the surface easy to warm. Aim the buds sideways or slightly upward rather than burying a set upside down. Water thoroughly once, then keep the soil evenly damp while the buds activate.
In a very warm, windy location where you expect a large clump, deeper preparation can improve anchoring. A University of Hawaiʻi expert interviewed by Homes & Gardens recommends a trench about 18 inches deep for a 1- to 2-foot cutting, with the cane laid at the bottom and only part of the trench backfilled at first so shoots can emerge as the soil settles. That method makes sense for a permanent, tall clump, but it is unnecessary for every container or small seasonal bed. The Homes & Gardens sugar cane guide is useful here because it connects planting depth with the leverage created by many tall stalks.
Expect shoots in roughly two to four weeks when the cane is fresh and conditions are warm. Do not dig up an apparently quiet set every few days; that breaks new roots and dries the bud. Instead, check moisture with a finger a couple of inches down and wait for the soil to warm.
Container Planting Method
Use a heavy container with generous drainage holes and enough depth for a substantial root mass. A pot around 18 to 24 inches wide is a more realistic starting point than a small decorative planter, especially if you want the plant to stay upright. One clump per container is easier to water, move, and divide than several crowded sets in one pot.
Fill the container with a quality potting mix amended with a modest amount of compost. Avoid using dense garden soil by itself; it compacts in a pot and can keep the lower cane wet. Set the cutting horizontally or plant a rooted division so that the buds have warm contact with the mix, then water until excess drains freely.
Place the pot where it receives full sun and where a hand truck or two people could move it. A large container becomes surprisingly heavy after watering, and the plant’s leaves can make it awkward to carry through a doorway. If you plan to overwinter it, measure doors and identify the protected location before the cane reaches its largest summer size.
Propagate More Plants from Stem Cuttings
Commercial sugar cane is commonly multiplied vegetatively because a stem already contains the buds needed to make new shoots. The same logic works in a home garden: each viable node is a potential plant. Seed is a poor first choice for a named variety because seedlings may not resemble the parent and flowering is uncommon in short seasons.
Choose a Viable Cane Set
Use a sharp, sanitized tool to cut a healthy stalk into sections with multiple nodes. A long set gives you more possible buds; shorter pieces are easier to fit into a pot. Let the cut surfaces dry only briefly if they are dripping, then plant promptly so the cane does not lose moisture.
Lay the section horizontally in moist mix or a shallow furrow, cover it lightly, and keep the bud zone warm. You can also root a short upright section, but horizontal planting gives several nodes a chance to activate and is more forgiving when you are unsure which bud is strongest.
Freshness matters more than a magic measurement. An agricultural germination study on sugar cane found that bud position on the stem influenced emergence and early growth, which supports a practical rule: use several undamaged buds rather than betting your whole crop on one eye. The study on bud location and stem-cutting germination is a research reference, not a reason to count nodes obsessively in a backyard pot.
Once shoots appear, resist the temptation to separate them immediately. Let the new plant establish roots and produce several leaves first. If you want multiple plants, divide a rooted clump during active growth, ensuring each division has a healthy shoot and roots, or make additional cane sets from mature stalks after a planned cutback.
Common propagation failures have clear patterns. No shoots after several weeks usually means cold soil, a dead bud, a dried-out cane, or excessive planting depth. A soft, foul-smelling set points to rot, often from stale material or waterlogged mix. Remove failed material, refresh the medium, and correct the condition before trying another cutting.
Water and Feed for Steady Growth
Sugar cane grows fastest when it has consistent moisture, but “moist” is not the same as “always wet.” Water deeply when the upper few inches begin to dry, then let excess drain. During hot, windy weather, a container may need checking daily; an in-ground bed with mulch and clay soil may need water much less often after rainfall.
Use the plant and the soil together as your gauge. Curling or limp leaves with dry soil call for a thorough soak. Yellowing lower leaves, a sour smell, slow growth, or a soft crown calls for a drainage check before more water. Mulch can reduce evaporation, but keep it a few inches away from the stalk bases so the crown stays ventilated.
Do not deliberately drought-stress young cane to chase sweetness. A slight reduction in irrigation near a planned harvest may be reasonable in a warm, well-drained bed, but a thirsty plant has less ability to fill out stalks and recover from heat. In containers, drying too hard can shrink the root ball away from the pot wall and make subsequent water run down the sides.
Feed according to your goal and a soil test when possible. A vigorous ornamental clump often needs only compost plus a slow-release, grass-appropriate fertilizer applied according to its label. A production-oriented planting has a larger nutrient demand, especially for nitrogen, but repeated high-nitrogen applications can create lush, weak tops and fertilizer burn in a small bed.
Apply granular fertilizer to moist soil and keep it away from the stalk bases. Water it in, and stop feeding when the plant is entering cold dormancy or when a container is being moved into low light for winter. If new leaves are pale throughout the plant despite good light and drainage, test the soil rather than escalating fertilizer blindly; excess salts can mimic nutrient problems.
Prune and Manage a Heavy Clump
Sugar cane is not a tidy, self-contained tuft once it gets established. Remove dead leaves and cut damaged or leaning stalks at ground level with clean loppers. Wear gloves, long sleeves, and eye protection, and approach the clump from a clear side because the leaf edges and pointed tips can cut exposed skin.
Thin for airflow and access instead of shearing the entire plant on a routine calendar. Remove the weakest, oldest, or most inconvenient stalks first, keeping enough healthy canes to maintain the screen or ornamental effect. If the clump is repeatedly falling outward, the cause may be shade, shallow planting, wind, too much top growth, or a crown that has simply outgrown its space.
Cut stalks can become mulch or propagation material if they are healthy. Do not leave fallen cane lying on damp soil for months; nodes can root where they touch and create a second clump in an unwanted spot. This is one reason to keep a permanent planting contained and to remove spent material after pruning.
Flowering is not automatically a problem. Mature plants may produce pale flower plumes late in the season, while annuals often do not flower before cold arrives. If you grow for sugar content, flowering may coincide with a shift in the plant’s priorities, but for an ornamental, the plume is simply part of the seasonal display.
Overwinter Sugar Cane in Cold Climates
In USDA zones 9–10, a well-sited cane may overwinter in the ground, though leaf damage can still occur during an unusual freeze. Outside that range, container growing gives you the best odds. Bring the pot into a bright, protected space before the first frost, not after the leaves have collapsed and the crown has been chilled.
Indoor overwintering is a holding pattern, not a second summer. Place the plant in the brightest available light, reduce watering as growth slows, and do not keep the mix constantly wet. Check for insects before bringing it inside, and avoid placing a huge pot where it blocks a heater, narrows an exit, or can tip over.
If an in-ground plant is hit by frost, wait until the extent of damage is visible before cutting everything down. Remove mushy tissue, then cut dead stalks to healthy material. A thick mulch over the crown can buffer temperature swings in a suitable climate, but it cannot rescue a crown sitting in cold, saturated soil. In marginal zones, a cold frame, greenhouse, or container is a more dependable strategy than extra mulch alone.
Diagnose Pests, Diseases, and Weak Growth
Healthy sugar cane is vigorous, but a dense clump can hide trouble. The Missouri Botanical Garden lists moth caterpillars, borers, termites, spittlebugs, mealybugs, rots, smut, red stripe, and viral problems among potential concerns. A sugar cane pest guide from Gardening Know How is helpful for recognizing common insect patterns, but diagnosis should begin with the plant, not a spray bottle.
Read the Symptom Before Treating
Start by separating a site problem from a pest problem. Uniformly thin, floppy growth usually points to insufficient sun, shallow rooting, wind, or an overgrown clump. A single bent stalk after a storm is a structural event; many weak stalks across a shaded bed are a growing-condition issue.
Inspect the leaf undersides and stalk joints for clusters of aphids, mealybugs, or spittlebugs. A small population can often be knocked off with a firm water stream and followed with regular inspection. Ant activity, sticky residue, distorted new leaves, or sooty coating suggests sap-feeding insects and warrants closer checking.
Look for pinholes, frass, wilted tops, or tunnels when a stalk declines from the inside. Borers are harder to manage once established because the insect is protected within the cane. Cut out and discard badly affected stalks, sanitize tools between cuts, and do not use suspect cane as propagation material.
Root rot presents differently: the soil stays wet, the base softens, growth stalls, and yellowing may spread. Unpot a container specimen or inspect the crown edge in a bed, trim away only clearly rotten tissue with a clean tool, and replant into a better-drained medium if healthy roots remain. If the crown is extensively mushy or the plant shows systemic streaking, remove it rather than spreading the problem through divisions.
Smut, red stripe, and viral diseases need a higher threshold for intervention because symptoms can overlap with weather or nutrient stress. Do not save cuttings from a plant with persistent striping, distorted shoots, unexplained stunting, or abnormal black growth. For edible cane, use only products specifically labeled for the crop and follow the label’s harvest interval; a home remedy is not automatically safe because the plant is technically edible.
Harvest Cane for Chewing or Juice
Home harvest is best treated as a bonus, not the first measure of success. A fast-growing cane can become tall in one season, but stalk maturity and sweetness depend on variety, temperature, water, and the length of the warm season. Some home growers cut usable cane after roughly 10 to 18 months, while a short-season planting may need to overwinter or simply remain ornamental.
Look for firm, well-filled lower stalks and mature-looking internodes rather than harvesting the first green stem that reaches waist height. The lower portion generally contains more developed juice than the leafy top. In a cold climate, finish the harvest before a hard freeze; frost-damaged stalks are a poor way to end the season and can complicate crown protection.
Cut, Clean, and Use the Stalks
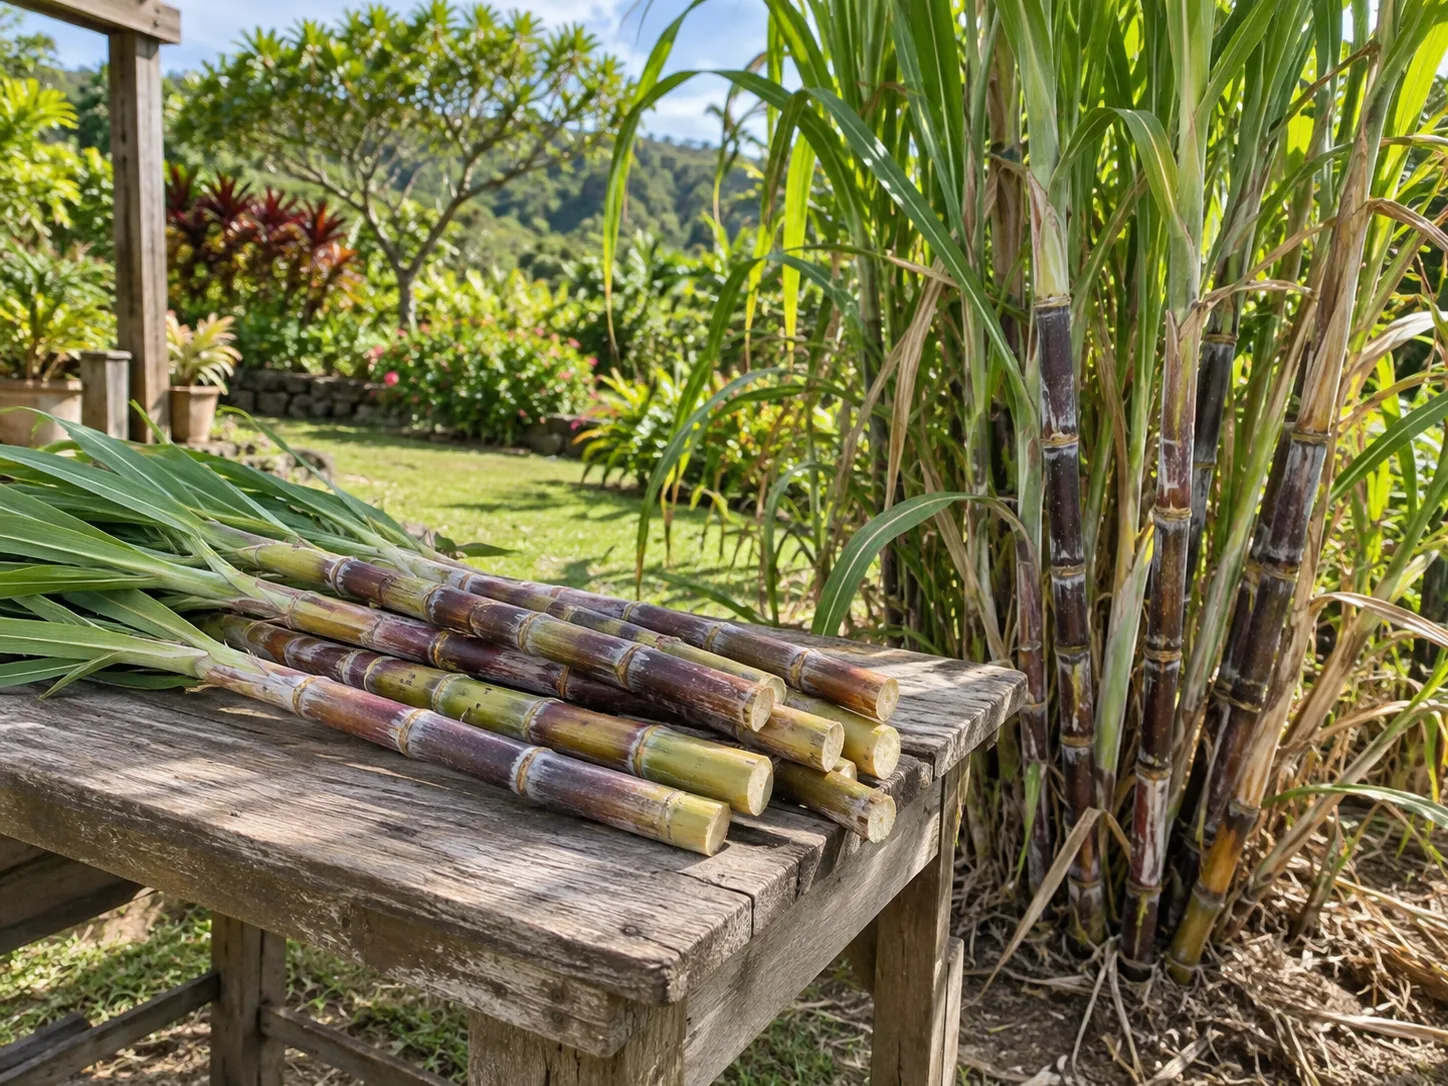
Wear long sleeves and gloves, then cut selected stalks as close to the ground as practical with a sharp, clean lopper or machete designed for the job. Keep your other hand and your legs out of the blade’s path, and do not wrestle a lodged stalk through a crowded clump. Remove the leafy top and set aside healthy sections you intend to propagate.
For chewing, trim away the tough outer skin and cut the clean inner cane into manageable lengths. For juice, use equipment made for fibrous cane and clean it thoroughly after use. Fresh-cut cane is perishable; refrigerate prepared pieces promptly, and discard anything that develops mold, a sour odor, or an off taste. Do not eat stalks from a plant recently treated with a product whose label does not permit edible harvest.
Harvesting does not have to mean killing the planting. In a warm climate, cut only the mature outer stalks and leave younger canes to fill the clump. If you are finishing an annual container crop or need to reset an overgrown bed, cut more heavily, save the healthiest node-bearing sections, and use the remaining material as mulch only if it is free of pests and disease.
Conclusion
The reliable sugar cane formula is simple but specific: start with a fresh, node-bearing cane set, plant after the soil warms, give it full sun and steady moisture, and keep the roots out of standing water. Plan for the mature footprint before the first shoot appears, because tall stalks, sharp leaves, and wind can turn a good crop into an awkward hazard when the clump is too close to a path.
In warm climates, sugar cane can return each year and become a useful screen, accent, or small harvest. In colder regions, a large container and an early winter move are usually more realistic. Grow it for the job your climate can support, and you will get a striking grass that is far easier to manage—and much more likely to produce usable cane—than a rushed planting in the wrong spot.



