Sundew Plant Care Guide: Light, Water, Soil, and Feeding
Learn how to grow a Cape sundew with the right light, mineral-free water, bog mix, and simple fixes for leaves that lose their sticky dew indoors or out.
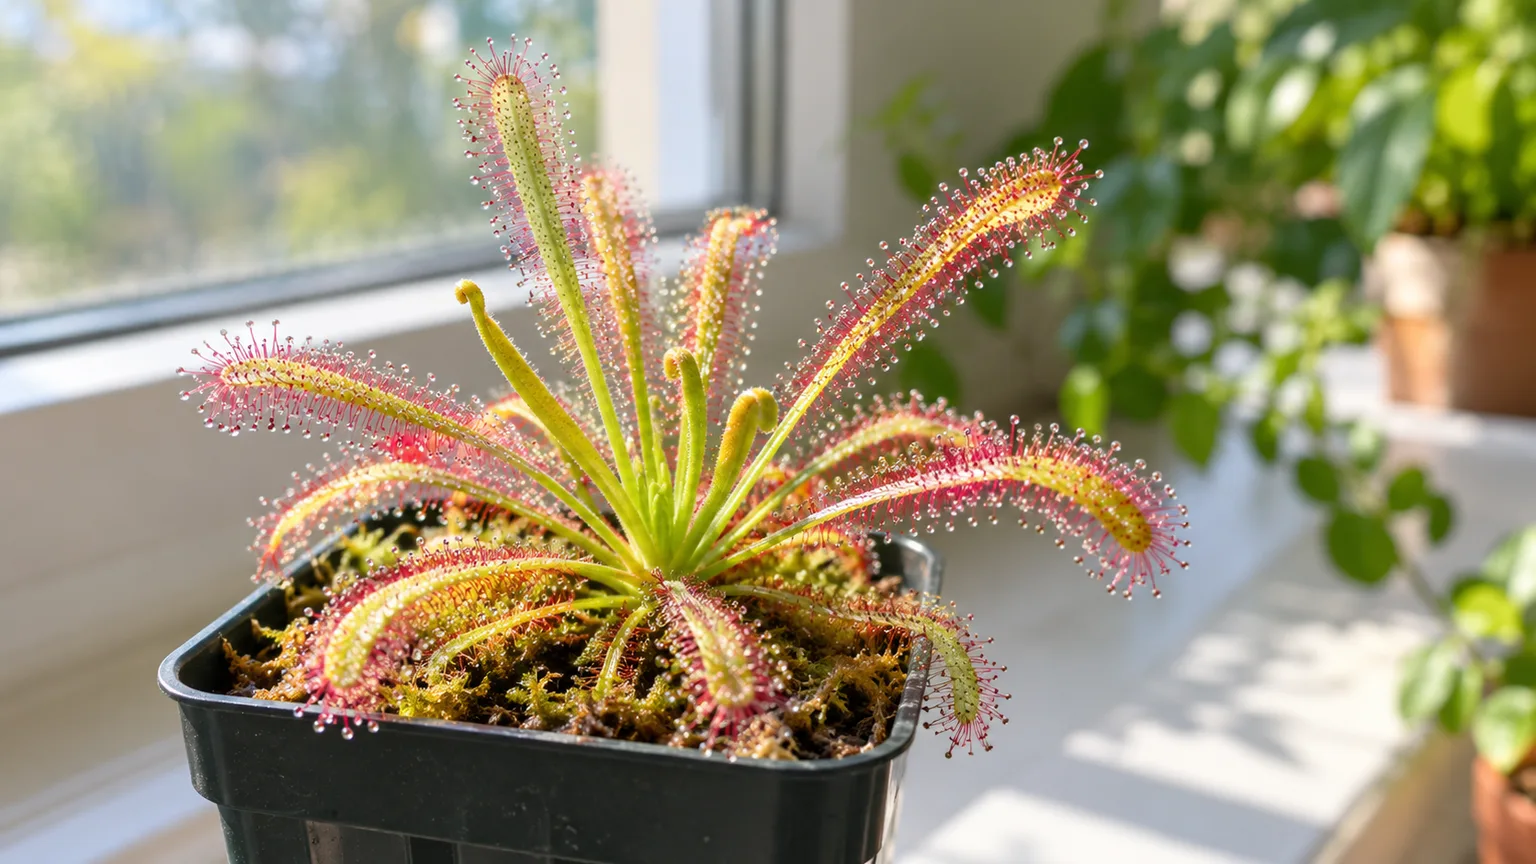
Sundews look as if their leaves have been dotted with morning dew, but the glistening beads are sticky mucilage produced by tiny tentacles. That surface traps small insects; the plant digests its catch to supplement nutrients that are scarce in its native wetland soil. The most useful starting point for a home grower is to identify the species, because “sundew” covers plants with different light, water, and seasonal needs.
This guide focuses on Cape sundew, Drosera capensis, a resilient rosette-forming species that is commonly sold as a houseplant. Its routine is simple once you get three things right: low-mineral water, nutrient-poor media, and enough bright light. It does not need a sealed terrarium, routine fertilizer, or a steady supply of insects.
Start by identifying the species
Check the label for Drosera capensis or “Cape sundew.” The species comes from the Cape region of South Africa and grows in wet, nutrient-poor habitats. Kew lists it as a perennial or subshrub native to the southern Cape; SANBI describes it as a robust, evergreen plant with a short rhizomatous base and long leaves that radiate from the stem. Those details explain why a well-grown plant keeps producing new leaves rather than dying back every winter. Kew’s Plants of the World Online entry and SANBI’s PlantZAfrica profile are useful references for its identity and natural form.
Do not apply the same care automatically to every plant sold as a sundew. Some temperate species form a winter resting bud called a hibernaculum; pygmy and tuberous sundews can have other seasonal cycles. A Cape sundew usually grows year-round indoors and does not need an induced winter dormancy, according to specialist grower Carnivero. If your label is missing or ambiguous, identify the species before changing temperature or watering for a presumed dormancy.
An established Cape sundew stays compact enough for a windowsill, but its shape changes as it matures. SANBI describes plants around 15 centimeters tall with a flower stalk bearing a succession of pink-mauve blooms. New leaves rise from the center while older leaves settle toward the outside, so judge a plant by its growing point rather than expecting every leaf to stay fresh at once.
Build a low-mineral growing medium
Use a nutrient-poor, acidic mix that stays wet without collapsing into dense mud. A dependable starting recipe is one part unfertilized peat moss to one part perlite or washed silica sand. SANBI also recommends a peat-and-sand or sphagnum-based medium for D. capensis. Carnivero uses a similar peat-and-perlite bog mix and advises wetting peat before potting because dry peat can resist water at first. Carnivero’s Drosera care guide and Gardenia’s Cape sundew guide both reinforce the need for a nutrient-poor substrate.
Avoid regular potting soil, compost, manure, garden soil, and mixes that contain fertilizer or lime. Those ingredients add nutrients or minerals that the roots are not adapted to handle. Do not add ordinary sand from a beach or building site; it can contain salts or fine particles that compact. Choose horticultural silica sand or perlite, and rinse it if the packaging is dusty.
Set the mix in a plastic nursery pot with open drainage holes, then place the pot in a shallow watertight tray. Plastic is light, easy to move, and less likely than unglazed clay to dry the mix rapidly or contribute minerals. The pot itself should drain freely: a sundew needs constant moisture around its roots, not a sealed container of stagnant, airless soil.
If you buy a premixed carnivorous-plant substrate, check that it is unfertilized and does not contain compost, lime, or a slow-release plant food. Pre-moisten it with suitable water before filling the pot; this both settles the mix and prevents dry peat from floating or shedding water during the first few irrigations. Choose the smallest pot that gives the roots and offsets room and still fits securely in its tray.
Give it bright light and acclimate it slowly
Put the plant in the brightest spot available, such as a sunny windowsill or under a strong grow light. Cape sundew can take full sun to partial shade outdoors; indoors, weak filtered light often produces long, pale leaves and fewer droplets. A little direct sun is useful, but a plant raised in a dim shop or terrarium should not be moved suddenly into scorching midday sun.
Acclimate it over roughly one to two weeks. Start with bright indirect light or gentle morning sun, then add a little more direct exposure every few days while watching the newest leaves. If they remain firm and the red coloring deepens without bleaching or crisping, keep progressing. If the leaf surfaces scorch or the pot heats excessively, move it back a step and give it more shade during the hottest hours.
In winter or in a dim room, a grow light can make the routine more consistent. Follow the lamp maker’s distance guidance and start with a moderate schedule, adjusting based on growth rather than assuming a particular number of hours works for every fixture. Rotate the pot occasionally so one side does not lean toward the window. A carnivorous plant setup can share a bright sill with other bog plants, but the sundew still needs its own pot and water tray so you can control its water quality.
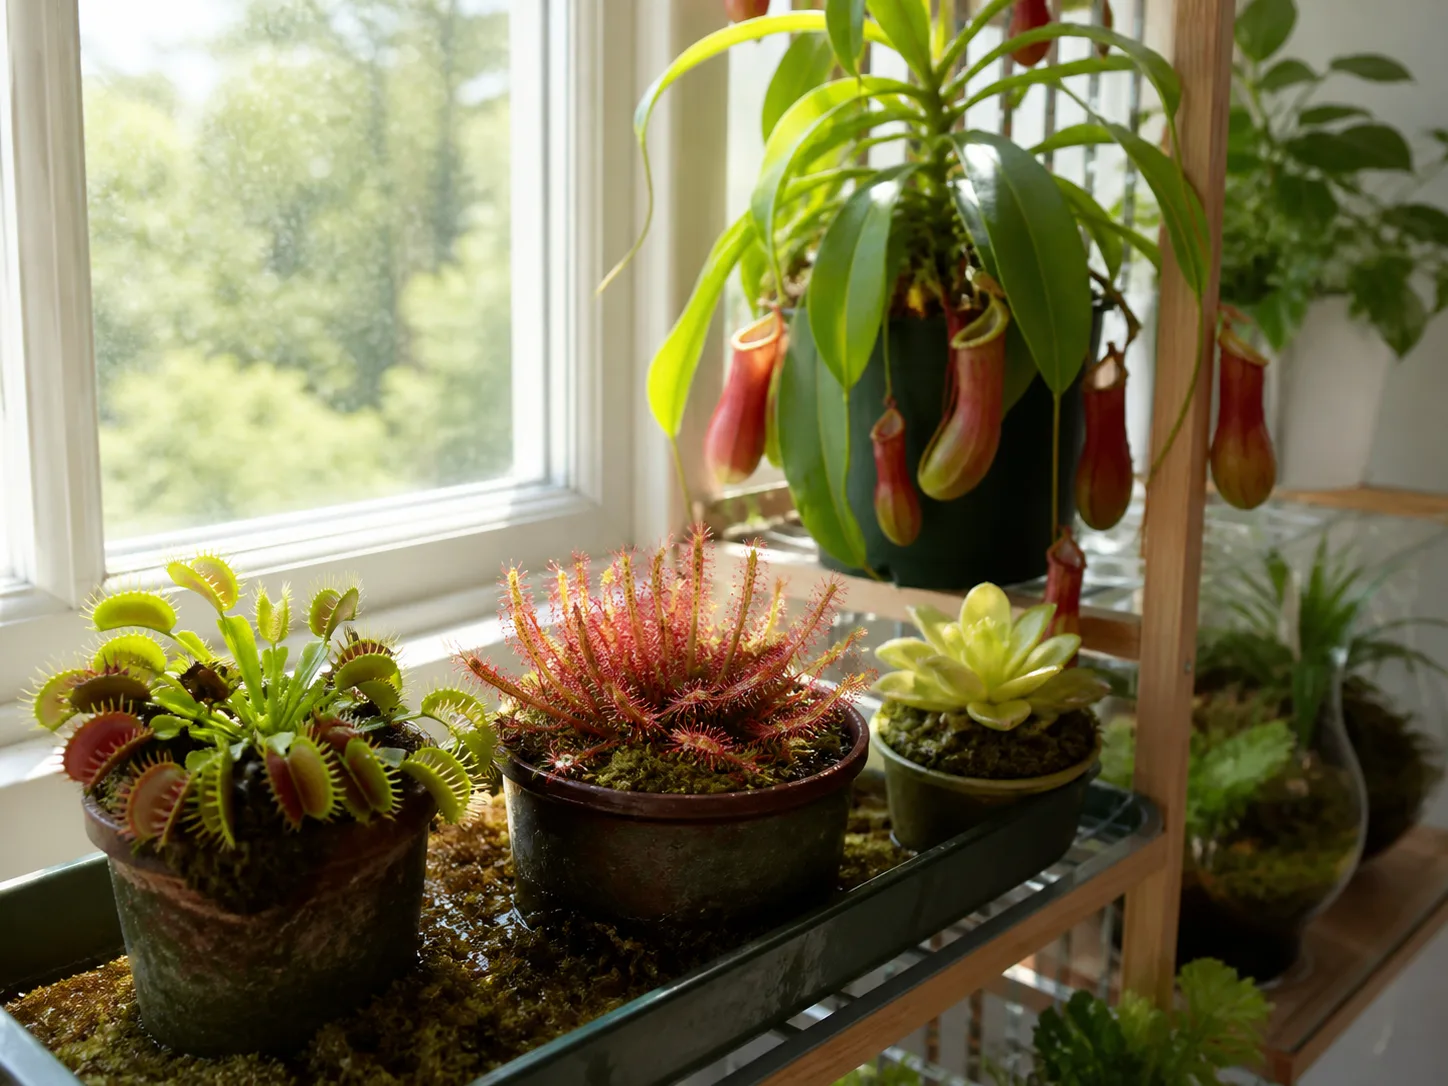
Water with mineral-free water
Use distilled water, reverse-osmosis water, or clean rainwater. Ordinary tap water and mineral water can leave dissolved salts in a small pot, even when they taste fine. Carnivero advises keeping water below 100 parts per million total dissolved solids (TDS) for long-term carnivorous-plant use; if your rain or tap water is uncertain, a simple TDS meter helps you check it instead of guessing. Boiling or using a basic carbon pitcher filter does not reliably remove dissolved minerals.
The tray method is straightforward: keep a shallow layer of water in the saucer so the mix can wick moisture through the drainage holes. SANBI gives a saucer depth of about 1 to 3 centimeters for Cape sundew. Refill when the tray is nearly empty, before the medium dries out. In warm, bright weather you may need to check daily; in cooler or darker conditions, the tray may last longer. The interval changes with the pot and room, so a weekly calendar is less reliable than looking at the water level.
Keep the medium consistently moist, but do not let a tray become dirty or foul-smelling. Empty and rinse it if algae or debris builds up, then refill with suitable water. If the plant has been watered with mineral-rich water once, switch to purified water and flush the mix gently from above with distilled or RO water. A single mistake is not always fatal; repeated mineral deposits are the bigger risk.
Keep temperatures mild and airflow steady
Cape sundew is comfortable in ordinary warm indoor conditions. Avoid prolonged cold exposure and protect it from frost; a potted plant can move indoors before cold weather arrives. The species is not a North American temperate sundew that should be forced into an outdoor winter rest. Carnivero groups D. capensis with tropical and subtropical sundews that can be grown without a seasonal dormancy.
Humidity does not need to be extreme if the plant has bright light and an even supply of water at its roots. A normal room can work. A terrarium may help in an especially dry home, but a sealed glass container in direct sun can overheat quickly, and stagnant air can encourage mold. Leave some airflow around the leaves, open a terrarium periodically, and do not rely on misting as a substitute for keeping the pot moist.
Feed sparingly; do not fertilize the roots
An established Cape sundew can catch small insects on its own, particularly if it is near an open window or among other plants. If it is growing new leaves and holding droplets, you do not need to feed it. Its insect-catching habit supplements the plant’s nutrition; it does not mean every leaf needs a meal or that the plant will control a household gnat problem.
If the plant lives in a screened room with no prey and you want to supplement it, offer one very small insect to a mature sticky leaf. Do not place a large fly across several leaves or repeatedly trigger every tentacle. Avoid meat, cheese, fish flakes, fertilizer pellets, and improvised kitchen scraps; they can rot on the leaf or create more damage than nutrition. Never add houseplant fertilizer to the substrate. The roots evolved in poor soil, and nutrient-rich mixes can burn them.
You can also leave feeding entirely to chance. A sundew that catches nothing for a few weeks can still grow well if light, water quality, and the potting mix are right. When you do offer prey, choose an insect small enough to sit on one leaf without bending or covering its growing point, and leave the plant undisturbed while the trap works. Feeding is a supplement, not a schedule to follow every week.
Read the dew before changing conditions
The sticky droplets, or mucilage, are a helpful clue but not a stand-alone health test. A newly shipped, handled, or repotted plant may lose much of its dew for a while even though the central crown remains firm. Older outer leaves also age and dry as new ones emerge. Watch the newest leaves over several weeks: fresh leaves that develop droplets are a better sign of recovery than whether every old leaf looks perfect.
If all new leaves stay dry, check the basics in a deliberate order: confirm the water is low in minerals, make sure the mix has not dried, and improve light gradually. Then look at room heat and airflow. Low humidity can contribute, but sealed glass and frequent misting are not the first fixes to try. SANBI notes that touching the leaves can reduce mucilage on them; avoid handling the sticky surfaces to “test” them, and let newly formed leaves show whether the plant is settling in.
Repot only when roots or offsets need room
Repot when roots extend well beyond the drainage holes, the plant and its offsets crowd the pot, or the growing medium has broken down. A stable plant does not benefit from frequent repotting. Choose a pot only slightly larger, refresh it with the same low-nutrient mix, and use a nonporous container such as plastic or glazed ceramic.
Moisten the new medium first. Slide the plant out gently, rinse away old mix with distilled or RO water if needed, and keep the fine roots damp while you work. Sundew roots can look dark and stringy; color alone is not proof that they are rotted. Remove only roots that are soft and decaying, then set the crown at the same height in the fresh mix. Return the pot to its tray and bright light, but give it a short settling period before judging the dew. A pause in sticky droplets after root disturbance is common; persistent decline in new growth is the reason to reassess.
Propagate Cape sundew
Cape sundew can be propagated from seed or vegetative material. Seeds create genetically variable seedlings; a leaf cutting makes a new plant from the parent. Work with clean tools and a fresh, damp carnivorous-plant medium, and label the pot because the smallest seedlings can be easy to overlook.
Leaf cuttings
Choose a healthy mature leaf and remove it cleanly with a disinfected blade or scissors. Lay it on the surface of moist peat-and-perlite mix or float it in a shallow container of distilled water. SANBI recommends partially covering healthy leaf cuttings with the growing medium and keeping them in a well-lit place out of direct sun while they form new growth.
Cover the pot loosely with a clear dome or bag to hold humidity, but allow some air exchange and keep it out of hot direct sun. Check that the medium stays damp, not flooded. Small plantlets may take weeks to appear; do not pull up the leaf to inspect it. Once each plantlet has several leaves and its own roots, separate it gently into a small pot. Keep it in bright indirect light at first, then acclimate it to stronger light as it establishes.
Fresh seed
Let the flower stalk finish and the seed capsules dry before collecting seed. The seeds are tiny, dark, and easy to lose, so shake the dry capsule over a sheet of white paper. Use a fresh pot of moist, unfertilized peat-based mix and scatter the seed over the surface; do not bury it. SANBI also recommends surface-sowing Cape sundew seed and keeping the medium moist.
Place the pot in a tray of low-mineral water under bright light and keep it warm. A loose clear cover can slow drying, but vent it so condensation does not remain trapped against the seedlings. Germination timing varies with seed age, warmth, and conditions, so keep the surface evenly damp and wait rather than digging for seeds. Skip neem oil or fungicide as a routine seed treatment; clean medium, careful watering, and airflow are better first safeguards for seedlings.
Handle flowers, pruning, and offsets
Mature Cape sundews send up a slender flower stalk with small pink or pale flowers. SANBI notes that flowers open briefly in good light and are usually self-pollinated. If you want seed, leave the stalk until capsules dry; if you do not need seed and a small plant is struggling, you can remove the stalk near its base. Flowering by itself is not a sign the plant is unhealthy. On a strong plant, you can let the flowers open one after another and collect the seeds later; they are far finer than ordinary garden seed and should be handled over a clean, light-colored surface.
Trim leaves only when they are fully brown or dead, using clean scissors near the base without cutting into the crown. Do not remove green leaves to tidy the rosette; they still capture light and may still produce dew. A healthy Cape sundew can also make young offsets at its base. Leave them attached while small, then divide during repotting when each has enough roots to establish on its own.
Prevent pest damage without harsh sprays
Aphids, mealybugs, and thrips can still attack a plant that catches insects. Look at new growth and leaf joints for clusters, cottony patches, or distorted leaves. Isolate an affected pot so pests do not spread to neighboring plants. For a small outbreak, remove visible insects carefully with tweezers or a soft brush, taking care not to crush the sticky leaves.
Avoid soap-based sprays and untested neem or oil treatments. SANBI specifically warns against soap-based insecticides for Cape sundew because they can dry the plant and reduce mucilage. Sundew leaves are specialized traps, not ordinary foliage, so a product that is safe on common houseplants may still harm them. If pests persist, consult a carnivorous-plant specialist and follow the product label rather than improvising a concentrated spray.
Choose an indoor or outdoor spot by climate
Indoors is the safer default if your weather includes frost or abrupt cold snaps. Outdoors, grow the pot where it gets strong light and can be moved quickly if temperatures fall. Keep the pot in a tray of rainwater or other suitable water, and protect it from a hot black surface that can cook the roots in direct summer sun. A container is easier to manage than planting directly into garden soil, where fertilizer, minerals, and neighboring roots are hard to control.
In a warm, mild climate, Cape sundew can grow outside in a bog-style container or protected wet area. Its South African native habitat is moist and marshy, but a home garden is not the same as a natural bog; use a pot or contained bog mix, and prevent the plant from spreading beyond the area you can manage. Do not infer a hardiness zone from generic sundew labels. A temperate sundew and D. capensis may look similar while needing different winter treatment.
Season matters because the tray can empty faster in hot, breezy weather, while a winter windowsill can cool sharply at night. Check the water level more often during a heat wave, and move the pot away from freezing glass if the room drops in temperature. Do not move an indoor plant outdoors just because spring has arrived; wait until nights are reliably mild, then acclimate it to brighter light in stages. This protects the leaves and makes it easier to respond if a cold front returns.
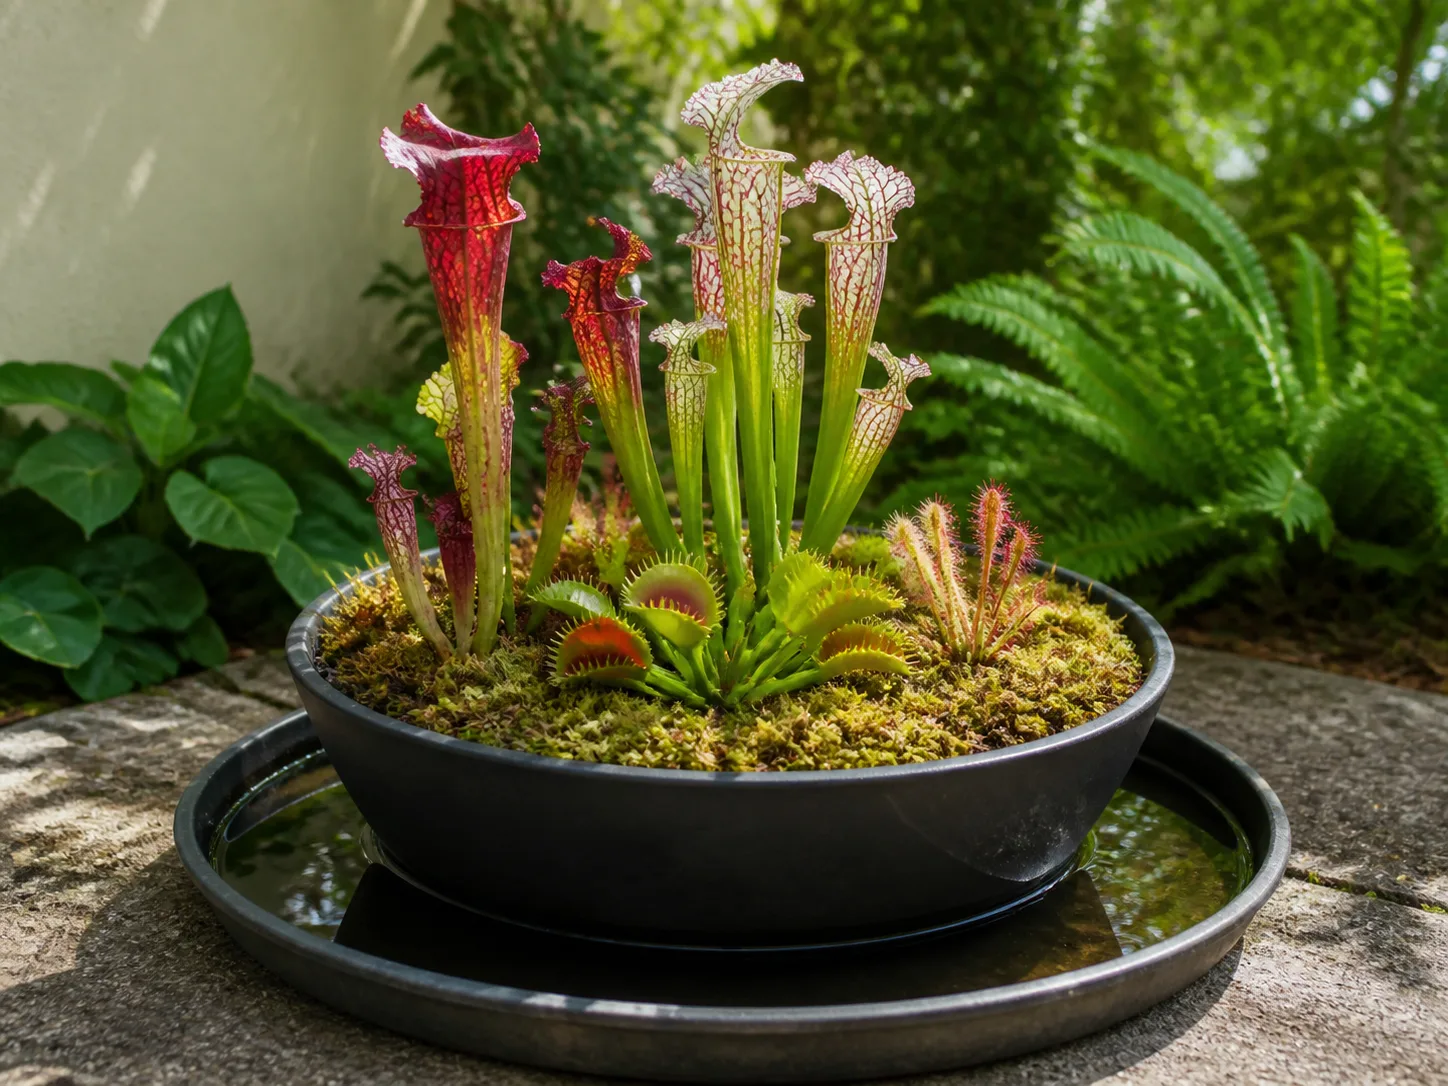
For an indoor plant, a bright windowsill with a stable tray is usually simpler than a terrarium. A multi-plant carnivorous display can work if you keep the Cape sundew’s water and species needs in view. SANBI’s profile describes the species as suitable for pot culture and also grown outdoors in bog gardens in its native region.
Troubleshoot leaves and the crown
Change one factor at a time and judge the next leaves, not just the damaged ones. Sundews replace old leaves as they grow; a few brown outer leaves do not automatically mean root rot. A soft central crown, a mix that has dried hard, or repeated loss of new growth deserves a closer look.
Pale, stretched, or dewless new leaves
Pale growth that stretches toward a window usually points to insufficient light. Move the plant to a brighter location gradually or add a grow light, rather than giving it sudden harsh sun. If new leaves are formed but stay dry, also verify the water source and tray level; mineral buildup and short dry spells can undermine the traps even in a bright room.
After repotting or shipping, a temporary drop in dew is less concerning if the crown is firm and new leaves continue to emerge. Do not mist repeatedly or fertilize to “wake it up.” Keep moisture steady, give it time to acclimate, and compare new growth after a few weeks. If the newest leaves become more colorful and sticky, the conditions are moving in the right direction.
Brown older leaves or a soft crown
Outer leaves naturally brown as they age. Remove them only when fully dead, then check whether the center continues to produce healthy leaves. A soft or collapsing crown is more serious than a brown edge and can point to rot, especially if the mix is compacted or the plant was buried too deeply during repotting.
Keep the pot moist but restore drainage if the medium has become dense. Gently remove loose dead material and inspect only if decline continues; pulling apart a stable plant can cause more stress. If the roots are soft and the crown is still firm, replant healthy tissue in fresh, airy, nutrient-poor medium. If the crown itself is mushy, recovery is less certain, so take a healthy leaf cutting before discarding the plant.
Conclusion
For a healthy Cape sundew, start with species identification, a peat-based nutrient-poor mix, and distilled, RO, or clean rainwater in a shallow tray. Give it bright light, acclimate it instead of exposing it abruptly, and keep air moving around the leaves. Most problems become easier to solve when you inspect the newest growth and change one condition at a time.
Once those basics are stable, the plant can capture its own prey, flower, and produce offsets or seed without demanding a closed terrarium or weekly feeding. Keep the pot protected from frost, leave fertilizer out of the soil, and use gentle propagation methods when you want more plants. The glistening traps are the payoff for a routine built around the wet, mineral-poor conditions this sundew is adapted to.



