How to Care for Hydrangeas in Fall for Better Blooms
Learn how to care for hydrangeas in fall: identify bloom type, water and mulch correctly, deadhead safely, protect buds, and overwinter potted plants.
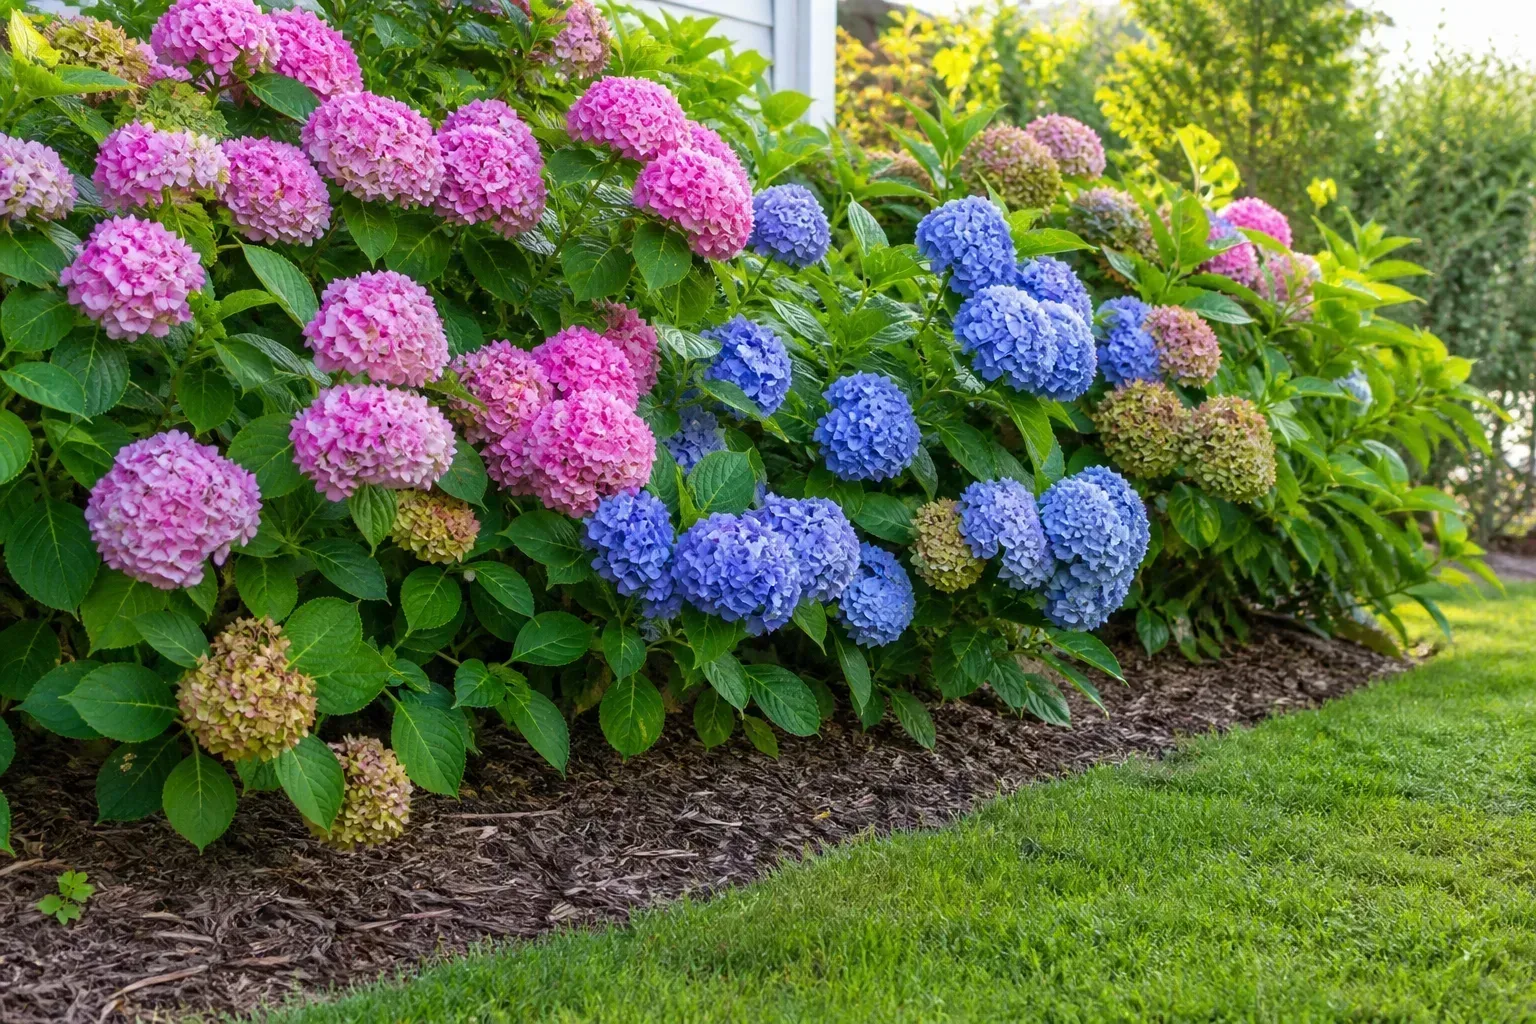
Fall hydrangea care is mostly about restraint. The shrub may look finished after its last flowers fade, but its roots can still be taking up moisture and some types are already carrying next year’s flower buds on the stems you are tempted to cut.
The safest approach is to identify the hydrangea first, then work from the ground up: correct watering, a clean mulch ring, limited feeding, and protection matched to your winter. Cosmetic cleanup comes last. If the cultivar is unknown, leave healthy stems in place and remove only a clear hazard, dead branch, or diseased material.
The short answer: protect roots and avoid the wrong cut
For most hydrangeas, the fall checklist is simple: water deeply during dry weather, add a moderate layer of mulch, stop pushing soft new growth, and protect vulnerable plants from drying wind and severe cold. Do not automatically cut the shrub to the ground, and do not assume that leaf drop means every stem is dead.
The important exception is bloom biology. Bigleaf, lacecap, mountain, and oakleaf hydrangeas generally flower on old wood, meaning the stems that grew this season may hold next year’s buds. Panicle and smooth hydrangeas flower on new wood, so their spring growth carries the flowers; even then, early spring is usually a better structural-pruning window than fall because intact stems provide winter interest and reduce exposure to injury.
This is why fall is a poor time for a blanket haircut. A branch can be leafless and alive, a dried flower head can be useful winter cover, and a plant that looks untidy may be perfectly prepared for dormancy.
Identify your hydrangea type before touching pruners
Look at the flower shape, leaf shape, and plant label rather than relying on a generic “hydrangea” tag. The Royal Horticultural Society’s hydrangea pruning guide separates mopheads and lacecaps from panicle and smooth types because they carry flowers on different ages of wood.
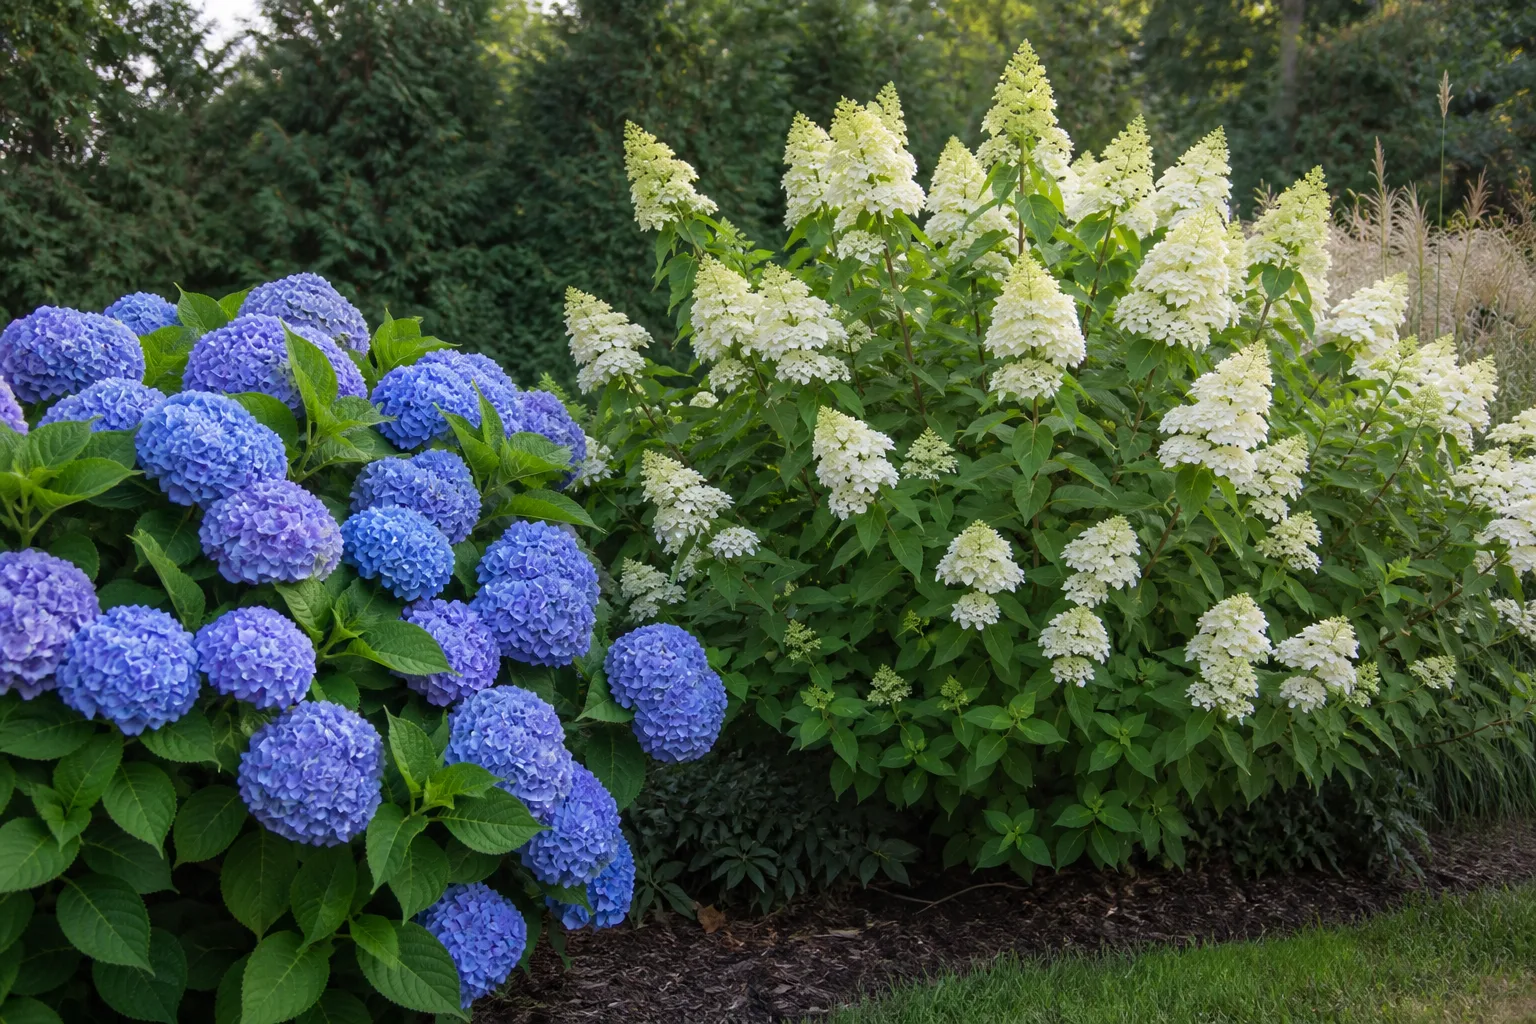
| Type | Flower and foliage clues | Where next year’s flowers form | Fall default |
|---|---|---|---|
| Bigleaf, mophead, or lacecap (H. macrophylla) | Rounded or flat heads; broad, toothed leaves | Mostly old wood | Leave structural stems intact |
| Mountain (H. serrata) | Smaller lacecap-like heads and leaves | Old wood | Avoid late shaping |
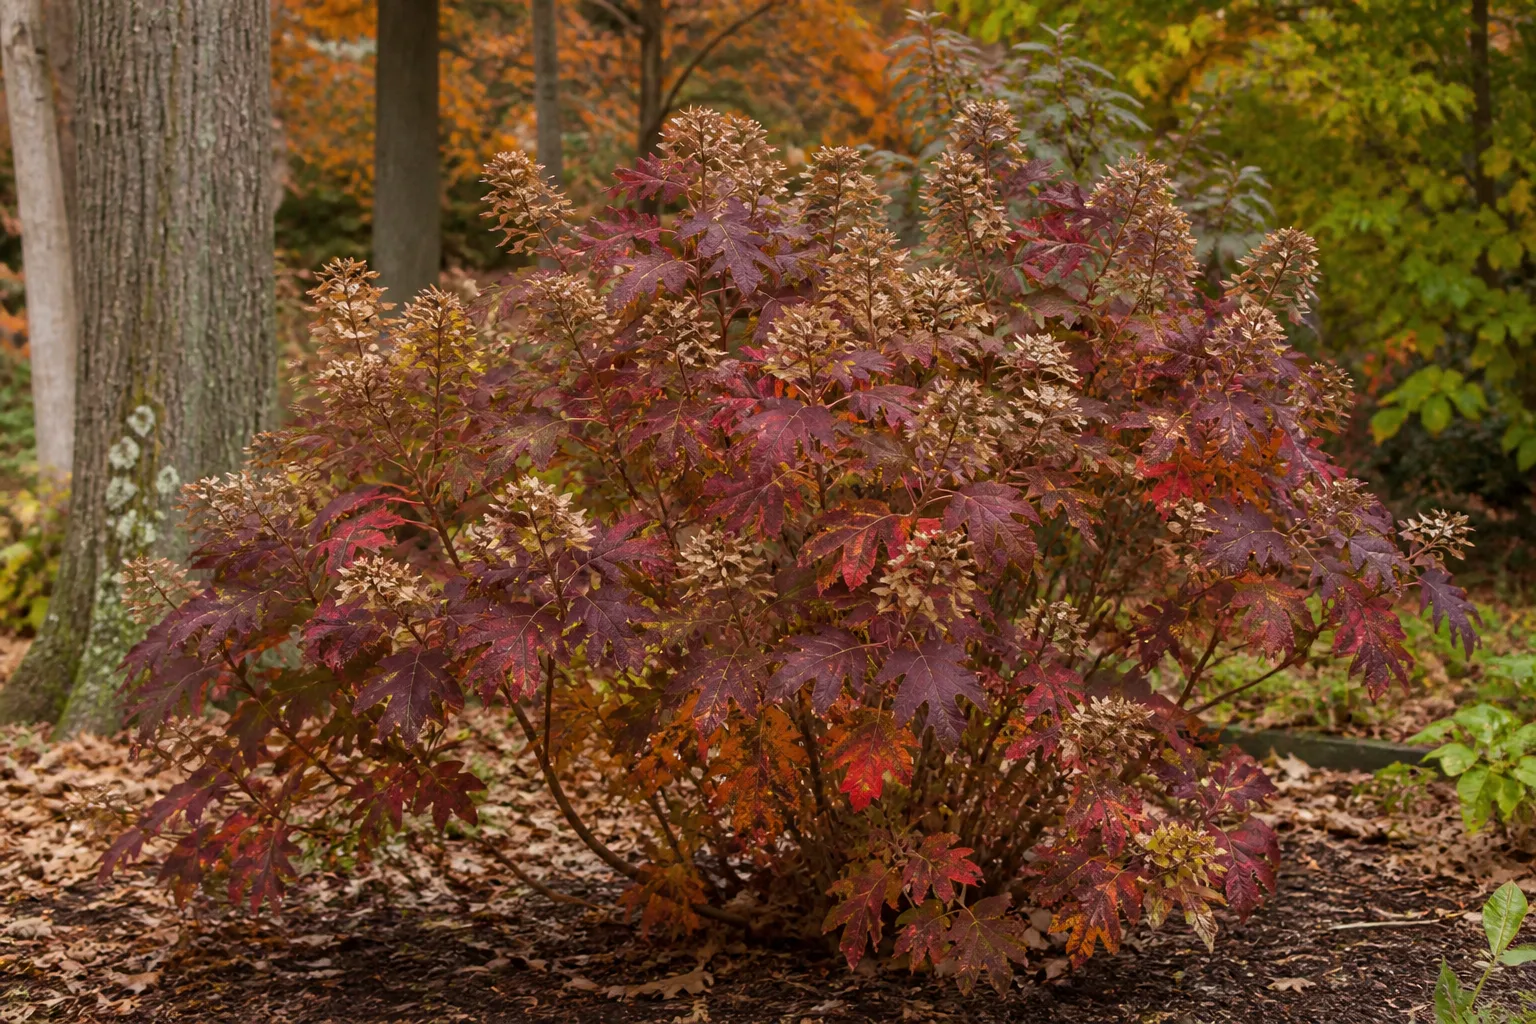
| Oakleaf (H. quercifolia) | Oak-shaped leaves; cone-shaped heads; strong fall color | Old wood | Keep stems; tidy lightly only |
| Panicle (H. paniculata) | Cone-shaped heads; often white aging to pink | New wood | Save major pruning for late winter or early spring |
| Smooth (H. arborescens) | Rounded heads, often white; flexible stems | New wood | Do not need a fall cut |
Old-wood bloomers
Old-wood types are the ones most likely to lose a season of flowers after an enthusiastic fall prune. Bigleaf hydrangeas include classic mopheads and lacecaps, and many of their flower buds sit near the tips of this year’s stems while the plant is dormant.
Oakleaf and mountain hydrangeas follow the same basic caution, although they differ in leaf shape, hardiness, and overall appearance. The RHS recommends minimal pruning for oakleaf types and careful timing for bigleaf and lacecap plants; its guidance also notes that faded mophead flowers can stay in place through winter to shelter tender buds below.
If the plant’s leaves were damaged by an early frost, do not use the brown foliage as a pruning map. Wait until spring growth reveals which stems are alive. A live stem may be brown and leafless on the outside but still contain viable buds.
New-wood bloomers
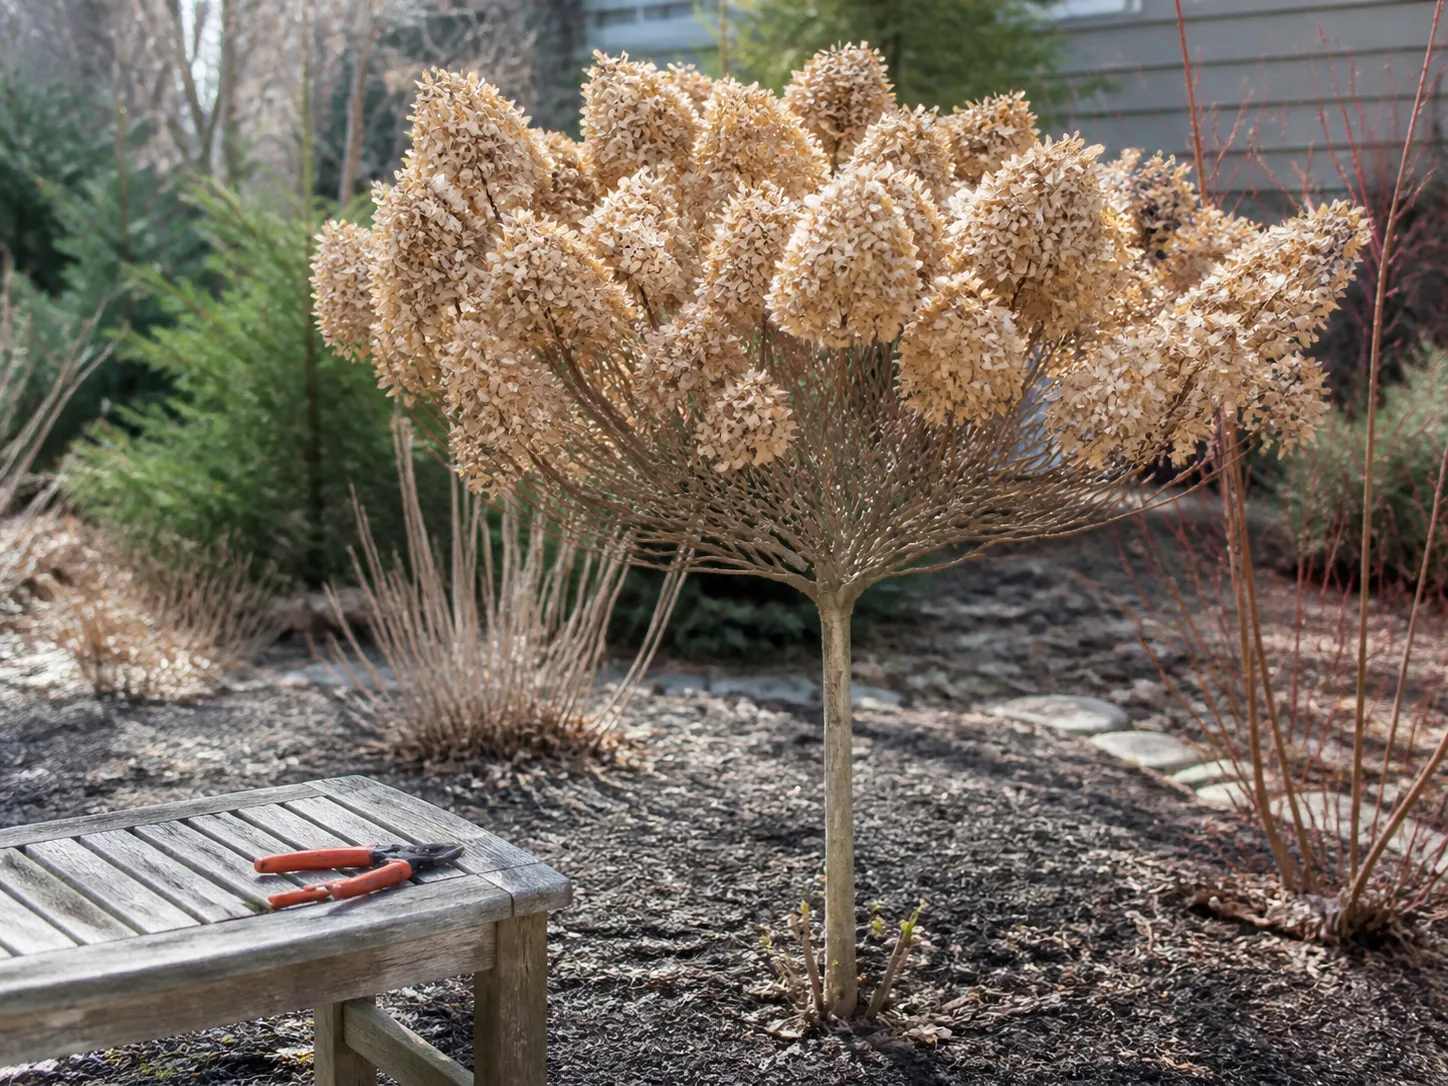
Panicle hydrangeas, including many PeeGee-type selections, and smooth hydrangeas such as ‘Annabelle’ flower on new shoots produced after winter. That makes them more forgiving if a late frost damages the tips, and it allows a stronger spring pruning routine when the plant is dormant.
New wood does not mean “cut whenever you want.” Fall cuts can expose fresh wounds to winter weather, remove attractive structure, and encourage a gardener to keep cutting when only a light reduction was needed. Gardening Know How’s practical fall pruning guidance recommends waiting until early spring for panicle and smooth types when possible, even though they can flower after a fall cut.
Reblooming cultivars
Some bigleaf cultivars flower on both old and new wood. Their ability to make a later flush can help after winter damage, but it is not permission to hedge-trim them in September. Removing old stems still removes the earliest buds, which are often the first and heaviest flowers of the season.
If you know you have a rebloomer, follow the cultivar’s care instructions and keep late-season cuts light. If you do not know the cultivar, use the old-wood default: save shaping for the next safe pruning window and protect the stems you have.
Put fall care in the right order
The order matters because one task can undo another. First inspect the plant and its site. Then correct moisture, clear weeds and fallen debris from the crown, refresh mulch, and decide whether wind or cold protection is justified. Only after that should you consider deadheading.
Use this priority order when time is limited:
- Check moisture around the root zone and water deeply if it is dry.
- Identify the type before removing any branch longer than the flower stem.
- Refresh the mulch ring without touching the stems.
- Stop routine fertilizer unless a soil test or diagnosed deficiency says otherwise.
- Add protection where the plant is exposed or the pot is vulnerable.
- Leave healthy stems alone until the correct pruning season.
This sequence handles the highest-impact risks first. A tidy shrub with dry roots is not ready for winter, while a slightly untidy shrub with a hydrated root zone and protected buds often is.
That “do less, but do it in the right order” approach also appears in the practical Savvy Gardening fall-care checklist, which emphasizes moisture, mulch, and type-specific restraint over a late-season burst of fertilizer or pruning.
Water until the ground begins to freeze
Hydrangeas prefer steady moisture but not a saturated root zone. The RHS shrubby hydrangea growing guide describes them as happiest in moist, well-drained soil and recommends watering newly planted shrubs through their first growing season. In fall, that means checking the soil rather than following a calendar.
Push a finger, narrow trowel, or soil probe several inches into the root zone. If the soil is dry below the mulch, water slowly at the base until the planting area is thoroughly moist. A short sprinkle that wets leaves and the top of the mulch will not rebuild moisture around the roots.
Continue checking until the ground freezes in climates where winter freezing is normal. Water before a hard freeze if the soil is dry, but do not create a muddy basin around the crown. In warm climates with no hard freeze, continue watering during dry spells, reducing frequency as growth and evaporation slow.
Newly planted shrubs need closer attention than established ones because their roots occupy a smaller volume of soil. A mature hydrangea can usually handle a longer interval between deep soakings, but it still suffers when autumn drought follows a stressful summer. Water in the morning when possible, and direct the stream at soil level to keep foliage drier.
Mulch the root zone without burying the crown
Use about 2 to 3 inches of organic mulch such as shredded bark, pine straw, composted leaves, or fine arborist chips. This layer buffers soil temperature, slows moisture loss, and reduces the rapid freeze-thaw cycling that can heave shallow roots.
Make a broad, low donut rather than a volcano. Leave several inches of open soil around the stems and crown so bark stays dry and air can circulate. Do not pile mulch against the base, even if the shrub looks small; a thick wet collar can encourage decay and hide damage.
The right depth depends on what is already there. If the bed still has a healthy 2-inch layer, loosen the surface and add only enough to restore coverage. More is not automatically safer. Over-mulching can keep the crown too wet, attract rodents, and delay the soil’s spring warming.
Shredded leaves work well if they are not matted into a water-repellent blanket. Mix coarse leaves with bark or rake them lightly after rain so water can reach the soil. In a very cold, exposed garden, a deeper temporary layer may be useful around the root zone, but remove or reduce it in spring once severe cold has passed.
Deadhead by bloom type and season
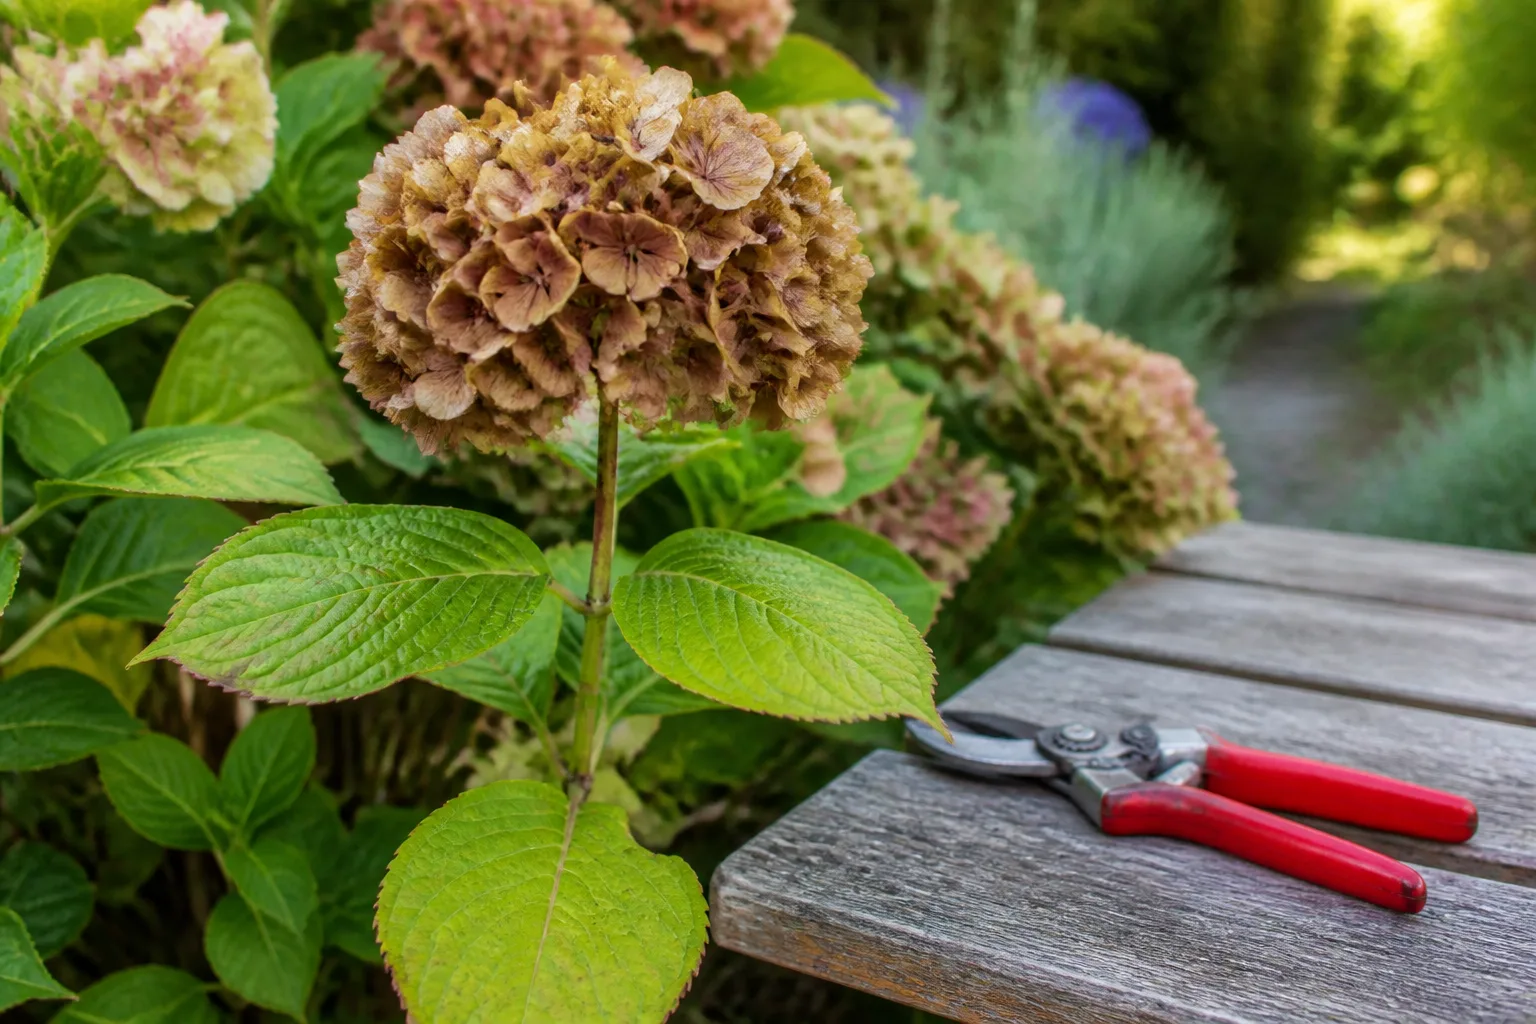
Deadheading is mainly cosmetic. It can make the shrub look tidier and remove old flower heads that are beginning to collapse, but it is not a guaranteed way to create more flowers next year. The safest fall choice for an unknown hydrangea is to leave the flower head in place.
If you do remove a spent bloom, clean and sharp bypass pruners are enough. Trace the flower stem down to the first strong pair of leaves or buds, then make one clean cut just above that point. Avoid cutting deep into bare stem on an old-wood plant.
For mopheads in cold areas, leaving faded heads through winter is often the lower-risk choice. They add structure, catch snow, and may shelter the buds immediately below. The RHS recommends removing those heads in early spring by cutting down to the first strong, healthy pair of buds.
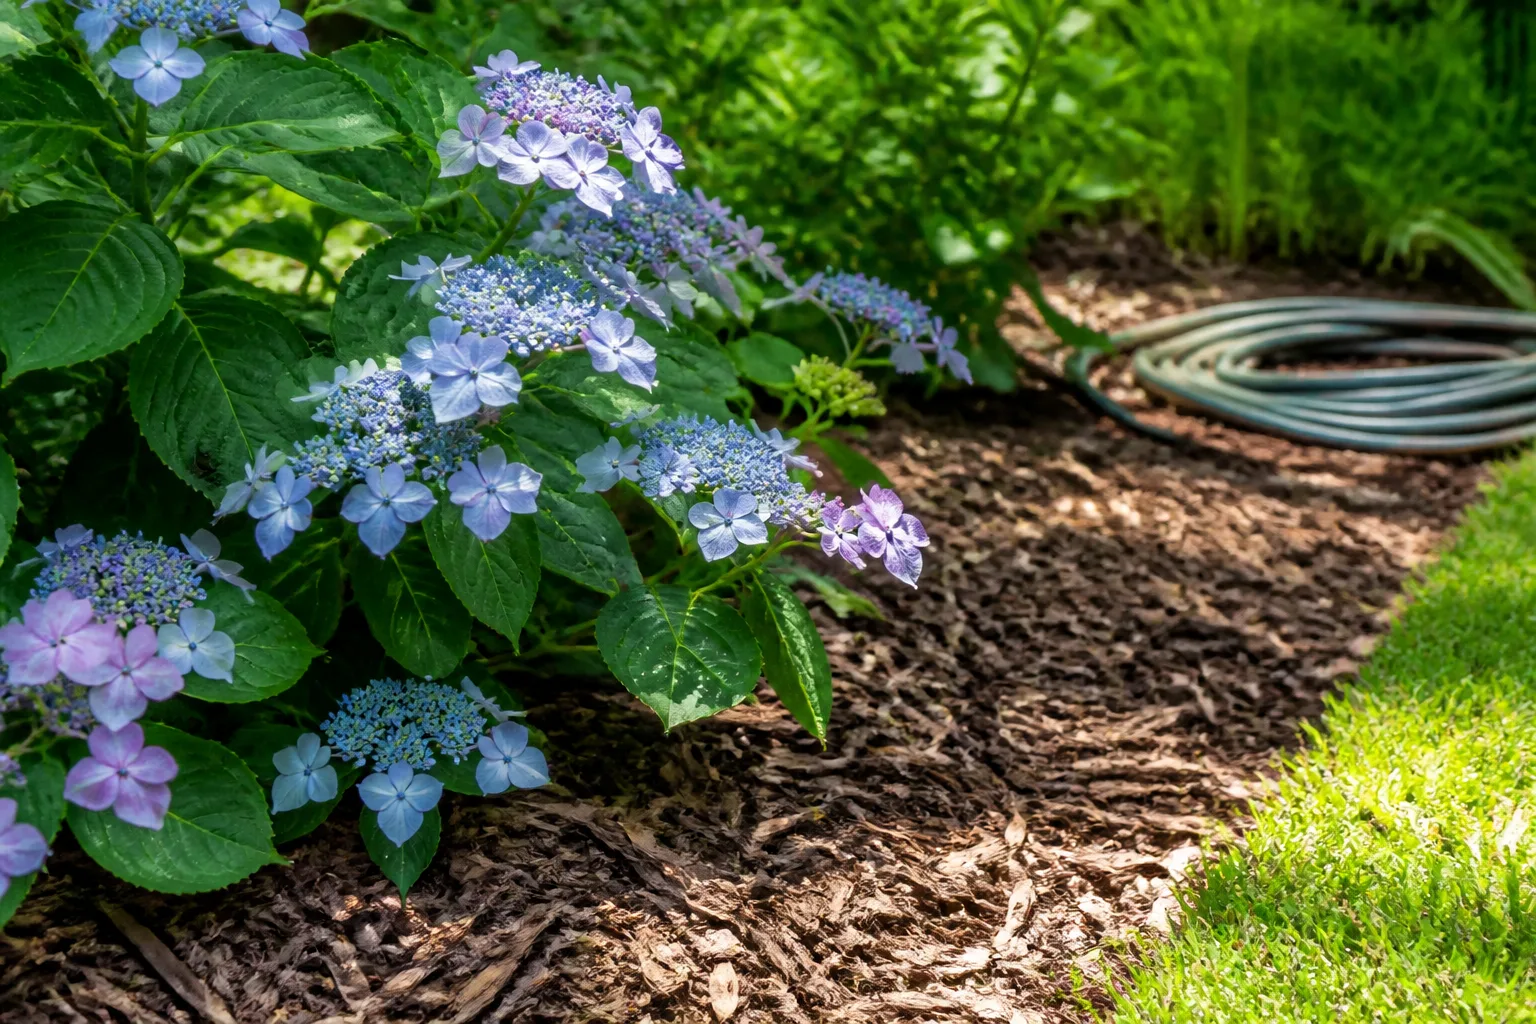
Lacecaps are generally more tolerant of post-flowering cleanup, but the timing still depends on the climate and the plant’s condition. If the shrub is exposed to hard freezes, leaving some heads is reasonable. For panicle and smooth types, spent flowers can remain for winter interest or be removed without changing the old-wood bud equation; structural cuts still belong later.
If you deadhead for bouquets, do not strip every flower head from a young or recently transplanted shrub. The remaining canopy and stems help the plant keep building reserves, and the visual benefit of a perfectly bare shrub is small compared with the protection those stems provide.
Pruning: why fall is usually not the time
Fall pruning is often driven by two understandable impulses: the plant looks untidy, or the gardener wants to prevent snow from breaking it. Both are valid concerns, but neither justifies removing healthy wood without knowing the plant’s bloom cycle.
For bigleaf, lacecap, mountain, and oakleaf hydrangeas, save shaping for the appropriate post-flowering or spring window. Heavy pruning removes old stems that may carry the next display. The RHS advises pruning established mopheads and lacecaps lightly and regularly, removing one or two oldest stems at the base rather than shortening the whole plant at once.
For panicle and smooth hydrangeas, late winter or early spring is usually the better time to reduce last year’s growth. The RHS pruning advice says these types can be cut back to healthy buds to maintain a framework; a low framework can produce larger heads on strong stems, while leaving more height can create a taller, less severely pruned shrub.
Remove a branch in fall only when there is a clear reason: it is completely dead, broken, diseased, rubbing against another branch, or creating a safety problem. Cut back to healthy wood or the branch collar without leaving a long stub. If you cannot tell whether a branch is alive, mark it and wait until spring.
Feed only when the plant actually needs it
Healthy, established hydrangeas rarely need a late-season fertilizer push. Too much nitrogen can produce lush, soft growth when the plant should be hardening toward dormancy, and that growth is more vulnerable to frost. The RHS also warns that excessive fertilizer can reduce flowering and increase frost risk.
If the shrub grew strongly and has normal green foliage, wait until spring for routine feeding. If growth was unusually weak or pale, diagnose before buying fertilizer: poor light, drought, root damage, compacted soil, and high pH can look like nutrient deficiency. A soil test is more useful than guessing from leaf color.
Compost is a gentler fall amendment than a fast-acting liquid feed, but it is not a cure for every problem. Spread a thin layer over the soil surface and keep it away from the crown. Do not fertilize a drought-stressed plant, a freshly transplanted shrub in hot weather, or a plant about to face a hard freeze.
The practical rule is simple: feed for a demonstrated need, not because fall has arrived. When the timing is uncertain, a spring application is the safer default.
Use soil pH for color, not for general vigor
Soil pH is relevant mainly to color-changing bigleaf and mountain hydrangeas, not as a universal bloom booster. On responsive blue or pink cultivars, acidity affects aluminum availability and can shift flowers toward blue, purple, mauve, or pink. White, red, and green cultivars generally do not become blue just because the soil is acidic.
Fall can be a useful time to test soil because pH changes take time. The RHS notes that blue color is most dependable in acidic soil, roughly pH 4.5 to 5 for some cultivars, while very alkaline or chalky soil can resist quick correction. That does not mean every garden should be pushed to a low pH.
Test first, then use only a labeled soil amendment at the product’s stated rate. Sulfur, lime, and aluminum-containing products are not interchangeable, and applying more will not speed the change safely. A cultivar bred to stay pink or blue may hold its color regardless of the soil, and a white cultivar will not be transformed by pH.
If your main goal is healthier growth and larger flower heads, prioritize light, moisture, drainage, and correct pruning. Color experiments are optional; a stable root zone is not.
Protect buds from wind, snow, and late frost
Winter protection depends on what you are protecting. In-ground panicle and smooth hydrangeas are often hardy enough to need only a mulch ring and a spring inspection. Bigleaf and mountain hydrangeas may survive the cold while losing the buds that would have produced flowers, especially in exposed sites and climates with repeated freeze-thaw cycles.
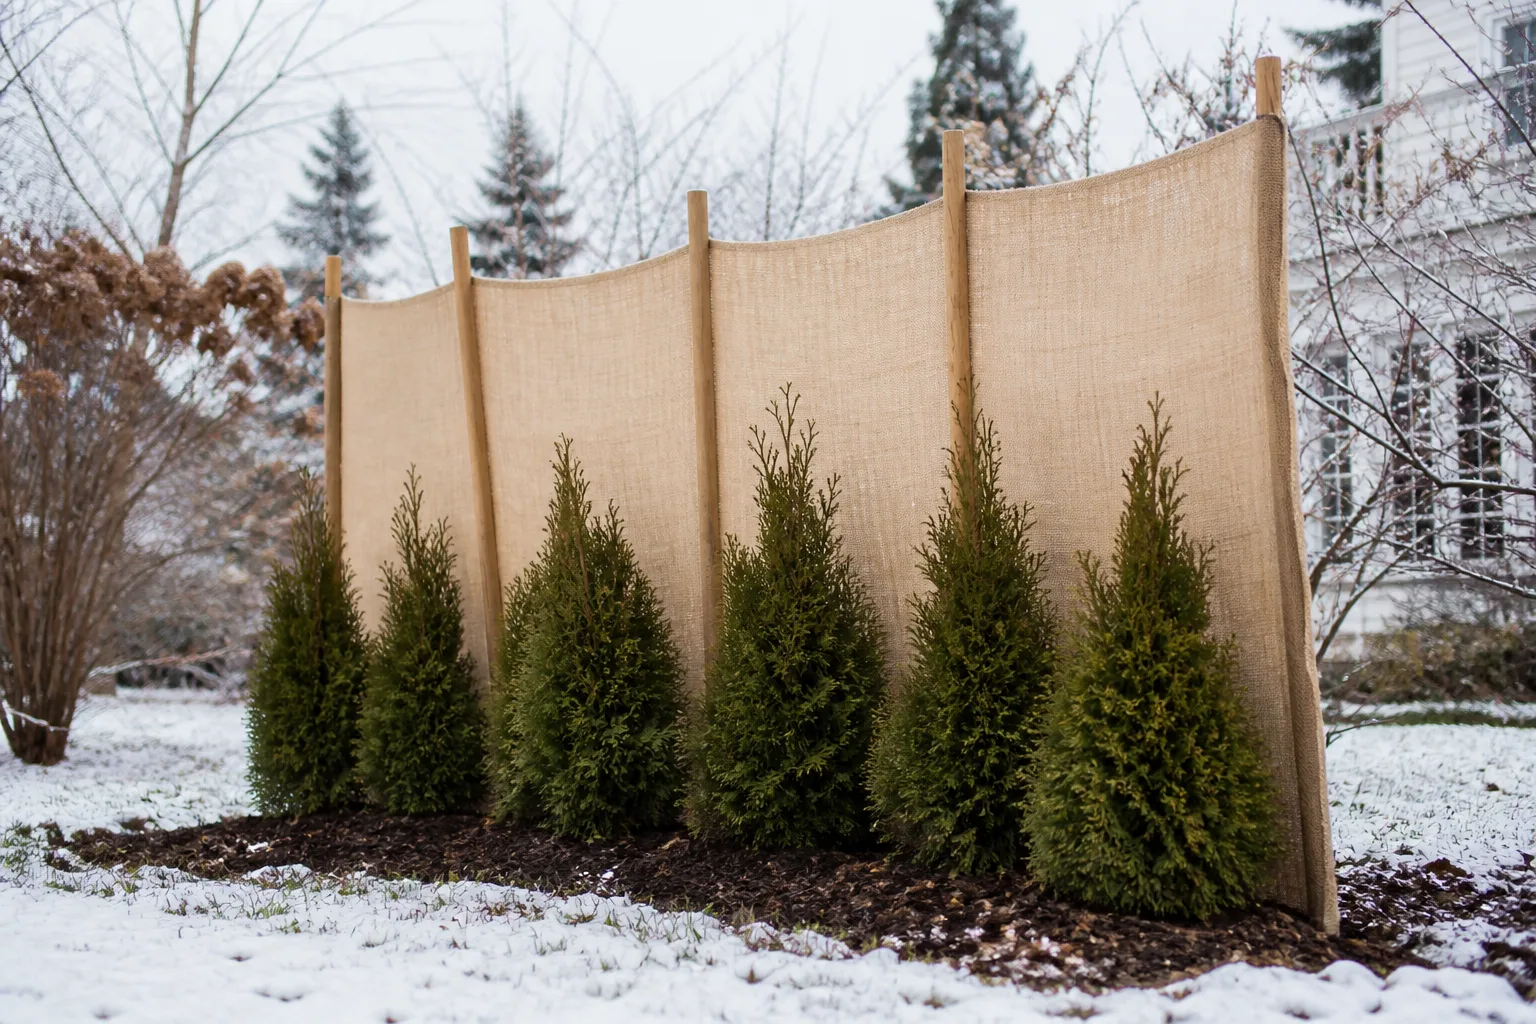
Start with placement: a fence, wall, hedge, or building can reduce drying winter wind. Do not create a sealed plastic tent around the shrub. It can trap moisture, rub against stems, and warm unpredictably in sun.
In a cold or exposed garden, build a loose cage from stakes and wire fencing, then surround the outside with burlap or a breathable landscape fabric. The goal is to slow wind and catch insulating snow, not to compress the stems. Install the screen after leaf drop or once persistent cold arrives, and remove it gradually in spring when severe weather has passed.
Do not wrap a plant tightly while it is still actively growing or keep a dark cover on through mild weather. Check the plant after storms and wet snow; a leaning cage can break branches even when the cold itself would not have done damage.
If you had an unusually early freeze, do not rush to cut off every browned tip. Mark the suspected damage and wait until spring. Once new growth begins, cut back to live wood above a healthy pair of buds. This preserves any lower buds that survived.
Prepare container hydrangeas for winter
Container roots are more exposed than roots in the ground because the pot has less insulating soil around it. A hydrangea that is hardy in a garden bed may need shelter when its root ball sits above a patio, balcony, or deck.
Choose one of three approaches based on the cultivar and winter severity. Move the pot against a protected wall or into an unheated garage, cold frame, or shed where it can remain dormant. Or sink the pot into the ground or a mulch bed up to the rim, making sure drainage remains open. In milder climates, keeping it outdoors in a protected location may be enough.
Before moving the plant, inspect leaves, stems, and the pot surface for pests. Remove fallen foliage from the soil, confirm that drainage holes are clear, and place the container on pot feet or bricks if winter rain could leave it sitting in water. Do not put a dormant pot in a warm living room and expect it to follow a normal outdoor cycle; insufficient light, dry air, and active growth can make winter care harder.
Water dormant containers sparingly but do not let the root ball turn bone-dry. Check every few weeks, more often during a dry, windy spell, and water only when the mix is beginning to dry. Empty any saucer after watering. Cold plus saturated roots is a faster route to rot than cold alone.
When spring arrives, return the pot outdoors gradually. Start in a sheltered spot, watch for late frost, and move it into stronger light over several days. This transition matters because a plant that has been dormant in low light can scorch when placed immediately in bright sun.
Handle deer and disease pressure before spring
Deer often browse hydrangea buds and tender stems when other food is scarce. If deer are regular visitors, a physical barrier is more dependable than a rotating collection of shiny objects or scent tricks. Use netting or fencing that is taut enough not to sag onto the plant, and inspect it after snow or wind.
Repellent products can be useful when applied according to their labels, but they require reapplication and may be less reliable after rain. Keep the barrier high enough and secure enough that deer cannot simply push under it. Protecting an old-wood hydrangea is especially valuable because one night of browsing can remove the buds you were trying to preserve.
Fall sanitation also reduces spring problems. Remove diseased leaves from the ground, open crowded growth only during the correct pruning season, and avoid overhead watering. Do not compost heavily infected material in a home pile that does not heat consistently.
Brown leaves after frost are not automatically a disease. Seasonal leaf drop, drought scorch, cold injury, and leaf-spot symptoms can overlap. Photograph the plant, note when symptoms appeared, and wait for spring growth before making a drastic cut or treatment.
Make a spring inspection plan
Fall care is not finished when the mulch goes down. Put a reminder on your calendar to inspect the plant after the worst cold and again when buds begin to swell. Check whether the protective screen is trapping moisture, whether snow has bent stems, and whether the soil has dried during a warm winter.
For old-wood hydrangeas, look for live buds along the stems before pruning anything. Scratch a small area of bark only if necessary; green tissue beneath the bark suggests live wood, while dry brown tissue may be dead. Start at the tips and work downward, stopping as soon as you reach healthy tissue.
For panicle and smooth hydrangeas, wait until you can see the framework and the start of new growth before making the spring cut. Remove dead or weak stems first, then shorten last year’s flowering stems according to the plant’s desired height and the cultivar’s habit. A low cut may produce larger heads but can also create heavy stems that need support.
If the plant does not bloom after a difficult winter, do not immediately add fertilizer. Check whether buds were killed, stems were pruned too late, the plant is too shaded, deer browsed it, or the soil stayed too dry. Rebuilding a shrub after lost old wood can take a season; a reblooming cultivar may flower later, while a standard old-wood plant may need intact new stems before it returns to normal.
Conclusion
The best way to care for hydrangeas in fall is to protect the plant’s future options. Keep the root zone evenly moist, mulch in a broad ring, stop unnecessary fertilizer, and match any wind or frost protection to the actual exposure. Most importantly, identify the hydrangea before you prune: old-wood types may already be carrying next year’s buds, while new-wood types can wait for a more useful spring cut.
When the label is missing, minimal intervention is the expert move. Leave healthy stems and faded flowers in place, remove only clear hazards, and let spring reveal what survived. A hydrangea that enters winter hydrated, insulated at the roots, and free from needless cuts has the best realistic chance of returning with a strong display.



