How to Grow and Care for Miniature Roses
Learn how to grow and care for miniature roses in beds, pots, or temporary indoor displays with practical advice for light, water, blooms, and winter.
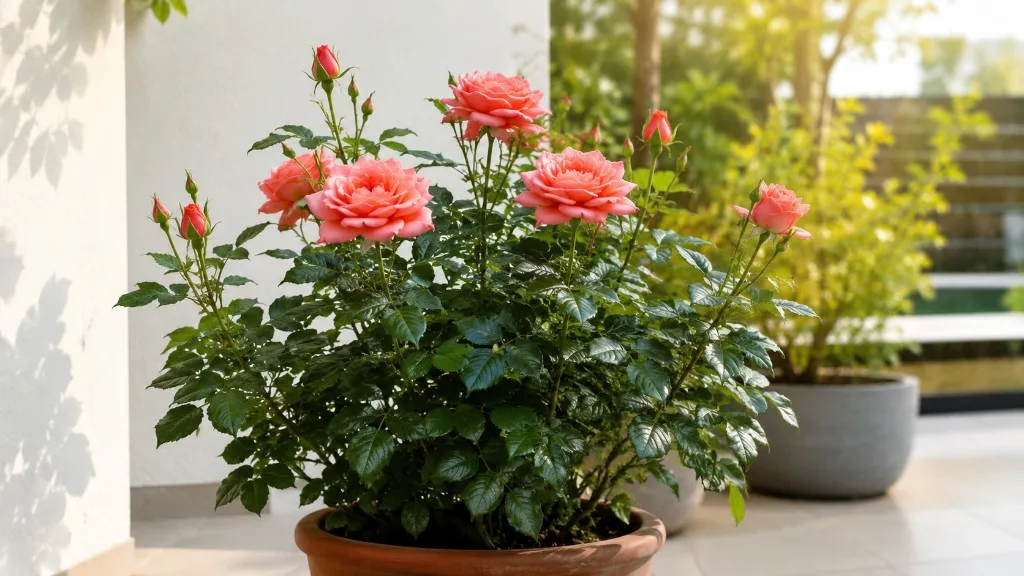
Miniature roses are true roses bred for compact growth, not artificial flowers or short-lived annuals. Their small scale makes them useful in containers, edging, balcony gardens, and narrow borders, but it does not make them low-light houseplants. The care that produces a sturdy, repeat-blooming mini rose is still recognizably rose care: direct sun, a well-aerated root zone, deep watering when needed, seasonal feeding, and pruning that respects the plant’s growth habit.
The biggest mistake is treating every potted mini rose the same. A florist or grocery-store plant may be a temporary indoor display that needs to move outside, while a labeled garden cultivar may be intended for a border or patio pot. Start by deciding where the plant will live, then match light, pot size, watering, and winter protection to that decision.
Miniature rose care at a glance
| Care factor | Practical target |
|---|---|
| Light | At least 6 hours of direct sun for dependable flowering; more morning sun is usually easier than hot reflected afternoon heat |
| Soil | Rich, moisture-retentive soil that drains freely; never a permanently wet root ball |
| Water | Soak the root zone when the surface layer has dried slightly; containers may need water daily in hot weather |
| Feeding | Begin as new growth starts and follow the fertilizer label; containers generally need more frequent feeding than beds |
| Pruning | Remove dead or damaged wood in late winter or early spring; shape lightly rather than shearing hard |
| Bloom care | Remove faded flowers while the plant is actively reblooming unless you want hips to form |
| Winter | Protect the root zone in cold climates; a pot is more vulnerable to freezing than a rose planted in the ground |
If you need a broader rose reference, the Rose plant profile explains the larger group. This guide focuses on the extra choices that matter when the rose is compact, container-grown, or sold as an indoor gift.
What miniature roses are—and what “mini” does not mean
Miniature roses are Rosa cultivars and hybrids selected for smaller leaves, flowers, and overall stature. They can bloom in the same broad color range as larger roses and may be fragrant, thorny or nearly thornless, upright, spreading, trailing, or climbing. NC State Extension’s profile of ‘Green Ice’ shows why a single care formula can be misleading: that cultivar is a small perennial shrub with an erect-to-spreading habit, full-sun to partial-shade tolerance, good drainage needs, and a mature spread that can exceed its height. (NC State Extension)
“Miniature” describes scale, not a promise that the plant will remain six inches tall forever. Some micro-mini cultivars stay under a foot, while shrub-like minis can reach roughly 18 to 36 inches in a good season. Climbing and trailing miniatures can send out much longer canes than the word mini suggests. Read the cultivar tag for mature height, spread, bloom habit, and hardiness before choosing a permanent location.
Mini roses also are not automatically indoor plants. They can survive a bright indoor period, especially when purchased in flower, but a warm room with weak light often produces pale leaves, long gaps between leaves, dropped buds, and spider mites. Think of indoor culture as a specific growing project—or a short transition—not as the default home for every little rose.
Choose the right miniature rose for your space
Match the growth habit to the job
Choose an upright shrub miniature for a border edge, a compact pot, or a small patio focal point. A trailer works in a wide container where its canes can spill over the rim, while a climber needs a trellis and more horizontal or vertical room than a standard mini rose. A micro-mini is charming in a small pot but dries quickly and gives you less margin for missed watering.
Climate matters as much as size. Many modern miniature roses perform as perennials in roughly USDA Zones 5 through 9, but the hardiness range belongs to the cultivar, not to the marketing label. A rose that survives winter in the ground may still lose roots in a thin-walled patio pot. In hot, humid regions, prioritize an open, airy site and cultivars with documented disease resistance; in cold regions, prioritize a manageable pot or a protected bed.
Use a buying checklist, not just open flowers
The prettiest plant on the display bench is not always the best plant to take home. Choose a rose with firm green canes, fresh leaves, and several unopened buds rather than one covered in flowers with no new buds behind them. Inspect leaf undersides, stem joints, and the soil surface for webbing, sticky residue, distorted growth, insects, or a sour smell.
Avoid a plant that is collapsing in a waterlogged sleeve or whose root ball has dried so severely that the soil has pulled away from the pot. A few old blemished leaves are less concerning than active pests, a soft crown, or roots that are brown and mushy. If the plant is wrapped in decorative foil, remove or puncture the cover as soon as you get home so excess water can drain.
Choose the growing setup before you plant
Plant in the ground when you have a sunny, well-drained site and want the most stable moisture and winter protection. The surrounding soil buffers temperature and gives roots room to explore, so an established bed rose usually needs less frequent watering than a rose in a small pot. Leave enough room for air to move around the mature plant rather than squeezing it into a crowded edge.
Use a container when your soil is heavy, your space is rented, or you want to move the rose for winter. Containers give you control over mix and placement, but they dry and heat faster, need more regular feeding, and expose roots to colder temperatures. A pot with a drainage hole is non-negotiable; a cachepot without drainage is an outer cover, not a growing container.
Keep a mini rose indoors only if you can provide very bright direct light, airflow, and a watering rhythm that allows the mix to drain. A sunny south- or west-facing window may work, but the plant should not touch cold glass or sit above a heating vent. If your home cannot provide enough light, a grow light on a timer is more useful than trying to compensate with extra fertilizer.
Plant miniature roses without transplant shock
Plant a nursery container rose in spring or whenever the ground is workable and the plant is not facing a heat wave, drought, frozen soil, or waterlogged soil. The RHS recommends planting container-grown roses promptly but avoiding extreme soil conditions; its broader rose guide also stresses choosing a position that suits the plant rather than trying to force a poor site. (RHS)
Water the plant in its original pot a few hours before planting. Slide it out gently, inspect the roots, and loosen only the outer circling roots. If the root ball is densely matted, make a few shallow vertical cuts rather than tearing the whole ball apart. Dig a hole about as deep as the root ball and wider than it, then set the plant so the surrounding soil meets the same level it did in the nursery container. Do not bury the crown or pile mulch against the canes.
Backfill with the soil you removed, firm it lightly, and water slowly until the entire root zone is settled. Add a thin layer of compost or mulch over the surface, keeping it several inches away from the stems. For the first few weeks, check the soil more often than you think necessary because newly disturbed roots cannot yet draw from a large volume of surrounding soil.
If you are moving a gift rose outdoors, harden it off. Put it outside in bright shade for a few days, then give it gentle morning sun, gradually increasing exposure over one to two weeks. A sudden jump from filtered indoor light to hot afternoon sun can scorch leaves even when the final outdoor position is correct.
Build a root zone that drains and stays evenly moist
Garden-bed preparation
Roses want moisture, but their roots also need oxygen. A rich loam with organic matter and free drainage is a better target than a heavy, sticky soil that stays saturated after rain. If water sits in the planting hole, solve the drainage problem with a better site or a raised bed; filling a badly drained hole with a little bagged soil does not create a drainage system.
Mixing a modest amount of finished compost into a broad planting area can improve structure, but avoid creating a small pocket of dramatically different soil around the roots. Keep the surface mulched with compost, shredded bark, or another suitable organic material, and renew it as it settles. Mulch reduces evaporation and buffers temperature while leaving the crown dry and visible.
Container mix and pot selection
Use a quality potting mix formulated for containers, not straight garden soil. Garden soil compacts in a pot, displaces air, and can leave a small rose with wet roots even when the surface looks dry. Add drainage material only if it is part of a tested potting mix; a layer of gravel at the bottom does not fix a container with poor drainage and can reduce the usable root volume.
Choose a pot with a drainage hole and enough depth for the root ball plus several inches of fresh mix. For many compact minis, an 8- to 12-inch container is a sensible starting range, but the tag and the plant’s eventual spread should decide the final size. Do not jump from a tiny nursery pot into a huge tub: excess wet soil around a small root system is a common route to root rot.
Repot when roots circle densely, water runs straight through because the mix has collapsed, or the plant dries out unusually fast despite adequate light. Otherwise, a flowering plant may benefit more from stable light and careful watering than from an immediate repot. Remove decorative foil, place the nursery pot in a saucer, and empty the saucer after watering.
Give miniature roses enough direct light
Six or more hours of direct sun is the useful benchmark for abundant flowering. NC State Extension lists full sun as six or more hours for ‘Green Ice,’ and Homes & Gardens’ horticultural sources likewise emphasize six to eight hours for most miniature roses. (NC State Extension; Homes & Gardens) Morning sun is especially helpful in humid climates because it dries leaves early; afternoon sun can be excellent in mild climates but harsh beside heat-reflecting walls or glass.
Watch the plant, not only the clock. A rose that receives too little light may stay green while producing thin stems, small flowers, long spaces between leaves, or buds that fail to open. Move it gradually into stronger light, because a sudden change can burn foliage. In a container, rotate the pot every week or two if one side stretches toward the window, but do not keep moving it so often that you cannot tell how quickly the soil dries.
Water by the root zone, not the calendar
There is no universal “once a week” schedule for miniature roses. A potted rose in hot sun may need water every day, while a bed rose in cool, damp weather may need none. Insert a finger a couple of inches into the soil or lift the container to learn its dry weight; when the surface layer has dried slightly and the pot feels lighter, water thoroughly at the base.
Let water run through the container’s drainage hole, then empty the saucer. In the ground, water slowly enough to wet the whole root zone rather than producing a shallow splash that runs away. The RHS advises a deep soak during dry spells and notes that container roses need much more frequent attention than established border roses. (RHS) The goal is a cycle of thorough wetting followed by partial drying, not either drought or permanent saturation.
Water at soil level. Wet leaves that stay damp overnight create a friendlier environment for fungal disease, and spraying flowers can mark petals. If the plant wilts in the morning even though the soil is wet, do not automatically add more water; inspect the roots, drainage, temperature, and light. Wilting can occur when damaged roots cannot supply a thirsty canopy.
Feed for repeat flowering without soft, weak growth
Miniature roses bloom repeatedly, so they use nutrients during active growth. Start feeding when new leaves and shoots are expanding, using a rose fertilizer or balanced all-purpose product exactly as its label directs. A modest, regular program is safer than alternating between neglect and heavy doses. The RHS recommends feeding roses in borders around the start of the growing season and again after the first flush, while container roses generally need more frequent feeding because each watering can carry nutrients out of the pot. (RHS)
Water the plant before applying dry fertilizer and keep granules away from the canes. Stop or reduce feeding well before the first expected frost in cold climates so the plant is not pushed into tender new growth just as it should be hardening off. In a warm, frost-free climate, follow the cultivar’s active-growth pattern rather than a winter rule written for a cold garden.
Too much nitrogen can produce lush leaves at the expense of flowers and can make soft growth more attractive to pests. Brown leaf margins, a white crust on the soil, or a sudden decline after feeding can indicate fertilizer salt buildup, but they can also have other causes. Flush a container thoroughly with clean water only when the mix drains freely, then reassess the fertilizer rate and watering pattern.
Prune for structure and deadhead for more flowers
Do the main shaping prune in late winter or early spring, just before strong new growth begins in your climate. Start with dead, broken, diseased, or crossing wood. Then shorten overly long canes to an outward-facing bud eye to keep the plant open and balanced. Miniature roses rarely need a severe haircut simply because they are small; removing about one-third of the plant is a ceiling for routine shaping, not a target you must hit every year.
Clean, sharp secateurs make precise cuts. Cut slightly above the bud eye and angle the cut away from it so water does not collect on the new tip. If you are unsure which stems are alive, scrape a tiny section of bark rather than cutting half the plant at once: green tissue under the bark is a useful sign, while dry brown tissue may need removal.
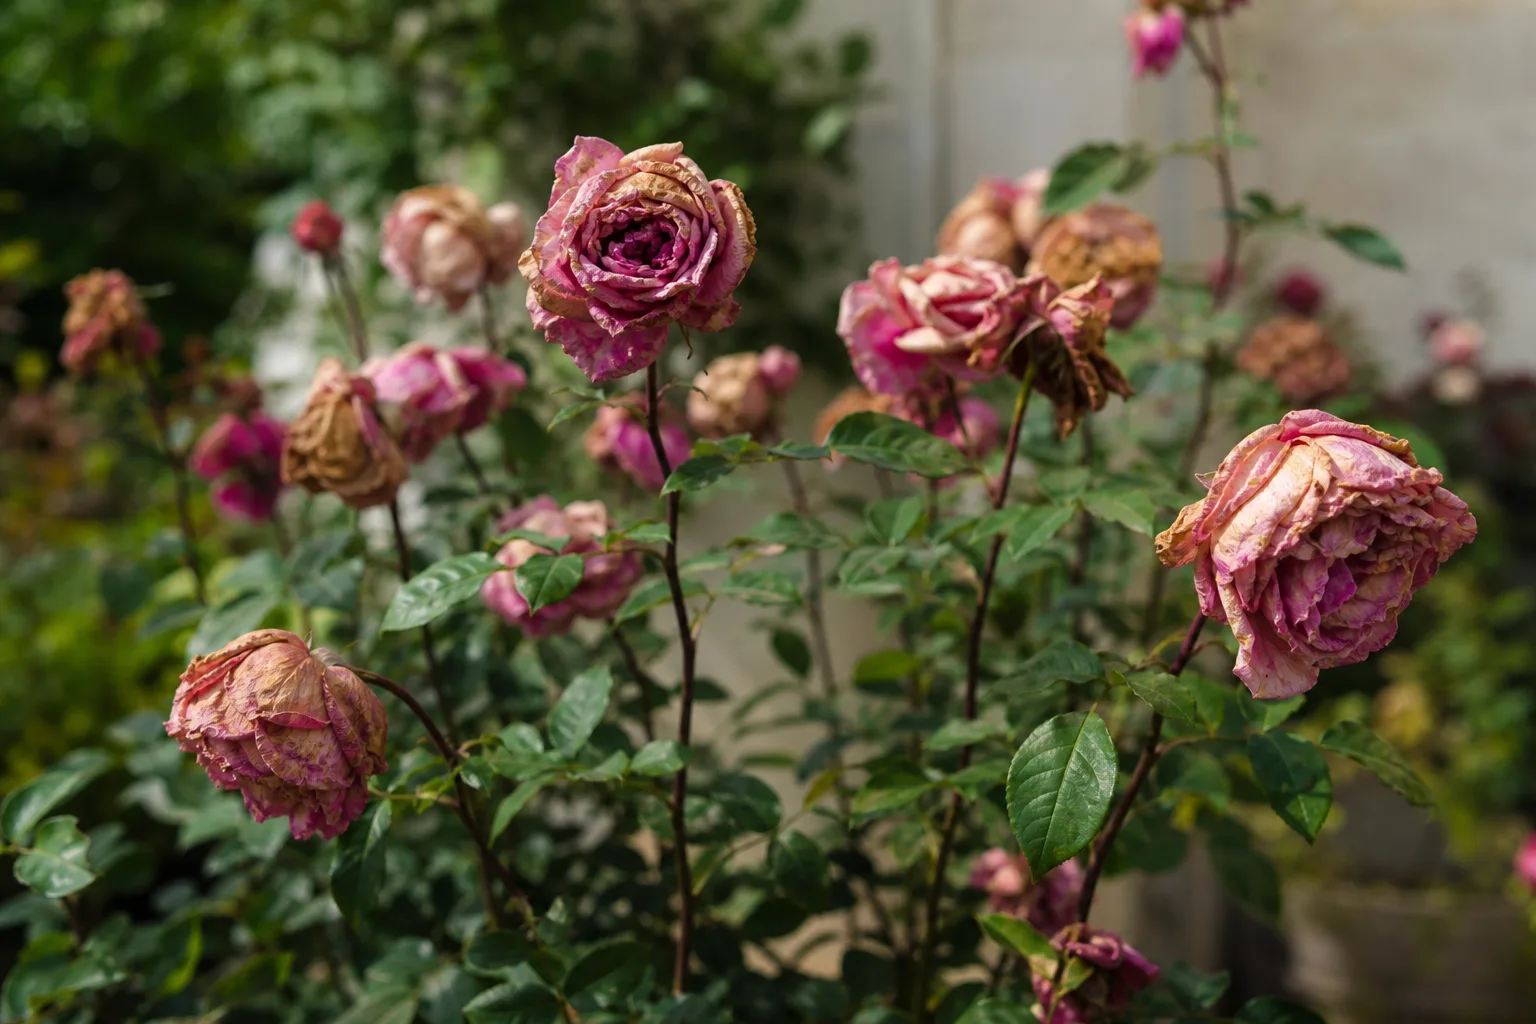
Deadhead during the blooming season when you want the plant to keep producing flowers. Remove the faded flower and its short stem back to a healthy leaf joint, choosing a cut that leaves a strong outward-facing shoot. Some roses have attractive hips, and leaving a late-season flush to form hips can be worthwhile for winter interest and wildlife. The RHS notes that deadheading encourages more blooms but that gardeners may stop on roses valued for their hips. (RHS)
Propagate miniature roses from cuttings
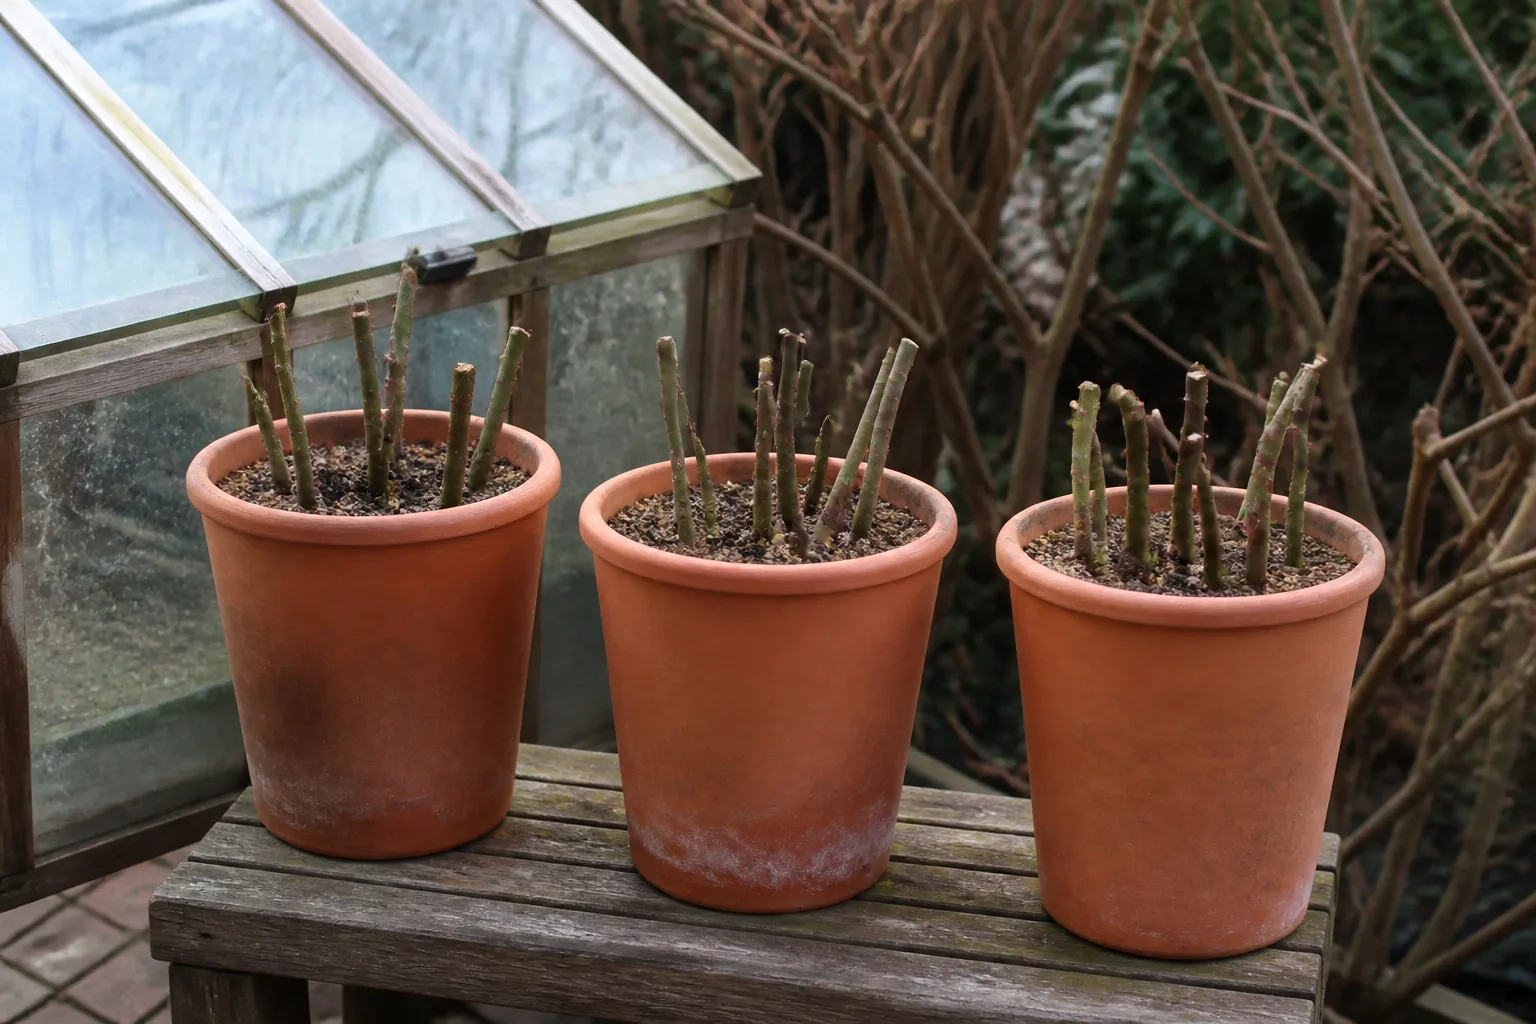
Stem cuttings are the most practical home method, but success varies by cultivar. The RHS describes softwood tip cuttings in early to mid-spring as an accessible approach, with new plants taking time to root and mature. Hardwood cuttings taken from dormant growth can also work but are slower. (RHS) Our guide to propagating roses in winter covers the colder-season version in more detail.
Choose a healthy, non-flowering shoot with several nodes. Make a clean cut, remove the lower leaves, and place the cutting in a clean, free-draining propagation mix. Keep the mix lightly moist, provide bright indirect light, and cover the cutting loosely only if you can maintain airflow and prevent condensation from staying on the leaves. Check for resistance after several weeks, but do not tug repeatedly; new roots are easy to break.
Rooting hormone is optional rather than magic. Hygiene, the right maturity of the cutting, even moisture, and patience matter more than coating a weak or diseased stem in powder. Once rooted, pot the cutting separately and grow it on before moving it into a large container or the garden.
One important exception is legal and horticultural: some named roses are protected by Plant Breeders’ Rights, so propagating them for sale may be restricted. A cutting also grows on its own roots, which means it may not behave exactly like a grafted parent plant. Keep propagation to personal use unless you have confirmed the cultivar’s rights and performance.
Overwinter by climate and container
In the ground, a well-established miniature rose can be hardier than its delicate appearance suggests. Exact survival depends on cultivar, exposure, snow cover, wind, soil moisture, and the timing of cold. The most vulnerable part is often the root crown, so water the plant before the ground freezes if conditions are dry, stop late feeding, and apply a loose layer of mulch over the root zone after dormancy begins. Do not mound wet mulch tightly against the stems.
In very cold areas, use a protective collar or rose cone after the plant has gone dormant. The Iowa State Extension overwintering guidance distinguishes the protection needed for roses in the ground from the strategy for container plants: a potted mini rose can be moved to an unheated garage or similarly cool shelter before a hard freeze, allowing dormancy without exposing the root ball to the full cold. (Iowa State Extension)
Container roses need special attention because a pot can freeze from every side. Move the container before a hard freeze, not after the soil is a solid block. A cool, dark or dim garage is appropriate for dormancy if the cultivar is deciduous and the temperature stays above damaging extremes; water sparingly so the roots do not dry to dust, but do not keep the dormant pot saturated. See our rose frost-protection checklist if a hard freeze is approaching.
If you keep the rose actively growing indoors, give it the brightest light available and inspect regularly for mites. Do not move a dormant plant straight into hot sun or a warm room in midwinter. In late winter, bring it gradually into brighter light, begin modest watering as growth resumes, and return it outdoors only after frost risk has passed and the plant has been acclimated.
Diagnose pests and diseases before treating
Start with the pattern and the root-zone conditions. Check new and old leaves, the undersides, the stems, buds, and the soil. A plant with black spots after prolonged leaf wetness needs a different first response from a plant with stippled leaves and fine webbing in hot, dry air. Remove badly affected leaves and fallen debris, improve spacing and airflow, and correct watering before reaching for a spray.
Black spot, mildew, aphids, mites, and bud failure
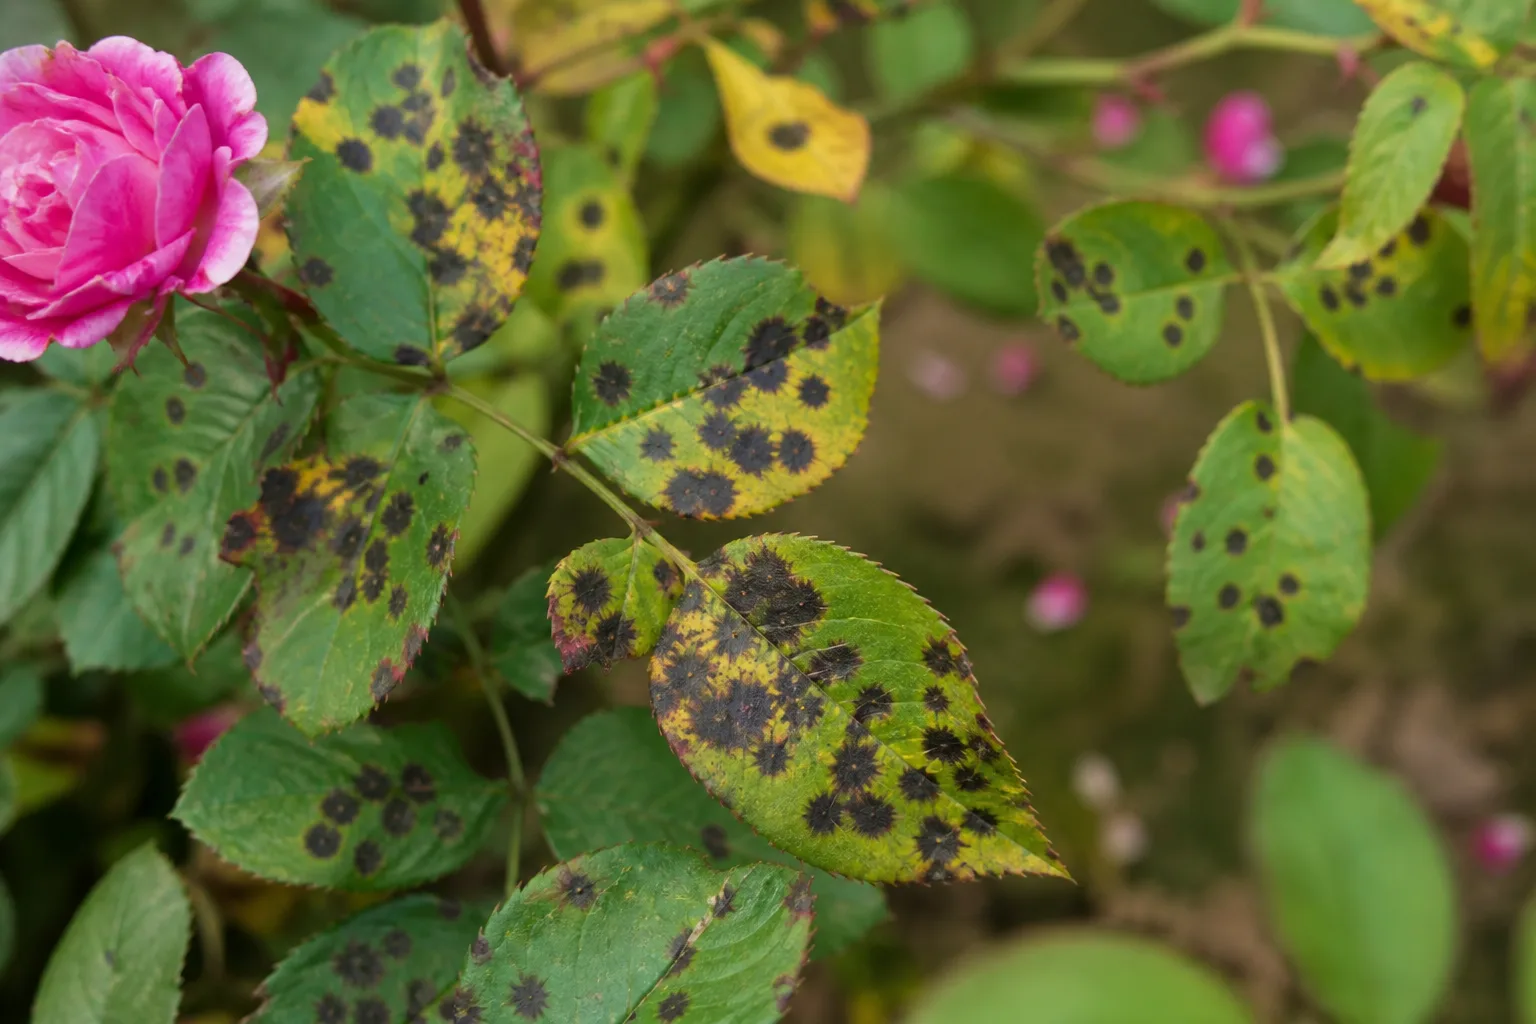
Black spot appears as dark, often expanding spots followed by yellowing and leaf drop. Keep foliage dry when watering, give the plant morning sun and air movement, remove infected fallen leaves, and avoid crowding. If a fungicide is justified, choose a product labeled for roses and the disease in your location. Our black spot on roses guide goes deeper on the disease cycle and response order. Bordeaux mixture is not a casual kitchen recipe: UC IPM describes it as copper sulfate, lime, and water, warns that it can be corrosive and phytotoxic, and notes that application after dormancy can injure leaves. (UC IPM)
Powdery mildew looks like a pale, powdery coating, often on young leaves and buds. Improve air circulation, reduce crowded growth, and avoid creating a humid, stagnant canopy. A shaded, poorly ventilated position is more likely to repeat the problem than a rose in a bright site with dry foliage.
Aphids cluster on soft new shoots and buds, where they can distort growth and leave sticky honeydew. Knock a small infestation off with a firm stream of water, prune badly distorted tips if needed, and reassess after a few days. Spider mites are more likely when conditions are hot and dry; look for stippling, fine webbing, and mites on leaf undersides. Washing the foliage and improving plant vigor can help, but avoid indiscriminate insecticides that also kill beneficial predators.
Japanese beetles and other chewing insects can skeletonize leaves quickly. Handpick visible adults into soapy water, remove severely damaged leaves, and monitor during the local beetle season. For any pesticide, use only a product registered and labeled for the crop and pest where you live, follow protective directions, and never increase the concentration because the plant is small.
Buds fail to open for several reasons: insufficient direct light, drought followed by stress, a root ball that stays wet, thrips or other bud-feeding insects, or a cultivar reacting to extreme heat. Move through the diagnosis in that order. More fertilizer is rarely the first fix for a rose that is in shade or has unhealthy roots.
Conclusion: make the plant’s size work for you
Miniature roses succeed when their small canopy is matched with a serious growing site. Give the plant direct light, drainage with consistent moisture, enough room for air to move, and a pot or bed that reflects its mature habit. Treat an indoor gift rose as a transition unless you can provide real sun or supplemental light, and plan winter protection before cold arrives.
The repeat-blooming rhythm is simple once the setup is right: water the root zone when it begins to dry, feed during active growth without excess, deadhead while you want more flowers, prune lightly before spring growth, and inspect leaves before a minor problem becomes a defoliated plant. That routine lets the rose stay compact without making it fragile.



