How to Grow and Care for Angelonia
Learn how to grow angelonia in beds and pots, choose seed or cutting propagation, and diagnose yellow leaves, weak blooms, aphids, and winter damage.
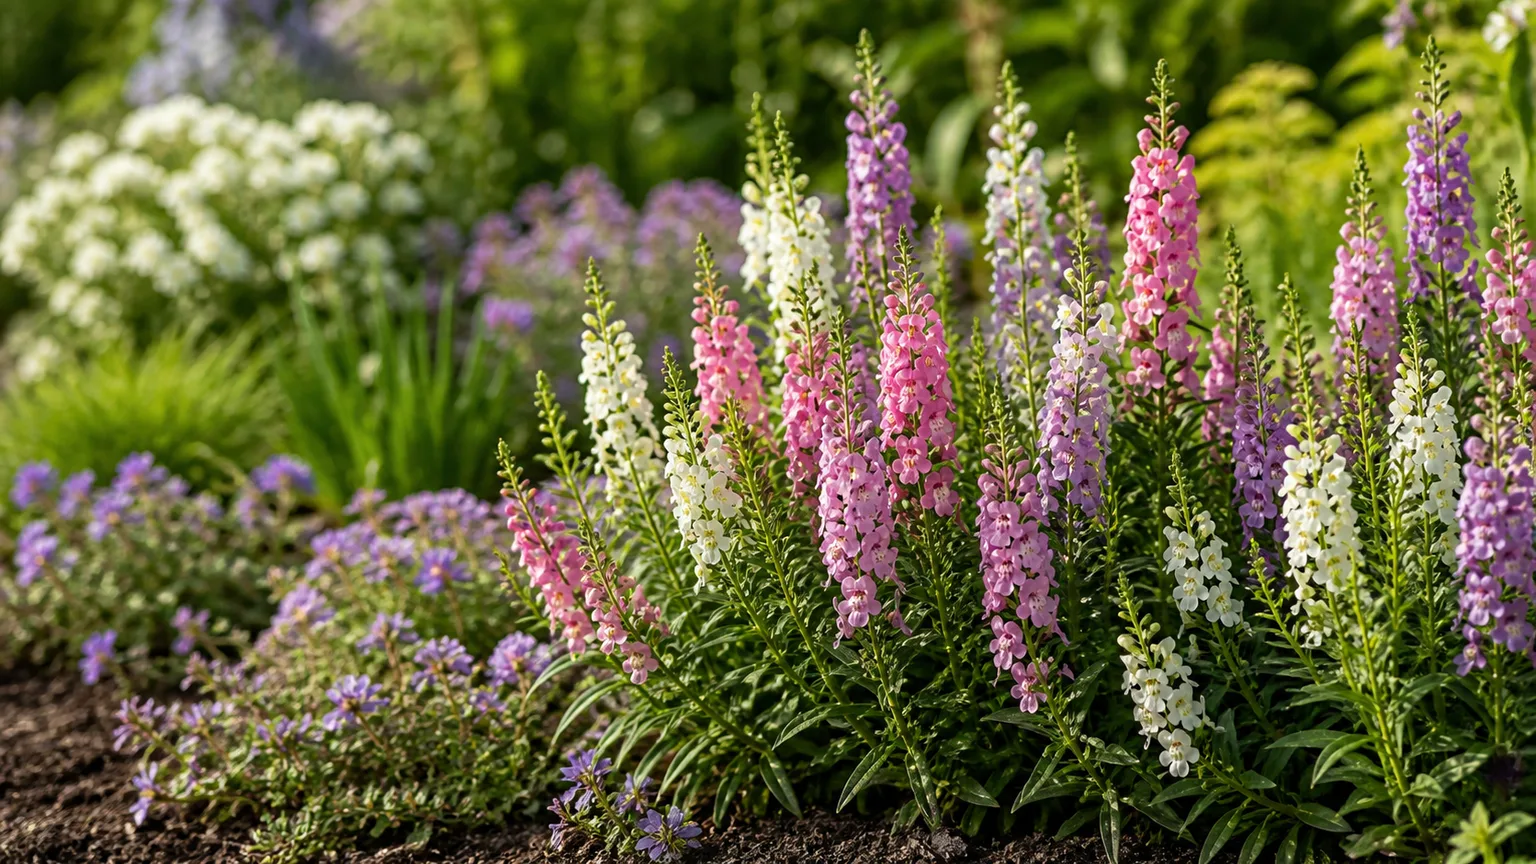
Angelonia is a warm-season flowering plant that can carry a sunny bed or container through the hottest part of summer. It is usually sold as an annual where winter brings frost, although it can behave as a short-lived perennial in reliably mild climates. The key to a strong plant is not a complicated fertilizer routine; it is warm weather, direct sun, and soil that stays moist enough to support growth without remaining waterlogged.
The name “summer snapdragon” is helpful for imagining the flower spikes, but Angelonia is not a true snapdragon. The small two-lipped blossoms rise on upright stems above narrow, sometimes aromatic leaves. Below is a care plan for choosing a variety, planting at the right time, propagating the plant, and reading problems before a simple water or light issue turns into root damage.
What Angelonia Looks Like and How Tall It Gets
Most garden angelonias are cultivars of Angelonia angustifolia, a member of the Plantaginaceae family native to parts of Central America, Mexico, the Caribbean, and northern South America. The plant forms a bushy clump with narrow foliage and flower spikes in shades of white, pink, purple, lavender, blue, or bicolor. North Carolina State Extension’s Plant Toolbox describes typical plants as roughly 12 to 18 inches tall, though named cultivars and growing conditions can produce both more compact and taller forms.
Angelonia flowers resemble miniature snapdragons or orchids at first glance, but their petals are fused into a small two-lipped flower rather than the hinged mouth of a true snapdragon. The shared nickname can be confusing because the two plants fill different seasonal roles: angelonia prefers warm conditions and typically becomes most useful when cool-weather snapdragons slow down. Its upright habit works in a border, a cutting patch, or a container, but not every variety has the same height or spread.
Choose Sun, Warmth, and Airflow
Give angelonia a spot with at least six hours of direct sun; more sun generally means sturdier stems and more flowers. A plant receiving only a few hours may stay green yet stretch toward the light, form fewer spikes, and hold moisture longer around crowded foliage. If your garden gets intense afternoon sun in a very hot inland climate, do not assume shade is the first fix for poor flowering: first check that the plant is rooted, watered, and not surrounded by dense competitors.
Warm soil matters as much as the summer forecast. Planting into chilly ground soon after the last frost can stall a tender plant even when daytime temperatures seem pleasant, so wait until frost danger has passed and nights are consistently mild. UF/IFAS recommends late-spring planting for Florida gardens, while North Carolina State Extension notes the plant’s tolerance for summer heat and humidity. That makes Angelonia a practical choice for long, hot summers, but not a cold-hardy perennial for freezing winters.
Air movement helps dense plantings dry after rain or overhead watering. Do not pack plants closer than the variety’s mature width simply to create instant fullness; a little room around the stems makes inspection easier and can lower the chance that foliage remains damp for prolonged periods. In coastal or humid gardens, spacing and sun are especially useful safeguards against powdery mildew.
Set Up Soil and Drainage Before Planting
Angelonia performs best in fertile, moisture-retentive soil that drains freely. “Moist” does not mean swampy: roots need water and oxygen, and soil that stays saturated can lead to root and crown problems. In a bed, loosen compacted soil and work in a modest amount of mature compost if the ground is low in organic matter, then observe how quickly water drains after a soaking rain.
If water sits in a planting hole or the bed stays wet for days, choose a raised bed or a container rather than trying to solve the problem with more frequent light watering. Heavy clay can be improved over time with organic matter and broad soil preparation, but adding a little sand to one small hole is not a reliable drainage fix. In containers, use a fresh, well-draining potting mix and a pot with open drainage holes; garden soil is too dense for a dependable container root zone.
There is no need to chase a precise soil-pH number unless a soil test indicates a broader issue. For a backyard planting, consistent drainage and moderate fertility are more actionable than adjusting the bed to a narrow acidity target. If the leaves yellow or growth stalls, check moisture, roots, sunlight, and cold exposure before assuming the plant needs a pH amendment.
Plant After Cold Weather Has Passed
Start with healthy nursery plants or seedlings that have several sets of true leaves and a compact shape. Avoid plants with blackened stems, an odor from the root ball, or a pot that is saturated and heavy; those clues can signal cold or moisture stress that will not disappear simply by putting the plant in the ground. If roots circle the pot, gently loosen only the outer edge rather than tearing the root ball apart.
Set the plant at the same depth it grew in its nursery pot, firm soil around the roots, and water thoroughly to settle the planting area. Follow the spacing on the plant label because cultivar habits vary; as a starting point, extension recommendations range from about 9 to 18 inches apart. Closer spacing closes a bed more quickly but increases competition and makes it harder to water at the root zone, while wider spacing allows each clump to branch and reduces crowding.
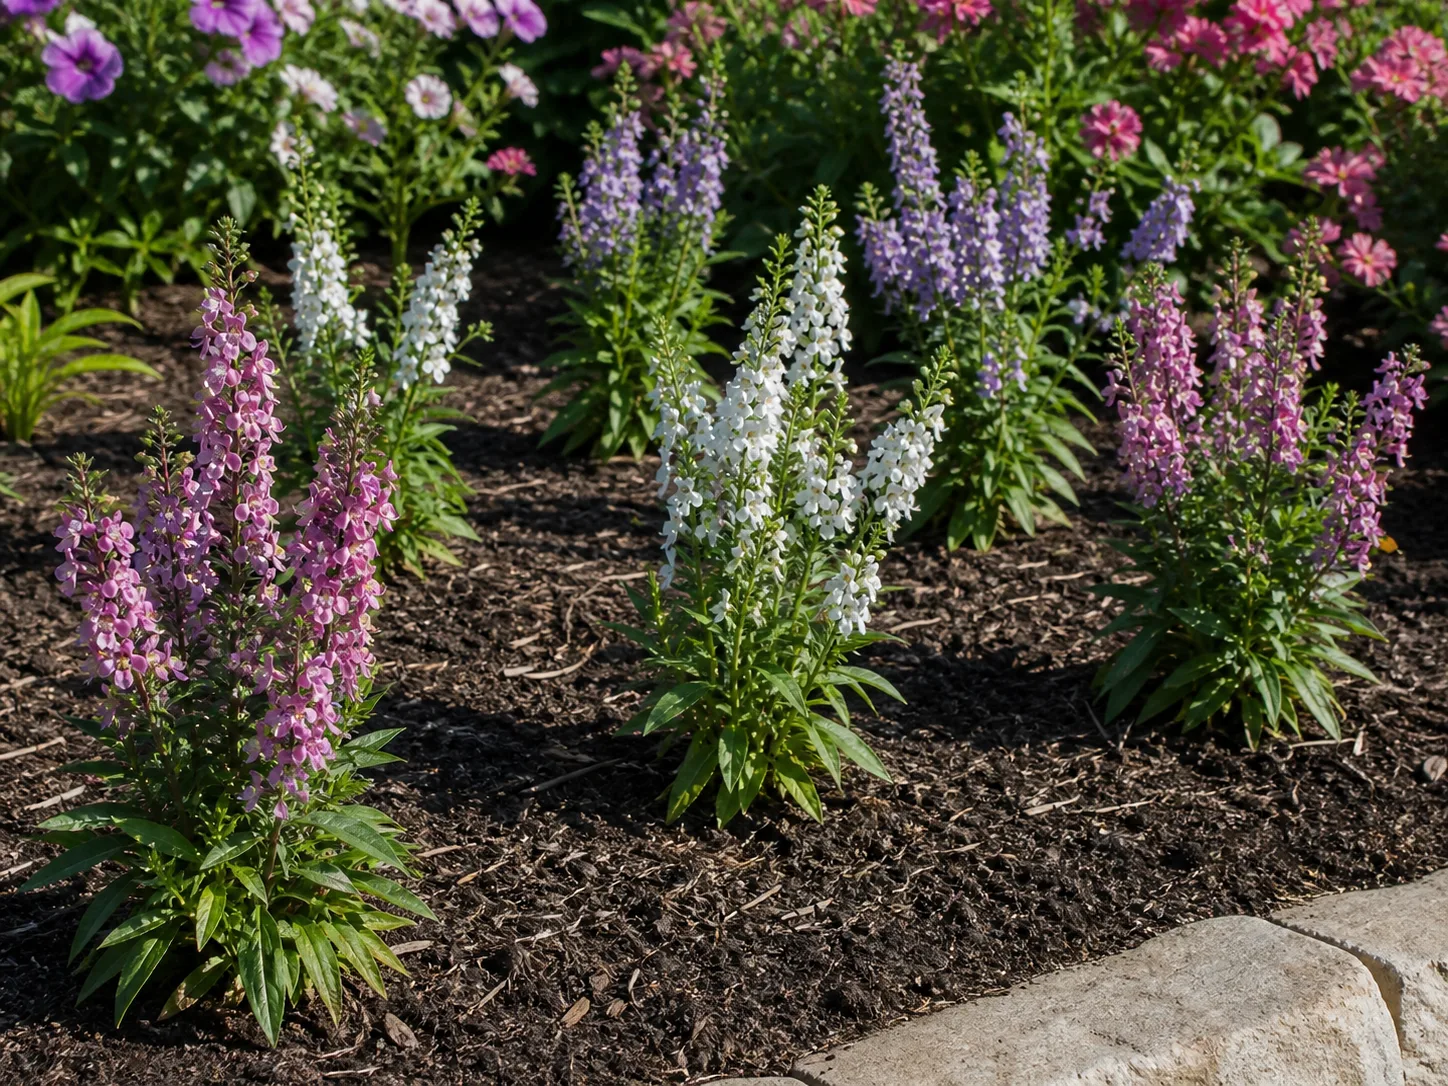
For a mixed border, place taller upright forms where they will not block shorter flowers, and use spreading selections near the front or edge. Water regularly while the root ball is establishing, but let excess water drain instead of building a permanently wet basin around the crown. A thin layer of mulch can slow evaporation in a bed; keep it away from the stems so the base remains open to airflow.
Water by Root Development, Not a Calendar
Newly planted angelonia needs a more attentive routine than an established bed plant. For the first week or two, check the original nursery root ball as well as the surrounding soil because a small plug can dry faster than the ground around it. Water when the root ball is beginning to dry, then reassess as roots move into the bed; do not rely on a weekly reminder that ignores rainfall, soil texture, and temperature.
Once rooted, angelonia can tolerate short dry spells, but drought tolerance is not a reason to let a flowering plant repeatedly collapse. Feel the top inch or two of soil and check deeper if the surface is dry but the plant looks wilted. When the root zone is dry, water slowly and deeply; a quick sprinkle may wet leaves while leaving the roots thirsty. Mulch helps beds hold moisture, but containers and hanging baskets lose water faster and need more frequent checks.
In a pot, water until the mix is evenly moist and excess drains from the bottom, then empty any saucer. During hot, windy weather, a container may need water daily, while a large pot in mild conditions may need it less often. The pot’s size, material, exposure, and root fill all change the interval, so check the mix rather than trying to memorize one frequency for every angelonia.
Wilting alone does not diagnose drought. A plant in dry soil needs a thorough drink; one in constantly wet soil may be losing roots and be unable to take up water. If a wilted plant is already wet, pause irrigation and check drainage, roots, and stem bases before watering again.
Fertilize Lightly and Read the Plant’s Growth
Begin with the nutrients in the potting mix or amended bed rather than automatically feeding at every planting. Angelonia is not a heavy feeder, and excess nitrogen can push leafy, soft growth while reducing the display of flowers. UF/IFAS describes a light monthly fertilizer application for Florida gardens, but that is a regional recommendation, not a reason to combine multiple products or exceed the label rate in every soil.
If you fertilize, use a balanced or flower-formulated product at its labeled rate and account for fertilizer already present in the potting mix. A bed with compost and steady growth may need little additional feeding, while a plant in a small container that is watered frequently may use nutrients sooner. When flowering drops, first check whether the plant receives enough sun and has warm roots; fertilizer will not compensate for shade, cold, or a saturated pot.
Pinching, Pruning, and Deadheading
Pinching young plants is optional, but it can encourage branching when a plant is tall and sparse. Once the transplant is growing steadily, pinch or snip the soft growing tip just above a leaf pair; do not pinch a plant that is wilted, newly moved, cold-stressed, or already branching well. The result depends on cultivar, and compact selections may not need this treatment.
Routine deadheading is usually unnecessary because many cultivated angelonias continue producing spikes without having every spent bloom removed. North Carolina State Extension and University of Missouri IPM both describe Angelonia as not requiring deadheading or routine pruning. If a plant becomes leggy or the first flush looks ragged, a selective cutback can still tidy it and encourage a later flush; Texas Tech University’s plant profile notes that angelonia responds to shearing. Remove no more than about one-third to one-half of the leafy growth at once, and avoid cutting into bare lower stems that have no healthy leaves or side shoots.
Choose a Variety for Your Space
Choose by mature habit first, then by color. Upright selections such as many Angelface or Archangel types provide vertical structure in a bed or a large pot, while compact Serenita and Serena varieties suit smaller spaces and seed-starting projects. Spreading AngelMist types can soften the front of a bed or edge a container, though their habit varies by series and they may not drape like a trailing vine.
The University of Missouri’s 2024 cultivar overview describes several series with different heights and uses, while North Carolina State Extension lists examples with different resistance to Phytophthora root and stem rot. Those details are reminders to read the tag rather than buying by flower color alone. If your garden has a history of wet soil or root disease, select a variety with a documented resistance claim where available and still provide good drainage; resistance is not immunity.
For the exact look of a named cultivar, purchase a labeled plant or start with seed sold for that specific seed-grown selection. Seed collected from an unnamed or hybrid garden plant may produce offspring that differ in height, color, or vigor from the parent. If you are filling a large bed on a budget, seed-grown series can make sense; if you need a uniform row, clonal nursery plants are more predictable.
Grow Angelonia in Containers
Choose a container with drainage holes and enough volume to hold moisture through a warm afternoon. Very small pots dry quickly and magnify watering errors; a larger container buffers soil temperature and gives roots space. A general-purpose potting mix is appropriate, and combining angelonia with other plants works best when all of them need strong light and similar watering.
Use upright angelonia as a thriller or focal point and compact or spreading forms to fill the rim. A container that looks sparse immediately after planting may fill out as stems branch, so avoid crowding several full-size plants into a narrow pot just to get an instant bouquet effect. If you use multiple plants, match their mature spread to the container’s diameter and leave enough room to direct water onto the mix rather than continually wetting dense foliage.
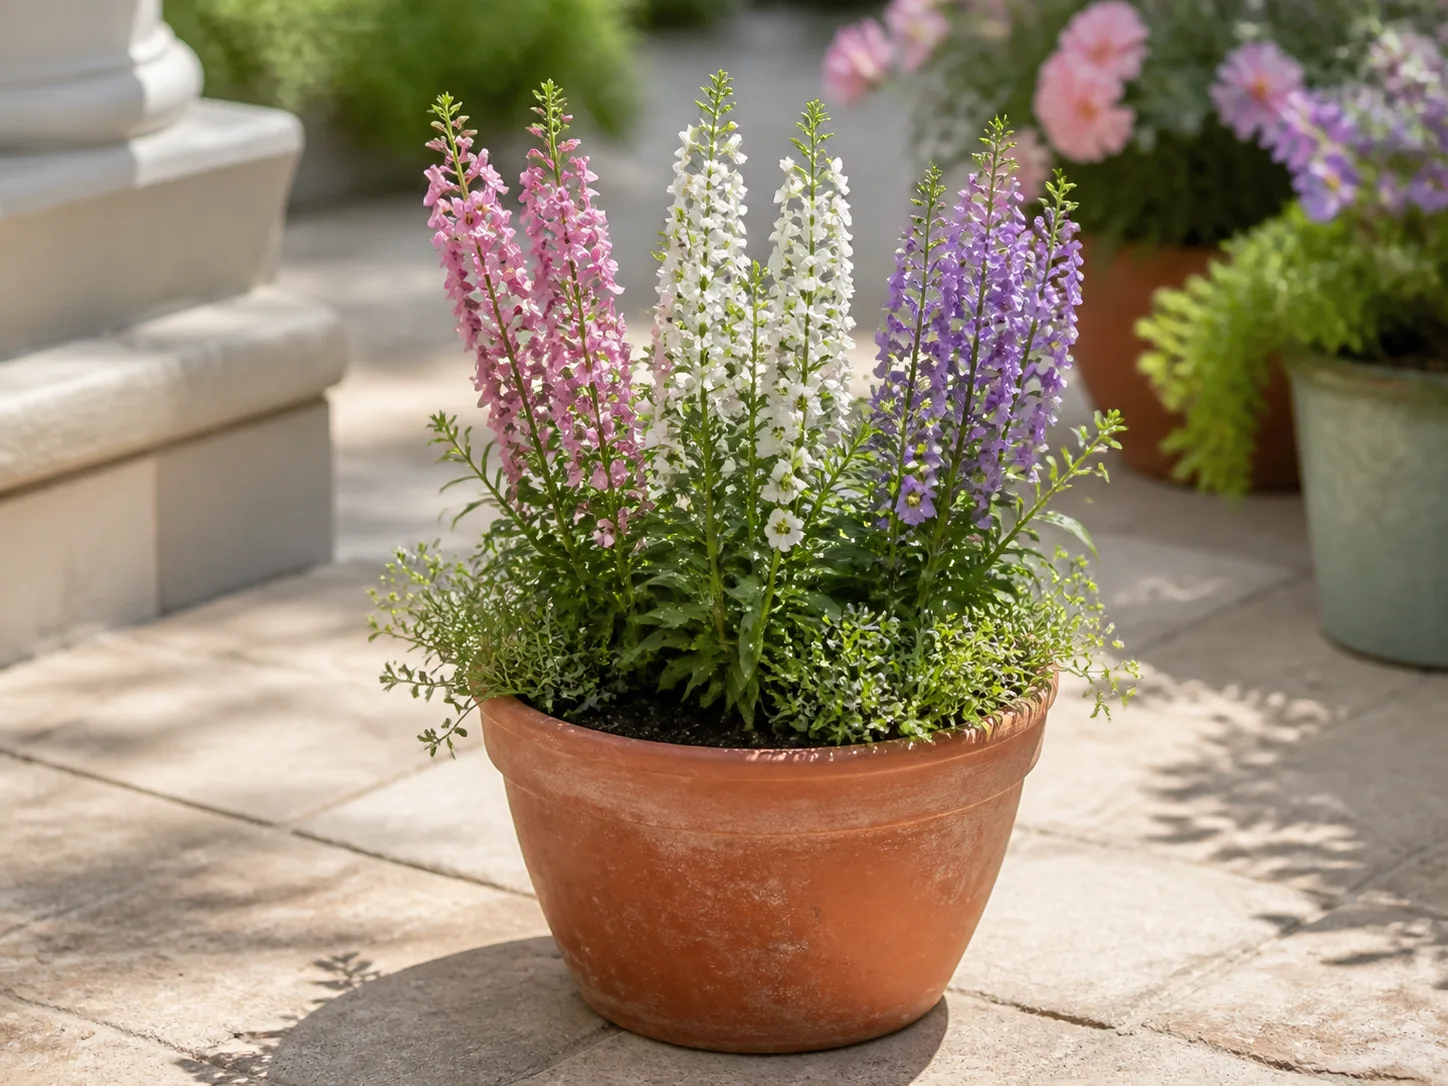
Check container moisture more often than bed moisture, particularly when roots fill the pot or the container sits on hot paving. Water thoroughly, allow the pot to drain, and do not leave it standing in runoff. If a plant repeatedly wilts by midday but recovers after watering, the pot may be too small, root-bound, or too exposed; move to a larger container or adjust placement before increasing fertilizer.
Start Angelonia From Seed
Starting seed gives you access to seed-grown cultivars and more plants for the cost of a packet, but tiny seed and a slow early stage make this method less convenient than buying a transplant. Better Homes & Gardens and Epic Gardening recommend beginning indoors about six to eight weeks before the last frost, so seedlings have time to develop before the outdoor season. Check the seed packet because light and depth directions can differ between seed treatments and cultivars.
Fill a clean tray with a fine-textured seed-starting mix and moisten it before sowing. Scatter the seed thinly so seedlings will not compete immediately, then press it against the surface; because angelonia seed is very small, avoid burying it deeply. Some sources advise only a light covering, while others call for a shallow dusting, so follow the packet and prioritize even contact with the mix and access to light. A clear dome can slow drying, but remove or vent it once seedlings emerge to improve airflow.
Keep the tray evenly moist, not waterlogged, in a warm spot around 70 to 75°F if that range appears on the seed packet. A heat mat can help maintain steady warmth in a cool room, but once seedlings appear, place them under a grow light or in a bright window so they do not stretch. Water gently from below or with a fine spray to avoid washing the seed into a corner.
After seedlings develop several true leaves and a stable root system, pot them up if necessary and gradually acclimate them outdoors over about a week. Set them outside for short periods in sheltered shade at first, then increase sun and exposure each day. Transplant only after frost danger has passed and nights have warmed; moving a soft seedling straight from a warm tray to hot midday sun can cause setback that looks like a watering problem.
Propagate Angelonia With Stem Cuttings
Stem cuttings are useful when you want more plants with the same traits as a healthy parent, but use this method only for varieties you are allowed to propagate. Better Homes & Gardens recommends cuttings for nonpatented angelonia; read the plant label and cultivar information, and buy another plant if propagation status is unclear. Seed-grown selections or clearly unprotected plants avoid the same uncertainty. A cutting also requires a few weeks of protected growing conditions, so it is not a fast fix for a plant that is already declining.
Choose a vigorous, nonflowering stem with no pests or disease. With clean snips, take a 3- to 4-inch tip cutting just below a node, remove the leaves from the lower portion, and keep a few leaves at the top. Set the stem into a moist, clean, well-drained propagation mix; rooting hormone is optional, not a substitute for oxygen and steady moisture.
Covering the cutting loosely with a clear bag or propagator can slow water loss, but keep the plastic from resting on the leaves and open it periodically for air exchange. Place the cutting in bright indirect light and warm conditions, not hot direct sun, and keep the mix lightly moist rather than soaked. New growth is encouraging, but a gentle tug is a better check for roots; once the cutting resists and begins to grow, pot it up and harden it off before placing it outdoors.
Keep Flowers Coming and Cut Spikes
Angelonia often blooms for much of the warm season, but the first flush is not a guarantee of nonstop flowers in every climate. Strong sun, warm nights, drainage, and steady moisture help maintain a healthy plant that can keep producing spikes. A few missed blooms after cool weather or transplant stress are less concerning than a plant that stays leafy for weeks in deep shade.
The flower spikes make useful cut stems for small arrangements. Cut stems when the lower flowers are open and upper buds still show color, then strip leaves that would sit below the waterline. A clean vase and fresh water help the stems stay presentable; in the garden, remove only the spent spike or shear a tired plant lightly if you want to encourage a new flush.
Diagnose Yellow Leaves, Wilting, and Weak Growth
One yellow lower leaf on an otherwise vigorous plant can be normal aging, but several yellow leaves at once deserve a check of the growing conditions. Start with soil moisture, then look for drainage, sunlight, cold exposure, and pests before applying fertilizer. Yellow foliage can accompany both drought and excessive moisture, so adding water or nutrients without checking the root zone can worsen the underlying problem.
For slow, stretched growth with few flowers, count direct-sun hours and consider whether the plant was put outdoors before nights warmed. If the plant receives adequate light but has remained wet after rain, improve drainage and thin nearby growth instead of feeding it more. If older leaves are pale while new tips remain green, nutrient availability may be part of the issue, but root health and watering still come first.
When leaves drop after a cold night, remove only clearly damaged tissue after you can see where healthy growth remains. Do not cut the whole plant back immediately: tender angelonia may recover if the crown and lower stems are alive, while a blackened, soft crown in soggy soil signals more serious damage. Give the plant warmth, bright light, and moderate moisture as it recovers.
When Leaves Wilt Even Though the Soil Is Wet
Wet-soil wilting is a warning that roots may not be taking up water effectively. Check whether a pot has blocked drainage, whether water is trapped in an outer cachepot, or whether the garden bed remains saturated; if the soil smells sour or roots are dark and soft, root rot is possible. Stop watering on schedule, empty standing water, and let the root zone regain air before reassessing.
If the plant is in a container and root damage is limited, remove it gently, trim only mushy roots with clean snips, and repot into fresh, free-draining mix in a pot with working holes. Avoid adding fertilizer while the roots recover. If a bed has persistent drainage problems, relocating the plant or using a raised bed may be more effective than repeated rescue attempts.
Manage Aphids and Powdery Mildew
Angelonia is often relatively trouble-free, but aphids can cluster on tender tips and powdery mildew can appear when foliage stays damp or air movement is poor. Inspect new shoots and the undersides of leaves when growth changes, rather than spraying a plant based on a single yellow leaf. Ants, sticky residue, distorted tips, or visible clusters make aphids more likely; a white surface coating on leaves points toward mildew but should be checked against dust or dried spray residue.
For a small aphid population, rinse the stems with a firm stream of water and repeat inspections every few days. Remove badly affected tips if the plant can spare them. If a labeled insecticidal soap is needed, follow its label exactly and avoid spraying open flowers or pollinators; repeated applications are not a substitute for checking whether the pest is still present. NC State Extension lists aphids and powdery mildew among Angelonia’s potential problems, so good observation and airflow are more useful than assuming the plant is immune.
For mildew, water the soil rather than wetting foliage, thin crowded stems if needed, and remove fallen leaves. A fungicide is rarely the first step for a small ornamental planting; if the disease keeps spreading, confirm the diagnosis and choose only a product labeled for that plant and setting. Never combine products or increase a dose beyond its label.
Overwinter or Replace It Based on Climate
Angelonia is tender to frost. In places with regular freezing weather, treat it as an annual and plan to replace it in spring rather than expecting roots to survive in the ground. In warmer parts of USDA zones 9 to 11, some plants can persist as perennials, but local exposure, drainage, cultivar, and cold snaps still matter; a zone number is a broad climate guide, not a promise.
A potted specimen is easier to move than a bed plant, but indoor wintering can be disappointing. Before frost, inspect for pests and bring the plant into a bright, warm room; reduce watering because growth slows in lower light and keep the pot draining freely. Expect some leaf drop after the change in light and humidity, and do not feed while growth is weak. If it becomes lanky, stays pest-ridden, or occupies valuable indoor space without making healthy growth, taking permitted cuttings or buying a new plant next spring is often more practical.
Conclusion
To grow angelonia well, give it warm weather, direct sun, fertile but freely draining soil, and a deeper watering routine while it establishes. After that, use the plant’s condition to guide care: check moisture before watering, look at light before feeding, and diagnose yellowing from the root zone outward instead of guessing from one symptom.
Choose a named cultivar for a predictable habit, a seed-grown series when you want quantity, or a permitted stem cutting when you want a close copy of a healthy parent. Angelonia is low-maintenance when its site suits it, but it is not frostproof and it cannot thrive in waterlogged soil or deep shade. Get those limits right and the plant can provide a long run of summer spikes without demanding daily deadheading.