How to Grow Flowers From Seed: Complete Step-by-Step
Learn how to grow flowers from seed by choosing indoor or outdoor sowing, setting the right depth, managing moisture and light, and transplanting safely.
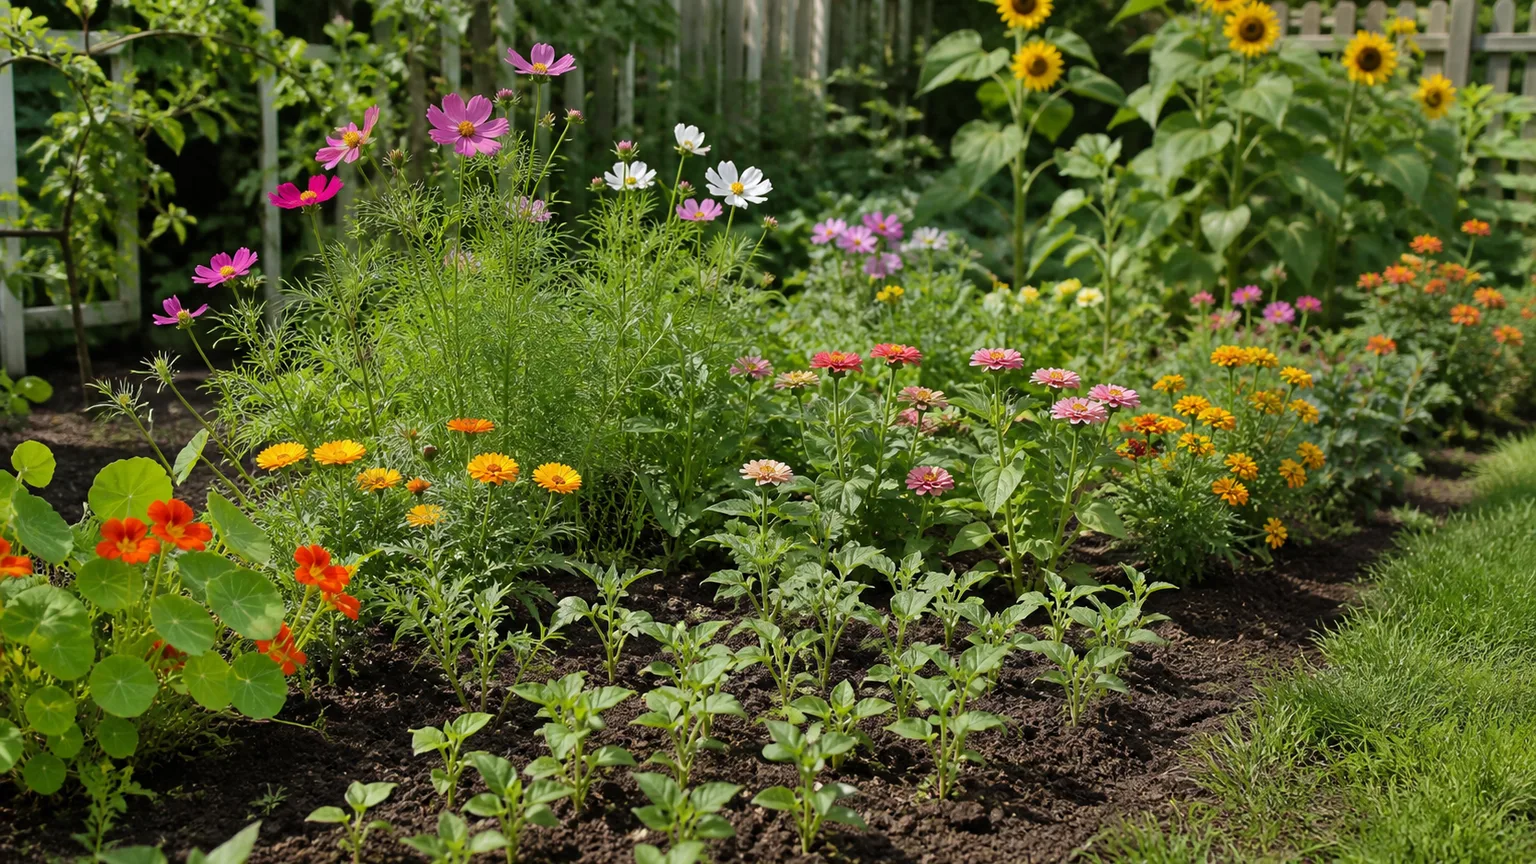
Growing flowers from seed gives you more choice and more plants for the price of a packet, but there is no single sowing recipe for every species. A sunflower, a poppy, and a perennial that needs a winter chill can all start as seeds, yet they ask for different timing, depth, and handling. The reliable method is to read the packet, match the seed to your local conditions, and keep the first weeks simple.
Most flowers fit one of three routes: sow directly where they will bloom, start them in containers indoors and transplant them, or sow them outdoors in a protected container so winter weather can trigger germination. Choose the route that suits the flower’s roots, the length of your growing season, and the space you can actually care for. This guide follows the seed from packet to established plant and explains where the process commonly goes wrong.
Choose the right sowing route before you open the packet
Direct sowing is usually easiest for flowers that germinate quickly in workable garden soil, dislike root disturbance, or produce many small seedlings that are awkward to transplant. It also avoids grow lights and indoor trays. The trade-off is that you cannot control outdoor temperature or rain as closely, and weeds may emerge alongside the crop.
Indoor sowing makes sense when a flower needs a longer season than your climate reliably provides, when you want earlier blooms, or when seedlings are easier to protect in a tray. It also lets you start a known number of plants for a bed or container. However, indoor starts need steady light, attentive watering, enough room as they grow, and a gradual transition outside; starting too early can leave you with root-bound plants before the weather is ready.
| Choose this route | It is a good fit when | Watch for |
|---|---|---|
| Direct sow outdoors | The flower tolerates local outdoor timing and is best left in place | Cold soil, heavy rain, crusting soil, weeds, and seed washout |
| Start indoors | The season is short, the seedling transplants well, or you need a planned number | Weak window light, crowded roots, dry cells, and transplant shock |
| Winter sow in a ventilated jug or pot | A hardy species benefits from natural seasonal temperature changes | Containers drying out, overheating in spring, or staying sealed after emergence |
The seed itself should decide more than the calendar. Seed Savers Exchange recommends planning around local frost dates, available space, and whether a crop should be started indoors or sown outside; those same checks help with ornamental flowers. Direct sowing can save work, while indoor sowing can buy time, but neither is automatically better for every flower.
Read the seed packet for biology, not a calendar shortcut
Start with the botanical name and cultivar, then look for sowing method, planting depth, light requirement, germination temperature, expected germination window, and any pretreatment. The packet’s “days to germination” is an estimate under suitable conditions, not a countdown that starts the moment you plant. Some packets provide only a broad range because temperature and seed age influence how quickly sprouts appear.
Use your average last frost as a planning anchor, not as a universal planting date. A warm-season annual can be injured by a late frost even if a neighboring perennial is already growing, while a hardy annual may be sown outdoors earlier or in fall. Regional frost maps help you estimate your season, but check local forecasts before exposing tender seedlings to a cold snap.
The packet can also tell you whether a seed needs light to germinate. Do not assume every seed should be buried: some very fine seeds are surface-sown and pressed gently against the medium, while larger seeds are covered. If the packet is missing or vague, search the species and cultivar from an extension service, botanical garden, or reputable seed supplier rather than applying a treatment by guesswork.
Pay attention to whether the plant is an annual or perennial, but do not treat the label as a bloom guarantee. Annuals often flower in their first growing season when sown early enough; many perennials prioritize roots and foliage first and may bloom later. A perennial that does not flower in year one can still be establishing normally.
Set up an indoor seed tray that stays moist and airy
For indoor starts, gather a clean container with drainage, a fine seed-starting mix, labels, water, and a bright light source before sowing. You do not need a heated greenhouse or a pile of equipment. A shallow reusable tray or separate cells can work; cells make it easier to lift seedlings without disturbing neighboring roots, while a communal tray is efficient for seeds you will prick out soon.
Use a fresh, fine-textured seed-starting medium that holds moisture but drains freely. Garden soil is usually too dense for small containers and may compact around delicate roots. Pre-moisten the mix before filling the tray so water distributes evenly, but stop while it feels damp rather than soggy; excess water squeezes out the air spaces a germinating seed also needs. Epic Gardening’s seed-starting guide likewise emphasizes a light medium, drainage, and removing covers after emergence.
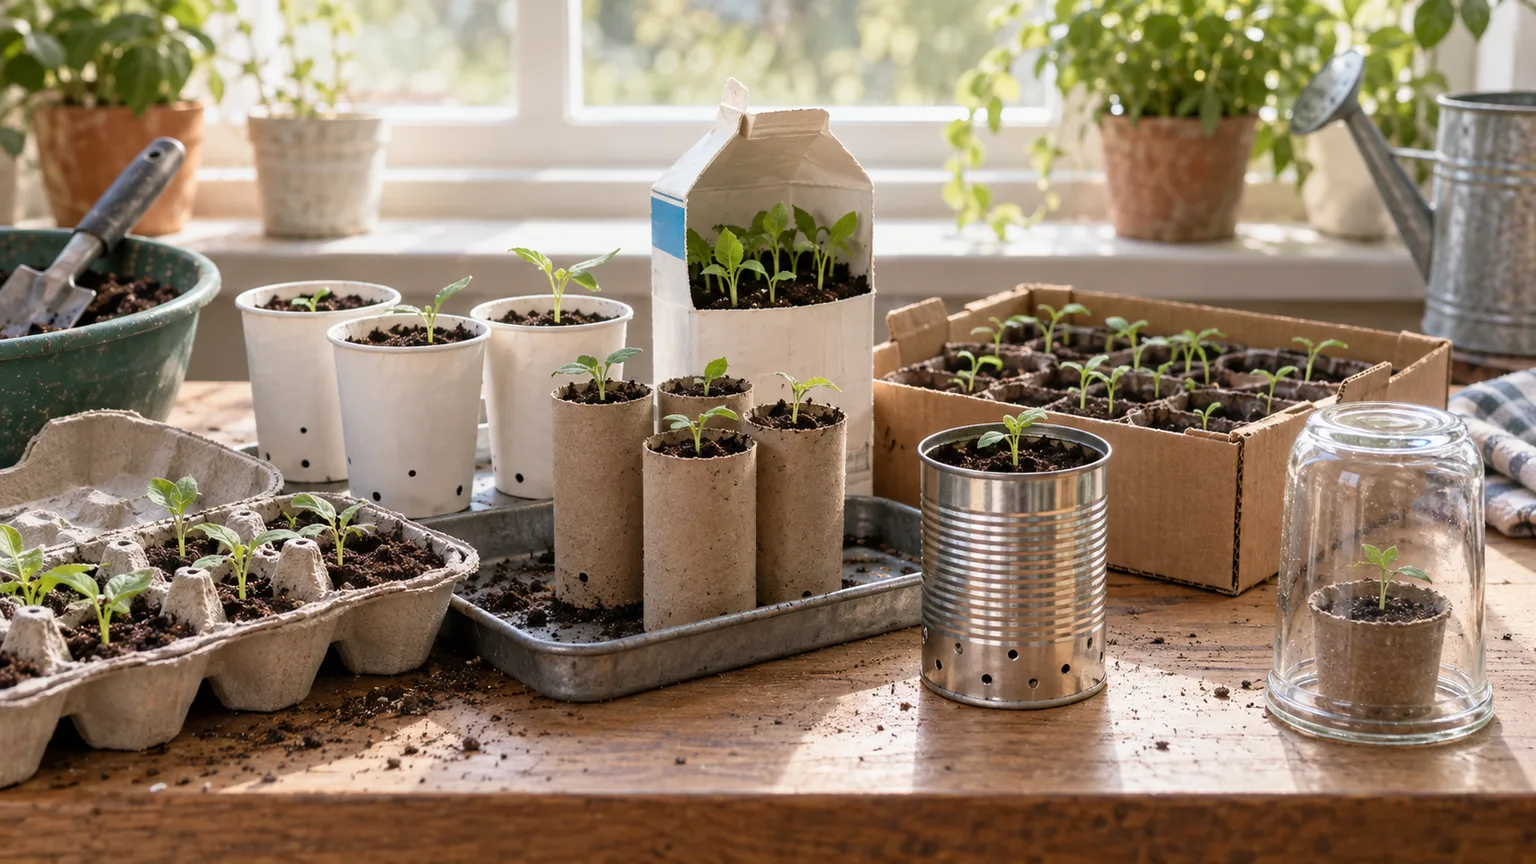
Choose containers with drainage
A container must let extra water escape. If you reuse a yogurt cup, food tub, or paper cup, make drainage holes before filling it and set it in a watertight catch tray so watering does not damage a shelf. Wash reused containers and tools, especially if previous seedlings showed mold or collapse, and avoid containers so shallow that the mix dries within hours.
A clear cover can slow surface drying before seeds sprout, but it is optional when you can check the tray regularly. Vent it if condensation is heavy, and remove it as soon as seedlings emerge; leaving seedlings sealed in warm, stagnant air encourages weak growth and fungal trouble. Label each row or cell with flower name and sowing date because seedlings often look alike before true leaves appear.
Sow at the right depth and density
Follow the depth on the packet whenever it gives one. If no depth is listed, a useful starting rule is to cover a seed with about two to three times its own diameter, but this is not a law: tiny or light-dependent seeds may need to stay on the surface, and some larger seeds are planted deeper. Seed Savers Exchange describes the two-times-diameter rule as a general guideline while stressing packet-specific instructions.
Make a shallow hole or furrow, place the seed, and cover it loosely rather than packing down a hard cap of soil. Surface-sown seeds can be pressed gently into damp mix so they make contact without being buried. In the garden, rake the bed to a fine, crumbly surface before sowing; clods leave large air gaps, and a crust that forms after rain can block emerging shoots.
Space seeds with the next step in mind. If the packet gives a final spacing, you do not have to sow each seed exactly that far apart, but avoid dumping a whole packet into one small cell. For indoor trays, sow one or two seeds per cell when seed is scarce or expensive, then snip the weaker seedling at soil level if both sprout; pulling it can disturb the keeper’s roots. In an outdoor row, sow a little more densely if germination is uncertain, then thin early rather than allowing seedlings to compete for light and water.
Water gently after covering. A fine mist, careful pour, or bottom-watering tray is less likely to dislodge shallow seeds than a strong hose stream. Keep labels in place, and record the sowing date so you can judge the expected germination window accurately.
Balance moisture, warmth, oxygen, and light
A seed needs water to activate, but not a waterlogged environment. West Virginia University Extension explains that seeds take in water and oxygen through the seed coat as germination begins; Penn State Extension adds that overly wet or compacted media can restrict gas exchange. In practice, keep the mix evenly damp and allow drainage rather than letting a tray sit in standing water.
Temperature is species-specific. A heat mat can help seeds whose packets call for warm soil when the room is cool, but it is not a universal requirement and can overheat a tray if left on without checking. Cool-season flowers may germinate at lower temperatures than heat-loving annuals, so do not assume that the warmest windowsill is best; follow the listed range and keep trays away from radiator blasts or cold drafts.
Some flower seeds need light to germinate, while others germinate better covered or in darkness. That instruction applies to the seed before emergence, not the seedling after it emerges. Once green shoots appear, provide strong light immediately; a bright window can work for a short period, but seedlings often lean or stretch if the light is weak or comes from one side.
Move light closer once seedlings emerge
Place a grow light close enough to illuminate seedlings evenly without heating or scorching them, following the fixture’s instructions. Rotate trays on a windowsill if stems lean toward the glass, and avoid crowding cells so air can move around the leaves. A seedling that grows tall, thin, and pale is usually stretching for more light, not asking for extra fertilizer.
As seedlings develop their first true leaves—the leaves that look more like the mature plant—reduce humidity and increase airflow. If a few cells remain empty beyond the packet’s expected window, first check moisture and temperature before adding more water or heat. Penn State Extension notes that suitable water, oxygen, temperature, and light support faster, more even germination, but the optimal combination varies by seed.
Pot up and feed seedlings only when they are ready
Seed leaves, or cotyledons, are the first leaves to unfold and use food stored inside the seed. Wait until a seedling has true leaves and enough roots to hold its small plug of mix before potting it up, unless the species grows quickly and is already crowding its cell. Handle seedlings by a leaf, not the tender stem, which can be crushed easily.
Move each seedling into a slightly larger pot rather than a huge container full of wet soil. Set the root plug at about its previous depth unless the plant’s guidance says otherwise, then water to settle the mix around the roots. If several seedlings are tangled in one tray, tease them apart only when the roots separate easily; when they are tightly matted, snipping extras at the surface may protect the strongest plant.
Do not rush to fertilize as soon as seeds sprout. The seed supplies initial energy, and a fresh seed-starting mix may contain enough nutrition for early growth. Once true leaves appear and seedlings are actively growing, use a diluted, balanced fertilizer only if the mix or plant guidance calls for it; excessive feeding can produce soft growth or injure tender roots. If growth stalls, check light, temperature, watering, and root space before assuming fertilizer is missing.
Harden seedlings before moving them outdoors
Indoor-grown seedlings have not yet adapted to direct sun, wind, cooler nights, or faster moisture loss. Move them straight from a protected room into a sunny bed and leaves can scorch or wilt even if the plant is healthy. Penn State Extension describes hardening off as a gradual exposure to outdoor light, airflow, and temperature changes; it is a transition, not an optional extra.
Acclimate in stages
For roughly a week, begin with a few hours outdoors in a sheltered, bright-shade spot, then increase exposure over successive days. Bring trays in if frost threatens, strong wind is forecast, or the seedlings begin to wilt; the goal is to toughen them gradually, not to stress them. By the end of the process, match the outdoor light to the site where each flower will grow.
Transplant on a mild, overcast day or late afternoon when the soil is workable and the species’ frost limits are met. Water the tray beforehand so plugs hold together, plant at the right depth, and water again around the root zone. Leave the seedling’s original root ball intact, then monitor the bed closely for a few days; small starts in windy or sunny locations may need temporary protection while roots settle.
If a seedling is still cramped but outdoor weather is not safe, pot it up and keep it under suitable light rather than hardening it prematurely. A large, overgrown seedling is not necessarily stronger; root-bound plants can stall after planting and may be more difficult to establish than compact, younger starts.
Direct-sow flowers into a prepared seedbed
Prepare the planting area before opening a packet. Remove weeds and debris, loosen the surface without turning up a deep layer of dormant weed seed, and smooth the top so small seeds land at a consistent depth. Direct sowing works best when the soil is moist but not sticky, and when rain is not likely to wash the seed away before it roots.
Sow in the season the packet recommends and consider the temperature at seed depth, not just the air temperature. If the soil is cold and saturated, a warm-season seed may sit for a long time and rot; if the soil dries quickly, a tiny seed can fail before it absorbs enough water. For a mixed border, sow in rows or marked blocks rather than scattering everything at once, so you can tell seedlings from weeds and thin with confidence.
Homes & Gardens gives practical examples of warm-season annuals such as amaranthus, cosmos, and nasturtium that can be sown outside after frost danger passes and conditions warm. Its directions also show why species instructions matter: a tiny seed may need only a light cover, while a larger nasturtium seed can be planted deeper. Use those examples as illustrations of variation, not as calendar dates for every region.
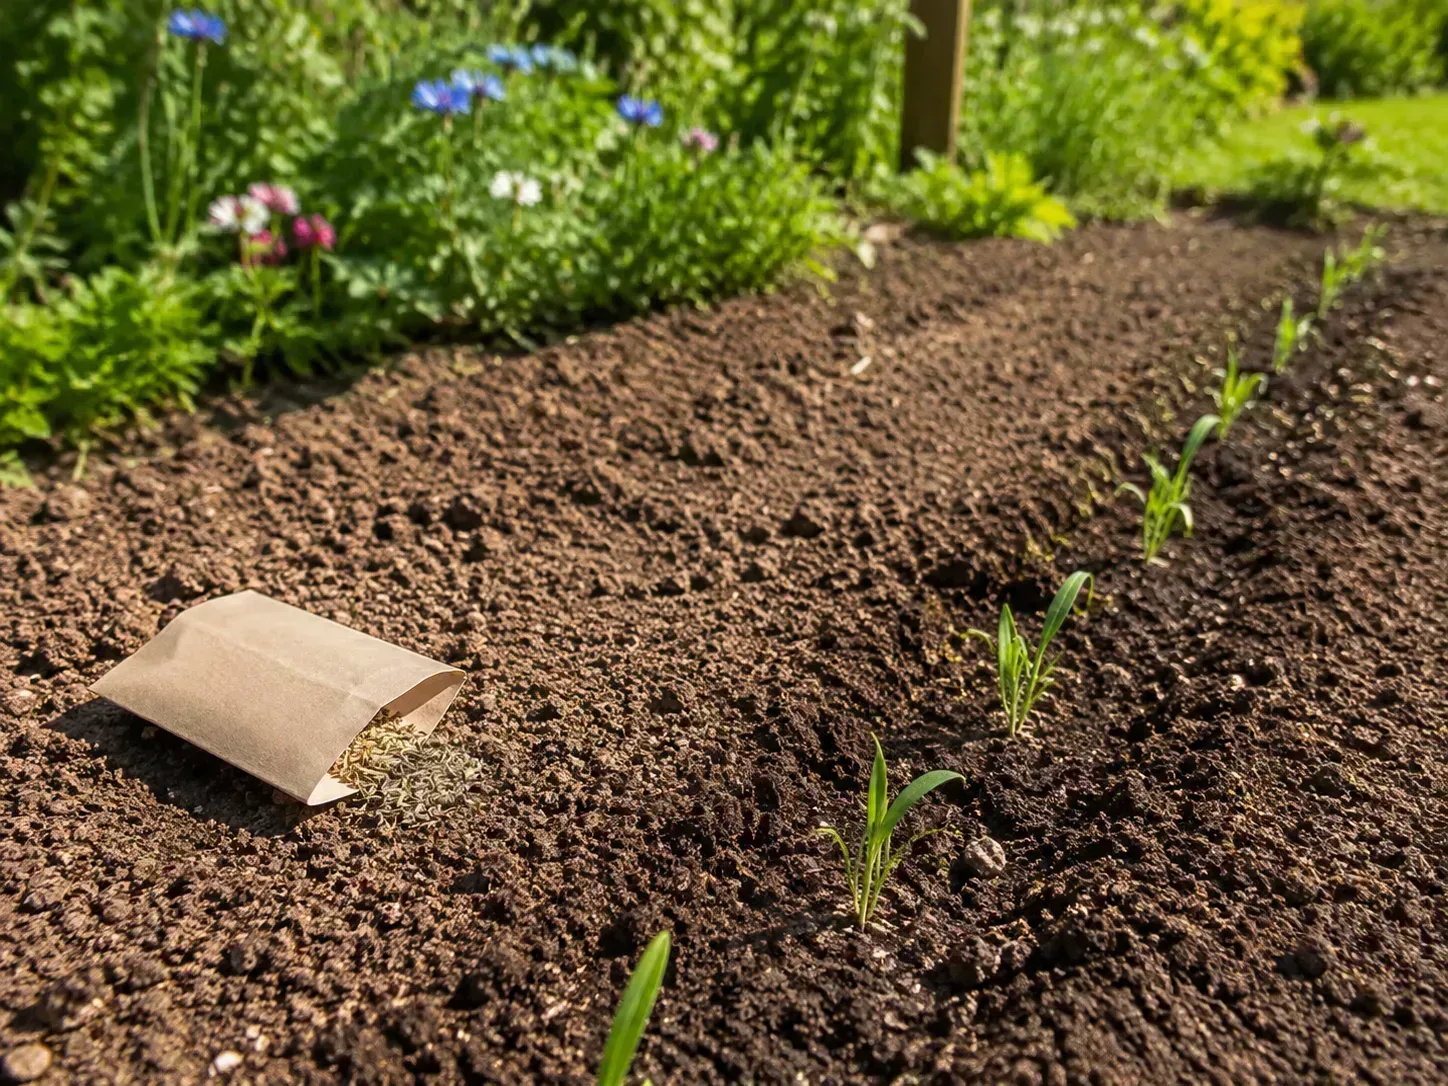
Keep the surface evenly moist until seedlings establish, using a gentle spray or a watering wand with a fine rose. A thin, open layer of mulch may conserve moisture around larger seedlings, but do not bury a newly sown bed under thick mulch; light-dependent seeds and tiny sprouts need to reach the surface. Once seedlings are large enough to identify, thin them to the packet’s recommended spacing instead of letting a crowded carpet compete for water and airflow.
Use stratification and scarification only when needed
Some seeds remain dormant even when water, air, and temperature appear suitable. Dormancy is a survival strategy that prevents a seed from sprouting during a brief warm spell before winter or drought; it is not proof the seed is dead. West Virginia University Extension describes cold-moist stratification as one way to break dormancy for seeds that require a period of cool, moist conditions.
Stratification means keeping seed moist and chilled for the species-specific period, often in a labeled bag with a slightly damp medium in a refrigerator. Do not freeze seeds unless the packet or a reliable species guide calls for that treatment. Check them periodically; if roots start to emerge, plant promptly without breaking the new root.
Scarification is different: it weakens a hard seed coat so water can enter. A file or a brief soak may help some large, hard-coated seeds, but the treatment is inappropriate for tiny seeds or seeds with no physical dormancy. Follow the supplier’s instructions and avoid scraping through to the embryo. Soaking is not a general shortcut; too long in water can deprive a seed of oxygen.
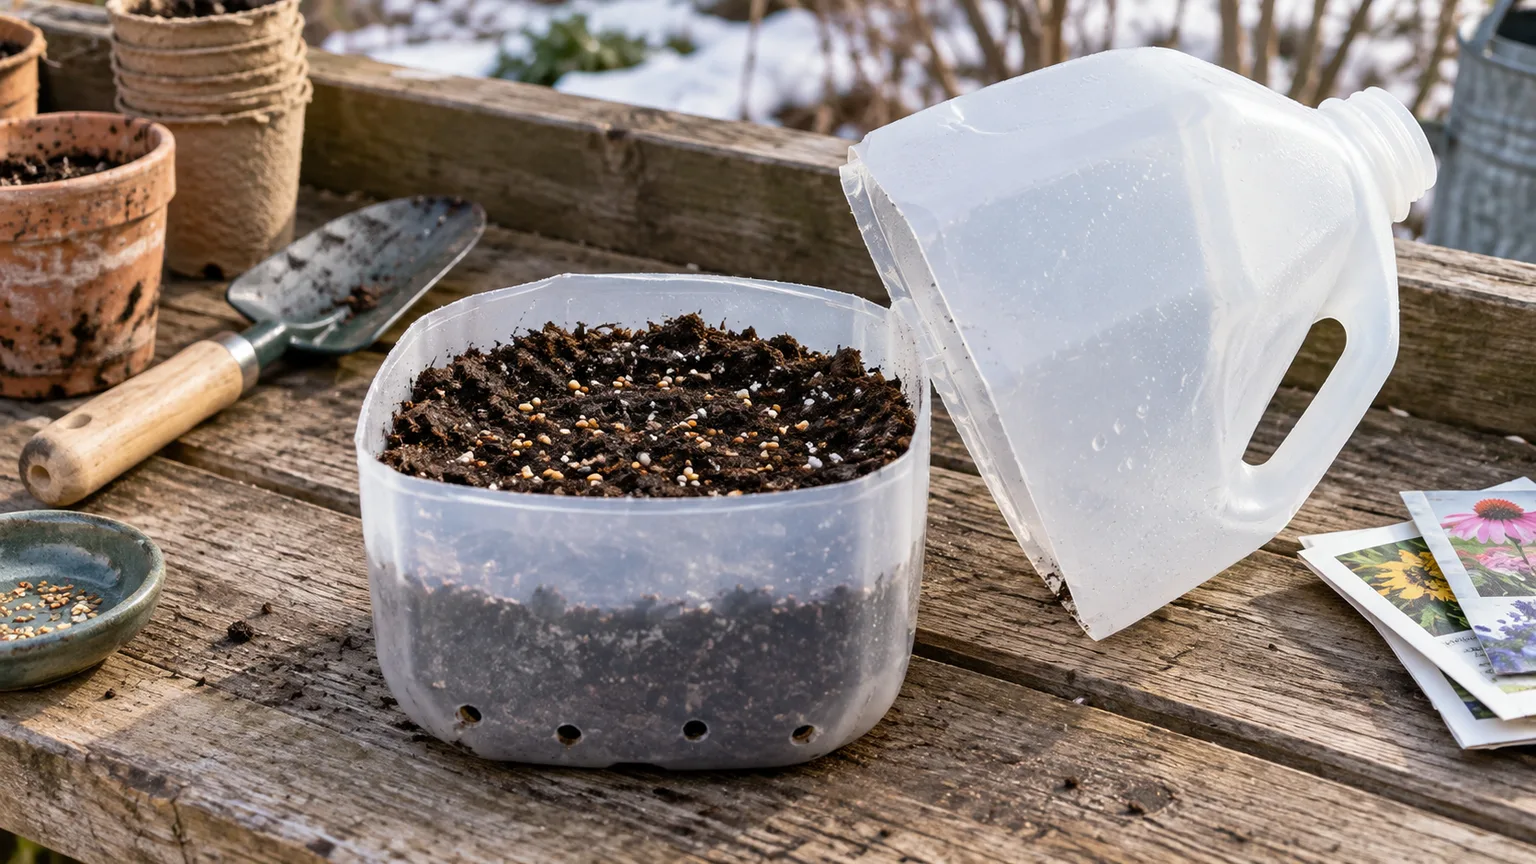
Winter sowing uses ventilated, translucent outdoor containers to shelter hardy seeds while still exposing them to seasonal temperature changes. It can be convenient for native perennials and hardy annuals, but it is not equivalent to cold stratification for every species. Provide drainage and ventilation, keep the medium from drying out, and open the container as temperatures rise so seedlings do not overheat.
Plan a wildflower patch as a small ecosystem
A bag labeled “wildflower mix” is not automatically suitable for every garden or region. Check the species list, whether the seed is native to your area, and whether the plants match the site’s sun, drainage, and moisture. A mix designed for a dry sunny slope may fail in a shaded, wet corner; an unsuitable species may spread aggressively or be invasive locally.
Start with a manageable patch rather than scattering seed across the whole lawn. Remove existing weeds, expose mineral soil lightly so seed can contact it, and sow at the density and season listed for the mix. If seeds are tiny, mix them with a small amount of dry, inert carrier such as clean sand so you can distribute them evenly, but avoid burying the seed beneath a thick layer of compost or mulch.
A mixed patch will not emerge as a uniform carpet. Some annuals may flower in the first year while perennial species concentrate on roots, and fast-growing species can shade slower ones. Watch which plants establish, thin or remove plants that overwhelm the intended balance, and replenish the species that disappear. If the goal is habitat as well as color, choose regionally native seed from a source that identifies species and origin instead of relying on vague “wildflower” labeling.
Troubleshoot slow or failed germination
When a tray looks empty, do not immediately add more water. Check the packet’s germination window, then inspect a few seeds if you can do so without disturbing the rest. A firm seed that has not changed may still be dormant or waiting for its temperature range; a seed that is mushy, split, or foul-smelling is more likely to have rotted.
Use this order to diagnose the problem:
- Too deep: Tiny seeds may lack the energy to push through a heavy cover. Resow on the surface if the packet indicates light is needed.
- Too dry: The mix may have dried during the first days after sowing, especially at the tray edges. Re-moisten evenly and cover only if the seed’s light needs permit.
- Too wet or compacted: Standing water and dense soil limit oxygen. Drain the tray, improve airflow, and resow in a fresh, porous mix if seeds have rotted.
- Wrong temperature: Move the tray to the species’ recommended range; do not solve every slow start with a heat mat.
- Dormancy or age: Look for required chilling or scarification, and test older seed rather than assuming every viable-looking seed will sprout.
If seedlings collapse at the soil line, separate affected cells, remove covers, and improve airflow while avoiding soggy media. This can be damping off, a group of seedling diseases favored by wet, stagnant conditions; once stems are pinched or rotted at the base, those seedlings usually will not recover. Prevent repeat trouble with clean containers, drainage, careful watering, and enough room between sprouts.
For questionable old seed, test a small sample on a damp paper towel before using the whole packet. Penn State Extension describes checking germination by counting how many seeds sprout after several days; use the packet’s normal timing and conditions for the species. If only a fraction germinates, sow more densely or replace the seed rather than spending weeks troubleshooting an empty tray.
Save flower seeds without losing variety traits
Collect seed only after the seed head or pod has matured and dried on the plant. Seed harvested too early may not be fully developed, and seed left in a damp bag can mold. Clip dry heads into a paper bag, label the flower and date, then finish drying them in a cool, airy place before separating seed from chaff.
Store thoroughly dry seed in labeled paper envelopes or another breathable container inside a cool, dark, dry place. The exact lifespan differs by species, so keep a small record and test older seed before sowing. Penn State Extension notes that seed longevity is sensitive to moisture and temperature; a dry, stable storage location is more useful than a complicated container that traps humidity.
Open-pollinated varieties often reproduce more predictably than hybrids, but cross-pollination can still change the next generation if different varieties bloom nearby. Seeds from an F1 hybrid may not resemble the parent at all, and some cultivated flowers produce little or no viable seed. If you want a particular color or form next year, save seed only when the variety and pollination conditions support that goal.
Build a simple first-season plan
Start with two or three flowers rather than a dozen packets. Choose one easy direct-sown annual suited to your season, one flower that benefits from indoor starting if you have adequate light, and one perennial only if you are comfortable waiting longer for blooms. Record each name, date, route, and location so next season’s choices are based on what actually happened in your garden.
Before sowing, read each packet from top to bottom, mark frost timing on a calendar, prepare labels, and gather containers or ready the bed. Sow a small test batch if seed is rare, old, or unfamiliar. Keep the medium damp, not flooded; after emergence, shift your attention to light and airflow; before planting outside, harden seedlings in stages. Each transition has a different risk, so make one change at a time.
If a planting fails, note what you observed rather than changing several variables at once next time. Delayed emergence points you toward temperature or dormancy; uneven growth suggests inconsistent moisture, seed depth, or light; collapse at the soil line suggests stagnant dampness. That short record turns a disappointing tray into useful information and helps you grow more of the flowers that thrive in your specific conditions.
Conclusion
To grow flowers from seed reliably, match the sowing method to the species, follow its packet directions, and give seeds the moisture, oxygen, temperature, and light they need at each stage. Direct sow when the plant and weather favor it; start indoors when extra season or protection is useful; use dormancy treatments only when evidence says they are needed. Then thin seedlings, provide strong light, and harden transplants gradually.
No seed-starting setup can make every variety sprout on the same schedule, and not every saved seed will reproduce its parent. But a clean container or prepared bed, careful watering, clear labels, and a little observation are enough to turn a packet into a garden. Start small, track what works, and use the next season to build on it.



