How to Grow Pumpkins for a Better Fall Harvest
Learn how to grow pumpkins with warm-soil timing, variety choices, pollination, steady watering, pest checks, harvest cues, and realistic storage advice for your climate.
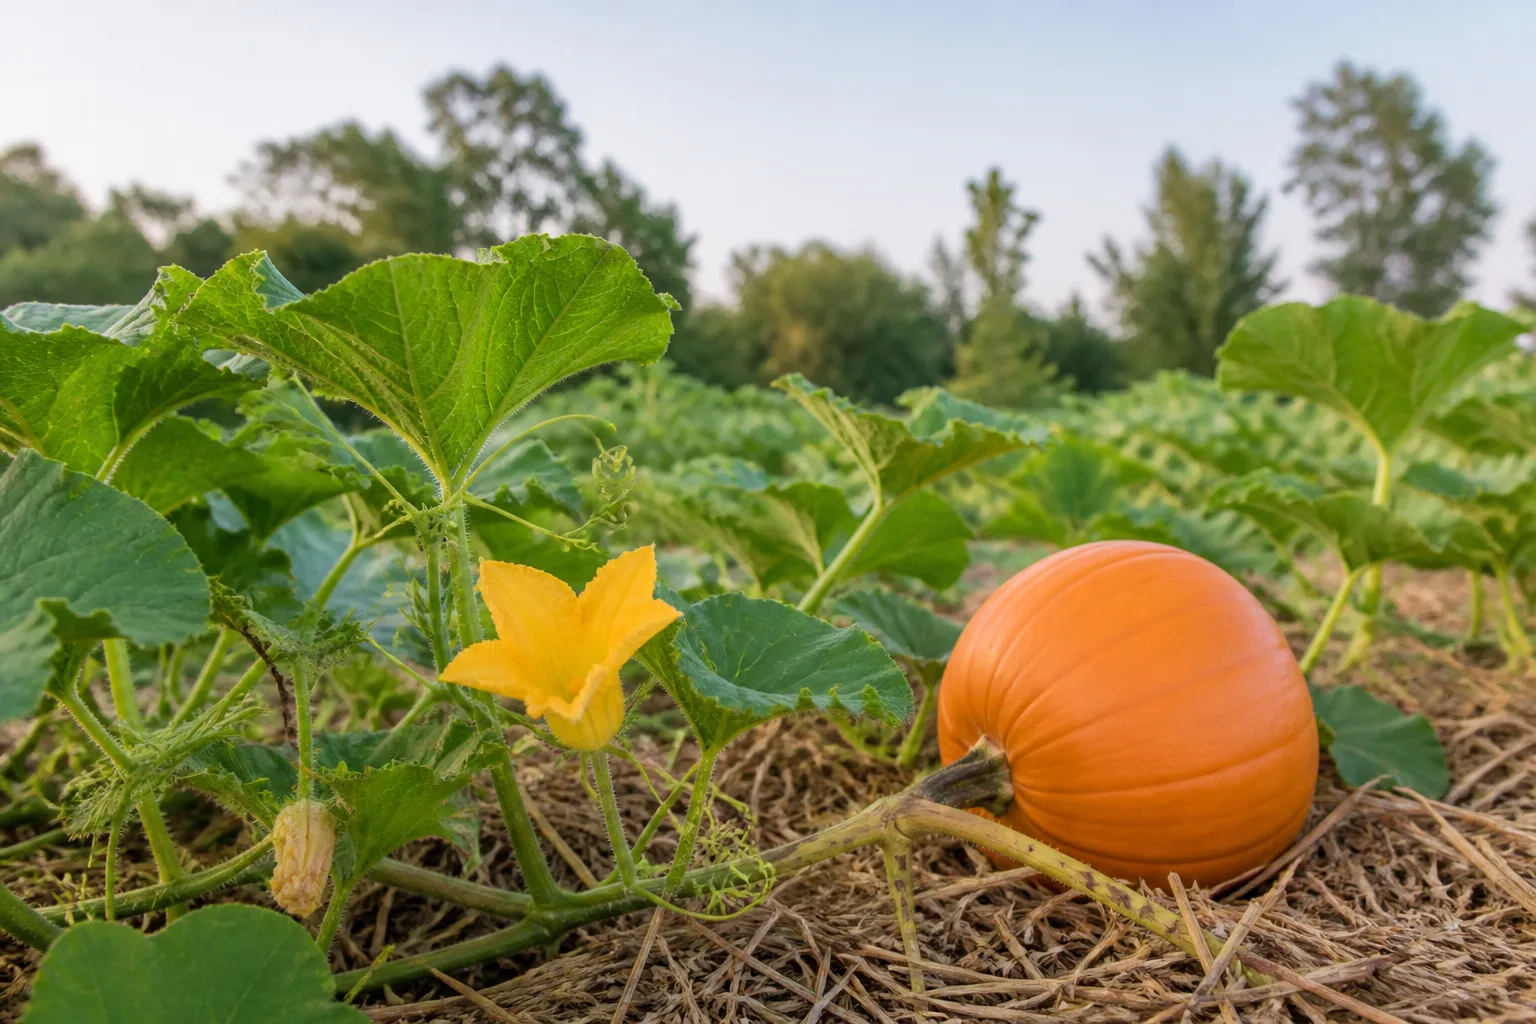
Pumpkins are warm-season annual vines that need a long, frost-free stretch, open sun, and more room than their first few leaves suggest. The reliable way to grow one is to choose a variety for its job, plant into genuinely warm soil, keep moisture steady while flowers set, and harvest by rind maturity rather than by a holiday date alone.
The biggest planning mistake is to count backward from a desired harvest using only the “days to maturity” on a seed packet. Those days are an estimate under favorable conditions; cool soil, cloudy weather, heat stress, uneven water, and a late fruit set all add time. Treat the packet as a starting point, add a buffer before your first fall frost, and use the plant’s visible cues to decide when a fruit is ready.
Pick a pumpkin for its purpose and season
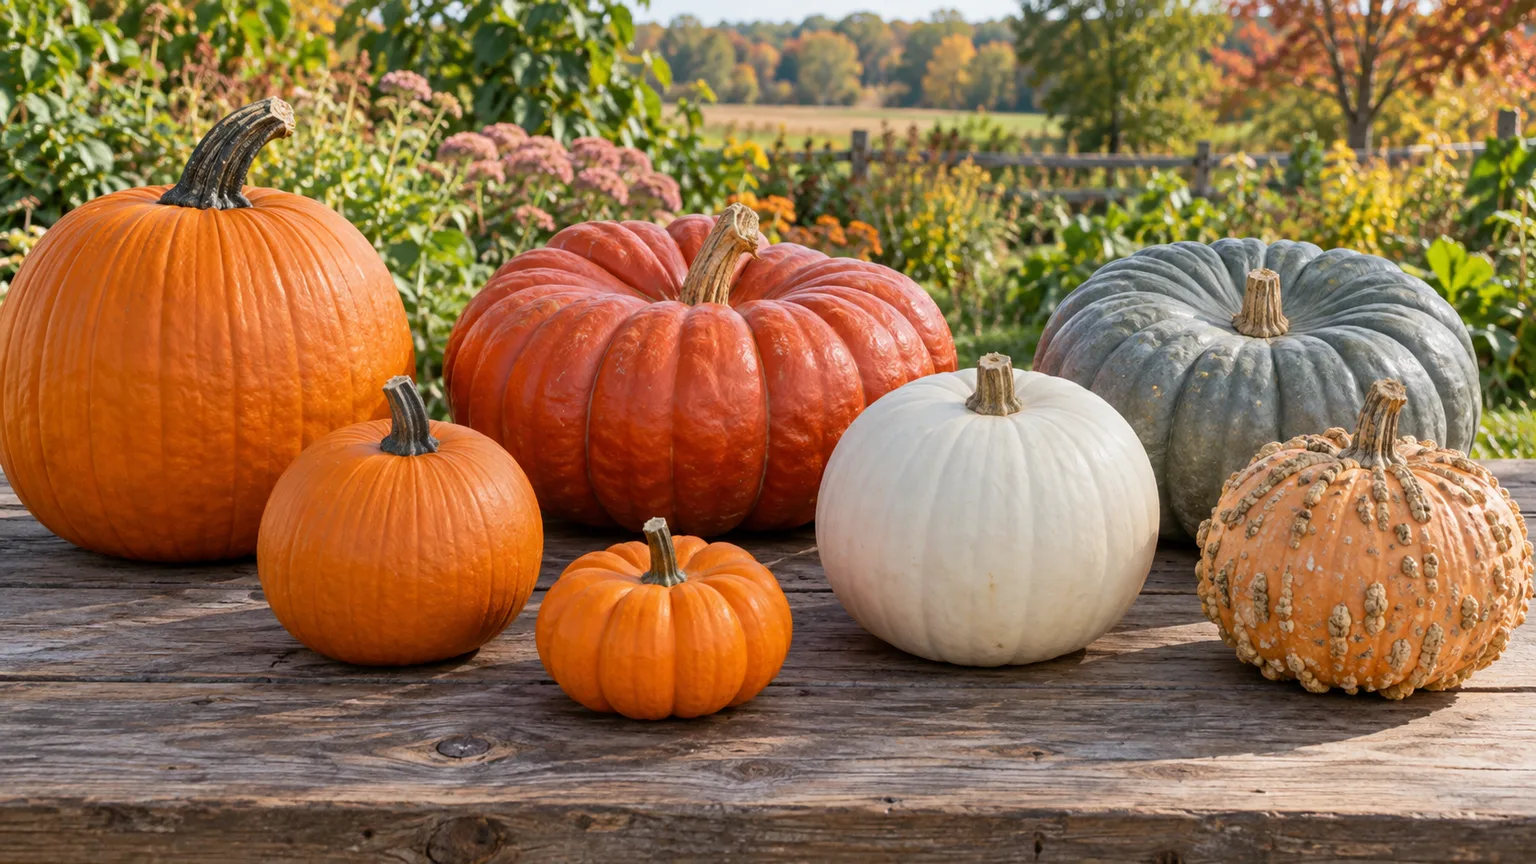
Pumpkins belong to the genus Cucurbita. Most garden cultivars come from C. pepo, C. maxima, or C. moschata, and the word “pumpkin” covers fruit with very different sizes, flavors, rind thicknesses, and vine habits. Start with how you plan to use the crop: a sweet, fine-textured cooking pumpkin is not always the same variety as a thin-walled carving pumpkin, and a giant show cultivar is a demanding space-and-time project.
For pies, roasting, or soup, look for a cultivar described as a pie, sugar, or processing pumpkin. Small Sugar and Baby Pam are examples of compact culinary types; cultivar names and availability vary by seed company. For carving, choose a variety bred for a broad, stable fruit and a wall that is easy to cut. Connecticut Field and Howden are familiar larger types. Miniature cultivars such as Munchkin fit small displays, while Atlantic Giant is for gardeners willing to dedicate substantial ground and care to one or a few fruits.
Check the stated vine habit as well as the fruit description. “Bush” or “compact” varieties still need sun and watering room, but they are a more realistic choice for a small garden or a large container than a vigorous trailing type. If your season is short, favor a cultivar with fewer days to maturity and avoid giant pumpkins: large fruit generally takes longer to reach mature rind than small fruit.
Count backward from frost to choose a planting date
Pumpkin seed is not a good candidate for cold, wet spring soil. Utah State University Extension recommends planting once soil is about 65°F and frost danger has passed; Penn State Extension notes that pumpkin seed germinates and develops best once soil is at least 60°F, while cold conditions slow establishment. For a home garden, use 65°F at roughly 2 to 3 inches deep as a practical minimum, measured in the morning for several days. Warmer, crumbly soil gives seed a better start than a calendar date does.Utah State University Extension Penn State Extension
Next, work backward from the first expected fall frost. If a cultivar lists 100 days to maturity, plan for roughly 100 favorable days after sowing or transplanting, then add a margin of two or three weeks for cool spells, pollination delays, and uneven ripening. A pumpkin that begins swelling late in summer may not mature before a short-season frost even if its vine looks enormous. In a long-season region, direct sow after the soil warms; in a short-season region, start seed indoors only a few weeks before the outdoor window so seedlings do not become root-bound while waiting.
If you want fruit for an autumn event, estimate from the intended use date but do not force an early planting into cold ground. Row covers, a warm raised bed, or dark mulch can advance soil warming in some gardens, but these tools cannot protect a frost-sensitive plant from every cold night. Remove covers when flowers open unless you will hand-pollinate, and avoid keeping a covered vine hot on sunny days. Local extension calendars are more useful than a fixed national planting date because last frost and first frost shift substantially by location.Farmers’ Almanac
Give pumpkins the right site and soil
Choose a spot with at least six to eight hours of direct sun and enough open ground for the selected vine to spread without smothering neighboring crops. Pumpkins can be planted at the edge of a garden so runners trail onto a path or unused lawn, but plan the route before the vines lengthen; moving an established runner can tear its shallow roots. Keep the patch away from places where water stands after rain, since wet soil increases root stress and fruit rot.
Pumpkins grow best in fertile, well-drained soil that holds moisture without remaining soggy. A soil test is a better guide than adding fertilizer by instinct: it shows whether pH or nutrients need adjustment and helps prevent a lush vine from receiving more nitrogen than it can use for fruit. Penn State lists a pH range of about 5.8 to 6.6 for production, while Utah State emphasizes organic matter and drainage; the shared practical point is to improve soil according to its test rather than trying to force a single recipe.Penn State Extension Utah State University Extension
Before sowing, loosen compacted soil and incorporate mature compost if the bed needs organic matter. A low mound can warm and drain faster than flat ground in a cool or heavy-soil garden, but it is optional in a warm, well-drained bed. Avoid fresh manure touching seed or stems, and do not bury the crown in a pocket that stays wet. Leave enough space between hills for sunlight and airflow; the seed packet’s spacing should take priority because a compact bush and a vigorous giant do not have the same footprint.
Start seeds outdoors or transplant carefully
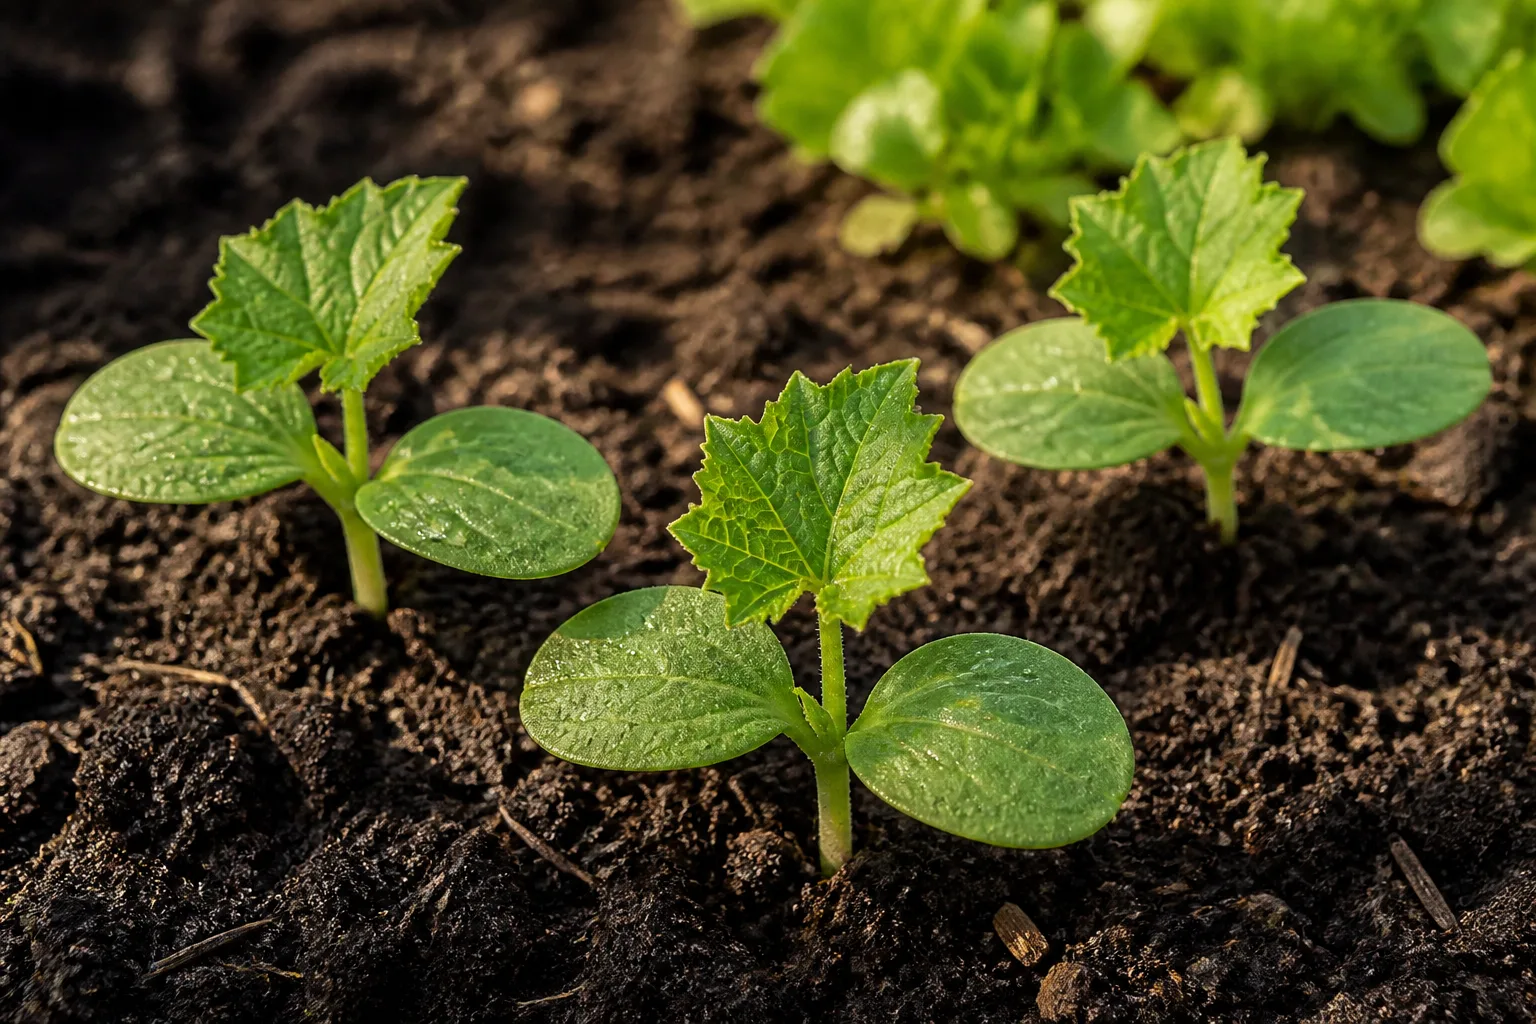
Direct sowing is usually the simplest method: pumpkin roots establish without the pause that can follow transplanting. Plant two or three seeds about an inch deep where each plant will grow, then thin to the strongest seedling after true leaves appear. If seed is expensive or the season is short, start one seed per individual biodegradable pot; pumpkin seedlings grow quickly and resent having their roots separated or disturbed.
When direct sowing works best
Wait until frost danger has passed and the soil is warm, not merely until a warm afternoon forecast appears. If a cold rain is likely, delay a few days; seeds in saturated chill-prone soil can rot or emerge unevenly. Keep the seedbed evenly moist until emergence, then water less often but more deeply as roots spread. A hill is useful where soil is slow to warm, but rows work well too if spacing and drainage are good.
Thin rather than pulling neighbors out of the soil. Cut extra seedlings at ground level with clean scissors so you do not disturb the roots of the plant you are keeping. One vigorous plant per planting position is sufficient for most home gardens; two may fit a very spacious bed, but competition for light, water, and air increases quickly as the foliage expands.
How to start transplants safely
Start indoor seed only two to three weeks before the garden is ready. Use a pot large enough to hold the seedling until planting, give it bright light, and harden it off gradually outdoors over several days. Set it out when it has a few true leaves and the soil is warm, handling the root ball gently and keeping it at its original depth. Older, root-bound seedlings often lose their head start after transplant shock, so an earlier sowing date is not automatically better.
Row covers can protect a young plant from insects or a cool breeze, especially in a region with a short spring. They also keep bees away. Remove the cover as flowering starts or hand-pollinate flowers while the cover is lifted; otherwise, the plant may produce healthy foliage but no set fruit. In warm climates, watch daytime temperatures under plastic or fabric and ventilate or remove covers before plants overheat.Royal Horticultural Society Utah State University Extension
Water and feed according to the plant’s stage
Once vines begin to run, a pumpkin plant can use water quickly because its broad leaves lose moisture in summer heat. The aim is not to keep the soil wet every day; it is to prevent repeated deep drying and rewetting, particularly as flowers open and young fruit begins to swell. A plant can tolerate a brief dry surface while the root zone remains moist, but drought followed by a heavy soak can stress fruit and crack or deform developing pumpkins.
Water deeply and consistently
Use rainfall as part of the weekly total and adjust for soil type, heat, wind, and container size. In a typical garden, about 1 inch of water per week is a useful starting point, with more needed during hot, dry weather and fruit enlargement. Check the soil several inches below the surface rather than watering because leaves look droopy at midday; pumpkin leaves often wilt temporarily in heat and recover by evening. If the soil is still damp, more water can make matters worse.
Apply water at the soil line with drip irrigation, a soaker hose, or a slow hand watering. This directs moisture to roots and avoids keeping leaves wet for long periods, which can favor leaf disease. Water early enough that accidental splashes dry during the day. A mulch layer can reduce evaporation and weeds after the soil has warmed; leave a small gap around the crown so the stem is not held against constantly damp material. Utah State Extension recommends deep, infrequent watering and roughly 1 to 2 inches per week, adjusted as fruit ripens.Utah State University Extension
Fertilize from soil evidence, not a calendar
Mixing a soil-test-recommended, balanced fertilizer or mature compost into the bed before planting gives roots a useful start. If foliage is pale, growth is weak, or the soil test shows a deficiency, a side-dressing may help; apply it away from the crown and follow the product label. Once vines are established, avoid automatically feeding every week or two. Excess nitrogen can produce long, dark-green growth at the expense of flowers and fruit, and extra phosphorus or potassium is not useful when the soil already has enough.
The right feeding plan depends on what is already in the bed. Utah State Extension gives a specific side-dressing recommendation after runners develop, while the Royal Horticultural Society says most garden pumpkins need no additional feeding unless a gardener is aiming for particularly large fruit or growing in a container. Those recommendations serve different soils and growing goals, so a soil test and the seed packet should guide the choice. For a giant-fruit attempt, follow a specialist cultivar plan rather than applying concentrated fertilizer close to roots.Utah State University Extension Royal Horticultural Society
Help flowers set fruit
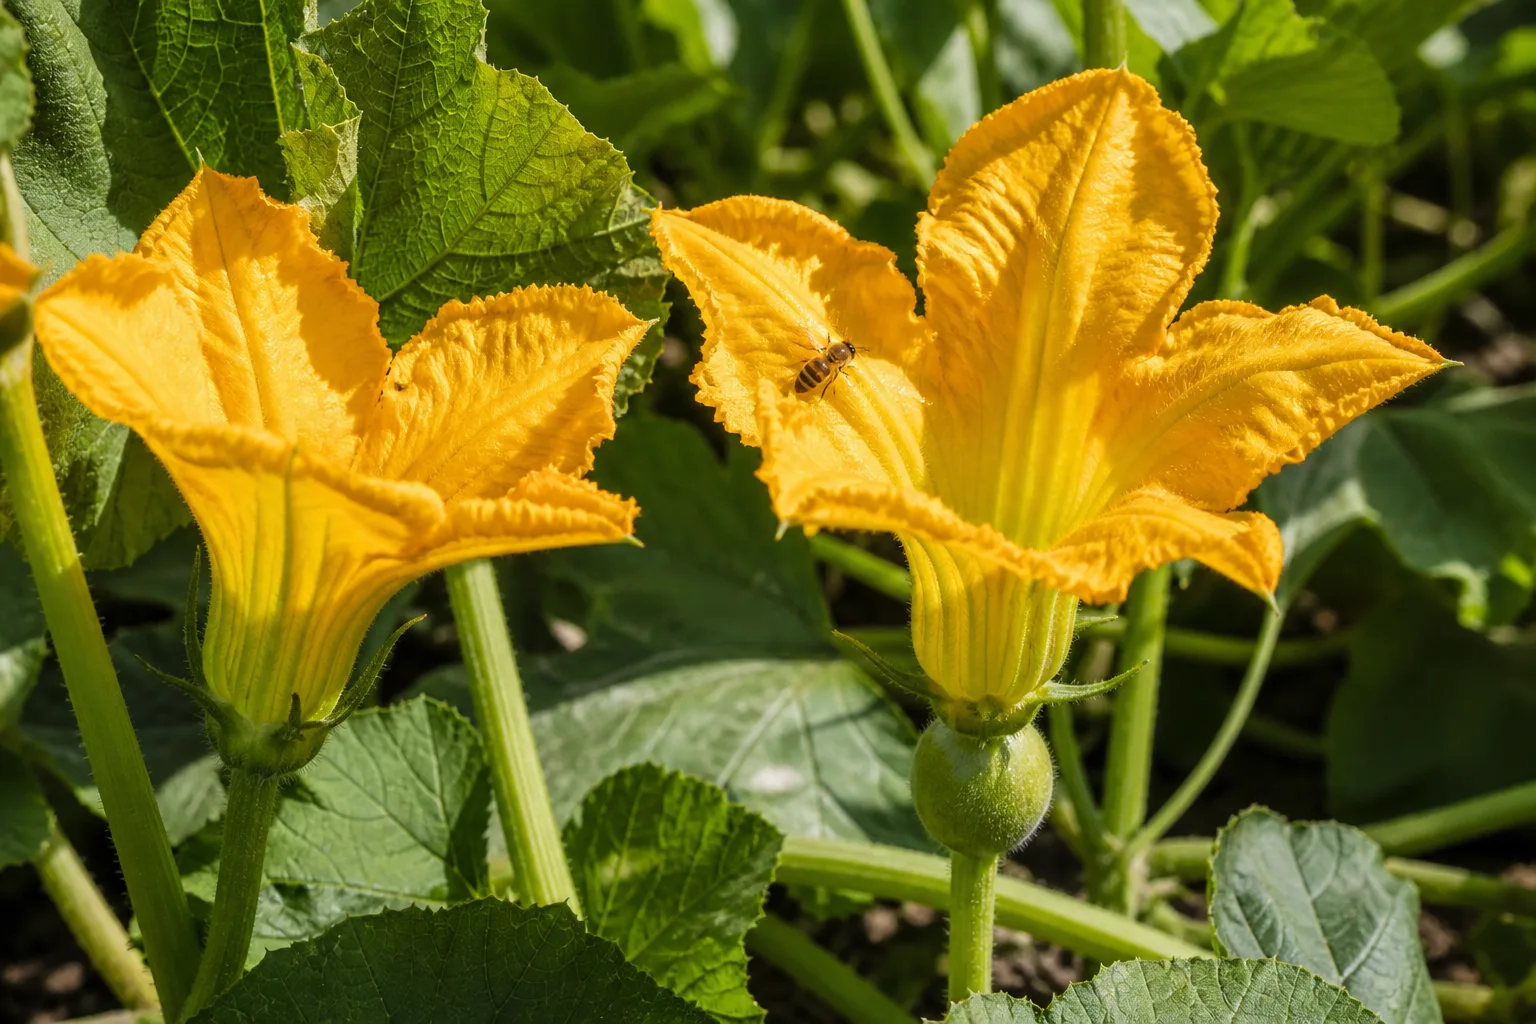
Pumpkin plants produce separate male and female flowers on the same vine. The first flowers are often male; they supply pollen but do not grow a fruit, so their dropping is normal. A female flower has a small round swelling immediately behind the petals. If it is pollinated, that ovary begins to enlarge after the flower closes. Bees usually move pollen, but poor weather or a shortage of visits during the short flowering window can leave a female flower unfertilized.Penn State Extension Utah State University Extension
If one or two very young pumpkins yellow, shrivel, and stop growing, check for a female flower that was not pollinated before adding fertilizer. Rain, cold, heat, and reduced bee activity can interfere with pollination, and early fruit may abort even when later flowers set successfully. Keep soil moisture steady, preserve pollinator habitat, and wait for the next female flower if the vine is otherwise healthy.
Hand pollination is a backup when bees are scarce or when you want to control seed parentage. On a dry morning, pick a newly opened male flower, peel back its petals, and gently dust the pollen-bearing anther across the central stigma of a newly opened female flower. A soft clean brush also works. Do not force open flowers that are still closed or pollinate after the petals have wilted. If you used row covers, leave them off long enough for pollinators to reach flowers unless you are hand-pollinating each new female bloom.
Manage vines and protect developing fruit
Most gardeners do not need to prune pumpkin vines. Let the plant use the leaves that support sugar production and shade the soil, and only redirect young runners when they are flexible. If you must limit a vine because it is blocking a walkway, cut it cleanly at a point that does not disturb a fruit you intend to mature. Aggressive pruning, late in the season especially, removes productive leaves and can expose the fruit to sunscald.
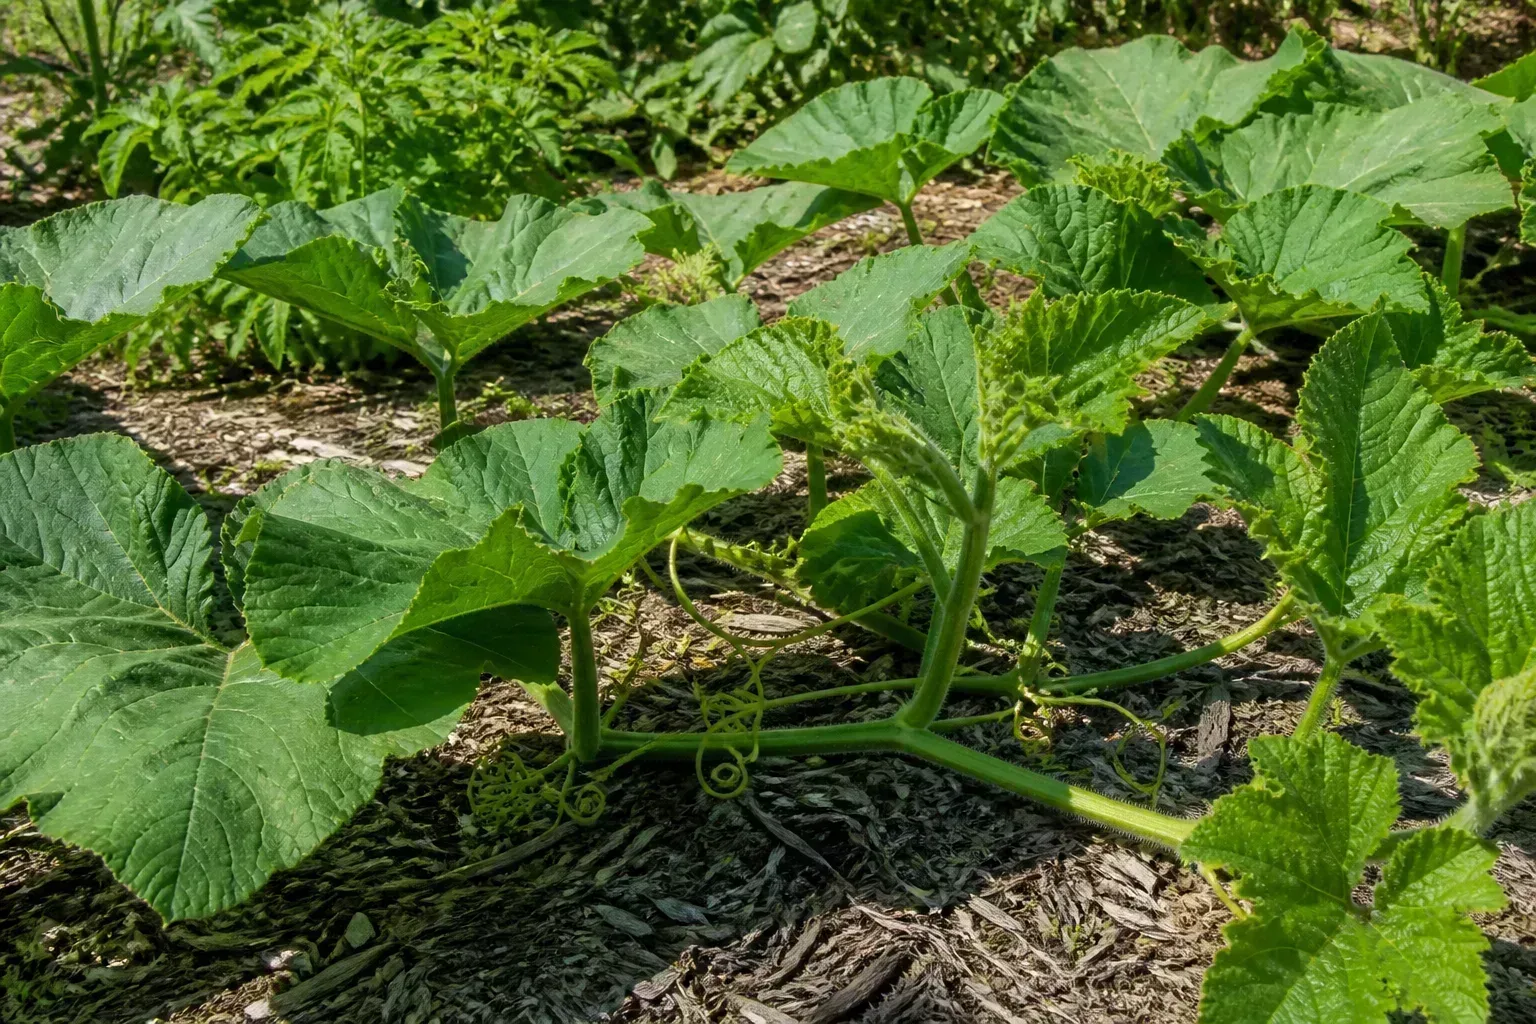
If you want a few large pumpkins, choosing a large-fruited variety and giving it generous space matter more than pruning every side shoot. Once a fruit is clearly growing, some growers remove later fruit to concentrate the plant’s resources, but this trades total harvest for size and is not necessary for ordinary pie or carving pumpkins. For a family harvest, leave healthy fruits on the vine and thin only damaged or poorly positioned ones.
Set a tile, board, or other dry support under a developing pumpkin if it rests on damp soil. The support should keep the underside from sitting in a puddle without trapping moisture against the rind. Do not twist a growing pumpkin to make it sit at a preferred angle; the stem can crack. The Royal Horticultural Society recommends keeping fruit off wet ground and fully ripened in sunlight before storage.Royal Horticultural Society
Grow pumpkins in a container only if the variety fits
Container growing is possible with a compact bush cultivar, a large pot, reliable drainage, and a sunny open position. The Royal Horticultural Society suggests a container at least 45 cm (18 inches) wide for compact bush pumpkins. Choose a much larger vessel when practical, because limited soil dries faster and heats more quickly than garden ground. A small pot or hanging basket cannot support a standard sprawling variety through a long fruiting season.Royal Horticultural Society
Use fresh, quality potting mix rather than digging heavy garden soil into the pot. Check moisture daily in hot weather, but water when the root zone is beginning to dry rather than keeping it saturated. Containers may need nutrients more often than in-ground beds because watering can wash soluble nutrients out, but follow the mix or fertilizer label and watch for excessive leaf growth. If the plant begins to wilt repeatedly despite watering, or foliage shades the whole patio, the cultivar is too vigorous for the container rather than simply “thirsty.”
Allow the vine to trail over a safe edge or across an open area. A trellis is suitable only for smaller fruit and a sturdy structure; heavy pumpkins need dependable support, and fruit slings must not constrict the stem. If you have room for a compact raised bed, that is usually easier to keep evenly moist than a pot.
Catch pests and disease before they stop fruiting
Walk through the patch a few times each week and inspect leaf undersides, stems near the soil, and fruit resting on the ground. Early checks are more useful than spraying on a fixed calendar: you can remove egg clusters or identify a damaged stem before an entire vine collapses. Rotate cucurbits to a different bed each year when possible, clear diseased plant debris after harvest, and give vines enough room for airflow. Pest pressure varies by region, so local extension alerts can help distinguish a real threat from ordinary late-season leaf aging.
Scout squash pests early
Squash bugs feed on pumpkin leaves and can cause yellow stippling, browning, and wilting when populations are heavy. Look for adults, nymphs, and egg clusters on leaf undersides and stems. Hand-remove eggs and insects when numbers are small, and clear plant debris after harvest so fewer pests have shelter. Early scouting matters because feeding is easier to manage before insects spread across a dense canopy.Penn State Extension Farmers’ Almanac
Squash vine borer damage looks different: a runner or crown wilts, and a small entry hole with wet, sawdust-like frass may appear near the stem base. Row covers can exclude egg-laying moths early, but must come off at flowering or be paired with hand pollination. If a borer is already inside a stem, an outside spray will not reach it; gardeners sometimes carefully open the affected stem to remove a larva and then cover the injured area with soil so a vine node can root. If the main crown is badly damaged, salvage may not be possible. Rotate to a new area next season if borers are common in your garden.West Coast Seeds Penn State Extension
Cucumber beetles chew leaves and flowers and can spread bacterial wilt in cucurbit crops. Floating row covers are most useful before flowering; once pollination is needed, use hand checks, physical removal, or locally recommended measures. If you use any insecticide, verify that it is labeled for the crop and pest, follow the exact label directions, and protect bees by avoiding treatment of open blossoms. A product being sold for gardens does not make it safe for pollinators when applied incorrectly.
Manage mildew and fruit rot
Powdery mildew appears as white, powdery patches on leaf surfaces and often becomes more visible as vines age. A little late-season mildew does not automatically mean the fruit is ruined; the concern is widespread leaf loss before pumpkins have finished filling and coloring. Start by improving airflow, watering at the soil instead of over the foliage, rotating crops, and selecting a mildew-tolerant variety when that option is available. Remove badly diseased foliage without stripping the vine bare.
If mildew progresses early or rapidly, identify the disease before choosing a treatment. Home remedies are not interchangeable with tested products, and some sprays can injure leaves in hot sun. For any fungicide, use only a product labeled for edible pumpkins and the target disease, follow the label, and observe harvest intervals. A pumpkin lying on wet soil can develop a soft or sunken patch; move a board beneath fruit early and keep mulch from packing against the stem. If rot has entered the rind, harvest and use or discard the fruit rather than storing it with healthy pumpkins.Penn State Extension Royal Horticultural Society
Harvest when the rind has matured
Use the seed packet’s days-to-maturity estimate as a forecast, not as a harvest command. A ripe pumpkin should have the mature color of its cultivar and a firm rind that resists a fingernail scratch. The stem typically becomes hard and corky, and the nearest tendril may dry. In a green or white cultivar, judge by its expected mature color and hard rind rather than waiting for orange. Utah State Extension describes pumpkins as mature when they are fully colored, the vine starts to die back, and the rind is hard; those signs together are stronger than any one clue alone.Utah State University Extension
Cut the stem with clean pruners or a sharp knife, leaving about 3 to 4 inches attached. Do not pull the fruit from the vine or lift it by the stem; a torn stem creates an entry point for rot and shortens storage life. Carry each pumpkin from underneath, especially a large one. Harvest before a hard frost. If a light frost is forecast and the rind is mature, bring fruit in rather than gambling on extra days outside; frost-damaged pumpkins do not store as reliably.
If the vine dies from disease or frost before the fruit is mature, a pumpkin can continue to color somewhat after picking, but it will not gain the same keeping quality as one that finished on the vine. Use a damaged or immature pumpkin promptly in the kitchen if it is otherwise sound; set it aside from long-term storage fruit.
Cure and store whole pumpkins
For pumpkins intended to keep, wipe away loose soil and let the surface dry. Cure sound fruit in a warm, dry, ventilated place for about a week to ten days; curing helps the rind harden, but it cannot repair cracks, bruises, or a broken stem. Keep fruit out of rain and direct contact with damp floors, and do not pile it where air cannot circulate.
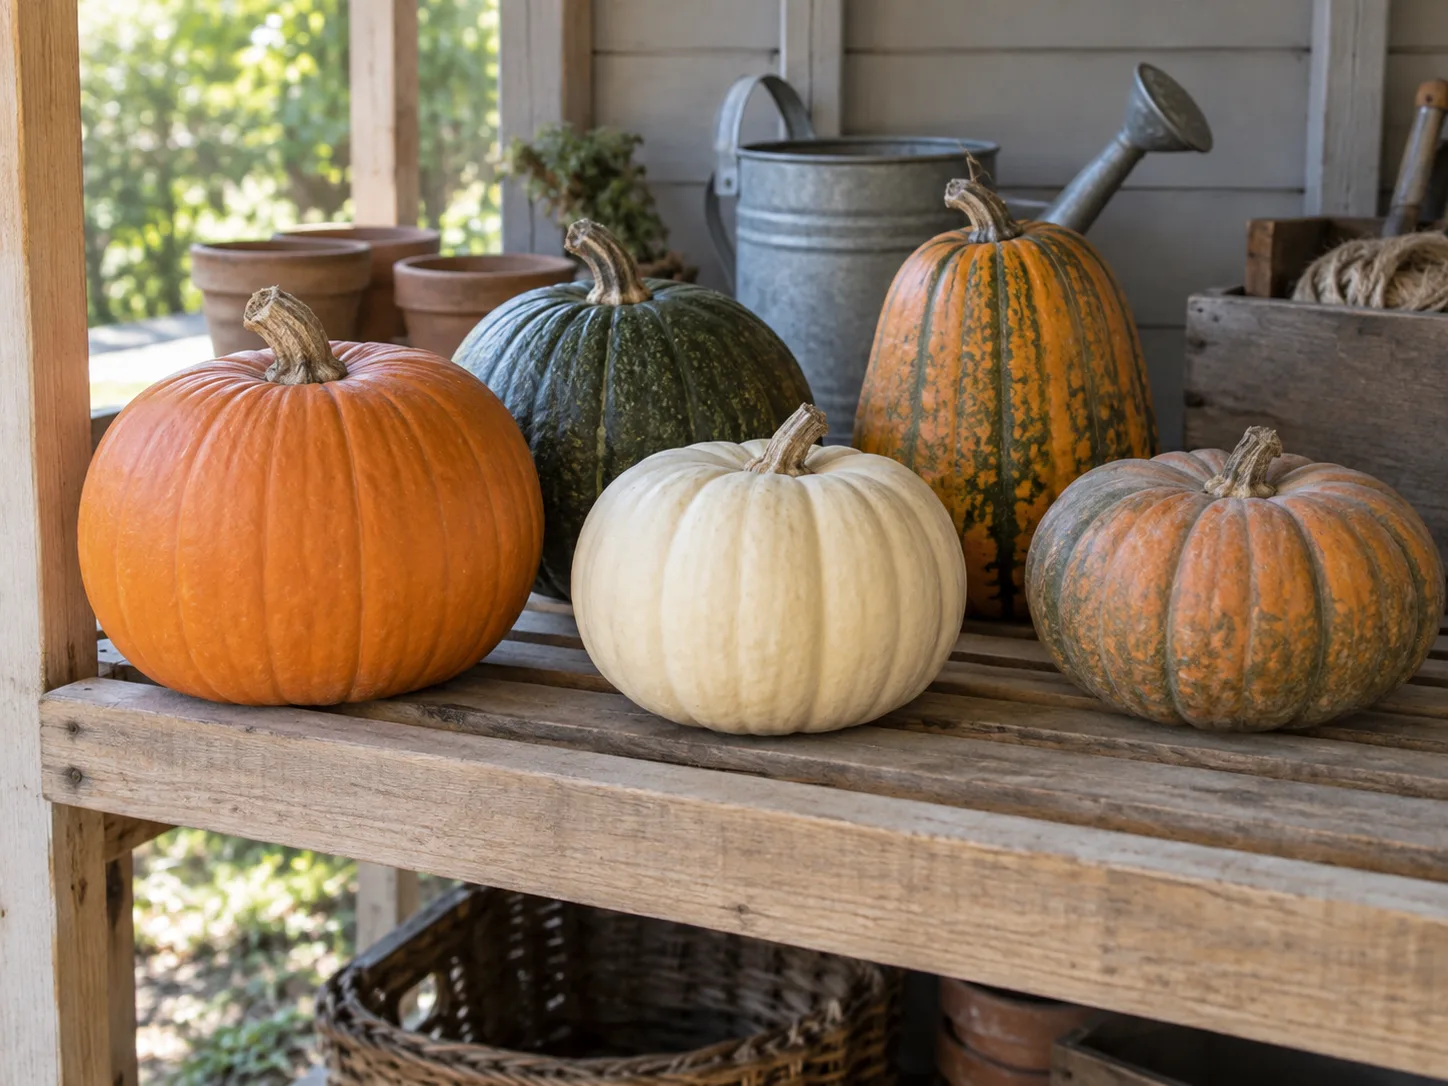
After curing, store pumpkins in a cool, dry, ventilated place, ideally around 50 to 55°F, with enough space that fruits do not touch. Penn State Extension gives a roughly 50 to 55°F and 50 to 70 percent relative-humidity range for commercial storage and notes that quality can last about two to three months under suitable conditions. In a home, variety and handling make a large difference; check stored pumpkins weekly and cook any fruit that develops a soft spot before rot spreads.Penn State Extension
Storage life is not a promise that every pumpkin will last through winter. Thick-rinded storage types generally keep longer than thin-walled carving types. Refrigeration is for cut pumpkin, not whole fruit: wrap cut pieces and chill them promptly, or cook and freeze the flesh for longer keeping. Use carved pumpkins quickly because cutting exposes moist flesh to microbes and drying.
Save seed only when you know what will grow
Seeds from a homegrown pumpkin can be dried and saved, but the plant they produce may not resemble the parent. Pumpkins and some related squashes can cross-pollinate when they are the same Cucurbita species; that cross changes the next generation, not the flesh of the pumpkin you are eating now. Hybrid cultivars also do not reliably come true from saved seed. If predictable fruit matters, buy seed of a named open-pollinated variety or learn how to isolate and hand-pollinate flowers before saving seed.Utah State University Extension
To save seed for planting, select a healthy, fully mature fruit from a known open-pollinated variety. Scoop out the seed, separate it from the pulp, rinse it, and spread it in a single layer on a labeled screen or plate until it is completely dry. Store dry seed in a labeled paper envelope in a cool, dry place. Do not save seed from a pumpkin whose cultivar or pollination history is unknown if you need the same size, shape, or cooking quality next year.
Conclusion
Successful pumpkins come from matching the variety to your purpose and season, then protecting the plant from cold soil, uneven moisture, poor pollination, and avoidable fruit damage. Make the planting decision with a soil thermometer and frost calendar, not a universal date; give the vine room, check flowers and leaf undersides, and feed only when the soil and growth call for it.
As harvest approaches, rely on mature color, a hard rind, and a sound stem rather than the calendar alone. Cut with a generous stem attached, cure only healthy fruit, and store it cool, dry, and ventilated. Those few decisions make more difference than trying to force the biggest possible vine or following a rigid care schedule.



