How to Harvest Collard Greens: Timing and Technique
Pick collard greens at the right size and season. Compare leaf-by-leaf and whole-plant harvests, protect regrowth, and store fresh or frozen leaves safely.
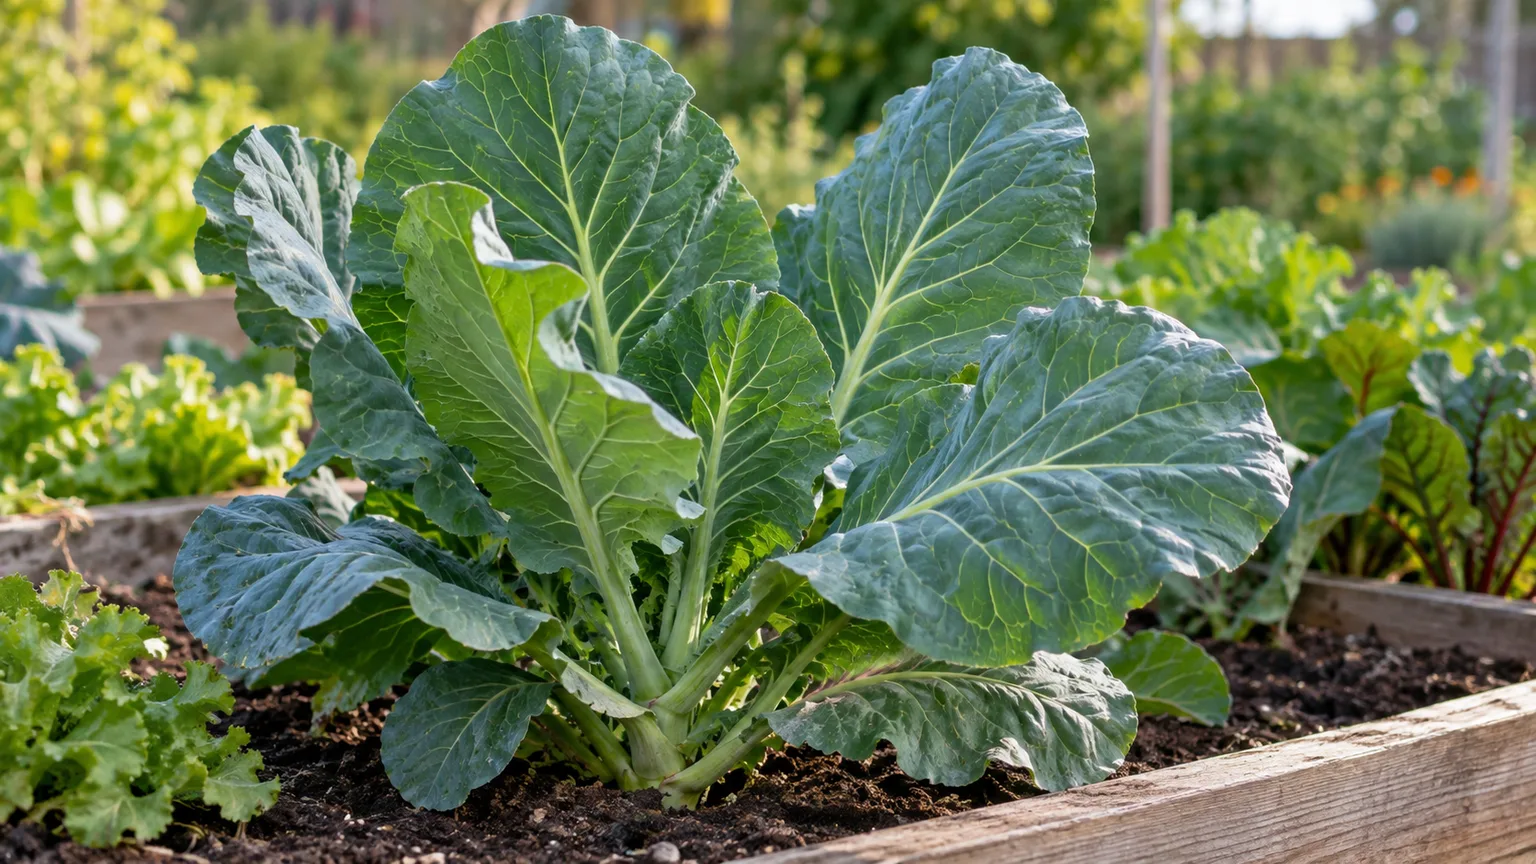
Collards do not form a tight head like cabbage. They grow as a loose rosette of leaves around a central stem, so you can either remove a few outer leaves at a time or cut the whole plant for one large harvest. For repeat picking, choose firm, healthy leaves about 6 to 10 inches long, cut them close to the main stem, and leave the crown and its youngest leaves intact.
The best harvest day depends on what you want from the plant. Pick only the leaves you need for a meal if you want it to keep producing; take the whole plant when you need a large quantity or the crop is nearing its end.
When are collard greens ready to pick?
Use leaf size and condition as your main cues. Collard leaves around 6 to 8 inches long are commonly ready, and larger leaves can still be good when they are firm and unblemished. Harvest younger leaves for a more tender texture; leave very small, newly unfurled leaves in the center so they can keep growing.
The ideal leaf is fully expanded, deep green, and sturdy enough to hold its shape. A leaf that is yellowing, limp, insect-chewed, or starting to decay is past its best for a fresh harvest, though a little cosmetic damage does not automatically make an otherwise sound leaf unusable. Collards vary by cultivar, so a smaller-leaf type may be ready sooner than a plant bred for especially large leaves.
Days-to-maturity figures are a planning guide, not a signal to wait before taking the first leaves. Gardening Know How gives an average of 60 to 75 days for maturity, while Harvest to Table lists 75 to 85 days from transplants and 85 to 95 days from seed; both sources note that leaves can be picked earlier when they reach edible size. That spread is a reminder to check the variety and count from the right starting point, then judge the actual leaves rather than treating a calendar date as a deadline. (Gardening Know How; Harvest to Table)
The crop name used by extension sources is Brassica oleracea var. acephala, but collard varieties differ in leaf shape, size, and speed to maturity. The University of Delaware Cooperative Extension’s cultivar examples include types listed at 50 and 69 days, another reason to follow your seed packet and use leaf readiness as the final test. (University of Delaware Cooperative Extension)
Choose between repeat picking and a one-time harvest
Choose the harvest method before you start cutting. Removing outer leaves keeps the growing crown in place and gives a healthy plant a chance to produce more leaves; cutting the whole plant gives you a larger batch at once but ends the current rosette’s normal leaf production.
| Harvest method | Best when | What happens next |
|---|---|---|
| Pick outer leaves | You need a meal or a steady supply over time | The center continues growing if the crown stays healthy |
| Cut the whole plant | You need a large batch, or the crop is nearly finished | The main plant is harvested; any later regrowth is uncertain |
Cut-and-come-again picking
For a continuing harvest, take the oldest usable leaves from the outside and bottom of the plant. This gives the younger leaves room to expand while preserving the center, where new leaves emerge. The method works best when the plant is growing actively and has enough healthy foliage left to support new growth.
A cut-and-come-again harvest is not a promise of endless production. Severe heat, drought, frost damage, pests, disease, or a plant that is already flowering can shorten the picking window. If you have several plants, rotate among them instead of stripping one plant bare; that spreads the harvest and gives each crown more time to recover.
Harvesting the whole plant
Take the whole plant when you want a large cooking batch, when the leaves are becoming coarse, or when weather is about to end the crop. Use a sharp knife to cut through the main stalk close to the soil line, taking care not to drag leaves through soil. Collards are harvested as a whole plant, not as a compact head that needs to be cut away from surrounding leaves.
A full-plant harvest is the simplest choice for a single large meal or for freezing a surplus. Some plants may send out side growth if part of the crown or root remains and conditions stay favorable, but treat that as a bonus rather than a guaranteed second crop. If you want reliable repeat picking, remove leaves individually and keep the growing point intact.
How to harvest collard leaves without damaging the crown
Pick on a cool part of the day and bring a clean basket or bucket so leaves do not sit on warm soil or in direct sun. Choose healthy leaves first, then remove any damaged foliage separately. If the plant is wet from rain or dew, let it dry when practical; wet leaves are harder to handle cleanly and need more drying before storage.
Use clean, sharp garden snips, pruners, or a small knife. A sharp cut leaves less torn tissue than pulling a stubborn leaf, and careful cutting makes it easier to avoid the central stem. Gardening sources describe both snapping leaves down from the stalk and cutting them; use whichever method removes the petiole cleanly without bruising or splitting the crown. (Epic Gardening; Harvest to Table)
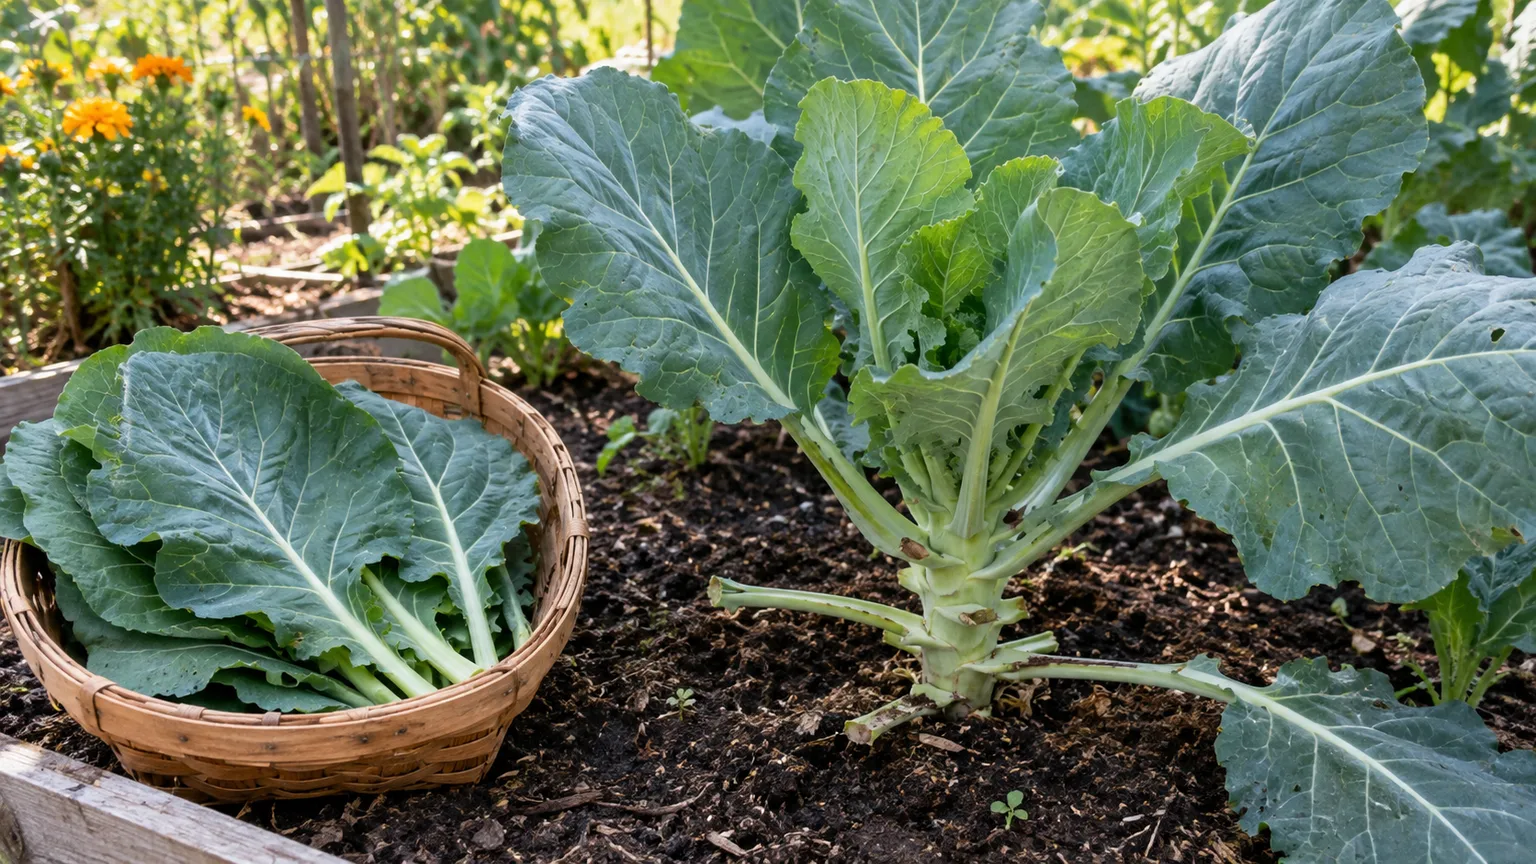
Start low and work upward
Find a leaf that is fully expanded and growing from the outside of the rosette. Follow its leaf stalk, or petiole, back to the main stem and cut or snap it off near the point where it joins the stem. Avoid cutting into the main stalk or nicking the tightly packed leaves at the center.
Start with the lowest outer leaves and move upward only as needed. The lower leaves are older and often larger, while small central leaves are still unfolding. If the leaf does not release with a clean downward snap, stop tugging and use the knife or snips; tearing a strip of stem can damage the plant and leave a rough wound.
How many leaves should you take?
Take only the leaves you can use, and leave the plant with a healthy canopy. At a minimum, keep all of the young leaves and the central growing point; Harvest to Table recommends leaving at least four leaves at the top so the plant can continue producing. A small or stressed plant may only have one or two leaves ready, while a large, vigorous plant can spare more. (Harvest to Table)
There is no universal safe number for every cultivar and plant size. If removing several leaves leaves mostly bare stalks, you have taken too much at once. Pause the harvest, keep soil moisture steady, and wait for new growth before picking again. If the center has been cut off or the plant is already flowering, it may not produce another good flush.
Time harvests around your climate and the season
Collards are often grown for a cool-season harvest, but the useful window depends on local weather and when the crop was planted. For a new bed, use a local extension calendar or the seed packet’s planting dates rather than copying another region’s schedule. University of Minnesota Extension, for example, gives spring and summer seed-starting dates for its Minnesota climate; those dates should not be transferred unchanged to a warmer region. (University of Minnesota Extension)
Spring leaves before summer heat
A spring planting can provide leaves before prolonged hot weather slows the crop or encourages it to bolt. Pick regularly once the outer leaves reach usable size, and do not wait for every leaf to become enormous. Larger, older leaves tend to be tougher and more stringy than leaves picked while they are still young and pliable. (Harvest to Table)
When days turn hot, growth and flavor can change quickly. Keep the soil evenly moist, harvest promptly, and watch the center for a flower stalk; once it rises, the plant is shifting from leaf production toward flowering. Removing a stalk may give you a little more time to use leaves, but it does not reliably reverse bolting or restore the original tender growth.
Fall crops, light frost, and bolting
Fall collards can remain productive into cool weather, and a light frost may make the leaves taste sweeter. That flavor change is common enough to plan around, but frost is not a requirement for harvest and it does not guarantee every leaf will taste better. Pick before an extended hard freeze if you cannot protect the plants, and use a row cover when a short cold spell threatens an otherwise healthy crop. (Harvest to Table; Epic Gardening)
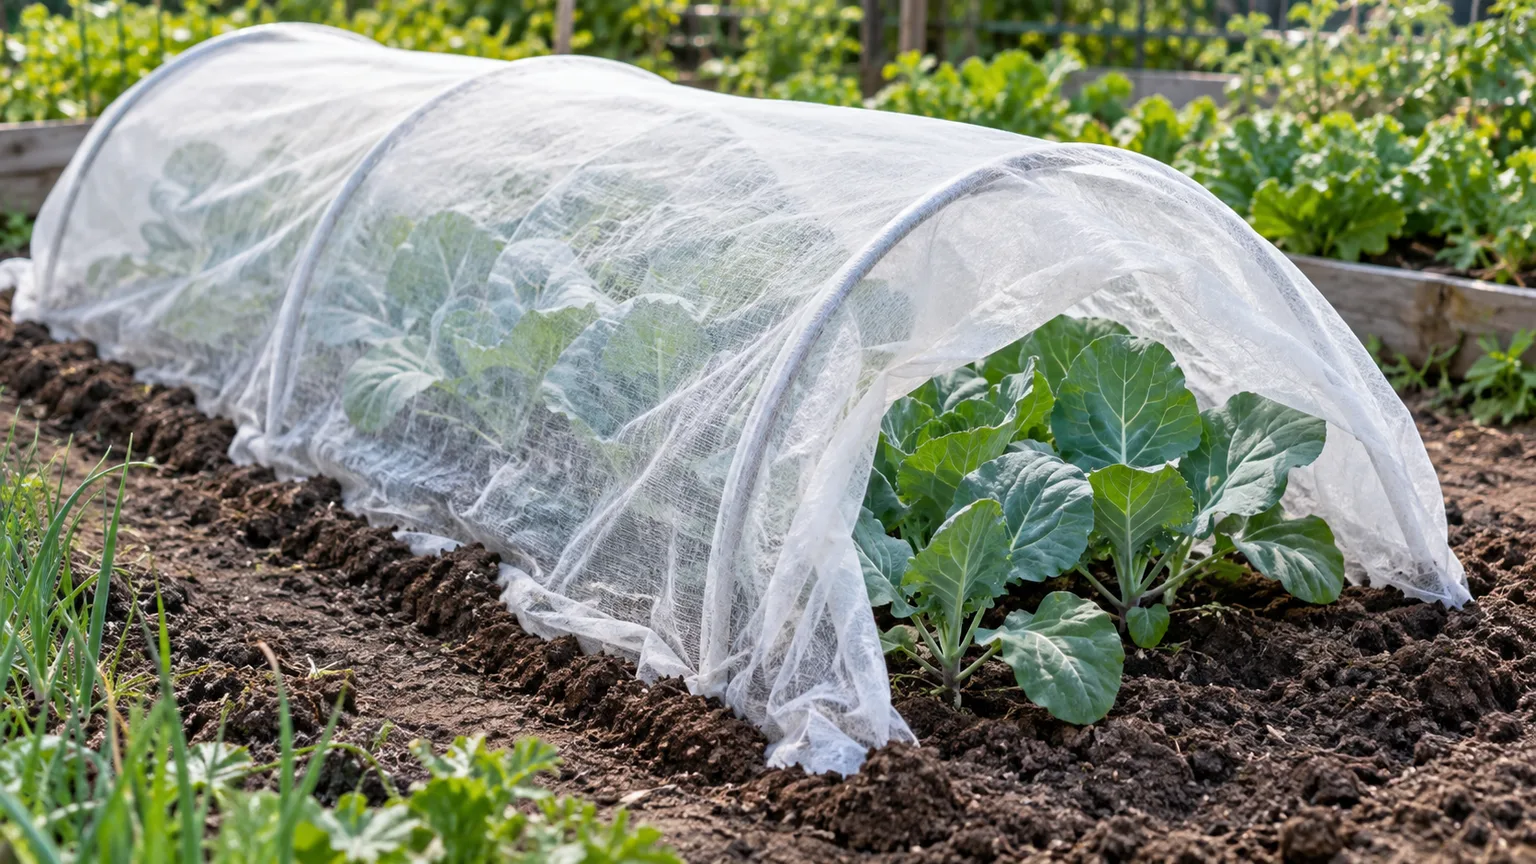
In a mild-winter garden, outer leaves may continue to develop for a long stretch. In a colder climate, repeated freezing and thawing can damage foliage, so harvest sound leaves before a severe cold snap rather than assuming collards are indestructible. When days lengthen and a plant sends up a flower stalk in spring, harvest any leaves you still want while they are usable; flowering generally marks the end of the best leaf-harvest stage.
Can you harvest collards as baby leaves?
Yes. You can harvest young collard leaves before the plant reaches full size, especially if you want tender greens for quick cooking or a mixed salad. Clip only the leaves you need and avoid pulling out the central growing point if you want the plant to keep growing.
A dense planting can also be harvested as a one-time crop of young greens. Cut the seedlings just above the soil when the leaves are large enough to handle; because the whole seedling is removed, it will not regrow like a mature plant picked leaf by leaf. Keep the harvest clean and use it promptly, since small leaves wilt faster than mature collard foliage.
Prepare the bed and tools before you pick
A few minutes of preparation keeps a quick harvest from turning into a damaged plant or wilted basket. Bring a clean knife or sharp snips, a container that does not crush leaves, and a shaded place to set the harvest while you finish. If you are picking more than one plant, empty the container before it becomes heavy enough to bruise the leaves underneath.
Look over both sides of each leaf as you choose it. Skip leaves with soft decay, extensive disease, or heavy pest damage; remove them separately so they do not mix with clean greens. Small holes or ragged edges alone do not necessarily mean a leaf must be discarded, but check for caterpillars, eggs, and debris before bringing it into the kitchen.
If you use a pesticide in the vegetable bed, follow that product’s label for when it is safe to harvest and how to wash the crop. A product-specific waiting interval cannot be replaced by a general rule for collards. For planting and growing details that affect when a crop is ready, see the existing collard greens growing guide.
Wash, cool, and store collards after harvest
Collards lose crispness when they sit warm and dry, so move the basket out of the sun and start cooling the leaves soon after picking. Harvest only what you can use in the near term if refrigerator space is limited. If you have more than you can cook in a few days, freeze part of the crop while the leaves are fresh.
Remove soil and insects with cool running water when you are ready to prepare the leaves. If you wash them before storage, dry them thoroughly; packing dripping-wet leaves can encourage slime and decay. For leaves that are already clean, it is often simpler to store them unwashed and rinse them just before cooking.
Refrigerate fresh leaves
Wrap dry leaves loosely in a clean, slightly damp towel and place them in a perforated bag or a container that allows some airflow. Keep them in the refrigerator’s crisper, away from produce that is already decaying. The towel should feel barely damp rather than wet, and the leaves should not sit in pooled water.
Plan to use home-stored collards within several days to about a week for the best texture. Very cold storage with high humidity and some air circulation can extend the keeping time, but a home refrigerator rarely holds every condition perfectly. Check the leaves before cooking; discard any that have become slimy, moldy, or unpleasant-smelling. (Harvest to Table; Epic Gardening)
Freeze a surplus
For a longer hold, freeze collards rather than leaving a large harvest in the refrigerator until it deteriorates. Sort out damaged leaves, wash away grit, remove tough stems if you prefer, and blanch the leaves before freezing to preserve quality. Cool them promptly after blanching, drain well, pack in meal-size portions, remove excess air, and label each package with the date.
Frozen collards work well in soups, stews, and other cooked dishes, where a softer texture is expected. Do not freeze leaves that have already become slimy or badly wilted, and avoid freezing a large wet clump that will be difficult to separate later. Use current food-preservation guidance for blanching times and storage limits, since these depend on the preparation and equipment. (Epic Gardening)
Fix common harvest problems
The leaves are bitter or tough. Older, oversized leaves are more likely to be fibrous, and hot weather can make the crop less pleasant to eat. Pick younger leaves, keep the plant watered during dry periods, and consider shifting the next planting to a cooler part of the season. A naturally strong collard flavor is normal; smaller leaves are often a better choice when you want a milder texture.
The plant stopped producing new leaves. Check whether the growing crown was damaged, the plant was stripped too heavily, or a flower stalk has begun to rise. Heat, cold injury, drought, and pests can also slow new growth. Leave the remaining healthy leaves in place, correct the growing stress you can control, and wait before taking another large harvest.
Leaves wilt in the basket or fridge. A warm, sunny basket can lose moisture quickly, while wet leaves sealed in a bag may decay. Move harvested leaves into shade, dry them before packing, and keep a little humidity around them with a barely damp towel. If the plant wilts in the garden, check soil moisture before assuming the harvest itself caused the problem.
The crop is about to freeze or flower. Harvest the sound leaves that remain before severe weather or flowering makes them less usable. If cold is brief and the plants are otherwise vigorous, row cover can protect the bed; if a flower stalk is already elongating, take the leaves you want rather than expecting the plant to return to steady leaf production.
Conclusion
Harvest collard greens when the outer leaves are large enough to use, firm, and still tender—not on a single fixed day. Pick from the bottom outward, cut close to the main stalk, and leave the crown and its youngest leaves untouched if you want repeat harvests. Cut the whole plant when you need a large batch, protect fall crops from severe freezes, and cool the leaves soon after picking.