How to Keep a Container Garden From Drying Out
Stop container plants from drying out with seven practical fixes for pot size, soil, deep watering, shade, mulch, irrigation, and summer maintenance.
Container plants can go from fine to wilted in a single hot afternoon because a pot is a small, exposed root zone. Unlike a plant in a garden bed, it has no surrounding soil mass to borrow moisture from, and the sides of the pot are warmed and dried by sun and wind. The cure is not automatically “water more.” It is to make the container hold moisture predictably, then deliver that moisture to the roots at the right time.
Start by checking the mix below the surface, the drainage holes, and the pot’s position. Then work through the seven fixes in order: increase the reservoir, water slowly, adjust for weather, lower heat and wind, cover the mix, add a backup system if necessary, and keep the plant from outgrowing the setup. That sequence prevents the common swing from bone-dry soil to saturated roots.
Why container gardens dry out so fast
The main difference between a container and a ground bed is limited root volume. A plant in a small pot has less water-holding mix, while the outer walls are exposed to moving air and radiant heat on every side. Roots also compete for the available water as the plant grows, so a pot that was adequate in May can become an emergency by July.
Pot material changes the pace. Unglazed terracotta and other porous containers lose moisture through their walls, while thin dark plastic can heat the root zone even though it holds water better. A glazed ceramic or thick, light-colored plastic pot often gives a hotter patio plant a more forgiving environment, but only if the drainage holes stay open.
The plant itself matters just as much. A leafy tomato, cucumber, fuchsia, or hanging basket transpires heavily; a rosemary, lavender, succulent, or plant with fleshy leaves can tolerate a drier interval. Mixed pots are easiest when their residents have similar light and water needs. Otherwise, the thirstiest plant can turn a supposedly balanced container into a daily watering chore.
Start with a five-minute moisture audit
Before changing your schedule, inspect one dry-looking pot from top to bottom. Push a finger or wooden stick about one-third of the way into the mix near the plant, not only along the dry outer edge. The Royal Horticultural Society recommends checking below the surface because light rain or a damp-looking crust may not have wet the root zone at all (RHS guidance on watering containers).
Lift a small pot or tilt it carefully. A surprisingly light container is a useful clue, but weight is only a comparison tool because wet potting mixes, ceramic walls, and large plants vary. For a large planter, use the probe test in several places: one dry spot beside the wall does not always mean the center is dry, and one wet spot near a blocked hole does not represent the whole pot.
Read the pot, not the calendar
Check the root zone before you water, then check the weather before you decide how often to check again. A sunny, windy balcony can need a morning inspection and a late-day glance during a heat wave; a shaded courtyard may need far less. There is no reliable “every Tuesday” rule for containers because exposure, plant size, pot volume, and recent rain change the demand.
Also look for evidence that watering is not the real problem. Leaves that droop only in the hottest part of the afternoon and recover by evening may be losing water faster than the roots can supply it, even when the mix is still moist. Leaves that stay limp overnight, crisp at the edges, or drop after the pot dries point more strongly to prolonged root-zone stress.
1. Give the roots a larger, better-balanced reservoir
The highest-leverage fix is often more mix, not more trips with a watering can. University of Georgia Extension explains that outdoor container plants in larger pots have more room for roots and do not require watering as frequently as plants in very small containers (UGA Extension’s container gardening circular). A small pot can be attractive and still be fundamentally mismatched to a full-sized tomato, thirsty annual, or rootbound herb.
Choose a container that can hold the plant’s mature root system without becoming top-heavy. As a practical starting point, several gallons of mix is easier to manage than a tiny nursery pot for most vigorous patio plants, while shallow hanging baskets and coco-lined baskets should be treated as high-frequency systems. Leave about two inches of headspace below the rim so water can enter the mix instead of spilling over the edge. Proven Winners’ summer container guidance also recommends moving an outgrown container into a roomier pot when roots and foliage have used the original reservoir.
Choose pot size, material, and mix as one system
Use a purpose-made container mix rather than garden soil. A good mix needs both water-holding capacity and air-filled pore space: fine material retains moisture, while bark, perlite, or another coarse component keeps the root zone from collapsing into a dense, airless mass. UGA Extension notes that poorly aerated, poorly drained container media can stress roots and invite root-rotting organisms, so “holds the most water” is not the same as “best for plants.”
Match material to exposure. Terracotta is useful for plants that dislike wet feet but is a poor choice for a thirsty plant on a sun-baked balcony unless you accept more frequent checks. Metal can heat quickly in direct sun. Plastic, glazed ceramic, and thick fiber generally slow moisture loss, but a dark pot still needs protection from afternoon heat.
If the pot has no drainage hole, use it as a cachepot with a smaller inner pot that has real holes. Do not rely on a layer of gravel at the bottom to create drainage; it can reduce the effective soil depth and leave the root zone perched above standing water. Set a saucer underneath only when you need to catch runoff, and empty it after the pot has finished draining.
2. Water the whole root zone slowly
A quick splash often wets the top while the center remains dry. Water at the surface around the entire root ball, including the mix near the pot edge, and keep the stream aimed at the soil rather than flowers and leaves. This gives the roots a chance to absorb the water and avoids spending moisture on foliage where it evaporates before it reaches the root zone.
The RHS recommends watering slowly and thoroughly, allowing the first application to soak in before repeating. Its container research also found that some bedding plants performed well with a smaller daily amount rather than being watered until the pot dripped, while excess water reduced plant quality (RHS container-watering experiment). That is a useful reminder that “more runoff” is not a quality test.
Use the two-pass method, then re-wet hydrophobic mix
For a normal, still-wettable pot, use this sequence:
- Pour slowly over the full surface until the mix is evenly damp and the first water begins to approach the drainage holes.
- Pause for five to ten minutes so dry pockets can absorb moisture.
- Water again more slowly, stopping when the root zone is fully wetted and a modest amount begins to drain.
- Empty the saucer after the pot has drained; do not leave the roots in standing water.
If water runs instantly down the inside wall or beads on the surface, the mix may have shrunk away from the pot or become hydrophobic. Do not keep adding a fast stream. Lightly roughen only the top surface, then set a small pot in a tub of water until the mix rehydrates from below. Let it drain completely before returning it to its usual position, and repot if the mix has become a hard, collapsed mass.
3. Time checks around heat, wind, and sun
Use early morning as the default watering window because cooler air gives water more time to enter the mix before evaporation accelerates. Early evening can work when morning is impossible, but aim to wet the soil rather than leave foliage damp overnight. The real rule is to water when the root zone needs it, not because the clock says the pot is due.
During warm or windy weather, check more often. The RHS advises that young plants may need regular, sometimes daily, watering in warm dry weather, while deeper pots, drought-tolerant plants, and more sheltered exposures can go longer. In winter, evergreen container plants may still need water during a dry spell, so do not treat “summer care” as a permanent calendar.
Build your routine around the pot’s microclimate. A south- or west-facing wall, reflective paving, rooftop, metal railing, or hanging basket in steady wind will lose moisture faster than a pot in morning sun beside a cool wall. After a heat wave, reassess the schedule; do not keep a high-frequency routine once cloud, rain, or cooler temperatures return.
4. Reduce the load with shade and grouping
If the root zone is moist but a plant wilts every afternoon, reduce the heat load before increasing water. Move the pot out of reflected afternoon sun, use temporary shade cloth, or place it where it receives gentler morning light. A plant that is already stressed can lose more moisture from its leaves than its roots can replace, and extra watering can leave the lower mix soggy while the leaves still look tired.
Group containers with similar moisture needs so their foliage casts some shade over pot walls and the surrounding air is less exposed to drying wind. This is especially useful on balconies and terraces where concrete, glass, and metal create a hotter microclimate than the local air temperature suggests. Homes & Gardens’ container advice describes grouping as a way to reduce exposure and slow moisture loss, while also recommending root-zone irrigation for exposed balcony pots (Homes & Gardens on cooling balcony plants).
Do not crowd pots so tightly that air cannot move after rain or that every plant shares the same pest problem. Group by compatible watering needs, leave a little space between foliage, and keep the most drought-sensitive container where it can be moved quickly. Shade is a tool for reducing demand, not permission to ignore moisture checks.
5. Cover the surface with a thin mulch layer
An open soil surface loses water directly to evaporation, especially when sun hits the mix between leaves. Add a thin, even layer of bark fines, composted material, shredded leaves, straw, or another clean mulch suited to the crop. Leave a small gap around stems so the crown stays dry and easy to inspect.
For pots, restraint matters. A layer around one to two inches can reduce surface evaporation and buffer the temperature of the upper root zone, but a deep wet blanket can hide the true moisture level, hold stems against damp material, or make small containers slow to dry. Check below the mulch with a finger or probe instead of watering because the surface looks pale.
Mulch buys time; it does not replace a good potting mix or a thorough watering. Plants still lose much of their water through leaves, so a heavily leafed container in full sun may need the same root-zone attention after you mulch it—just not quite as soon.
6. Add a controlled backup watering system
If a pot dries out faster than your schedule can handle, add a delivery system after correcting pot size, mix, and exposure. A timer cannot rescue a blocked hole, rootbound plant, or hydrophobic root ball. It can, however, make a sound setup more consistent when you are managing many containers or leaving home for a few days.
Compare drip, ollas, and self-watering reservoirs
Drip irrigation is the most flexible choice for a row or group of pots. Use an emitter or small line aimed at the root zone, run a separate zone or schedule from in-ground beds, and test the output into a cup before trusting the timer. A tiny emitter may not deliver enough for a large tomato pot; several emitters may overwater a small herb. Check the actual wetting pattern after a cycle.
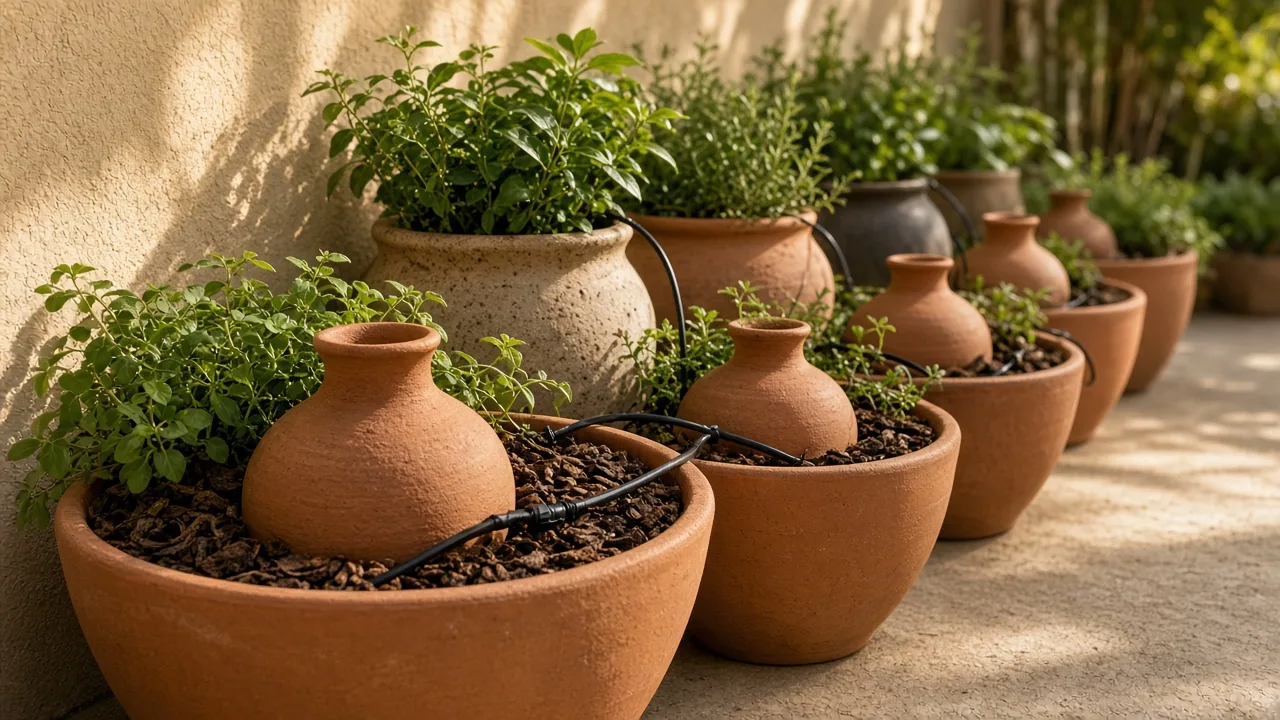
An olla or porous clay reservoir can work well inside a large container when the plant tolerates a steady nearby moisture source. It is less useful in a tiny pot where the reservoir takes up valuable mix, and it still needs refilling and cleaning. Growing in the Garden’s container-watering notes describe ollas as especially useful where hot, dry conditions make ordinary pots hard to keep evenly moist, but the method still needs to match the plant and container. Keep any open reservoir covered where mosquitoes are a concern, and do not use a moisture-delivery method that keeps a drought-tolerant plant permanently wet.
A self-watering container provides a reservoir below the mix with a wicking zone between water and roots. It can be excellent for leafy annuals, vegetables, and gardeners who travel, but the reservoir must be sized to the plant and checked for algae, salt buildup, and stagnant water. Do not convert a plant that needs a dry interval into a permanently damp setup just because the container has a reservoir.
For a short absence, combine a thoroughly watered pot, shade from the harshest afternoon sun, and a tested backup rather than improvising a bottle with an unverified flow rate. Test the system for several days while you are home. The goal is predictable moisture, not a mystery drip that floods the pot on day one and runs dry on day three.
7. Maintain the plant so water lasts longer
Water demand rises as foliage and roots fill the container. Inspect for roots circling densely at the drainage holes, mix that has collapsed below the rim, and stems that have grown far beyond the pot’s capacity. A rootbound plant can dry rapidly because the roots have displaced the mix that once held water; moving it to a slightly larger container may help more than watering twice a day.
Feed only according to the plant, mix, and label. Frequent watering can carry nutrients out of a container, but adding fertilizer to a bone-dry pot can damage roots. Water the mix first, then feed at the recommended dilution. Remove spent flowers and damaged leaves, but avoid aggressive pruning during the hottest stress unless the plant’s care requirements support it; sudden loss of leaf area can change water demand while the roots are still recovering.
Keep the container surface free of weeds and debris, and inspect drainage holes whenever water stops leaving the pot. Colorado State University Extension notes that containers may need daily or even twice-daily attention in active summer growth and warns that letting the medium dry completely can kill fine roots and make the mix difficult to re-wet (Colorado State University Extension on container gardens). The useful takeaway is not a fixed frequency; it is to prevent the repeated dry-to-soggy cycle that weakens the root system.
Troubleshoot a container that dries out again
When a pot is dry again a few hours after watering, do not immediately double the water. Compare it with a similar pot in the same area and ask which variable differs: volume, plant size, pot material, wind, direct sun, mix texture, root crowding, or drainage. One “thirsty” pot is often a placement or setup problem hiding inside a watering problem.
Match the symptom to the fix
| What you see | Most likely weak link | First response |
|---|---|---|
| Water beads or races around the edge | Shrunken or hydrophobic mix | Slow the flow, pause, and re-wet from below if needed |
| Surface is dry but the middle is cool and moist | Surface evaporation or mulch gap | Check deeper before watering; add a thin mulch layer if appropriate |
| Plant wilts while mix is wet | Heat load, root stress, or poor aeration | Move out of harsh afternoon heat and inspect holes and roots |
| Pot needs water twice daily | Too little volume, rootbound plant, porous pot, or wind | Increase volume, repot, group, shade, or add tested irrigation |
| Leaves crisp after a hot afternoon | Drought stress or heat scorch | Check root moisture, provide temporary shade, and remove only dead tissue |
| Mix stays wet for days and plant droops | Blocked drainage or degraded mix | Clear holes, empty saucer, and refresh the mix rather than adding water |
If a pot stays wet but the plant looks thirsty, treat that as a root problem until proven otherwise. Roots need both water and oxygen; more water cannot compensate for a saturated, airless mix. If you see foul odor, black or mushy roots, or rapid decline, isolate the container from healthy plants and repot into a clean, appropriately draining mix.
If the container is dry and the plant is limp, rehydrate gradually rather than pouring a large volume onto a surface that repels water. After the first recovery watering, keep the pot in gentler light for a day and monitor new symptoms. A leaf that has already crisped will not become green again; judge recovery by firm stems, stable moisture, and new growth.
A simple weekly routine for busy gardeners
Choose one cool morning each week for a full container walk, then add short checks on the hottest or windiest days. Touch the mix below the surface, lift small pots, inspect the underside for blocked holes, and compare the most exposed pots with the sheltered ones. Group your checks by watering need so a rosemary pot is not treated like a leafy vegetable planter.
When a pot needs water, use the same slow, whole-surface method every time. Note which containers dry first and why. If the same pot repeatedly fails, change one structural variable—larger volume, different placement, better mix, mulch, shade, or a tested emitter—before simply watering more often.
Before a forecast heat wave, water according to the root-zone test, move vulnerable pots out of reflected afternoon heat, top up a tested reservoir, and make sure saucers are not holding stagnant water. After the weather breaks, inspect again and return plants to their normal light gradually. A routine that adapts to conditions is more reliable than a timer or calendar used blindly.
Conclusion
The most dependable way to stop a container garden from drying out is to make the root zone more forgiving before you increase the watering frequency. Use a pot large enough for the plant, a mix that holds moisture without losing air, working drainage holes, and a position that does not turn the container into a heat trap.
Then water slowly across the whole surface, check below the top layer, use shade and grouping to lower demand, cover the mix lightly, and add drip, olla, or reservoir support only after testing it. If the same pot still dries out, compare its size, material, roots, and exposure with a healthier neighbor. That short diagnosis usually reveals the fix—and keeps your container garden hydrated without trading drought stress for root rot.



