How to Grow and Care for Peonies
Learn how to grow peonies with the right fall timing, planting depth, sun, soil, watering, support, pruning, division, and bloom troubleshooting.
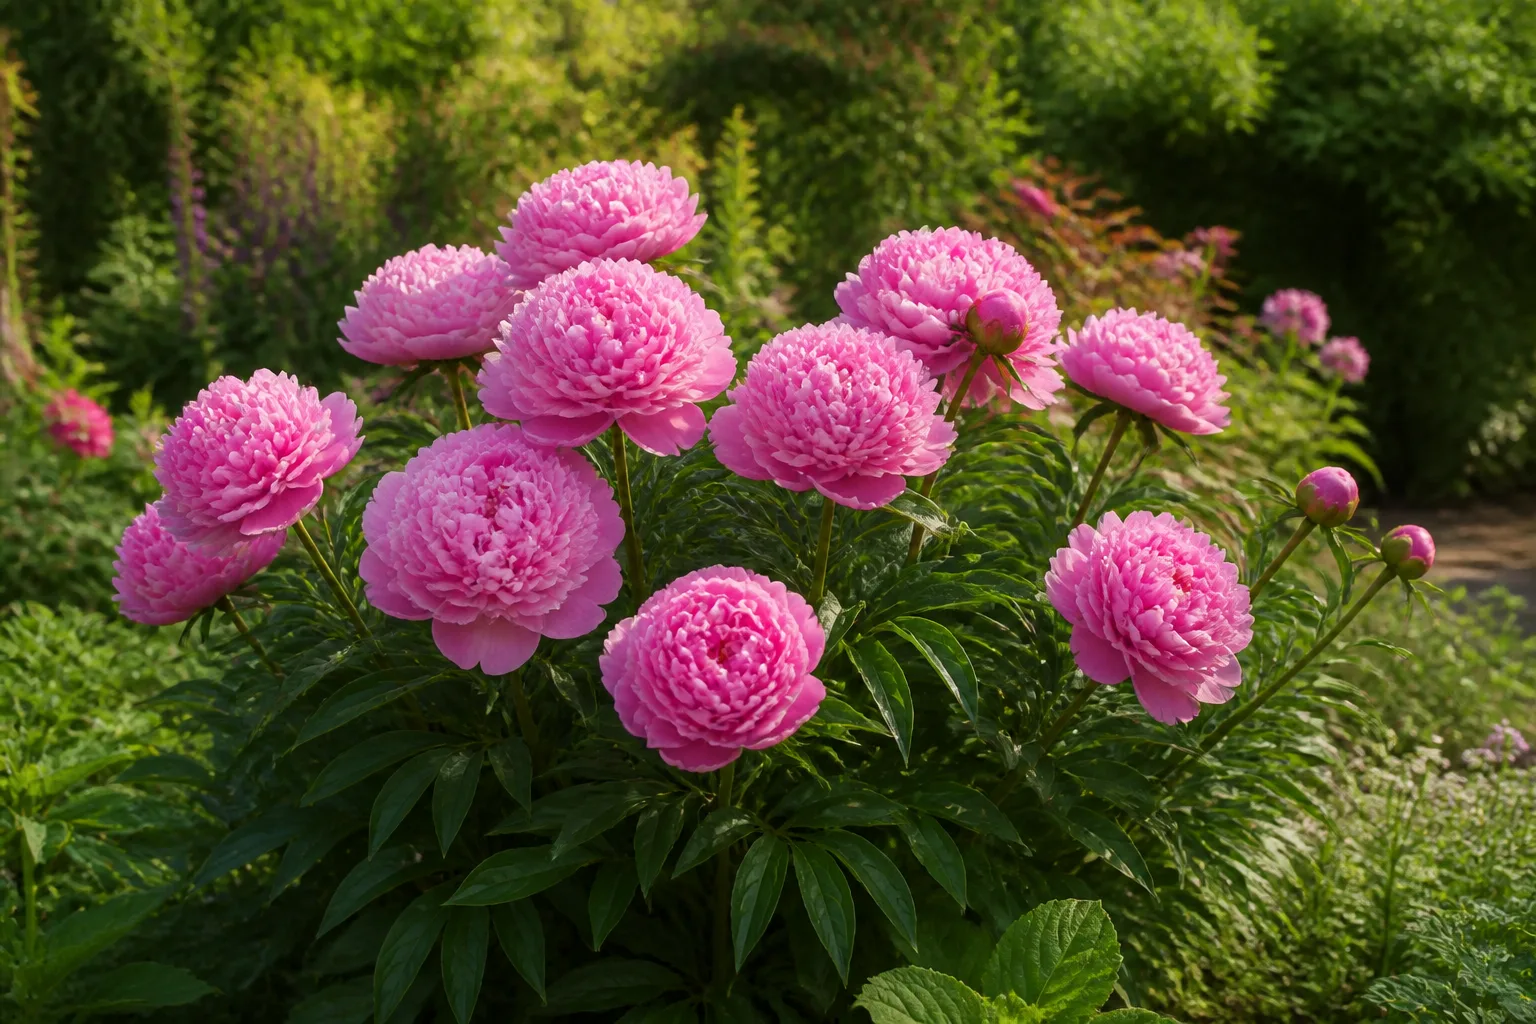
Peonies are unusually forgiving once they are planted correctly—and unusually stubborn when they are not. Put a crown too deep, give it soggy soil, or choose a site without enough winter chill, and it may produce handsome leaves for years with few or no flowers.
The highest-value peony care happens before the first bloom: identify the type, choose a permanent site, plant in fall, and keep the growth eyes shallow. After that, the routine is mostly steady moisture during establishment, light feeding, early support for heavy flowers, summer foliage protection, and clean fall cutback.
Start With the Right Peony Type
“Peony” can mean several very different plants. Herbaceous peonies are the familiar garden clumps whose soft stems die to the ground each winter. Tree peonies are woody shrubs that keep their framework, while Itoh or intersectional peonies combine tree-peony ancestry with herbaceous dieback. Woodland peonies are another group, generally suited to more specialized shade conditions.
Most general planting and care advice in this guide is for herbaceous garden peonies, including many Paeonia lactiflora hybrids. The distinction matters at pruning time: a tree peony must not be cut to the ground, while an herbaceous peony should be cleaned up after its foliage is killed by frost. Itoh peonies also die back, but their short, sturdy woody bases make them less likely to need staking.
Flower form is a useful practical clue, too. Single and semi-double cultivars often hold themselves up better than large doubles, whose rain-filled petals can pull stems to the soil. If your garden is exposed or you dislike staking, choose a cultivar described as sturdy-stemmed rather than choosing only by color.
Peonies are toxic to dogs, cats, and horses according to the ASPCA’s peony listing. The listed toxic principle is paeonol, with vomiting, diarrhea, and depression among the reported clinical signs, so place the plant where pets are less likely to chew it and contact a veterinarian if ingestion is suspected.
Choose a Permanent Site and Match Winter Chill
Choose the spot as if you were planting a small, long-lived shrub. Peonies dislike being moved once established because their fleshy roots are deep, brittle, and slow to rebuild after disturbance. A site that is sunny, open, and well drained is worth more than a heavily amended hole in the wrong place.
Aim for full sun—roughly six or more hours of direct light, with more light generally producing better flowering. In hot climates, some afternoon shade can protect flowers and foliage, but dense shade is a poor compromise. UConn Extension notes that part shade may be tolerated with fewer blooms, while NC State Extension’s herbaceous peony profile emphasizes full sun to light shade, good air circulation, and the difficulty of meeting the chilling requirement in warm areas.
Winter cold is part of the flowering process, not just a hardiness footnote. Many garden peonies perform best in cool regions; NC State describes zones 5–7 as the sweet spot, with some plants growing in zones 3–8. UConn describes a minimum chilling need of about six weeks below 40°F for flowering, but cultivars differ, and local winter conditions can be warmer than a zone label suggests.
If you garden in a mild-winter area, look specifically for a low-chill cultivar from a reputable local nursery rather than assuming every peony will behave the same. A warm microclimate beside a south-facing wall, winter mulch that insulates the crown, or a cultivar with a higher chill need can produce the frustrating combination of healthy foliage and missing flowers.
Give the plant room for air movement and root access. Keep it away from large trees and aggressive shrubs: their roots compete for water, and dense neighboring growth traps humidity around peony foliage. Avoid a low pocket where rain collects, a downspout outlet, or soil that stays slick and saturated after storms.
Plant Peonies at the Right Depth
For a bare-root peony, the pink or reddish buds are the growth eyes. Set those eyes only 1 to 2 inches below the finished soil surface. This is the rule most likely to determine whether a new peony flowers; deeper planting often produces foliage without blooms.
The American Peony Society’s planting guidance recommends fall planting because peonies make much of their root growth as the season cools. Late summer through autumn is workable in many growing regions while soil remains unfrozen, but early fall is a safer target than waiting until the ground is hard.
Prepare a generous area rather than a narrow post hole. Loosen soil deeply enough that roots can spread without folding, remove perennial weeds, and correct drainage before the crown goes in. If the soil is heavy clay, improve the bed broadly with organic matter and, where practical, use a raised or gently mounded site; simply filling one small hole with loose material can create an inconsistent pocket that holds water.
Place the root with eyes facing upward and roots fanning down and outward. Backfill with the same soil, settle it with water, and check the final depth after the soil has settled. Do not pile compost, soil, or a thick winter mulch over the crown later—the added material counts as extra planting depth.
Bare-Root Crowns and Potted Plants
Buy bare roots that are firm, plump, and free of soft rot. Three to five healthy eyes with substantial roots is a useful starting size, but a smaller division is not automatically bad; it simply needs more time. A new crown with one or two eyes can establish, yet it may take longer to reach flowering size.
For a nursery-grown potted peony, dig a hole about as deep as the root ball and set the top of the existing soil at the same level it occupied in the container. Do not bury a potted plant deeper just because the garden bed is loose. Gently loosen only circling roots that truly need it, then water thoroughly so soil closes around the root ball.
Spring planting is possible when soil is workable, especially for a potted plant that must be planted, but it is a compromise. The American Peony Society warns that spring-planted peonies make little root growth and depend heavily on stored moisture through summer. If you must plant in spring, protect the plant from drought and do not judge it harshly if flowering is delayed.
Water and Mulch During Establishment
For the first growing season, keep the root zone evenly and lightly moist, never waterlogged. Water deeply when the surface begins to dry rather than giving frequent sips that wet only the top inch. The exact interval depends on soil, rainfall, wind, temperature, and container size; a clay bed may need less frequent watering than a sandy bed, while a new potted peony can dry quickly.
That “deep, then wait” rhythm also matches the practical advice in Get Busy Gardening’s peony care guide, which warns against wet feet and recommends keeping water off the foliage when possible. Use the advice as a method, not a fixed calendar: the soil and weather in your garden decide when the next soaking is due.
Pay particular attention from shoot emergence through bloom formation. This is when the plant is building leaves and flower buds, and a prolonged dry spell can reduce the display. Once a peony is established, it handles ordinary summer weather better, but deep watering during extended drought is still more useful than a daily sprinkle.
Water at the soil line or use a soaker hose. Wetting dense foliage late in the day increases the conditions that favor leaf spots and gray mold, while overhead water can splash spores from one plant to another. If you do use a sprinkler, run it early enough for leaves to dry.
Mulch is a thin moisture buffer, not a second planting layer. Keep mulch a few inches away from the crown and use only a light layer around the plant. For a first-year planting in a cold area, the American Peony Society recommends adding wood or bark mulch after the soil freezes and removing it from the emerging area in early spring. Established crowns usually need less winter protection than new divisions.
Feed Lightly, Not Heavily
Peonies are not high-demand fertilizer plants. A fertile bed with adequate organic matter may need no routine fertilizer beyond a light, surface-applied compost dressing. The common mistake is treating weak flowering as a signal to add more nitrogen, which can produce lush leaves without solving excessive shade, deep planting, immaturity, or poor drainage.
Start with a soil test if the bed has a history of poor growth. UConn Extension’s peony factsheet describes peonies as light feeders and notes that excess nitrogen reduces blooms. If a test or local recommendation supports fertilizer, choose a modest, relatively low-nitrogen product and keep it away from direct contact with the crown and roots.
Timing matters more than quantity. Feed in spring or shortly after flowering only when the soil needs it, and avoid late-summer or fall fertilization that pushes tender growth when the plant should be storing energy and preparing for dormancy. Never use fertilizer to compensate for a site that stays wet; fertilizer cannot repair root stress from poor drainage.
Add Support Before Stems Flop
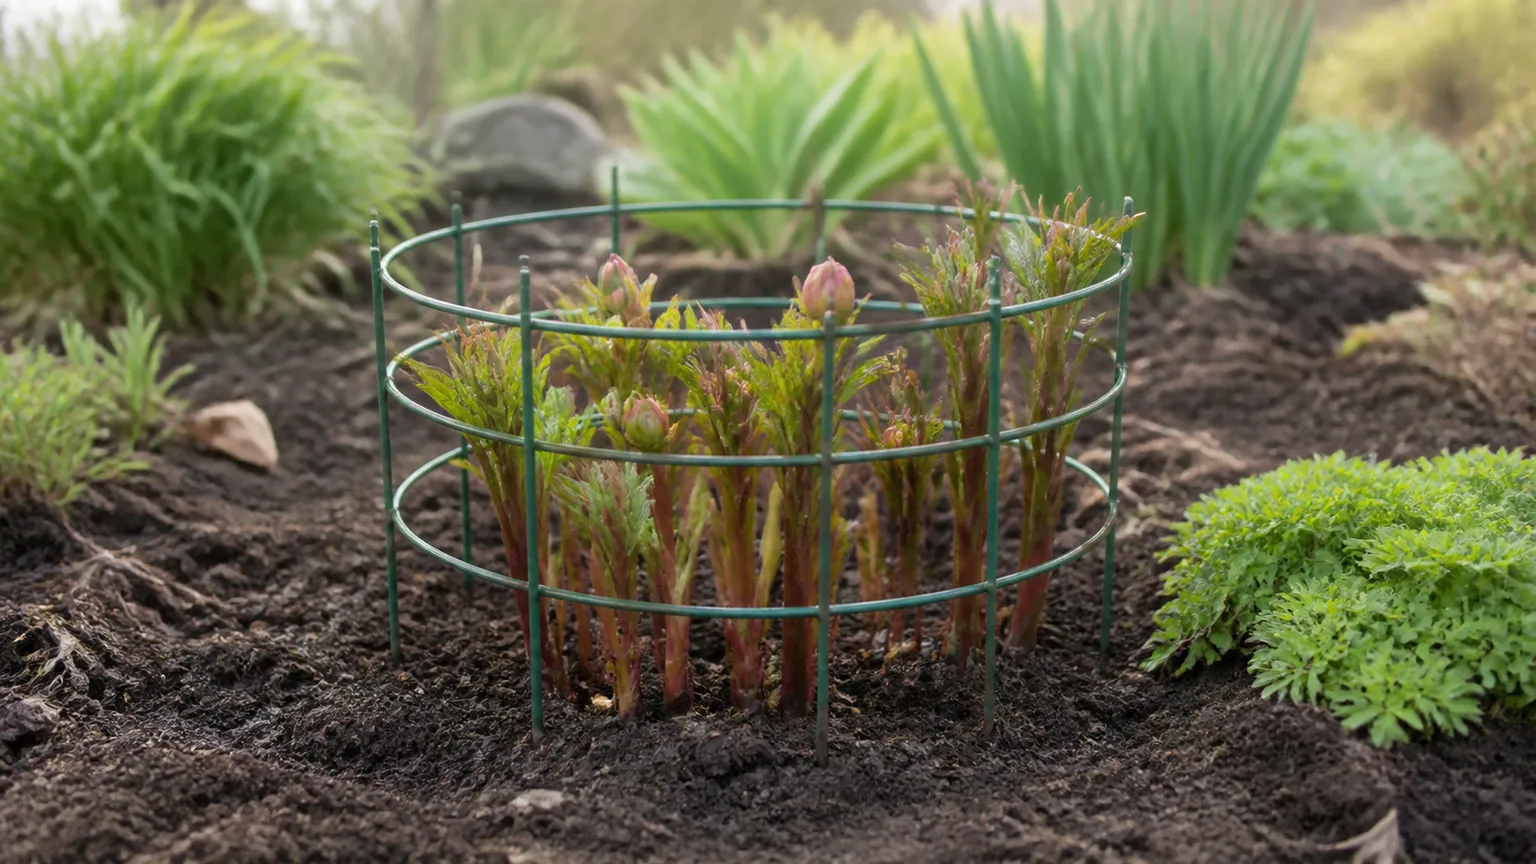
Install a grow-through peony ring, low hoop, or discreet stake system in early spring while shoots are short. The stems will grow through the support and hide much of it by bloom time. Waiting until a double peony is fully budded usually means trying to thread a cage over brittle stems and risking damage.
Support is most valuable for tall, double-flowered cultivars and for plants exposed to wind or heavy rain. Single flowers and many Itoh or tree peonies may stand without help, but cultivar habit and weather matter more than labels. A ring is not a sign that the plant is weak; it is a way to keep flowers off wet soil and make the display last through rain.
For a cut-flower garden, harvest selectively. UConn recommends cutting no more than about one-third to one-half of the flowers and leaving as much foliage as possible. Cut stems when buds are soft and beginning to show color if you want them to open indoors, and do not strip a young plant of every long stem just because the bouquet is tempting.
Keep Foliage After Bloom
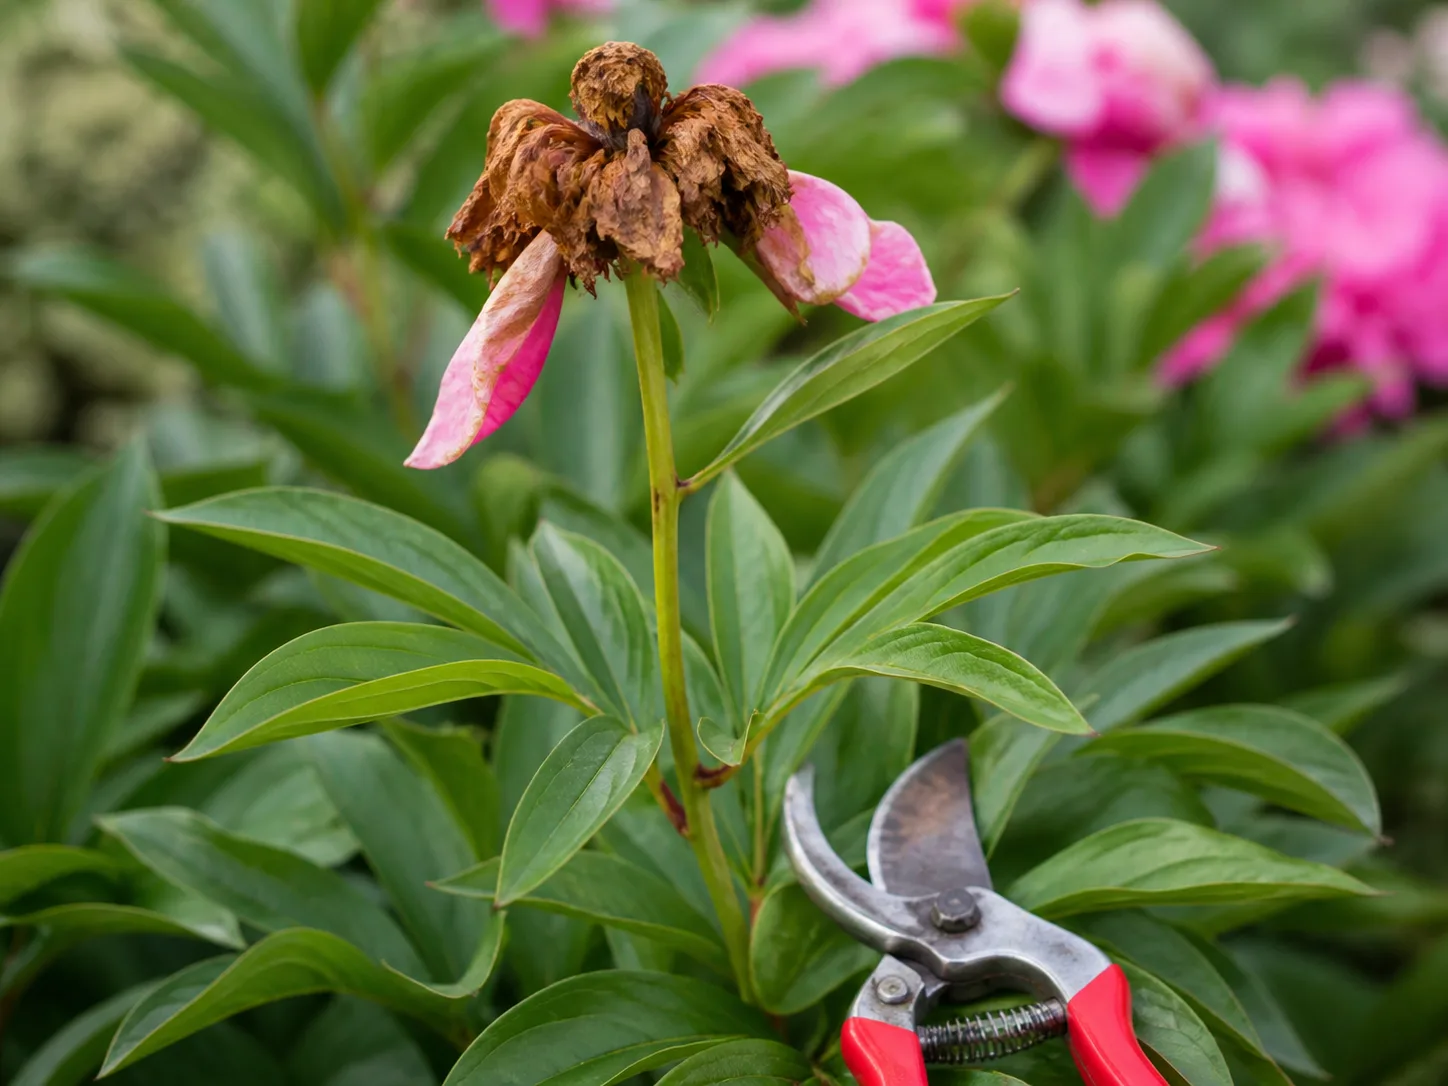
Deadhead spent flowers when petals fade, especially on large doubles that turn into wet clumps after rain. Trace the flower stem down to a healthy leaf set and cut just above it, removing a developing seed pod unless you are deliberately saving seed. The goal is to remove the finished flower while leaving the leaves that recharge the crown.
Do not cut a healthy herbaceous peony to the ground in June. After flowering, its leaves are the plant’s solar panels for the rest of the season, helping build next year’s underground buds. If the plant looks untidy, remove only the spent heads and any damaged or diseased leaves; avoid a cosmetic haircut that leaves the crown underfed.
Peonies generally have one main flowering window rather than a repeat-bloom cycle. Deadheading improves appearance and prevents unwanted seed production, but it will not create a second August flush. If you want to experiment with seedlings, leave a pod or two on a healthy plant and accept that named hybrid offspring may not resemble the parent and will take years to flower.
Ants on peony buds are usually harmless. They are attracted to sugary nectar on the outside of unopened buds, not because they are needed to open the flowers. The Missouri Botanical Garden’s peony problems guide notes that ants do not injure peonies; shake or gently brush them off cut stems before bringing flowers indoors.
Cut Back and Protect Peonies in Fall
Wait for herbaceous foliage to yellow or for a hard frost to kill it before cutting back. Then cut stems close to the crown, leaving a short stub if that makes the crown easier to locate, and remove fallen leaves from the bed. This is a sanitation task as much as an appearance task because diseased tissue can carry pathogens into the next season.
Do not apply the herbaceous cutback rule to tree peonies. Their woody stems are permanent structure and may carry next year’s buds; remove only dead, broken, or diseased wood with a clean tool. Itoh peonies die back like herbaceous types, though their lower woody framework may remain more substantial.
If the plant had wilt, gray mold, or severe leaf spotting, bag or otherwise dispose of the affected debris rather than putting it in a home compost pile. The RHS guidance on peony wilt explains that Botrytis paeoniae forms resting structures in dead tissue that can release spores the following spring. Good cleanup reduces risk, although wind-borne spores mean sanitation cannot guarantee a disease-free bed.
Divide or Transplant Only for a Reason
Do not divide a peony simply because a calendar says it is time. Healthy clumps can remain productive for decades. Division makes sense when flowering has declined despite adequate light and correct depth, when the crown has outgrown its space, or when you need to share a plant.
Transplanting is best done in early fall after the season’s growth is finished but while soil can still be worked. Water the plant a day or two beforehand, lift a wide root zone, and keep the crown from breaking under its own weight. Replant at the same depth, or correct the depth if the old planting was clearly too deep.
How to Divide a Mature Herbaceous Clump
Cut the foliage back, dig around the clump, and lift it with as much root mass as you can manage. Wash or brush away soil until you can see the eyes and the thick roots; a clean, sharp knife is safer than a dull tool that tears the crown.
Make divisions with at least three healthy eyes and a good portion of fleshy root when possible. Remove rotten tissue, discard weak or diseased material, and replant divisions promptly with eyes 1–2 inches below the surface. Water once to settle the soil, then keep the new planting slightly moist until winter.
Expect a pause after disturbance. A divided or moved peony may produce leaves before it produces flowers, and a small division can need several seasons to mature. If the plant is otherwise healthy, digging it up repeatedly to “make it bloom” only prolongs the recovery.
Growing Peonies in Containers
Peonies can grow in containers, but a pot is a more demanding version of the same plant. Choose a container at least about 18 inches wide and deep, with drainage holes, and use a stable, well-drained potting mix rather than garden soil. Dwarf or compact cultivars are easier to manage than a large, floppy double.
Plant the eyes at the same shallow depth used in the ground. Container soil settles, dries, and freezes differently from a garden bed, so check moisture more often during active growth and avoid leaving the pot in a saucer of standing water. During dormancy, water sparingly but do not let the root mass become bone dry.
The largest container challenge is winter chill. A potted peony still needs an appropriate dormant period, but its roots are more exposed to rapid freezes and thaws. In cold regions, place the pot in a sheltered outdoor location or an unheated space that remains cold enough for dormancy, and protect the container from repeated freeze-thaw swings without storing it in a warm room.
Diagnose a Peony That Will Not Bloom
If a peony has leaves but no flowers, check the causes in this order rather than adding fertilizer:
- Depth: Expose the crown carefully and measure the soil above the eyes. If it is more than about 2 inches, plan a fall correction; in a warm area, even shallower placement may be needed.
- Age: A new bare-root division, a young potted plant, or a recently moved clump may need two or three growing seasons to settle.
- Light: Confirm that buildings, shrubs, or a tree canopy have not reduced direct light below the plant’s needs.
- Roots: Check for competition from tree roots, persistent drought, or soil that stays saturated after rain.
- Fertilizer: Excess nitrogen can make foliage impressive while flowers remain scarce.
- Weather: A late frost can kill swollen buds, and a cool, wet spring can trigger botrytis before flowers open.
- Plant health: Look for sudden wilt, dark stem tissue, gray fuzz, distorted growth, or a declining crown rather than assuming the problem is cultural.
The depth clue is especially strong when the same plant flowers reliably in a previous garden or produces vigorous leaves every year. Do not correct a slightly young plant by moving it in summer; wait for fall, prepare the new site first, and disturb the roots once.
Recognize Pests and Diseases
Peonies are comparatively low-maintenance, but the word “low-maintenance” does not mean “immune.” The most useful disease prevention is cultural: give plants space, keep the crown out of standing water, water the soil rather than the leaves, remove diseased material, and clean up in fall.
Botrytis and Peony Wilt
Peony wilt and gray mold are most concerning in cool, wet weather. Watch for young shoots that suddenly collapse, brown or black buds that fail to open, water-soaked lesions, and fuzzy gray growth on dead tissue. RHS identifies peony wilt as Botrytis paeoniae, while the Missouri Botanical Garden’s botrytis guidance describes it as a common disease that is favored by damp, rainy seasons.
Remove infected stems and buds promptly, cutting into healthy tissue where appropriate, and disinfect pruners between clumps. Put diseased cuttings in the trash or use another disposal method allowed in your area; do not spread them through compost. Improve airflow and drainage before reaching for a product.
Product availability and legal labels vary by location. The Missouri Botanical Garden notes that protectant fungicides may be used in some settings, while RHS states that no chemical controls are available to gardeners in its context. If you consider a fungicide, use only a product currently labeled for peony and the specific disease in your jurisdiction, follow the label, and do not spray open blooms when pollinators are active.
Leaf Spots, Mildew, and Root Rot
Purple or red blotches that develop after flowering can be peony blotch; a white powdery coating on leaves is powdery mildew. These problems are often more cosmetic than lethal, but recurring symptoms point back to shade, crowding, wet foliage, or poor sanitation. UConn Extension’s disease guidance recommends moisture management, airflow, and thorough end-of-season cleanup, and notes that minor leaf spotting may not affect plant health.
Dark, leathery tissue at the soil line, a crown that pulls up easily, or a plant that wilts in wet soil is more serious. The Missouri Botanical Garden’s problem guide describes Phytophthora blight as a risk in saturated conditions; the practical response is to improve the site and remove badly infected plants rather than repeatedly watering or fertilizing a failing crown.
Scale and thrips can occur, though they are not the first explanation for every damaged flower. Inspect stems and leaf undersides before treating. A few ants on buds need no control, while distorted new growth, sticky honeydew, silvered petals, or widespread decline deserves closer diagnosis.
What to Expect in the First Three Years
Year one is mostly root establishment. A healthy bare-root division may produce a modest number of stems, or none at all, while it builds roots underground. Resist the urge to fertilize heavily or relocate it because it did not flower immediately.
Year two often brings a clearer picture: more stems, stronger foliage, and perhaps the first dependable flowers. If flowers appear but stems flop, install support before the following spring rather than trying to brace a fully grown clump during a storm.
By year three and beyond, the plant should begin to look like the long-lived border anchor it can become, provided the site suits it. Early, middle, and late cultivars can extend a peony display across several weeks, but each individual plant still has a concentrated bloom period. After the show, the foliage is the reason to keep caring for the plant until fall.
That slow start is normal enough that The Flower Expert’s peony growing guide treats the first two or three seasons as an establishment period rather than a test of whether the plant is viable. Judge the crown by healthy shoots and foliage as well as flowers, and investigate only when decline, persistent wetness, or a clear cultural problem appears.
Conclusion
To grow and care for peonies successfully, get the permanent decisions right first: choose a sunny, well-drained site with enough winter chill, keep competing tree roots away, and plant bare-root eyes only 1–2 inches deep in fall. Water new plants deeply enough to settle the soil, mulch lightly without covering the crown, and feed only when the soil needs it.
Install support while shoots are short, deadhead flowers without removing healthy leaves, and wait until frost to cut back herbaceous foliage. Divide or transplant only for a clear reason, treat tree peonies as woody shrubs, and read sudden wilt or gray mold as a sanitation and drainage problem rather than a cue to add more fertilizer. With patience through the first few seasons, a correctly planted peony can become one of the most reliable flowering plants in the garden.



