How to Propagate Hydrangeas from Cuttings
How to propagate hydrangeas step by step: choose softwood, prepare the node, root in fresh mix, layer low branches, and harden plants before planting.
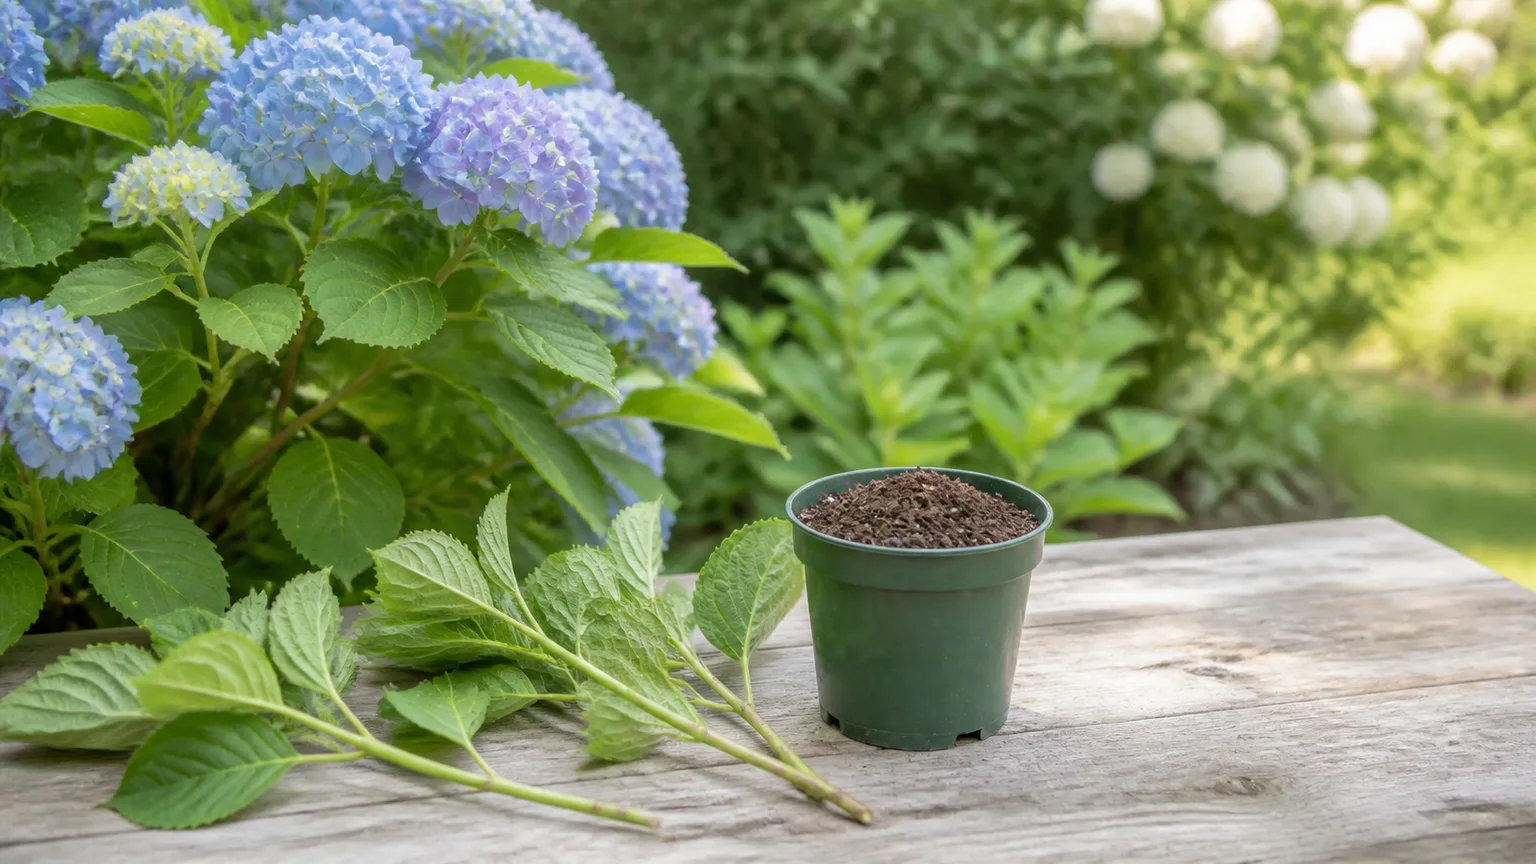
Quick answer: the best hydrangea propagation method
The most dependable way to propagate a hydrangea at home is to take a nonflowering softwood cutting from healthy current-season growth and root it in a fresh, airy medium. Choose a stem about 4 to 6 inches long, cut just below a leaf node, remove the lower leaves, reduce the remaining leaf area, and keep the cutting humid, bright, warm, and out of direct sun.
If your shrub has a flexible branch close to the ground, simple layering is even more forgiving because the new plant stays attached to the parent while it forms roots. Water propagation is possible, but it is best treated as a small experiment: it is easy to watch, yet the resulting roots may be less ready for soil and the cutting can rot in stagnant water.
| Method | Best choice when | Main advantage | Main risk |
|---|---|---|---|
| Soil or soilless mix | You want a pot-ready plant | Roots develop in their final type of medium | Dense or wet mix causes rot |
| Simple layering | A low, flexible branch is available | Parent plant supplies water while roots form | Produces fewer plants and needs a suitable branch |
| Water | You want to see root development | Easy to monitor | Stale water, weak roots, and transplant shock |
Hydrangeas are clones when grown from vegetative material, so a successful cutting or layered branch should retain the parent’s characteristics. That is useful when you want another plant with the same flower form, but it also means a weak or diseased parent is a poor source for propagation.
Pick the right time and stem
For most home gardens, aim for late spring through early summer, after new shoots have emerged but before the stems become fully woody. The RHS guidance on softwood cuttings places this work in spring and early summer, while Montana State University Extension’s stem-cutting guide describes softwood as new growth taken after budbreak and before the tissue fully matures.
The calendar is only a shortcut. In a cool northern garden, the right shoot may not be ready until early summer; in a warm climate, the useful window can arrive sooner and may extend into mid-summer. Look at the stem rather than forcing a date: it should be green, flexible, and firm enough to snap when bent quickly, not limp at the tip and not hard brown wood.
Take cuttings in the morning, ideally after the parent plant has been watered the day before. Soft stems lose water quickly, and the practical advice from A Way to Garden’s discussion of softwood propagation is to keep freshly gathered material cool, shaded, and damp until you can prepare it.
Avoid stems carrying flowers or obvious flower buds when you have a choice. Flowering is not proof that a cutting cannot root, but reproductive growth competes with the root-forming process and a flowering stem often has less of the flexible vegetative growth you want.
How to tell softwood from old wood
Use this quick test on a candidate branch. The tip may bend without breaking because it is too soft; the section a little farther down should bend and snap cleanly. If it only flexes and strings, it is still too green. If it is rigid, gray-brown, or cracks before bending, it is old wood and better suited to a different seasonal method.
The best cutting usually has several visible nodes and healthy leaves, with no black spots, powdery growth, insect clusters, or wilt. A node is the joint where a leaf or bud attaches to the stem; it is the area with the tissue most likely to initiate roots. The internode between two leaves is useful for length, but do not bury a long section while missing the node itself.
Gather clean supplies and choose a rooting setup
Before cutting, assemble a sharp pair of bypass pruners or a clean knife, a small pot or propagation tray, fresh seed-starting or cutting mix, a pencil or dibber, a clear cover, and a label. Wipe the blade with alcohol or wash it before starting and between visibly diseased plants. Clean tools do not guarantee success, but they reduce the chance of smearing decay into fresh wounds.
Choose a pot with drainage holes. A 3- to 4-inch pot works for one or two cuttings; a wider tray is fine when you label varieties and leave enough space for air to circulate. Do not fill the container with garden soil or a rich, water-holding potting mix. Fresh, low-fertility medium gives the stem oxygen and avoids the microbial load and compaction that make a small cutting fail.
Rooting hormone is optional. If you use it, follow the product label, put a small amount in a separate dish, dip only the basal end, and tap off the excess. More hormone is not a substitute for a viable node, clean medium, warmth, or the right moisture level.
What kind of rooting mix works best
The goal is a mix that holds moisture around the stem while letting air reach the buried node. A fresh commercial seed-starting mix, perlite blended with a little coir or peat-free compost, or another clean cutting medium can work. Avoid a mix that stays shiny and muddy after watering; the surface should be moist, not saturated.
The RHS softwood-cutting method uses cutting compost and recommends a dibber so the stem is not scraped as it enters the medium. Make the hole first, then insert the cutting. That small step preserves the rooting surface and keeps hormone from being wiped off the base.
Moisten the mix before planting so you do not have to flood a newly inserted stem. If water runs out of the drainage holes and the medium remains sodden, let it drain fully before adding the cutting. Good propagation is a balance: the stem must not dry, but a permanently waterlogged pot removes the oxygen roots need.
Prepare a softwood cutting step by step
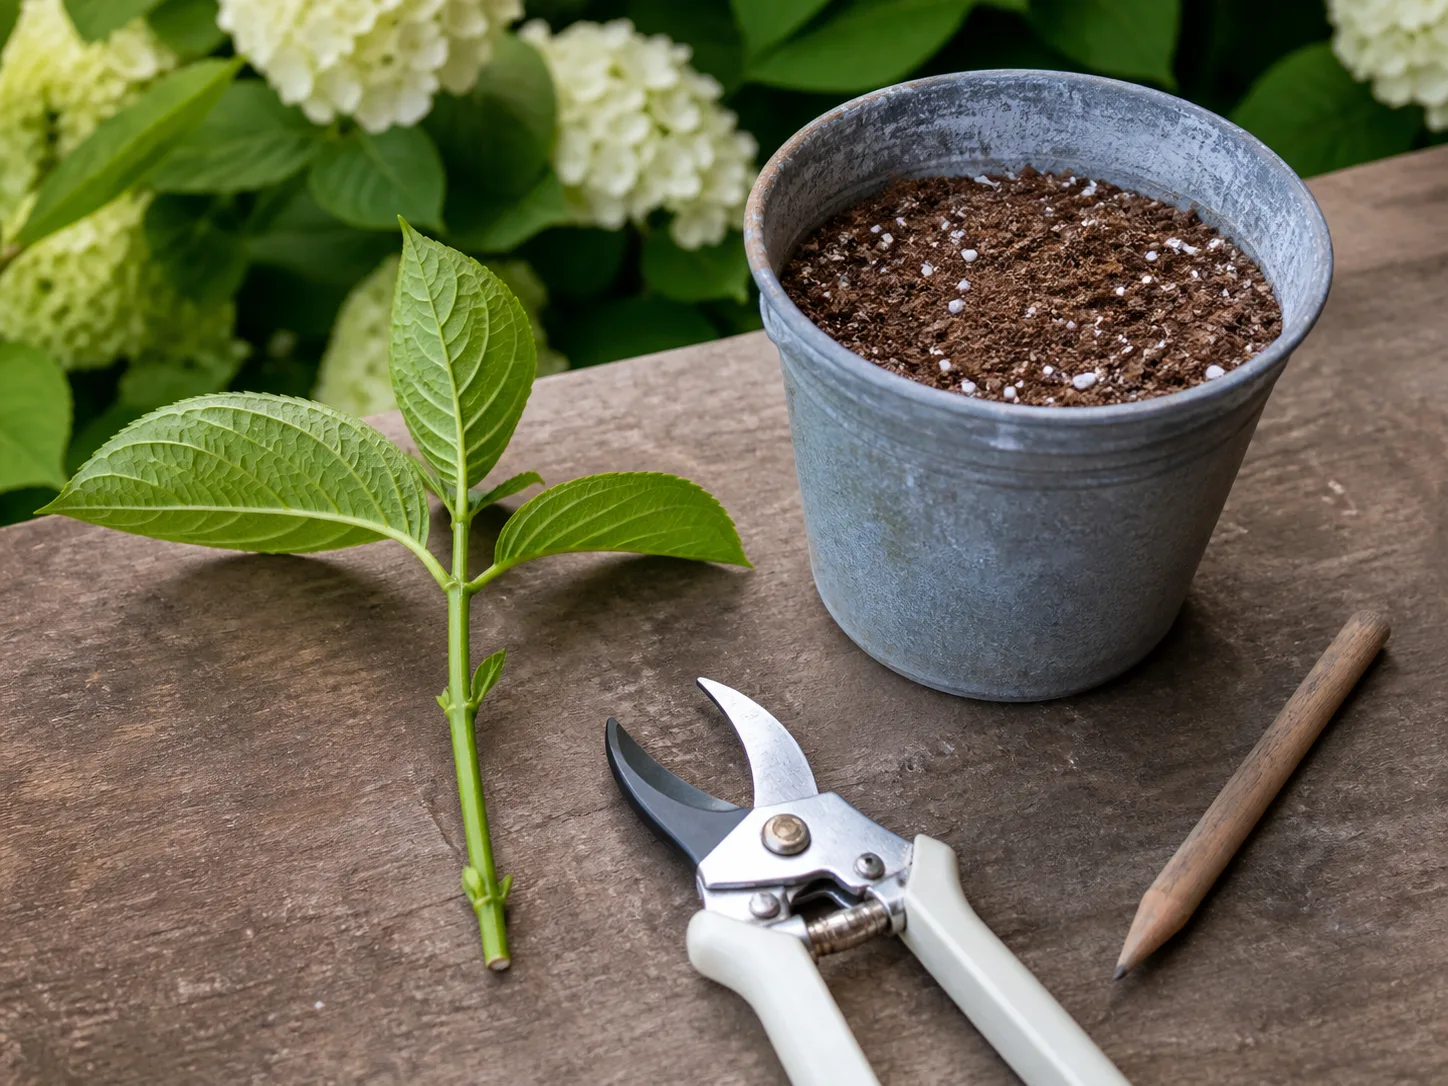
- Choose a healthy shoot. Select a 4- to 6-inch section of current-season growth with at least two or three nodes and no flower head. If you are taking several cuttings, keep them cool and shaded while you work.
- Make the basal cut. Using a sharp, clean blade, cut just below the lowest node. A fresh cut exposes the part of the stem most useful for rooting; do not crush it with dull shears.
- Remove the lower leaves. Strip off the leaves that would sit below the medium or in water. They decay when buried, and decaying tissue invites the stem to collapse.
- Reduce the top leaves. Leave one or two pairs of leaves at the top. If the leaves are large, cut each blade across its width to reduce water loss while keeping enough green tissue for photosynthesis.
- Apply hormone only if desired. Dip the cut end according to the label and discard the portion of powder that has touched the stem rather than returning it to the container.
- Plant immediately. Insert the base so at least one node is below the surface, firm the mix around it, and label the cultivar or cutting date.
The cutting should be upright and stable, with its remaining leaves above the medium. If the stem rocks when you touch it, the buried contact is poor and the base may dry. Firm the mix gently rather than pressing so hard that you close all the air spaces.
Root cuttings in soil (the most reliable all-around method)
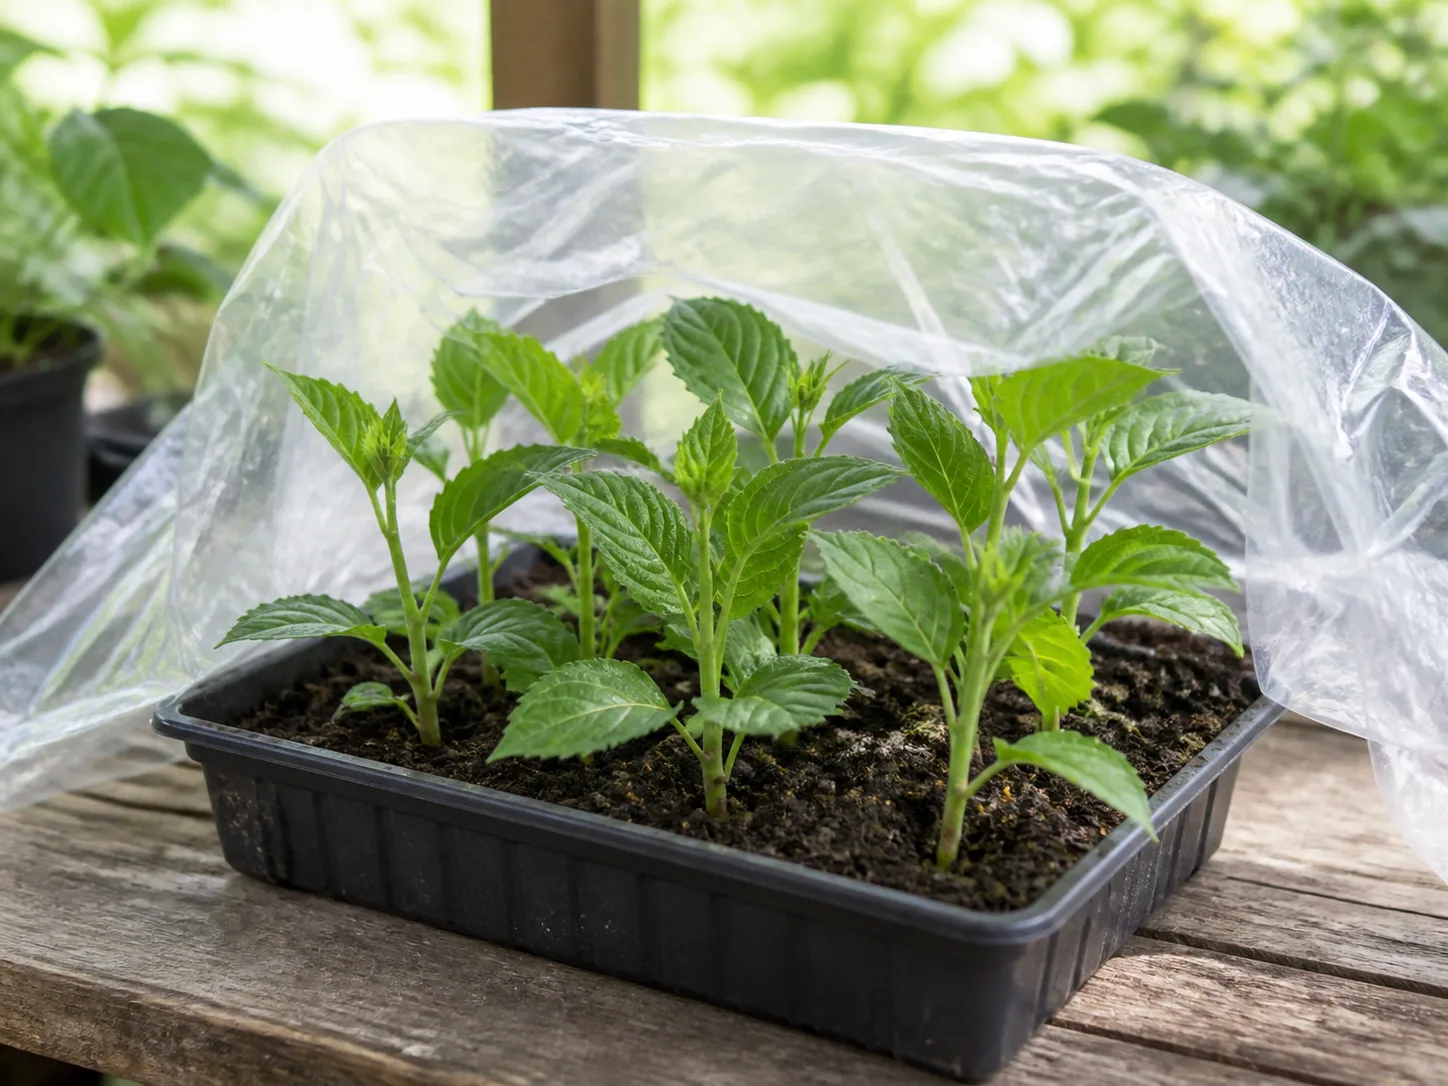
Set the covered pot in bright filtered light, a sheltered outdoor spot, or a bright indoor location away from hot glass. Direct midday sun can heat the cover and force water out of the leaves faster than an unrooted stem can replace it. Low light is also a problem because the remaining leaves cannot support the cutting well; bright indirect light is the middle ground.
Cover the pot with a clear plastic bag, a propagation dome, or an improvised cover held above the leaves with stakes. The cover slows water loss from the foliage, but it should not touch the leaves. Contact creates wet spots, reduces airflow, and can turn one damaged leaf into a source of rot.
Keep the medium evenly moist and check it with a finger rather than watering on a rigid schedule. Condensation is not the same as a properly watered pot: if the mix is wet for days, open the cover and improve drainage; if the leaves wilt and the surface is dry, add a small amount of water and move the pot out of stronger light.
Softwood cuttings generally need a few weeks, not a few days. The RHS propagation guidance gives roughly 2 to 4 weeks for well-rooted softwood cuttings under suitable conditions, while Montana State University Extension notes that woody softwood cuttings can take 6 to 8 weeks depending on species and setup. Use that range as a checkpoint, not a deadline.
Keep humidity high without trapping rot
Humidity helps because the cutting has leaves but no functioning root system. It is not a reason to seal the pot indefinitely. Open a bag or vent a dome briefly several times a week, and open it longer if the inside is constantly dripping, the medium smells sour, or leaves are pressed against wet plastic.
The best cover is one that holds moisture while allowing some air exchange. Commercial growers may use mist, bottom heat, or specialized propagation benches, but a home gardener can get close with a clean pot, fresh medium, a loose cover, and bright shade. A Way to Garden’s practical propagation notes emphasize that a little ventilation can help prevent the humid setup from becoming a rot chamber.
Do not fertilize an unrooted cutting. It has no root system to use the salts, and fertilizer cannot make a buried node root faster. Wait until the cutting is rooted and pushing new growth, then move it into a modestly fertile potting mix and resume gentle hydrangea care.
Use simple layering when you want the lowest-risk start
Simple layering is often the smartest choice when the shrub has a low, flexible branch. Instead of cutting the stem away immediately, you encourage a section to root while it remains supplied by the parent plant. The RHS propagation overview lists layering as a practical method for producing one or two new plants from suitable shrubs.
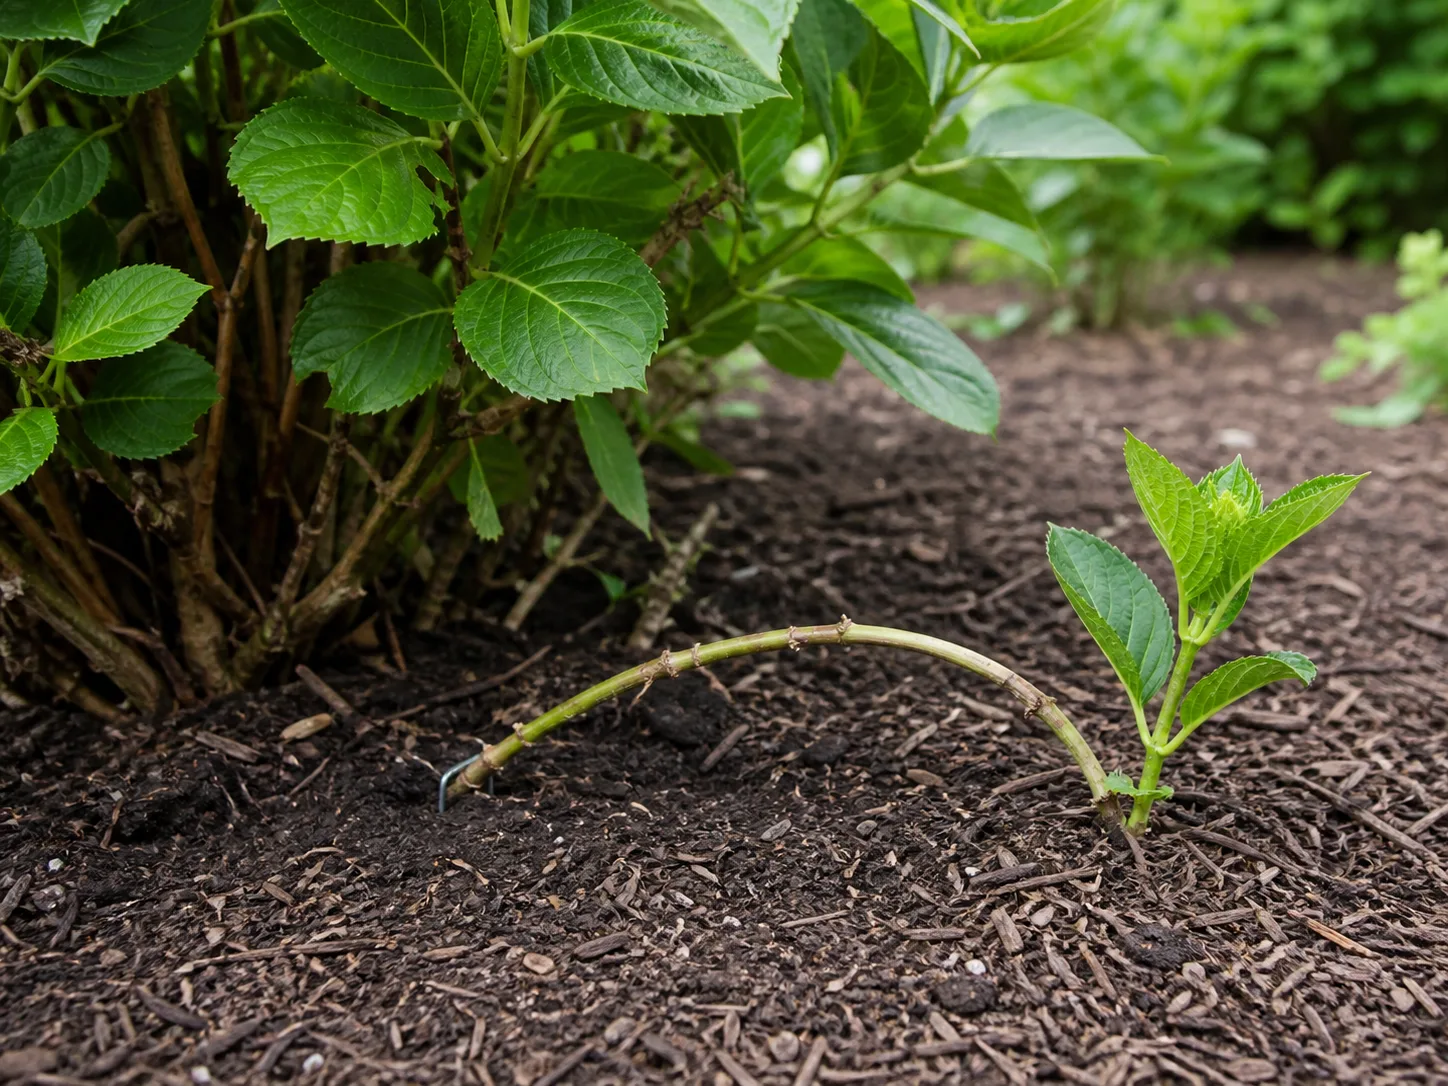
Choose an outside branch that can bend to the soil without kinking. At the point that will touch the ground, remove the leaves and lightly wound only the underside if the stem is firm; a shallow scrape is enough. Do not ring-bark the branch or sever it.
Loosen a shallow patch of soil, press the prepared section into it, and cover the node with a few inches of soil. Hold the branch in place with a landscape staple, bent wire, or a smooth stone, while leaving the growing tip above ground. Water the area when the parent shrub is watered, keeping it moist but not permanently wet.
Layering takes patience because the stem is doing two jobs at once. After several weeks, check for resistance by lifting the soil carefully rather than yanking the tip. Once you can see a useful root system or the layered section holds firmly, cut it from the parent with clean pruners, pot it, and give it a protected transition before planting it in its final spot.
Layering is not better for every situation. It makes fewer plants, needs a branch that can reach the ground, and is awkward in a container or densely planted bed. It is excellent when you have a valuable cultivar, a hot dry spell, or a history of losing detached cuttings to wilting.
Should you root hydrangeas in water?
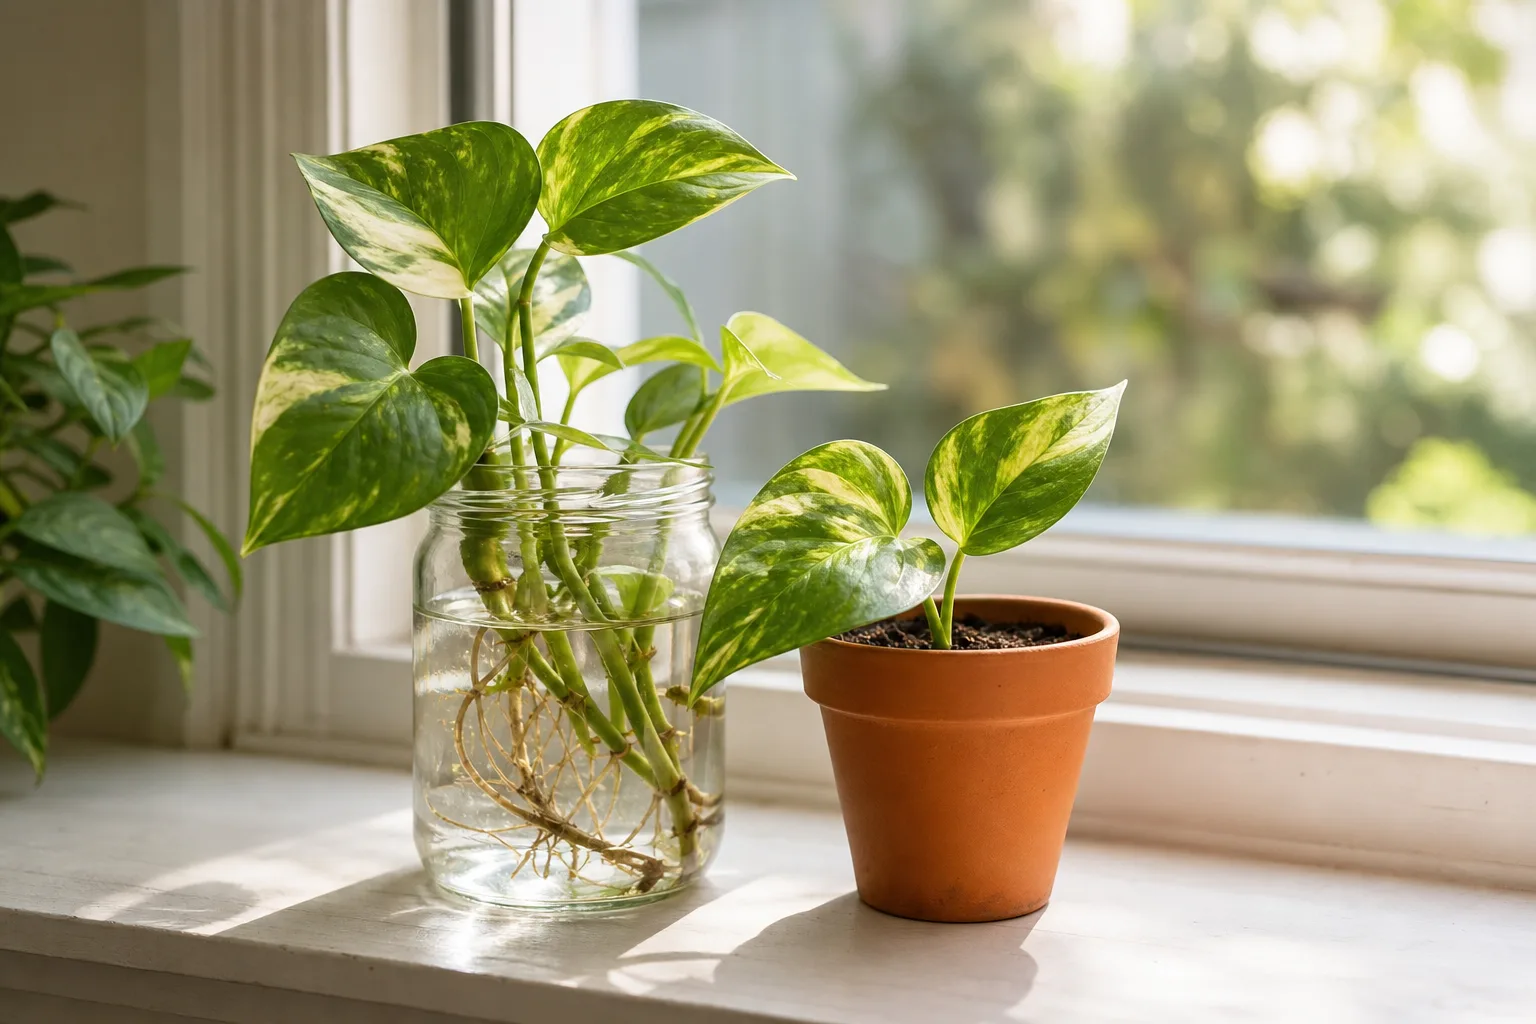
Yes, a hydrangea cutting can sometimes root in water, but water is not the best default for a large batch. It lets you see the roots and makes moisture simple to monitor, yet a jar offers less oxygen than an airy medium and a neglected cutting can turn soft before roots appear.
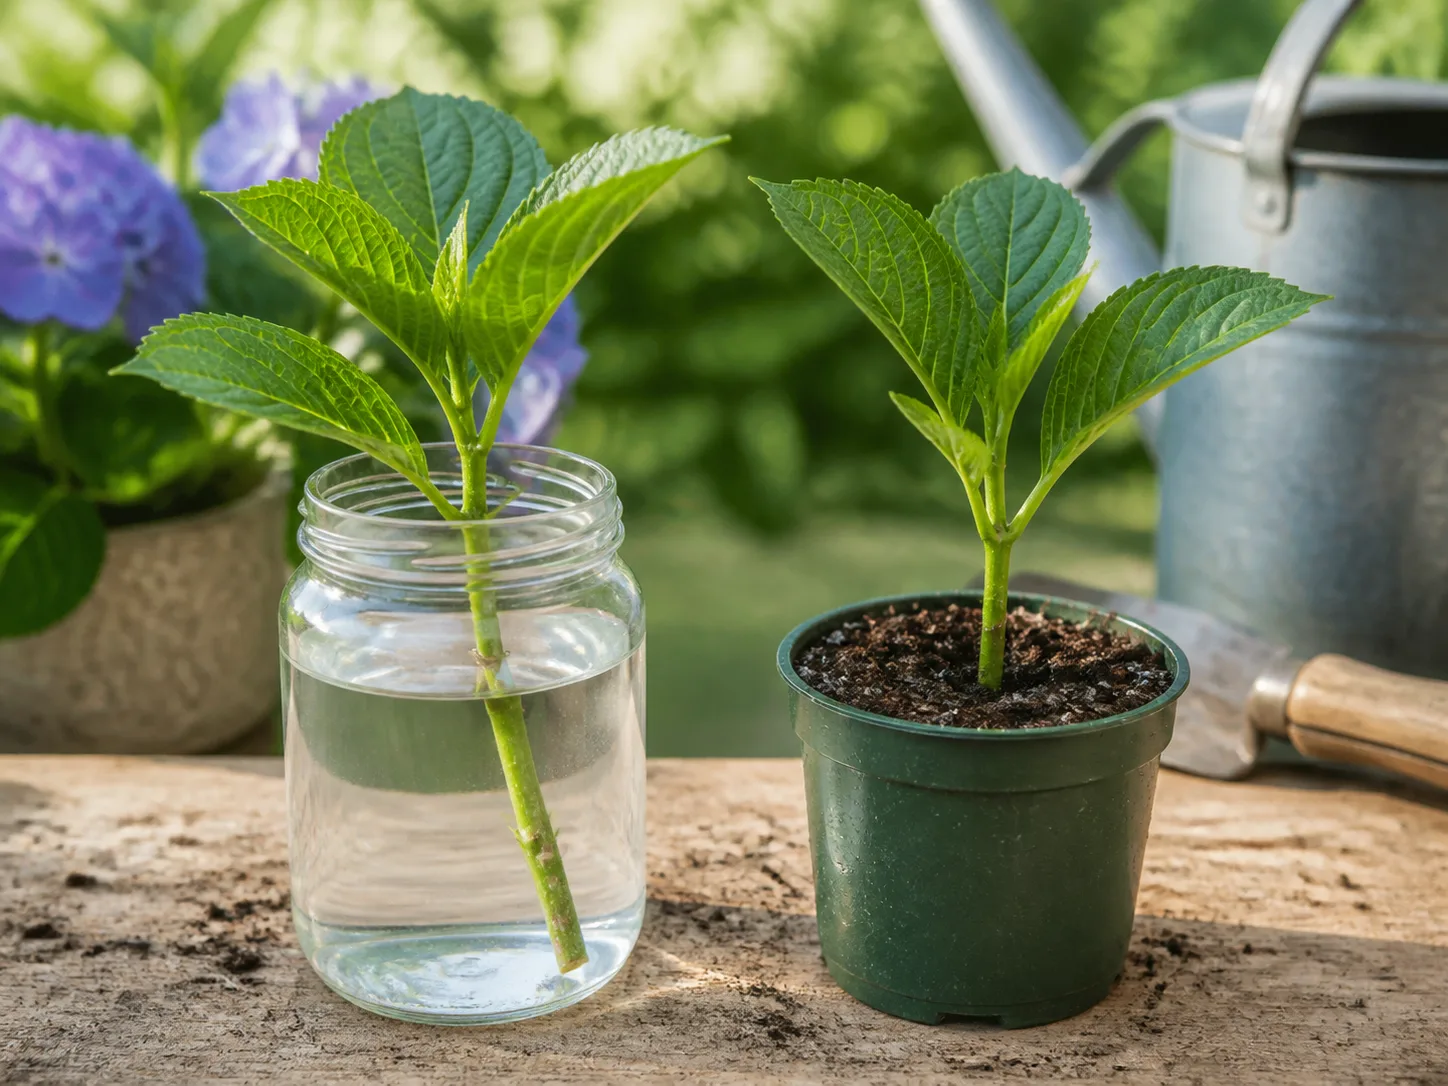
Use a clean, narrow jar with room-temperature water. Keep at least one node submerged, keep every leaf above the waterline, and place the jar in bright indirect light. Refresh the water whenever it clouds or smells stale; frequent changes are safer than waiting for a visible film to form.
When roots appear, do not leave the cutting in water for months. Move it to a small pot of moist, well-drained mix once it has several roots roughly 1 to 2 inches long. Roots formed in water are adapted to that environment, so the transition can cause temporary wilting. The Gardening Know How hydrangea propagation guide also cautions that water-rooted cuttings are often less successful when moved into soil than cuttings rooted directly in a medium.
If you are uncertain which setup suits your conditions, run a small comparison: put one or two cuttings in water and two in fresh mix. Keep light and temperature similar, label the dates, and judge success by healthy roots and later growth rather than by which jar shows the first white nub.
Know when roots have formed
New leaves are encouraging, but they are not proof of roots. A cutting can use stored energy to push growth before it has a strong root system. Check the base only after the expected rooting window has passed and do so gently.
For a soil cutting, look for firm resistance when you ease the plant upward, or slide the root ball from the pot to look for white roots along the edge. Do not tug hard on a stem just to satisfy your curiosity; delicate new roots can tear, sending the cutting backward.
For a water cutting, roots should be firm and branching rather than a single brown thread. A white or cream root system with several side roots is a better potting signal than a single long root. If the base is slimy, brown, or foul-smelling, trim back to firm tissue only if healthy stem remains; otherwise discard it and clean the jar.
Once rooted, the cutting still needs time to become a plant. Keep it in the same bright, sheltered conditions for several days after potting, then gradually increase light and airflow. Rooting is the midpoint, not the finish line.
Pot up and harden off the new plant
Use a container only slightly larger than the root system. A very large pot holds a large volume of unused wet mix, which makes a small hydrangea easier to overwater. Set the cutting at the same depth it occupied while rooting, water it once to settle the medium, and let excess drain completely.
Keep the new plant protected while it replaces the high-humidity conditions of the propagation cover. Remove the cover in stages over several days, then move the pot from bright shade toward the light level it will receive outdoors. The RHS recommends hardening rooted cuttings gradually so soft leaves develop a stronger protective surface before they face normal outdoor air and sun.
For outdoor planting, wait until frost danger has passed and avoid placing a newly rooted cutting into peak heat. Montana State University Extension recommends a gradual 7- to 10-day hardening period and notes that fall planting should leave several weeks before the first frost. In a short-season climate, overwintering the young hydrangea in a sheltered pot may be safer than rushing it into the bed.
Water based on the pot and weather, not the calendar. A young hydrangea needs consistent moisture while establishing, but its roots still need air. A layer of mulch around an outdoor plant can slow drying; keep mulch away from the stem itself.
Troubleshoot wilt, rot, and no roots
Propagation problems usually have a pattern. Read the stem and the setup together instead of adding more hormone or more water automatically. A green cutting that has not rooted is not the same problem as a brown, collapsing cutting.
When the cutting wilts before rooting
Immediate wilting usually means water loss is outrunning water uptake. The parent may have been dry, the cutting may have too much leaf area, or the pot may be sitting in sun, wind, heat, or a draft. Recut a fresh, firm stem if necessary, remove another large leaf, water the medium, and move the setup to bright shade with a loose humidity cover.
If the stem firms overnight and the leaves recover, keep watching the balance between cover and airflow. If the base is already pinched, dark, or hollow, do not try to rescue it with more mist; start again above the damaged section from healthy parent tissue.
When the base turns dark or mushy
A dark, soft base is usually rot, not a sign that roots are about to emerge. Common triggers are a dense mix, a pot without drainage, constant water contact, wet leaves under sealed plastic, or a dirty tool. Remove the cutting, inspect for firm tissue, and discard it if decay has climbed into the stem.
Clean the container and start with fresh mix rather than replanting into the same wet pocket. Vent the cover more, reduce watering, and keep leaves off the plastic. If several cuttings fail the same way, suspect the environment first: stale air and saturated medium can defeat otherwise healthy stems.
When it stays green but never grows
Green is a holding pattern, not a guarantee. Check that a viable node is actually buried, that the stem is not old wood, and that the cutting is warm enough. Cool nights, dim light, very dry air, and an overlarge leaf load can slow rooting without causing immediate collapse.
Give a healthy cutting several more weeks if the base is firm and the leaves look stable. If there is still no resistance or root growth after the longer end of the expected window, restart with a younger nonflowering shoot and improve one variable at a time. Do not keep a failed cutting in a stagnant jar or saturated pot indefinitely.
Variety, patent, and flowering expectations
Propagation preserves the parent’s genetics, but the new shrub will not become a full flowering specimen overnight. Expect the first season to focus on roots and leafy growth, especially if the cutting is small. Pinching off an early flower can be reasonable if it lets the young plant build a stronger framework, but do not treat flowers as a test of whether the propagation worked.
You can often propagate common hydrangea types from healthy stem material, including bigleaf, smooth, panicle, oakleaf, and climbing hydrangeas, but the exact ease and timing vary by cultivar. A hydrangea sold under a trademarked brand name may also be a patented or otherwise protected cultivar. Montana State University Extension specifically warns that plant patents can prohibit propagation.
Do not treat TM or ® alone as a complete legal answer; those marks identify branding, not necessarily the plant’s propagation rights. Check the nursery tag, breeder information, and rules where you live before making or selling clones of a named cultivar. If the status is unclear, propagate an older unprotected plant or ask the breeder or a local extension office.
Finally, take cuttings judiciously. Never strip a shrub of all its new growth, and do not use material from a plant with spreading disease, severe drought stress, or pest damage. The best parent plant is healthy enough to recover from a few careful cuts—and worth copying for more than its flowers.
Conclusion
To propagate hydrangeas successfully, start with the stem, not the calendar: choose healthy current-season growth that is flexible but firm, nonflowering, and cut just below a node. Root it in a fresh, airy medium under bright filtered light, steady moisture, high humidity, and enough ventilation to prevent rot.
Use simple layering when a low branch gives you a safer path, and use water only when visibility matters more than a smooth transition into soil. Once roots form, pot up gently, harden the plant over a week or more, and give it time to become a sturdy shrub. A small batch, careful labels, and a willingness to discard rotten cuttings will teach you more than chasing a guaranteed trick.