How to Propagate Snake Plants: 4 Reliable Methods
Learn how to propagate snake plants by division, soil, water, or seed, with orientation tips, variegation warnings, timelines, and rot fixes.
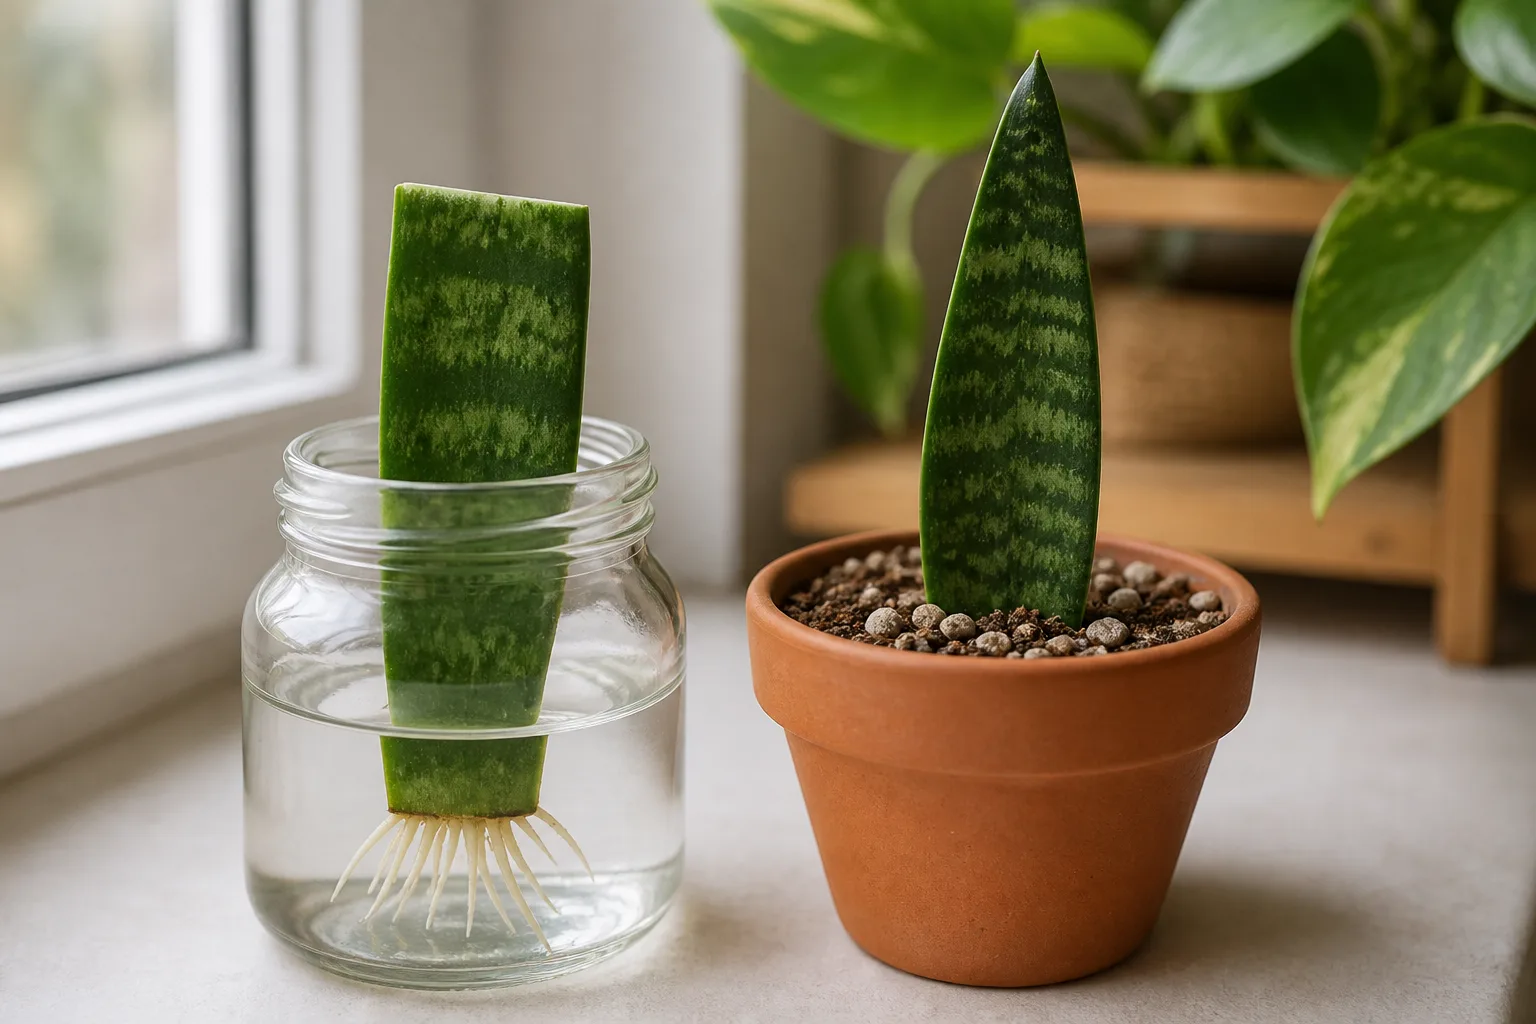
You can multiply a healthy snake plant from a rooted pup, a divided clump, a leaf section, or seed. The best choice depends on what you want at the end: an instant, true-to-parent plant; several inexpensive experiments; a cutting you can watch in a jar; or the challenge of growing from seed.
Snake plants are now generally classified as Dracaena trifasciata, although many plant labels still say Sansevieria. Their thick leaves store water, while underground rhizomes produce new shoots. That combination makes propagation forgiving, but it also explains the main rule: a cutting usually fails from staying too wet long before it fails from being too dry.
The best method depends on what you want
Start with this decision rather than with a knife. If the plant already has side shoots or a crowded root ball, division is usually the quickest and least stressful route because each new piece begins with roots and stored energy. If you have one tall leaf and want several chances, leaf sections work; water lets you watch the roots, while soil avoids a later water-to-soil transition.
| Your goal | Best starting method | What you gain | Main trade-off |
|---|---|---|---|
| A rooted plant quickly | Divide a pup or clump | Roots and leaves already exist | You need a mature, crowded plant |
| Preserve yellow or silver variegation | Division | The new plant keeps an existing growth point | Fewer plants than a leaf can produce |
| Make several cuttings from one leaf | Soil leaf sections | One leaf can provide multiple trials | Progress is hidden below the mix |
| Watch roots develop | Water leaf sections | Easy visual monitoring | More exposure to rot and transplant stress |
| Experiment with genetics | Seed | Potentially different offspring | Slow, uncommon indoors, and not reliably true to the parent |
Division includes separating a natural pup and cutting a firm rhizome between rooted sections. These are not really different biological strategies for a home grower; both give a new plant a piece of the parent’s underground growth system. A leaf cutting, by contrast, has to build roots and a new shoot from stored tissue.
Gardening Know How’s propagation guide makes the same practical distinction between rooted division, rhizome pieces, and leaf cuttings: the first two begin with stored resources, while a leaf cutting has to wait for roots to form. That is why “fastest” usually means divide what the plant has already made, not cut the leaf into the smallest possible pieces.
Before you start: choose a healthy leaf or clump
Choose a parent with firm leaves, a stable base, and no spreading soft spots. A plant that is actively collapsing from root or crown rot is a poor source for routine propagation because the same wet conditions or diseased tissue can move into your new pots. If you are propagating to rescue a damaged plant, be stricter: cut only from firm, healthy tissue and treat every tool and surface as contaminated until cleaned.
Look at the base before deciding on a method. A crowded pot with several fans of leaves and visible pups is a division candidate; a single healthy leaf is enough for cuttings. The RHS sansevieria growing guide describes these plants as rhizomatous, succulent houseplants and lists offsets, division, and leaf cuttings as practical propagation routes.
When to propagate snake plants
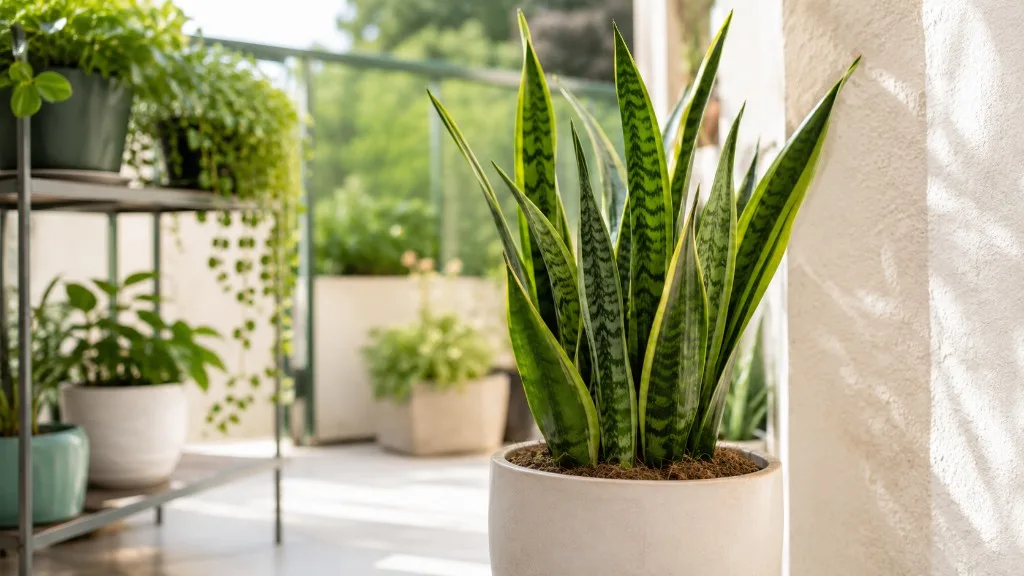
Spring through early summer is the easiest window for most homes because light, warmth, and active growth support faster rooting. The RHS recommends spring propagation as sansevierias come back into growth after winter, while indoor plants under steady warmth and strong light can sometimes root outside that window.
Winter propagation is possible, but the margin for error is smaller. A cutting uses less water and grows more slowly in cool, dim conditions, so a pot that stays damp for two weeks can become a rot chamber. If you must start in winter, use less water, provide bright indirect light, and wait for the medium to dry rather than watering by the calendar.
Tools and materials
You do not need a greenhouse or a specialized propagator. Assemble the supplies first so a freshly cut leaf is not left on a dirty counter while you look for a pot.
- A sharp knife or pruners that make a clean cut rather than crushing the leaf
- Rubbing alcohol or soap and hot water for cleaning the tool before and after use
- A small pot or shallow tray with a drainage hole
- A loose cactus or succulent mix, ideally opened up with perlite, pumice, or horticultural grit
- A clean jar and room-temperature water if you are using the water method
- A pencil, plant label, or small piece of tape to mark the basal end of every leaf section
- A clean paper towel or dry tray for short callusing
Rooting hormone is optional. Snake plant leaf pieces can root without it, and powder does not compensate for a wet, airless mix. If you use it, apply only a light dusting to the basal end and follow the product label; do not treat it as a substitute for drainage.
Method 1: Divide pups and rooted clumps
Choose division when you want the best combination of speed, stability, and matching foliage. It is also the right method for a variegated snake plant such as ‘Laurentii’ when preserving the yellow margin matters. The UF/IFAS division guidance explains the key reason: division can maintain variegated chimeras that may lose their pattern when grown from leaf pieces.
Step-by-step division
Water the parent only if the mix is already dry and the plant needs its normal drink; do not saturate it immediately before dividing. A slightly dry root ball is easier to handle, and dry surfaces are less likely to smear wet soil into every cut.
- Slide the plant from its pot. Squeeze a flexible nursery pot or run a dull tool around the inside edge rather than yanking on the leaves.
- Brush or tease away enough mix to see where leaf fans connect. You are looking for firm, pale-to-tan rhizomes and roots, not for a random line through the leaves.
- Separate a naturally loose pup by hand when it has its own roots. If the clump will not separate cleanly, use a sterilized knife to cut through the rhizome in one controlled motion.
- Give each division a viable growth point, at least one healthy leaf fan, and a useful portion of roots or rhizome. A tiny leaf with no growth point is not equivalent to a rooted pup.
- Inspect the cut surfaces. Remove black, hollow, or foul-smelling tissue; keep firm tissue. Let a large rhizome cut dry for several hours before potting if the surface is wet, and longer if the cut is broad.
- Pot each division into a container only slightly larger than its root mass. Set the rhizome at its original depth, firm the mix around it, and keep the plant upright.
- Water lightly only after potting if the mix is very dry, then let excess drain completely. Return the plant to bright indirect light and avoid feeding until it is settled and actively growing.
The RHS propagation techniques guide recommends dividing clumps into sections with their own shoot and root system, removing damaged material, and avoiding excessive water while new roots establish. That is a better mental model than trying to produce the maximum number of tiny pieces: fewer robust divisions beat a tray of unsupported leaves.
How to know a pup is ready
A pup is ready when it is large enough to stand as a small plant and has roots of its own, not merely a leaf emerging from the mother plant. Gently expose the connection during repotting. If the pup pulls away with a small root bundle and a firm rhizome section, it can be potted separately; if it is a rootless nub, leave it attached and check again later.
Pot a newly separated pup in a small container with a drainage hole. A large pot holds more unused wet mix around a small root system and slows drying, which is exactly the condition snake plant divisions dislike. Support a tall, wobbly division with a clean stake temporarily rather than burying the crown deeper to make it stand.
Method 2: Root leaf cuttings in soil
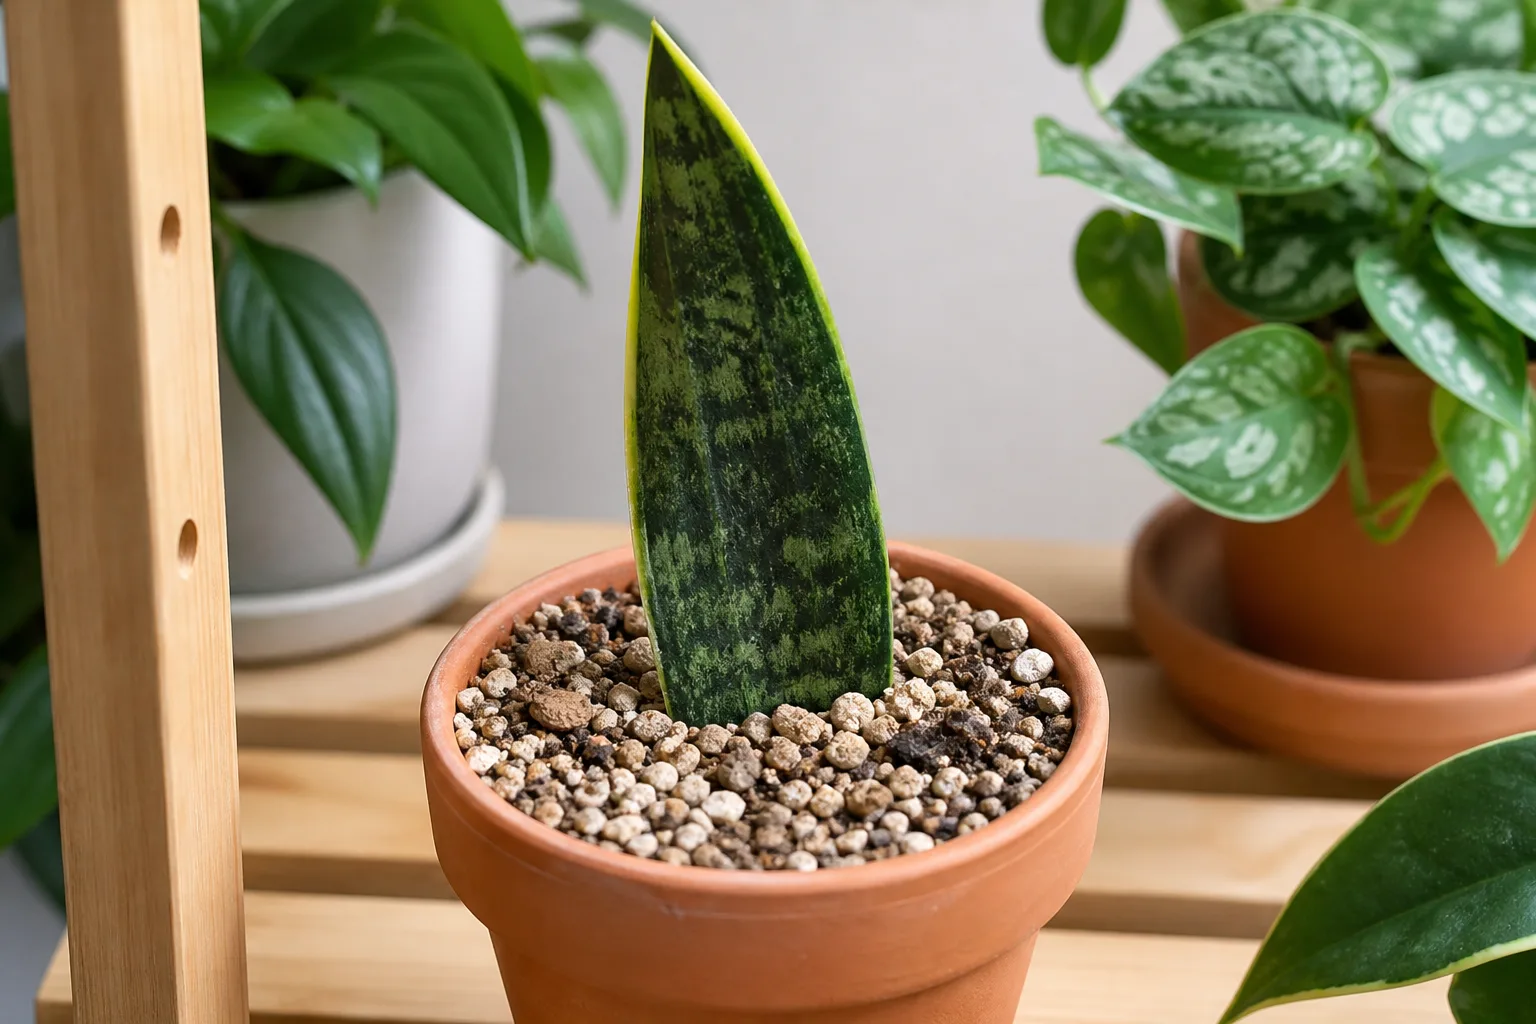
Soil propagation is the most practical choice when you want a cutting to root in its final medium. You cannot watch the roots form, but you also do not have to move fragile water-grown roots later. This method is especially useful when you plan to make several sections from one mature leaf.
Prepare and orient the leaf sections
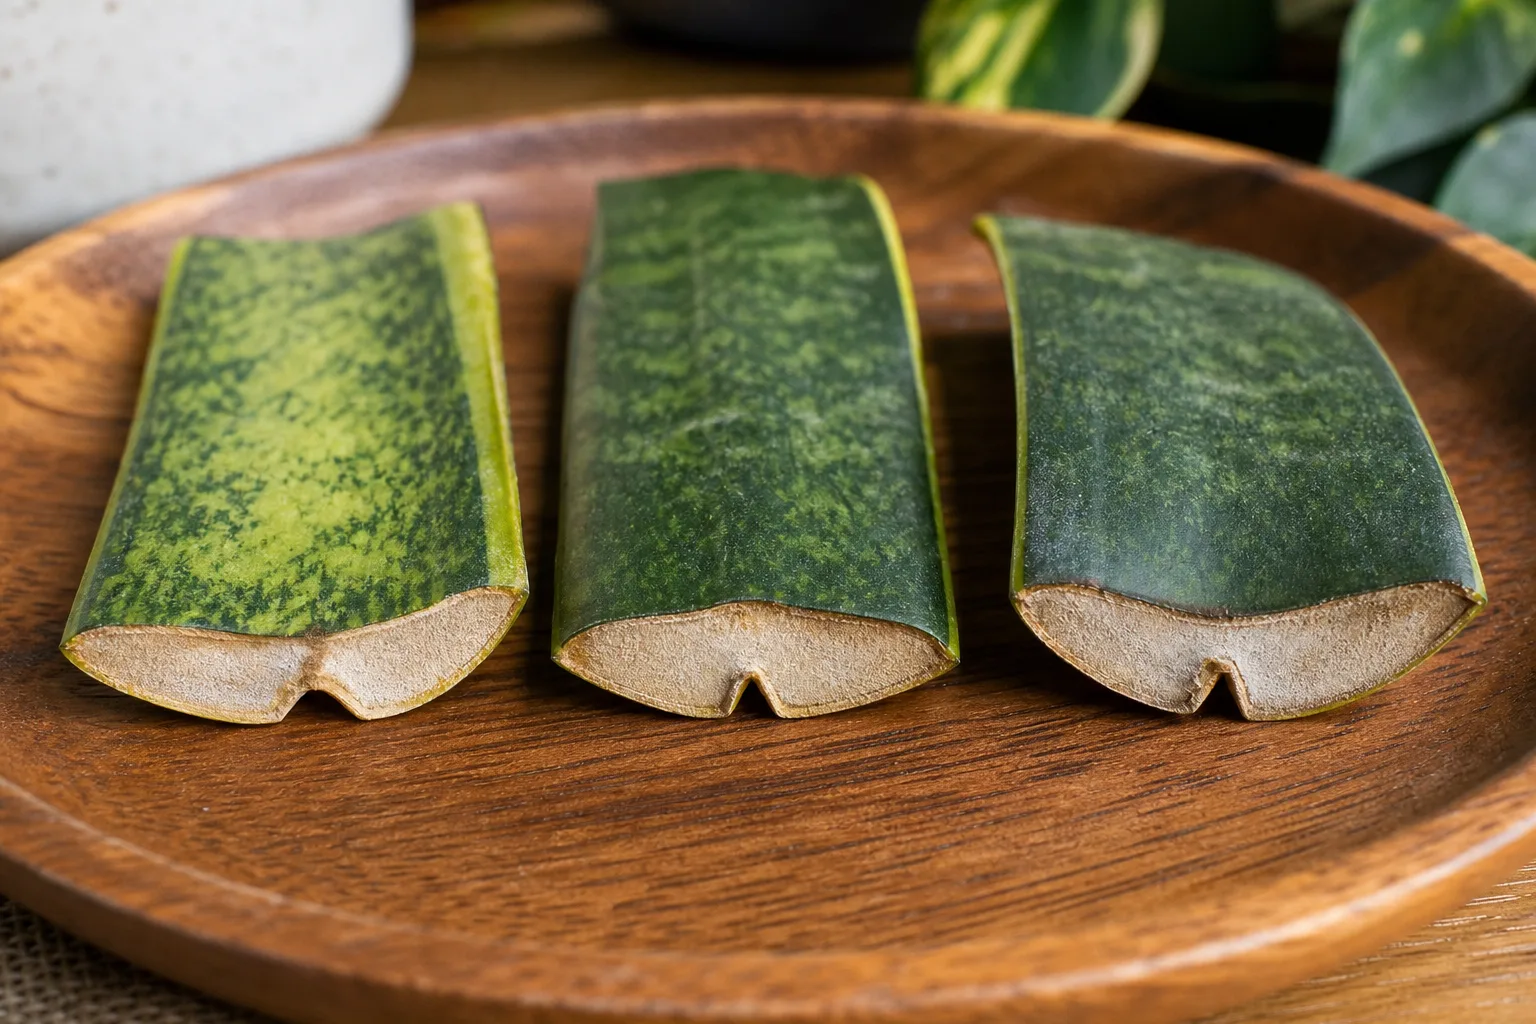
Cut a healthy, mature leaf at its base, then lay it flat on a clean surface. Slice it crosswise into sections about 2 to 4 inches long. Longer pieces give a deeper planting area and more stored tissue; shorter pieces make more trials but dry out faster and are easier to plant upside down.
Mark the bottom immediately. The end that was closest to the soil is the basal end, and it must go into the rooting medium. Use a pencil mark, a tiny notch on the basal edge, or arrange every piece in a row with the bottom facing the same direction. Do not rely on memory after several pieces are cut.
The RHS guide gives about 5 cm (2 inches) as a useful leaf-section size and advises keeping the original orientation. Some gardeners cut a shallow V or angle at the basal end to make polarity obvious; the notch is an orientation aid, not a magic rooting treatment.
This orientation detail also appears in the Iowa State Extension guidance on leaf-section cuttings, which is useful because a cutting can look perfectly healthy while doing nothing when its basal end is pointing up. Mark first, cut second, and you remove an avoidable source of failure.
Let the sections rest in a dry, shaded place for roughly one to two days. The cut surface should feel dry rather than wet and look sealed, not freshly glossy. This callus is a simple risk-control step: it gives the wound time to close before it meets moist mix. Do not leave the pieces for weeks, and do not use any section that becomes soft, translucent, or foul-smelling.
Pot and care for soil cuttings
Fill a shallow pot with a loose, fast-draining propagation mix. A commercial cactus mix amended with perlite or pumice works well; a 50:50 blend is a reasonable starting point if the bagged mix is peat-heavy and slow to dry. The goal is not a particular recipe but a medium that holds the cutting upright while leaving air around the base.
Moisten the mix before planting so you do not have to flood the cutting afterward. Insert the basal end about half an inch to an inch deep, depending on the section size, with enough tissue below the surface to anchor it. Keep most of the leaf above the mix and space pieces so air can move around them.
Place the pot in bright indirect light with warm, steady room temperatures. Strong filtered light supplies energy without heating the leaf surface like a hot pane of glass. A clear cover is optional; if you use one, leave ventilation and remove it if condensation remains heavy, because still, saturated air adds more rot risk than rooting benefit for a drought-adapted plant.
Water sparingly. The mix should be slightly damp after the initial planting, then allowed to dry substantially before the next small drink. Do not tug every few days; wait several weeks, then give one cutting a gentle lift. Resistance means roots are holding below the surface. A leaf can remain green while doing very little above ground, so a quiet pot is not automatically a failed pot.
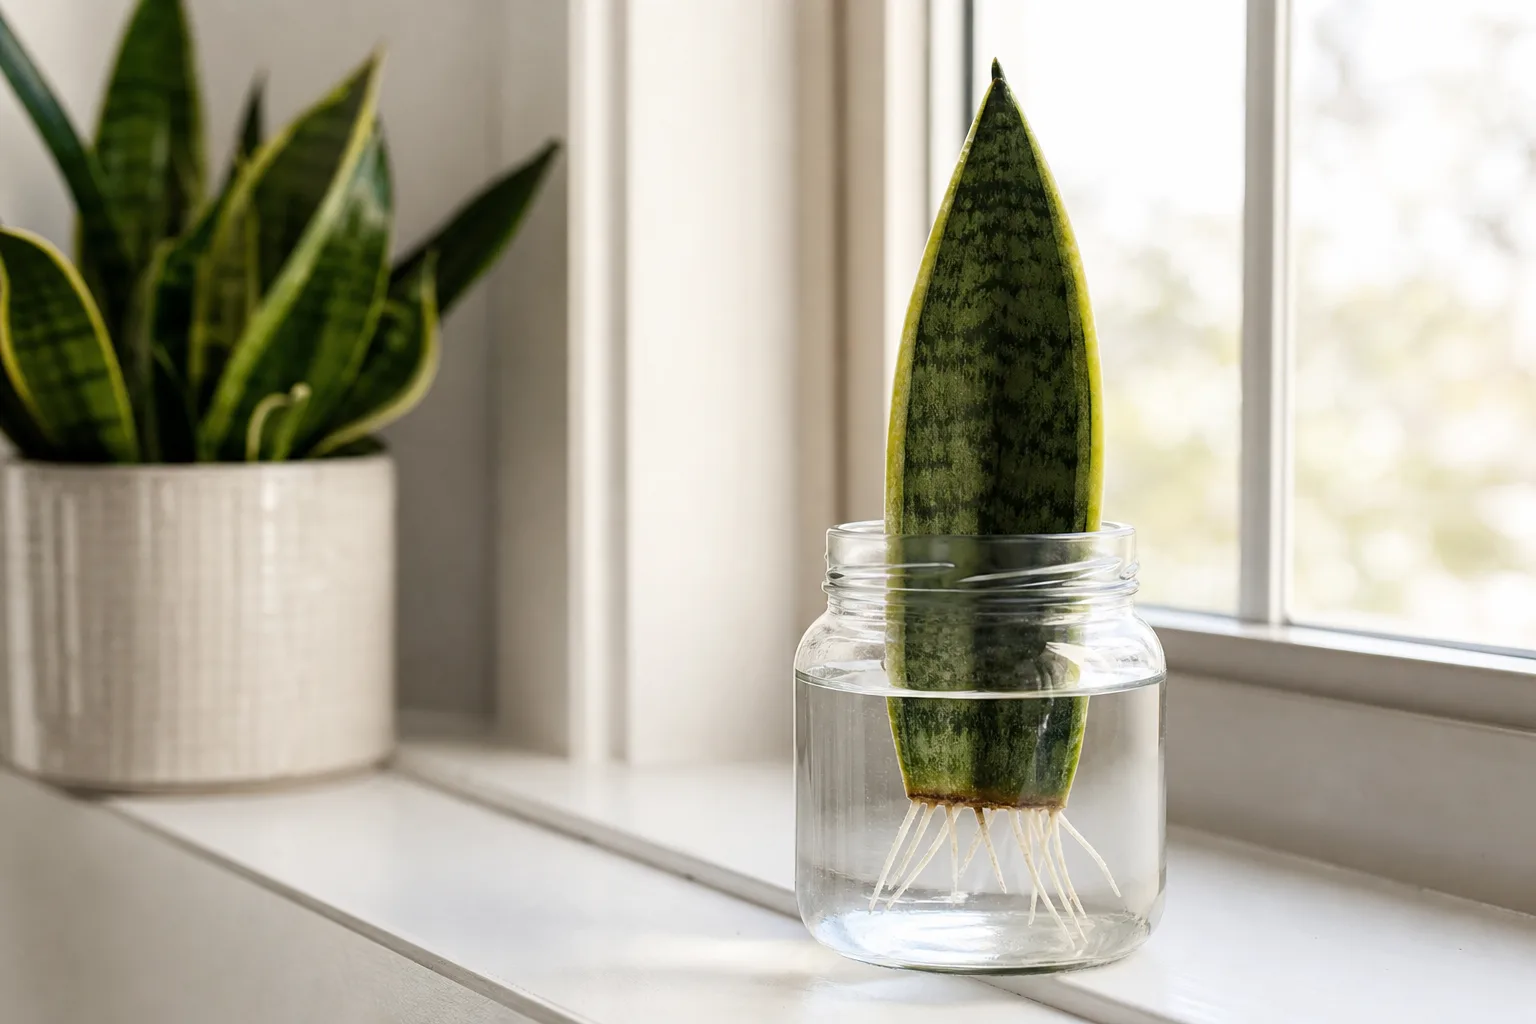
Method 3: Root leaf cuttings in water
Water propagation is the most satisfying method to watch because the roots are visible. It is not automatically faster, however, and it exposes the cut end to a continuously wet environment. Use it when monitoring progress will help you stay patient, not because a jar removes the need for clean cuts and careful timing.
Water propagation steps
Use the same healthy leaf sections and the same basal-end marking as for soil propagation. If you put a whole leaf in a jar, keep the original base down; if you use sections, only the lower end should touch the water.
- Let freshly cut sections callus for about one to two days in a dry place.
- Add a small amount of room-temperature water to a clean jar—just enough to cover the bottom of each cutting.
- Stand the pieces basal-end down. Keep most of the leaf above the water and prevent the pieces from pressing against the jar bottom if that causes them to sit in stagnant debris.
- Place the jar in bright indirect light, away from hot midday sun. Direct sun can heat a small volume of water and stress the leaf.
- Replace the water about once a week and rinse the jar. Change it sooner if it turns cloudy, smells sour, or develops floating debris.
- Check for firm white roots and a sound cutting base, not just a swollen or discolored cut edge.
The BHG propagation guide describes weekly water changes and roughly two months as a reasonable expectation for roots under suitable conditions. Treat that as a checkpoint, not a deadline: a cool room, low light, a thick cultivar, or a small section can take longer.
If the base turns translucent, brown, or slimy, take it out immediately. Cut back to firm tissue with a clean tool, let the new end callus, and either restart in fresh water or switch to a barely moist, airy mix. If the rot has moved through most of the section, discard it; repeatedly changing water will not reverse decayed tissue.
Move rooted cuttings to soil
Move a water-rooted cutting when it has several firm roots and a stable base, rather than waiting for a tangled mass. Roots around an inch long are a practical starting point, but the cutting’s condition matters more than one measurement. Very short roots may be damaged during planting; very long water roots can be more sensitive to the change into an airy medium.
Use a small pot with drainage and a loose succulent mix. Make a hole first, lower the roots without bending them sharply, and firm the medium around the base. Water once to settle the mix, allow it to drain, and then let the top portion dry before watering again. For the next few weeks, expect a pause while the plant replaces water-grown roots with roots adapted to soil; that pause is normal unless the base becomes soft.
Method 4: Grow from seed
Seed propagation is possible, but it is the least predictable home method. Snake plants do not reliably flower or set seed indoors, and a seed-grown plant may not reproduce a named cultivar’s exact leaf pattern. Use seed when you want to observe the full life cycle or explore variation, not when you need a matching copy for a gift or collection.
What to expect from seeds
Start with fresh, correctly identified seed. Soak it only if the seed supplier or a trusted species-specific guide recommends doing so; otherwise sow it in a sterile, loose seed-starting medium at the depth listed for that seed. Keep the container warm and evenly—not heavily—moist, with bright filtered light and gentle airflow.
The RHS notes that many seed-grown plants do not come true to the characteristics of the plant that produced them. That matters with snake plants: a seedling is a new genetic individual, while a division is a piece of the parent. Germination may take weeks, and the seedling can take many more months to become a recognizable houseplant. Label the sowing date and keep more than one seedling if you want a fair chance of success.
Once seedlings emerge, remove any cover gradually and keep the medium from swinging between saturated and bone-dry. Pot up only after the roots and leaves can hold the young plant together. Do not compare seedling progress with a divided pup; they start with entirely different reserves and structures.
Troubleshoot slow or failed propagation
Most propagation problems can be sorted by inspecting the base, the moisture level, the light, and the orientation. Do not respond to a slow cutting by watering more. Snake plants often look unchanged while roots form, and extra moisture can turn a viable waiting period into rot.
| What you see | Most likely issue | What to do next |
|---|---|---|
| Cutting is soft, translucent, or smells bad | Rot from wet tissue, dirty tools, or stagnant water | Cut back to firm tissue if enough remains, let it callus, and restart in a cleaner, airier setup. |
| Cutting is firm but has no roots after several weeks | Cool conditions, low light, or normal slow rooting | Move to bright indirect light and warmth, verify the basal end is down, and wait before disturbing it again. |
| The piece never changes and eventually dries | It may be upside down or the medium was too dry | Recheck polarity on the next piece; a fully desiccated section is unlikely to recover. |
| Water becomes cloudy repeatedly | Water is not being refreshed or the cut is decomposing | Rinse the jar, replace the water, and inspect the base before returning the cutting. |
| New pup is solid green from a striped leaf | Normal loss of cultivar pattern in a leaf cutting | Keep it if you like the green plant; use division for future plants when the original variegation matters. |
| Division leans or pulls loose | Too little root support or a pot that is too large | Stake it temporarily, reduce disturbance, and move it to a smaller draining pot if the mix stays wet. |
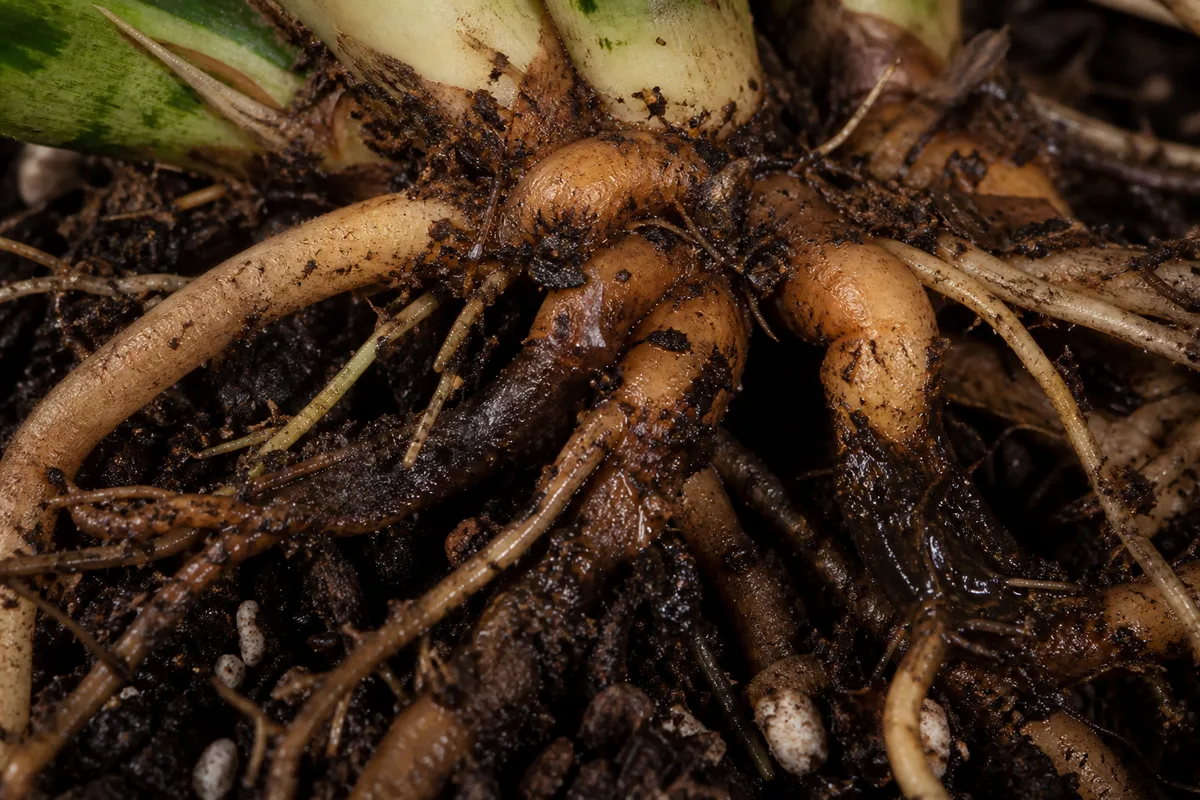
Root inspection is worth the interruption when the plant is declining. Healthy roots and rhizomes are firm; brown-black, hollow, slimy, or foul-smelling tissue should be removed with a clean blade. Repot salvageable sections into fresh, airy mix and keep the first watering restrained. The close-up above shows why a dark, wet root ball deserves inspection instead of another drink.
No roots after eight weeks is not an automatic failure, especially in a dim room or during cool weather. Check three things in order: is the basal end down, is the cutting still firm, and is the medium drying between small waterings? If all three answers are yes, improve light and warmth and give it more time. If the base is soft, restart from healthy tissue rather than waiting for a rotten piece to recover.
Aftercare until new growth
Rooting is not the finish line. A cutting with roots but no new shoot is still living from the leaf’s stored reserves, so it needs stable conditions while the rhizome and growth point develop. Keep it in bright indirect light, protect it from cold drafts and harsh afternoon sun, and rotate the pot occasionally so new growth does not lean toward one window.
Water by the condition of the mix, not by the age of the cutting. A newly potted division can receive a modest drink that reaches its roots, then should dry down. A leaf section in soil needs much less water than a leafy tropical cutting. Empty any saucer after watering, and never leave the pot standing in a reservoir unless you are using a deliberately designed system that keeps the root zone aerated.
Do not fertilize a leaf section simply because it has been in the pot for a month. Wait until you can see active new growth and the roots are holding the mix together. Then use a dilute, balanced houseplant or succulent fertilizer during active growth; feeding a rootless or waterlogged cutting adds salts without solving the reason it is stalled.
Keep a water-rooted cutting in its own small pot until it is stable. When new leaves or a pup emerge, it is beginning to function as a plant rather than a leaf with roots. At that point, transition gradually to the ordinary dry-down routine used for mature snake plants. The RHS propagation guidance also advises potting on once cuttings show strong active root and shoot growth and avoiding overwatering while young roots establish.
Conclusion
For the fastest, most dependable result, divide a rooted pup or mature clump. For more plants from one leaf, use soil cuttings; choose water when seeing the roots will help you monitor the process. Keep every section oriented basal-end down, let fresh cuts callus briefly, use an airy medium, and water less often than your instincts suggest.
If the parent is variegated, choose division when matching foliage is important. If a cutting is slow but firm, improve its light and warmth and wait; if it is soft or smelly, cut back to healthy tissue or start again. Snake plant propagation rewards a clean first cut, good drainage, and patience much more than complicated equipment.



