How to Repot a Cactus Safely Without Getting Pricked
Learn how to repot a cactus safely with the right wrap, pot, gritty soil, root check, and no-guesswork watering plan for recovery.
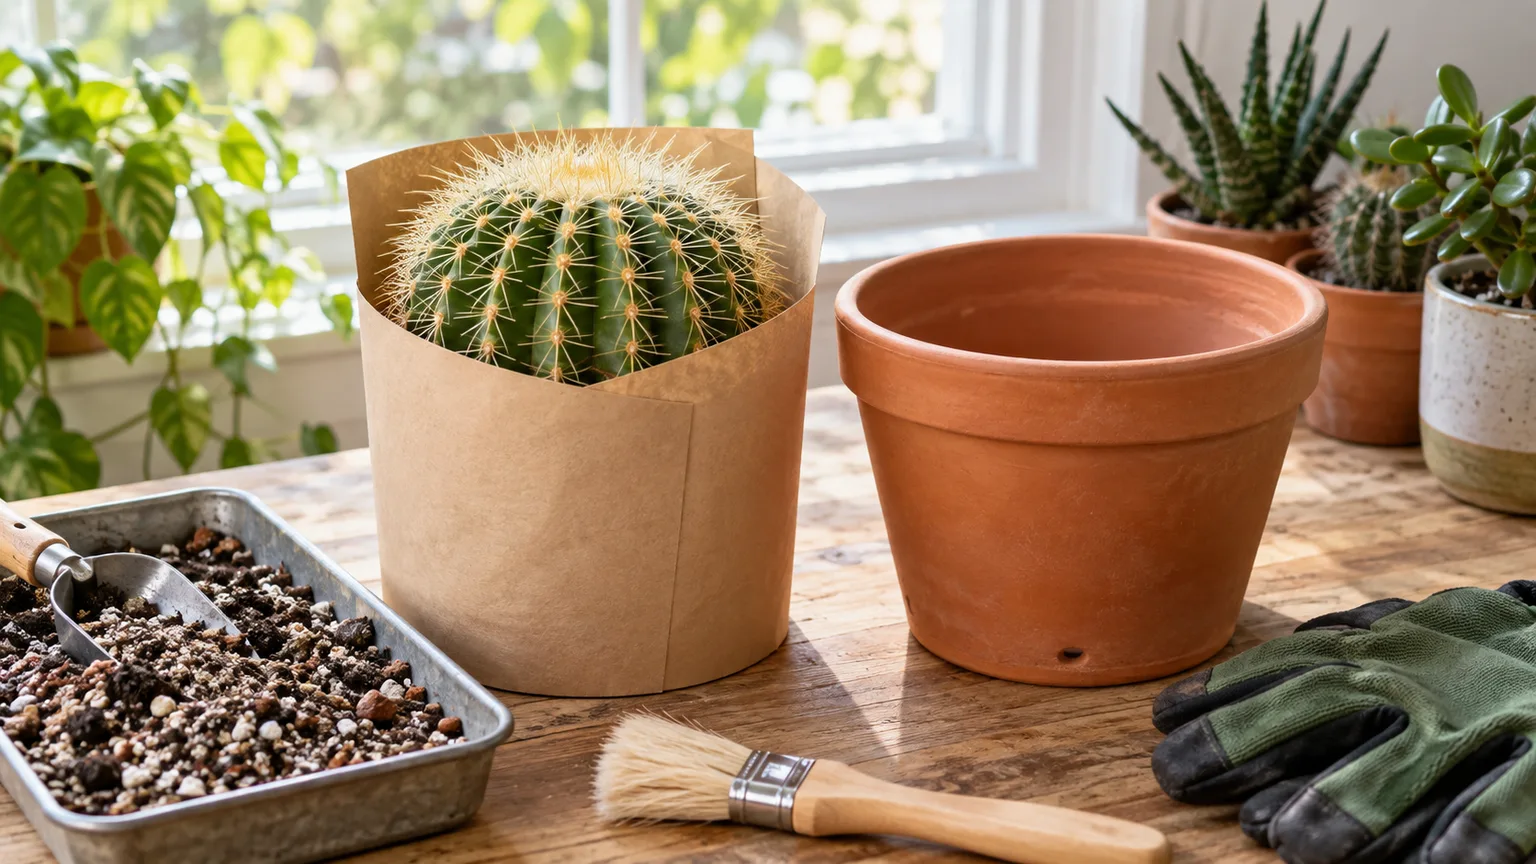
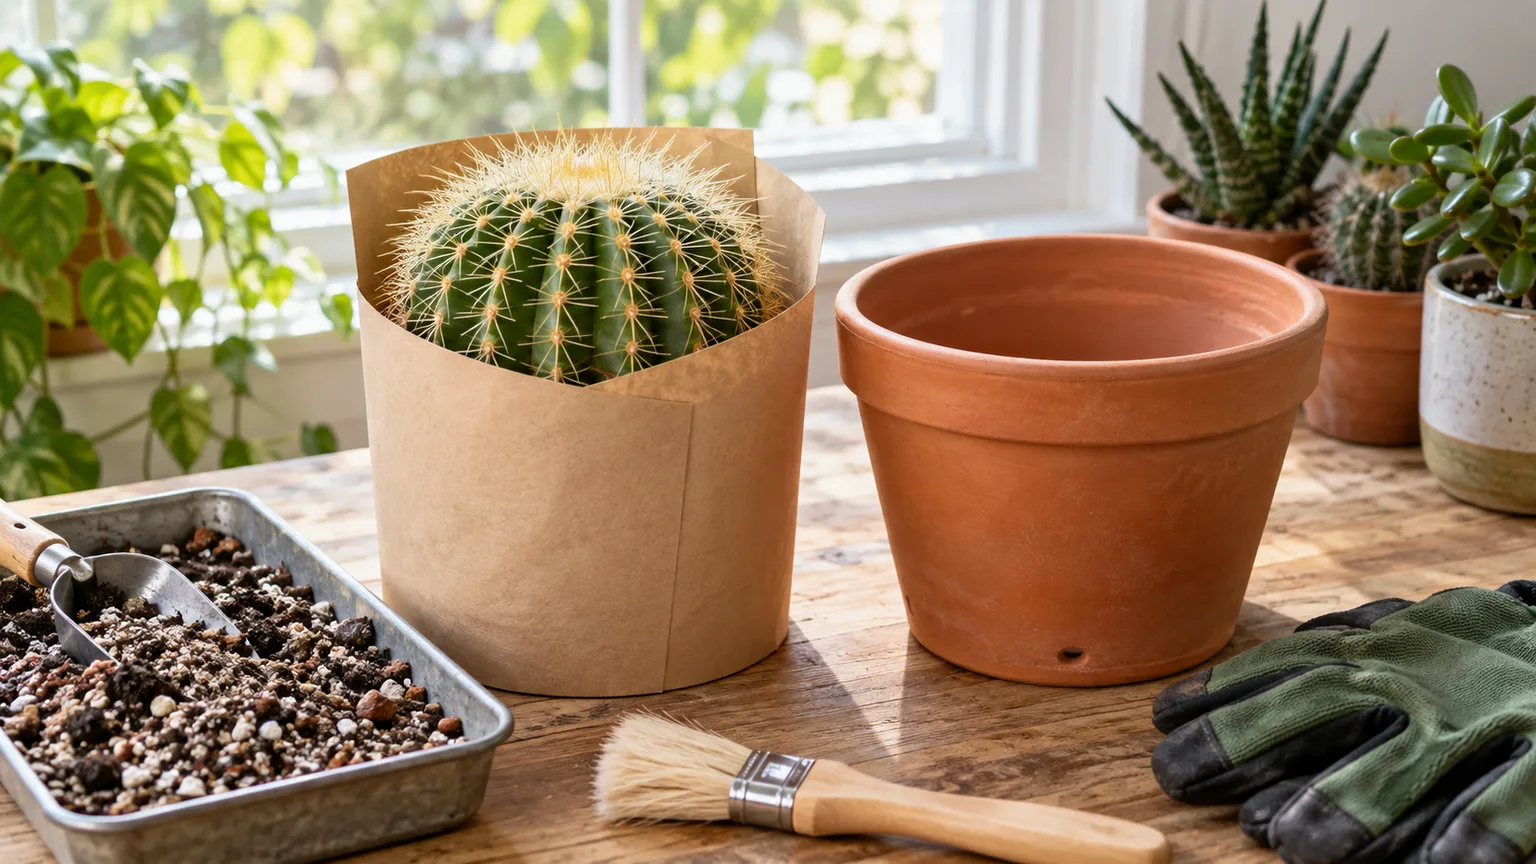
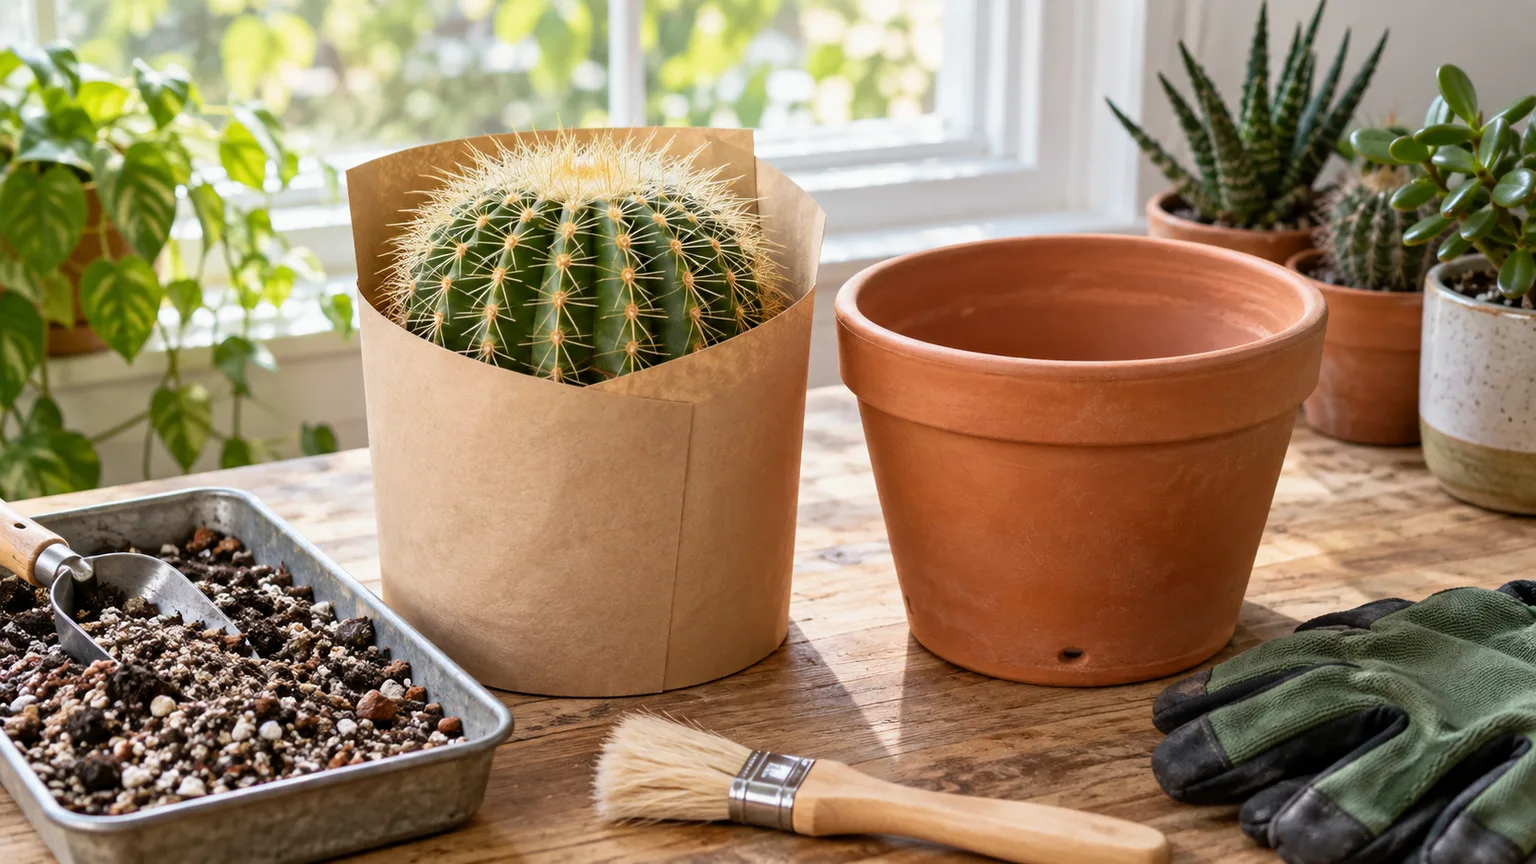
Repotting a cactus is mostly a problem of leverage, not bravery. Keep the spines away from your hands with a folded newspaper collar or thick towel, keep the old soil dry, and let the pot—not your fingers—do the work of releasing the root ball.
The best time is usually the beginning of the plant’s active growing season, but a calendar is only a starting point. A cactus that is leaning, trapped in a dense wet mix, or showing roots through the drainage hole needs a different response from a healthy plant that simply looks cute in a new pot. This guide covers both the safe technique and the decisions that keep the plant from trading spine damage for root damage.
Know whether your cactus actually needs repotting
Cacti prefer a snug container, so repotting is not an annual decorating ritual. A new pot is justified when roots are circling densely, escaping the drainage hole, or lifting the plant; when water runs straight through a severely root-bound ball; when the mix has collapsed into a slow-draining mass; or when the plant is leaning because its current base no longer anchors it.
Penn State Extension recommends removing a plant for a root inspection when the mix dries unusually fast, roots emerge from drainage holes, or growth has slowed despite suitable care. That inspection is more useful than counting years. A slow-growing Mammillaria may remain happy for several seasons, while a fast-growing or top-heavy cactus may need a change sooner. See Penn State Extension’s repotting guidance for the same root-bound checks used across container plants.
Check roots, soil behavior, and stability
Start with the symptoms you can verify. Does the pot tip whenever the cactus gets bumped? Does the root ball fill the container so completely that almost no mix is visible around the sides? Does water remain on the surface or sit in the saucer long after watering? Those signs point to a container or mix problem, but they do not all mean “buy a much larger pot.”
Sometimes the right fix is a same-size repot: remove tired or compacted mix, trim only damaged roots if necessary, clean the container, and return the plant with fresh medium. This is especially useful when the cactus is already the size you want. A larger pot adds wet soil volume and can make the next mistake—watering on a schedule—more dangerous.
Know when to wait
Wait if the cactus is flowering, has just arrived home, is sun-stressed, or is already declining from cold, pests, or a recent move. Moving a healthy plant during bloom is not automatically fatal, but it is an avoidable disturbance when there is no urgent drainage problem. Let flowers finish, stabilize the plant, and prepare the supplies before you begin.
Do not wait for a convenient season if the soil stays wet, the stem is soft at the base, or the plant smells sour when lifted. Those are possible root or stem-rot situations. In that case, the job is rescue repotting: remove the wet medium, inspect the roots and base, cut away soft tissue with a clean blade, let wounds dry, and use a fresh dry mix. The aftercare rule for a wounded plant is stricter than for an ordinary soil refresh.
Choose the right timing for your cactus type
“Cactus” covers plants from very different habitats. The timing and mix that suit a desert barrel cactus are not automatically right for a holiday cactus with thin, leafy segments. Clemson Cooperative Extension separates arid-climate cacti from rain-forest cacti for exactly this reason; its Indoor Cacti factsheet notes that forest types need more organic matter and more regular moisture than desert types.
Desert cacti
For barrel, columnar, Mammillaria, Echinopsis, and many Opuntia, aim for late winter through spring as new growth begins. Clemson identifies April as a useful repotting window for indoor arid cacti, while local light, temperature, and indoor growing conditions may move that window earlier or later.
Repot when the old mix is dry. Dry soil is lighter, slips from the pot more cleanly, and is less likely to smear around or tear fine roots. A plant that is actively growing can replace small root losses faster, but do not water simply to make the plant easier to handle; plan the job so the soil is already dry.
Opuntia and other prickly pears need extra caution because their tiny barbed glochids can detach and hide in fabric or skin. A thick wrap is not optional for these plants, and keep the work area away from children, pets, food, and soft furniture until every loose spine and glochid has been contained.
Holiday and forest cacti
Christmas, Thanksgiving, Easter, orchid, and other forest cacti often have segmented stems and more organic, moisture-holding roots. Repot after flowering rather than while buds are forming or flowers are open. Epic Gardening’s Christmas cactus repotting guide also emphasizes that a holiday cactus is not a desert cactus in its watering and habitat preferences.
Use a lighter, well-draining houseplant or succulent mix with more organic material than you would choose for a gritty barrel-cactus blend. Handle the plant by its pot or by a loose towel around the container; squeezing a chain of segments can snap them off. If a segment does break, set it aside rather than trying to force the broken end back into the soil.
Build a safety kit before you touch the pot
Set up the entire job first. You want both hands available when the plant is wrapped, and you do not want to discover that the new pot, soil, or brush is across the room while a cactus is balanced over a table.
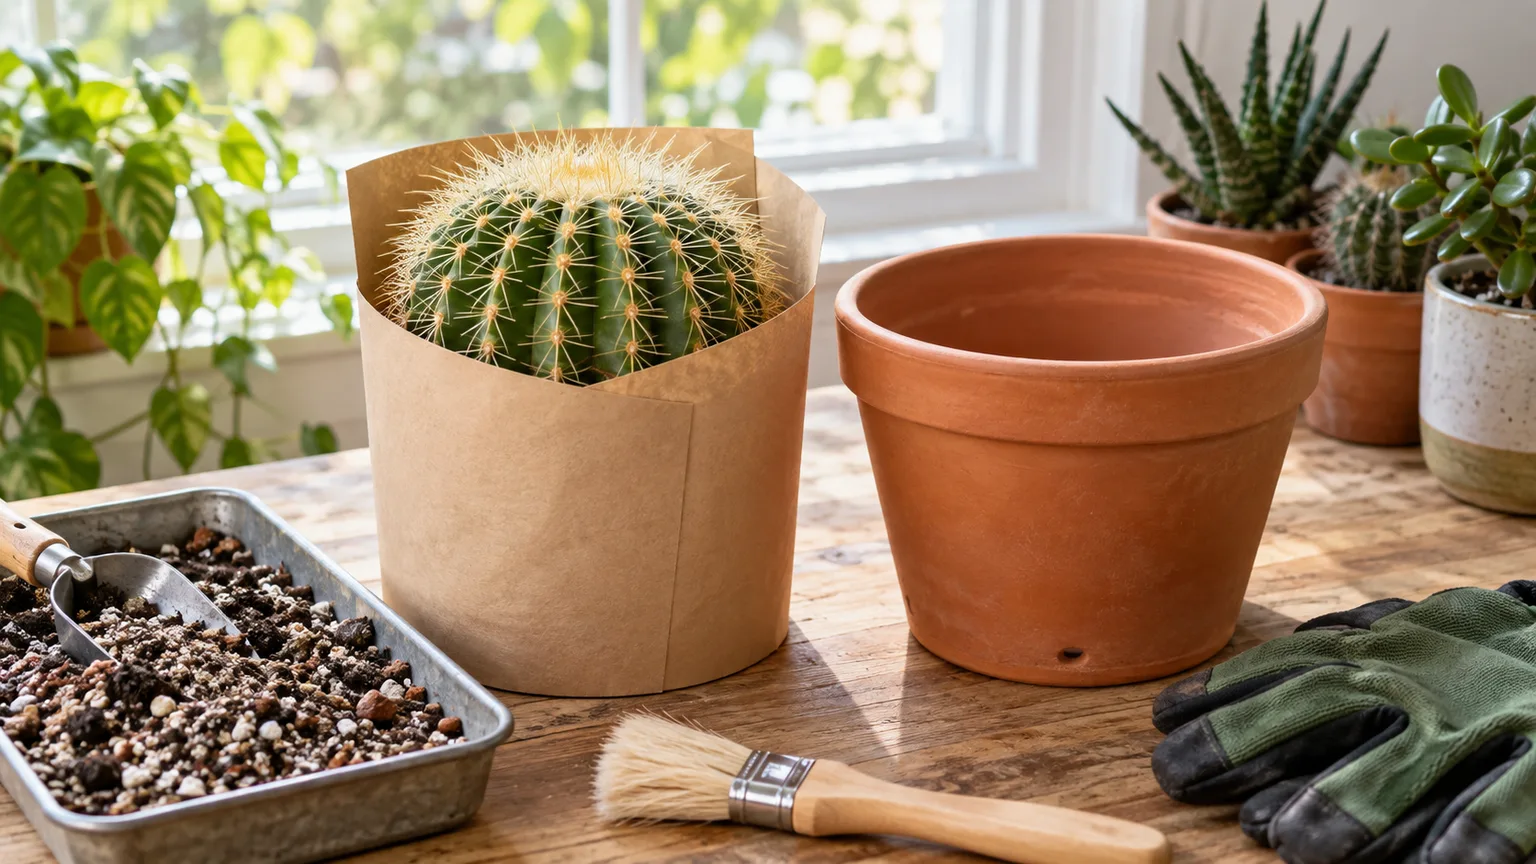
Gather:
- thick leather or heavy work gloves, especially for large spines;
- a folded newspaper strip, old beach towel, or thick tea towel;
- a new pot with a real drainage hole and a saucer;
- dry cactus or succulent mix plus pumice, perlite, or coarse mineral grit;
- a small trowel, blunt chopstick, or wooden plant label for loosening the pot wall;
- a soft paintbrush for removing loose soil from the body;
- clean pruning snips or a knife only if damaged roots need to be removed;
- a sheet, tray, or cardboard work surface to contain spilled soil and spines.
Fine Gardening’s cactus repotting method uses an old towel and a tilted pot to keep the gardener’s hands away from the needles. That simple idea is more important than the brand or shape of any tool: support the plant broadly and move the container, rather than pinching the cactus body.
Wrap the plant instead of gripping the spines
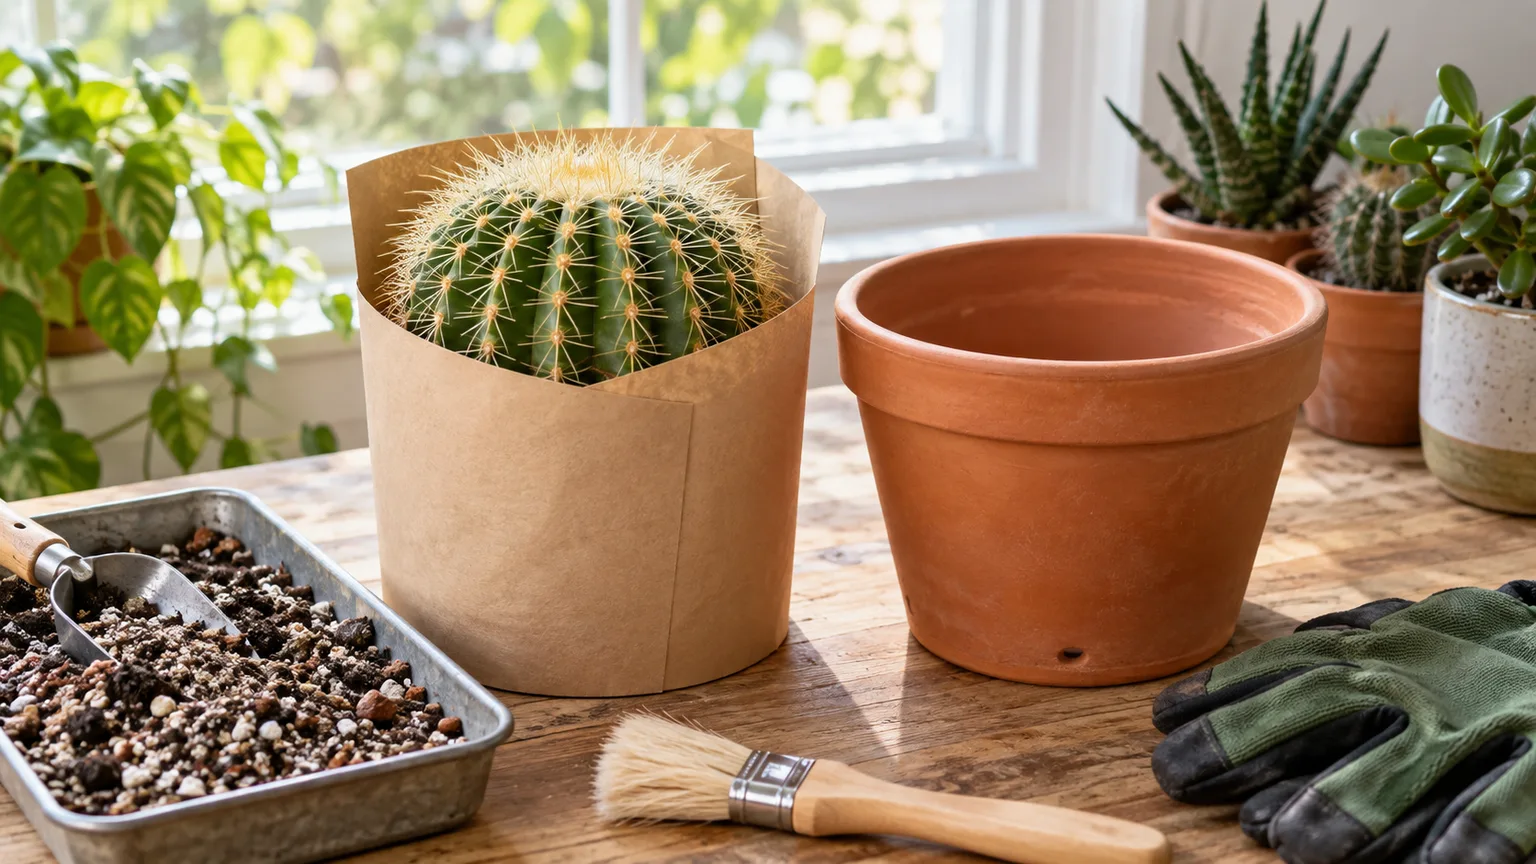
For a short, barrel-shaped cactus, fold newspaper into a wide band several layers thick and wrap it around the middle. Overlap the ends so you can hold the paper without pressing directly on the plant. For a tall cactus, make a long loop or sling around the body and have a second person steady the pot if it is heavy.
A towel gives more padding but can snag on glochids. Newspaper is easier to discard after handling an Opuntia. Gloves help, but ordinary thin gardening gloves are not a guarantee against fine spines; treat gloves as a second layer, not as permission to grab the plant bare-handed.
Use long-handled tongs only when they can support a sturdy plant without squeezing ribs, pads, or the growing tip. Never lift a tall cactus by its crown, and never pull hard on the stem to free a stuck root ball. If the container is cracked, glued to the soil, or too heavy to control, ask another adult to help or sacrifice the old pot rather than wrestling the plant.
Choose a pot and mix that dry at the right speed
The new container controls the margin for error after repotting. A fast-draining mix in a giant pot can still stay wet around a small root ball, while a small pot with no drainage hole turns every watering into a gamble.
Pot size, shape, and material
Choose a pot only one size up in most cases—roughly 1 to 2 inches wider than the old pot, or no more than about 2 inches larger according to University of Arkansas Extension’s repotting guidance. The root ball should have room for fresh mix around it, not a moat of unused soil. If the plant is already the right size, keep the same diameter and refresh the medium.
Match the shape to the plant. A shallow, wide pot suits a clumping cactus with a broad root system, while a tall columnar cactus needs enough depth for its roots and a heavy, stable base. Do not bury a cactus deeper just because the new pot is deep; the stem should sit at its previous soil line unless you are following a specific rescue plan for a bare-root or damaged plant.
Unglazed terracotta dries faster and adds weight, which is helpful for a top-heavy cactus. Plastic is lighter, durable, and perfectly workable, but it holds moisture longer, so the mix and watering interval need to compensate. Penn State Extension describes terracotta as porous and notes that plants in it may need water more often than plants in plastic. Whatever the material, drainage is non-negotiable; a decorative cachepot should hold a draining nursery pot rather than replace it.
Clean a reused pot before filling it. Scrub away old salts and soil, then sanitize it with a one-part bleach to nine-parts-water solution as recommended by extension repotting guidance. Rinse and let it dry completely. Do not put a thick layer of gravel in the bottom as a substitute for a drainage hole; use a proper pot and a mix that is airy throughout.
A gritty mix that still anchors roots
Buy a reputable cactus mix and test a handful before using it. When squeezed, it should not form a dense mud ball; when watered, it should absorb enough moisture to wet the roots and then drain freely. If it is fine and peat-heavy, amend it with pumice, perlite, lava rock, or coarse horticultural grit. Avoid garden soil indoors and avoid very fine sand that fills air spaces.
For a practical starting blend for many desert cacti, combine two parts commercial cactus mix with one part pumice or perlite and one part coarse mineral grit. This is a starting point, not a law: a cool, dim room may need a more mineral mix, while a very dry, bright home may need slightly more organic material to keep roots from desiccating too quickly. Forest cacti can use a more organic, chunky mix with excellent drainage.
Keep the old root ball dry and the new mix dry or only barely damp. Slightly moistening a dusty mix can reduce airborne particles, but wet soil removes the safety advantage of a dry repot and makes it easier to compact the root zone. The goal is an open mix that settles around roots without being packed tight.
How to repot a cactus step by step
Work slowly enough to stop if the plant shifts. The safest repot is controlled and boring: every movement has a place for the cactus to land, and the root ball is never suspended by a thin stem.
Prepare the workspace and new pot
Cover the work surface and place the new pot beside the old one. Put a small amount of mix in the new pot so the top of the old root ball will end slightly below the rim, leaving room for watering. A small piece of screen over a large drainage hole can hold mix in while still allowing water out; do not seal the hole.
Before opening the old pot, compare its soil line with the new one. This prevents the common mistake of placing the cactus too low and covering the lower stem, or placing it so high that the roots cannot be anchored. Keep the soft brush, waste container, and gloves within reach.
Unpot without pulling
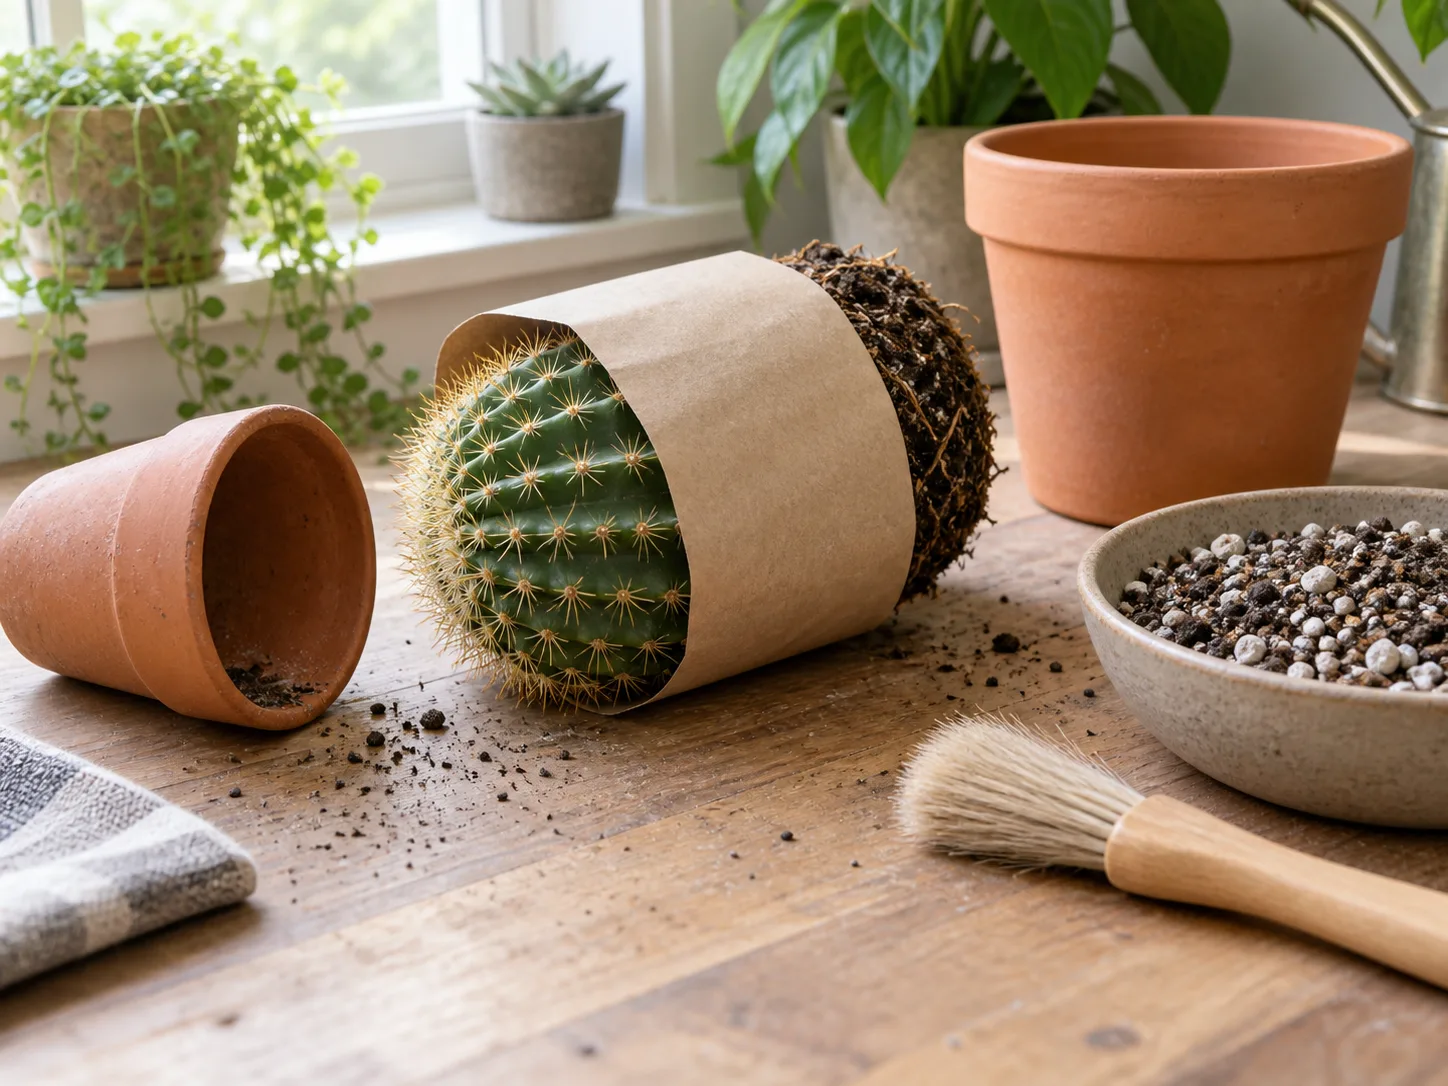
Put on gloves, wrap the cactus, and hold the wrap with one hand. Tilt the pot on its side over the covered surface. Tap the base and gently massage flexible plastic walls; for a rigid pot, slide a blunt tool around the inside edge to loosen the soil from the wall.
Let gravity work. Keep the wrapped plant supported while the container slides away, and do not yank the body upward. If the cactus will not release, stop and loosen more of the pot edge. With a valuable plant in a damaged clay pot, breaking the old pot may be safer than twisting the stem.
Inspect and clean the roots
Once free, remove loose old soil with a gentle shake or soft brush. You do not need to scrape every crumb from healthy roots. The purpose of cleaning is to see the root condition and remove material that is clearly compacted, sour, pest-ridden, or staying wet—not to leave every fine root polished bare.
Healthy cactus roots are generally firm and light tan to cream, though color varies. Root rot tends to be dark, soft, collapsing, or foul-smelling. Do not mistake a dry, thin root for a rotten one solely because it is brown; feel and texture matter more than color alone.
If roots are healthy, tease only densely circling sections with your fingers or the tip of a clean fork. If roots are mushy, trim back to firm tissue with a clean sharp blade, wiping the blade between cuts. Let the plant sit in a dry, shaded place until the cut surfaces are dry to the touch—often at least a day, and longer for substantial cuts—before potting into fresh dry mix. The Desert Botanical Garden’s cactus care guidance likewise advises removing rotted tissue, allowing it to dry, and then re-rooting or transplanting.
Set the depth and fill the pot
Place the cactus in the center of the new pot while it is still supported by the wrap. Adjust the bottom mix until the original soil line sits at the same height as before, just below the rim. Keep the stem out of the soil; buried tissue that was adapted to air can stay damp and decay.
Hold the wrapped plant steady while you add mix around the roots in small handfuls. Tap the pot lightly to settle it, then use a wooden stick to guide mix into large air pockets without stabbing the roots. Firm the surface only enough to anchor the plant. If it leans, remove it and adjust the base rather than packing harder on one side.
Leave a small watering space below the rim. A thin top dressing of coarse grit can keep loose mix from splashing onto the body, but it should not bury the stem or create a sealed crust. Remove the wrap only after the cactus is stable, then use the soft brush to clear soil from the spines.
Aftercare: light, water, and fertilizer
Place the repotted cactus in bright light that is gentler than its most intense usual exposure for several days. A plant moved from a dim room to a hot sunny window at the same time it loses roots can scorch; reintroduce stronger direct sun gradually. Keep it warm and out of drafts while new roots re-establish.
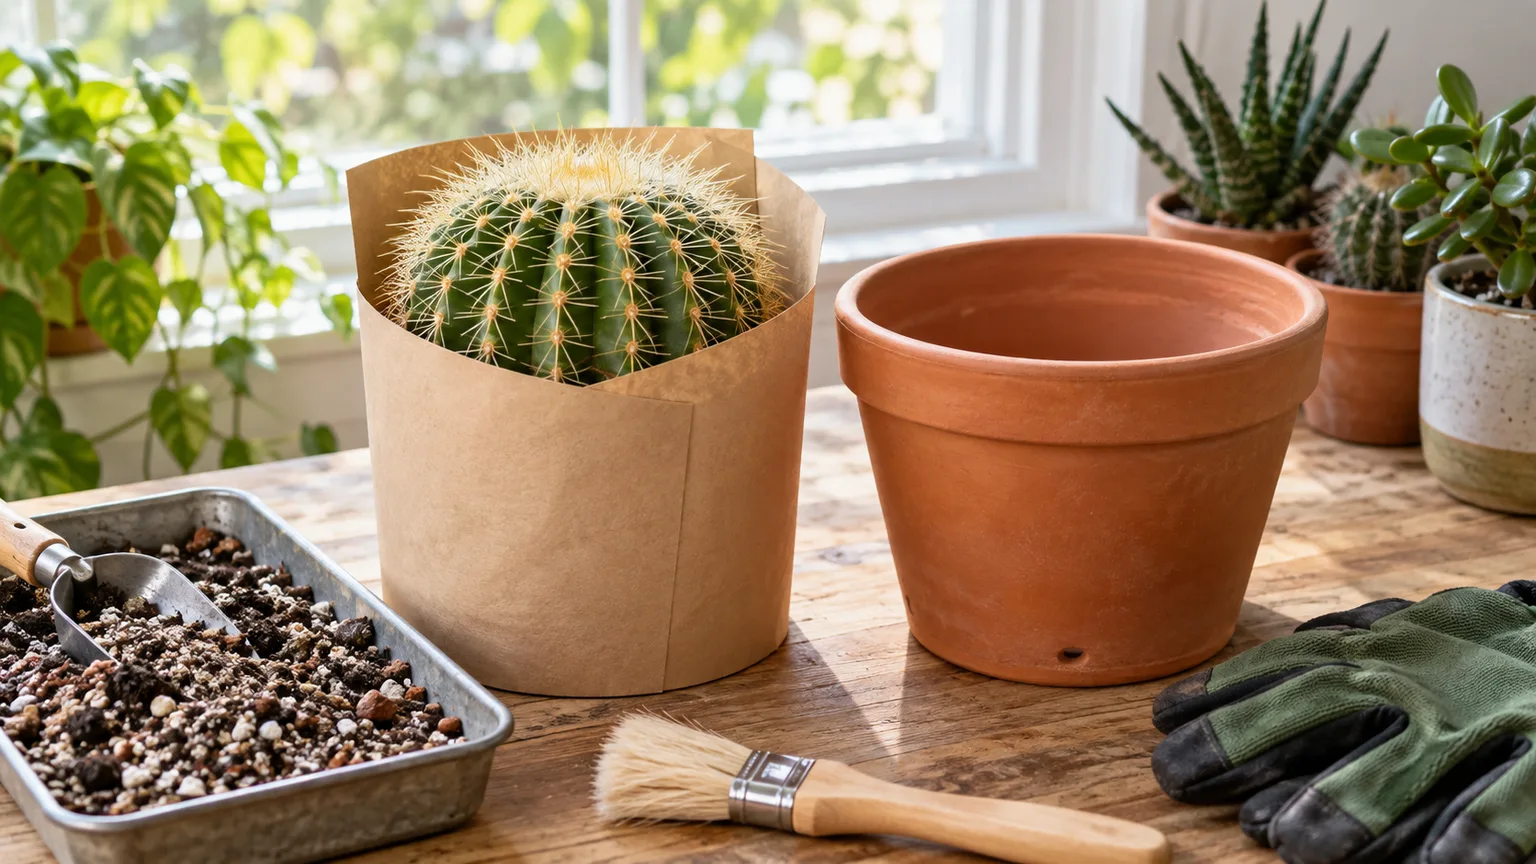
For an ordinary dry-root repot with no cuts, wait about five to seven days before watering. If you removed rotten roots or cut the stem, wait until every wound is dry and callused; that may mean a week or more. This pause is not a punishment or a way to “shock” the plant into growth. It gives small breaks and cut surfaces time to dry before water reaches them.
When it is time, water the mix thoroughly until water exits the drainage hole, then empty the saucer or cachepot. Do not add a small sip every few days; shallow watering can leave the center of the root ball unevenly wet. After that first watering, wait until the mix is dry throughout before watering again. The Desert Botanical Garden notes that cacti do need water during active growth, but the soil should dry between waterings and the plant should never stand in water.
Forest cacti are the exception to the desert schedule, not to the drainage rule. They may need more frequent watering and a more organic mix, but they still should not sit in a saturated cachepot. Watch the mix and the plant rather than copying a weekly calendar from a different room or species.
Hold fertilizer for roughly three to four weeks after repotting. Fresh mix may already contain nutrients, and new roots are more vulnerable to concentrated salts than an established root system. Once growth resumes, use a cactus-appropriate fertilizer at the label rate or weaker, and skip feeding while a desert cactus is dormant.
What to do if you find root rot or get a spine
Root rot changes the job from routine maintenance to triage. Remove all wet, sour mix you can, inspect the roots and lower stem, and cut only tissue that is genuinely soft or collapsing. If the base is still firm, let the cleaned plant dry in bright shade and repot it in a clean pot with fresh dry medium; do not water immediately just because the plant looks dehydrated.
If rot has moved into the main stem and the tissue continues to soften, a simple repot may not save the plant. Separate a firm, healthy cutting above the damaged area only when you know the species and can handle it safely, then let the cut end callus before attempting propagation. Severe cases, valuable specimens, or plants with an unstable heavy body are good reasons to ask a local cactus nursery or extension office for help.
If you are pricked, do not rub the area or crush the spine deeper. Use clean tweezers for a clearly visible loose spine, and take extra care with Opuntia glochids, which can be tiny and barbed. Wash the area afterward and seek medical care for an eye injury, a deep puncture, spreading redness, worsening pain, or a fragment you cannot remove safely.
Conclusion
The safest way to repot a cactus is to make the plant easy to control before you make it easy to move. Let the old soil dry, choose a pot only modestly larger with a drainage hole, wrap the body in folded newspaper or a thick towel, and slide the container away instead of pulling on the stem.
Then inspect rather than attack the roots. Healthy roots need gentle handling; mushy roots need clean cuts and a longer dry period. Match the mix and watering plan to the cactus type, keep new roots out of standing water, and give the plant a quieter light period while it settles. With that sequence, repotting becomes a calm maintenance job—and your hands stay out of the pincushion.



