How to Grow and Care for Japanese Camellia Plants Outdoors
Japanese camellia care starts with planting at the right depth, watering steadily during bud formation, and pruning after bloom. Get frost and disease advice.
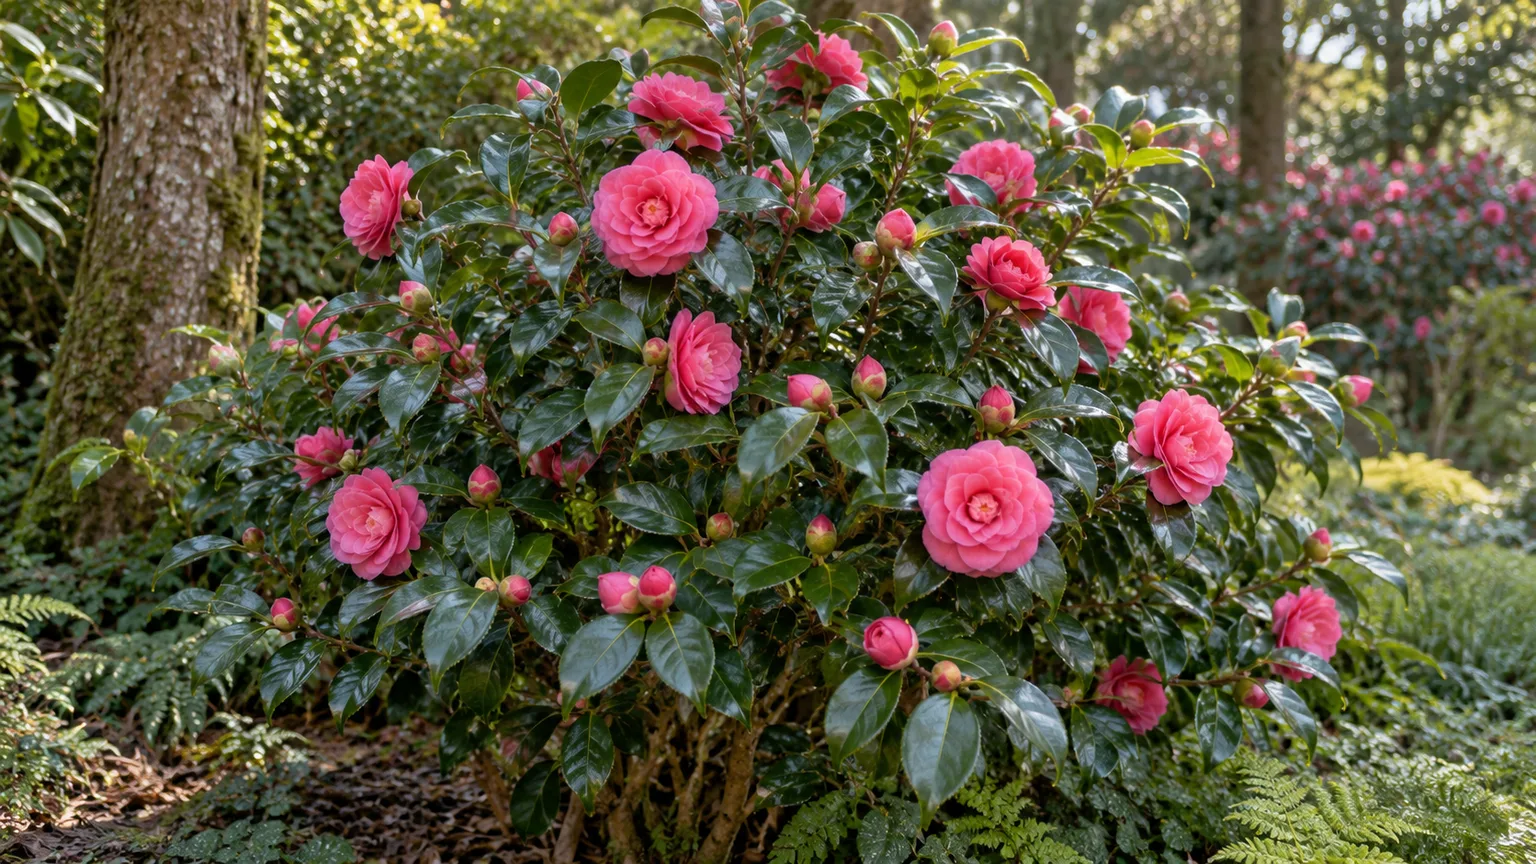
Japanese camellia (Camellia japonica) is an evergreen shrub valued for glossy foliage and large flowers that can open from fall into spring. It is often described as fussy, but most recurring problems trace back to a short list: a hot or windy site, alkaline or waterlogged soil, uneven moisture while flower buds develop, or pruning at the wrong time. Choosing the site well and leaving the shallow root zone undisturbed prevent more trouble than a complicated fertilizer routine.
Give the shrub bright filtered light, acidic soil that drains freely, and steady moisture without saturation. Plant it at the same depth it grew in its nursery pot, protect it from drying winter winds, and prune only after its flowers finish. The exact bloom window and cold tolerance depend on the cultivar and local conditions, so buy by the plant label rather than assuming every Japanese camellia behaves alike.
Japanese camellia at a glance
| Feature | What to expect |
|---|---|
| Botanical name | Camellia japonica |
| Plant type | Broadleaf evergreen shrub or small tree |
| Typical garden size | Often 6–12 feet; mature size varies by cultivar and climate |
| Light | Partial shade or dappled light; shelter from harsh afternoon sun and wind |
| Soil | Moist, organic, well-drained, acidic; about pH 5.5–6.5 |
| Bloom | Usually late fall through early spring; cultivar and region shift timing |
| Hardiness | Commonly grown in USDA Zones 7–9; select and site cultivars for local winter conditions |
| Growth | Slow to establish; long-lived once settled |
Those ranges describe the species broadly, not a guarantee for every named plant. Oregon State University describes Japanese camellia as a substantial evergreen shrub that can reach roughly 10 to 15 feet, while compact selections stay smaller; NC State Extension notes slow establishment and cultivar-dependent flowers. Check the nursery’s mature size and local hardiness rating before placing a specimen near a path, window, or foundation. Oregon State University’s plant profile and NC State Extension’s Japanese camellia profile are useful references for species-level characteristics.
Japanese camellia is not the tea plant. Tea comes from Camellia sinensis, a different species in the same genus; C. japonica is grown mainly as an ornamental shrub. That distinction matters when you shop: care pages that discuss “camellias” may blend advice for C. sasanqua, C. sinensis, hybrids, and Japanese camellia, even though their sun tolerance, bloom time, and size can differ.
Choose a site before you plant
Think about what the camellia will be doing in the garden as well as what it needs. Its evergreen leaves can anchor a woodland border or screened corner, and winter flowers make it especially useful near a window or path where you can see them in cold weather. Leave room for the mature width and access to both sides if you expect to prune; a shrub wedged against a wall or squeezed beneath thirsty tree roots is harder to maintain and may receive too little water.
Japanese camellia has relatively shallow feeder roots. They compete poorly with dense surface roots from large trees, and deep cultivation beneath an established shrub can damage the root system. Choose a location that is sheltered from drying winter winds and where rainwater will not collect at the base. NC State Extension recommends shade to part shade, well-drained organic soil, and protection from drying winds; Oregon State likewise advises mulching the roots because they are not especially deep.
Light and shelter
Filtered light under a high, open tree canopy is a dependable starting point. Morning sun with afternoon shade can also work, especially in a mild or cool region. Young plants with less foliage can scorch more easily than established shrubs, while dense shade may keep the plant alive but reduce flowers. In a hot-summer climate, prioritize protection from the strongest afternoon sun; in a cooler climate, a little more morning light can help the plant flower without exposing it to a harsh, drying position.
Wind is easy to overlook because it does not leave the same obvious mark as sunburn. Cold, dry gusts pull moisture from evergreen leaves while frozen or dry soil limits replacement water; exposed buds and open flowers can also brown. A fence, hedge, or building can soften the wind, but avoid a cramped pocket where air and drainage are poor. The practical test is whether the spot offers dappled light and some protection without staying wet after rain.
Soil and drainage
Aim for a soil pH of about 5.5 to 6.5. Camellia roots take up nutrients best in this slightly acidic range; in alkaline ground, a plant can show iron chlorosis even when the soil contains iron. NC State Extension gives the same pH range and flags yellow leaves as a possible sign that soil is not acidic enough. Test before applying sulfur, iron chelate, or an acidifying fertilizer: a soil test tells you whether pH is actually the issue and avoids adding amendments that the garden does not need.
Drainage is as important as acidity. The soil should stay evenly moist but should not remain saturated around the root ball. If a planting spot holds water after a soaking rain, choose another spot, improve the broad bed, or build a raised planting area rather than digging a deep pocket and filling it with a different mix. A sharp change between loose amended soil and dense surrounding clay can create a bathtub effect. Container culture can solve a poor-soil problem, but a pot dries faster and needs more frequent checks.
Plant Japanese camellia at the right depth
Spring is a safe planting window in colder regions because roots have time to establish before winter. In a mild climate, fall can also work while the soil is warm and the weather is not extreme. Avoid planting into frozen ground, saturated soil, or the hottest part of summer. Homes & Gardens favors fall planting where conditions allow, while Gardener’s Path recommends spring; that difference reflects regional conditions rather than a universal rule. Choose the mild season that gives your plant weeks of moderate weather and follow local nursery or extension advice.
Before digging, water the nursery pot so the root ball is moist and easier to handle. Dig a broad hole—NC State recommends roughly three to four times the root ball’s width—but no deeper than the root ball. Loosen only roots that are circling tightly around the outside. Set the shrub so the top of the root ball meets the surrounding soil line; do not bury the stem flare to make the plant look more secure. Japanese camellia needs air around its upper roots, and settling soil can cover a plant that was initially set too deep.
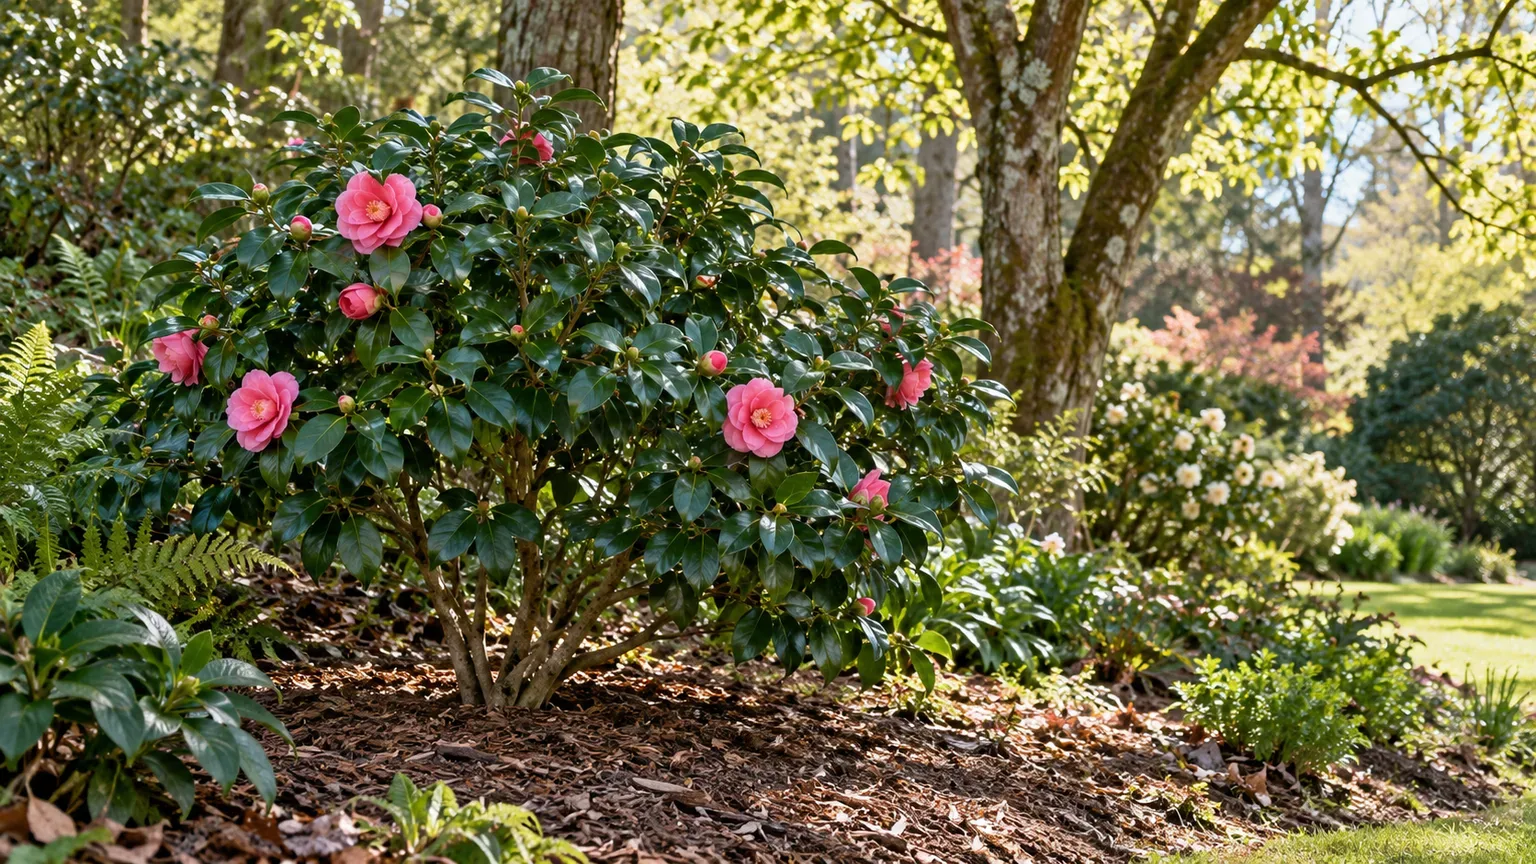
Backfill with the soil you removed unless a soil test or regional recommendation supports a specific amendment. Firm it gently, water slowly to settle soil around the roots, then add a shallow mulch layer over the root zone. Keep mulch several inches away from the stems. If you are planting more than one shrub, use the mature width on the label to set spacing rather than the size of the nursery pots; tight spacing reduces air movement and makes later pruning awkward.
Water for steady roots and next season’s flowers
Water by checking the soil, not by following a fixed weekday schedule. For a new shrub, feel the soil a few inches below the mulch near the original root ball. When that zone begins to dry, apply water slowly enough to soak the root ball and nearby soil, then let excess drain. Sandy ground and hot wind may call for more frequent watering than cool clay; after rain, the soil may stay moist for days. Frequent shallow sprinkles wet the surface without encouraging roots to settle into the surrounding ground.
Keep moisture especially consistent in late summer and fall, when the next flower buds are developing. NC State Extension notes that drought in August and September can reduce the following spring’s bloom, and Clemson lists both overly dry and overly wet soil among causes of bud drop. This is why “water more” is not always the right fix: if soil stays soggy, adding water worsens root stress. Check both moisture and drainage before changing the schedule.
Once established, a camellia can draw on a larger soil volume, but evergreen leaves still lose water during dry winter spells. Water before the ground freezes when the soil is dry and rain has been scarce. A two- to three-inch layer of leaf mold, pine bark, or another organic mulch helps moderate root temperature and slows evaporation; keep it away from the stems to avoid trapping moisture against the crown. Gardener’s Path also emphasizes root-ball watering and fall moisture, but its calendar amounts should be adjusted to your soil and weather rather than applied mechanically.
Fertilize modestly and at the right time
Do not use fertilizer as a reflex when a camellia flowers poorly. First check light, soil moisture, drainage, pruning date, and whether the shrub is newly planted. A healthy established plant in fertile soil may need little or no supplemental feed. If growth is weak or a soil test indicates a deficiency, use a product labeled for acid-loving shrubs and follow its directions for the plant’s size; applying extra does not speed establishment and can injure shallow roots.
If feeding is appropriate, apply it as new growth begins after flowering, rather than during a drought, heat wave, or while the soil is frozen. Avoid late-season feeding that pushes tender growth just before cold weather. Homes & Gardens advises finishing fertilizer by midsummer, while exact timing shifts with climate; in colder regions, stop earlier if new growth would not have time to harden. A soil test is more useful than guessing between a high-nitrogen foliage feed and a high-potassium bloom feed. More fertilizer cannot replace adequate light or correct late pruning.
Prune after bloom, before new buds form
Japanese camellia usually needs only light corrective pruning. Remove dead, damaged, crossing, or badly placed branches, and shorten an outlying stem only when it disrupts the shrub’s shape or crowds a path. Make cuts just above a healthy side branch rather than shearing every shoot to the same height. A lightly thinned shrub keeps its natural outline and admits more light and air than a dense hedge clipped only around the surface.
Prune immediately after flowering or in early summer, before the next flowering buds are far along. The shrub makes future growth after the current bloom; a late summer, fall, or winter haircut can remove buds that would otherwise open in the next cool season. If you prune to reduce a large plant substantially, expect to lose some of the next display. For a neglected specimen, reduce size over more than one season instead of cutting it back severely all at once.
Use clean, sharp pruners and reach carefully through the foliage. If you are cutting visibly diseased branches, remove them at a healthy point and clean the blades between cuts according to local extension guidance. Deadheading individual spent flowers is optional: it can tidy the plant, but it is not a substitute for good site and moisture conditions and will not make a stressed shrub produce an extra flush of flowers. Homes & Gardens’ camellia guide also places routine shaping after flowering; NC State Extension cautions that later pruning may sacrifice the next season’s blossoms.
Understand bloom timing and choose a cultivar
Japanese camellia flowers may be single, semi-double, or densely petaled, with colors commonly ranging from white through pink to red. Individual flowers can last several days, and the shrub’s overall display can continue for weeks, but bloom timing is not a single fixed month. NC State reports that cultivars may begin as early as October and continue into March; Oregon State describes a winter-to-spring bloom. Weather, local climate, and cultivar can shift that window, so compare named selections available from a regional nursery or botanical garden.
Choose the plant by mature size, cold tolerance, bloom period, and flower form—not color alone. A compact camellia can fit a sheltered courtyard or large container, while a vigorous selection may ultimately become a small tree. Where winters are marginal, ask for a cultivar proven locally and protect it from wind; a general species hardiness range is not a promise that every named camellia will tolerate the same freeze. Duke Gardens’ description of ‘Tama-no-ura’ illustrates how specific this can be: it identifies that cultivar’s dappled-shade site, local bloom period, and zone range rather than treating all Japanese camellias as interchangeable. Duke Gardens’ cultivar profile is a useful model for reading plant-specific information.
How cultivar and climate shift bloom time
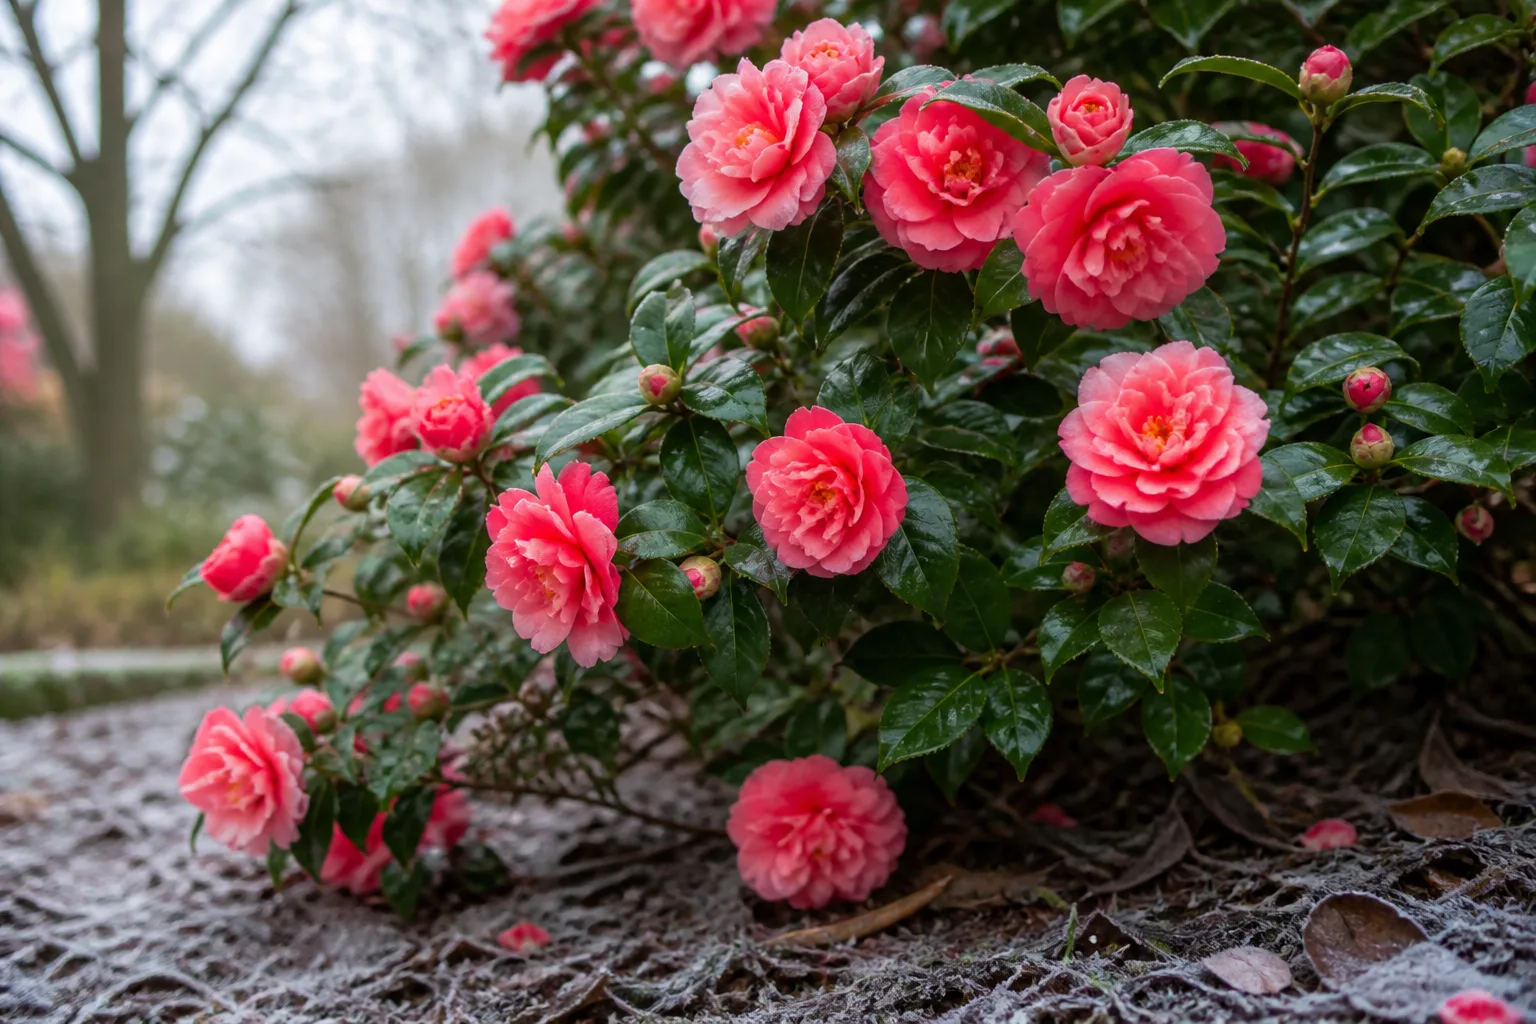
Most Japanese camellias flower in the cool part of the year, but a warm autumn can make an early cultivar open before a later one. A late-blooming variety may still carry tight buds when an early selection is already finished. Frost can damage open petals and buds, and a warm spell followed by a hard freeze may cause more visible damage than a steady cold spell. For a flower display near a door or walkway, plant a known local cultivar where you can shelter it from wind and see it from indoors.
Do not buy a camellia because a label promises a particular month without checking the cultivar and your region. Ask when that selection flowers locally, how large it becomes, and whether it is grafted or own-root if root-rot tolerance is a concern. Some collections describe the same cultivar under slightly different names; compare flower photos and the botanical name, and favor a reputable nursery or camellia society when a precise cultivar matters.
Grow Japanese camellia in a container
A container gives you control over soil pH and lets you move the plant away from a heat-reflecting wall, harsh sun, or a severe cold snap. Choose a broad, sturdy pot with unobstructed drainage holes and room for the root ball; avoid a huge pot filled with wet mix around a small root system. Use a free-draining acidic mix formulated for camellias, azaleas, or other acid-loving shrubs. Garden soil is usually too dense for a permanent container and may carry a pH or drainage problem straight into the pot.
Set the root ball at the same depth it grew in its nursery container, water thoroughly, and empty any saucer that holds standing water. Check the pot more often during hot weather because containers dry more quickly than garden soil, but do not water again while the mix is still saturated. If roots begin to circle the pot or emerge from drainage holes, repot after flowering into a container one size larger and refresh the mix. Avoid repeated large root cuts; Japanese camellia grows slowly and can take time to recover from root disturbance.
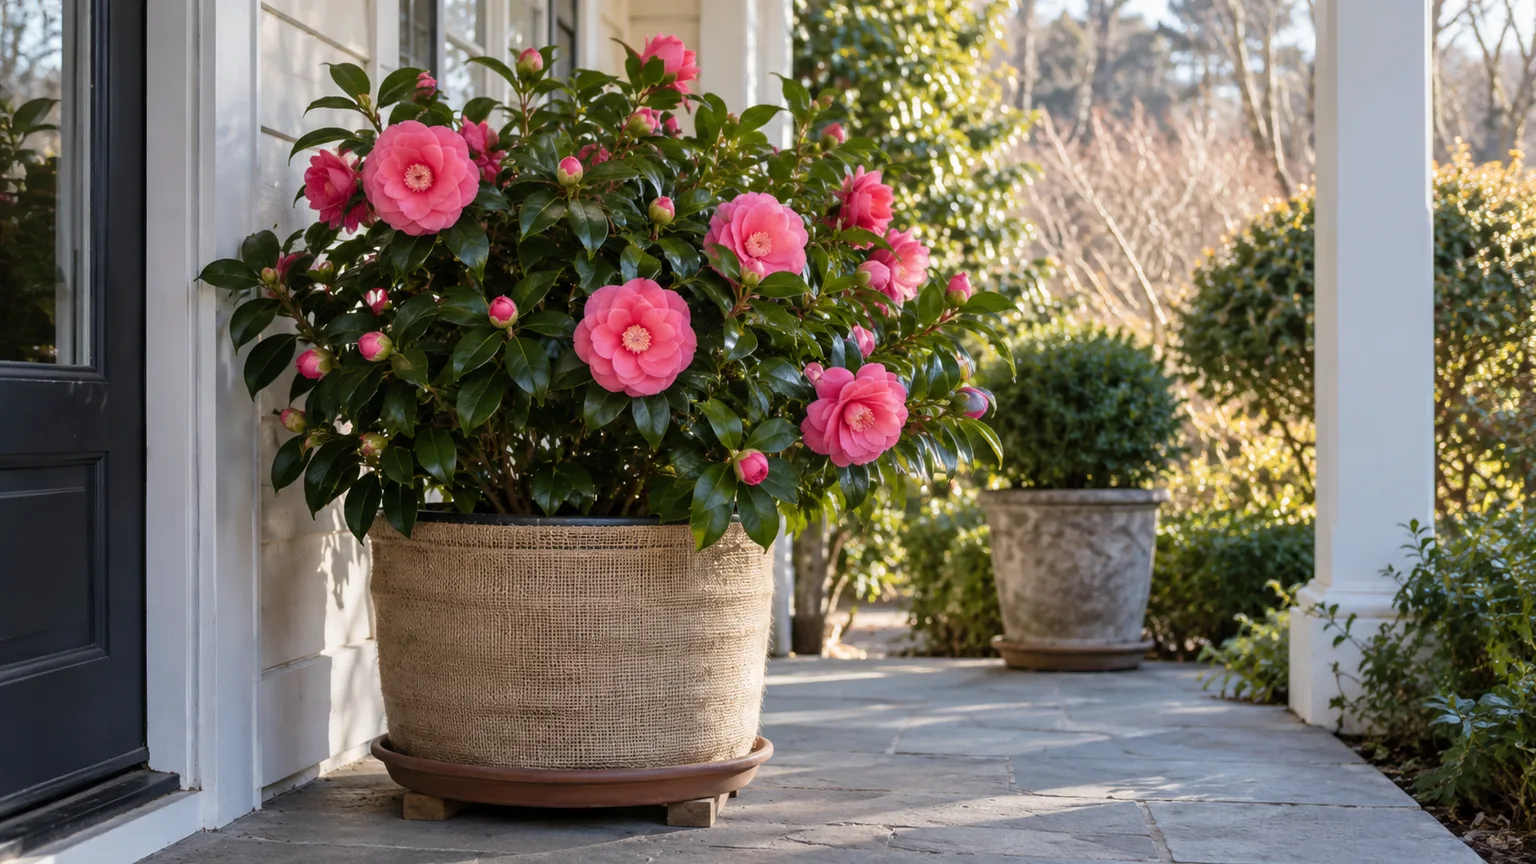
A potted camellia can stay outdoors in a suitable climate, but its roots have less insulation than roots in the ground. In colder areas, move it to a sheltered, bright, cool location or protect the pot before a hard freeze; a warm living room is not a substitute for a cool winter rest. Homes & Gardens and Gardener’s Path both note that container growing is possible, with drainage and pot size determining much of the routine care.
Protect the shrub and flowers through winter
A sheltered planting site is more dependable than trying to cover a large shrub every cold night. Before winter, water the root zone if the soil is dry, refresh the mulch without piling it against the trunk, and keep the plant out of drying wind. In a cold pocket, a fence or evergreen windbreak can reduce exposure, but do not wrap foliage tightly for the whole season; persistent dampness and poor air movement can create new problems.
When a hard freeze is forecast while flowers are open, a breathable garden fabric can reduce exposure if it can cover the plant without crushing branches. Remove it when the weather moderates. This may limit damage but cannot guarantee that every flower survives. For a container, protect the root ball as well as the canopy: cluster pots against a sheltered wall, raise the container off a cold wet surface, and wrap the pot with breathable insulation. Keep checking moisture through mild winter periods because evergreen leaves continue to lose water.
If you garden near the edge of the species’ normal hardiness, prioritize local cultivar choice and placement before relying on coverings. A plant in a warm south-facing nook can break dormancy early and be caught by a later cold snap; a steadier, partly shaded site may protect buds better. Consider your local extension’s cold-weather advice when a freeze is unusually long or severe.
Troubleshoot bud drop, yellow leaves, and disease
Start with the pattern, not a product. Is the problem limited to buds, flowers, one branch, or the whole shrub? Did it follow a hot dry stretch, heavy rain, a sudden temperature swing, or a late prune? Look beneath a few leaves for scale and check the soil below the mulch. These observations narrow the likely cause before you change watering, amend the soil, or reach for a pesticide.
Diagnose buds that fall before opening
Some bud loss can be normal, especially when a shrub sets more buds than it can open. A sudden increase in dropped buds, browned tips, or buds that shrivel before opening suggests stress. Check whether the root zone alternates between dry and saturated, whether water stands after rain, and whether late-summer or fall drought coincided with bud development. Clemson Extension also lists temperature fluctuations, freezing, hot weather, poor drainage, nutrient deficiency, bud mites, and cultivar sensitivity as possible causes.
Correct the condition you can verify: restore even soil moisture without waterlogging, improve drainage, add wind shelter, or avoid pruning after the bloom. Do not transplant a large shrub or fertilize heavily based on one dropped bud. If buds have distorted tips, inspect for bud mites or other damage and ask an extension service or knowledgeable nursery for identification. A cultivar that is poorly suited to a frost pocket may continue to lose buds there even after watering improves.
Separate yellow leaves from root and pest problems
Yellow leaves with green veins on newer growth can signal iron chlorosis, often because alkaline soil limits iron availability. Test the soil pH first. If it is above the camellia’s preferred range, follow a local soil-test recommendation for correction; pouring iron or acidifier around the plant without checking the cause can waste money and may not help.
Uniform yellowing across the plant, wilting while the soil is wet, weak growth, or steady decline points more toward root stress or root rot than simple chlorosis. Clemson Extension describes root rot as associated with saturated or poorly drained soil and notes that infected roots turn brown rather than white. Improve drainage and avoid repeated watering until the root zone is assessed. A badly declining shrub may need an in-person diagnosis; root rot is difficult to reverse once established.
Recognize petal blight and scale
Camellia flower blight begins as small irregular brown spots that spread across petals; flowers can turn brown and drop quickly. Clemson Extension notes that dark brown veins in the petals help distinguish blight from cold injury. Remove infected blooms and fallen flower debris promptly, and replace the mulch below the plant if blight has been identified. Do not compost diseased blooms. Cold injury usually follows a freeze and can brown exposed petals without the same rapidly spreading spotted pattern. If the diagnosis is uncertain, photograph affected blooms and ask your county extension office before applying a fungicide.
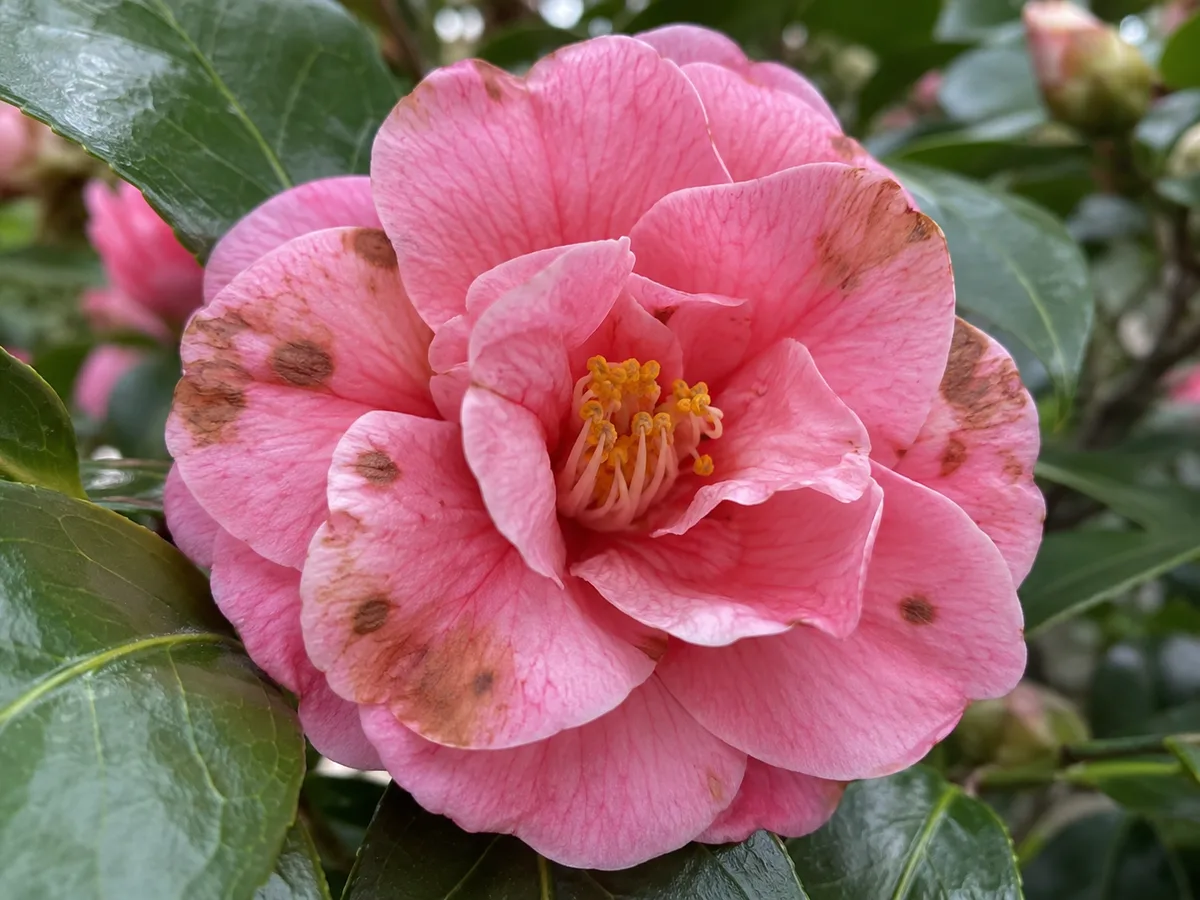
Petal blight can cause irregular brown spots; compare symptoms with recent freeze exposure before treating.
For scale, inspect the undersides of leaves and stems for small fixed insects, pale or yellow stippling above, sticky honeydew, or black sooty mold. Tea scale can reduce vigor and flowering, but yellow foliage alone is not enough to identify it. Remove heavily infested leaves if the problem is limited, preserve natural predators, and confirm the pest before selecting a treatment. Pesticide labels and permitted uses vary by location; follow the current label and local extension guidance rather than copying a spray schedule from another climate. Clemson Cooperative Extension’s camellia disease and pest guide provides diagnostic detail, including flower blight, root rot, scale, and environmental bud drop.
Propagate Japanese camellia by layering
Layering is a patient way to root a low flexible branch while it remains attached to the parent plant. It is useful when you want a plant similar to a named cultivar, though it takes time and success depends on a healthy branch and suitable conditions. Seed-grown plants may differ from the parent, so seed is better for experimentation than for copying a selected flower form.
In spring or early summer, choose a healthy lower shoot long enough to reach the ground. Bend it gently, mark where it touches soil, and make a small wound or scrape on the underside at that point without severing the stem. Pin the wounded section below the soil surface with a landscape staple or bent wire, then cover it with soil and keep that patch evenly moist. Leave the leafy tip above ground and check periodically for new growth rather than tugging on the branch.
After roots have formed—often not by the end of the first season—sever the layered branch from the parent and transplant it during mild weather. If it resists a gentle lift, leave it attached longer. NC State lists layering and stem cuttings as propagation methods; Gardener’s Path likewise distinguishes vegetative propagation from seed when true-to-type plants matter.
Conclusion
Japanese camellia is most reliable when its roots stay cool, moist, and well drained and its canopy gets bright shade with protection from harsh wind. Plant the root ball level with the soil, mulch without burying the stems, and pay particular attention to moisture while buds form in late summer and fall. If flowering disappoints, check pruning, exposure, weather, drainage, and cultivar before adding fertilizer; prune only after blooms finish. That simple sequence supports a healthier evergreen shrub and gives the next season’s flowers a better chance to open.