How to Grow and Care for Monstera Obliqua
Monstera obliqua care is precise, not mysterious. Get a realistic setup, watering cues, propagation steps, ID tips, and troubleshooting for fragile leaves.
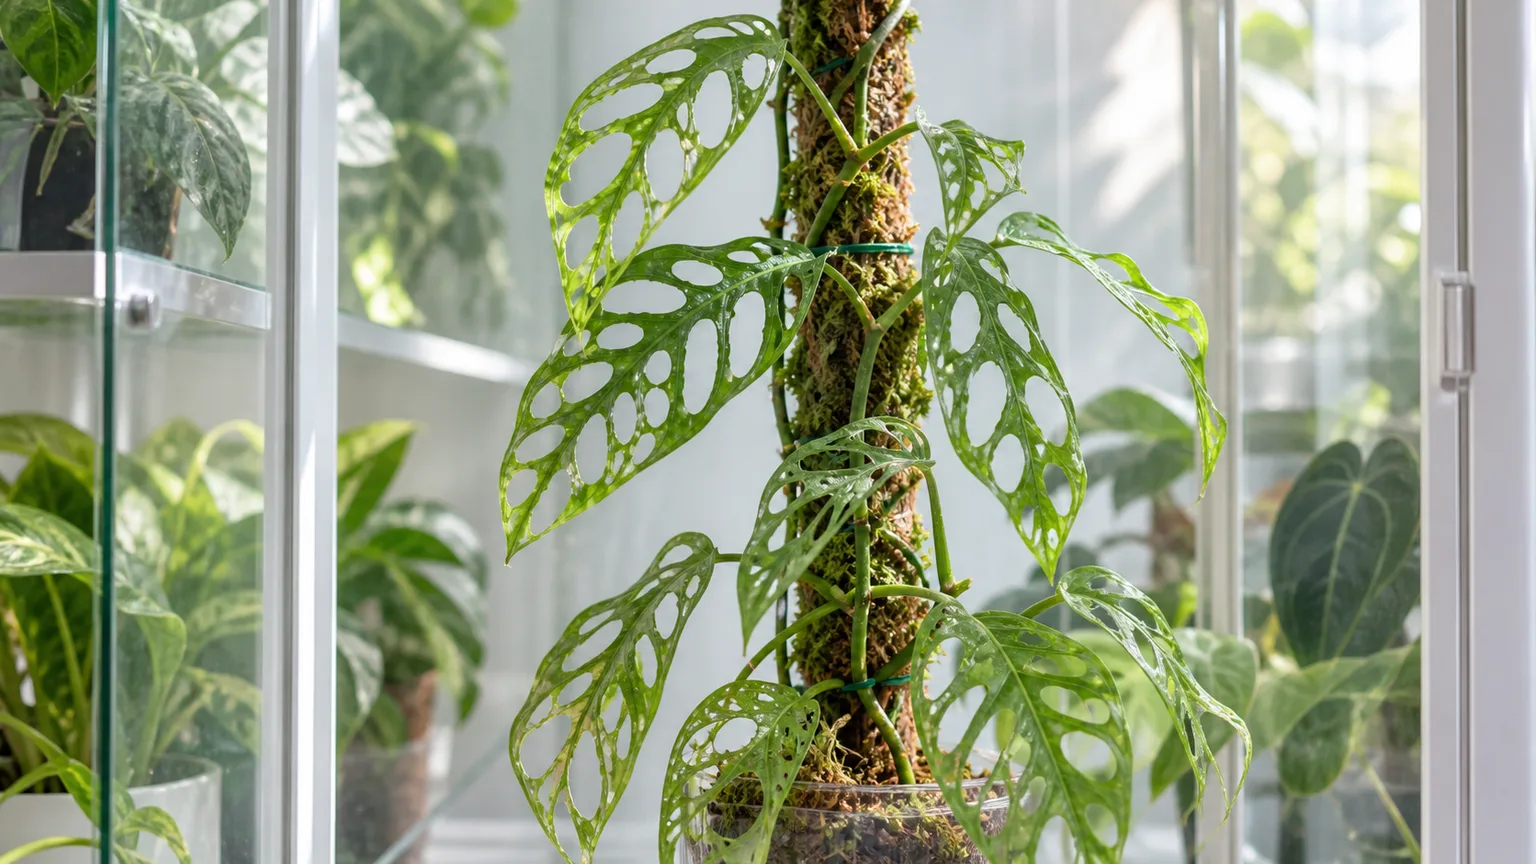
Monstera obliqua is a collector plant with a very specific bargain: you get extraordinary, hole-filled leaves, but you must provide a more controlled environment than a typical Monstera needs. The most reliable approach is to stabilize light, temperature, humidity, airflow, and root-zone moisture before you chase faster growth or larger fenestrations.
One important correction comes first. A plant sold as “Monstera obliqua,” “Peru,” or even “Peruvian obliqua” may be a mislabeled Monstera adansonii. True M. obliqua is an accepted species, a climber native from Costa Rica through southern tropical America and Trinidad, and a plant of wet tropical habitats according to Plants of the World Online from Kew. That identity matters because an expensive, thin-leaved plant should not be managed by the same expectations as a common, faster-growing Swiss cheese vine.
Is This Really Monstera obliqua?
Before changing your care routine, confirm what is in the pot. Kew lists Monstera obliqua Miq. as an accepted species in the Araceae family, but a retail label is not a botanical verification. The market’s “Peru” language is especially slippery: it can describe a trade form, a seller’s shorthand, or a plant that has been called obliqua because it has holes.
True obliqua foliage is typically extremely thin and delicate, often nearly translucent when held toward a soft light. The defining impression is skeletal: the holes take up a very large share of the blade, while the remaining tissue feels much less leathery than the foliage of a typical adansonii. Juvenile plants and stressed plants can be less dramatic, so identification from one small leaf is never absolute.
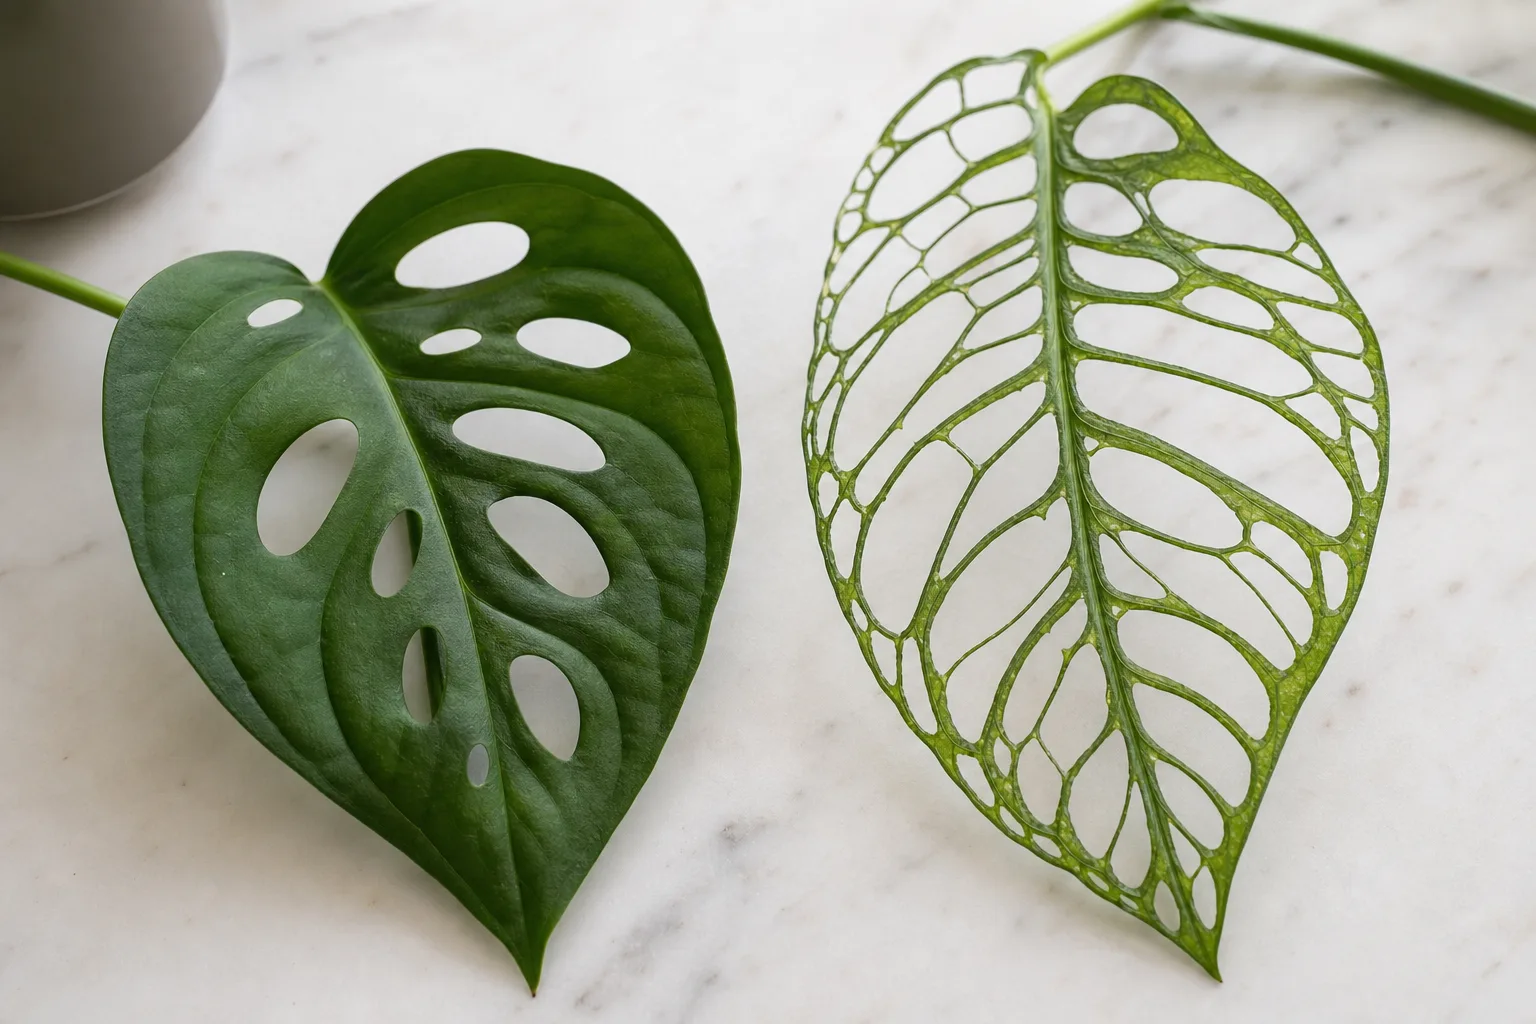
If the plant is inexpensive, vigorous, and sold with no mature growth or provenance, treat the name as unconfirmed rather than paying a rarity premium. Ask for a photo of the mother plant, several mature leaves, the stem and nodes, and the seller’s propagation history. That diligence does not make adansonii a disappointment; it prevents you from applying an expensive name to the wrong care problem.
Monstera obliqua vs. Monstera adansonii
The two plants overlap enough to fool buyers, but their growing experience is different. Adansonii usually has thicker, more durable leaves and is forgiving about ordinary indoor fluctuations. Obliqua is more fragile, slower, and more likely to show rapid edge damage when the root zone dries too far or the air is too dry.
| Field mark | Monstera obliqua | Monstera adansonii |
|---|---|---|
| Leaf feel | Very thin, papery, sometimes translucent | Thicker and more leathery |
| Hole-to-leaf ratio | Often extreme; leaf can look skeletal | Holes are prominent but leave more blade tissue |
| Growth habit | Climbing vine; may produce long leafless stolons | Climbing or trailing vine with more continuous foliage |
| Recovery from stress | Slow and easily set back | Usually faster and more forgiving |
| Buying risk | High mislabeling and rarity premium | Common and easier to verify |
Do not use fenestration alone as the test. Light, age, support, and genetics affect holes, while leaf thickness and overall plant habit are more useful clues. If the evidence conflicts, buy or care for the plant according to its visible traits and keep the seller’s label provisional.
Build an Environment You Can Control
For most homes, the challenge is not finding one perfect number. It is preventing sharp swings. A small greenhouse cabinet, ventilated terrarium, or bright plant enclosure can work well because it moderates humidity and temperature, but a sealed box can also trap heat, condensation, and fungal problems. The goal is a stable microclimate with measurable air movement, not a permanently wet display case.
Start with a digital hygrometer placed at leaf height, not on the floor several feet away. Give the plant at least a week to show how the space behaves through the day before making major changes. If the reading is high only immediately after misting but falls sharply later, the plant is experiencing a temporary spike rather than a stable humidity level.
The general Monstera baseline from NC State Extension is warm conditions, moderate brightness without harsh direct sun, high humidity, thorough watering followed by partial drying, and sturdy support. M. obliqua’s much thinner foliage makes the margin for error smaller, so use that guidance as a starting framework rather than proof that every obliqua needs the same treatment as deliciosa. Practical care guides from Bonsai Mary and Plants for All Seasons likewise converge on bright filtered light, a partly dry upper mix, and extra humidity, but those routines still need adjustment for pot size, airflow, and season.
Light: Bright, Filtered, and Consistent
Place obliqua in bright, indirect light, ideally close enough to a bright window that the room is clearly illuminated but direct midday rays do not strike the leaves. A sheer curtain, exterior shade, or a position just outside the sunbeam can turn a harsh window into a useful growing site. In a cabinet, place the light above and slightly in front of the plant so the vine does not stretch toward one corner.
Low light causes a slow plant to become even slower. It can also produce longer spaces between nodes, smaller leaves, and weak stems that cannot support a dense display. Direct sun is a different problem: thin foliage can scorch quickly, leaving pale or tan patches that will not turn green again.
If you add a grow light, begin farther away or at a lower intensity and watch the newest leaf for several days. A sudden jump from dim ambient light to intense illumination can burn a plant even when the final position would have been suitable after acclimation. Turn the plant a little at a time if growth leans, rather than rotating it repeatedly while a new leaf is unfurling.
Temperature, Humidity, and Airflow
Aim for warm, steady conditions rather than a hot cabinet. A practical indoor target is roughly 65–80°F (18–27°C), with no cold draft, heater blast, or overnight drop that repeatedly shocks the plant. The exact number matters less than the combination of warmth, active roots, and consistent moisture.
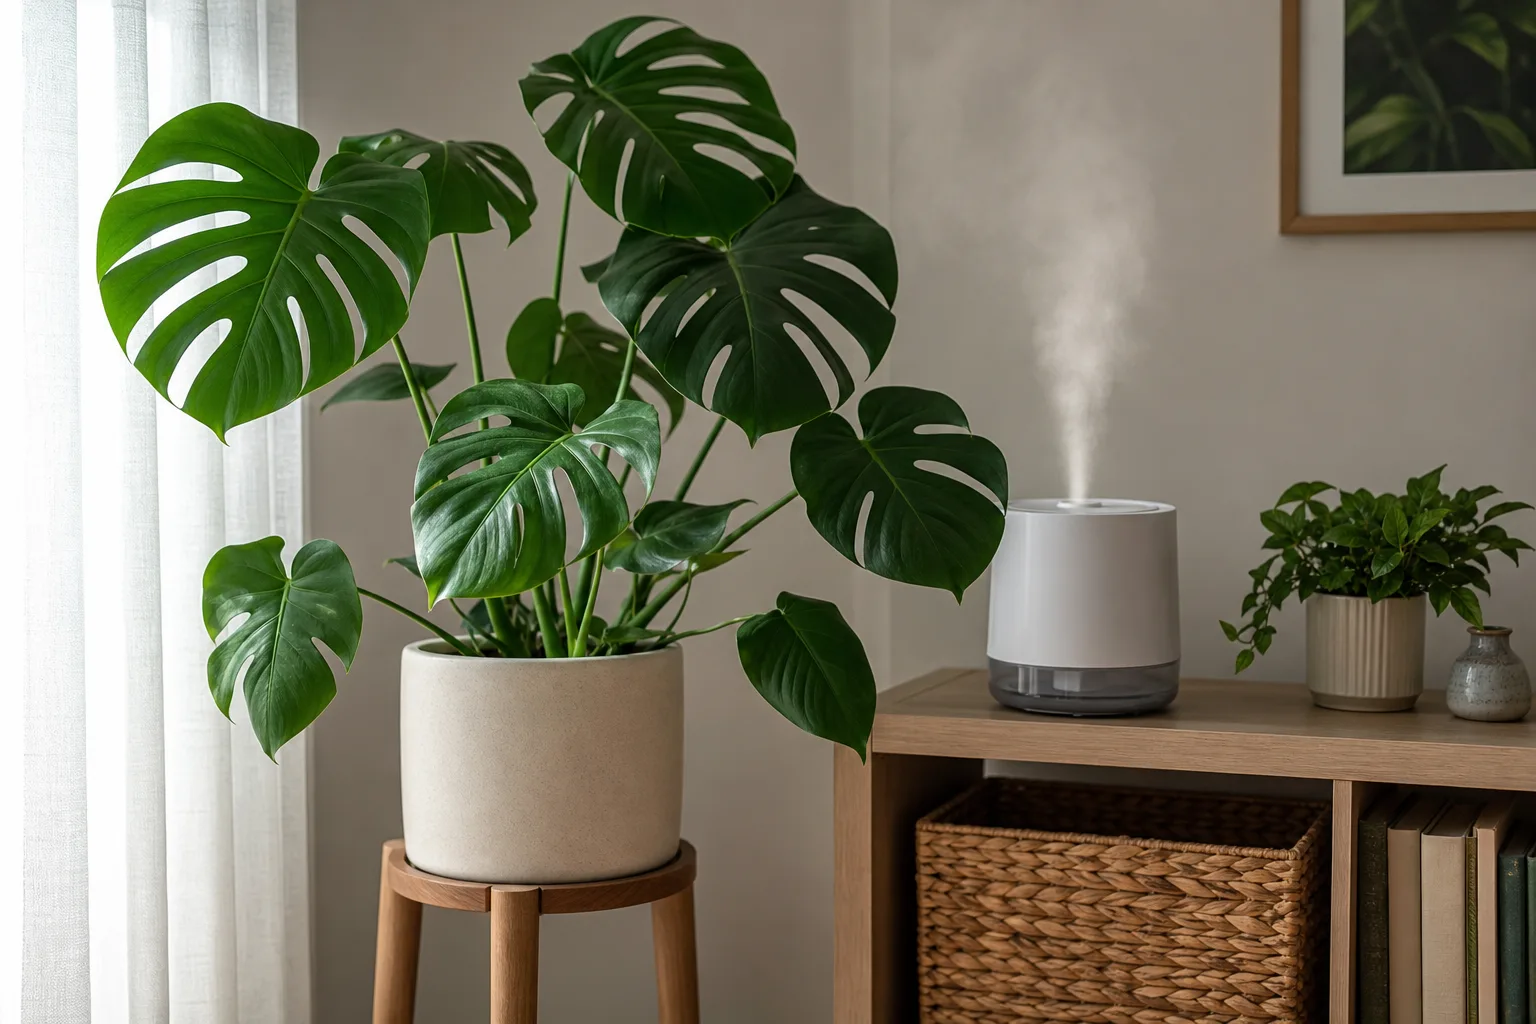
Humidity is where obliqua differs most from a casual Monstera. A range around 60–80% relative humidity is a reasonable working target, with the upper half often more comfortable for thin leaves. The plant does not need stagnant air to reach that reading: run a quiet fan outside or inside the enclosure so air moves gently around the foliage without blowing directly on it.
Misting is a short-lived surface treatment, not a reliable way to raise room humidity. A humidifier gives a steadier result, while a pebble tray is useful only as a small local aid and never as a substitute for a measured cabinet or room. Keep the pot above any tray water, and wipe condensation or wet foliage if the enclosure stays damp for hours.
Build a Root Zone That Stays Airy
The best Monstera obliqua soil mix holds a little moisture while leaving large air spaces around the roots. A workable starting mix is two parts quality indoor potting mix, one part fine orchid bark, and one part perlite or pumice. If your home is very dry and the pot dries within a day or two, add a small amount of sphagnum or coco coir; if the mix stays wet for many days, increase the bark and mineral fraction instead.
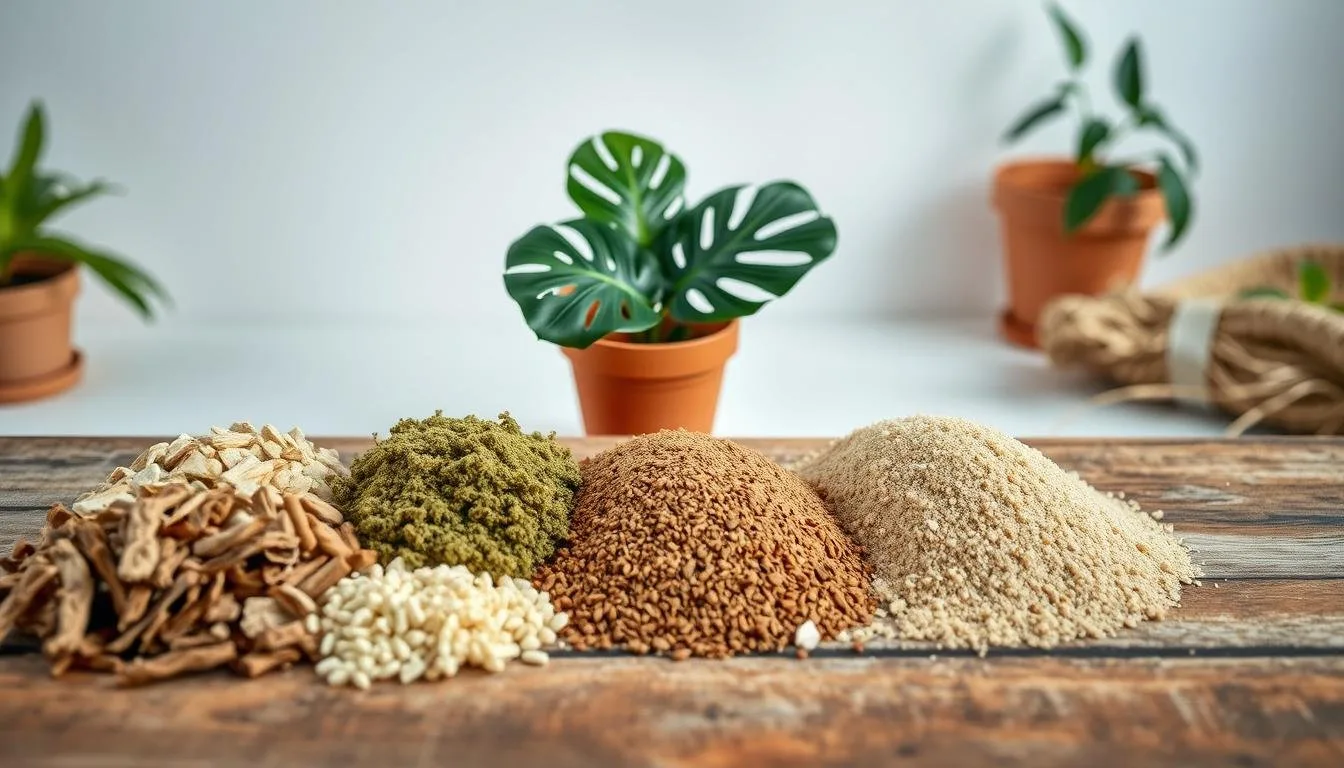
The recipe is less important than the test. Wet a handful, squeeze it, and check whether it forms a dense mud ball or falls apart into a loose clump. In the pot, water should move through the mix within seconds and the top should begin to dry without the center turning bone-dry immediately. Never use garden soil in an indoor pot: it compacts, drains poorly, and can carry pests.
Use a pot with a real drainage hole and a diameter only slightly larger than the root ball. A clear nursery pot inside a heavier cover pot makes inspection easier, but do not let the cover pot hide standing water. Obliqua’s thin roots need both oxygen and moisture; a decorative container that holds runoff can erase the benefit of an airy mix.
Water by the Root Zone, Not the Calendar
Water when the upper layer has dried and the pot is noticeably lighter, not because it is “watering day.” The exact depth depends on the pot size and mix, but checking the top inch or two with a finger or a wooden skewer gives a better signal than a fixed weekly schedule. In a small, warm cabinet, the plant may need water every week; in a cool room or a larger pot, the same plant may take two weeks or more.
When it is time, water slowly over the entire surface until a little drains from the bottom. Wait a few minutes, empty the saucer, and return the pot only after it stops dripping. This flushes dry pockets and distributes moisture through the root ball; repeated sips can wet only the top while leaving lower roots dry.
Use three checks before watering: the surface and upper mix should be partly dry, the pot should feel lighter, and the leaves should not be the only reason you are reaching for the can. A drooping plant with wet soil is not thirsty by default. If the upper mix is dry but the center is soaked and sour-smelling, pause and inspect the roots instead of adding more water.
Water less often in a cool, dim winter room, but do not force a long drought if the plant remains warm under grow lights. Room-temperature water reduces unnecessary shock, although root-zone drainage and timing matter far more than the exact temperature of the water. The useful habit is to record watering dates for a month, then use the plant’s actual drying pattern to refine the interval.
Feed Lightly and Only When Growth Is Active
Obliqua is slow, so fertilizer is a support, not a growth switch. During active growth, use a complete liquid houseplant fertilizer at half the label strength about once a month, or follow a weaker schedule if the plant is in a very small pot or a fresh, nutrient-rich mix. Never apply fertilizer to bone-dry soil; water first or feed alongside a normal watering.
Stop or sharply reduce feeding when the plant is cool, dim, or not producing new growth. Fertilizer salts accumulate when roots are not taking up much water, and thin roots are easily damaged by excess concentration. If the leaf tips brown soon after feeding, the plant is not asking for more fertilizer; flush the pot thoroughly with plain water and correct the routine.
Do not use yellow leaves as a fertilizer diagnosis until you have checked moisture, roots, light, and pests. Nutrient deficiency is possible, but adding food to waterlogged roots can intensify the damage. New leaves that emerge progressively smaller in good light and a healthy root zone are a stronger reason to review nutrition than one old leaf yellowing at the base.
Give the Vine Support Before It Gets Leggy
Provide a narrow moss pole, textured stake, or small trellis while the vine is still easy to position. Soft ties should hold the stem near the support without pinching it, and the plant’s climbing side should face the support. A support does not manufacture fenestrations, but it gives aerial roots a place to attach and helps the plant invest in upward growth instead of producing a loose, wandering runner.
Keep the support proportionate. A huge wet moss pole in a tiny pot can keep the whole root zone damp, while a smooth decorative stick may offer nothing for aerial roots to grip. If you use a moss pole, moisten the moss lightly and only when the plant is actively attaching; do not turn the pole into a second water reservoir.
Prune only for a clear purpose: remove dead or damaged tissue, shorten a bare vine to a viable node, or take a cutting from a healthy, established plant. Clean the shears between cuts, and avoid removing a large share of the foliage at once. For a rare, slow grower, every healthy leaf is part of the recovery budget.
Propagate Only Healthy, Viable Nodes
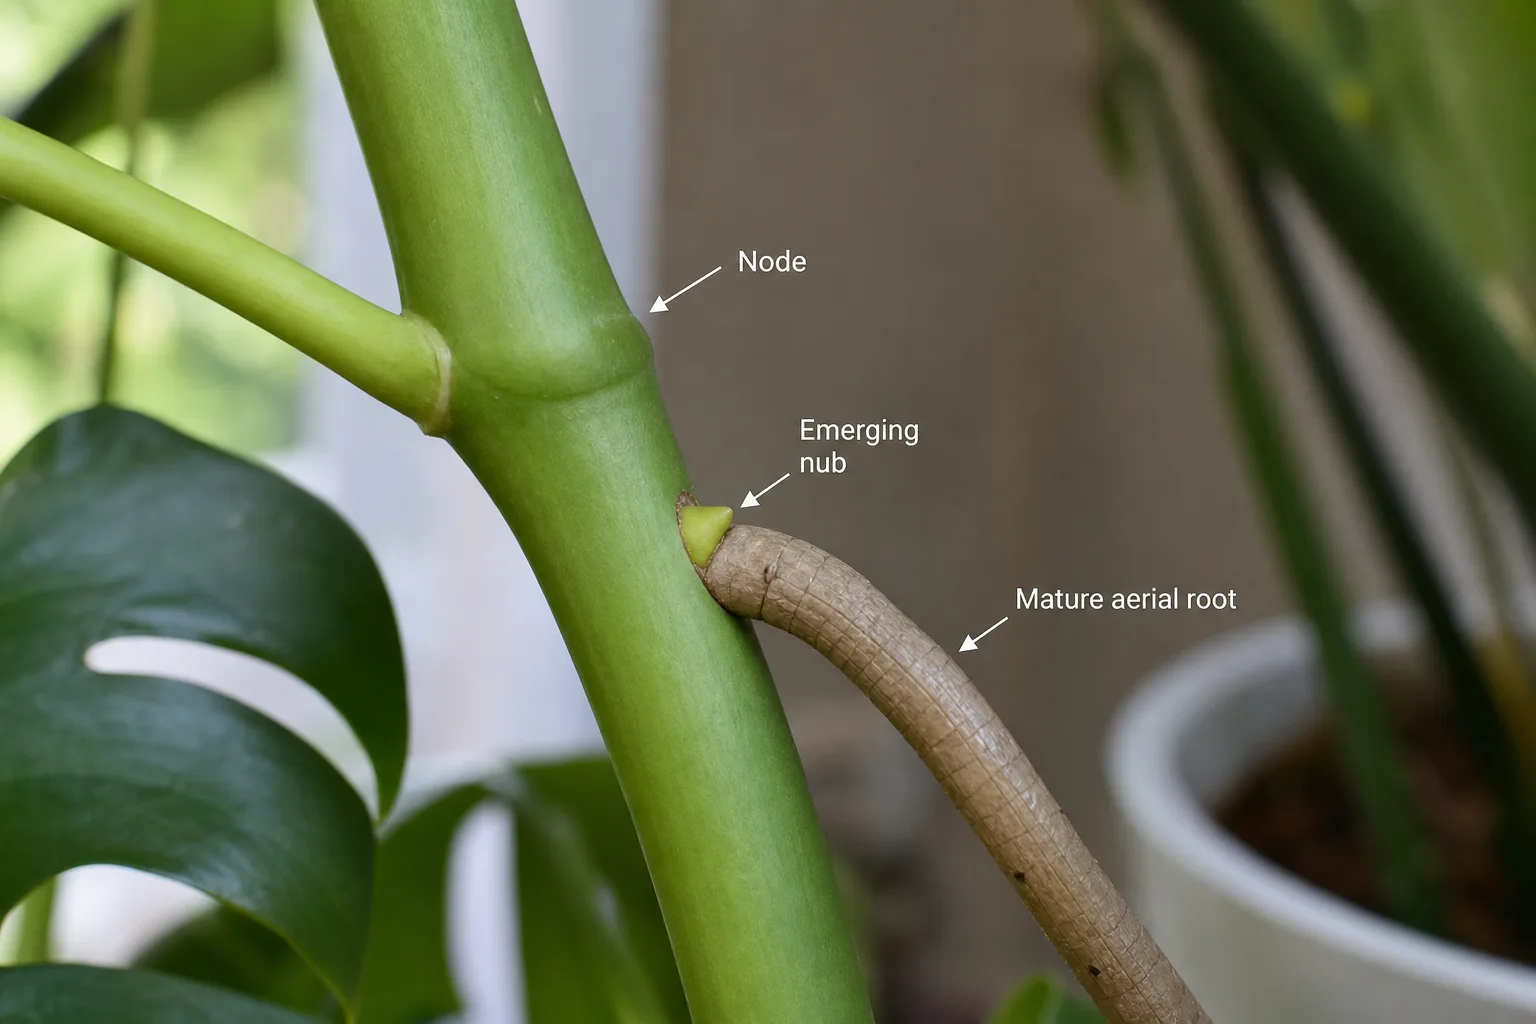
Propagation is possible, but it is not a good rescue plan for a plant that is already collapsing. Start with a firm, actively growing mother plant and choose a stem segment with at least one visible node; two nodes and one healthy leaf give you a better margin. A leaf without a node can stay green for a while and still never produce a new plant because the growth point is in the node, not the leaf blade.
Make the cut with sterilized, sharp shears just below the node. Let the cut surface dry briefly, then place the node in a lightly moist, airy medium. Warmth, bright filtered light, and high humidity help, but saturated moss or a sealed bag with no ventilation invites rot.
Stem-Cutting Propagation
For a stem cutting, remove only leaves that would sit in the medium and keep the remaining leaf above the surface. Sphagnum moss, perlite, or a loose propagation mix can work; choose the medium you can keep evenly damp without squeezing water from it. Put the node in contact with the medium, not buried with the entire stem.
Check weekly rather than disturbing the cutting every day. New roots may appear before a new leaf, and a little resistance when the cutting is gently tested is more meaningful than a calendar promise. Once roots are several inches long and branching, pot it into the same airy mix used for the mother plant, keep it slightly more evenly moist for the first few weeks, and acclimate it gradually to the final cabinet or room.
Water propagation can make roots easy to see, but those roots still need to transition into a solid medium. Change the water regularly, keep the leaf out of the water, and move the cutting once the roots are substantial rather than leaving it indefinitely in a jar. If the node turns brown, soft, or foul-smelling, cut back to firm tissue; do not plant rot and hope humidity will cure it.
Stolon Propagation
A leafless runner, or stolon, is not automatically a useless stem or a ready-made plant. It is a growth strategy: the plant can send a runner across a surface before committing to more foliage. Look for firm tissue and a node with a visible eye, aerial root, or other sign of a viable growth point.
You can pin a viable node against lightly moist sphagnum while leaving the runner attached to the mother plant. This air-layering approach lets the node receive support while it roots; once it has a healthy root system and shows active growth, sever the connection and pot it. Cutting a long, leafless piece into random sections is a poor bet because not every section contains a bud capable of producing a new shoot.
Repot Without Resetting the Plant
Repot when roots circle densely, emerge repeatedly from the drainage hole, the mix has collapsed and stays wet, or the plant dries almost immediately despite a healthy root ball. Do not repot simply because the plant has not produced a new leaf this month. Slow growth is part of the species’ profile, and an unnecessary pot upgrade creates a larger, wetter root zone.
Choose the next pot only one size larger, keep the stem at its previous depth, and disturb roots as little as possible. Refresh loose, degraded mix around the root ball, but do not strip every particle from fine roots. Water once after repotting, let excess drain, and keep the plant in familiar light for a week or two while it reestablishes.
The exception is confirmed root rot or a badly compacted, sour mix. In that case, remove the plant, rinse enough soil away to see the roots, cut away only soft or dark tissue with sterilized shears, and move the remaining firm roots into fresh, airy mix. If no viable roots remain, a firm node from the upper plant may be a propagation attempt, but recovery is not guaranteed.
Monitor Pests Before They Become a Cabinet Problem
Inspect the undersides of leaves, petioles, nodes, and the inside of the cabinet once a week. Spider mites often show fine stippling or webbing; thrips can leave silvery scars and black specks; scale appears as fixed bumps; and fungus gnats point to persistently wet media. A cabinet magnifies small problems because warm, close quarters let pests move quickly between plants.
Quarantine a new plant before placing it beside your collection. Physically remove visible scale, rinse foliage where the plant tolerates it, and use a labeled insecticidal soap or other product exactly as directed if treatment is needed. Repeat according to the pest’s life cycle and the product label; one spray rarely reaches eggs or every hidden individual.
Avoid routine pesticide applications “just in case.” They can stress delicate leaves, harm beneficial organisms, and obscure whether the real issue is poor airflow or excessive moisture. A weekly inspection, clean foliage, isolation, and a written treatment schedule are more reliable prevention than a cabinet full of overlapping sprays.
Diagnose Stress by Pattern, Not Panic
Obliqua can respond dramatically to a single change, but a symptom usually has more than one possible cause. Start with the newest and oldest leaves, the pattern of damage, the last few waterings, the temperature and humidity at leaf height, and a close inspection for pests. Change one major variable at a time so you can tell what helped.
Yellow Leaves and Brown, Crispy Edges
One old lower leaf turning yellow can be normal aging, especially if new growth is firm and the roots smell fresh. Several leaves yellowing in quick succession, especially with wet soil, points more strongly to root stress or overwatering. Yellowing with fine stippling, webbing, or distorted new growth moves pests higher on the list.
Brown, crispy edges on paper-thin foliage often signal a moisture imbalance, but “more humidity” is not the entire diagnosis. Check whether the pot is drying completely, whether a heater or fan hits the leaves, whether direct sun creates a hot spot, and whether roots are actually taking up water. If the soil is wet while edges crisp, inspect roots and airflow before watering again.
Brown patches that are pale and sharply bounded on the window-facing side are more consistent with light scorch. Move the plant back from the glass, keep the light bright but filtered, and do not cut the damaged tissue until you know the new position is stable. Existing damage will not reverse; success means the next leaf is cleaner.
Root Rot, Collapse, and Leaf Loss
Root rot is a root-zone problem first and a leaf problem second. Warning signs include a sour smell, persistently wet mix, soft brown or black roots, a mushy stem base, leaves that wilt despite wet soil, and yellowing that keeps advancing after watering is reduced.
Confirm it by sliding the plant from its pot and looking at the roots rather than guessing from one leaf. Healthy roots are firm and pale to tan; rotten roots are soft, hollow, or easily stripped. Remove the worst tissue, keep the remaining root ball small enough for the new pot, and use fresh mix with a drainage hole. Afterward, give bright filtered light and gentle airflow, then water only when the reduced root system has partly dried.
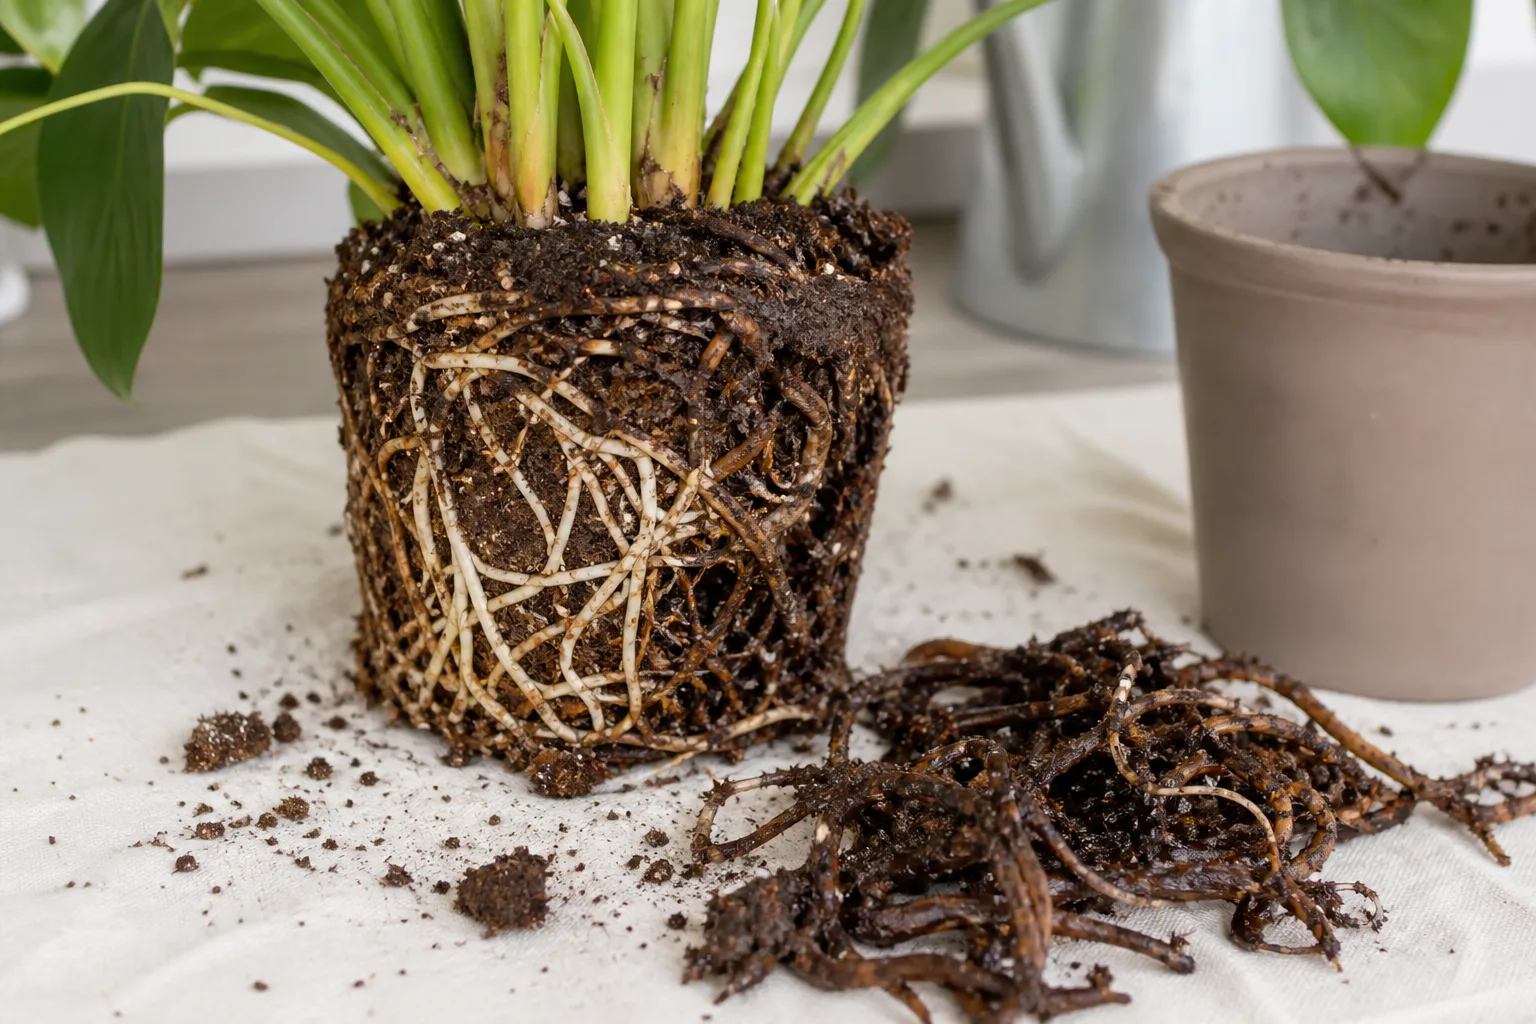
If the stem base is soft or the plant has lost nearly all roots, do not keep the entire plant in wet soil while hoping for new roots. Take a firm, viable node above the rot and treat it as a propagation project, while accepting that a rare plant may not recover. The fastest rescue is not the most aggressive rescue; it is the one that stops the rot and preserves healthy tissue.
Safety Around Pets and Children
Treat Monstera obliqua as toxic if chewed or swallowed. UF/IFAS describes Monstera species as containing insoluble calcium oxalate crystals that can irritate and inflame the mouth, throat, eyes, and digestive tract of people, dogs, and cats. Keep the plant, fallen leaves, pruning waste, and propagation jars out of reach, and wash hands after handling sap or cutting tissue.
The sensible response is access control, not panic. Put the plant in a room pets and young children cannot enter, use a stable stand that cannot tip, and clean up dropped leaf pieces promptly. If a person or animal chews the plant, do not wait for symptoms to become severe: contact a medical professional or poison-control service for a person, or a veterinarian or veterinary poison-control service for a pet.
Conclusion
Successful Monstera obliqua care is mostly the art of preventing extremes. Confirm the plant’s identity before paying or changing conditions, give it bright filtered light, keep warmth and humidity steady with real airflow, and use a loose mix that can be watered thoroughly without staying saturated.
Check moisture by the pot and root zone, feed only during active growth, support the vine early, and propagate only from firm tissue with a real node. When leaves yellow, edges crisp, pests appear, or the plant collapses, read the pattern and inspect the roots before adding water, fertilizer, or another spray. That measured routine will not make a slow collector plant behave like a common Monstera, but it gives the delicate plant the stable conditions it needs to keep growing.