How to Propagate a Philodendron in Water or Soil
Make more philodendrons from one healthy plant. Compare water vs. soil propagation, choose the right node, and move rooted cuttings into soil without shock.
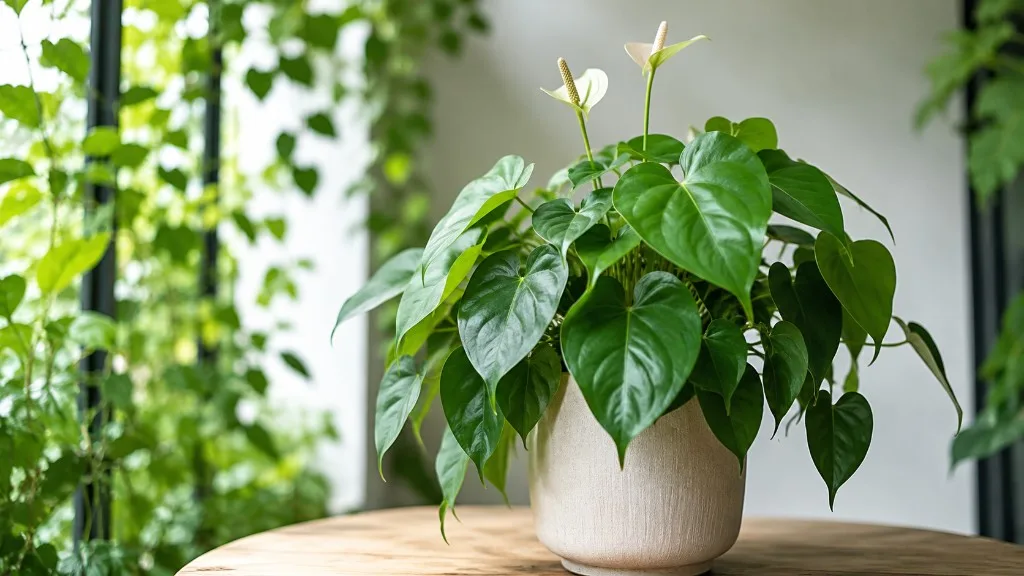
If your philodendron has a long vine, you already have the material for a new plant. Cut a healthy piece below a node, keep at least one leaf above the rooting medium, and choose either a clear jar of water or a small pot of airy mix. The node—not the leaf—is the part that can produce new roots and a new shoot.
For most trailing philodendrons, including heartleaf philodendron (Philodendron hederaceum), ‘Brasil,’ micans, and brandtianum, stem cuttings are the simplest route. Upright types such as ‘Birkin’ or ‘Red Congo’ can also root from suitable green stem sections, although their structure is less vine-like and their nodes may be harder to identify. This guide focuses on the two reliable cutting methods: rooting in water and rooting directly in soil.
Start by Identifying the Philodendron You Have
Philodendron is a large genus, so the phrase “take a cutting” does not look identical on every plant. A trailing or climbing plant shows a sequence of leaves along a flexible vine, while a self-heading plant makes leaves from a compact central stem. NC State Extension describes heartleaf philodendron as a trailing or climbing tropical perennial with slender stems and adventitious roots; Missouri Botanical Garden likewise lists it as a vine and recommends spring stem cuttings.
That difference matters when you decide how much stem to take. On a trailing plant, a three- to six-inch section with one or two nodes is easy to handle. On a self-heading plant, choose a firm, green stem section with a clearly visible node rather than cutting a leaf stalk, and expect slower or less predictable results from woody tissue.
A healthy heartleaf philodendron is the best beginner subject because its vines expose the nodes and it tolerates pruning well. If your plant is severely wilted, full of pests, or recovering from root rot, stabilize it first. A cutting cannot escape a failing parent plant; it starts with the same depleted reserves, damaged tissue, or pest load.
Choose the Right Stem Before You Cut
Look for a stem that is firm, green, and actively carrying healthy leaves. A little aerial root at a node is useful but not required. Avoid yellowing leaves, black or translucent stem tissue, crushed sections, and vines with visible scale, mealybugs, or webbing. Cutting only the attractive tip from a stressed plant often creates a weak cutting and leaves the parent with an unnecessarily large wound.
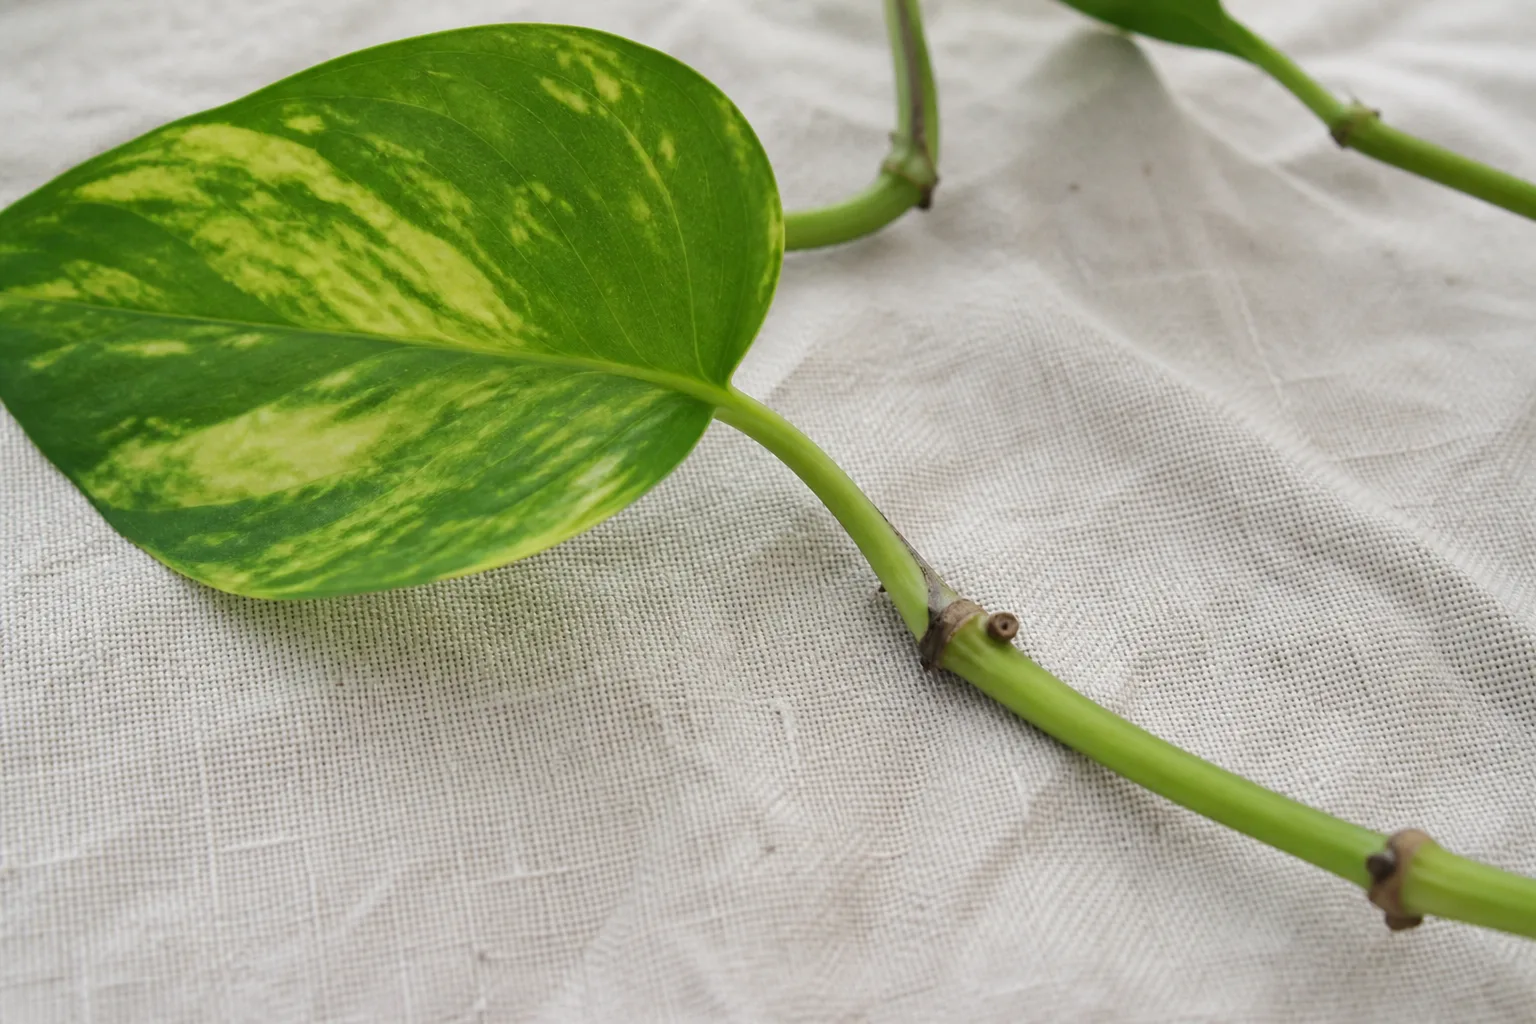
What a Healthy Node Looks Like
A node is the point on a stem where a leaf, petiole, branch, aerial root, or dormant bud emerges. On a heartleaf philodendron vine, it usually looks like a slightly thickened band or bump at the leaf joint. On older stems, you may see a short brown aerial-root nub; on newer green growth, the node may be a subtle raised crescent.
Trace the stem with your finger instead of assuming that every green segment is a node. The long section between two leaf joints is an internode. An internode can keep a leaf alive for a while, but a leaf-only or petiole-only cutting does not contain the stem node needed to organize new roots and a replacement shoot.
When you are uncertain, plan for two nodes: one to root and one to support the next growth point. Mark the lower node with a washable pencil or simply keep the cutting oriented the same way it grew. A stem can be placed upside down, especially when it is cut into several short sections, and an upside-down node is much less likely to perform well.
Top, Mid, and Single-Node Cuttings
A top cutting includes the growing tip and one or two nodes below it. It is usually the quickest choice because it already has a functioning growth point and a couple of leaves. A mid-stem cutting comes from the section behind the tip; it can root well, but it may need to activate a dormant bud before it makes a new leaf.
A single-node cutting is the most economical use of a long vine, but it leaves less leaf area to power rooting and dries more easily. For a first attempt, use a leaf-bearing top or mid-stem cutting rather than a bare node. If you use multiple small sections, keep each one paired with at least one node and, ideally, one healthy leaf above the medium.
Gather the Materials and Clean Your Tools
You do not need a specialized propagation station. Prepare the rooting setup before you make the cut so the fresh wound is not left on a dirty table while you look for a jar or pot.
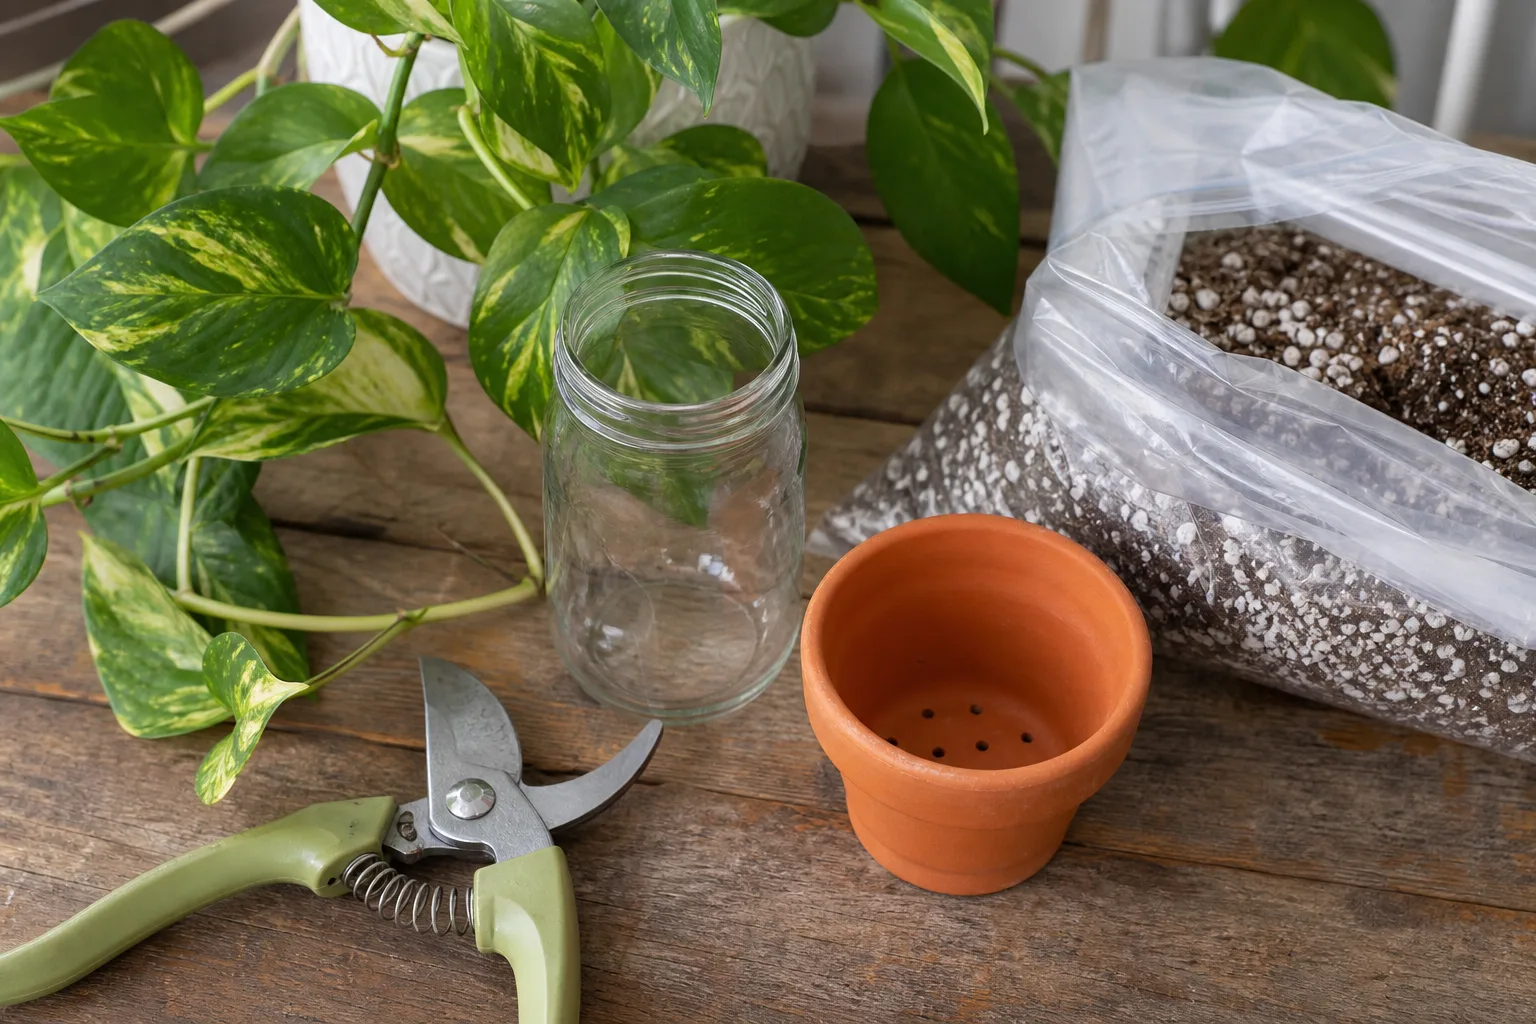
For water propagation, use sharp pruners or scissors, rubbing alcohol, a clean glass or narrow jar, and room-temperature water. For soil propagation, add a small pot with a drainage hole and a loose mix. A practical blend is two parts quality potting mix to one part perlite, with a little fine orchid bark if the base mix is dense; the goal is moisture without a sealed, muddy pocket around the stem.
Wipe the blades with alcohol before cutting and again between different plants. A sharp blade makes a clean wound instead of crushing the stem. Rooting hormone is optional for philodendron cuttings and is rarely the factor that decides success; a viable node, clean conditions, warmth, light, and appropriate moisture matter more.
If you are sensitive to plant sap, wear gloves and wash your hands after handling the cut stem. NC State Extension lists heartleaf philodendron as having low-severity poison characteristics and contact-dermatitis potential; keep fresh cuttings and discarded leaves away from pets and children who may chew them.
Make the Cutting Without Losing the Node
Water the mother plant normally a day before cutting, but do not soak it immediately before you work. A hydrated plant gives a firm stem, while a freshly saturated pot makes handling messy and can make it harder to tell whether the parent already has a root problem.
Choose a leaf-bearing section and make the lower cut about one-half inch below the lowest node. That small tail protects the node from being shaved away and gives you enough stem to anchor in water or soil. If you are preparing a longer top cutting, make sure the growing tip is at the top and leave one or two leaves intact.
Remove leaves from the lower portion of the cutting by trimming their petioles close to the stem. No leaf should sit under the waterline or be buried in the potting mix. Keep one or two healthy leaves above the rooting medium; too much foliage increases water loss before roots exist, while removing every leaf removes the cutting’s main energy source.
Pause for a final check before putting the piece into its medium. You should be able to point to the node that will be submerged or buried, identify which end is down, and see firm tissue at the cut. If the cut end is already soft, brown, or foul-smelling, recut above the damage into clean tissue and discard the piece if no healthy node remains.
Method 1: Propagate a Philodendron in Water
Water is the easiest method to monitor because the roots stay visible. It is a good choice if you are learning what a philodendron node looks like, if you want to catch rot early, or if you are willing to transplant the cutting once a small root system has formed.
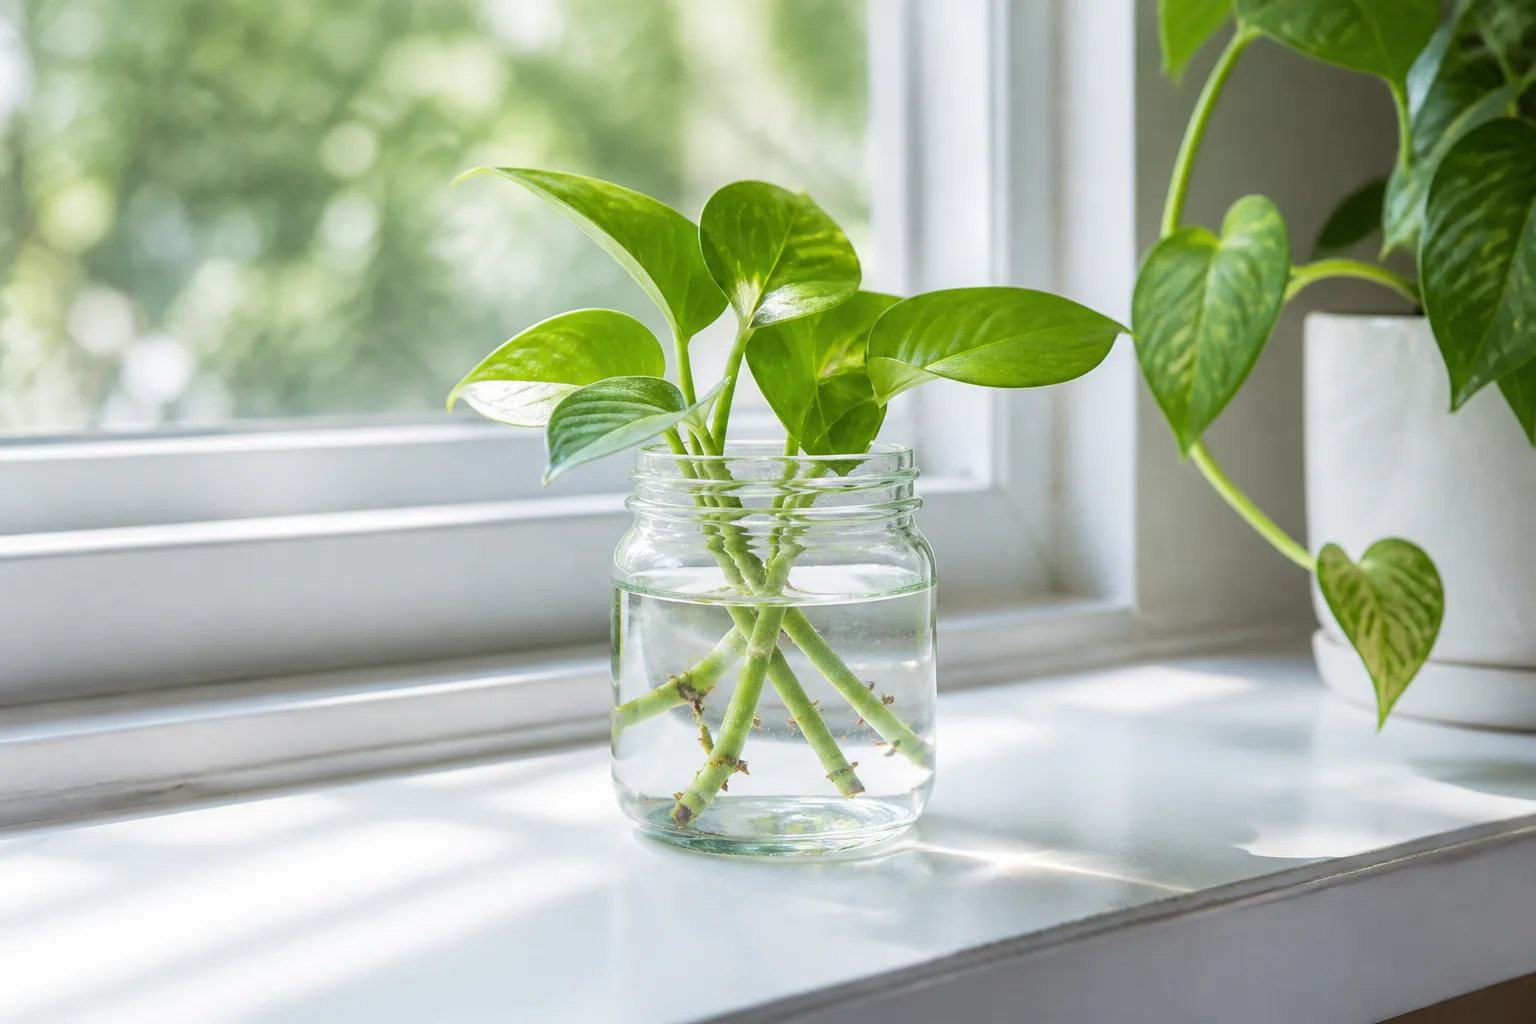
Put the cutting into the water with at least one node submerged and every leaf above the waterline. Do not pack a jar so tightly that stems rub against one another, and do not submerge the whole vine just because the container is tall. The node needs moisture; the foliage needs air.
Set Up the Jar
Use a clear container that supports the cutting without forcing the leaf to rest on the rim. Place it in bright, indirect light, such as near an east-facing window or a few feet back from a brighter window. Direct afternoon sun can heat the water and stress the leaf, while a dark shelf can keep the cutting alive without supplying enough energy for fast root growth.
Keep the water fresh rather than relying on a single fill for a month. Change it every few days, or sooner if it turns cloudy, develops a film, or smells sour. Rinse the jar and the node gently during a water change. Clean water does not make the cutting sterile, but it reduces the buildup of decaying leaf tissue and keeps oxygen available around developing roots.
Warm, stable indoor conditions around 65–80°F (18–27°C) are a useful practical range. Rooting can happen outside that range, but cold windowsills and fluctuating drafts slow the process. Epic Gardening reports that roots often begin in one to three weeks under suitable conditions, while broader growing conditions and cultivar differences can stretch the wait toward four weeks.
Watch the node, not just the calendar. Healthy new roots are usually white, cream, or light tan and emerge as firm points or threads. A brown sheath around the node can be normal, but a stem that becomes soft, slimy, or black is breaking down and needs immediate cleanup.
Know When Water Roots Are Ready for Soil
Do not pot the cutting at the first tiny white nub. Wait until it has several roots, or at least one or two roots around one to two inches long with some side growth. That root mass is easier to position and gives the cutting more margin while it adjusts to a drier, air-filled potting mix.
The move from water to soil is a change in environment, not just a change in container. Water-grown roots develop in constant contact with water, while soil roots must balance moisture with air spaces. Epic Gardening notes that waiting too long can leave a large, tangled water-root system that needs more adjustment; transplant at a useful size rather than chasing the longest roots possible.
When the roots reach the milestone, fill a small drainage pot with premoistened mix. Make a hole with a pencil, guide the roots down without bending them sharply, and bury the lowest rooted node. Firm the mix lightly, water until a little drains from the bottom, and let the pot finish draining before returning it to its bright, indirect-light spot.
Method 2: Propagate a Philodendron Directly in Soil
Soil propagation skips the water-to-soil transition and lets roots develop in the medium where the plant will live. It is a strong choice if you already understand how to control moisture, have limited windowsill space, or want to avoid handling fragile water roots later.
Pre-moisten the mix so it is evenly damp but not dripping. Push the cutting into a hole rather than forcing the stem through compacted soil. Bury one node, or two if the cutting is long enough, while keeping the leaves and any upper growth point above the surface.
The cutting needs contact with moist mix, but it does not need a large pot. A container only slightly wider than the stem base dries more predictably than a deep pot filled with unused wet soil. Press the mix around the cutting just enough to hold it upright; compacting it hard removes the air spaces roots need.
Create a Humid but Airy Rooting Environment
Set the pot in bright, indirect light and a warm, stable room. If the air is very dry, place a loose clear bag or propagation cover over the pot, keeping it from touching the leaves. Vent the cover daily and remove it if condensation stays heavy, the stem softens, or gray mold appears.
Humidity slows leaf water loss; it does not replace drainage. Keep the mix consistently damp during the initial rooting window, but allow excess water to drain fully. If the top begins to dry while the lower mix remains saturated, do not keep adding water on a schedule—check the pot, the drainage hole, and the mix texture first.
Do not fertilize a soil cutting before it has roots. Fertilizer cannot substitute for a root system and can accumulate around an unrooted wound. Wait for clear rooting or new growth, then begin normal philodendron feeding at a conservative strength during active growth.
Test for Roots Without Tearing Them
Soil roots are hidden, so use several clues together. A cutting that stays firm, holds its leaf, and resists a very gentle upward nudge after two to four weeks is likely rooting. New leaf growth is an even better sign because it shows the cutting has both roots and enough stored energy to restart its shoot.
Avoid pulling every few days to check. Each tug breaks tiny roots just as they form and turns a manageable wait into repeated damage. If the cutting is still firm but unchanged after four weeks, improve light and warmth, check that the node is actually buried, and adjust moisture before unpotting it.
If the stem slides out easily and the buried end is clean, place it back at the same depth and give it more time. If the lower section is brown or mushy, trim back to firm tissue, discard the wet mix, and restart in a clean pot with a fresh node if one remains.
Water vs. Soil: Which Method Should You Choose?
Both methods can produce a healthy philodendron. The better choice depends on whether you value visibility and easy inspection or a direct start in the final medium.
| Factor | Water propagation | Soil propagation |
|---|---|---|
| Best for | Beginners learning node anatomy; cuttings you want to monitor | Growers comfortable judging soil moisture; direct potting |
| Main advantage | Roots are visible, so problems are easier to spot early | Roots develop in the medium where they will stay |
| Main risk | Stale water, submerged leaves, algae, or a rough water-to-soil transition | Overwatering that rots the buried stem before roots are visible |
| Checkpoint | Several roots about 1–2 inches long before potting | Firm resistance or new growth after roughly 2–4 weeks |
| Light and warmth | Bright indirect light; warm and stable | Bright indirect light; warm and stable |
Choose water if you have never propagated a philodendron and want feedback. Choose soil if you tend to forget jars but can check a small pot’s moisture, or if the cutting is already going into a new container. Our Wild Garden also emphasizes the practical difference between visible water roots and the more direct soil start. You can split several cuttings between the two methods; that is a useful way to learn which setup works best in your home without putting every piece at the same risk.
Neither method is automatically faster in every room. A healthy cutting in warm, bright indirect light can root quickly in either medium, while a cutting on a cold, dim windowsill may sit unchanged. Method, plant type, season, water cleanliness, and moisture control all interact, so use the condition of the cutting as the progress report.
Care for the Cutting After It Roots
The first week after rooting is a settling period, not a race to make the plant grow. Give the new plant stable bright indirect light, protect it from hot direct sun and cold drafts, and avoid rotating or relocating it every day.
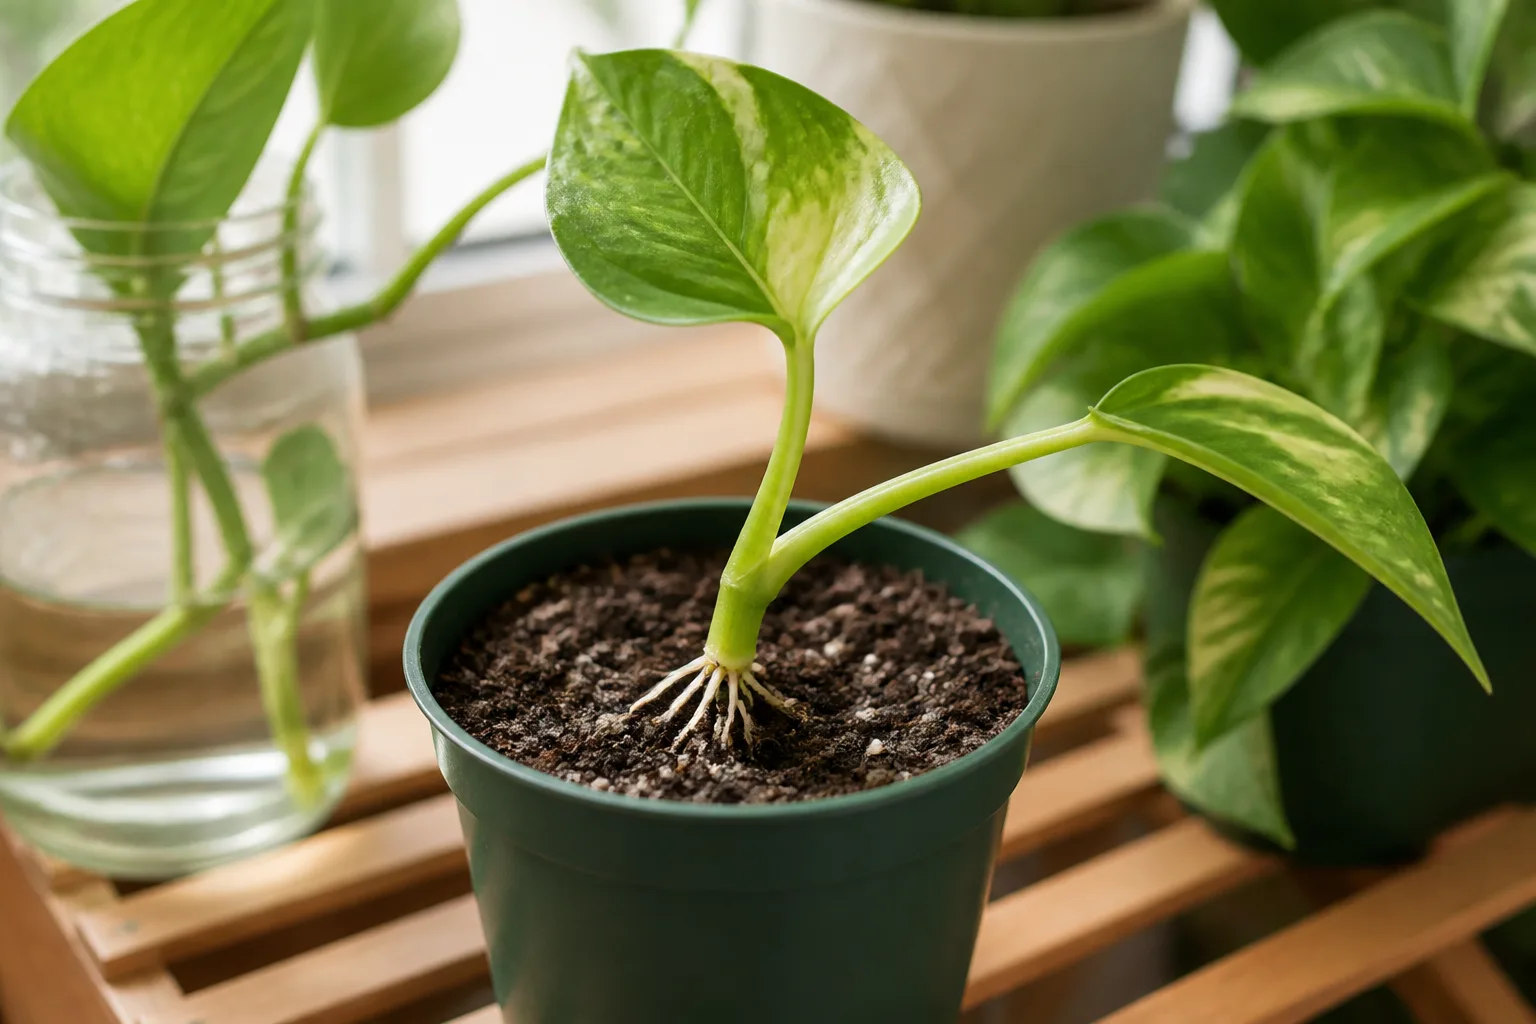
For a water-rooted cutting, keep the first pot small and the mix evenly but lightly moist. The roots should be covered, but the stem should not be buried deep enough that several leaves sit against damp soil. Water thoroughly once after planting, let it drain, and check the mix with your finger before watering again.
Some leaf droop after transplanting is normal, especially if the root system is small. Persistent wilt with a soft stem points to rot or water stress; persistent wilt with a dry, pulling-away mix points to insufficient moisture. Do not respond to every droop with more water—inspect the stem and root zone before choosing a fix.
Once the cutting makes a new leaf or shows steady growth, transition toward the mature plant’s routine. Heartleaf philodendron prefers moisture without sitting in saturated soil, and Missouri Botanical Garden recommends reducing watering when growth slows in fall through late winter. The Gardening Cook likewise recommends loose, well-draining mix, bright indirect light, and moisture checks rather than a fixed watering calendar. Hold fertilizer until the plant is clearly established, then feed only during active growth and follow the product label.
If you want a climber to make larger, more mature leaves, give it a stake, trellis, or moss pole after it has settled. A support changes the plant’s growth direction; it does not replace adequate light. A trailing cutting can also remain a trailing plant, so do not treat small juvenile leaves as proof that propagation failed.
Troubleshoot Slow, Rotted, or Leafless Cuttings
Most failed philodendron cuttings can be traced to one of a few checkpoints: no viable node, too much foliage, stale water, cold or dim conditions, or a rooting medium that stays wet and airless. Diagnose the physical symptom before changing several variables at once.
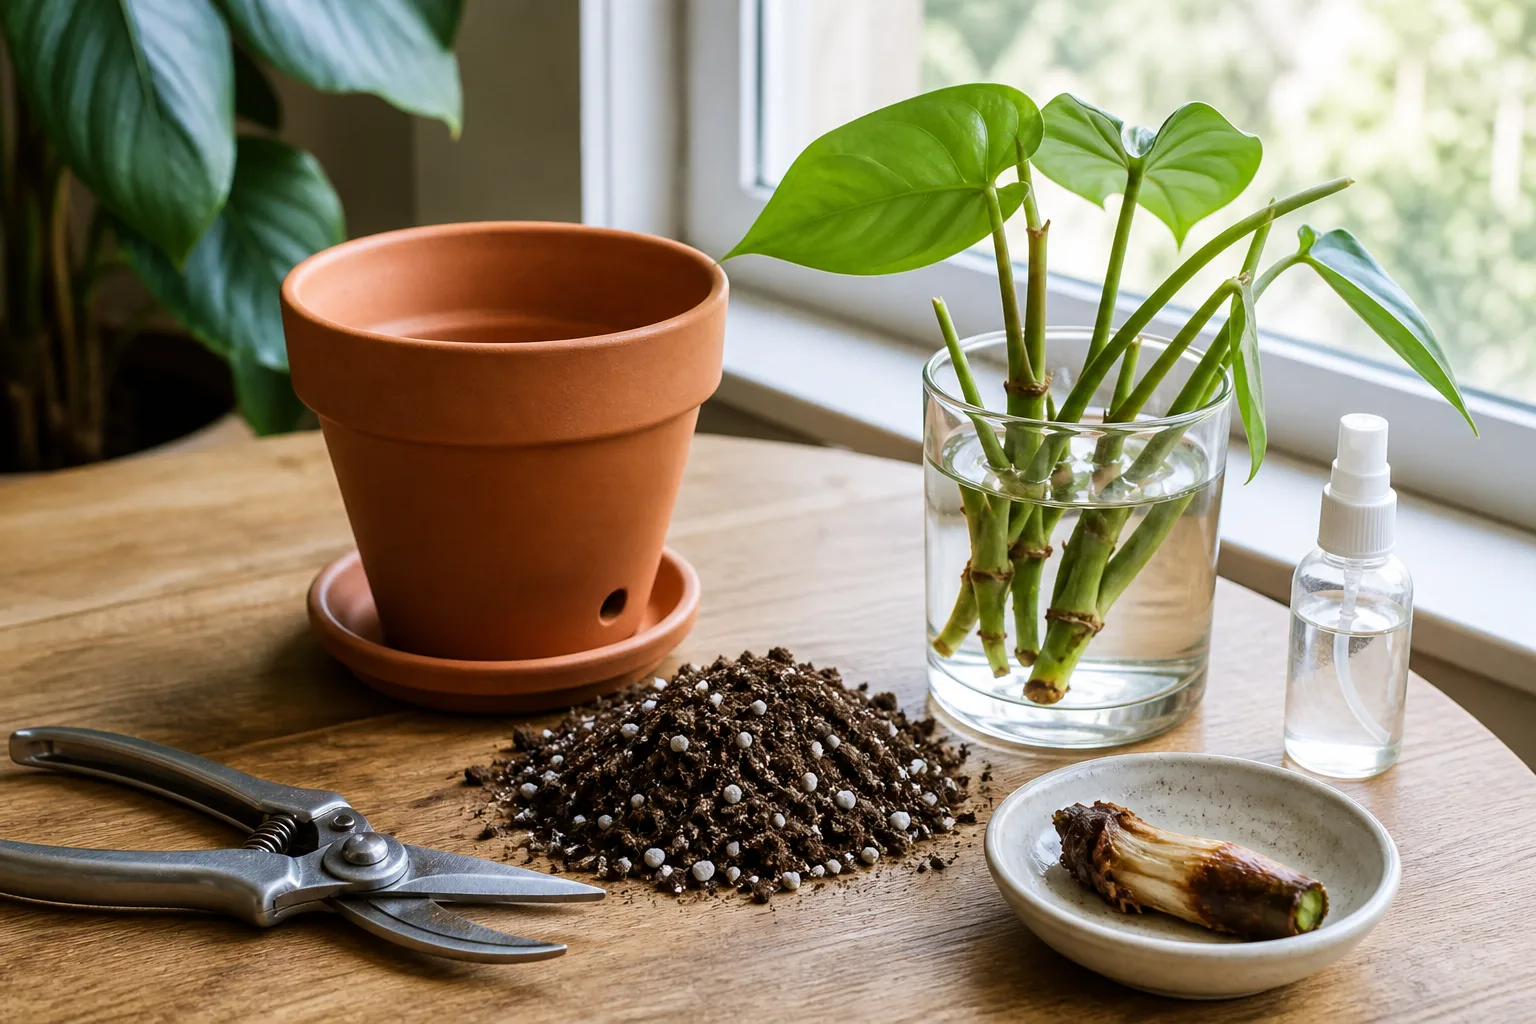
- No roots after two to four weeks: Recheck the node first. If the cutting has a node and remains firm, increase light to bright indirect levels and move it away from cold glass or drafts. A healthy cutting may simply be slow in low light or during the plant’s resting season.
- Black, brown, or slimy stem: Remove it from water or soil immediately. Cut above the soft tissue into firm stem, wash the jar or use fresh mix, and restart only if a healthy node remains. If the rot has reached every node, discard the piece rather than trying to bury the damage.
- Yellow leaf with a firm stem: A little yellowing can reflect transplant stress or a leaf that the cutting cannot afford to keep. Keep the node in the correct moisture range and avoid fertilizer. Yellowing paired with a soft stem is more concerning for rot than a yellow leaf alone.
- Leaves droop but the stem is firm: Check whether the mix is dry, the room is cold, or the cutting has too many leaves for its rootless state. Increase stability and humidity modestly, but do not seal a wet pot in a stagnant bag. Remove one excess leaf only if the cutting has a large amount of foliage.
- White fuzz or a film on the water: Rinse the cutting, scrub the container, and replace the water. Remove any decaying leaf tissue. If the stem itself is soft, treat it as rot rather than as harmless surface growth.
- Roots form but no new leaf appears: Roots come before visible top growth. Keep conditions steady, check that the cutting is oriented correctly, and give it time. A mid-stem or single-node cutting may need to activate a dormant bud before it can unfurl a new leaf.
When the Mother Plant Looks Bare
Pruning a long vine usually does not permanently ruin the parent. Make cuts just above a healthy node on the remaining stem so a dormant bud has a place to activate, then return the parent to good light and normal care. Do not keep chopping every week to force fullness; repeated removal of new growth can delay the recovery you want.
The parent may look sparser before it looks bushier. New shoots need time, warmth, and enough light to develop, and a low-light plant may replace the cut vine slowly. If the mother plant had root rot or pests before you cut, fix that problem before expecting vigorous regrowth.
Make a Fuller Pot From Several Cuttings
One rooted cutting grows into one new growth point, so a single plant may look thin for a while. For a fuller hanging pot, root several compatible cuttings and plant them together once each has a small, healthy root system. Space them around the center so their leaves face outward rather than burying all the stems in one tight bundle.
Use cuttings from the same cultivar if you want a consistent look. A ‘Brasil’ cutting will not turn into a plain green heartleaf plant because you changed the water or soil method; it keeps the growth traits present in the stem tissue. Variegated cuttings with very little green tissue may grow more slowly because they have less chlorophyll, so select a balanced section rather than an almost-white leaf.
After the grouped cuttings settle, pinch or prune only during active growth if you want more branching. Always cut above a node and reserve healthy prunings for another round of propagation. Keep the pot modestly sized until the combined root system fills it, since a large volume of wet mix is an avoidable rot risk for young plants.
Conclusion
To propagate a philodendron successfully, start with a healthy stem and identify the node before you make the cut. Remove the lower leaves, keep the node moist but the foliage dry, and choose water for visible progress or soil for a direct, no-transition start.
Give the cutting bright indirect light, warmth, clean water or airy mix, and enough time to root. Pot water-grown cuttings when they have several roots around one to two inches long, confirm soil cuttings with resistance or new growth, and treat soft black tissue as a rot problem rather than a patience problem. With a few well-prepared nodes, one healthy philodendron can become a fuller pot, a backup plant, or a thoughtful cutting to share.