How to Propagate Christmas Cactus: 2 Easy Methods
Learn how to propagate Christmas cactus in soil or water, from choosing segments and callusing the cut to rooting, potting up, and fixing rot.
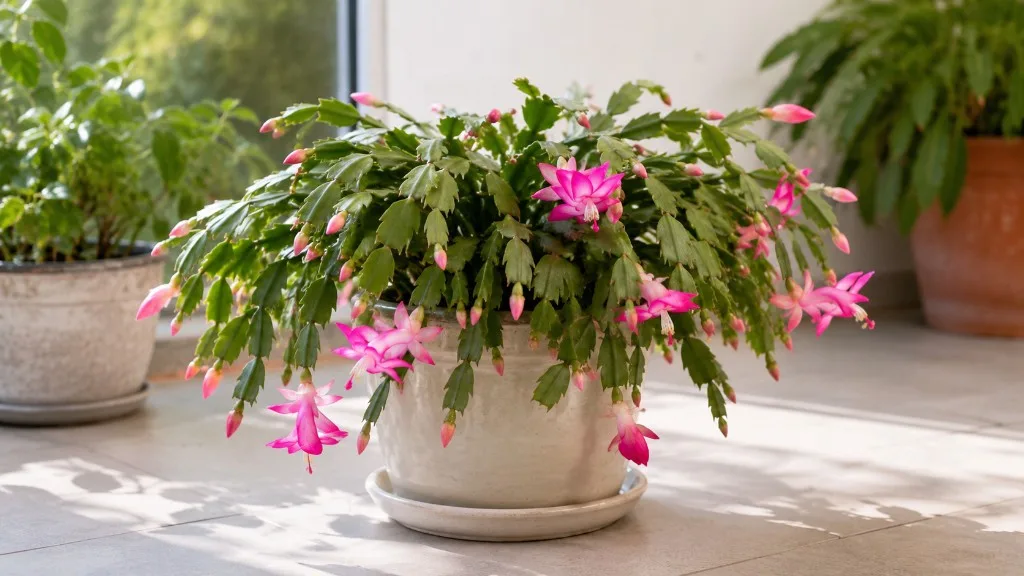
Christmas cactus is one of the friendliest houseplants to multiply because each stem is already divided into natural sections. Take a healthy piece at a joint, give the fresh end sensible moisture and warmth, and it can make roots without a complicated setup.
The best default is direct soil propagation: it is simple, keeps the cutting in the medium where it will eventually grow, and avoids a water-to-soil transition. Water propagation is useful when you want to watch roots develop, but it requires stricter control of the waterline and a careful potting-up step later.
Choose your propagation method before you cut
Do not start by removing the most convenient stem. Start by deciding which method suits your parent plant, your space, and the way you prefer to monitor progress.
| If you want to… | Choose… | Why |
|---|---|---|
| Root the cutting with the fewest handoffs | Soil | The cutting stays in its permanent type of medium from day one |
| See roots develop | Water | A clear glass makes early root growth visible |
| Make a fuller pot | Soil | Several segments can be planted together without later transplanting |
| Experiment with a naturally broken piece | Either | A firm, healthy broken stem can be prepared and rooted the same way |
If the parent plant is small, sparse, recently repotted, infested, or already dropping segments, wait. A propagation project is not worth sacrificing the plant you want to preserve. Choose a full, actively growing Christmas cactus with firm green segments and remove only a few pieces from places where pruning will improve the shape.
Soil versus water at a glance
Soil is the better starting point for most first attempts. It hides the roots, but it also avoids the shock of moving delicate water-grown roots into a different environment. Iowa State University Extension recommends rooting holiday cactus segments in moist perlite or coarse sand and reports that roots commonly form in about six to eight weeks.
Water is not a shortcut to a faster plant. It is a visibility trade-off: you can spot roots and a rotting base early, but the cutting eventually has to adapt to potting mix. Use water if observing the process will help you leave the cutting alone, not because the roots need to be permanently submerged.
Know what makes a Christmas cactus cutting different
Christmas cactus is a tropical or rainforest cactus in the genus Schlumbergera, not a desert cactus that wants to stay dry for long periods. The Royal Horticultural Society’s growing guide describes its long, succulent, segmented stems and notes that these plants prefer bright light without harsh full sun.
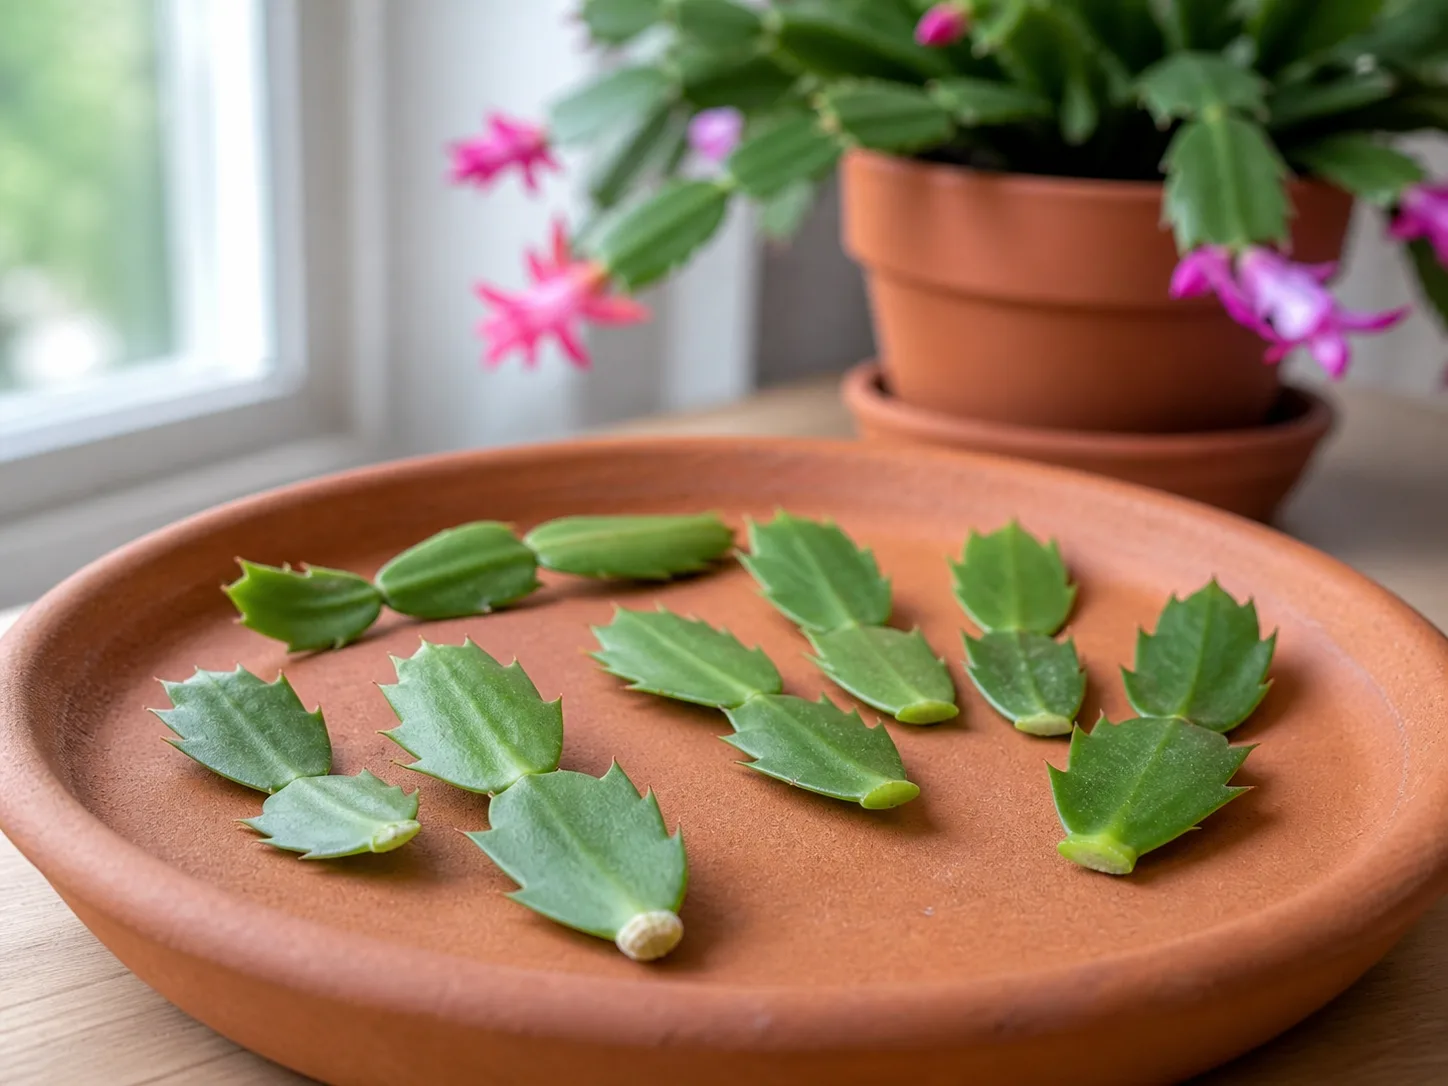
Each flat, leaf-like piece is a stem segment. The narrow connection between two segments is the joint, and that is the cleanest place to separate a cutting. A cutting can be two to four segments long; three segments is a practical target when the parent plant has enough growth to spare. A longer piece is easier to keep upright, while a very short piece can still root if it is healthy and correctly oriented.
The important detail is direction. The end that was closest to the parent plant is the root end. Mark it mentally before setting the piece down, and keep it at the bottom in either soil or water. Iowa State Extension specifically warns that holiday cactus cuttings will not root if planted upside down.
Choose the right timing and parent stem
The safest time to propagate is after flowering, when the plant is shifting back into active vegetative growth. Spring and early summer usually provide the warmth and light that help a cutting recover. The RHS guide recommends removing end segments in spring after flowering, while Iowa State University Extension advises repotting and handling holiday cacti when they are not in bloom.
Avoid taking cuttings while the plant is budding or flowering. Moving energy into a fresh wound at that point can interrupt the display, and the cutting has fewer favorable growing conditions if the season is cool and dim. If a healthy segment falls off accidentally, you can still try to root it, but a planned project should wait until the flowers have finished.
Select segments that are plump, evenly green, and free of soft spots, pests, sunscald, and black or translucent tissue. Avoid the oldest woody-looking pieces if they are shriveled, and do not use a section cut from a stem that is already collapsing at the base. Propagation cannot disinfect diseased material; it can only move the problem into a second pot.
Prepare the materials and cutting
Gather a clean pair of pruners or a sharp knife, a small pot with a drainage hole for soil propagation, a loose rooting mix, and a clean glass for water propagation. A pencil or dibber helps make a planting hole without scraping the cutting across dry mix.
For soil, use a commercial cactus mix or a regular indoor potting mix loosened with perlite, pumice, or coarse sand. The goal is not a particular recipe; it is a medium that holds the segment steady but lets excess water drain quickly. Do not use garden soil in a small indoor container because it can compact around the shallow cutting and remain wet too long.
Disinfect the blade before cutting, then separate the stem at a joint with one clean motion. You can also gently twist segments apart at the joint when the plant separates cleanly. Do not crush the narrow connection or saw repeatedly through the middle of a segment; bruised tissue is more vulnerable to rot.
Let the broken end callus without over-drying it
Place the cuttings on a clean, dry surface out of direct sun. Let the fresh end air-dry until it is no longer wet or glossy—often a few hours to overnight. Iowa State Extension recommends allowing the ends to callus overnight, while University of Tennessee Extension notes that a cutting can be planted after a shorter drying period or even immediately.
That difference is practical, not contradictory. A short callus period is a risk-control step for a damp room or a cutting with a juicy, torn end; it is not a reason to leave the segment exposed for several days until it is wrinkled. Once the wound surface feels dry, continue to the rooting method. The University of Tennessee Extension holiday cactus handout likewise emphasizes a clean joint, correct root-end orientation, shallow planting, and bright indirect light.
Method 1: Root Christmas cactus in soil
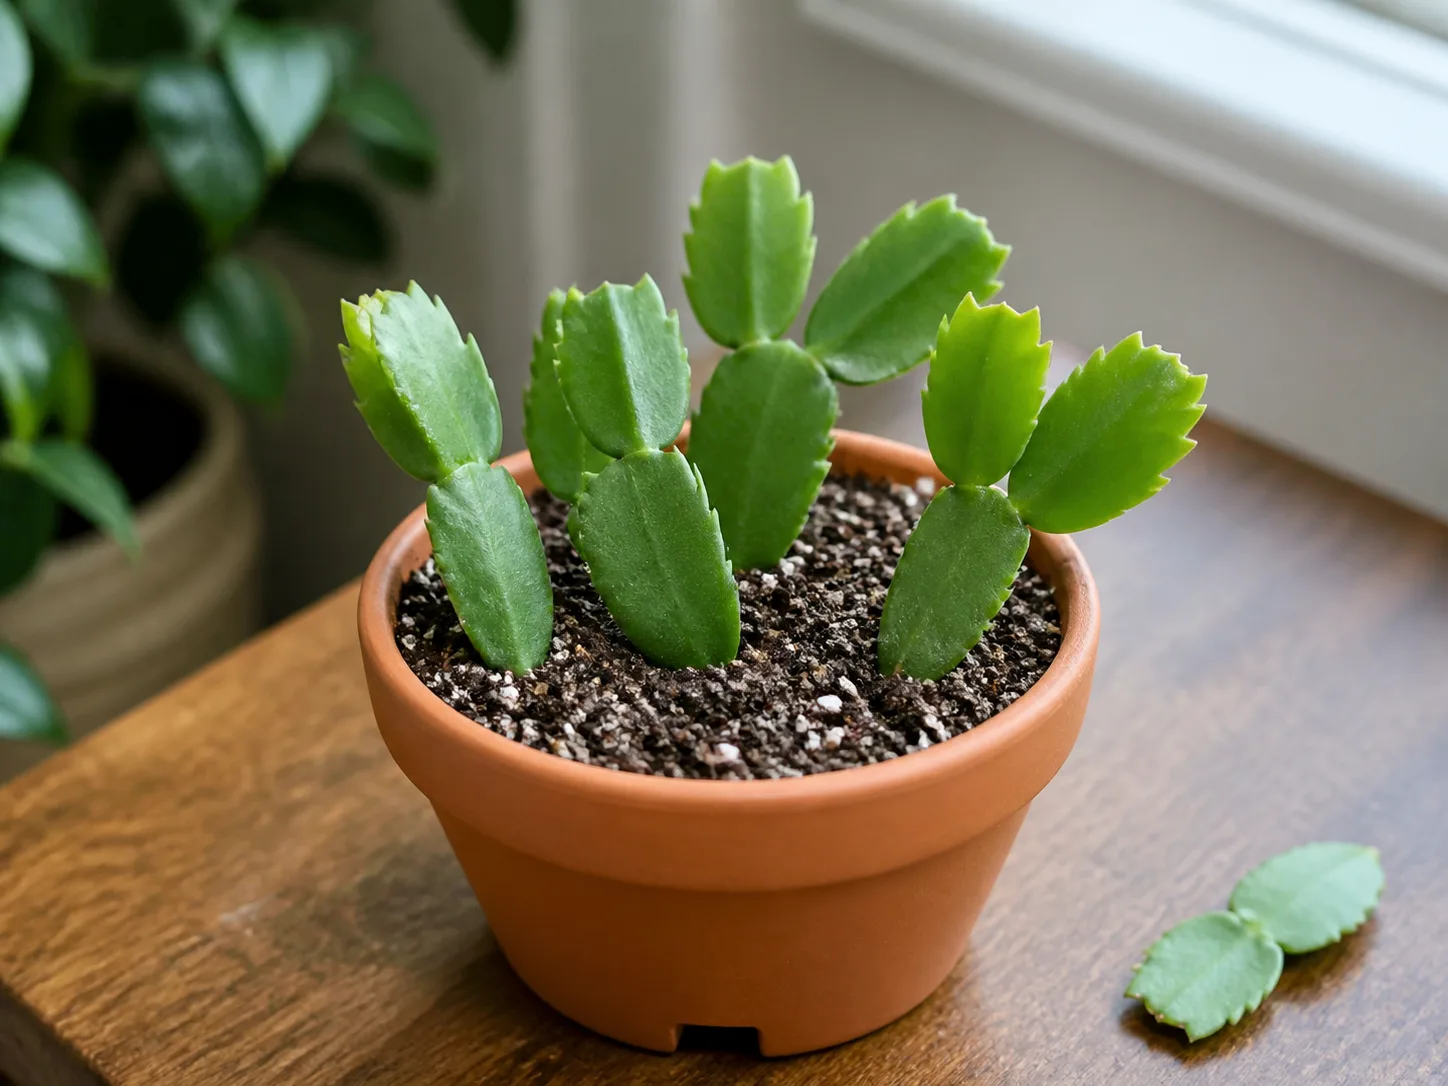
Direct soil rooting is the most forgiving setup because the new roots develop in the medium where they will remain. It also makes it easier to plant several cuttings together, which is useful if you want a fuller young plant instead of a single long stem.
Plant the cutting at the correct depth
Fill a small pot with lightly moistened, airy mix. Make a hole first, then place the root end down and bury only enough of the lower stem to hold the cutting upright—about 1 inch is a useful starting point. The RHS propagation guidance recommends inserting the base about 1 cm (½ inch) deep, while the University of Tennessee Extension handout allows 1–2 inches when needed for stability.
Use the shallower depth if the cutting stands securely. Deep planting does not create roots faster; it places more green tissue in contact with wet mix and gives rot more opportunity. If you are planting multiple pieces in one pot, leave a little space between them so air can move around the bases and so you can remove one failed cutting without disturbing all the others.
Press the mix gently around the base. It should support the segment, not clamp it in a dense plug. If the pot is top-heavy, use a small stake or arrange the cuttings around the rim for support, but keep the stake from scraping the fresh wound.
Care for it while roots form
Set the pot in bright, indirect light and keep it warm, ideally around 18–24°C (65–75°F). Protect it from hot afternoon sun, cold drafts, heating vents, and sudden temperature changes. The RHS gives this temperature range for rooting cuttings, and the University of Tennessee Extension advises bright light without direct sun and avoiding temperatures below 50°F.
Start with a mix that is barely moist rather than saturated. After planting, let the upper part of the mix begin to dry before watering again; then add enough water to moisten the mix without leaving the pot standing in runoff. A rootless cutting cannot use repeated heavy watering, and a wet pot deprives the base of the air it needs.
Some limpness or slight wrinkling during the first week is not automatically failure. The segment is using stored water while it has no roots, so it may look less firm before it recovers. A soft, translucent, darkening base is different: that is a rot warning, not normal thirst.
Do not tug on the cutting every few days. Roots are easy to tear while they are new, and a gentle pull is only useful after several weeks when you have a reason to check. The most convincing early sign is new growth at a segment tip or joint; roots often develop before the cutting shows anything above the mix.
Method 2: Root Christmas cactus in water
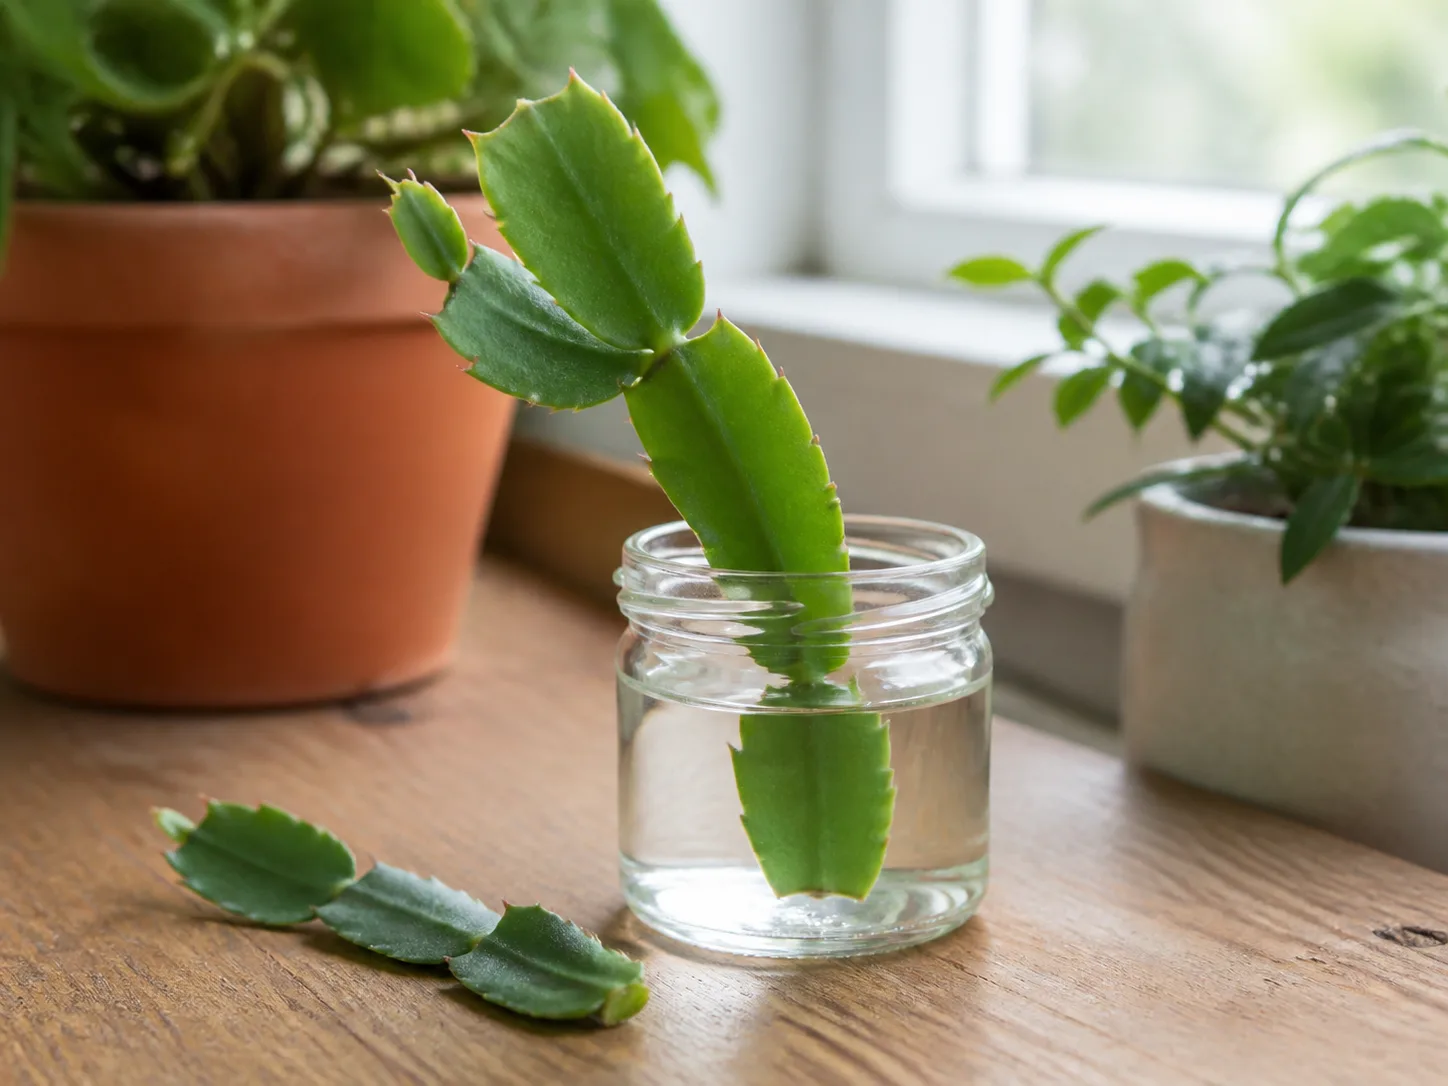
Water propagation works when you keep the cutting’s green tissue mostly dry and change the water before it becomes stale. It is especially useful for a grower who wants to see the first roots, but the method is less forgiving if the entire segment is submerged or the jar sits in strong sun.
Keep the waterline below the upper segments
Use a clean, narrow glass or jar that can support the cutting without forcing it against the rim. Add room-temperature water, then place only the lower end of the cutting in it. The lower joint or bottom segment should touch the water; the upper segments should stay above the waterline.
If the cutting will not stand, use a few clean pebbles to brace it, but do not pack the container so tightly that the base is trapped in stagnant water. Epic Gardening’s water-propagation guide also recommends keeping only the bottom one or two segments in water and leaving the rest dry to reduce rot.
Place the glass in bright, indirect light. Check it every few days and replace the water if it clouds, develops debris, or smells stale; a weekly change is a sensible routine while the cutting is rooting. Keep the jar away from direct sun, which can heat the water and encourage algae, and away from cold windows or vents.
Visible white root nubs may appear within a few weeks, but a single nub is not the same as a useful root system. Give the cutting time to produce several roots and some branching. If the segment remains firm and green, lack of visible roots at two weeks is a reason to keep waiting, not to move it repeatedly.
Move water roots into potting mix
Pot up when the cutting has several firm roots, with the longest around 1 inch or a little longer. Iowa State Extension uses roots of about 1 inch or more as a practical transplant point. Waiting for a dense tangle is unnecessary and makes the roots more likely to break during planting.
Prepare a small pot with a drainage hole and an airy mix before removing the cutting from the glass. Make a hole wide enough for the roots, lower them into place without bending them sharply, and cover them lightly. Water once to settle the mix, let excess drain, and keep the pot in the same bright, warm location.
Water-grown roots can look delicate and the cutting may droop briefly after the move. Keep the mix lightly and evenly moist for the first week or two while the roots adjust, but do not turn the pot into a saturated reservoir. After that adjustment period, let the mix dry somewhat between waterings, as you would for an established holiday cactus.
Do not move an entire mature, soil-grown plant into a jar of water as a way to skip propagation. Roots formed in soil are adapted to a different balance of air and water; rooting a fresh cutting in water is the safer experiment.
Aftercare for a newly rooted Christmas cactus
Once you can feel light resistance or see new segment growth, keep the young plant in bright indirect light and avoid sudden changes. Christmas cactus prefers more consistent moisture than a desert cactus, but it still needs an open mix and a pot that drains. The Iowa State holiday cactus guide notes that holiday cacti should not stay bone-dry, while overwatering can lead to limp growth and root rot.
For the first month after roots appear, water when the mix has begun to dry rather than following a fixed calendar. A small pot in a warm bright room may dry in a few days; a larger pot, cool room, or dim window may stay damp much longer. Judge the mix and the plant together instead of copying an interval from another home.
Do not fertilize a fresh cutting while it is still building its first root system. Resume a light houseplant feeding routine only after it is actively growing in its pot. A cutting that has rooted but has not produced a new segment is still establishing, not asking for a stronger dose of fertilizer.
Troubleshoot limp, stalled, or rotting cuttings
The cutting is limp but still green and firm at the base. This can be normal during the rootless period. Confirm that it is warm, bright without harsh sun, and not sitting in wet mix; then leave it alone for another couple of weeks.
The base is soft, translucent, brown, or foul-smelling. Remove the cutting from water or mix immediately. If any firm tissue remains, cut above the damaged portion with a clean blade, let the new end dry, and restart in fresh mix or clean water. If the entire base is soft, discard it rather than trying to force a dead section to root.
The cutting has no roots after several weeks. Check the basics in this order: is the original root end down, is the medium airy, is the pot draining, and is the plant warm enough? An upside-down cutting, a deeply buried segment, cool low light, and constant saturation can all stall rooting. The RHS gives a broad three-to-12-week range for cuttings, so a healthy, unchanged segment may still be within a normal window.
The water is cloudy or the jar smells stale. Remove the cutting, rinse the container, and replace the water. Inspect the base for softness before returning it. Cloudy water alone does not prove the cutting is lost, but it is a prompt to improve hygiene and reduce the amount of tissue below the waterline.
Roots formed, but there is no new segment. Roots and shoots do not arrive on the same schedule. Give the cutting bright indirect light and steady warmth, and avoid digging it up to look for a rhizome or new bud. If the roots are firm and the base is clean, patience is usually more useful than more water.
When will a propagated Christmas cactus bloom?
A rooted cutting may not flower in the same season, especially if it started as only a few segments. It first has to establish roots, produce new segments, and develop enough stem tips to carry buds. The University of Tennessee Extension notes that a newly planted cactus may not bloom that year because it needs to grow first.
Once the young plant is established, its flowering depends on the cultivar and on autumn conditions. Holiday cacti form buds as days shorten; Iowa State Extension describes the importance of long uninterrupted nights and cooler temperatures, while also warning that sudden changes during bud development can cause bud drop. Keep the plant away from late-night lamps, cold drafts, and abrupt moves once buds are forming.
The strongest way to get flowers is not to force a weak cutting. Build a healthy, well-rooted plant through the growing season, then give it stable light, moisture, and temperature as fall arrives. More mature stem tips usually mean more places for flowers to form, which is why a fuller plant becomes a better bloom display over time.
Conclusion
To propagate Christmas cactus, choose a firm healthy stem, separate it at a joint, keep the original root end down, and give the cut end a short chance to dry before rooting. Use soil if you want the simplest route with no later transition; use water if you want to watch roots, keeping only the lower end submerged and potting up once several roots are established.
The main risks are not a lack of special equipment. They are taking from a weak or flowering parent, burying too much of the segment, keeping a rootless base constantly wet, or disturbing the cutting before it has time to work. Bright indirect light, warmth, drainage, and patience will do more for your success than a complicated propagation trick.



