How to Grow and Care for Northern Red Oak Trees
Northern red oak rewards a roomy, sunny site. Get practical steps for planting, watering, pruning, fall cleanup, and diagnosing leaf or branch problems.
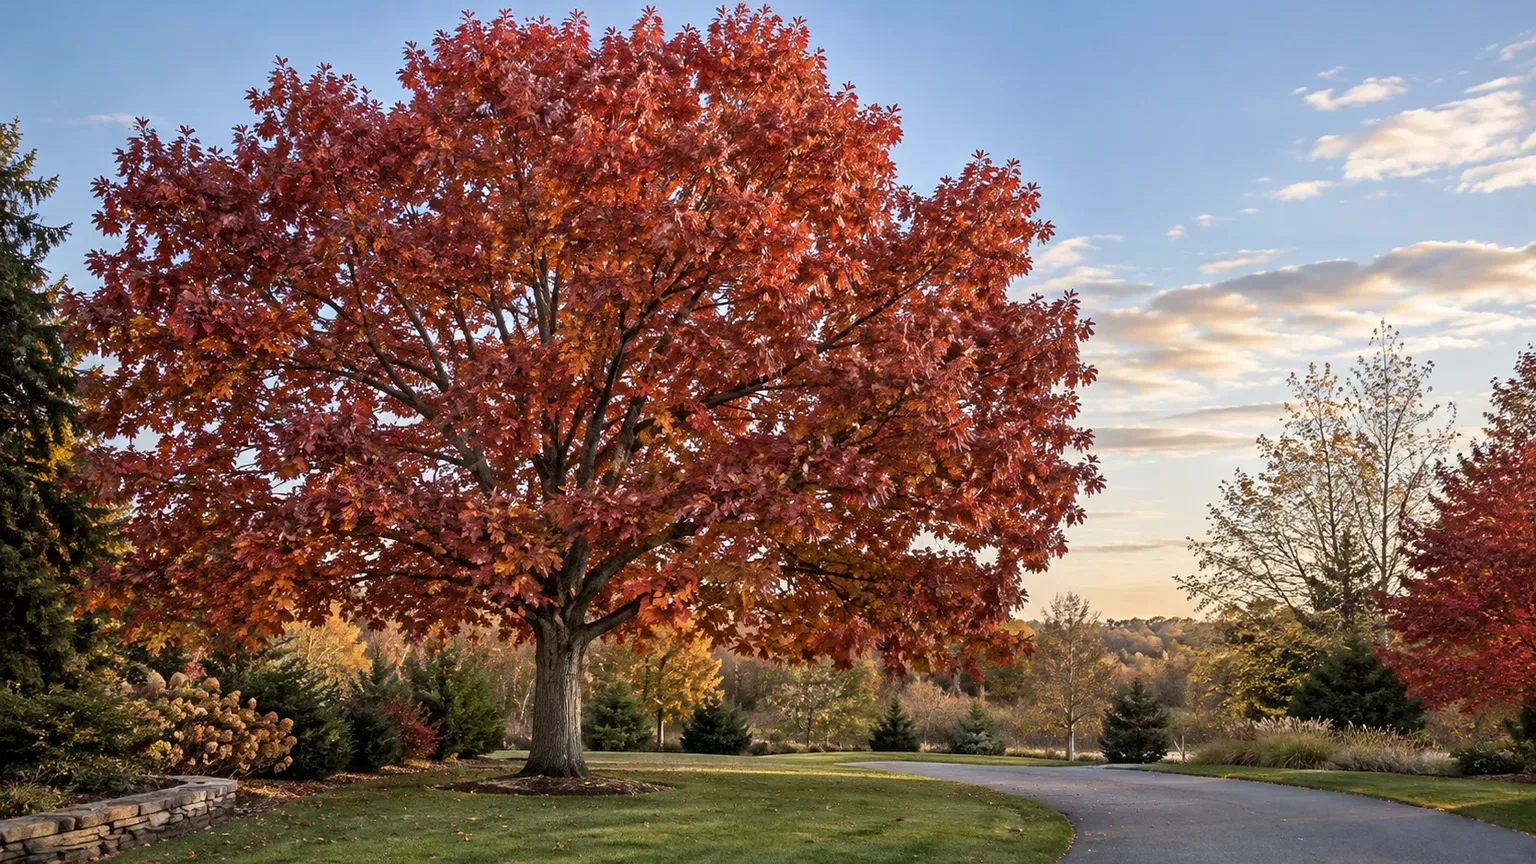
Northern red oak (Quercus rubra) is a fast-growing, long-lived shade tree for a site with real room: plan for a canopy roughly 50 to 75 feet tall and about as wide, not a compact ornamental that can be kept small with pruning. In the right landscape it brings summer shade, red-brown fall foliage, and acorns used by wildlife. In a narrow strip beside a house or beneath utility wires, its mature size becomes a maintenance problem rather than an asset.
The most useful care plan starts before purchase. Confirm the tree fits above and below ground, choose a sunny site with acidic to near-neutral, well-drained soil, set the root flare at the right level, and keep the root ball moist while it establishes. After that, protect the root zone, prune selectively during the locally safe season, and investigate rapid branch decline instead of treating every brown leaf as the same disease.
Is Northern Red Oak Right for Your Yard?
Northern red oak suits larger lawns, parks, open woodland edges, and broad planting areas where a spreading crown can develop without regular clearance cuts. It is native across much of eastern North America and is commonly listed for USDA hardiness zones 4 through 8, though local climate, exposure, and nursery provenance still affect performance. North Carolina State Extension’s species profile describes it as a medium-to-large tree with a rounded, spreading crown and a preference for full sun and well-drained soil.
A small nursery tree is a poor guide to the eventual scale. The branches are only half the question: roots extend into the surrounding soil well beyond the trunk, and paving, trenching, compaction, or construction fill can constrain them. If the planting space cannot accommodate a broad crown and an undisturbed root area, choose a smaller species before digging; severe pruning will not turn a large oak into a genuinely small tree.
Mature Size, Native Range, and Hardiness
Published dimensions vary by source and growing conditions, so use a conservative landscape allowance. NC State gives a typical mature range around 50 to 75 feet high and a similar width; Penn State Extension’s oak guide describes northern red oak as reaching roughly 75 feet with a rounded crown. Favorable soil, age, and open-grown conditions can produce a larger specimen, so do not plan around the smallest catalog figure. The existing guide to northern red oak fall color compares the species with other oaks if fall display is part of your choice.
The species tolerates cold winters and is usually recommended through zones 4–8, but a hardiness-zone label does not tell you whether the soil, moisture, or available space are suitable. A site with reflected heat, compacted fill, or alkaline construction debris may stress a tree even when winter temperatures fall inside its listed range. Local extension or an experienced native-tree nursery can help match a regional seed source to your climate.
Light, Soil, Drainage, and pH
Give northern red oak full sun—about six hours or more of direct light—when the site allows. It can tolerate some partial shade, especially while young in a woodland edge, but a tree planted under dense mature crowns may grow slowly and lean toward open light. Leave it enough overhead room for a broad crown rather than selecting a spot where neighboring trees will permanently crowd it.
The species grows in moist-to-dry, well-drained soil and generally prefers acidic conditions, though NC State lists it as adaptable to loam and sand and tolerant of dry soil once established. Good drainage means water moves through the root zone; it does not mean the young tree should be left dry through its first summers. Avoid ground that stays saturated for long stretches, as well as construction-compacted soil that holds water at the surface but lacks air deeper down. Penn State’s oak guide likewise identifies northern red oak as a full-sun tree for acidic, fertile, sandy-to-loamy, well-drained soil.
Soil pH matters because alkaline ground can make iron unavailable even where it is present, leading to interveinal chlorosis: yellow tissue with greener veins. If you are planting near concrete, limestone, or imported fill—or if nearby oaks show pale foliage—get a soil test before choosing this species. Do not scatter sulfur, iron, or fertilizer by guesswork; for a large established tree, changing the pH across the expanding root zone may be impractical, and a better-adapted tree can be the sensible choice.
Plan the Site and Select Healthy Nursery Stock
Stand where you expect the trunk to go and picture the mature canopy in every direction. Keep it clear of overhead wires, roofs, narrow walks, septic components, and likely future construction. Do not use a fixed distance from the house as a guarantee: the final spread, branch angle, soil, hardscape, and local building rules matter. Before any U.S. digging project, contact 811 or the relevant local utility-marking service and separately locate private irrigation, lighting, and drain lines.
Before buying, confirm the nursery label says northern red oak (Quercus rubra), since “red oak” can describe several species. Its mature leaves have pointed lobes ending in tiny bristles; white-oak-group leaves have rounded lobes. This distinction also matters when comparing care and disease susceptibility. NC State Extension’s species profile describes the identifying leaf form and the acorn’s two-season development.
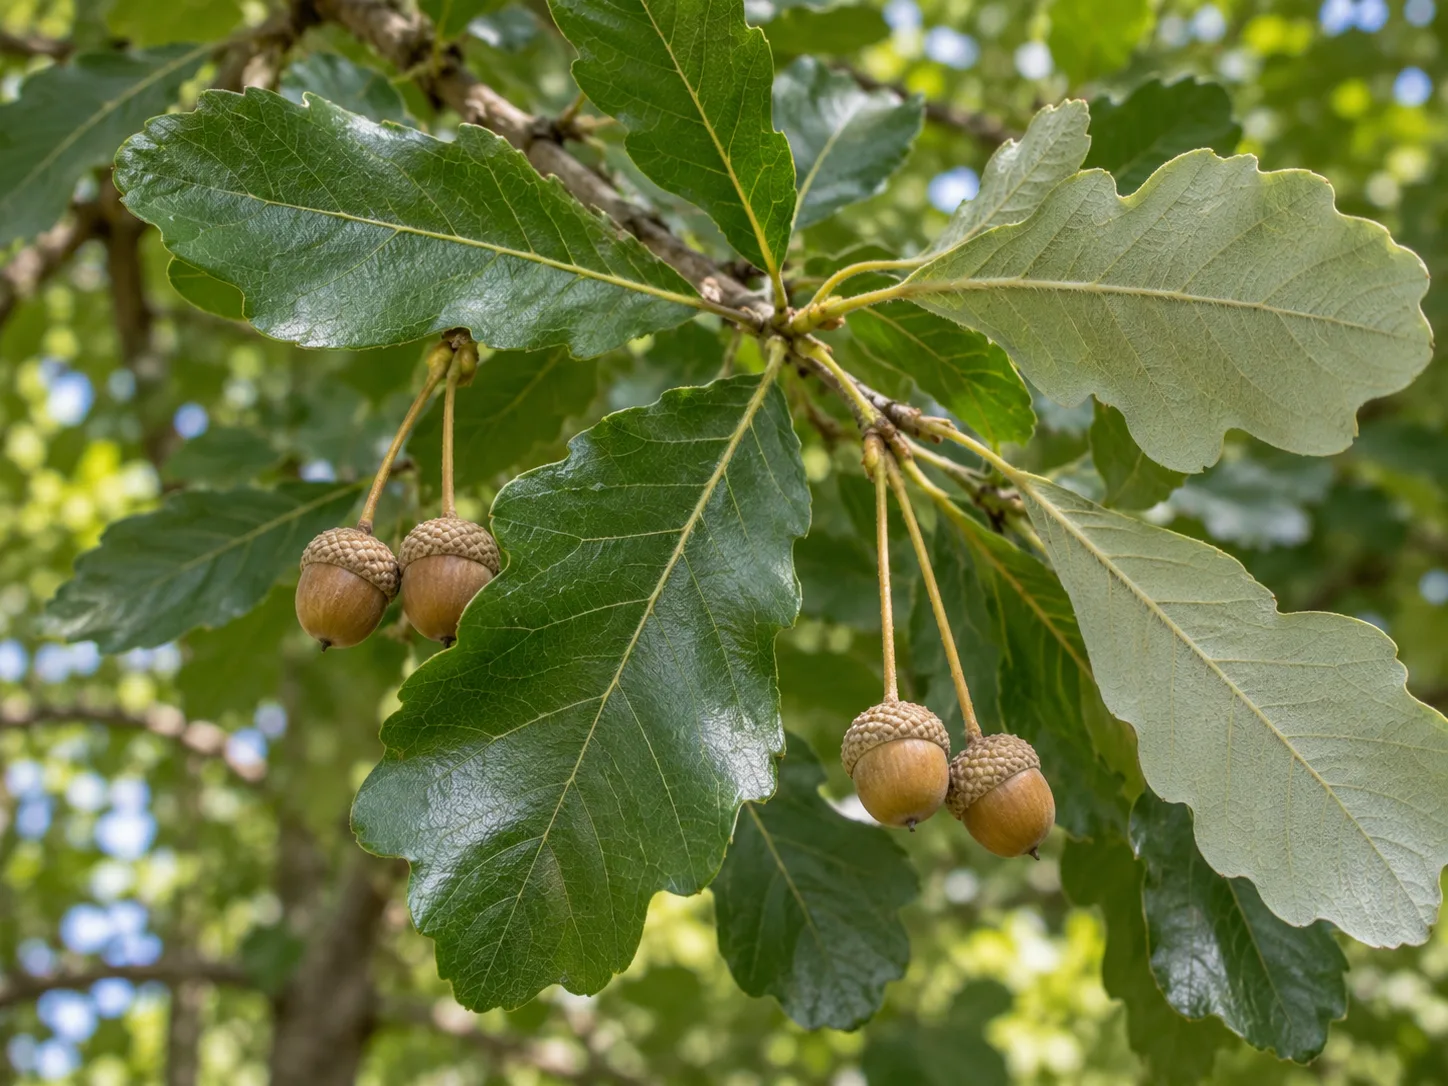
Swamp white oak (Quercus bicolor) is shown for comparison: its rounded lobes differ from the pointed, bristle-tipped leaves of northern red oak.
Inspect the nursery tree instead of buying by height alone. Look for a straight trunk, a sound leader, evenly distributed branches, and no large wounds or dead sections. At the trunk base, find the root flare—the widening where the first main roots emerge. If the flare is buried in the pot, ask the nursery to expose it so you can assess how deep the tree was grown; a trunk that enters the soil like a post may conceal circling roots or a deeply planted root system.
For container stock, slide the pot off if the nursery permits and inspect the outer root ball. A dense mat of woody roots that circles the container is a warning, especially if roots already wrap around the trunk flare. A few fine roots at the edge are normal; thick circling roots may need careful correction before planting, or the tree may be a poor candidate. Balled-and-burlapped stock should have a firm, intact root ball and a visible trunk flare; bare-root stock must be dormant and its roots kept shaded and damp from purchase to planting.
Plant the Tree at the Correct Depth
Plant in early spring or fall when the tree is dormant or the weather is cool, the soil is workable, and you can keep the root ball evenly moist. Avoid frozen ground, saturated mud, or hot windy periods that quickly dry exposed roots. Regional timing varies, so follow local guidance if your area has severe winters, fall drought, or a short growing season.
Prepare the hole before removing the tree from its container or wrapping. Make it broad enough—typically two or three times the root ball’s width—but no deeper than the root ball’s actual height after you expose the root flare. The hole bottom should be firm and level so the tree does not settle. A deep, soft hole filled with loose amended soil can sink and bury the roots after the first heavy watering.
Set the tree upright with the root flare at or slightly above the surrounding grade. Backfill with the soil you removed, breaking up large clods but avoiding hard tamping or a rich pocket of compost that differs sharply from the native soil. Water as you backfill to settle soil into gaps. Do not pile extra soil against the trunk or create a basin that stays flooded after rain; the goal is a stable root zone with the original flare visible.
Adapt the Hole to the Root Type
Container trees need their pot removed and roots inspected; loosen fine roots gently, and correct a small number of circling woody roots with clean cuts. Do not slash indiscriminately through a badly congested root ball simply to make it fit. Fine Gardening’s planting guide distinguishes bare-root, container, and balled-and-burlapped stock because each arrives with a different root condition; its central practical advice is to keep roots moist and set the crown or flare at the soil line. Go Gardening’s tree-transplanting guide likewise emphasizes dormant timing and keeping as much of the root ball intact as practical.
With balled-and-burlapped stock, cut away twine from the trunk and remove the upper portion of wire basket and burlap after setting the root ball, following nursery or extension directions for the wrapping material. Do not pull a heavy tree out of a stable ball just to strip every layer at once. For bare-root trees, spread the roots naturally over a soil mound and never bend the main roots upward to squeeze them into a narrow hole.
Staking is not automatic. Use a low, flexible support only if the root ball rocks, the tree is exposed to strong wind, or local planting guidance calls for it. Leave enough movement for the trunk to flex, check ties regularly, and remove supports once roots hold the tree securely, often within the first year. Ties left tight against bark can girdle the trunk, while rigid staking can prevent the trunk from developing strength.
Water Through Establishment
Water the planted tree thoroughly, then check both the original root ball and surrounding soil before watering again. The root ball can dry faster than heavier native soil, so checking only the surrounding lawn may mislead you. Pull back mulch and feel several inches down; if the soil is cool and moist, wait, and if the root ball is drying and crumbly, water slowly enough to wet its full depth.
For the first growing season, inspect the soil more often during hot, windy weather and whenever rain has been scarce. Sandy soil drains faster and may need more frequent attention than clay; clay can remain wet long after the surface dries. Use a hose on a slow trickle or a soaker hose to reduce runoff. Avoid brief daily sprinkling, which wets the surface without reliably reaching the absorbing roots, and avoid keeping the root ball constantly soggy.
Continue monitoring through the second growing season, especially during summer drought. A newly planted tree may take several seasons to establish, with the exact period influenced by its size, root condition, weather, and soil. Once established, northern red oak tolerates some dry conditions, but long droughts can still cause stress. Water deeply during extended dry spells if the root zone is dry rather than applying a small amount every day on a calendar.
Mulch and Protect the Root Zone
Spread a two- to three-inch layer of organic mulch over a broad area around the new tree, ideally extending beyond the original planting hole as the roots expand. Leave a visible gap of several inches between mulch and trunk. A wide, shallow ring suppresses competing turf, moderates soil temperature, and reduces mower and string-trimmer injuries; a tall cone of mulch against bark keeps the trunk damp and hides the root flare.
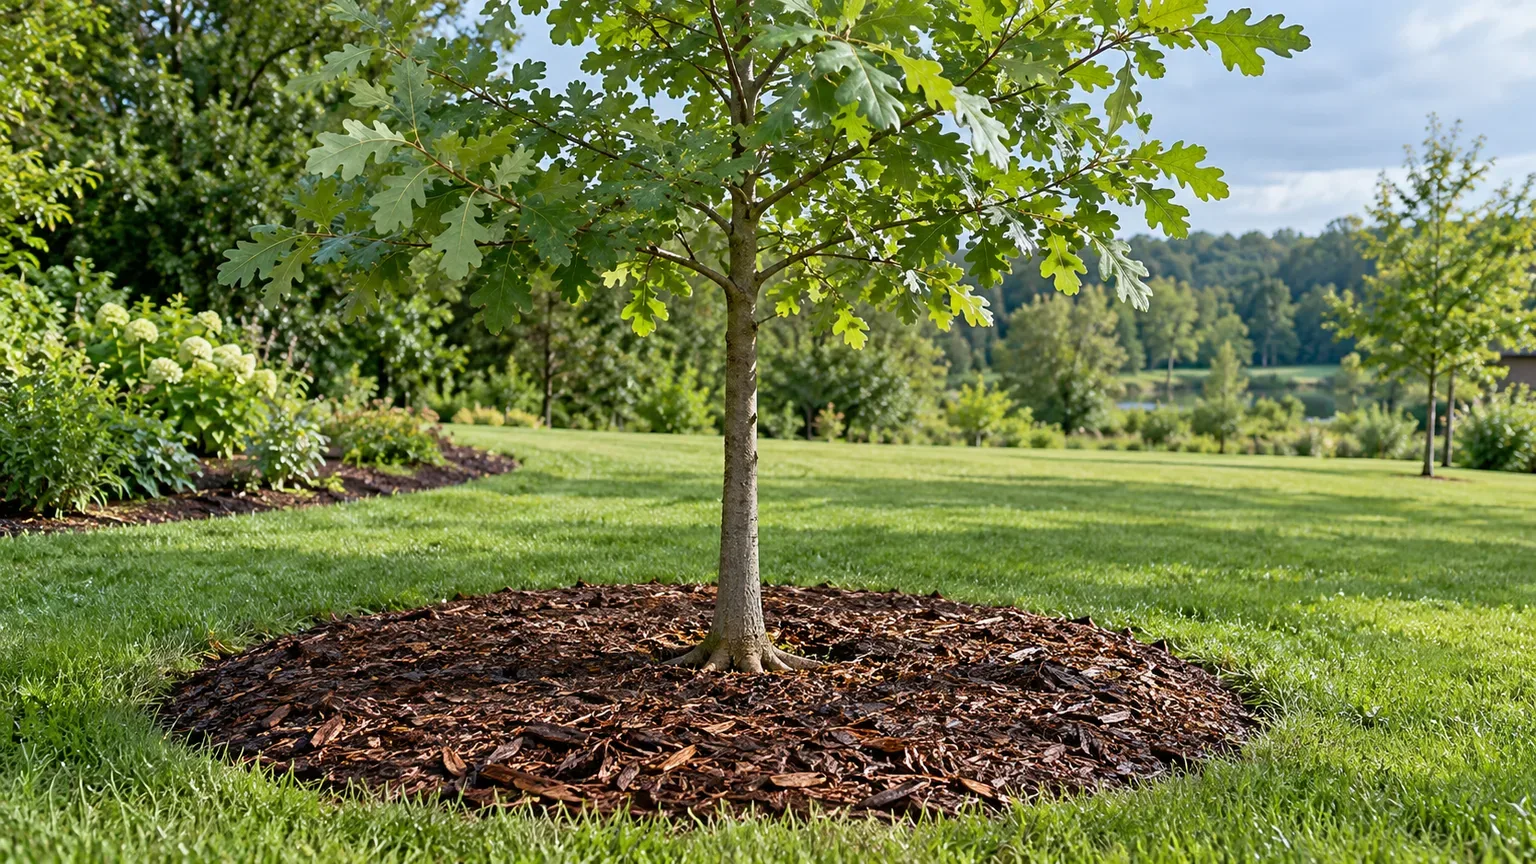
This young swamp white oak illustrates the root-zone mulch pattern: cover a broad area, but keep bark and the root flare uncovered.
Keep grass and dense groundcover away from the immediate trunk area during establishment. Turf competes for water and encourages repeated mowing close to young bark. Expand the mulched zone as the tree grows, but avoid piling mulch every year without checking depth; renew only what has decomposed. If you use fallen leaves as mulch, shred thick mats that would otherwise smother grass or stay wet against the trunk.
Do not cultivate deeply beneath an established oak to install a flower bed. Many fine absorbing roots lie near the soil surface, so trenching, rototilling, raising grade, or adding a thick layer of soil can injure roots even several feet from the trunk. Plant small perennials in existing open soil only when you can do so without cutting large roots, or choose a separate bed outside the tree’s most important root zone.
Fertilize Only for a Diagnosed Need
A healthy northern red oak usually does not need routine fertilizer at planting. First check the conditions that more often limit establishment: buried root flare, dry root ball, poor drainage, inadequate light, lawn competition, compacted soil, or damage from equipment. Adding nitrogen cannot fix those problems and may produce top growth that the recovering roots cannot support.
If growth is persistently weak or leaves show a repeated abnormal pattern, submit a soil sample through a local extension lab before applying nutrients or pH amendments. A soil test can distinguish low nutrient availability from alkaline soil or other conditions that require a different response. If a nutrient deficiency is confirmed, use the test recommendation and product label; do not spread fertilizer up to the trunk or over the whole yard by habit.
Prune for Sound Structure and Lower Disease Risk
Prune young trees selectively to establish a strong framework, not to force a rounded shape. Preserve one central leader where the tree’s form supports it, identify branches that compete with that leader, and correct only a few structural problems at a time. Remove broken, dead, or rubbing branches with clean cuts just outside the branch collar; do not leave a long stub or cut flush into the trunk.
A newly planted tree needs leaves to make energy while roots recover. Remove only damaged or diseased branches at planting, then postpone routine shaping until the tree is growing steadily. Never top a northern red oak to reduce its height: topping removes the natural structure, leaves large wounds, and encourages weak shoots that can become future hazards.
For mature or high branches, hire an ISA Certified Arborist rather than climbing with a chainsaw. Large pruning cuts are hard to reverse, and a professional can assess branch attachment, clearance, and disease risk. Routine work should remove a small amount of live crown; if a tree needs substantial reduction to fit the site, it was planted too close to a constraint.
Follow Local Oak-Wilt Timing
Oak wilt is a serious disease of the red oak group, and fresh wounds may attract insect vectors in some regions. Penn State Extension advises avoiding oak pruning in Pennsylvania from April through November, but that calendar should not be copied automatically into another state. Oak-wilt risk periods differ with local climate, disease presence, and extension recommendations, so check your state or county guidance before scheduling routine pruning.
If a limb breaks in a storm and creates an immediate hazard, public safety comes first; contact an arborist promptly and ask about wound and disease precautions. Do not apply wound paint as a routine fix unless a local professional or extension source specifically recommends it for the situation. Avoid pruning for appearance during the local risk window, and do not transport firewood from a tree suspected of oak wilt without checking current state guidance.
Grow Northern Red Oak From Acorns
Growing from seed is inexpensive, but it requires patience and a place to protect a deep-rooted seedling. Northern red oak acorns take two growing seasons to mature, unlike many white-oak-group acorns that germinate soon after falling. Gather mature, fresh acorns once they drop and sow them promptly; avoid dried seed, acorns with holes, and nuts that feel shriveled or soft. A float test may screen out some damaged seed, but sinking alone does not guarantee viability.
Plant sound acorns in fall in a deep pot or protected outdoor nursery bed, or keep them in a moist—not wet—medium through a cold period if sowing later. Red-oak-group acorns have dormancy needs, so confirm the cold-moist stratification period from a regional native-plant nursery or extension source rather than assuming all oak seeds behave alike. Set the acorn on its side and cover it with a shallow layer of mix, then protect it from squirrels, mice, and drying winds with mesh.
Keep the medium evenly moist through winter without leaving the pot in standing water. Check for emergence in spring, and let the seedling develop a strong root before transplanting it to the permanent site. A deep container helps reduce root bending, but even a small oak can form a substantial taproot quickly; move it while young and do not let roots coil at the pot bottom. For a fuller seed-to-planting walkthrough, see our guide to growing oaks from acorns.
What to Expect Through the Seasons
In spring, northern red oak produces inconspicuous yellow-green flowers. Male catkins may fall and make a brief litter layer, while the small female flowers develop into acorns. Young leaves emerge reddish or bronze before turning green. A young tree may put energy into roots rather than a dramatic flush of top growth, so lack of rapid height gain in its first season is not by itself a reason to fertilize.
Summer is the time to monitor moisture, mower damage, and sudden canopy change. Water a newly planted tree when its root ball begins to dry; do not diagnose a health problem from a few insect-chewed leaves. Oaks support many native insects and other wildlife, so minor leaf feeding is often part of a healthy food web rather than a reason for broad-spectrum pesticide.
Fall brings acorns, foliage color, and a substantial leaf drop. Northern red oak often develops russet, red, or reddish-brown foliage, but color varies with genetics, weather, and growing conditions. Leaves and acorns can be messy on walks and driveways; decide before planting whether seasonal cleanup is acceptable. In winter, the bare structure is easier to inspect and often provides the safest routine pruning window, subject to local oak-wilt guidance.
Diagnose Leaf Discoloration and Other Problems
A single symptom seldom identifies an oak disease. Note which leaves are affected, whether the pattern starts at the tips or between veins, how quickly it moves through the crown, and whether branches are dying. Also check soil moisture, trunk injury, planting depth, recent construction, and the timing of fall color. Photos taken over several weeks help an extension diagnostician or arborist distinguish a temporary leaf issue from a declining tree.
Oak Wilt Needs Prompt Professional Diagnosis
Red oaks are particularly susceptible to oak wilt. Penn State’s oak disease reference describes a pattern in which leaves near the top of the tree turn brown along their tips and margins, wilt, and drop while some green remains; decline then moves down the canopy. Other problems can resemble parts of this pattern, so do not declare a tree infected from a photograph or remove it based on one branch alone.
If multiple upper branches wilt rapidly during the growing season, contact your local extension service or an ISA Certified Arborist promptly and ask whether laboratory confirmation is available. Do not prune, move firewood, or apply fungicide as a guess. Diagnosis and management depend on where the disease is present, whether neighboring oaks share connected roots, and local rules for handling wood.
Scorch, Chlorosis, Leaf Blister, and Mildew
Marginal browning that appears during a hot, dry period may reflect drought stress, but similar symptoms can follow root injury or bacterial leaf scorch. Bacterial leaf scorch often progresses over years and may affect individual branches before much of the crown; drought symptoms may correspond more closely to a dry root ball or recently disturbed roots. Keep irrigation steady during establishment and protect roots from compaction, but use an arborist or extension lab to confirm a chronic diagnosis.
Yellow leaves with greener veins can point to iron chlorosis in high-pH soil. Test soil and inspect drainage and root flare before applying iron or acidifying the soil. Oak leaf blister makes raised, puckered spots as leaves expand; it is often a cosmetic problem on landscape trees. Powdery mildew may appear late in the season and is usually less urgent than rapid branch dieback. Penn State Extension’s oak disease table describes leaf blister and late powdery mildew as problems that typically do not justify routine landscape spraying.
Avoid blanket fungicide or insecticide applications. Many oak leaf galls and caterpillar feeding look dramatic but have little lasting effect on a vigorous mature tree, and unnecessary spraying can harm beneficial insects. Focus first on the root environment and distinguish a one-season leaf blemish from repeated decline in the crown.
Acorns, Wildlife, and Fall Cleanup
A red oak offers more than autumn color: its foliage supports native caterpillars, and its acorns feed birds and mammals. NC State’s profile lists northern red oak as a host for several native butterflies and moths and as an acorn food source for wildlife. That habitat value can be a deciding advantage for a large yard, especially when the tree is part of a diverse native planting rather than an isolated specimen surrounded by lawn.
The same ecology means the tree is not sterile or tidy. Catkins, leaves, and acorns fall at different points in the year, and acorns can roll onto paths or become awkward to mow over. Leave some leaf litter under the canopy where it will not smother turf or block drains, and collect acorns from high-use paving when needed. If you want bright red autumn foliage more than the tree’s broad shade and wildlife value, compare it with other species in the linked fall-color guide before committing.
Common Mistakes to Avoid
The costliest mistake is planting a large tree in a space sized for its nursery form. Check the canopy, utility clearance, and root-zone needs before purchase; do not assume root barriers or annual pruning will keep an unsuitable site manageable. Also avoid accepting a tree with a buried flare or badly circling root system simply because its top looks full.
Other preventable problems include digging too deep, leaving the root ball dry, watering by a fixed schedule when the soil is already wet, fertilizing without a soil test, and piling mulch against the bark. Deep cultivation beneath the canopy, lawn-mower injuries, and construction compaction can damage roots that you cannot see. A slow, moisture-aware establishment plan and broad mulch ring do more than repeated sprays or fertilizer.
Finally, do not treat all brown leaves as oak wilt or prune a red oak at any time of year without checking local recommendations. Rapid crown decline deserves prompt professional diagnosis, while late-season mildew, a few galls, and ordinary autumn color may require little intervention. The right response depends on the symptom pattern, timing, and region.
Conclusion
Northern red oak is a rewarding choice for a sunny, well-drained site with enough room for a large crown and expanding roots. Choose healthy nursery stock, expose the root flare, plant no deeper than the root ball, keep the soil evenly moist while the tree establishes, and protect the surface roots with a broad mulch ring that stays away from the trunk.
After establishment, this native canopy tree usually needs little routine feeding. Prune gradually for sound structure during the locally recommended dormant window, and get expert help when several branches decline quickly or oak wilt is possible. Make the space decision before planting, and northern red oak can provide lasting shade, fall color, and food and habitat for wildlife.



