When and How to Repot a ZZ Plant
Repot a ZZ plant safely with clear signs to check, a drainage-first pot and soil plan, careful root handling, and a drought-aware aftercare schedule.
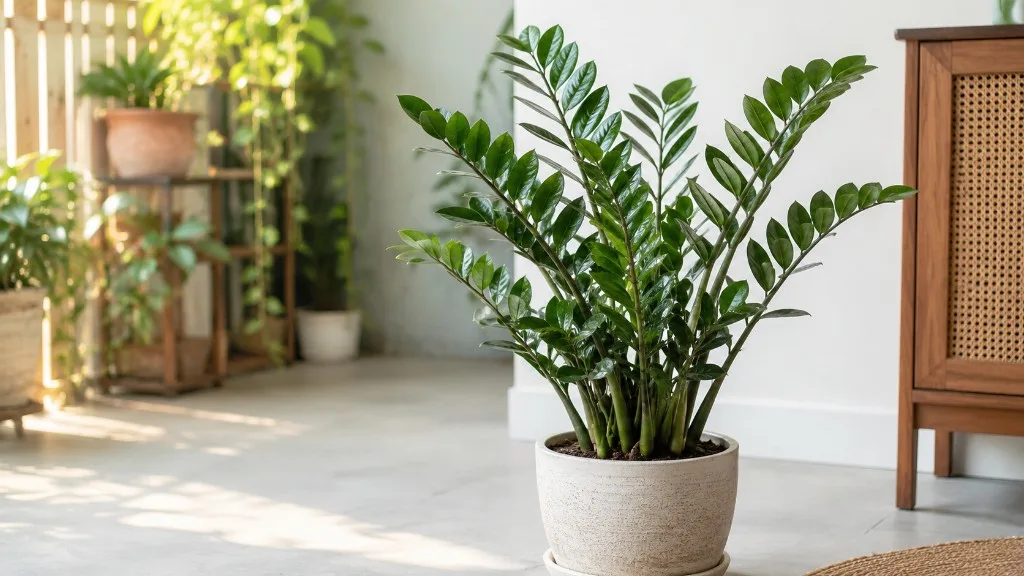
A ZZ plant can stay in the same container for years, so a calendar reminder alone is a poor reason to disturb it. Repot when the roots and rhizomes have genuinely crowded the pot, the container is failing, or the old mix no longer drains and rewets predictably. If the plant is healthy and the root ball still has room, leaving it alone is often the gentlest choice.
When a move is needed, the goal is not to give the plant a dramatically larger home. Choose a pot that fits the root mass closely, preserve the firm water-storing rhizomes, and use a mix that drains freely. Those decisions matter more than repotting on a particular month or following a strict number of years between moves.
The short answer: repot by condition, not by calendar
ZZ plants grow slowly, and their thick underground rhizomes store water. A young plant in bright indirect light may grow faster than an older plant in a dim room, while a plant can remain content in a snug container for a long time. Clemson Extension describes the plant as slow-growing and drought-resistant, with water-storing rhizomes; that biology is why a fixed two-to-three-year schedule is only a rough prompt to inspect, not a deadline to repot. Clemson Cooperative Extension
Use three questions before deciding: Is the root-and-rhizome mass densely filling the container? Is the pot cracked, bulging, or no longer stable? Has the growing mix become persistently compacted, soggy, or difficult to rewet? One strong answer may justify a move; several weak clues—such as no new stems for a few months—do not.
What is happening under the soil?
A ZZ plant is not a bundle of ordinary feeder roots. Its upright leaves emerge from thick, rounded underground rhizomes, which are modified stems that store water; smaller roots extend from those storage organs into the mix. North Carolina State Extension describes ZZ as a rhizomatous plant and notes that its fleshy rhizomes contribute to its drought tolerance. North Carolina State Extension
That anatomy changes how you repot. The rhizomes can press against the sides of a pot as they enlarge, but a firm, plump rhizome is useful storage tissue, not a root to trim just because it looks unusual. Fine roots may break during handling, so keep the plant supported at the base and avoid pulling it up by its stems. If a rhizome is soft, leaking, darkened, or foul-smelling, treat that as possible rot; otherwise, leave healthy storage organs intact.
The root ball also holds clues about moisture management. A congested mass may have little mix left to buffer water, while a small root system in a large pot leaves a broad volume of medium that can stay wet long after the plant has taken up what it needs. The right container is therefore a balance: room for the current plant, but not excess wet soil around it.
When repotting is justified
The clearest evidence comes from inspecting the root ball, not guessing from the leaves. Slide the nursery pot off when the mix is moderately dry and check whether roots and rhizomes occupy nearly all the space, whether the mass is forcing its shape, and whether the mix still has a usable structure. The Royal Horticultural Society likewise recommends lifting a container plant to see whether its roots are congested; root growth at a drainage hole is one clue, while a mass of roots around the bottom is much stronger evidence. RHS: How to repot a plant
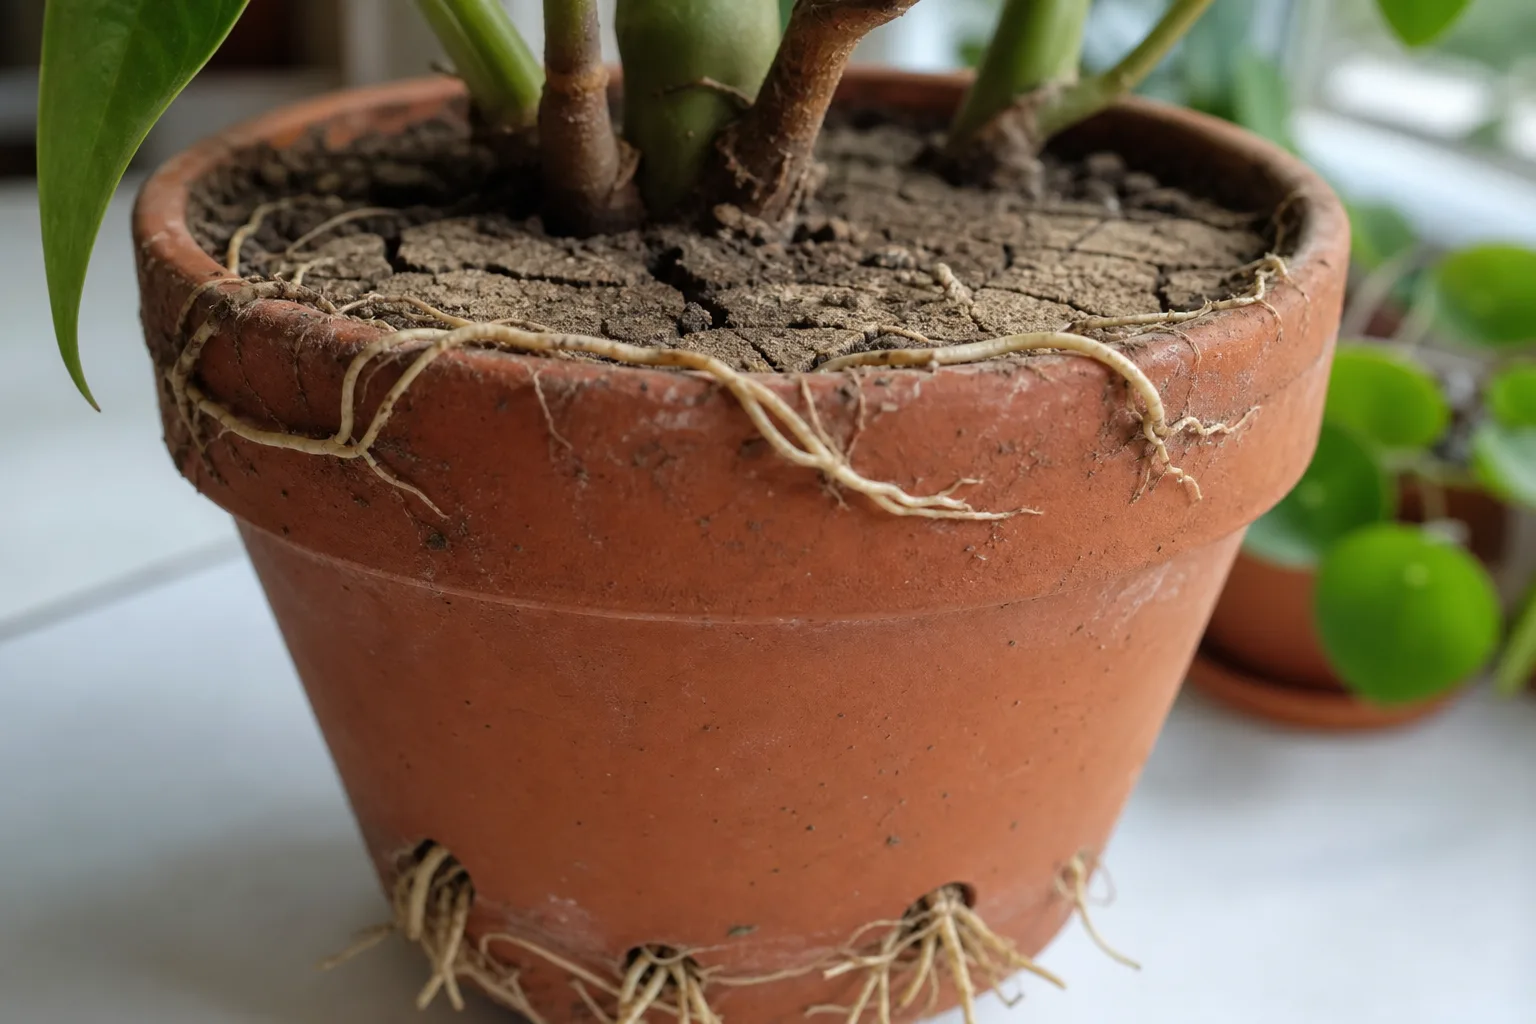
The root ball and rhizomes fill the pot
A ZZ plant is ready for a slightly larger container when the root ball comes out as a dense pot-shaped mass, the roots circle repeatedly around the outside or bottom, and there is very little loose mix left between them. You may also see several rhizomes pressed tightly against the pot wall. If there is still a clear band of healthy mix around the roots and the plant holds water appropriately, you can usually wait.
Roots emerging from a drainage hole are a useful prompt to inspect, not an automatic command to repot. One or two roots can find an opening while the rest of the root ball remains comfortable. If the pot is easy to remove, check the shape and density of the whole mass; if it is not, combine the visible roots with other evidence such as a distorted pot or a mix that now dries much faster than it used to.
A plant that repeatedly needs watering far sooner than its established pattern may also be crowded, but first make sure the cause is not heat, bright new light, a leak in the watering routine, or a potting mix that has shrunk from the pot wall. If the roots truly occupy the container and there is no soil left to hold an even amount of water, potting up is reasonable. If not, adjust the watering method before adding a larger pot.
The container is distorting or the plant is unstable
A flexible nursery pot that bulges, seams that are opening, or a ceramic pot that has cracked from pressure are strong reasons to move the plant even if new growth is not the priority. The pot itself may be damaged, and a constricted cluster of rhizomes can become difficult to release safely if you wait until it is tightly wedged. If the plant has simply become top-heavy, though, check whether it needs a heavier stable cachepot or brighter light before assuming the root ball needs more space.
For a root-bound plant inside a plastic nursery pot, cutting the pot is often safer than yanking at the stems or forcing a rhizome past the rim. Protect the plant surface, use clean scissors or a utility blade pointed away from the root mass, and make small cuts along the plastic. If the plant is in a brittle ceramic pot and the root ball will not slide out, do not risk a hand injury; carefully break the pot only if you can contain the shards and protect yourself, or ask someone experienced to help.
The mix has failed or roots are rotting
A soil refresh may be needed even when the plant does not need a larger pot. A mix that has collapsed into dense, airless material, remains wet for an unusually long time in the plant’s normal location, smells sour, or has become hydrophobic and pulls from the pot sides can make water management unreliable. Container compost breaks down over time; RHS explains that this can reduce air spaces, drainage, and the mix’s ability to hold water and nutrients consistently. RHS: How to repot a plant
Root rot changes the decision from routine maintenance to plant rescue. If the mix is saturated and roots or rhizomes are soft, dark, and decaying, waiting for spring can allow the damage to continue. Remove the failed medium, trim only tissue that is clearly rotten with a clean blade, and repot into fresh, dry, airy mix in a clean container sized to the remaining root ball. A larger pot is not the treatment for rot; correcting the wet conditions and removing damaged tissue are.
Clues that do not prove a ZZ plant needs repotting
Slow growth is normal for a ZZ plant, especially in low light or during the darker months. Clemson Extension notes that bright indirect light can speed this naturally slow growth, while North Carolina State Extension says the plant tolerates low light but does best in bright indirect light. If a healthy plant has not produced a new stem recently, improve its light gradually and review watering before disturbing the root system. Clemson Cooperative Extension North Carolina State Extension
Yellow leaves, drooping stems, or a dull appearance are also not proof of crowding. Overwatering, a cold draft, sudden changes in light, old leaves aging out, pest damage, and physical injury can cause similar symptoms. If the mix stays wet and the plant is yellowing, check the roots for rot; if the roots are firm and the pot is not crowded, repotting may add stress without solving the actual problem.
A root visible through the bottom hole does not tell you whether the pot is too small, and a plant that looks small above the soil may still have a large rhizome mass below it. Don’t diagnose by the top growth alone. If you are unsure and the plant is otherwise stable, wait for the mix to dry enough to handle, inspect the root ball once, and make the decision from what you find.
The best time to repot—and when to act now
For a healthy plant that needs a larger pot or fresh mix, spring to early summer is usually the easiest window. The plant is entering active growth, and warmer, brighter indoor conditions generally support recovery. RHS identifies spring, as plants begin growth, as the usual best time for repotting; for a ZZ plant, treat that as a helpful preference rather than a strict rule. RHS: How to repot a plant
You can repot at another time if the plant is indoors in stable warmth and the need is clear, but avoid combining the move with several other stresses. Don’t repot right after bringing a plant home unless the nursery pot is failing, the mix is waterlogged, or there is a pest or disease concern; let it adjust first. Likewise, avoid routine winter repotting when a plant is healthy, the room is cool, and the root ball still has room.
Rot, a broken container, or a root mass wedged so tightly that watering and drainage have become unsafe is an exception. In those cases, correct the problem promptly, regardless of season. Keep the operation focused: remove damaged roots or failed mix, preserve firm rhizomes, and return the plant to a suitably sized pot rather than making a cosmetic upgrade and dividing it at the same time.
Choose a pot and mix that dry at the right pace
A ZZ plant’s drought tolerance can make an oversized, moisture-holding pot more hazardous than a slightly snug one. Clemson Extension recommends a coarse, well-draining medium for this plant, and NC State advises allowing the soil to dry between waterings. That means choosing the container and mix together: a pot that is far wider than the root ball plus a dense peat-heavy mix can stay wet longer than the plant can use. Clemson Cooperative Extension North Carolina State Extension
Size, drainage, and material
Choose a pot about 1 to 2 inches wider in diameter than the current pot for a typical pot-up, but let the root ball decide. If roots fill a 6-inch nursery pot evenly, a roughly 7- to 8-inch pot is often a sensible next step; if the plant’s root mass is only 4 inches wide inside a much larger decorative pot, size to the root mass rather than the decorative shell. A ZZ plant does not need several inches of spare wet soil around its roots to grow.
Drainage holes are essential. A decorative pot without holes can still work as an outer cachepot if the ZZ plant remains in a draining nursery pot inside it and you empty any water that collects after watering. Do not put stones or gravel in the bottom as a substitute for drainage; use an actual drainage opening and a free-draining medium.
Pot material affects dry-down, so consider your room and habits. Unglazed terracotta loses moisture through its sides and can dry faster; glazed ceramic and plastic retain moisture longer. If your home is cool, the plant receives limited light, or you tend to water generously, a smaller pot with an open drainage hole and terracotta may provide a wider margin for error. A warmer, brighter room and a careful watering routine may suit other materials.
| Current pot | Typical next diameter | When to keep the same size |
|---|---|---|
| 4 inches | 5 to 6 inches | Root ball is smaller than the pot or only the mix needs refreshing |
| 6 inches | 7 to 8 inches | Roots still have loose mix around them |
| 8 inches | 9 to 10 inches | Plant is healthy and the root mass is not pressing on the sides |
These are starting points, not a formula. Measure the root ball at its widest point and make sure it fits with a modest margin on all sides. An unusually wide rhizome cluster may need a wider, shallower pot rather than a tall one; select a stable container that gives the roots room without leaving a deep column of damp mix below them.
A loose, fast-draining potting mix
Start with a quality indoor potting mix, then improve its structure with a chunky, moisture-managing component such as perlite, pumice, or fine orchid bark. Clemson Extension gives a coarse recipe using a coir- or peat-based potting soil with perlite and sand; the practical goal is a mix that absorbs water when watered but lets excess drain freely and allows air back to the roots. Clemson Cooperative Extension
A simple starting blend is about two parts indoor potting mix to one part perlite or pumice. If your existing mix is already loose and drying well, do not change it just to follow a recipe. Avoid garden soil, which can compact in a container, and avoid a very fine mix that stays heavy and wet in a dim, cool room. You do not need a special branded “ZZ soil” if the ingredients and performance are suitable.
Check the mix before using it. Moisten a handful lightly: it should hold together briefly when squeezed, then crumble when released, rather than form a dense muddy ball. If water beads on top or runs around the root ball without wetting it, pre-moisten the mix gradually; dry peat-based mixes can repel water. A mix that is already damp should not be soaked further before planting.
Gather supplies and prepare the plant
Set out the new pot, fresh mix, clean sharp scissors or pruners, a blunt stick or chopstick, a tray or sheet to catch soil, and gloves if you prefer them. Clean the blade before you begin, especially if you may need to remove rotten tissue. Have the final position picked out too: stable warmth and bright indirect light are better during recovery than a cold windowsill or the direct afternoon sun.
If the foliage is tall or spreading, loosely gather the stems with a soft plant tie or wrap a sheet of paper around the outside as a temporary collar. My City Plants describes wrapping ZZ stems before handling to make a large clump easier to manage; keep any support loose so it does not bend, pinch, or crease the fleshy leaf stalks. My City Plants: How to repot a ZZ plant
The root ball should be dry enough that it holds together when lifted, but not so bone-dry that the mix has shrunk into a hard block. If the plant is badly underwatered, water it lightly a day or two before the planned move and let excess drain. If the soil is already wet, wait for it to dry if the plant is otherwise healthy; wet soil is heavier, messier, and easier to compact against roots.
How to repot a ZZ plant step by step
Work over a surface you can clean, and keep the steps deliberate. The main rule is to support the root mass instead of tugging on the leaves. If the plant is very large, ask another person to steady the foliage while you handle the pot.
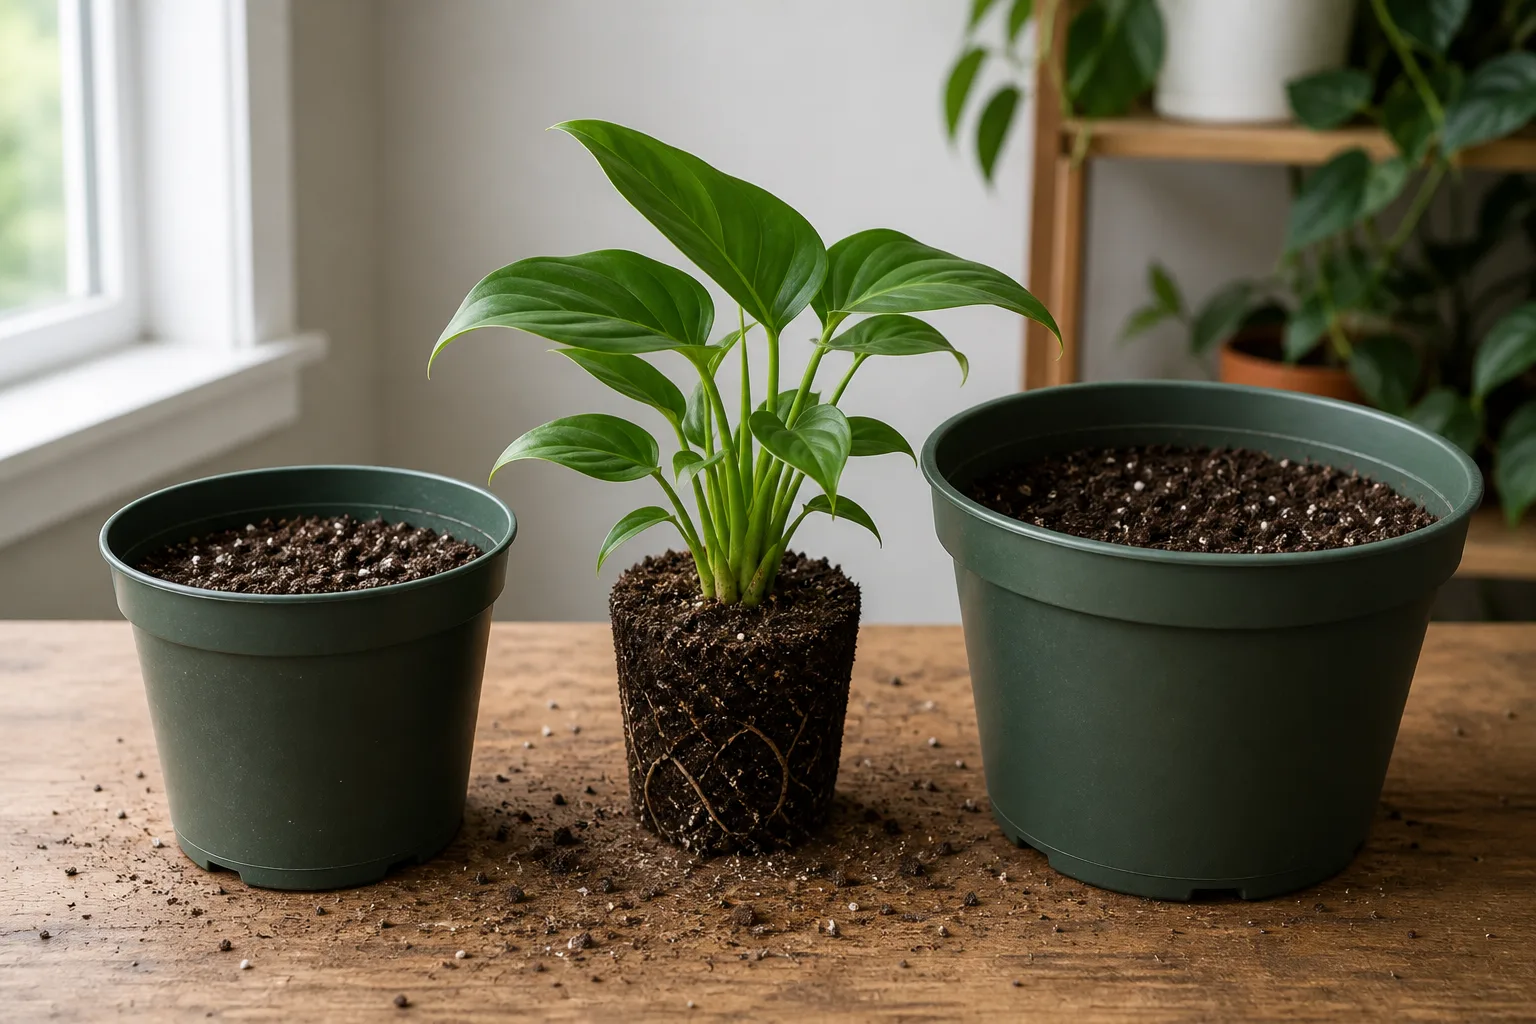
Ease the plant out without pulling its stems
Lay the pot on its side and squeeze the sides of a flexible nursery pot to loosen the root ball. Turn it slowly, supporting the plant near the soil line; do not lift it by a leaf stalk. If the root ball does not slide, run a blunt knife around the inside edge or cut the plastic container. Never force the rhizomes through a narrow opening.
For a ceramic pot, tip the plant and tap around the sides with your palm. If roots have grown through the drainage hole, gently free them if they move easily. If they are tightly locked in place, cut the root or the nursery pot rather than tearing a large section of roots just to preserve the container.
Once it is out, set the root ball on the work surface and support it from below. It may be awkward or heavier than expected because the rhizomes store water. A helper can hold the leaf cluster loosely while you guide the pot off, but avoid compressing the stems together tightly.
Inspect and loosen only what needs attention
Look for firm roots and plump, solid rhizomes. Fine roots can be tan or light brown as well as pale; color alone does not diagnose rot. The warning pattern is tissue that is soft, mushy, collapsing, or foul-smelling, especially when the surrounding mix is wet. Healthy rhizomes should remain firm and intact.
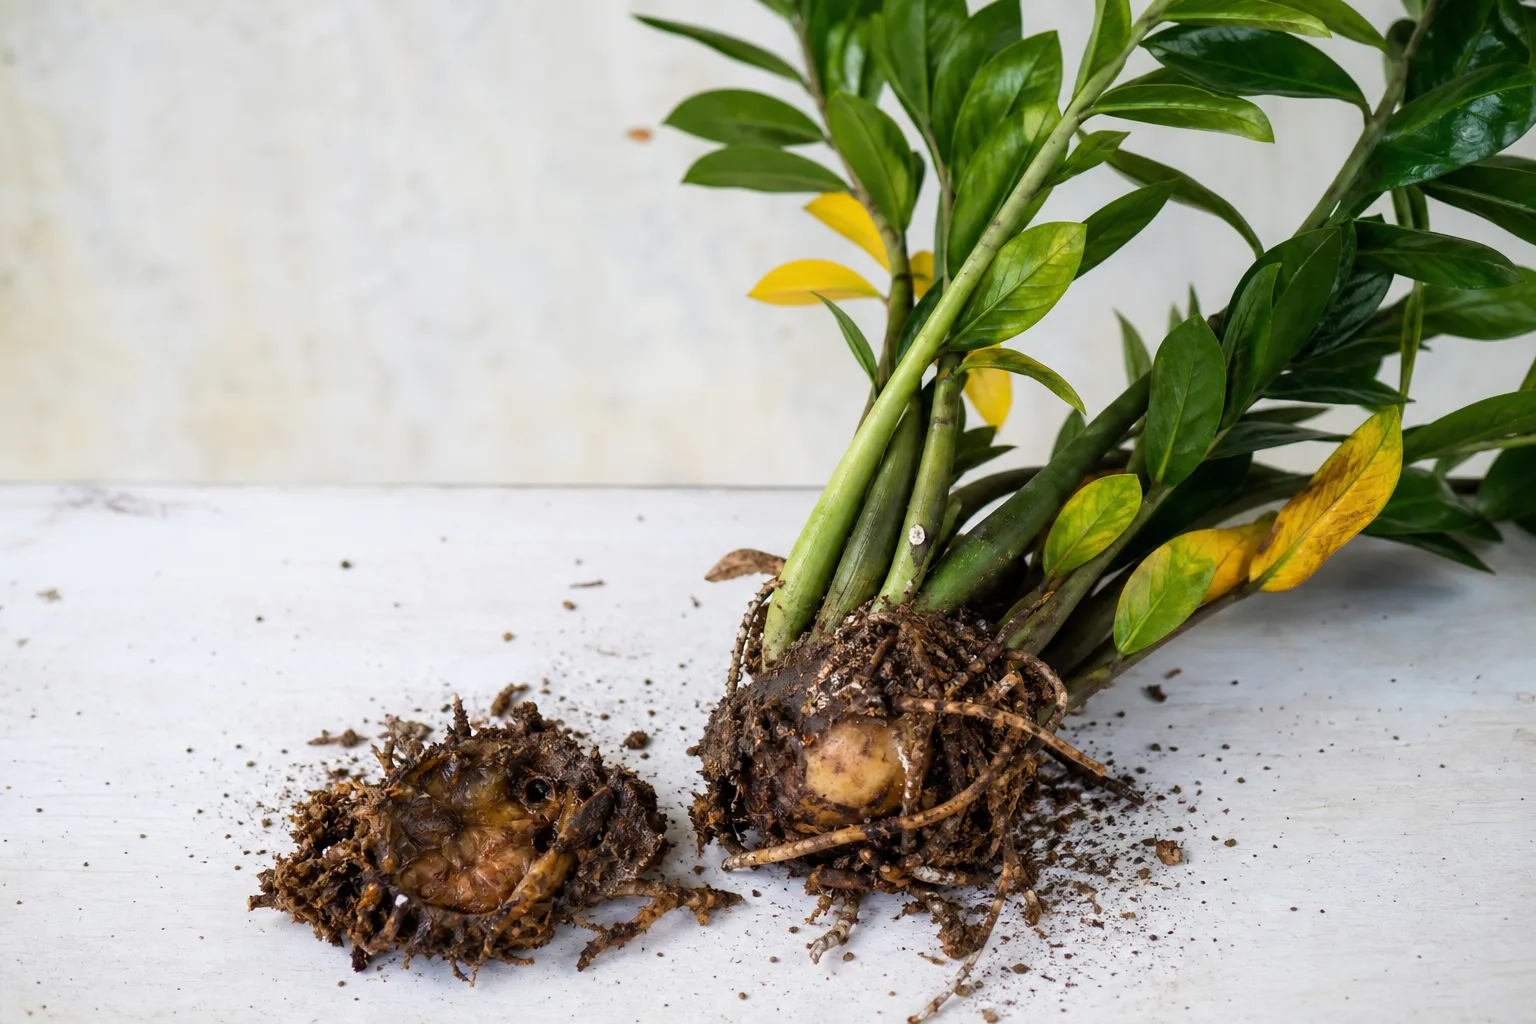
Remove loose old mix with your fingers or a chopstick, but do not bare-root a healthy plant just for the sake of it. Tease apart only roots that are circling tightly or crossing over the root ball in a way that prevents it from fitting. ZZ roots and rhizomes can be brittle; pulling a dense knot apart may do more harm than leaving it intact and choosing a slightly wider pot.
If you find rot, isolate the affected plant from other houseplants while you work. Use a clean blade to remove only the soft, decayed tissue, cutting back to firm tissue and cleaning the blade between cuts. Do not cut healthy rhizomes to make the plant fit a smaller pot. Discard the old soggy mix, wash the container or use a clean one, and keep the healthy remaining root mass as undisturbed as possible.
Set the root ball at its old soil line
Put enough fresh mix in the bottom so the plant sits at the same depth as before. Center the root ball and keep the upper surfaces of the rhizomes covered as they were, but do not bury the bases of the leaf stalks under a thick layer of soil. Planting too deeply can leave tissue in a persistently damp zone.
Fill around the sides in small handfuls. Use a chopstick to guide mix into large gaps without stabbing the root mass, and tap the pot lightly to settle it. Press just enough to stabilize the plant; packing the mix hard removes the air spaces that help excess water drain. Keep the final soil surface a little below the pot rim so water does not spill over.
Check that the plant stands securely and the drainage opening is unobstructed. If it rocks, add a little mix under the loose side or use a temporary stake placed near the pot edge, where it is less likely to pierce a rhizome. Don’t bury the plant deeper or add a pile of heavy soil just to force an upright shape; ZZ stems naturally arch, and staking will not fix a root problem.
Aftercare: light, water, and what to watch
Return the plant to bright indirect light, or to its previous suitable location if it was already thriving there. Avoid sudden shifts to direct sunlight, a draft, or a much darker corner while it is recovering. Keep the room comfortably warm; NC State notes that ZZ plants are sensitive to cold, so cold windows and outdoor temperatures are poor recovery sites. North Carolina State Extension
For a healthy root ball in a dry, airy mix, water slowly until a little drains from the holes, then empty the saucer or cachepot. This first watering helps settle the mix around the roots, and RHS recommends watering a freshly repotted container until water runs from the drainage holes, then allowing it to drain. A ZZ plant’s drought tolerance does not mean it should be left bone-dry indefinitely; it means you should not water again until the mix has dried well through the root zone. RHS: How to repot a plant North Carolina State Extension
If you removed rotted roots or rhizomes, use a different plan: pot into dry or barely moist mix and do not immediately soak the newly cut root mass. Give the cuts a short period in a warm, airy place before resuming careful watering; then water only when the mix is dry and the plant is stable. The exact interval depends on pot size, light, temperature, and how much tissue was removed, so checking the mix matters more than following a day count.
For the next several weeks, leave fertilizer off and avoid repeated handling. A few lower leaves may yellow after the disturbance, but widespread yellowing, soft stems, a sour odor, or mix that remains wet calls for another check of drainage and roots. Do not water more often because the plant looks stressed; a water-storing rhizome can carry it through a dry interval better than it can tolerate a constantly wet pot.
Common repotting problems and how to avoid them
A much larger pot stays wet too long. Extra mix holds moisture beyond the root ball and can reduce the margin for error, especially in low light or a cool room. If the current pot is several sizes too large, shift the plant into a container sized to the roots rather than adding more soil around it.
Stems snap during the move. Foliage often breaks when someone lifts the plant by its stems or tries to force the root mass through a narrow pot. Gather taller stems loosely, cut away a flexible nursery pot when needed, and lift from underneath. A broken stem can be removed cleanly at its base, but do not use the break as a reason to divide an otherwise healthy clump.
Leaves yellow and the owner waters again. Repotting can temporarily slow uptake while roots settle, so a pot may dry more slowly immediately after the move. Check the mix at root depth and empty standing drainage water instead of responding to a yellow leaf with an extra watering. If the mix is dry but repotting was recent, water thoroughly once and let it drain rather than giving repeated small sips.
The plant shows no new growth after repotting. ZZ plants can pause after disturbance, and they already grow slowly. Keep conditions steady, provide good indirect light, and judge recovery by firm stems and healthy rhizomes rather than expecting a new shoot in a particular number of weeks. If the plant is declining, recheck the roots, light, and watering pattern before repotting it again.
The old mix is stuck to healthy roots. Do not wash or scrape every particle away unless rot or a serious soil problem requires it. Leaving some intact mix reduces unnecessary root damage; remove only material that is loose, sour, waterlogged, or clearly compromised.
Conclusion
Repot a ZZ plant when its root-and-rhizome mass has filled the pot, the container is under pressure, or the mix has stopped draining and behaving predictably—not just because a date has arrived or the plant has not grown quickly. If you confirm that it needs a move, choose a pot only modestly wider than the root ball, make sure it has drainage, and use a loose mix that dries between waterings.
Handle the plant from beneath, preserve firm rhizomes, and loosen roots only where necessary. Then keep it warm in indirect light, drain every watering fully, and let the mix dry before watering again. That restrained approach gives a slow-growing, drought-tolerant ZZ plant the space it needs without surrounding its water-storage system with more wet soil than it can use.



