Should You Cover Garden Beds for Winter? Here's When
Should you cover garden beds for winter? Learn when to use mulch, row cover, or nothing at all, plus depths, materials, timing, and spring removal.
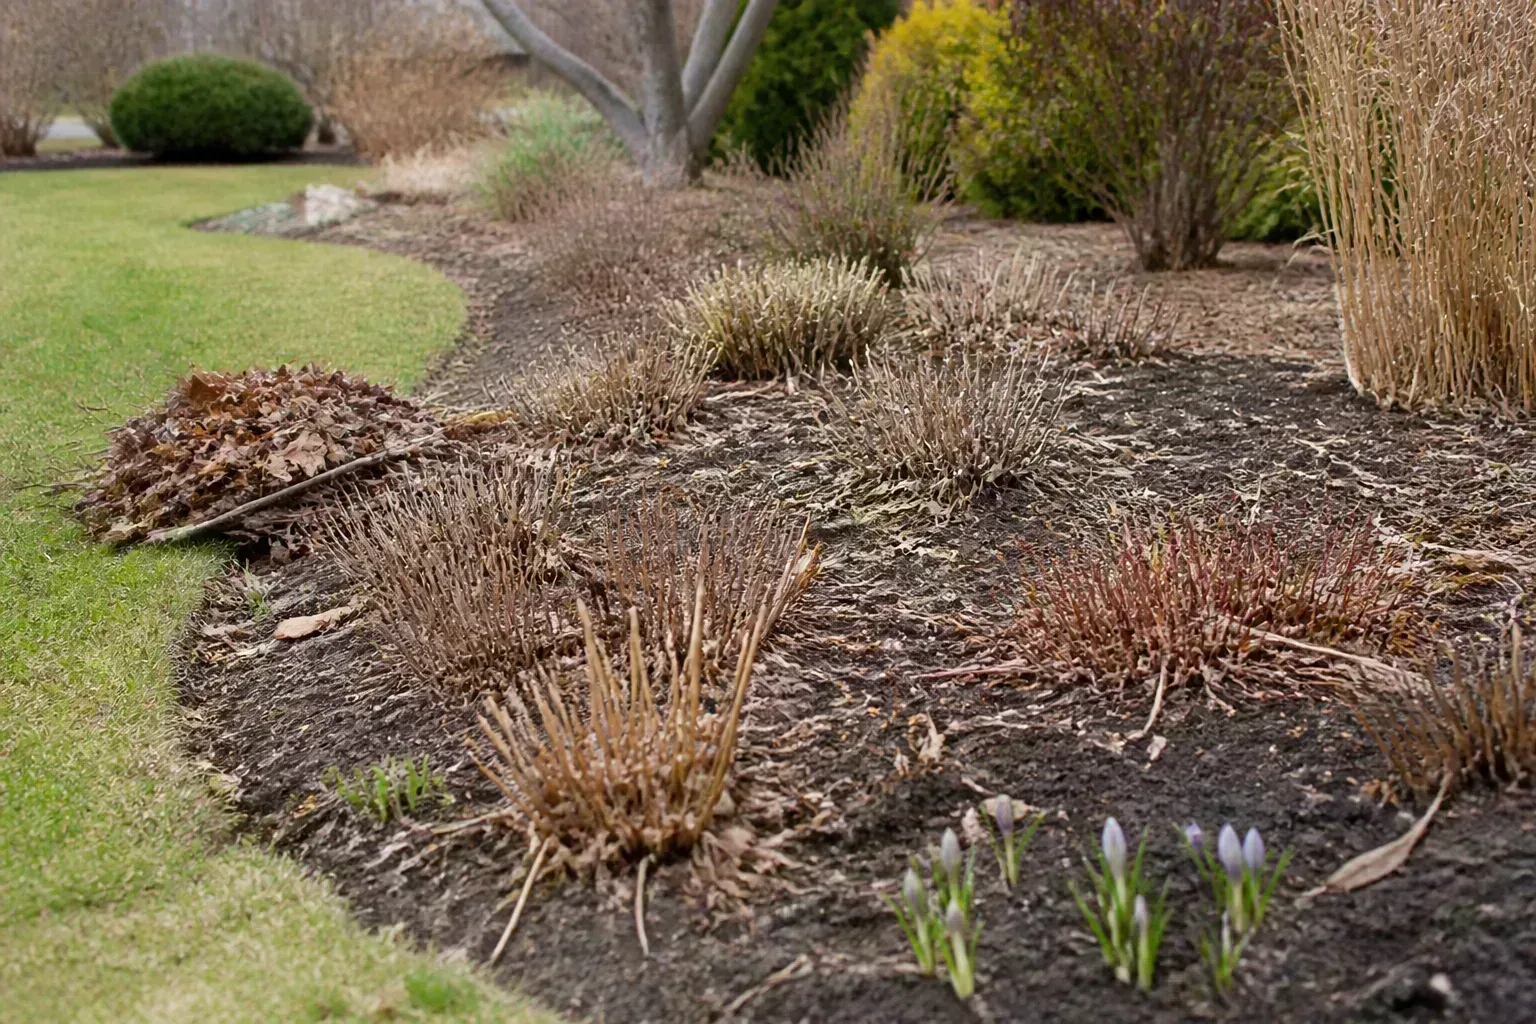
The short answer: cover soil selectively, not every plant
Yes, many garden beds benefit from a winter cover—but “cover” usually means an even layer of organic mulch over exposed soil, not a tarp or blanket over every plant. Mulch can reduce erosion, soften temperature swings around roots, and add organic matter as it breaks down, while a breathable fabric cover is better for protecting foliage that is still actively growing.
The right answer depends on what is in the bed, whether the soil drains, how exposed the site is, and what kind of winter you actually get. An empty raised bed, a newly divided perennial, and an established drought-tolerant plant in a mild climate should not receive the same treatment.
Think of winter protection as managing three separate risks:
- Root and crown injury: repeated freezing and thawing can lift shallow-rooted or recently planted plants.
- Exposed soil: rain, snowmelt, and wind can wash away fine soil and organic matter.
- Foliage and crop injury: frost and drying wind can damage winter vegetables or evergreens that remain above ground.
That distinction prevents the most common mistake: using a heavy, wet layer intended for bare soil to bury a plant that needs air and light. Penn State Extension’s perennial-care guidance describes winter mulch as especially useful for newly planted or divided perennials and tender plants, and recommends removing it gradually in spring rather than treating it as a permanent blanket.
Decide what kind of winter protection your bed needs
Before buying anything, walk the bed and identify the surface you are trying to protect. Look for exposed soil, small recently planted crowns, green winter crops, evergreen foliage, and places where water pools. A hardiness zone is a helpful starting point, but wind, drainage, snow cover, slope, and establishment often matter just as much.
Established hardy perennials
An established hardy perennial in the ground often needs less winter cover than gardeners assume. If it has survived previous winters, has a substantial crown, sits in well-drained soil, and is in a sheltered location, a thin organic mulch may be enough—or the existing leaf litter may already be doing the job.
Do not cut down every stem simply because the bed looks untidy. Seed heads and hollow stems can provide winter structure and habitat, and intact stems can help you see where a dormant crown is located. Remove foliage that is clearly diseased or slimy, but leave healthy structural stems when they do not create a specific disease problem.
Extra root-zone protection becomes more worthwhile when the perennial was planted or divided late in the season, grows in a wind-exposed site, has a shallow crown, or lives where the soil repeatedly freezes and thaws without stable snow cover. In those cases, apply a loose layer around the crown rather than compressing material directly onto it.
Newly planted, divided, shallow-rooted, or tender perennials
These are the beds most likely to benefit from deliberate winter mulching. New plants have not yet built a wide root system, and divisions may have small crowns that can be loosened by frost heaving before their roots knit into surrounding soil.
Wait until the plant has slowed or entered dormancy and the soil is cold. Then use about 2 to 3 inches of loose leaves, pine straw, shredded bark, or another airy organic material around the root zone. In very cold, exposed sites, a slightly deeper layer can be appropriate, but depth is never a substitute for drainage.
Keep the material loose enough that rain can move through it. If the plant has a visible crown or cluster of buds at soil level, do not bury it under a dense mound; place the insulation around and lightly over the root zone, leaving the crown identifiable.
Empty beds and raised beds
An empty bed does not need frost fabric because there is no foliage to protect. It does need a way to keep soil from blowing, washing, crusting, or losing organic matter during months when roots are not holding the surface together.
For an in-ground fallow bed, an even layer of mature compost, shredded leaves, or straw can protect the surface. A living cover crop can also work when it fits your planting calendar and local climate, but it requires planning for termination before spring crops go in. The goal is to keep the soil covered without creating a spring mat that is difficult to plant through.
Raised beds deserve extra attention because the soil is above ground and exposed to cold air on more sides. Burpee’s raised-bed winterization guidance recommends clearing spent annuals and vegetables, checking soil level, adding well-rotted compost, and covering the soil with several inches of mulch after the ground freezes. A raised bed in a windy location may also need an anchored breathable cover over the frame to prevent soil loss, but that cover should not seal a wet bed.
Beds with winter vegetables
Winter kale, spinach, carrots, parsnips, and other cold-tolerant crops are still using the bed. Do not treat them like dormant perennials and bury them under a thick layer of leaves.
Use mulch only where it can reach the soil without covering the growing point, or use hoops with a breathable row cover or frost cloth. The fabric should be anchored at the edges so wind cannot lift it, supported above the foliage, and opened or removed when the weather warms enough for excess heat and moisture to become a problem.
If your goal is to extend harvest rather than simply protect the soil, crop covers make more sense than a solid top layer. A practical winter-mulching guide from Morning Chores likewise separates protecting dormant perennials from insulating annual crops that are still being harvested. Check the plants after storms, keep the fabric from resting on wet foliage for long periods, and leave enough room for the crop to grow.
Evergreen shrubs and exposed crowns
Evergreen shrubs can be harmed by winter drying as well as by cold. Wind pulls moisture from leaves while frozen or dry soil limits the roots’ ability to replace it, especially on a sunny, exposed site.
Mulch the root zone with an even layer of compost, bark, or shredded leaves, keeping it away from the main stems. If the real problem is wind, a loose burlap screen placed on the windward side is more targeted than wrapping the entire shrub in plastic. Do not use mulch to cover evergreen foliage, and do not turn a shrub’s base into a wet, airtight collar.
Choose mulch, row cover, or a living cover
Match the material to the job. Mulch insulates soil and roots, row cover protects above-ground crops from frost and wind, and living cover keeps a fallow surface occupied by roots. No single material is best for every bed.
Best materials for dormant beds
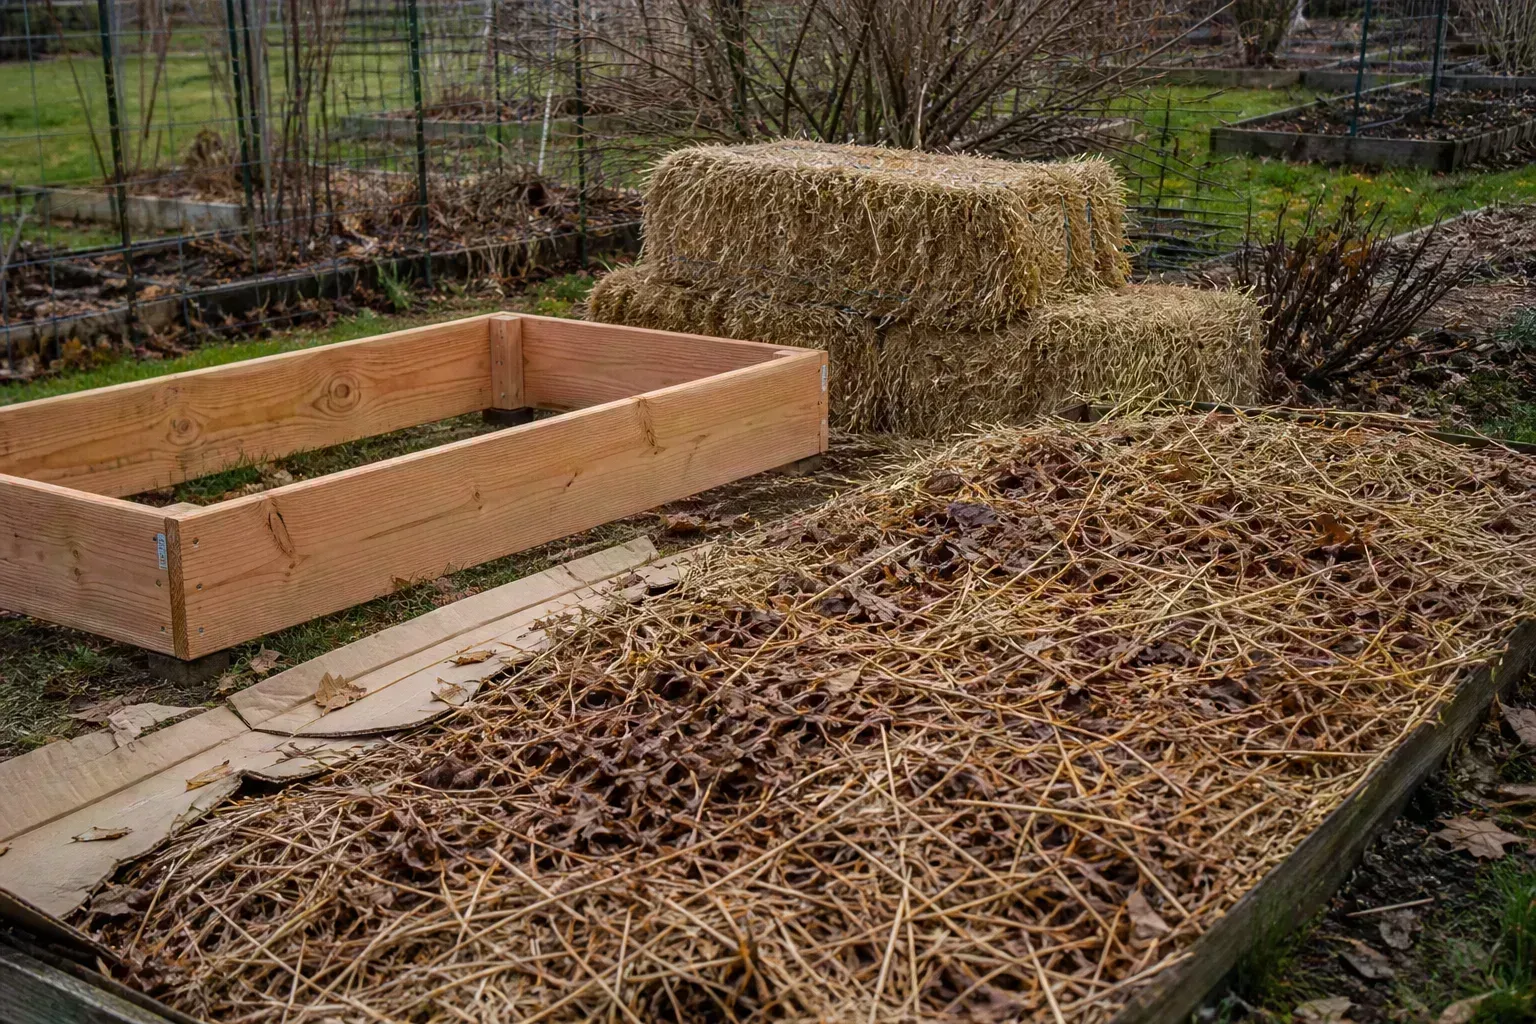
Shredded leaves are an excellent, inexpensive choice when they are dry and chopped or shredded enough not to form a solid mat. Whole, wet leaves can seal the surface, so run a mower over them, mix them with coarser material, or use a thinner layer that you can inspect after rain.
Pine straw and pine needles are light, airy, and easy to rake back in spring. They work well around many perennials and acid-loving plants, but do not assume every plant prefers acidic conditions simply because pine needles are available. Use what fits the bed’s existing soil and the plant’s needs.
Mature compost is useful when the main goal is protecting soil while adding organic matter. It is not a guaranteed fertilizer, and a thick layer of fine compost can hold more moisture than a coarse winter mulch. Use it as a surface dressing, keep it off stems and crowns, and correct drainage before adding more.
Shredded bark or aged wood mulch provides a durable, loose cover. Penn State Extension’s mulch survey notes that organic mulches can conserve moisture, moderate soil temperature, suppress weeds, and improve soil as they decompose, but layers deeper than about 3 to 4 inches in ornamental beds can limit water and oxygen. For winter, a moderate layer that stays airy is safer than building a tall mound.
Clean straw suits empty vegetable beds and can insulate crops when used with a frame or row cover. Choose straw rather than hay when you want fewer weed seeds, and inspect the bed in spring because damp straw can hide slugs, volunteer seedlings, or decomposing plant material.
The RHS mulching guidance recommends a biodegradable mulch layer of at least 2 inches and ideally about 3 inches for effective coverage, while Southern Living’s seasonal guidance suggests roughly 2 inches in warmer regions and up to 3 inches in colder ones. Treat those numbers as a useful starting range, then adjust for whether the material is coarse or compacting and whether the bed drains freely.
Materials to avoid or use carefully
Do not use a sealed plastic sheet directly over a perennial bed as your default winter cover. It can trap condensation, reduce airflow, shed water to the bed edges, and heat quickly when the sun returns. Plastic can be useful over a supported low tunnel or as a temporary rain shield, but it needs an air gap, secure anchoring, and regular ventilation.
Be cautious with landscape fabric on a bed you want to improve. Penn State’s mulch survey explains that synthetic barriers can interfere with the movement of water, worms, roots, and soil microbes, and can become difficult to remove once roots grow through them. A breathable row cover over hoops is a different tool from a permanent weed barrier laid across the soil.
Avoid thick layers of fresh grass, uncomposted wood chips, or wet leaves pressed against crowns and stems. Fresh materials may heat as they break down or temporarily change nutrient availability, while saturated material can create the rot-friendly conditions winter protection is meant to prevent.
Dyed mulch is not necessary for winter protection. If you use a colored product, know what the wood is made from and avoid putting uncertain recycled material on an edible bed. Natural, locally sourced material with a known history is usually the simpler choice.
When to cover garden beds for winter
Timing is more important than a calendar date. The right moment is when the plant and soil are ready for protection, not simply the first cool evening in autumn.
A timing rule based on soil and plant state
For bare or empty beds, cover the soil after the final harvest and cleanup, while the ground is workable and before repeated storms can erode it. Add compost or a loose organic layer; if you are using a cover crop, sow it according to the crop’s local planting window rather than waiting for the soil to freeze.
For established perennials, wait until growth has slowed and the soil is cold. In climates with freeze-thaw cycles, adding winter mulch after the soil has begun to freeze can reduce the chance that an early warm spell encourages premature growth. Penn State Extension places winterization after the ground is frozen, while RHS guidance also describes late autumn through winter as a normal mulching window; local weather and plant state determine the practical day.
For winter vegetables, install hoops and breathable fabric before a forecast frost, while the bed is still accessible. A crop cover is a short-term weather response and may need to be removed or vented repeatedly, unlike a dormant-bed mulch that can remain in place for weeks.
For newly planted or divided perennials, do not wait until a deep snowpack makes the crown impossible to find. Have the material ready, allow the plant to settle into dormancy, and cover before the first sequence of hard freezes if the site is exposed. A thin early layer can be topped up later, but a single heavy dump of wet material is harder to correct.
How to cover an ornamental bed step by step
Start by deciding what you are leaving intact. Mark the location of dormant crowns with a simple garden label or a visible stake if the stems will disappear, and remove only diseased foliage or debris that could carry a known problem. Burpee’s raised-bed guidance similarly recommends clearing spent, rotting vegetable growth while leaving some healthy seed heads or structural stems when they serve wildlife and winter interest.
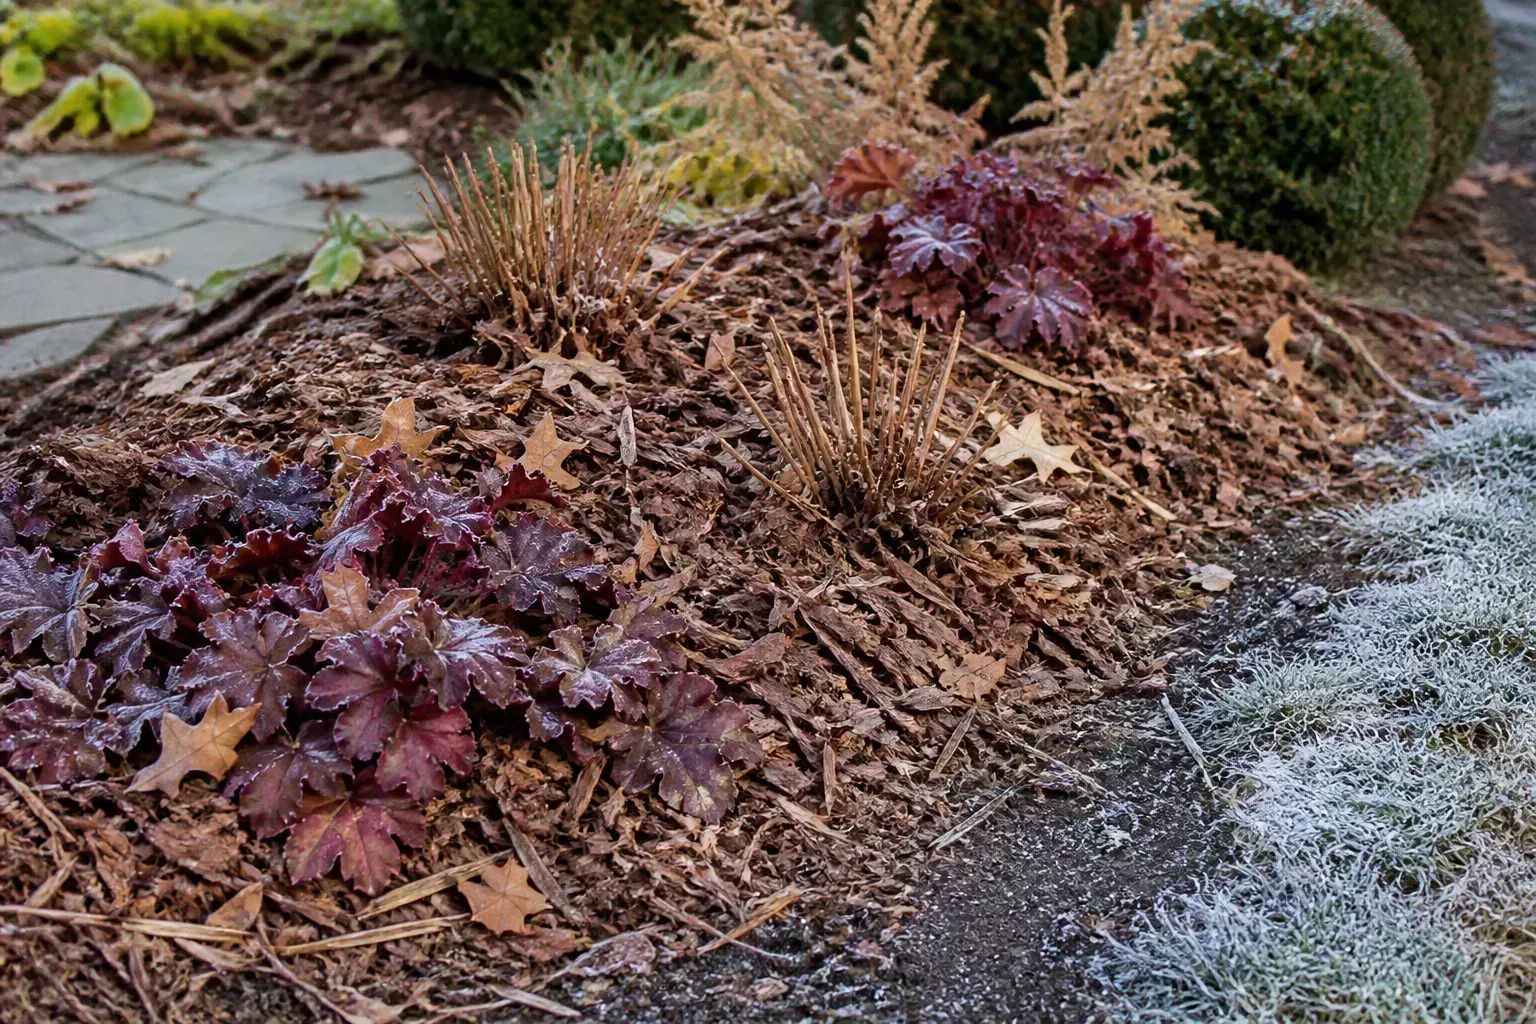
Next, weed the bed while the soil is still workable and correct obvious drainage trouble. Do not dig deeply just to make the surface look tidy; turning wet soil can destroy its structure and leave clods that freeze hard. If the bed is dry and plants are still active, water the root zone normally, then let the surface drain before mulching.
Spread 2 to 3 inches of loose organic material over exposed soil and around vulnerable plants. Keep a visible breathing space around woody stems, and do not bury low-growing evergreen foliage or the center crown of a plant that is prone to rot. Rake the layer smooth enough to shed wind without compressing it into a dense blanket.
Walk the edge after the first rain or wind. If mulch has washed into a path, exposed a crown, or formed a wet mat, redistribute it rather than automatically adding more. A winter cover works because it is even, airy, and in contact with the soil—not because it is as deep as possible.
How to winterize a raised vegetable bed
Clear annual crops that are finished, especially plants with obvious disease, insect damage, or soft debris. Pulling them in fall is easier than dealing with a wet, tangled bed in spring, but leave healthy winter crops and any intentionally planted cover crop in place.
Check the soil level and the bed’s drainage before adding amendments. A new raised bed may settle, so topping it with an inch or two of mature compost can restore the surface; do not fill the entire bed with compost or add a thick layer to compensate for a structural drainage problem.
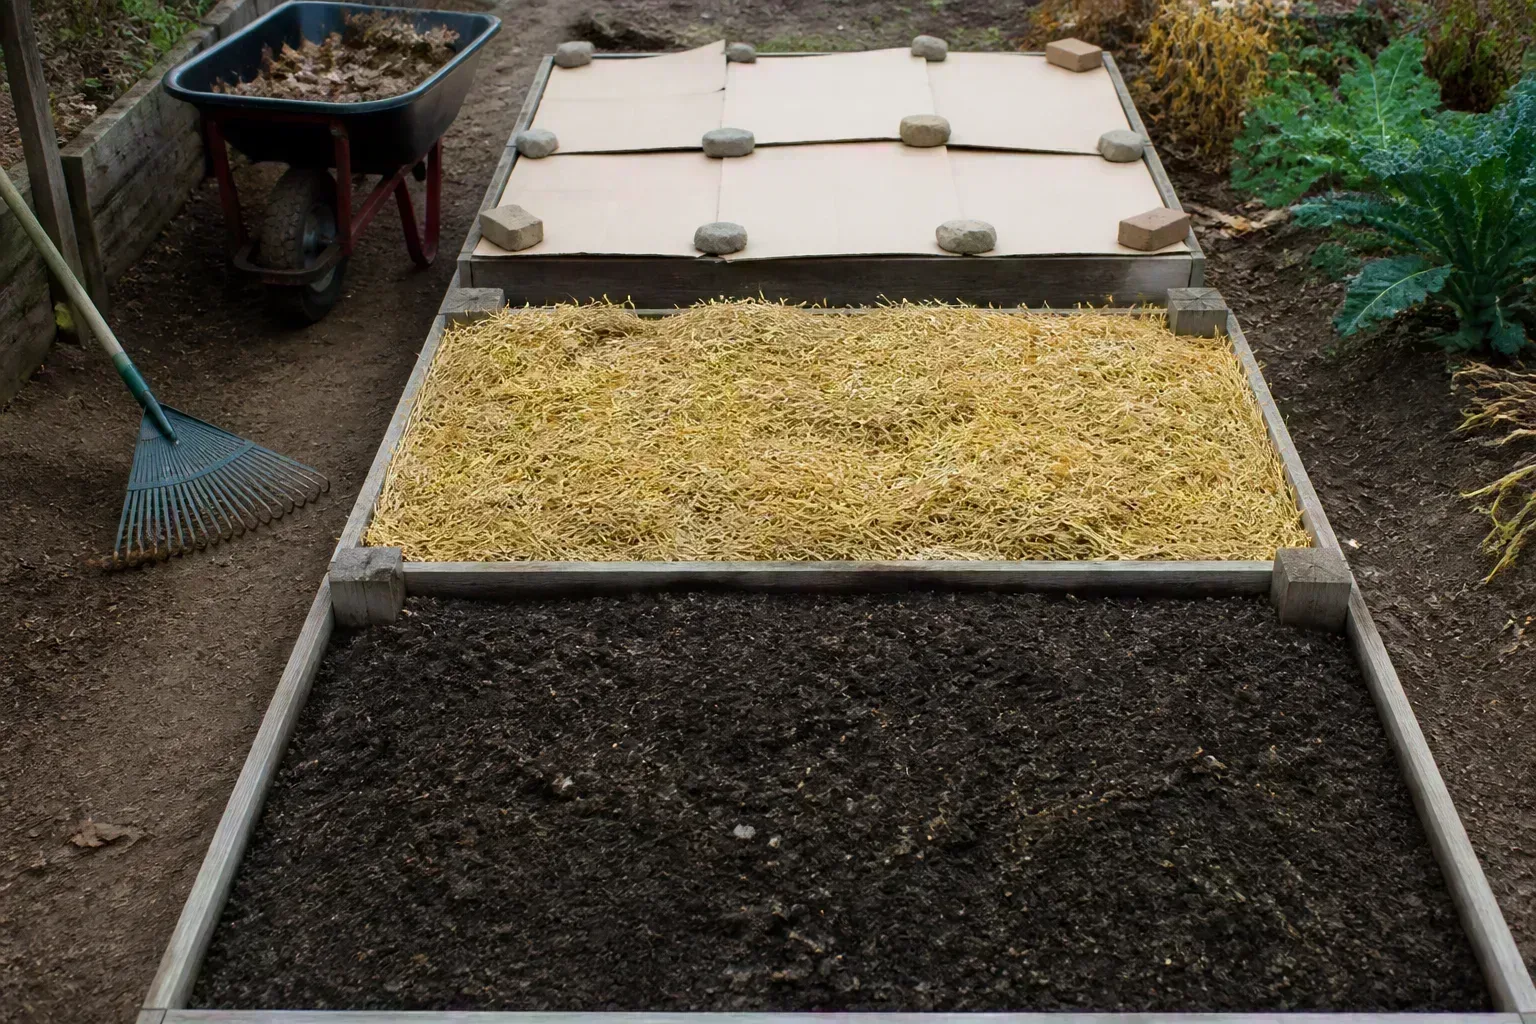
For an empty bed, apply a loose layer of shredded leaves, clean straw, or coarse organic mulch across the soil. If strong wind commonly removes the cover, use a breathable fabric or garden mesh anchored to the bed frame, but leave paths for rain to enter and inspect the surface after storms. Do not stretch an impermeable tarp tightly across a bed and forget it until spring.
Raised beds can also be divided by purpose. Put a deeper, airy mulch over the fallow section, a shallow layer between winter crops, and no mulch on top of plants that need light and airflow. This small amount of sorting is more useful than treating the whole box as one flat surface.
How to protect winter crops without smothering them
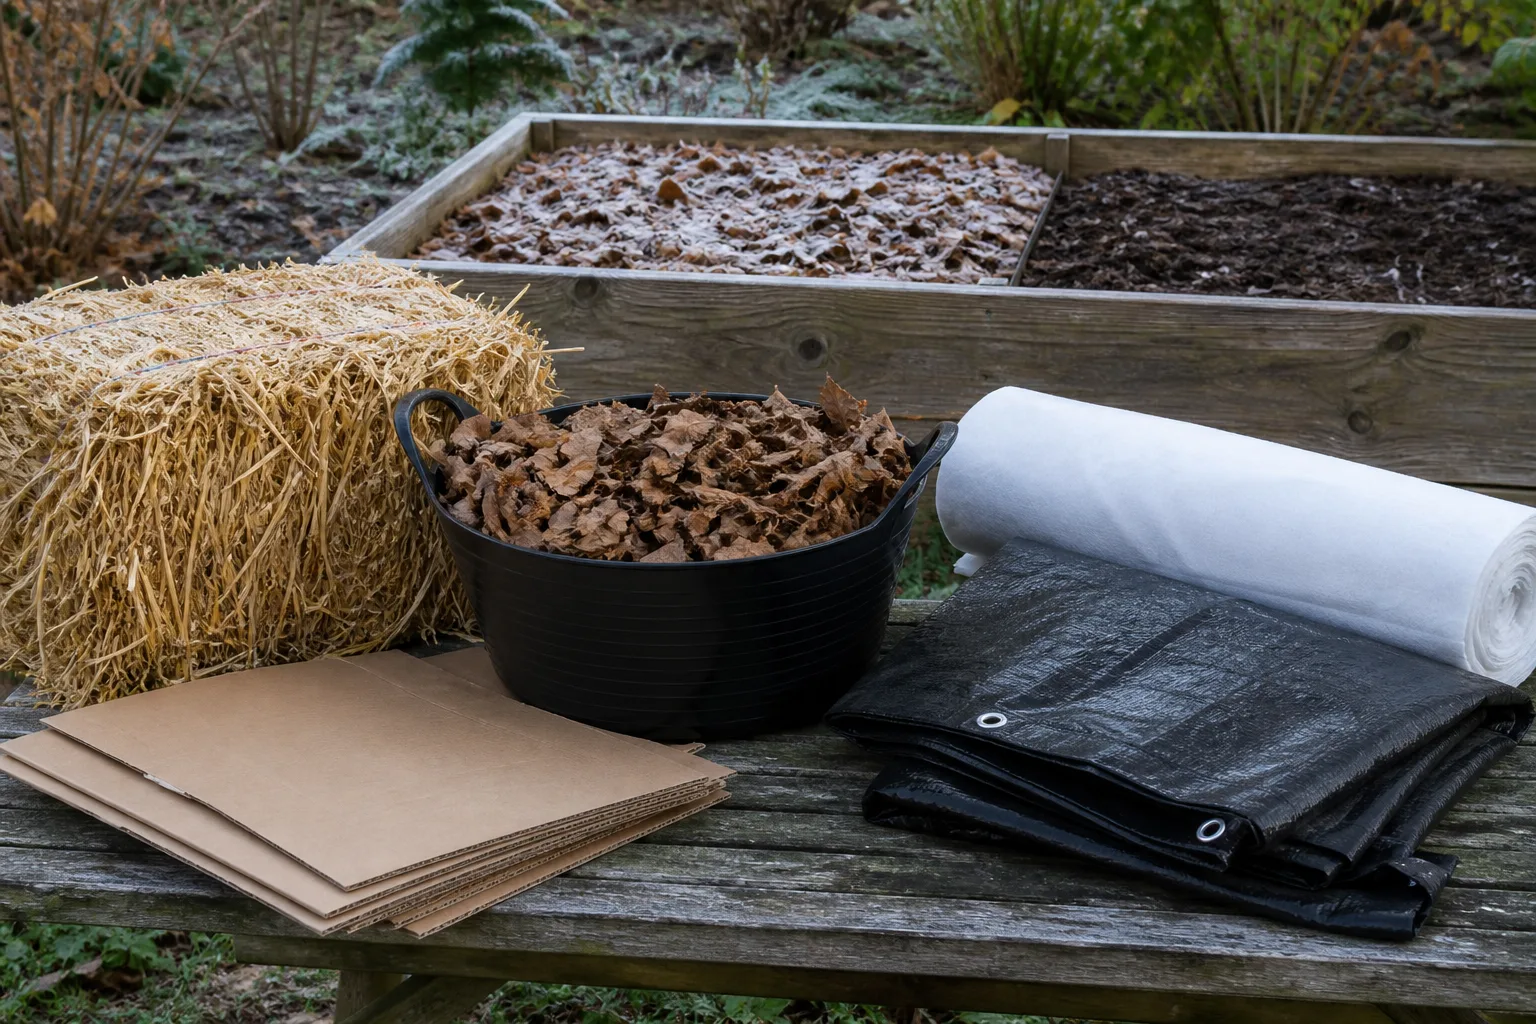
Frost cloth or a lightweight row cover is the practical choice when living plants need protection. Install hoops so the fabric rests above the crop, bury or pin the edges securely, and check that the cover does not create a pocket where wind can funnel underneath.
Use the cover for the weather event it is meant to handle. Open or remove it during a sunny warm spell, after a wet period if foliage is staying damp, and whenever the crop outgrows the space. A protected bed that overheats or remains humid for days can develop problems that a one-night frost would not have caused.
Mulch the soil between rows with a thin layer of leaves or straw if you need to reduce erosion and splashing, but keep the crop’s growing point clear. For root vegetables being stored in the ground, a deeper insulating layer may allow harvest to continue, but make sure you can still identify and access the plants before the material freezes into a solid mass.
When garden bed covers backfire
The first failure is over-mulching. A deep pile can bury crowns, hold excessive moisture, reduce oxygen near roots, delay spring emergence, and create a sheltered space for rodents. The RHS advises against smothering low-growing plants or piling mulch against woody stems, and Penn State warns that layers over roughly 3 to 4 inches in ornamental beds may limit water and oxygen.
The second failure is using the wrong cover for the job. A row cover protects leaves; it is not a substitute for root-zone mulch in a newly planted perennial. A thick leaf layer protects soil; it is not a safe replacement for hoops over kale or spinach. A tarp can stop wind and rain from reaching an empty bed, but a sealed tarp over wet soil can also block the air and water movement you need.
The third failure is covering diseased debris. If a plant was badly affected by a foliage disease, remove and dispose of that material according to local guidance rather than tucking it under mulch where it can remain wet. Do not assume every dead stem is harmful, though; healthy seed heads and stems can be valuable habitat.
The fourth failure is ignoring drainage. Winter mulch is not a cure for a bed that stays saturated. If water pools, soil collapses at the edge, or a pot or raised bed has blocked outlets, fix the water path first and use a lighter cover while the problem is being addressed.
What to do during winter and after snow
Winter protection is not a set-it-and-forget-it layer. After heavy rain, inspect whether mulch has moved away from the root zone or collected against a stem. After high wind, re-anchor fabric and check that the edge is not rubbing against tender growth.
Snow is usually an insulating layer, but wet snow can weigh down evergreen branches and fragile frames. Do not stomp through a frozen bed to make it look tidy, and do not scrape salt or salty slush into the root zone. If a cover collapses onto a crop, lift it carefully when conditions allow and rebuild the support.
Use midwinter checks to decide whether more material is warranted. Southern Living’s winter guidance recommends assessing whether mulch has blown away, washed away, broken down into fine soil-like particles, or fallen below an effective depth before adding another layer. If the existing cover is intact and the bed is draining, adding more simply because it is January increases risk without increasing protection.
Remove or thin winter protection in spring
Spring removal should be gradual for plants that were protected from freeze-thaw cycles. As temperatures moderate and new shoots begin to appear, rake the thickest material away from the crown and pull it toward the surrounding soil. Penn State Extension specifically recommends gradually removing winter protection rather than stripping it all away in one operation.
Do not uncover according to a fixed date if hard freezes are still forecast. Instead, thin the layer enough to let new growth emerge while keeping a reserve nearby that you can pull back over vulnerable plants for one more cold night. A breathable fabric over winter crops can be vented or removed as daytime temperatures rise, but be ready to reinstall it when frost returns.
Once the risk of severe cold has passed, use the old mulch where it makes sense. Move decomposing leaves into compost, leave a settled layer around established plants, or rake it aside before direct sowing. Remove any material that is sour-smelling, slimy, visibly diseased, or pressed against a crown.
Spring is also the moment to evaluate the cover rather than repeat it automatically. If a plant rotted, heaved, emerged late, or attracted rodents, reduce the depth, switch to a coarser material, improve drainage, or protect only the most exposed section next year. Good winterization is an observation loop, not a ritual.
Conclusion
Covering garden beds for winter is worthwhile when the cover matches the bed. Use mulch to protect exposed soil and vulnerable roots, breathable fabric to protect living winter crops, and targeted wind protection for exposed evergreens. Leave established, hardy plants and healthy winter habitat intact when they do not need a heavy layer.
The safest general plan is simple: clear diseased debris, check drainage, wait for the plant and soil to enter the right seasonal state, apply an even 2- to 3-inch layer of loose organic mulch where it helps, and inspect the bed after wind and rain. In spring, thin protection as growth resumes instead of letting a winter blanket become a wet, permanent lid.



