Mulching in Fall vs. Spring: When to Do It
Mulching in fall vs. spring explained: match the season to winter protection, weed control, soil temperature, crop timing, and your local weather.
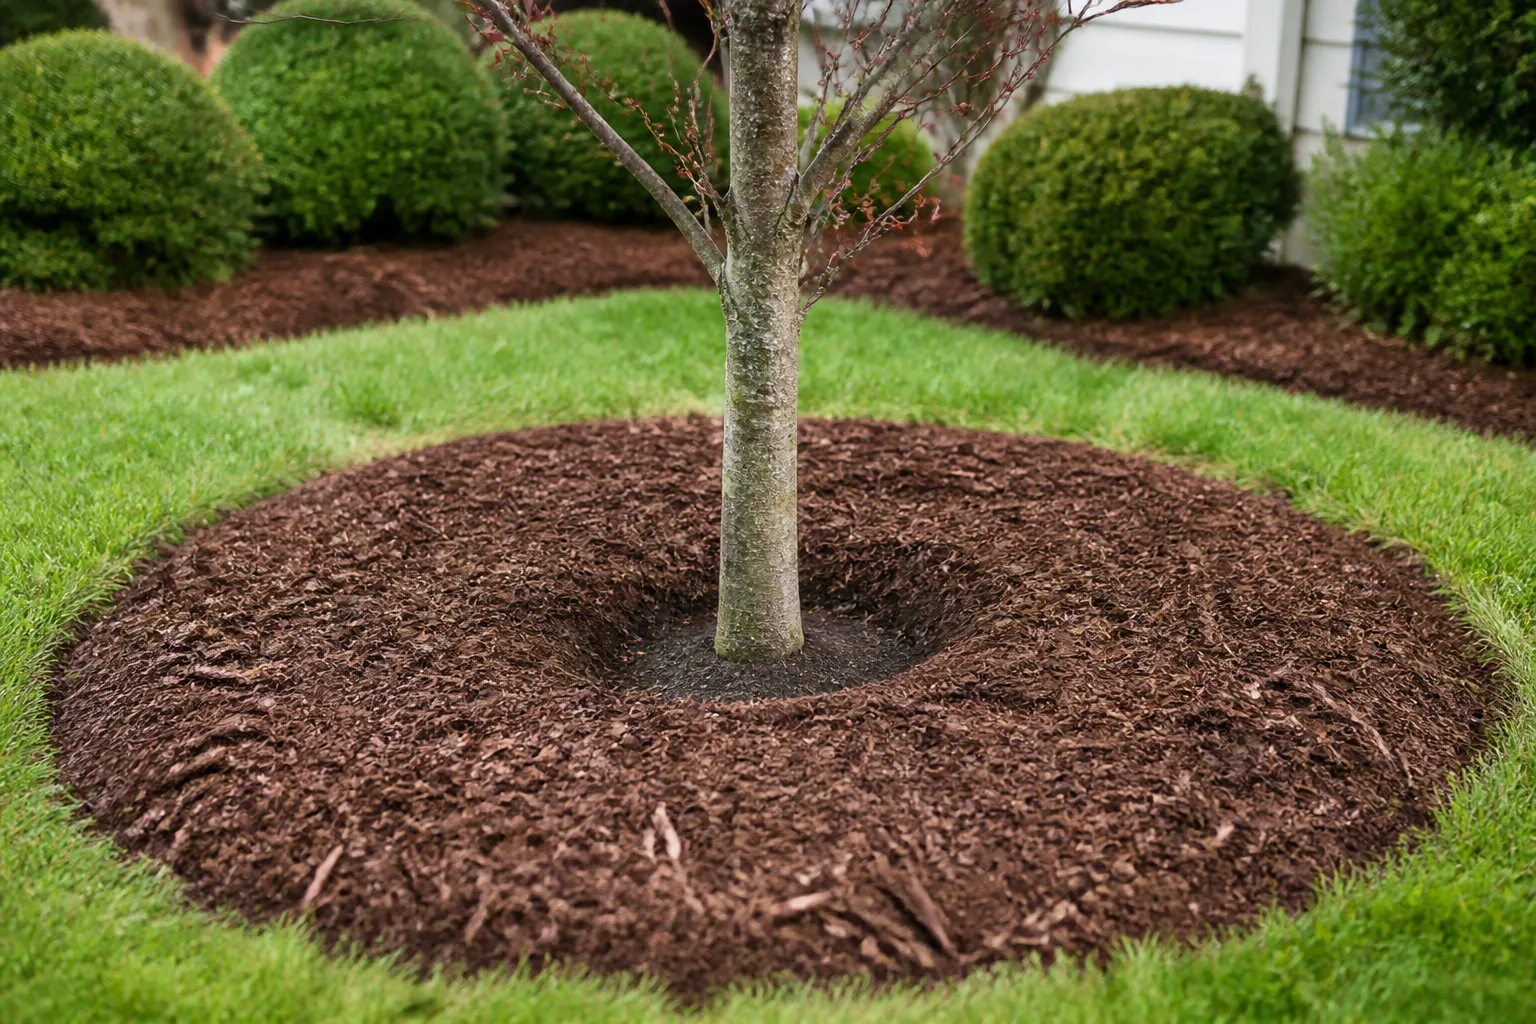
The right answer to mulching in fall vs. spring depends on the job. Choose spring when you want to block new weeds, conserve moisture for the growing season, and give a freshly planted bed a clean, workable surface. Choose fall when you need to protect vulnerable roots from freeze-thaw movement, shield an empty vegetable bed from winter rain, or give organic material time to settle before spring.
You do not have to mulch the whole property in one weekend. A perennial border, raised vegetable bed, tree ring, and newly planted shrub may each need a different season—or no additional mulch at all. The useful question is not “What month is mulch month?” but “What problem am I solving, and is the soil and plant ready for that layer?”
The short answer: spring for weeds, fall for winter buffering
If you can mulch only once in a typical mild-to-moderate climate, spring is usually the best all-purpose window for ornamental and edible beds. Apply it after the soil has begun to warm and dry enough to work, but before weeds establish and summer evaporation accelerates. This timing gives you the most visible payoff: less hoeing, steadier moisture, and a surface that is easier to maintain around new plants.
Fall is the better choice when winter itself is the threat. A loose layer can reduce rapid soil temperature swings, limit erosion from winter rain, and reduce the lifting and settling that exposes shallow roots during repeated freezing and thawing. Purdue Extension emphasizes that winter mulch is targeted protection, not a blanket every plant automatically needs; its goal is to keep plants dormant while buffering severe cold.
There is also a practical “both” option. Mulch an empty vegetable bed or a vulnerable perennial group in fall, then inspect it and pull it back in early spring. Later, once the soil is warming and weeds are germinating, refresh only the areas whose layer has thinned. That is usually more effective than adding a thick new blanket over a still-cold bed.
Decide by the job, not the calendar
Start with four questions before you bring home a load of mulch. First, is there a living crown, stem, seedling, bulb, or root zone underneath that must breathe and emerge? Second, is the bed occupied, newly planted, or empty? Third, are you managing winter exposure, summer weeds, moisture loss, erosion, or appearance? Finally, is the soil draining normally, or are you about to cover a wet problem with a thicker wet layer?
Use this quick rule:
| Your main goal | Better starting season | What to watch |
|---|---|---|
| Stop spring and summer weeds | Spring | Wait until soil is workable; weed first. |
| Reduce summer watering | Spring | Water the root zone before covering dry soil. |
| Protect shallow or newly planted roots | Fall | Apply after dormancy begins, before frozen ground. |
| Protect borderline-hardy perennials | Fall | Use loose material and remove or pull back in spring. |
| Protect an empty vegetable bed | Fall | Clean diseased debris first; consider a cover crop. |
| Freshen a settled ornamental bed | Spring | Measure the existing layer before adding more. |
The table is a starting point, not a prescription. In a warm climate, fall mulch may be mostly an erosion and moisture-management tool rather than frost protection. In a cold climate, a spring layer may need to wait until the bed is no longer saturated and the plants are visibly waking. Local weather beats a generic calendar.
What mulch does—and what timing changes
Mulch is a surface layer, not a substitute for good soil preparation. It intercepts some rain, slows evaporation, shades the soil surface, buffers temperature changes, and makes it harder for weed seedlings to receive the light they need. Organic materials also decompose, adding carbon-containing material to the surface over time, but a mulch layer should not be treated as a precisely measured fertilizer application.
Timing changes which of those effects matters most. Spring mulch deliberately slows warming at the surface, so putting it down while the bed is cold and waterlogged can delay activity you want: seed germination, root growth, and perennial emergence. Fall winter mulch is different from a decorative spring top-dress; it is placed late enough that plants are settling into dormancy, and it is often kept loose enough to moderate freeze-thaw movement without sealing the crown.
The trade-off is simple: the same insulation that protects roots in January can delay growth in March. That is why mulch should be managed as a seasonal layer. It is not “set and forget,” especially around perennials and bulbs that must push through it.
Spring mulching: wait for workable soil
Spring is the high-value season for most bed mulch, but do not let the first warm afternoon rush you. A practical readiness test is to take a handful of soil from a few inches down. If it crumbles when pressed, the bed is approaching workable conditions. If it forms a shiny clump or sticks like wet clay, walking and spreading on it can compact the surface and mulch can trap excess moisture.
The calendar varies by climate, exposure, and soil. Randy Lemmon recommends watching soil condition rather than committing to a fixed date; that is especially useful in gardens where one sunny wall warms weeks before a shaded, heavy-soil border. A soil thermometer can add confidence, but texture, drainage, and plant stage still matter more than one number taken at one spot.
Best spring timing for flower beds
For an established perennial border, clear winter debris and look for emerging shoots before you spread fresh mulch. If the old layer is still near the desired depth, rake it open, pull it away from crowns, and top-dress only where the surface has settled. A light spring refresh can improve weed suppression without burying the crown of a peony, daylily, coral bell, or other perennial that is already moving upward.
Spring mulch also helps newly planted shrubs and flowers hold more even moisture while their roots expand. Water the planting hole and surrounding soil normally before covering it; mulch on bone-dry soil can slow the first soaking rain from reaching the root ball. Leave a visible air gap around stems and crowns so the bark stays dry and the plant can be inspected.
Do not use fresh mulch as a disguise for a bed that needs weeding, drainage repair, or disease cleanup. Pull perennial weeds first, remove diseased foliage according to local extension advice, and correct standing water before adding a layer. Gary’s Garden Center summarizes the useful contrast: spring mulch emphasizes weed suppression, moisture conservation, and a renewed surface; fall mulch emphasizes protection and soil preservation.
Spring timing for vegetable gardens and raised beds
Vegetable beds need a little more patience because many crops prefer warming soil. Wait until the bed is no longer cold and soggy, then mulch around established seedlings rather than covering the planting line. Warm-season crops such as tomatoes, peppers, cucumbers, and squash usually benefit from a mulch layer after they are actively growing and the soil has warmed; putting dark or thick material over a chilly bed can work against the early-season growth you are trying to start.
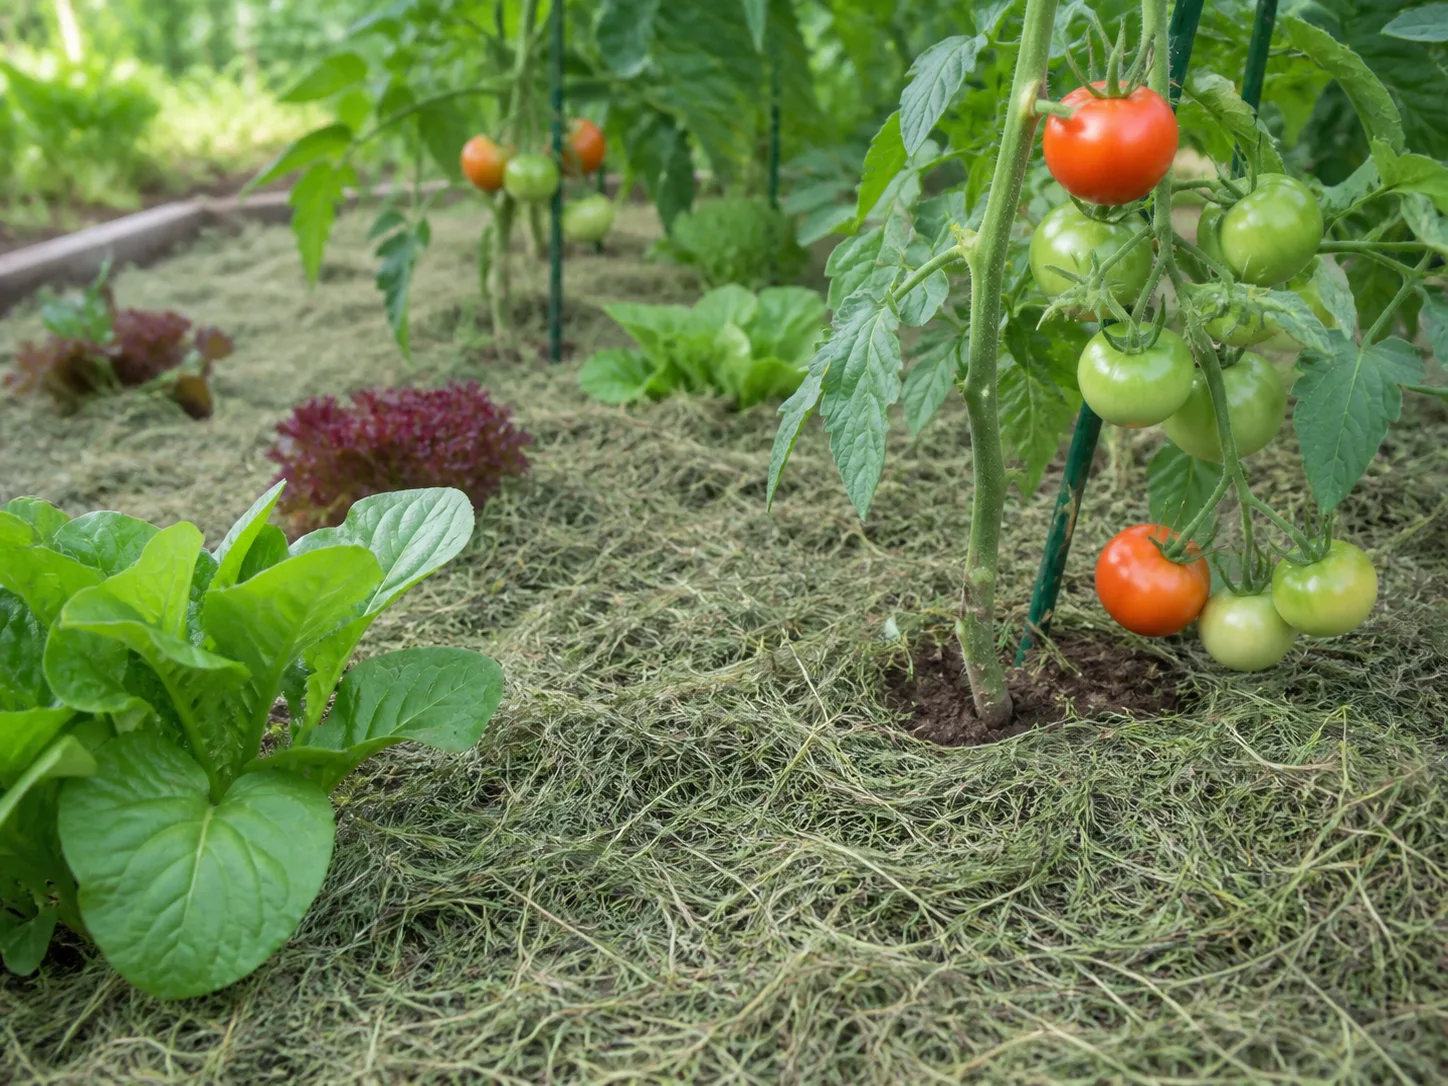
Keep mulch a few inches away from stems, and do not use a material that contains mature weed seeds or unknown herbicide residues. Clean straw is useful around many vegetables; shredded leaves can work when they are chopped enough not to form a windblown mat. Fine compost is better treated as a thin surface amendment than as a deep, fluffy mulch because its small particles can crust or stay wet when overapplied.
Raised beds dry and warm differently from in-ground beds, so inspect rather than copy a neighbor’s timing. N.C. Cooperative Extension recommends winter protection for raised beds but also highlights alternatives such as cover crops and finished compost. In spring, remove any dense winter covering from planting rows, check that the bed drains after rain, and then choose the lightest material that solves the actual problem.
Fall mulching: protect roots after growth slows
Fall mulch works best when it follows the plant’s seasonal slowdown rather than the first cool evening. For ordinary landscape mulch, you can top up a bed when the surface is dry enough to work and the layer has thinned. For winter mulch, wait until plants are dormant or nearly dormant, several hard frosts have cooled the bed, and the ground is not yet frozen solid. Purdue Extension warns that applying winter mulch too early can smother plants and encourage disease.
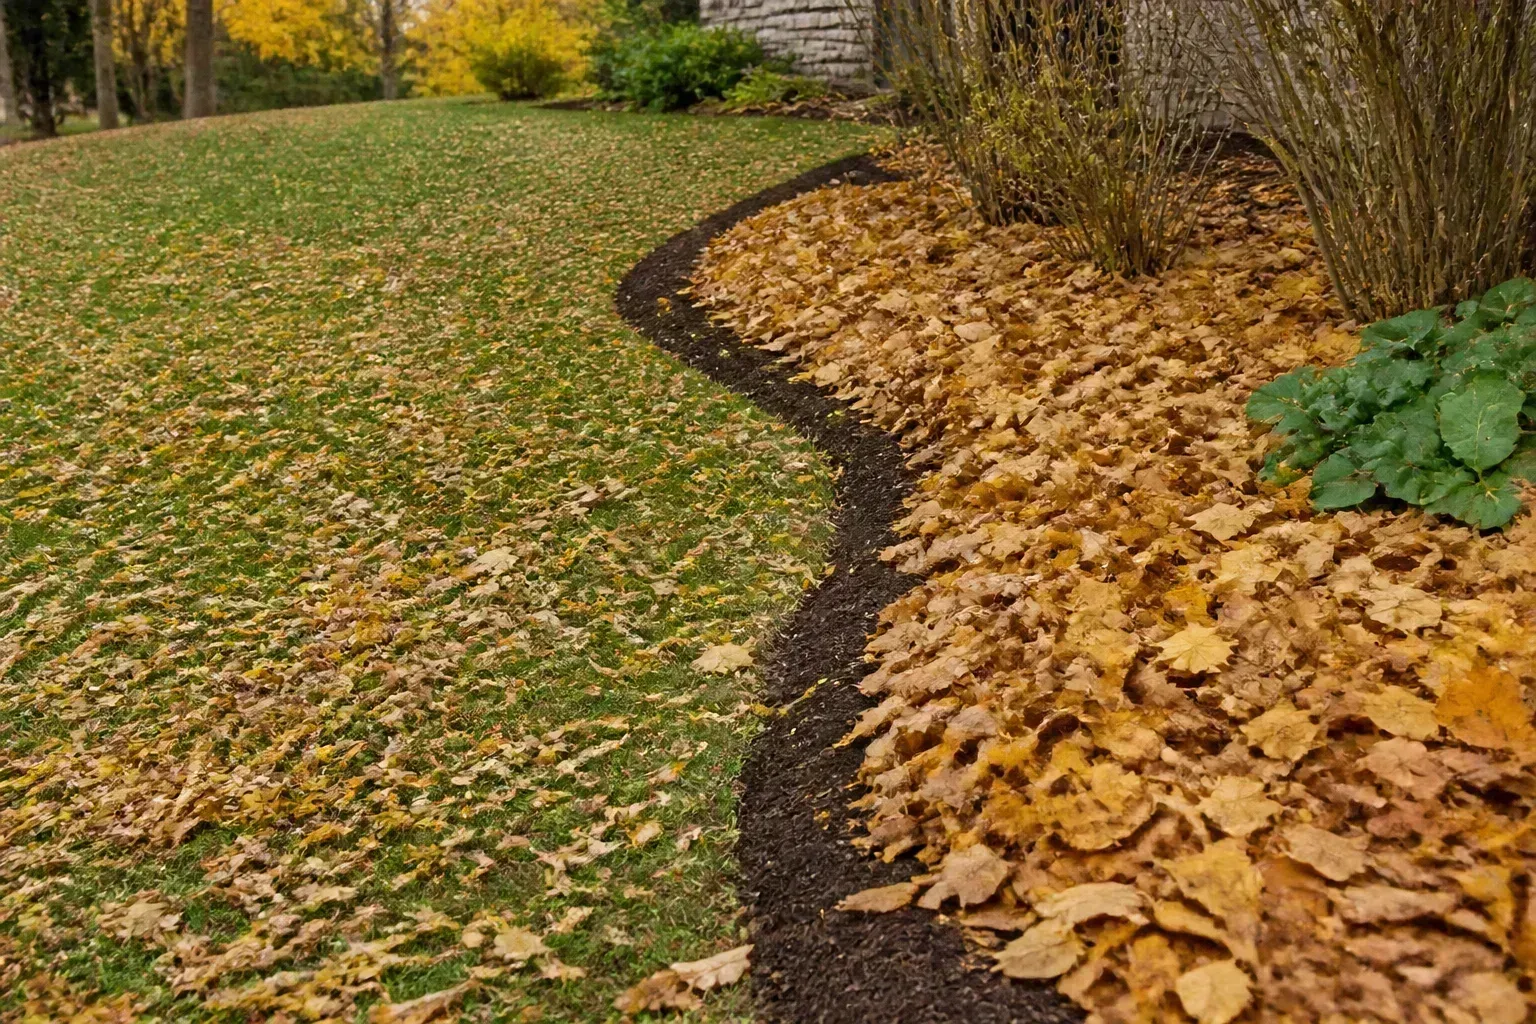
That timing protects against a common failure mode: covering an actively growing crown while the weather still alternates between warm afternoons and cool nights. Early, dense coverage can hold too much moisture, provide shelter for rodents, and keep the plant from completing its transition into dormancy. Late coverage over frozen ground may still reduce wind erosion, but it will not stabilize the root zone as reliably because the soil has already undergone its first major freeze.
Fall is also a good time to protect soil that would otherwise sit bare. In an empty vegetable garden, mulch helps soften the impact of hard rain and wind. It is not the only option—cover crops can protect and improve a bed—but it is a practical option when you need a low-maintenance surface cover.
Winter mulch for borderline-hardy perennials and bulbs
Target winter mulch at plants that are newly planted, shallow-rooted, recently divided, exposed to wind, or close to the edge of their local hardiness. Straw, pine needles, chopped leaves, or other loose organic material can provide air pockets and insulation. Purdue’s winter-protection guidance gives a general 2–4-inch range for many situations, while N.C. Cooperative Extension describes 3–6 inches for raised-bed winter protection; the right depth depends on material texture, exposure, and the plant.
Do not bury the crown as if it were a storage root. Place the material around the plant, leaving the crown identifiable and avoiding a wet collar where stems meet soil. Spring bulbs may be protected from heaving by a loose layer, but their shoots still need a clear path in spring. If a bulb bed is already well established and naturally snow-covered, extra mulch may add little and can make emergence harder to monitor.
A fall mulch layer cannot compensate for a plant that is fundamentally unsuited to the site, a pot that freezes solid above ground, or roots sitting in saturated soil. Check drainage and soil moisture first. Purdue Consumer Horticulture also notes that evergreens can lose water through their foliage while frozen soil prevents root uptake, so watering deeply before the ground freezes may matter more than piling mulch higher.
Fall mulch for empty vegetable beds
Clean the bed before covering it. Remove diseased or insect-infested crop residue rather than burying it under mulch, because the cover can protect unwanted inoculum and pests along with the soil. Healthy, non-diseased residues can be chopped and managed according to your local extension recommendations; if you are uncertain, remove them and start with a clean surface.
Next choose among three strategies. Plant a suitable cover crop if you can manage spring termination. Add finished, weed-free compost if the bed needs organic matter and you have time to let it settle. Or use loose straw, chopped leaves, or a thin layer of wood chips as a surface cover when erosion and winter weeds are the immediate concern. N.C. Cooperative Extension lists straw, pine needles, chopped leaves, and wood chips used as a top-dressing among winterization options.
An empty bed gives you more flexibility than a planted border, but “empty” does not mean “anything goes.” Whole leaves can mat in wet weather, fresh hay may introduce weed seeds, and a thick layer can become hard to pull back in spring. Shred or chop leaves, keep the cover loose, and leave paths and bed edges visible so you can inspect runoff and drainage after storms.
Adjust timing for climate and microclimate
Hardiness zones are useful for understanding winter risk, but they do not tell you when the soil is dry enough to work or when a particular bed cools. A south-facing foundation bed, a raised cedar box, and a low spot in heavy clay can experience three different “seasons” on the same property.
In cold regions with repeated freeze-thaw cycles, fall winter mulch deserves more attention for recent plantings, strawberries, shallow-rooted perennials, and plants exposed above the snow line. Apply it after dormancy and initial freezes, then keep some material available for a late spring cold snap. Pull it away in stages as growth resumes rather than removing all protection on the first warm day.
In mild-winter climates, fall mulch may be primarily about keeping soil from washing away, limiting winter weeds, and maintaining moisture during a dry season. Heavy insulation can be unnecessary or counterproductive if the soil stays warm and wet. Spring mulch often does the main work of weed and moisture management, but avoid applying it before a wet winter bed has drained.
In hot climates, spring mulch should go down before extreme heat and evaporation, once the soil is warm enough for the crop. In cool, wet regions, delay spring application until the bed is workable and the layer will not keep it cold for weeks. On windy sites, choose heavier or interlocking material, water the bed before covering dry soil, and check whether the mulch is blowing into drains or against stems.
Choose the material for the seasonal job
Material changes how much air, water, and insulation a layer provides. Shredded leaves are an excellent fall resource when chopped; intact leaves can knit into a slick mat. Straw is loose and useful for winter protection, but clean straw is preferable to hay in planted beds because hay commonly contains seed heads. Pine needles shed water and remain airy, while bark and wood chips last longer and suit paths, tree rings, and ornamental beds better than tender seed rows.
Finished compost is valuable around beds, but use it as a thin top-dressing or soil-building input rather than assuming more is always better. Fresh woody material should remain on the surface, not be mixed into the root zone as if it were compost. Surface chips may decompose slowly; mixing them into soil can change the balance and structure around roots before they have broken down.
Avoid choosing a material purely because it looks tidy. A fine, wet material may seal the surface; a fluffy material may blow away; a dark material may warm quickly in sun; a porous material may provide the air space needed for winter protection. Match texture to exposure, drainability, plant stage, and how often you can inspect the bed.
How deep to mulch in beds, borders, and around trees
Measure what is already there before adding more. For many flower and vegetable beds, about 2–3 inches of settled mulch is a practical maintenance range. Winter protection for vulnerable plants may call for a deeper, looser layer, often around 2–4 inches for common organic materials, with fluffy leaves or straw adjusted for settling and exposure. Extension recommendations vary because “four inches of straw” does not behave like four inches of wet shredded bark.
Trees and shrubs generally need a broad, shallow doughnut rather than a cone. Extend mulch over as much of the root zone as practical, but keep the trunk visibly clear. The point is to protect soil and roots, not to create a damp sleeve around bark. A ring that looks thin near the trunk and wider toward the drip line is safer than a mound piled at the base.
Depth is a guardrail, not a goal. If water beads on the surface, the layer smells sour, stays saturated, or has formed a compact crust, rake it open and remove excess before adding anything. A slightly thin layer that allows inspection is more useful than a deep layer you cannot see through.
A safe fall-or-spring mulching sequence
Use the same basic sequence in either season, then change the final timing and material to suit the job:
- Inspect the bed. Identify live crowns, seedlings, bulbs, tree trunks, irrigation lines, low spots, and places where water sits.
- Clean selectively. Remove diseased or pest-infested residue; do not bury known problems under a fresh cosmetic layer.
- Solve weeds first. Pull or hoe established weeds. Mulch blocks light but does not reliably kill a perennial weed with a strong root system.
- Check moisture and drainage. Aim for soil that is evenly moist, not dusty and not saturated. Repair runoff or compaction before covering.
- Rake or fluff old mulch. Break up crusts and measure the existing depth. Remove a thick, sour-smelling, slimy, or contaminated layer rather than stacking on top.
- Spread evenly. Place the material in a broad layer, keeping it off stems, crowns, and trunks. For winter protection, keep loose air space instead of compressing it.
- Record the spring action. Mark vulnerable perennials mentally or with a garden map so you remember where to pull mulch back as shoots appear.
In spring, the final step is to wait until the soil is workable and then use a maintenance layer. In fall, the final step is to wait until plants are dormant enough for winter cover. The work is similar; the timing signal is not.
When to skip or delay mulching
Skip or delay the job when the ground is frozen, waterlogged, freshly disturbed, or covered with unresolved disease residue. Do not use mulch to hide standing water around a plant that needs better drainage. Roots need oxygen, and a thicker layer cannot create oxygen where the soil pores are already filled with water.
Delay spring mulch when the bed is still cold and clumpy, especially if you are sowing seeds directly. Delay fall winter mulch when plants are still actively growing, the forecast is warm for an extended period, or the bed is wet enough that the material will mat. A light erosion cover for an empty bed may be appropriate, but it is not the same as a dense crown-protection layer.
You may also skip an annual refresh when the existing mulch is clean, loose, at the correct depth, and doing its job. Decomposition is not failure. If the layer has settled into the soil surface and the bed remains healthy, rake it lightly and add only enough to restore coverage rather than removing good organic matter every year.
The spring reset: inspect, pull back, and refresh
Winter mulch should have an exit plan. Begin checking protected beds as daytime temperatures rise and the soil starts to thaw. Pull material away from crowns and stems when shoots appear, the cover becomes wet and compacted, or the plant needs light and air to resume growth. Do not wait for a fixed date if a sheltered bed is already several weeks ahead of an exposed one.
Remove gradually in freeze-thaw climates. Leave a loose reserve nearby if a hard freeze is still possible, then return it around a vulnerable plant overnight only when needed. This approach avoids the two extremes: smothering new growth under a blanket or stripping protection while roots are still exposed to a late freeze.
Use spring inspection to diagnose what happened over winter. A lifted crown with exposed roots suggests heaving; soft, discolored tissue at the soil line suggests excess moisture or rot; dry, browned evergreen foliage can reflect winter water loss rather than a mulch-depth problem. Firm heaved plants gently back into place, correct the depth, and improve drainage before deciding that they need more mulch.
Once the bed is open, rake the remaining layer, remove debris, and measure it. If it is earthy and loose, keep it. If it is sour, slimy, or packed into a water-shedding crust, remove enough to restore air and drainage. Only then add a spring layer where weed pressure or moisture loss justifies it.
Common mistakes that cancel the benefit
Applying winter mulch too early is the mistake most likely to turn protection into a problem. Plants may remain too warm, crowns may stay wet, and rodents may find a sheltered corridor before the cold season has even begun. Wait for dormancy and the weather signal, not simply the availability of a discounted bag of mulch.
Piling mulch against trunks and stems creates a damp contact zone where bark can soften and pests can hide. Pull it back into a doughnut shape. The gap should be obvious enough that you can see the trunk flare or plant base.
Adding new mulch without measuring old mulch slowly raises beds and buries crowns, edging, and low branches. Rake first, remove excess, and top up in a thin pass. If the layer has become a dense cake, more material will not fix its structure.
Covering dry soil can preserve the wrong condition. Mulch reduces evaporation, but it does not automatically rehydrate the root zone. Water deeply when conditions and plant needs call for it, let the surface drain, and then cover.
Using diseased debris as winter armor can move a problem into the next season. Separate clean organic matter from symptomatic material, and use local extension guidance for disposal and composting. Likewise, do not assume a cover crop, compost layer, or mulch layer can substitute for crop rotation and sanitation in a vegetable bed.
Treating every plant the same wastes material and can harm healthy, established plants. A fully hardy perennial in a sheltered bed may need little winter cover, while a recent division on an exposed slope may need targeted loose protection. Mulch should follow vulnerability, not just property size.
Conclusion
For most gardens, spring is the better time to mulch for weeds, summer moisture, and a refreshed growing surface; fall is the better time to mulch for winter protection, erosion control, and vulnerable roots. If your beds have different jobs, split the work by area instead of choosing one season for everything.
Before you spread, inspect the soil, plant stage, drainage, and existing depth. In spring, wait for workable soil and pull mulch away from emerging crowns. In fall, clean the bed, wait for dormancy and initial freezes, then use a loose, breathable layer around plants that actually need winter buffering. That small amount of timing discipline is what turns mulch from a decorative covering into useful seasonal care.



