How to Grow and Care for ‘Stargazer’ Lily
Learn ‘Stargazer’ lily care from bulb planting and drainage to container growing, propagation, bloom problems, and post-flowering pruning.
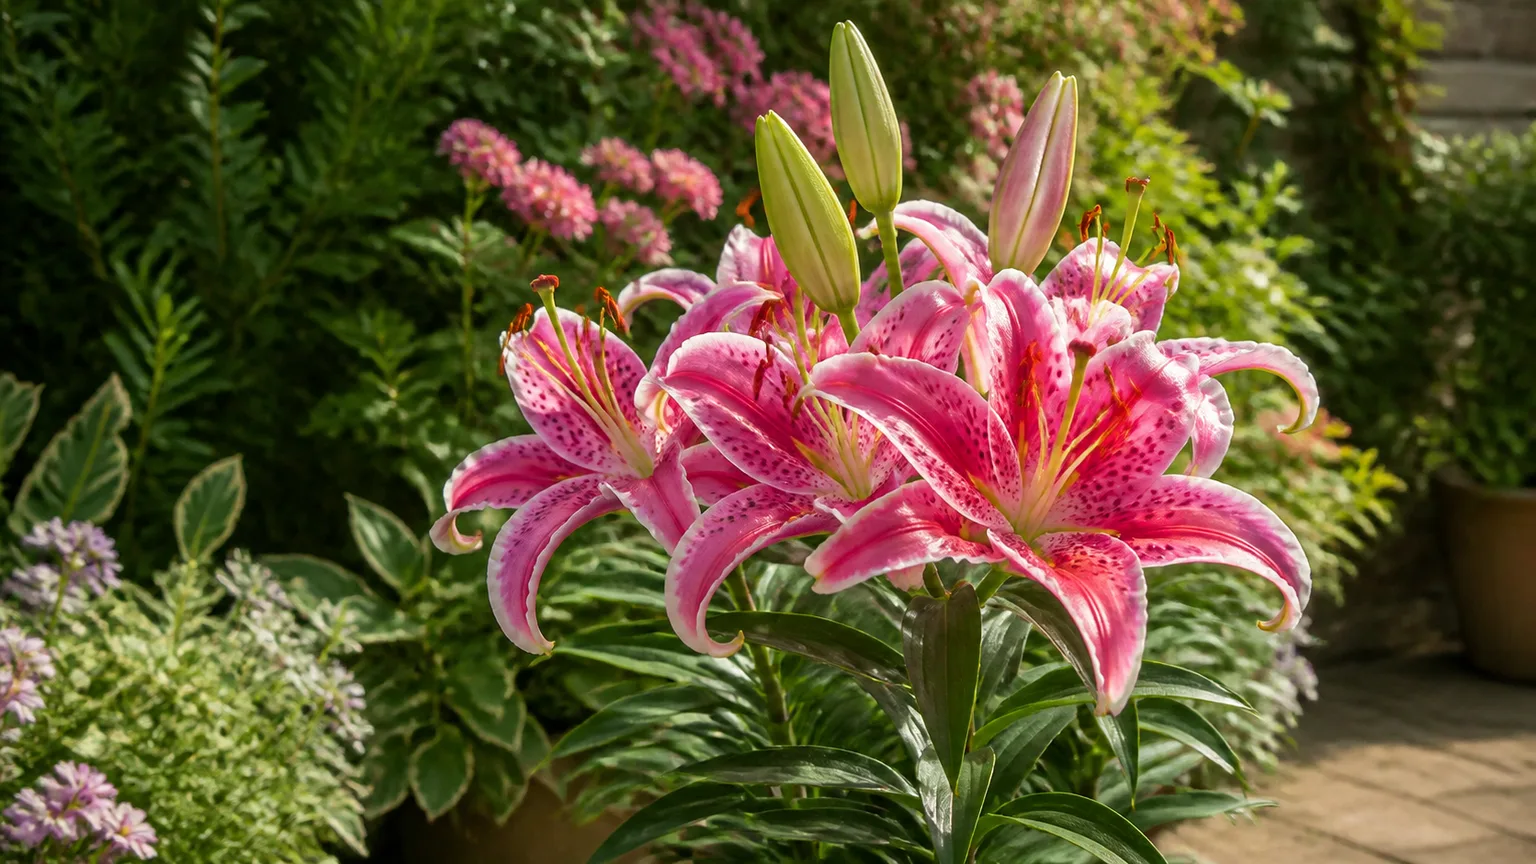
‘Stargazer’ lily is dramatic above ground and particular below it. Its large pink-and-white flowers, dark speckles, recurved petals, and strong fragrance make it a favorite for summer borders and bouquets, but the bulb performs only when the roots stay cool, the soil drains quickly, and the green foliage is allowed to finish its job.
The best ‘Stargazer’ lily care is therefore less about constant feeding and more about getting a few irreversible choices right: buy a firm bulb, plant it at a sensible depth, give the leaves enough sun, keep the root zone evenly moist without waterlogging it, and never plant a true lily where a cat can reach it. The plan below covers those choices from planting through winter.
‘Stargazer’ lily at a glance
‘Stargazer’ is an Oriental hybrid in the genus Lilium. NC State Extension describes Oriental hybrids as tall, fragrant lilies with large flowers that grow best in acidic, humus-rich, moist soil with organic mulch keeping the roots cool (NC State Extension). That combination explains why the plant can love sunshine and still fail in a hot, dry, or waterlogged root zone.
Expect a summer-flowering perennial bulb with upright stems, narrow leaves, and showy flowers carried near the top of the plant. Height and hardiness vary with the bulb stock, growing climate, and whether the plant is in the ground or a pot, so use the supplier’s cultivar label for the final zone and height rather than treating one catalog number as universal.
Do not confuse a true lily with a daylily, peace lily, or calla lily. True lilies have scaly bulbs and belong to Lilium; the name matters for planting depth, seasonal care, and especially pet safety. Missouri Botanical Garden lists Lilium as a bulbous perennial that flowers from June through August, prefers full sun to part shade, and needs even moisture without sitting wet (Missouri Botanical Garden).
Understand what an Oriental hybrid needs
Think of a ‘Stargazer’ lily as a plant with two different climates above and below the soil line. The leaves and flower stems want bright light and moving air, while the bulb and roots prefer a cool, moisture-buffered pocket that does not stay saturated after rain.
That is why a thin layer of organic mulch is useful, but a heavy blanket of wet material pressed against the bulb is not. Mulch should moderate temperature and slow evaporation; it should not turn a poorly drained planting hole into a permanent reservoir.
Oriental hybrids are also more fragrant and generally more exacting about soil reaction than Asiatic lilies. BBC Gardeners’ World recommends acidic soil or ericaceous compost for Oriental types, while describing Asiatic lilies as more tolerant of neutral to alkaline conditions (BBC Gardeners’ World Magazine). If your soil is strongly alkaline, a deep container with an appropriate acidic potting mix can be easier to manage than repeatedly adding amendments to a clay bed.
Pick a site that keeps roots cool and dry
Choose full sun to light part shade with at least several hours of strong light on the leaves. Morning sun with some afternoon protection can work in very hot climates, but dense shade usually produces weak, stretched stems and fewer flowers. A sheltered position also reduces wind damage to tall stems and keeps heavy blooms from whipping against each other.
The drainage test is more important than a perfect soil texture. After a substantial rain, the bed should drain rather than hold a puddle. If water collects beside a downspout, at the bottom of a slope, or in a compacted clay pocket, improve the whole planting area with a raised bed or choose a container; placing a bulb in a deeper hole within wet soil makes a small bathtub.
Aim for soil that is rich in organic matter, evenly moist during active growth, and loose enough for roots to breathe. Missouri Botanical Garden recommends average, medium-moisture, well-drained soil and notes that rich organic soil, a cool root zone, and good even moisture support the genus. A thin compost top-dressing can improve structure, but do not bury the bulb in a concentrated pocket of fresh manure or fertilizer.
Choose in-ground planting or a container
In-ground planting is usually the easiest long-term option. It lets the bulb remain undisturbed, buffers temperature better than a small pot, and gives the roots room to explore. Place it in a mixed border, a cutting garden, or among lower plants that hide the bare stems after the foliage eventually dies back.
A container earns its place when the garden soil is heavy, the site is persistently wet, or you need to move the plant away from a cat. Use a deep, stable pot with drainage holes rather than a shallow decorative bowl, and remember that container lilies are often smaller and more vulnerable to winter temperature swings than bulbs planted in the ground.
Plant ‘Stargazer’ bulbs at the right depth
Buy the bulb as close as practical to planting time and choose one that is firm, plump, and free of soft patches, mold, or a sour smell. Do not accept a damaged bulb simply because it has a visible shoot; a small amount of surface scale damage is different from tissue that collapses under light pressure.
Use the package depth first because bulb size and local conditions vary. As a starting point for a typical garden bulb, aim for roughly 6 to 8 inches of soil above the basal plate, then adjust to the label and the bulb’s size. Missouri Botanical Garden gives 4–6 inches as a broad Lilium planting depth, while NC State Extension gives 8 inches for the genus; the practical lesson is to measure from the bulb’s base and avoid burying a small bulb at a depth meant for a large one.
The bulb’s pointed growing end goes up and the flatter basal plate goes down. If you cannot tell which side is up, plant it on its side rather than forcing a guess; the emerging shoot can curve toward the surface. Space bulbs far enough apart for adult stems and air movement, usually about 8 to 12 inches for a garden display unless the label says otherwise.
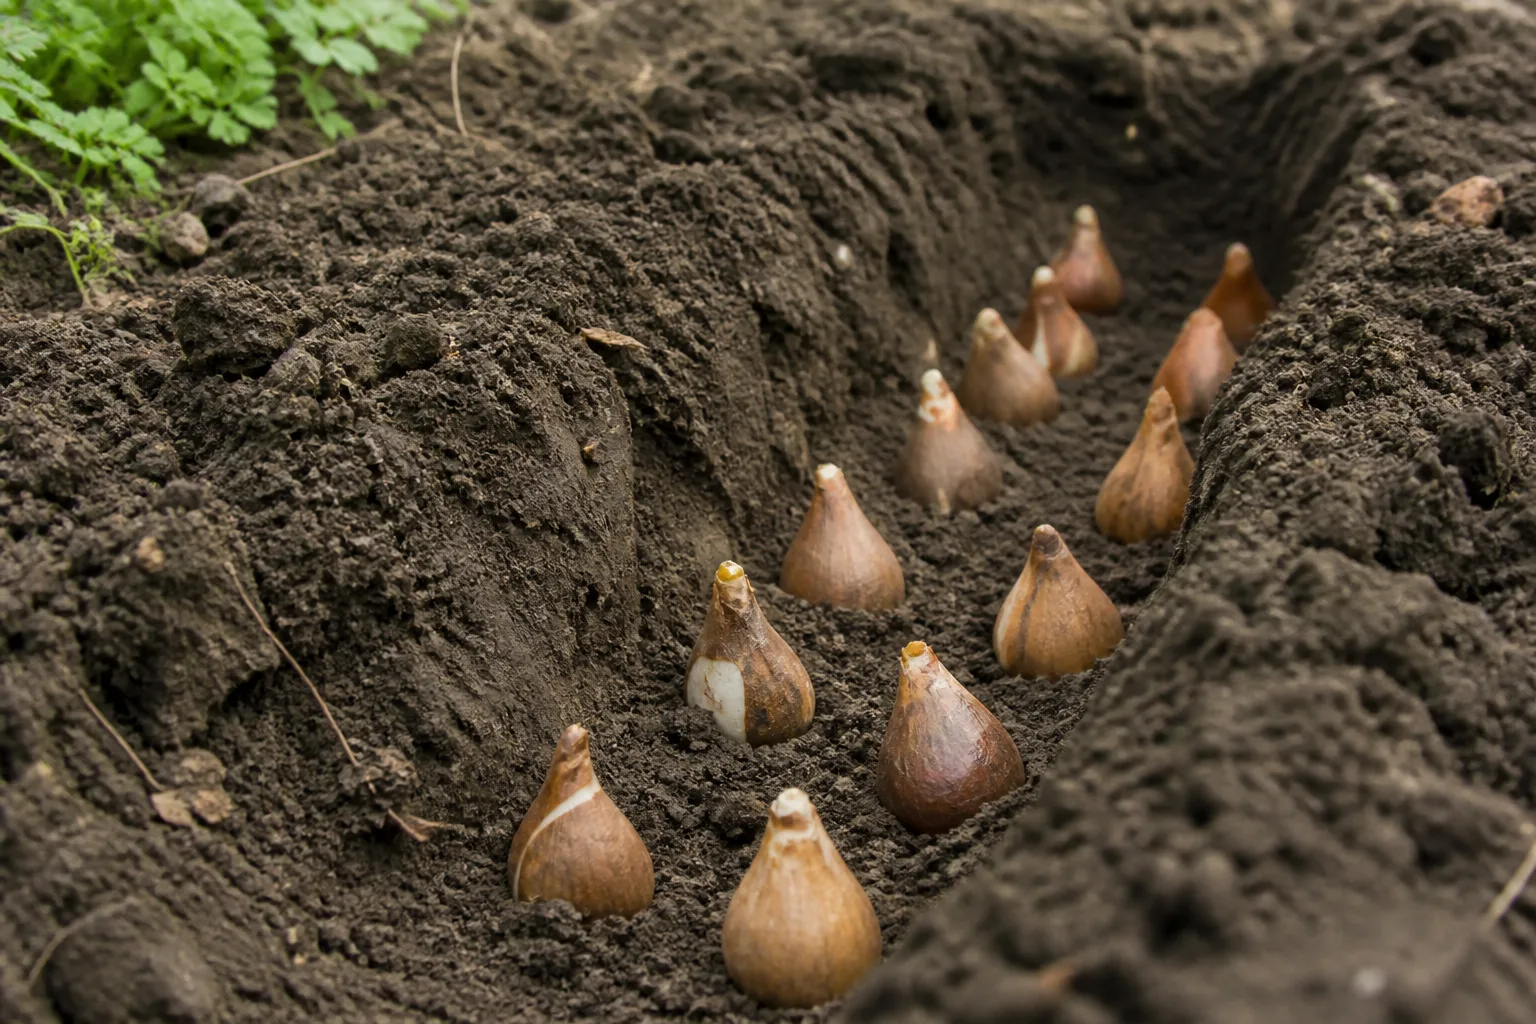
A reliable bulb-planting sequence
- Loosen the soil over a broad area, not only in one narrow hole. Remove stones and break up compacted layers that would trap water.
- Set the bulb on a small mound of soil with the basal plate down and the growing tip up. Measure the finished soil depth from the base of the bulb.
- Backfill with the native soil, firming it gently around the scales. Do not pack the soil hard enough to remove every air space.
- Water once to settle the root zone, then add a light organic mulch while keeping the stem area from becoming waterlogged.
- Mark the planting spot. A dormant lily can look like an empty patch, and accidental digging is one of the easiest ways to lose a healthy bulb.
Plant in fall or early spring when the soil is workable, following the supplier’s timing for your climate. Potted lilies bought in active growth can be planted more flexibly, but avoid breaking the root ball simply to correct a depth that is already working.
Water for even moisture, not soggy soil
Water deeply when the upper soil is beginning to dry, then let excess water drain away. The exact schedule depends on rainfall, soil, pot size, temperature, and wind, so a weekly number is less useful than checking several inches down with a finger or moisture meter.
During active leaf and flower growth, do not let the plant cycle from bone-dry soil to a flood. Consistent moisture helps the tall stem support buds, while saturated soil deprives the bulb of oxygen and increases the risk of rot. Water at the soil line so the flowers and foliage dry quickly rather than spraying the open blooms.
A good root-zone mulch reduces evaporation and keeps the bulb cooler, especially when the leaves are in hot afternoon sun. Keep mulch loose and do not pile it tightly around the stem. In a container, water until a little drains from the bottom, then empty any saucer instead of allowing the pot to stand in runoff.
Feed only when the plant can use it
Start with fertile soil and a restrained feeding plan. Apply a bulb fertilizer or balanced, slow-release product in spring as shoots emerge, following the label rate and keeping granules away from the bulb and stem. A second light feeding may be appropriate as buds develop in poor soil, but more fertilizer is not a substitute for sun, drainage, or intact foliage.
Avoid making high-nitrogen fertilizer the center of your routine. It can push lush leaves and soft stems while leaving the real limits—compacted soil, low light, a recently divided bulb, or waterlogging—unchanged. If you use liquid feed, water the soil first when it is very dry and follow the product’s dilution instructions exactly.
Deadhead blooms and keep the foliage
Remove each fading flower or seed pod before the plant spends more energy on seed production. Cut the small flower stalk behind the bloom, taking care not to strip the nearby leaves. The goal is to tidy the plant and return energy to the bulb, not to cut the whole stem while it is still green.
After flowering, leave the stem and foliage in place until they turn yellow or brown. BBC Gardeners’ World specifically warns against cutting flowering stems back to soil level and advises leaving them until they have gone brown; Missouri Botanical Garden likewise recommends cutting back only after leaves and stems yellow (BBC Gardeners’ World Magazine; Missouri Botanical Garden). Those leaves are rebuilding the bulb for next year’s flower.
If the yellowing happens gradually at the end of the season, it is normal. Remove the finished stem at ground level only when it pulls or cuts cleanly and no green tissue remains. Hiding the base with lower companions or a loose mulch is better than tying or braiding the leaves while they are still working.
Grow ‘Stargazer’ lilies in containers
Choose a pot that is deeper than a typical annual planter and has several drainage holes. BBC Gardeners’ World recommends at least 12 centimeters of soil above a potted lily bulb and notes that extra depth provides winter protection. In practice, the pot must hold the bulb at the correct depth while leaving enough room below it for roots and enough weight to keep a tall flowering stem stable.
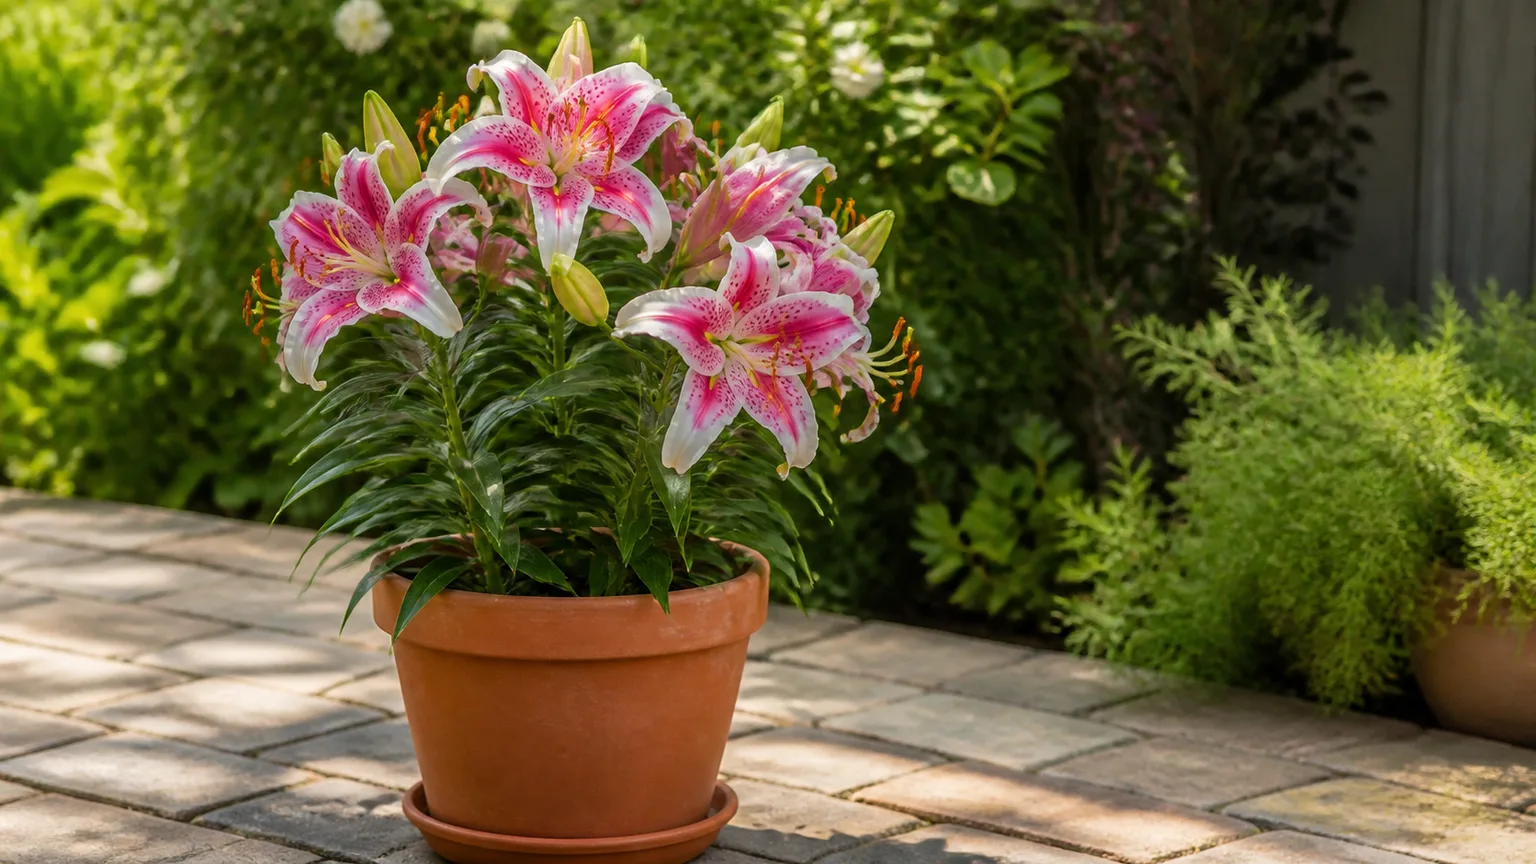
Use a free-draining potting mix with organic matter and a mildly acidic reaction. Do not fill a container with dense garden soil that collapses around the bulb when watered. Position the pot in bright light, rotate it if stems lean, and water when the mix is drying but before the bulb is left parched for long periods.
Container culture is not a way to ignore winter. The small volume of soil can freeze harder and thaw faster than a garden bed, so move the pot to a sheltered, cool place in a cold climate. If the container stays warm indoors, light and temperature may be unsuitable for the plant’s seasonal rhythm; a cool protected space is usually better than a heated room.
Plan for bloom timing and forcing
An outdoor ‘Stargazer’ normally flowers in summer, but the exact week depends on planting date, winter conditions, cultivar stock, and local weather. A newly planted or recently divided bulb can produce leaves without flowers while it establishes, so do not judge the bulb dead simply because its first season is quiet.
If you need flowers for a specific holiday, buy a nursery-grown potted plant that is already near bud rather than trying to force a dry bulb by guesswork. Chilling and forcing schedules are commercial techniques with precise temperature and timing requirements; a home refrigerator also exposes bulbs to fruit ethylene and creates a storage problem if the bulb is forgotten. For a garden planting, let the bulb follow its natural summer cycle.
Propagate by offsets or scales
Established lilies can make small offsets beside the parent bulb, and bulbs can also be propagated from scales. Division is the more practical choice for most gardeners because it is easier to inspect, replant, and label, while scale propagation takes patience and can require several years before a new plant reaches flowering size.
Divide only when the clump is crowded, you are renovating the bed, or you have a clear place for the new bulbs. Lift the clump during dormancy with a fork rather than driving a spade through the bulb, separate offsets carefully, and replant them promptly at the same depth and spacing as the parent. Water to settle the soil, then give the new bulbs time; transplant shock is a more likely reason for a missed season than a lack of fertilizer.
Overwinter bulbs in the ground and in pots
In a suitable climate, leave in-ground ‘Stargazer’ bulbs where they are. True lilies are perennial bulbs, and repeated lifting can damage scales and roots. After the foliage has naturally died back, clear only the dead material and apply a loose mulch if your winters are severe or freeze–thaw cycles repeatedly heave the soil.
In a marginal climate, the site matters as much as the nominal hardiness zone. A sheltered bed near a wall, a raised planting area, or a location protected from harsh wind is safer than an exposed low spot. Keep winter mulch from becoming soggy, and pull it back gradually in spring so emerging shoots do not remain wet and hidden.
Potted bulbs need protection around the entire root ball. Move the container to an unheated garage, cold frame, or other cool shelter before repeated hard freezes, checking occasionally so the mix does not stay saturated. Do not bring a dormant pot into a hot living room simply because the leaves have disappeared; warmth can trigger weak growth before the light is ready.
Diagnose a ‘Stargazer’ lily that will not bloom
Start with the physical conditions before reaching for more fertilizer. A bulb that is too shallow may heave or dry out, while one planted too deeply may produce weak or delayed flowering. A plant with lots of green leaves but no buds may also be recovering from division, growing in too much shade, or storing energy after a difficult winter.
| What you see | Likely cause | Best next step |
|---|---|---|
| Leaves grow but no flowers appear | Shallow or deep planting, low light, recent transplanting, or a juvenile offset | Check depth during dormancy, improve light, and give the bulb another full cycle before digging again. |
| Buds form but drop or fail to open | Heat, drought, wind, root stress, or damaged stems | Check soil moisture and shelter; do not flood the pot or cut the leaves. |
| Stem bends or needs repeated support | Low light, crowding, or exposed wind | Move future bulbs to brighter shelter and space them for airflow; stake early if needed. |
| Bulb is soft or smells sour | Waterlogged soil or rot | Remove the damaged bulb, correct drainage, and never replant into the same wet pocket. |
| Lower leaves yellow early | Root stress, compacted soil, or a normal end-of-season transition | Check timing and soil before treating; late-season yellowing is normal, early collapse is not. |
Correct one obvious problem at a time. If you change the depth, move the plant, add fertilizer, and alter watering in the same week, you lose the ability to learn what actually helped. A firm bulb with healthy seasonal foliage is often worth leaving alone for another year after a recent move.
Separate normal dieback from disease
Yellow leaves after flowering are expected when the plant is entering dormancy. Yellowing soon after emergence, water-soaked tissue, gray-brown spots, or a collapsing stem deserves closer inspection, especially in a crowded or rainy planting.
Missouri Botanical Garden lists bulb rot and botrytis among possible lily problems and notes that overly wet soil is a particular risk. NC State Extension also identifies aphids as vectors of lily mosaic virus and notes that there is no cure once infection is established (Missouri Botanical Garden; NC State Extension). Remove badly diseased plants and bulbs rather than composting uncertain material, and correct the wet or crowded conditions that made the problem likely.
Manage lily pests before they strip the plant
Inspect the undersides of leaves and the top of the stem whenever new growth appears. Aphids can cluster around tender growth, while lily leaf beetles and their larvae can chew foliage quickly. BBC Gardeners’ World notes that the bright red beetles can be difficult to spot because they drop onto their backs, and recommends checking for eggs and larvae on leaf undersides (BBC Gardeners’ World Magazine).
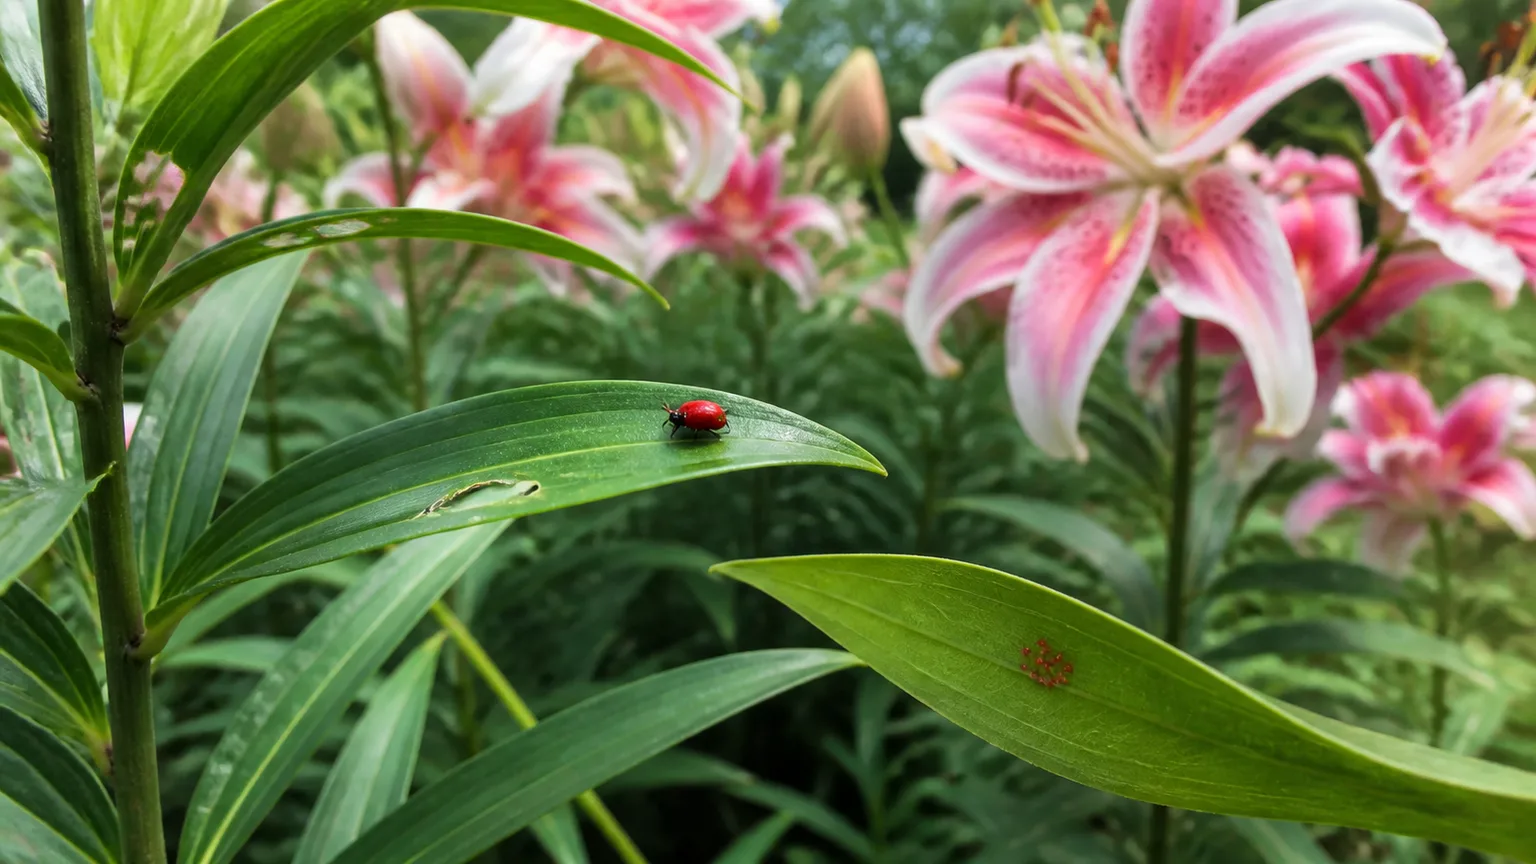
For a small planting, hand-pick visible beetles and larvae into soapy water and remove egg clusters before they hatch. Keep the bed clean, avoid spraying open flowers when pollinators are visiting, and use only a product labeled for the pest, plant, and application site if a severe infestation exceeds what hand removal can manage.
Do not diagnose every hole as disease. Chewed edges and black larval droppings suggest an insect; soft bulb scales and a sour smell suggest rot; expanding leaf spots in damp weather suggest a fungal issue. The correct response starts with identifying the damage rather than applying a broad treatment to a plant that may simply be finishing its seasonal cycle.
Keep ‘Stargazer’ lilies safe around cats
This is the non-negotiable part of ‘Stargazer’ lily care. The ASPCA lists Lilium species as toxic to cats, with kidney failure among the clinical signs, while listing the group as non-toxic to dogs and horses (ASPCA, Lily). Because ‘Stargazer’ is a true Lilium, do not rely on a cat avoiding the plant or assume that an outdoor bed is safe.
If a cat can reach the garden, choose a different flower or make the lily bed physically inaccessible. Do not bring cut stems indoors to a cat household, and keep bulbs, fallen petals, and discarded foliage out of reach. If ingestion is possible, contact a veterinarian or animal poison service immediately; do not wait for symptoms such as lethargy or vomiting before asking for help.
Use fragrance and color in a border
Plant ‘Stargazer’ where its fragrance is enjoyed without placing it in a cat-accessible path. A group of three or more bulbs creates a stronger display than a lone stem, and a sheltered border lets the flowers open without being battered by wind. Missouri Botanical Garden recommends grouping lilies for display and notes their usefulness as cut flowers.
Use lower plants around the base, but do not crowd the bulb with aggressive groundcovers or shallow-rooted plants that demand constant irrigation. Choose companions that hide the lower stems while allowing air movement and access to the soil. In a cutting garden, grow the lilies where pollen stains and fragrance are welcome; NC State Extension notes that lily pollen can mark skin and clothing.
The plant’s beauty is easiest to maintain when the design anticipates its whole year. The flowers are the summer event, the green leaves are the recovery period, and the dormant patch is a cue to mark rather than dig. Give the bulb a permanent place and let the planting around it do the seasonal camouflage.
Conclusion
Reliable ‘Stargazer’ lily care comes down to a cool, well-drained root zone, bright light on the leaves, even moisture during active growth, and patience after flowering. Plant a firm bulb at the label’s depth, deadhead the spent flowers, leave green foliage until it yellows, and protect pots and marginal beds from severe winter swings.
When a plant fails to bloom, inspect depth, drainage, light, transplant history, and foliage care before adding more fertilizer. And because this is a true lily, keep every part away from cats. Get those decisions right and the fragrant pink-and-white flowers can return each summer with far less fuss than their spectacular appearance suggests.



